Landing in the Forest of Fireflies
The bonus chapter becomes available on the chapter selection screen after the main game. Kiana crash-lands her glider in the Forest of Fireflies.
- On the chapter selection screen choose Bonus chapter - Play. Kiana's glider crashes in a forest of giant trees ("What a landing! Where am I? This is a special part of the forest..."); new task Away from grandma. Click the purple shifting object on the trunk of the giant tree, upper middle: Morphing objects 31/42. Click the small white fluffy figure on the twisted root left of the dwelling stairs (below the reed hut on the left): Collection Fluffy 1/12.
- Zoom on the glider on the left ("It's not that badly messed up. Could've been worse."). Zoom on the bridge with the thorns and take the dirty ROUND MIRROR. The door in the tree has a lattice ("The door is closed."). Zoom on the stone slab and take the KEY; read the inscription ("Welcome, traveler, to the Forest of Fireflies!... The Great Evil has awakened here...") and note the coloured bars beside it, top to bottom: blue, yellow, purple, red, blue. Kiana wants to climb to the cliff ("Apparently, I can lower one branch to the ground with a winch."); new task View from above. The winch right of the trunk: "I cannot simply hook the rope onto a branch." Pieces of broken dishes lie there.
Tree door: the flower lattice
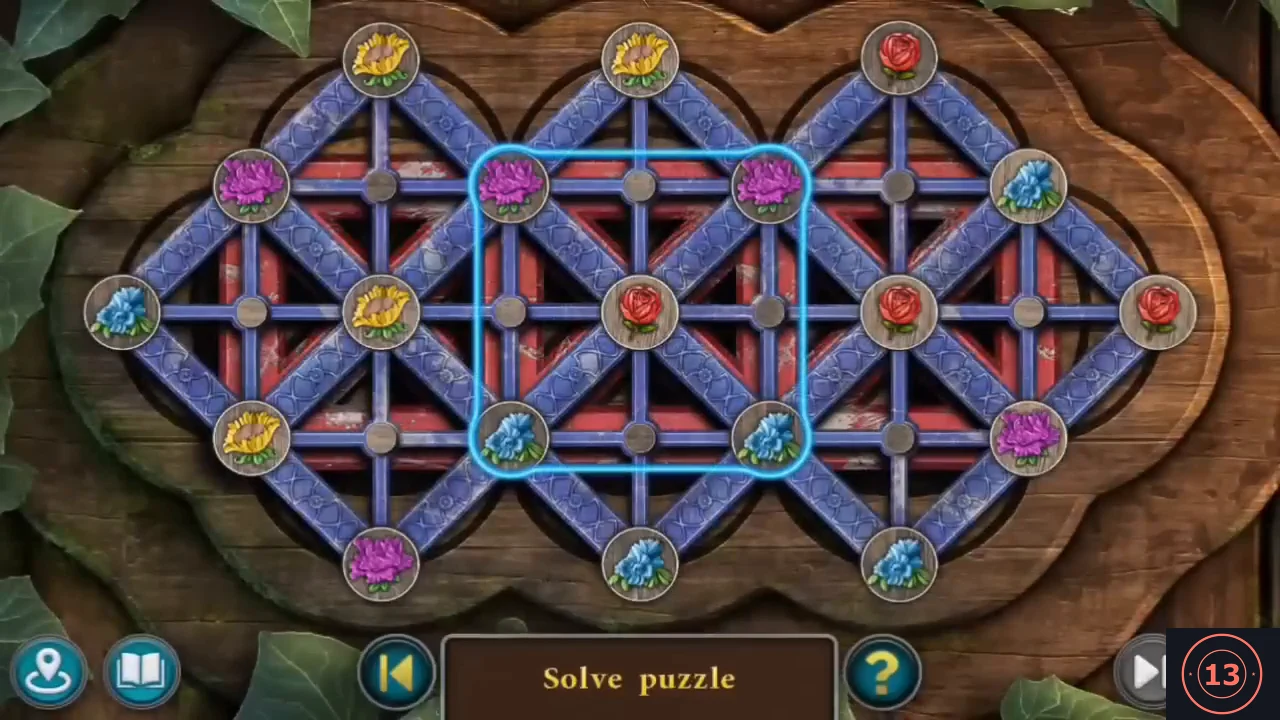
Rotate the flower squares on the tree door to match the colour bars on the slab.
- Use the KEY on the tree door; the lattice puzzle opens. Rule: "Rotate the squares with flowers and place them according to the hint - you have seen it in the game before." Clicking a square of four flowers rotates it. Turn the squares until every row matches the slab's colour bars, top to bottom: blue (3 flowers), yellow (4), purple (5), red (4), blue (3). The door opens.
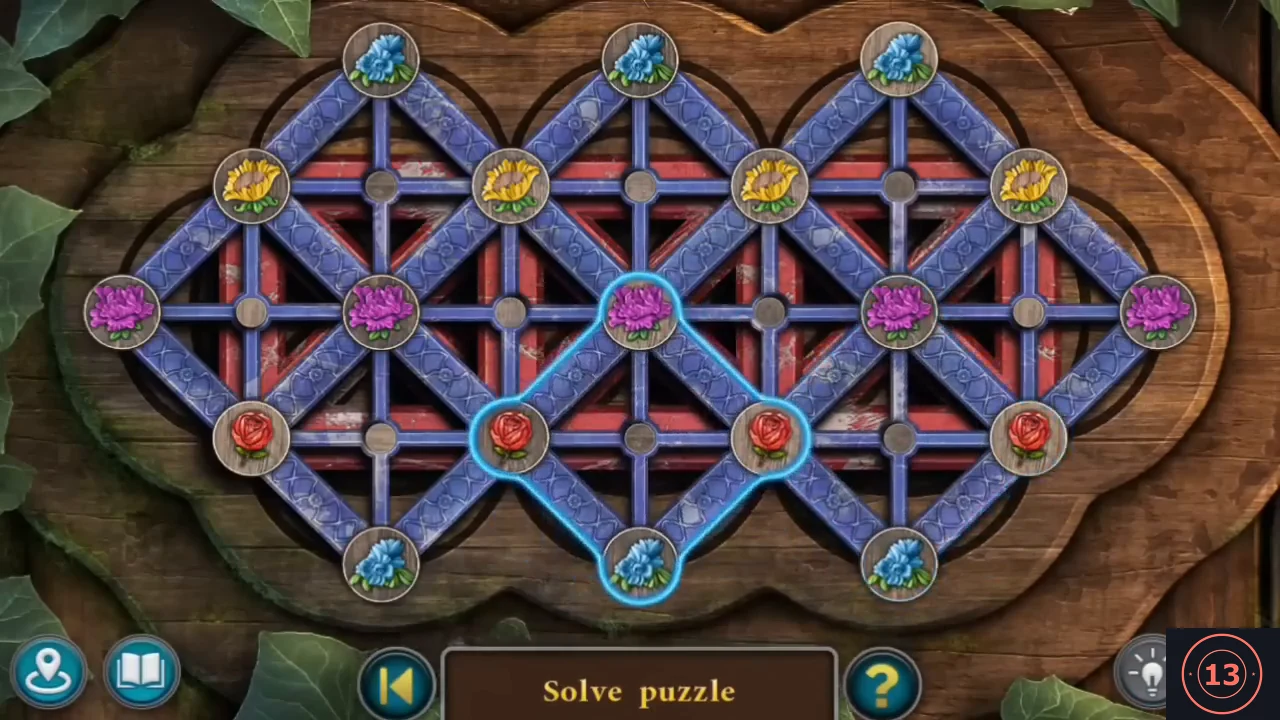
Solved: the rows read blue (3), yellow (4), purple (5), red (4) and blue (3) from top to bottom.
The dark dwelling: the mirror light
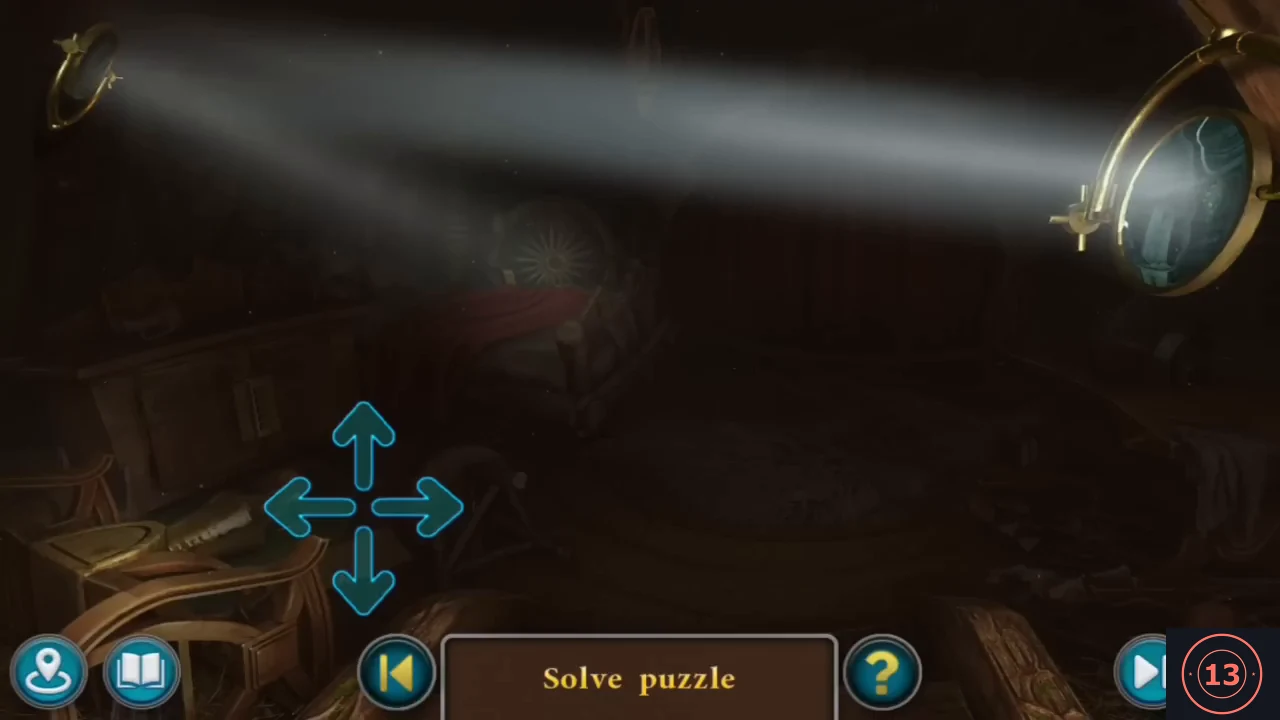
Light up Uri's dark dwelling with a mirror and a soaked brush.
- Inside it is dark: "It's too dark in here. I need to light up the dwelling somehow." Take the BRUSH from the lower left. At the winch outside take the BOTTOM OF THE JUG from the broken dishes, and at the glider put it under the leaking glider to collect ALCOHOLIC LIQUID. In the inventory dip the brush in the liquid and scrub the ROUND MIRROR clean.
- Fit the MIRROR on the bracket at the upper right of the room ("I'll try to redirect the light from the street to the crystal..."). Use the four-arrow pad to steer its beam into the second small mirror in the upper-left corner ("Wow! There's another mirror!"). The pad then steers the second mirror's beam; aim it at the crystal lamp hanging from the ceiling. The room lights up: "Got it! Well, now I can look around. It looks like no one has lived here for a long time."
Uri's dwelling: the figurines and the chest
Search Uri's dwelling for the insect figurines and the clue for the chest.
- Zoom on the bed and move the pillows: INSECT FIGURINE (green beetle). Zoom on the round floor hatch in the middle of the room: "I can see a mechanism behind the hatch, but there is no handle." Its cover has three insect outlines. Zoom on the big table with the grill stand on the right ("It is convenient to cook on such big table.") and take the INSECT FIGURINE (spider) at the grill. Zoom on the red leaning cabinet behind the red curtain at the back and slide its door: the second spider INSECT FIGURINE lies at the door edge. Inside hangs a portrait: "It can't be! Is it... Is it... Grandma? In her youth? And in her arms... is it my dad?! I don't understand." ("The cabinet doors are jammed due to the skew and they do not slide further. I need to apply force.")
Chest lock: the five symbols
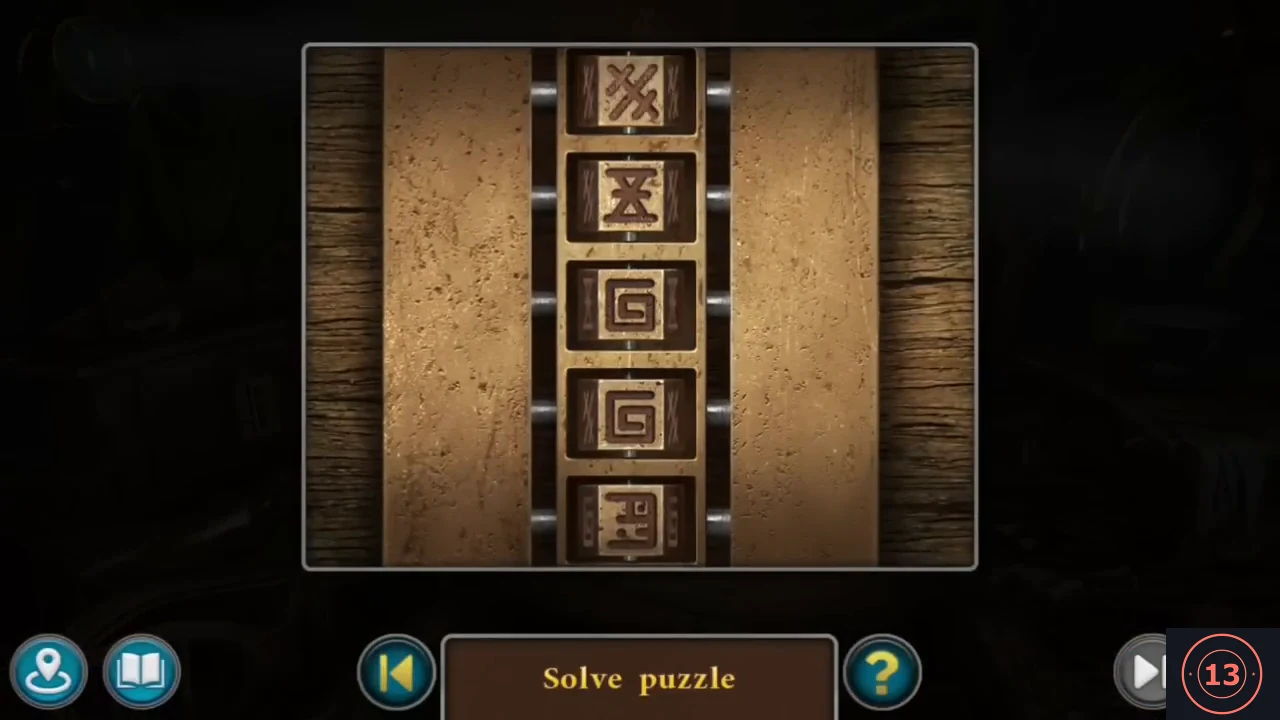
Set the chest's five tumblers to the symbols on the back of the portrait.
- Turn the portrait over: its back shows five symbols, top to bottom: square spiral, small zigzag figure, cross-hatched X, hourglass X, boxed glyph. Zoom on the chest with the tumbler lock on the left of the room and rotate its five tumblers to the same sequence. The chest opens: take URI'S DIARY ("It looks like a personal diary of this house owner." - the gnome Uri; it tells of Grandma's stay here and of a cursed golden statue found in the mines) and the GRAPPLING HOOK.
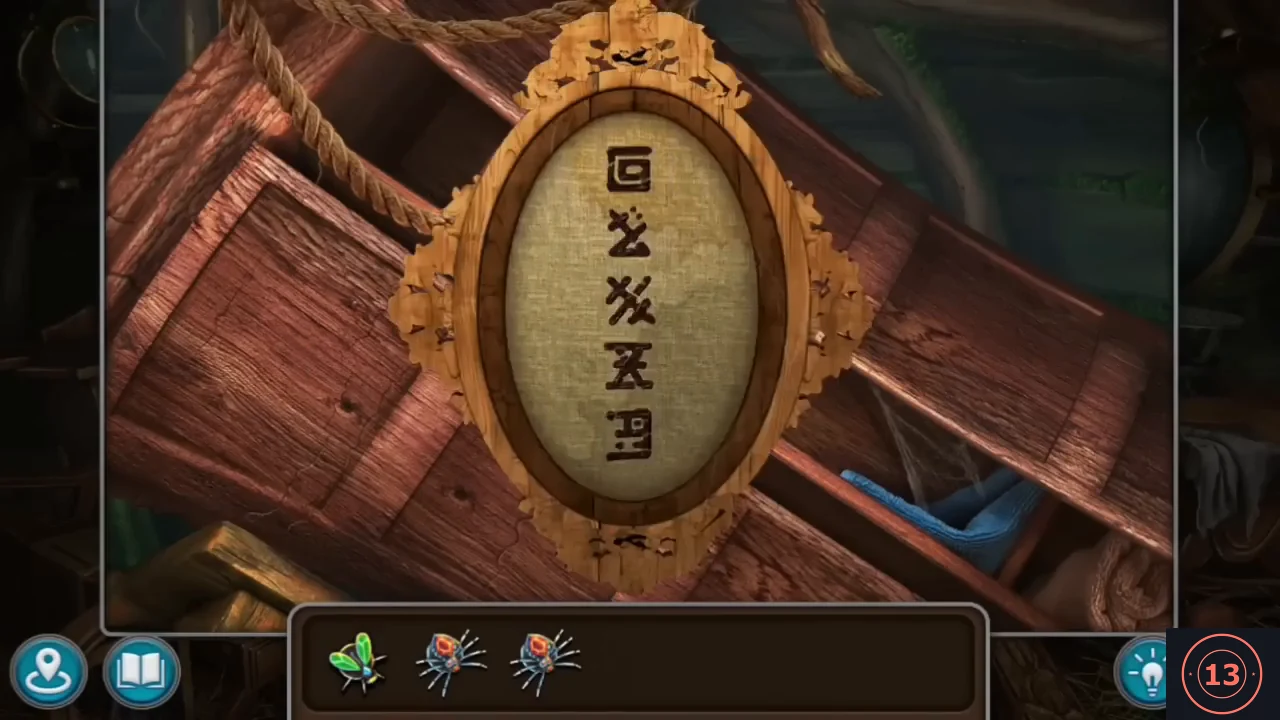
Clue: the back of the portrait shows the five symbols to set on the chest's tumbler lock, top to bottom.
Floor hatch: the spider web
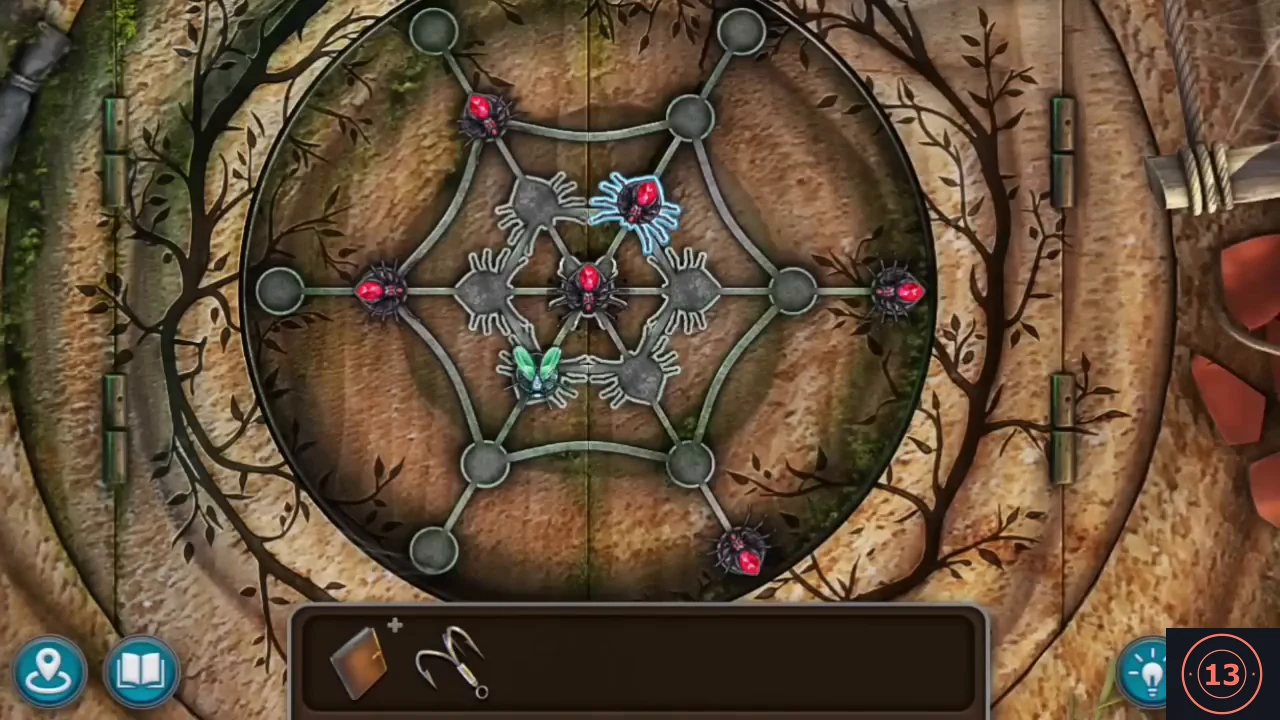
Put all six spiders on their outlines and the fly in the centre of the floor hatch web. The starting board, and even where the outlines are, can differ between playthroughs and in the Extras replay versions, so the step explains the controls and a general method, then gives the five drags that solved the board in our game as an example. Achievement Skillful: open this hatch cover in the tree house in less than 2 minutes. Read the method first and plan your drags. Our playthrough took much longer and did not earn it.
- Put the three INSECT FIGURINES on their outlines on the floor hatch; the cover slides open and shows a web with six red spiders, a green fly and six grey spider outlines around the centre. The goal is a spider on every grey spider outline and the fly in the centre; a spider on an outline, and the fly in the centre, glow blue. Controls: the web has three straight lines of seven nodes through the centre (horizontal, 1-to-7 o'clock and 11-to-5 o'clock), a ring of six nodes around the centre, a hexagon of six nodes joined by curved lines, and six outer end nodes. Drag a token along a straight line: every token on that whole line moves the same number of nodes, and a token pushed off one end comes back in at the other end. Drag a node of the inner ring or of the hexagon sideways along its curve: that whole ring turns by one position for each node dragged. The outer end nodes never turn; they only move with their line. A drag of three nodes is the same as three one-node drags in the same direction. Method: park the fly on an outer end node early, so ring turns cannot move it; use ring turns to bring spiders onto the line where an outline still needs one, and line drags of three or four nodes to carry tokens across the centre or wrap them round from the far end; set up the fly's line last so that one final drag drops the fly into the centre and that line's spiders onto their outlines together. Example from our game (positions as on a clock face; your board may differ): spiders on the centre, inner 1 o'clock, hexagon 11 and 9 o'clock and outer 3 and 5 o'clock, the fly on inner 7 o'clock, outlines on the six inner-ring nodes. 1) Drag the 1-to-7 line three nodes towards 7 o'clock (fly wraps to the outer 1 o'clock end). 2) Drag the horizontal line three nodes to the right (spiders land on inner 3 and 9 o'clock). 3) Drag the 11-to-5 line three nodes towards 5 o'clock (spiders land on inner 11 and 5 o'clock). 4) Turn the hexagon three positions (half a turn): its spider moves from 7 to 1 o'clock. 5) Drag the 1-to-7 line three nodes towards 7 o'clock: the fly enters the centre and the last two spiders land on inner 1 and 7 o'clock. Five drags solve this board. The hatch opens a way down.
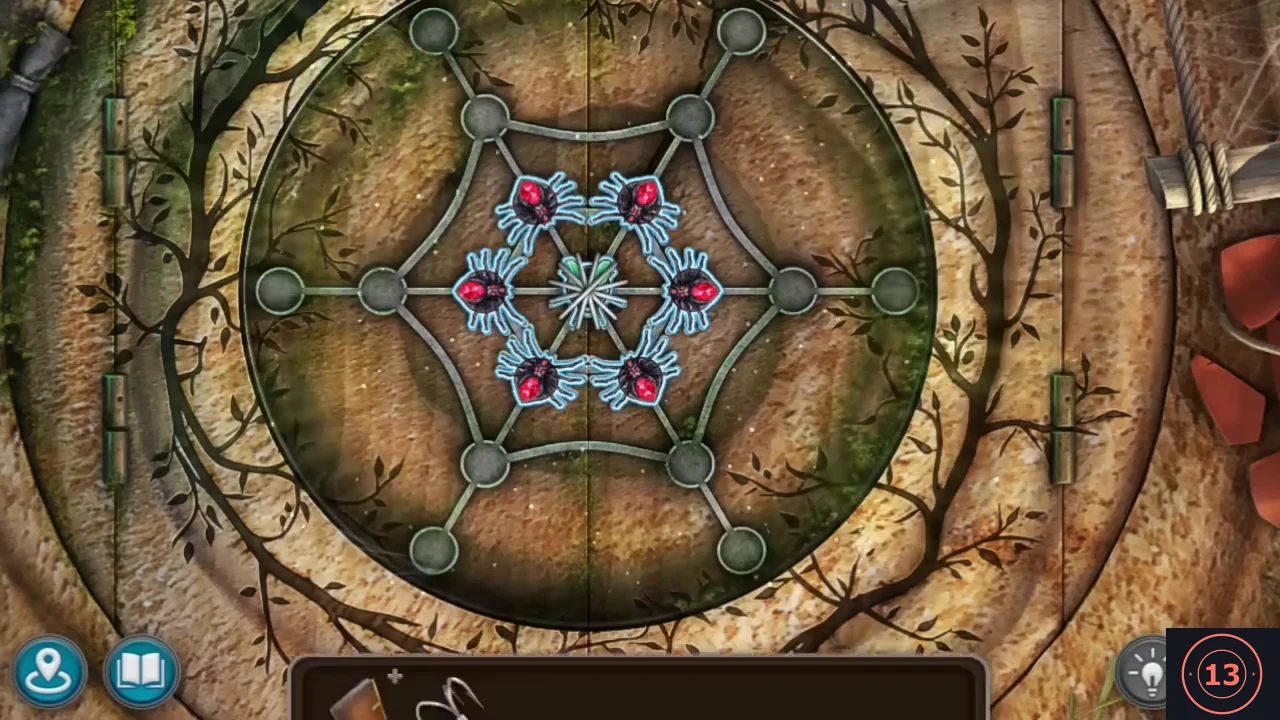
Solved: the six red spiders sit on the grey outlines around the green fly in the centre.
Cellar under the dwelling: the junk search
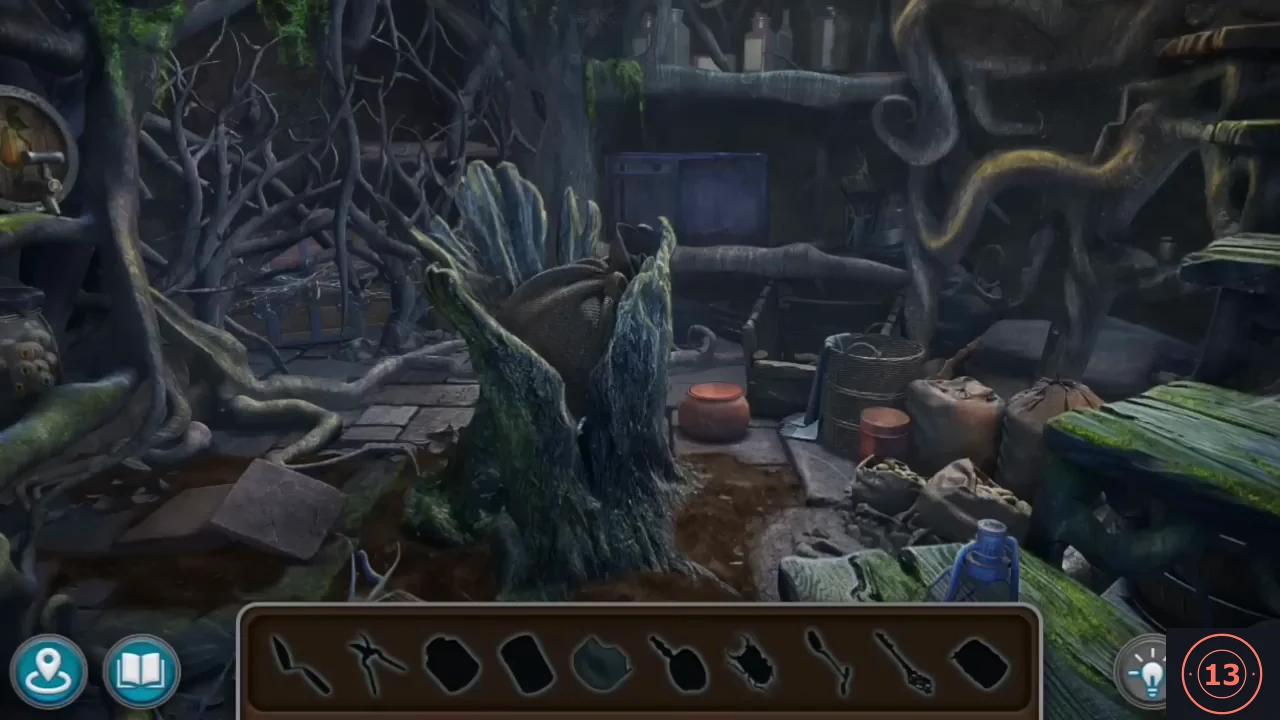
Search the junk in the cellar under the dwelling and open the chained chest.
- "Wow! There's so much stuff here! I hope there will be something in all that junk that will help me hook the rope onto the tree branch." The cellar is an item search: the bar shows ten silhouettes, and the items are used inside the scene. Take the ALE KEG. Zoom on the shelf above the glass tank and click the small glass jar at the right end of the shelf, beside the tall bottle: it breaks, and you get a KEY and a GLASS SHARD. Cut the knotted sack on the stump with the shard ("There is a lot of grain in the bag. It will take me a long time to scoop it out with my hands."). Take the CAN near the pot right of the stump. Pour the ale into the glass tank: "The volume of liquid was not enough to lift the key to the level of the window." Behind the roots a chest is visible. Pick up the TROWEL and dig at "Looks like there's something buried here..." (lower right, by the blue jar): BEETLE FIGURINE. Take the LADLE near the barrel and scoop the grain out of the sack; take the SECATEURS from the emptied stump and cut the roots in front of the chest.
- Use the KEY on the chains around the chest (the chest itself "is locked with a key"). Set the CAN down on the floor right of the glass tank. Take the TRADING WEIGHT (a small dark weight) from the ledge between the roots at the upper right, just left of the plank with the striped cloth. Clicking the empty can only gives "Some other item is needed." and "The jar is too light. It won't displace the liquid on its own." Use the TRADING WEIGHT on the can (it is set down beside it), click the can to take its lid off, click the weight to drop it inside, click the lid on the floor to close the can again, then pick up the weighted can and put it into the tank: the liquid rises and lifts the key to the window. Take the second KEY and use it on the right lock on the front of the chest ("How many keys does it take?!"), then put the BEETLE FIGURINE into the empty ornament on the left of the chest front: the chest opens. Take the JACK, the CORKSCREW and the third tool lying in the chest.