The lake of love
The couple on the festival pontoon will give it up for a bottle of fragrance. Meet Joko, take his staff and gather the ingredients for the halfling aroma.
- At the lake Kiana spots the festival pontoon on the water with a couple on it. Ask how long they will use it: they will give it up for a bottle of fragrant water (new task: Halfling's scent). Click the tiny white tower spire on the far hill at the upper left of the lake view (Collection: Academy tower 2/8).
- Talk to Joko, the halfling at the cart by the lake (Susan knows him). Ask about a cave or mine where a lone dwarf hermit lives; he will help you prepare the "halfling aroma" if you gather the missing ingredients.
- Zoom on Joko's cart: take the recipe and JOKO'S STAFF (shepherd's crook). The lotus on the pond is out of reach ("I can't reach the lotus, and I don't want to get into the water.").
- Use JOKO'S STAFF on the lotus in the pond and take the LOTUS FLOWER.
- From the lake of love go up the path at the upper right to the halfling vineyard. Read the HALFLING SOUR GRAPES sign (truffles grow under the vines; only a pig can find them) and take the WHEAT EAR tucked behind the right edge of the sign.
- Halfling Aroma recipe (check marks show what you have): water, pure alcohol, lotus flower, melissa, tangerine peel, truffle mushroom, wheat ear, rose petals, pumpkin seeds, cinnamon stick. Evaporate all ingredients; floral water and essential oil separate. Proportions for aromatic water: essential oil 2 parts, pure water 1 part, pure alcohol 7 parts.
- The HALFLING AROMA recipe is an inventory item: drop each ingredient on it to tick it off. Water, tangerine peel, rose petals and cinnamon stick are already ticked. Add the LOTUS FLOWER and the WHEAT EAR.
- Back at the river crossing (the scene with the wooden footbridge), zoom on the grassy bank at the left and take the BOTTLE WITH ALCOHOL; tick it on the recipe.
- Zoom on Joko's cart at the lake and take the manuscript page lying on the table left of the copper keg (Manuscripts 3/9: Joko). Kiana notes: "Here we can make a halfling scent, whatever that is."
- In the greenhouse zoom on the planter box with melissa and take the MELISSA; tick it on the recipe.
- In the forest clearing zoom on the wild pumpkins and take the PUMPKIN SEEDS from the cut pumpkin; tick them on the recipe.
- At the fair talk to the farmer at the pig pen: "We need a pig that can find truffles. For a while." He lends you a PIG.
- In the vineyard, use the PIG on the path between the vines. It sniffs along the row and digs a hole; zoom on the hole and take the TRUFFLE MUSHROOM; tick it on the recipe. All ten ingredients are now ticked and the recipe becomes the PERFUME SET.
Distilling the halfling aroma
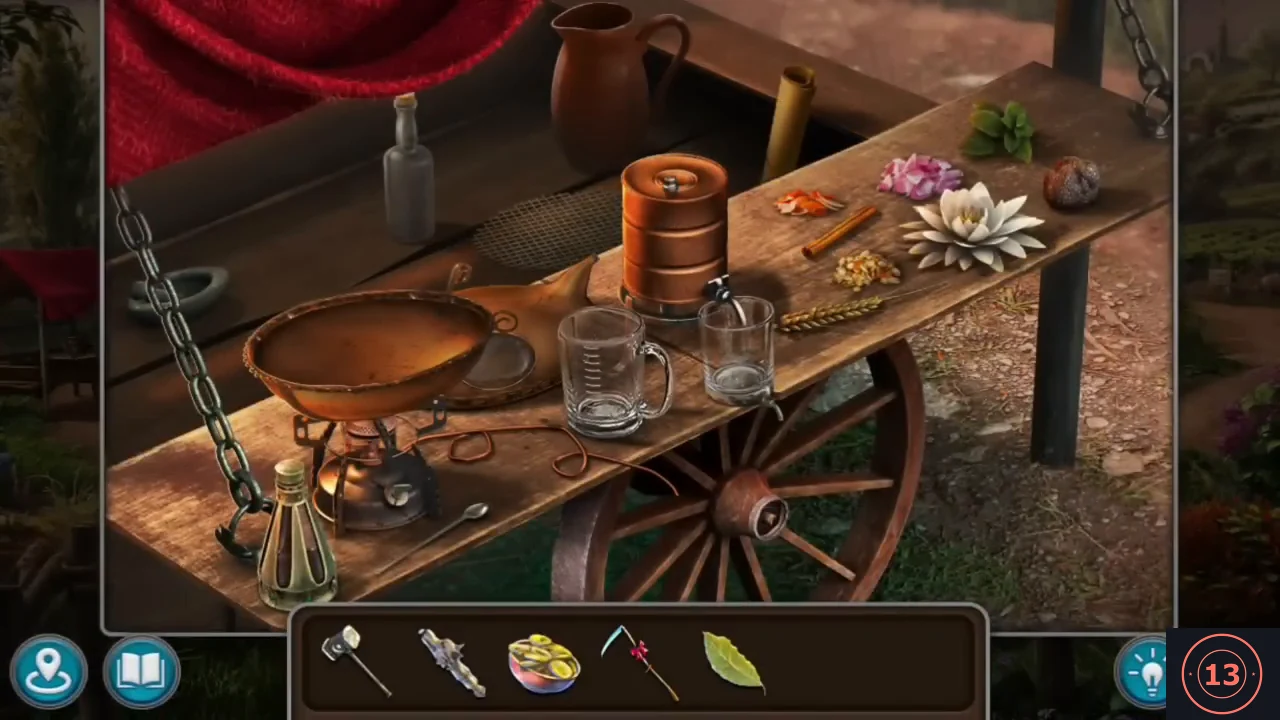
Distil the halfling aroma on Joko's cart by following the recipe in order, then use it to win over the couple on the pontoon.
- Place the PERFUME SET on Joko's cart and follow the recipe (out-of-order clicks give "I need to follow the recipe."): pour water from the jug into the copper still, light the burner under it, set the strainer on top and add the ingredients, then close the still so the condensate drips into the separating glass (essential oil settles on top of the floral water). Open the glass's tap to drain the floral water. Mix the aromatic water in the measuring jug in the recipe proportions: pure alcohol 7 parts (from the bottle, which you keep as REMAINING ALCOHOL), pure water 1 part (from the jug) and essential oil 2 parts (from the separating glass), stir with the spoon and fill the small perfume bottle. You receive the PERFUME HALFLING SCENT.
- Talk to the couple on the pontoon at the lake and offer the fragrant water: "Oh, you took so long! We've already had enough sailing, so you can take the pontoon." "Oh, did you prepare it? Keep it." The pontoon is yours, and Joko offers a cart with a crane. Task complete: Halfling's scent.
- At the fair, give the SUGAR LOLLIPOPS to the donkey ("It seems that without a treat the donkey does not want to obey at all." / "Donkey, come with us!"). It pulls the crane cart to the lake.
Lifting the pontoon
Use the crane cart to lift the festival pontoon so the donkey can cross the river.
- Zoom on the crane cart: "It looks like these clamps haven't been used for a long time. They're jammed." Use FOLNUR'S HAMMER on the clamps. Then click the crane to swing and extend the boom over the lake, lower the hook onto the pontoon and hoist it onto the cart.
- Joko joins you ("Come on, donkey, the last crossing. Help us to the end." / "Let me go with you! I'll take you to the mine."). At the river crossing zoom on the broken pontoon bridge, where the pontoon is set into the missing gap ("Kiana, put it down!"). Task complete: Missing pontoon.
The mine and the fortress
At the mine below the fortress the elevator is stuck deep in the shaft. You need a heavy load to bring it up.
- Cross the river to the mine below the fortress ("That's the mine. There is a descent into the dungeon..." / "This is an abandoned military fortress..."). Click the morphing object among the stones at the lower left (Morphing objects 7/42) and the ghost portrait at the hub of the big wooden winch wheel in the centre (Ghosts of the Past: Captain Finuer Stalburn 3/8).
- Zoom on the mine elevator: "Apparently, the elevator is now deep in the shaft. But we can load the counterweight with something heavy to lift the elevator." Joko's friends hid a stash of heavy things somewhere in the overgrown field. The wheelbarrow beside the elevator is described ("Wheelbarrow for transporting small loads."). The dolmen stone sign at the left gives no answer yet ("It is difficult to understand from this sign where the dolmen may lead.").
Mowing a path to the cache
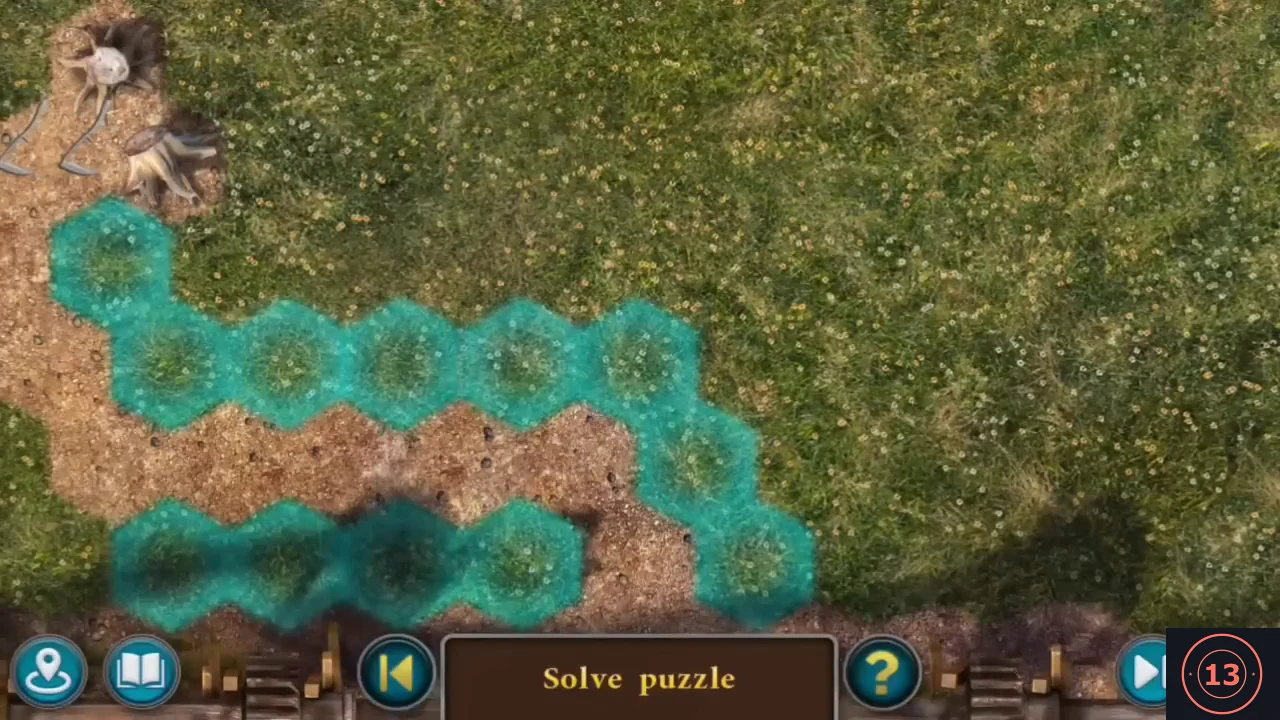
Mow a path through the tall grass to the hidden cache. The field and the cache position change between playthroughs, so follow the glowing cells on your own field; our route is given only as an example.
- Use the SCYTHE on the tall grass at the right of the mine path. The view shows the field from above: click the glowing hexagonal cells next to the mown strip to cut the next patch; the camera follows as the path grows. The field layout and the position of the cache change between playthroughs (the Extras replay of this mini-game has several versions with the cache in different places), so follow the glowing cells of your own field until the cache opens with a glow. In our playthrough the path ran from the bottom up to the right, then along the long row to the left and up the left side, and finally along the branch rising from the middle of that row up to the cache.
- Zoom on the cache: a pit full of heavy junk ("We need something to carry all this weight."). Zoom on the elevator and take the MINER'S WHEELBARROW, then use it on the cache.
Cache: the heaviest items
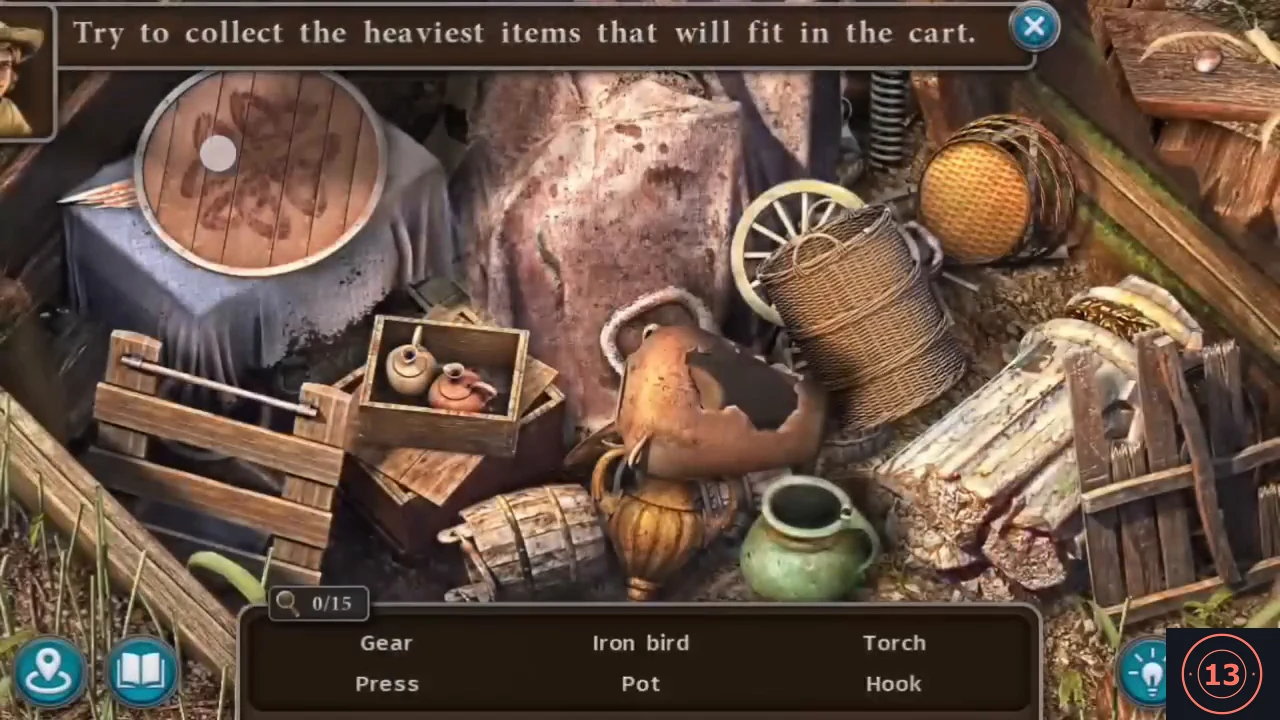
Fill the wheelbarrow with the heaviest items from the cache, then use the load to bring up the mine elevator.
- Interactive hidden-object scene, "Try to collect the heaviest items that will fit in the cart." (15 items, six listed at a time). In our playthrough: lift the round wooden board off the cloth-covered table at the upper left and take the IRON BIRD; then the HOOK from the crate, the MILLSTONES and the screw PRESS at the left; the WEIGHT (kettlebell) from the centre after clearing the jug; the CHOPPING BLOCK at the left; the TORCH and the POT in the centre; pull back the big tarp and take the BELL; assemble and take the MACE (spiked head at the upper left plus handle); the GEAR wheel at the right. "I need something to lift the column with": use the long pole as a lever on the fallen column, take the wire cutters that appear and cut the chain on the crate ("There is no time to search for the key. Cutting the chain will be faster."), then take the INGOT and the ANVIL from it. Lever the column away once more ("Can't dig while the column is in the way."), dig with the shovel where "something massive" lies and take the STATUE. The last item is the BRICK: the grey stone block lying on the ground at the left, just left of the open wooden crate full of bricks. Click it and the scene closes; the loaded wheelbarrow goes to inventory.
- You receive the WHEELBARROW WITH LOAD. Zoom on the mine elevator and use it on the counterweight; the elevator rises. Joko says goodbye ("Forgive me, but I cannot continue my journey with you..."). Kiana and Susan ride the elevator down and a mine cart through the tunnel, coming out at Maaron's hut ("...But I made it to Maaron's hut. Oh, Folnur! What an inventor!"). Task complete: Mine by the river.
Maaron's hut in the forest
Maaron's hut in the forest is sealed by a padlocked hexagonal lock. Search the surroundings for the key to the gate.
- At Maaron's hut, click the small glint on the ground at the foot of the stone wall, just right of the tree stump and left of the arched door (Collection Toto toy 3/7).
- Zoom on the tree stump at the left ("There is a nest of firebugs under the stump. Some of them are already dead.") and take the H-SHAPED ROD from the dug earth.
- Zoom on the hut door: it has a hexagonal lock full of padlocks (nothing to do yet). Zoom on the stone wall right of the door and take the KEY TO THE GATE from the niche.
- Zoom on the fallen logs and mushrooms right of the path and take the T-SHAPED ROD. Note the bone ("The edge of this bone is so sharp that it can crush something.") and the unusual mushroom ("...picking mushrooms without knowledge is dangerous."); neither is taken here.
Padlocks on Maaron's door
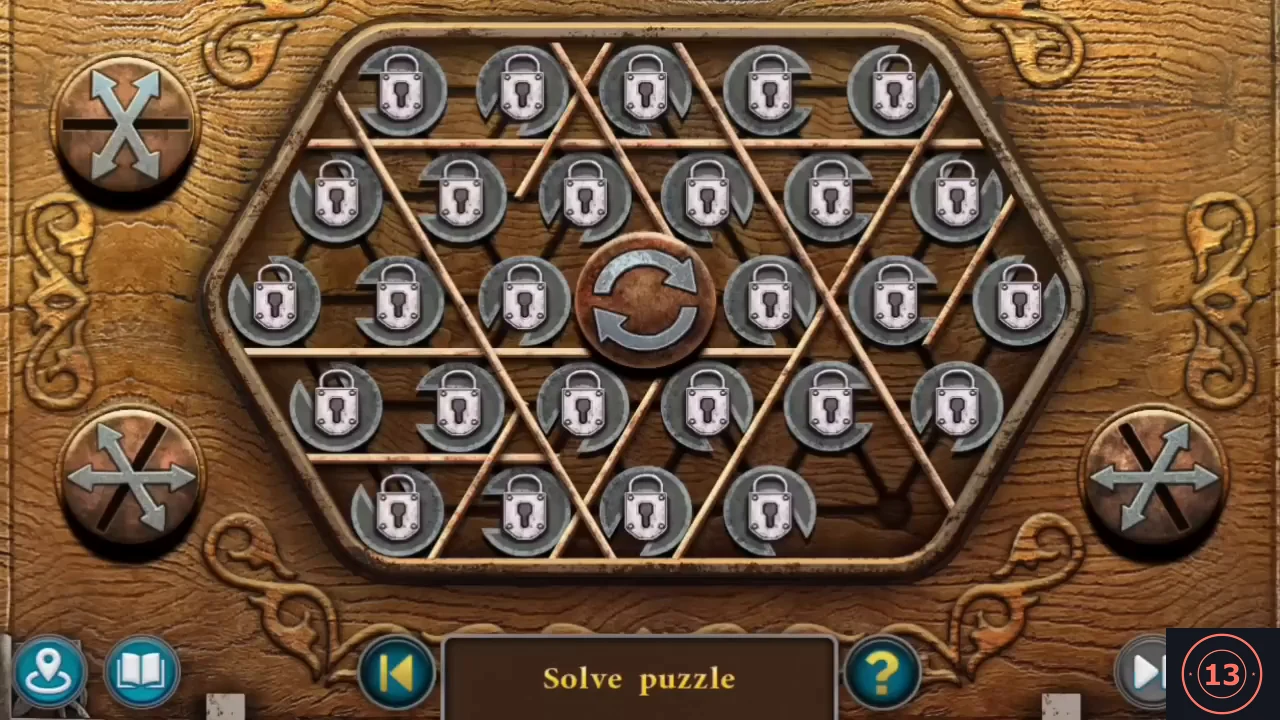
Slide the padlocked pieces of Maaron's door lock through the triangular grooves. This sliding puzzle is long and its starting layout varies between versions, so the step explains the method rather than a fixed move list.
- Use the KEY TO THE GATE on the hut door lock: it becomes the round centre button of a hexagonal board of padlocks. Every padlock sits in a metal ring with a gap on one side, the pieces stand on a grid of grooves, and one socket is empty. Wooden rails lie across the board and block the grooves they cross. A piece can slide into the empty socket only when it is joined to the socket by a groove that no rail crosses and its ring's gap points at the socket; click it (or the empty socket) and it slides across. A padlocked piece that slides opens and becomes an empty horseshoe; the goal is to open every padlock. Controls: the centre button turns the rings of all pieces at once, so press it until the gap of the padlock you want points at the empty socket. The three round arrow buttons in the corners each rearrange the wooden rails; press them when rails cut every groove between the socket and a padlocked neighbour. Open horseshoes slide the same way, so use them to move the empty socket next to padlocks that are still closed. Work across the board one padlock at a time; the reset button (bottom bar, left) restarts the board.