BONUS CHAPTER
The Dam and Roni the beaverling
Walk out to the Dam yard and meet Roni the beaverling.
- Walk out to the Dam yard (log building with a balcony, stone tower): "Oh, I already see a worker! I need to talk to him." Zoom on the balcony: a beaverling is holding the elevator platform and needs nails.
SEARCH
Dam yard: find twenty nails
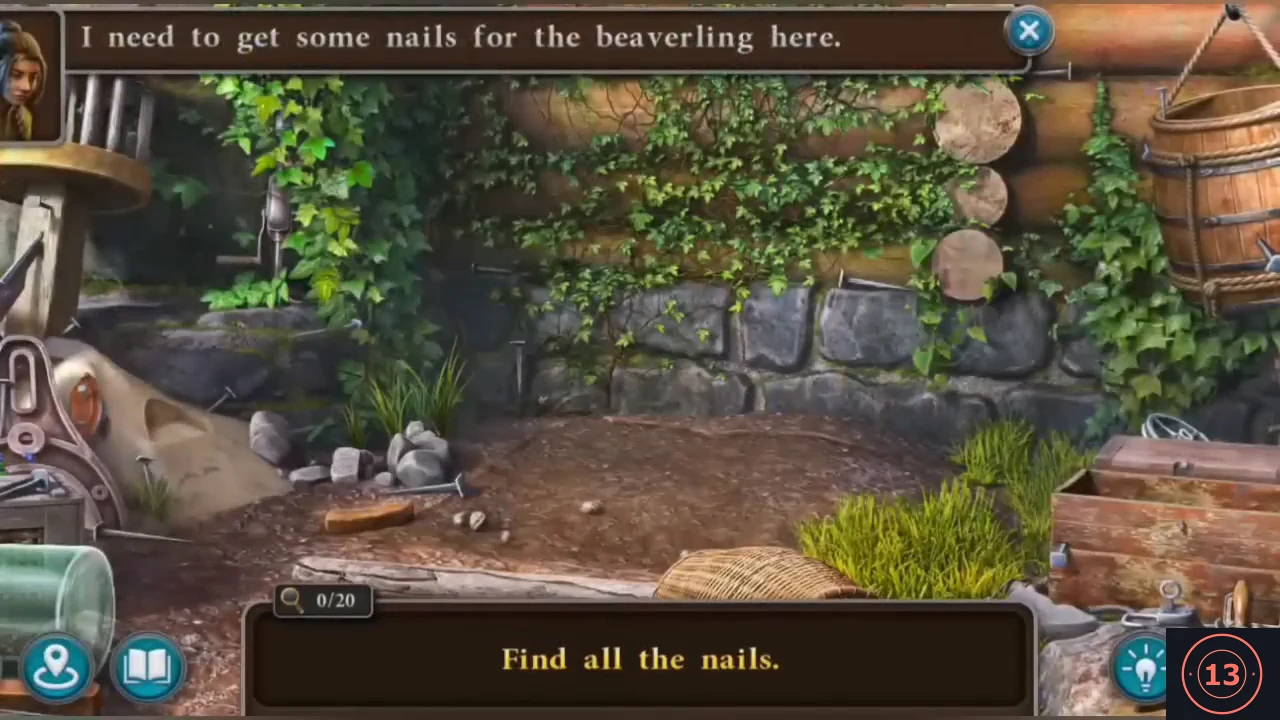
Collect 20 loose nails in the Dam yard, then get the planks for the second rope bridge past the vulture.
- Search the yard for 20 loose nails. A nail that only wiggles and shows "This nail is firmly driven in" is fixed and does not count. On a phone the yard is wider than the screen, so swipe sideways to see both ends. Ten nails are in the open yard. (1) On the ground just right of the small rock pile in the middle. (2) On the ground between the low crate at the lower left and the left end of the fallen log. (3) Sticking out of the ivy at the left end of the stone wall, just above the ledge. (4) Standing upright at the foot of the stone wall, right of the grass tuft. (5) A long nail lying along the top of the stone wall, centre right, under the ivy. (6) Sticking out sideways from the log wall just right of the stacked log ends. (7) Lying on the lid of the low crate at the lower left, beside the bent wrench. (8) Standing upright between the wooden crate on the right and the big wooden wheel. (9) Standing upright inside the frame of the metal crusher at the left, just left of its oval loop above the blue flowers. (10) A long nail leaning diagonally against the wooden post under the cage wheel, on the corner of the tilted board. Ten more are in four close-ups. Wooden wheel cage (top left): pull out the nail sticking out of the top-right rim, and the one sticking out sideways on the left behind the bars. The square-headed nails inside the cage are fixed. Sand heap (left, beside the crusher): the nail stuck in the sand at the upper right of the hollow, the long nail lying on the stone ledge at the top right, and the nail standing upright in the grass tuft at the lower left. Wooden crate (right): two nails lie on top of each other at the back left of the crate floor beside a bolt. Take one, then the one underneath. Hanging bucket of broken glass (top right): two nails lie on top of each other on the glass. Take both, then the nail standing upright at the lower-right corner of the view, below the bucket rim. The square-headed nail at the left side is fixed. All 20: NAILS.
- Give the NAILS to the beaverling on the balcony ("Catch!"). He comes down: "I was so lucky that you showed up! ... By the way, I'm Roni!" He gives you a PIKE POLE; new task Dwelling in the mountain.
- At the canyon zoom on the rope bridge by the pole and pull up the hanging half of the bridge with the PIKE POLE. Half of it has no planks yet.
- In the Dam yard zoom on the wooden plank ramp in the lower right foreground and cut its ropes with the RAZOR: PART OF THE RAMP. At the canyon put it on the bridge: the first rope bridge is complete.
- Cross to the rock plateau: the vulture sits on the planks you need for the second bridge ("I need to distract it from the boards."). In the Dam yard the fish in the stream is too slippery for bare hands. Back at the canyon take the SPIKED GLOVE from the fallen nest, catch the FISH in the Dam-yard stream with it (the glove is used up) and give the FISH to the vulture on the plateau. It leaves; click the boards.
PUZZLE
Second rope bridge: fitting the plank groups
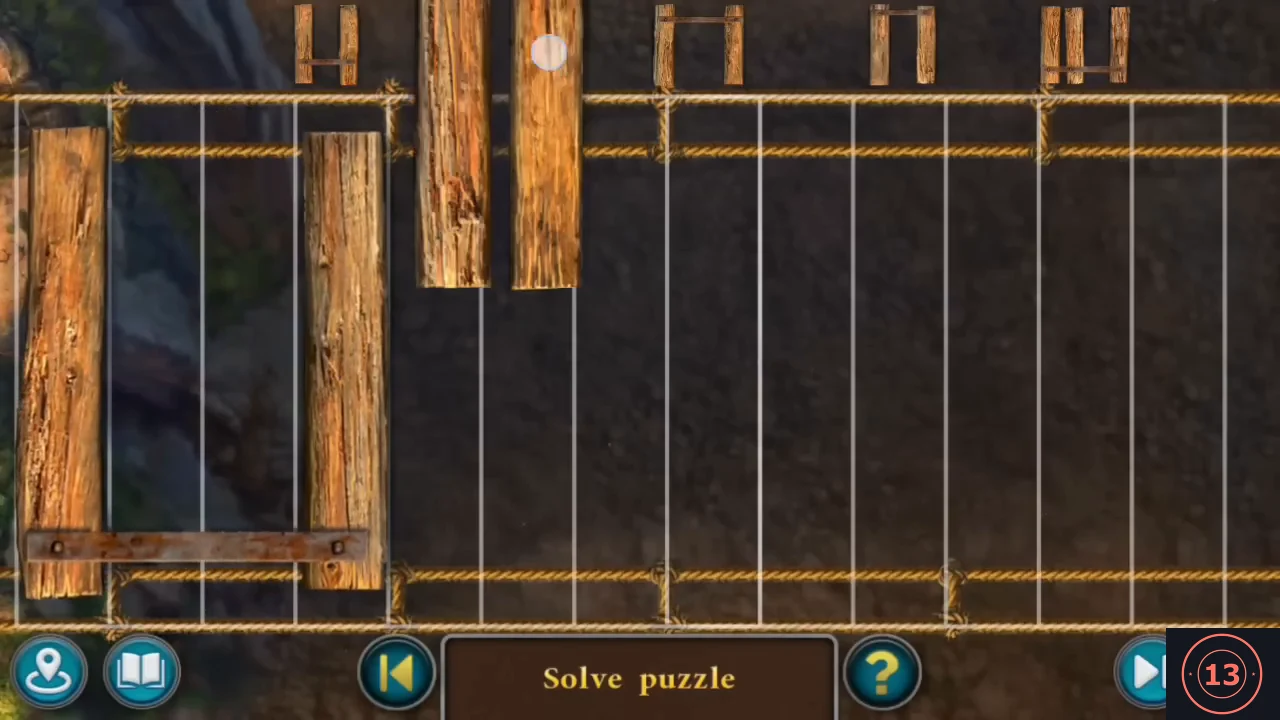
Fit the interlocking plank groups into the frame of the second rope bridge.
- The bridge frame is shown from above and is wider than one screen (it scrolls right). The tray at the top holds plank groups joined by crossbars, with gaps between their planks. Drag the groups down into the frame so that they interlock - a plank of one group fills the gap of another - until every slot of the frame is filled. Fill the left half first, then scroll right. The frame glows when it is complete.
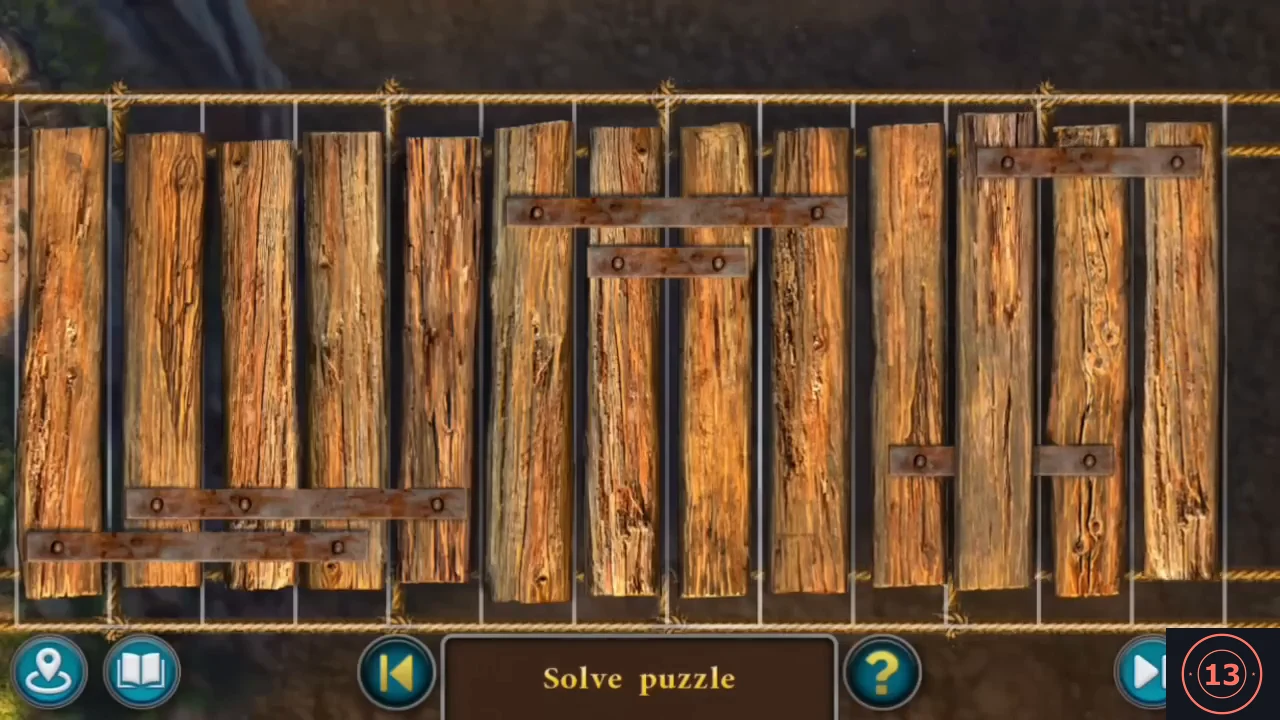
Left half of the bridge frame completed in our playthrough; scroll right for the rest. 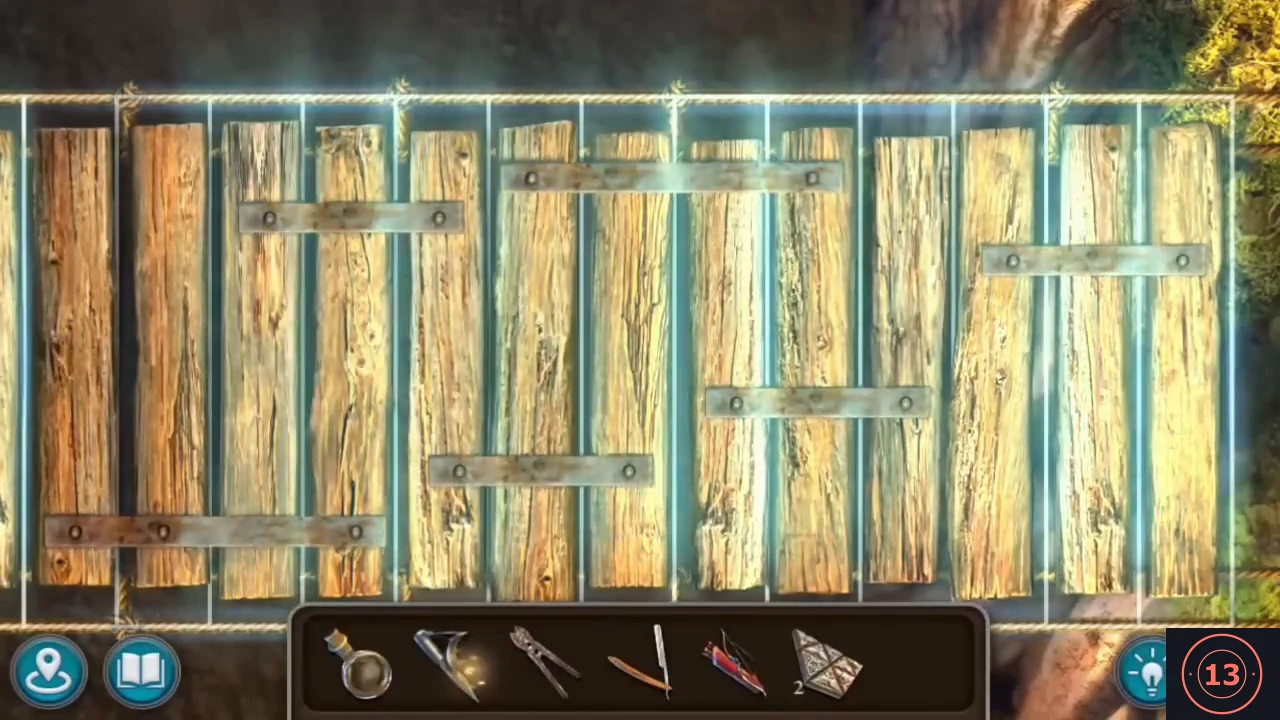
Right half completed: the whole frame glows once every slot is filled.
BONUS CHAPTER
The dwelling in the mountain
Cross to the mountain yard and enter Mora's dwelling in the mountain.
- Cross to the mountain yard (stairs on the left, flower shelves in a cave niche, a standing mirror, a boarded round door, a winch with a floating wineskin). A patterned trapezoid is caught in the ivy above the cave niche ("I can't get it."): shoot it down with the BOW AND ARROWS (trapezoids 3). The vulture now sits on the stairs. The door is boarded up: "I need some kind of tool to get the nails out."
- Pull the nails of the two lower door boards with the NIPPERS (used up). The top board is glued with hardened resin: "The only way to remove the board is to melt the resin somehow." (The floating wineskin at the winch cannot be taken yet.)
- At the canyon click the telescope: it swings round and focuses the sunlight into a hot beam, which now falls on the mountain-yard mirror. In the mountain yard zoom on the standing mirror and turn it: aim the beam at the vulture on the stairs ("Aha! Are you fried?! Fly away and don't come back!") and at the top door board. Take the PATTERNED TRAPEZOIDS lying at the foot of the stairs left of the mirror (trapezoids 4). The resin melts and the last board falls, exposing a hexagonal lock.
- Climb the stairs to the bell terrace. The vulture blocks it - it wants its nest branch fixed ("Okay, if I fix it, will you leave me alone?"). The chest at the lower left is padlocked. Zoom on the laundry winch on the parapet, move the clothes aside and take the FABRIC BELT.
- In the mountain yard pick up the fallen door board in front of the door: WOODEN BLOCK. At the canyon zoom on the broken nest branch, lay the WOODEN BLOCK on it as a splint and tie one side with the FABRIC BELT. At the oasis take the LEATHER BELT from the dead warrior and tie the other side. The vulture returns to its nest and leaves the terrace.
- On the bell terrace click the grey fluffy figure on the parapet at the top left behind the chest (Collection Fluffy 6/12) and the purple shifting shape in the ivy at the lower right edge (Morphing objects 35/42).
- Zoom on the hammers under the bell, set the loose hammer and click the mechanism: the hammers ring the bell and a note unrolls - someone is locked in a cave, needs water and asks you to open the cave door with a set of six patterned trapezoids from the chest beside the bell; the chest key is hidden in the flowers. In the mountain yard zoom on the flower niche, move the pots and lift the pink peony pot at the bottom: KEY TO THE CHEST.
PUZZLE
Bell-terrace chest: the flower rings
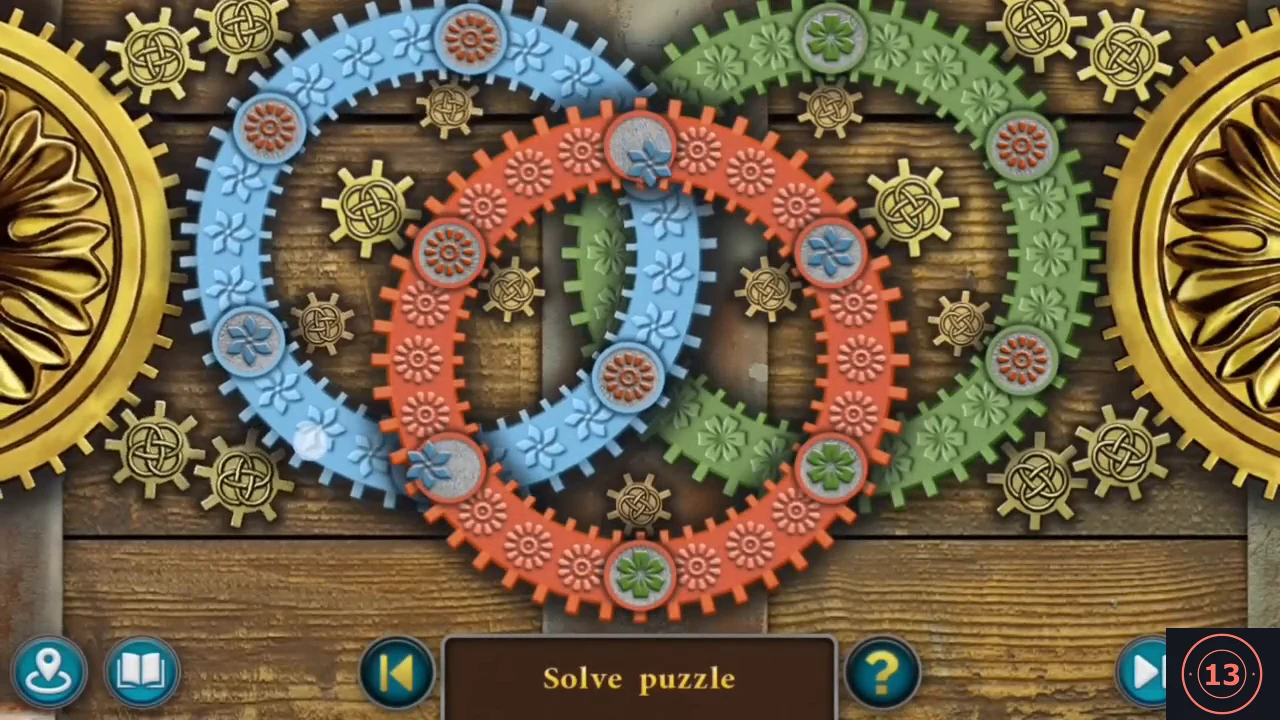
Turn the three flower rings on the bell-terrace chest until every flower sits in its own colour. The Extras replay of this puzzle has several versions, so your board may start differently; the method below works for every version.
- Open the chest padlock with the KEY. Rule: "Place flowers in circles of the same color." Three interlocking gear rings (blue left, red centre, green right) carry flower tokens; turn the rings so tokens pass through the crossings until every flower sits in the ring of its own colour. The chest opens and junk spills out: take the PATTERNED TRAPEZOID by the blue vase (trapezoids 5).
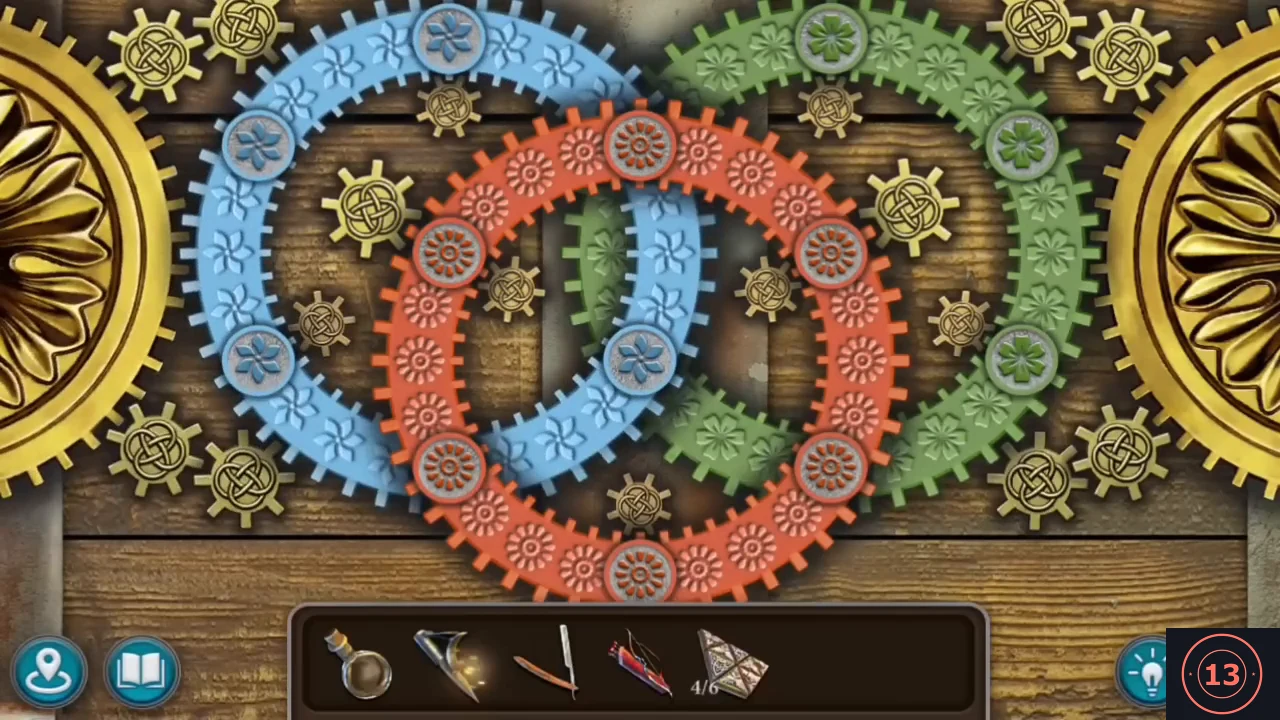
Solved: every flower token sits in the ring of its own colour. - Only one trapezoid was in the chest - write back. In Uri's dwelling take the CHARCOAL STICK at the foot of the portable stove. On the bell terrace zoom on the hammers, write the reply with the CHARCOAL (used up) and ring the bell. The answer: the rest were dumped nearby, and the prisoner sends one spare - a small sack drops at the bell base: PATTERNED TRAPEZOIDS 6/6. (The note also reminds you to bring water.)
PUZZLE
Cave door: the chain chips
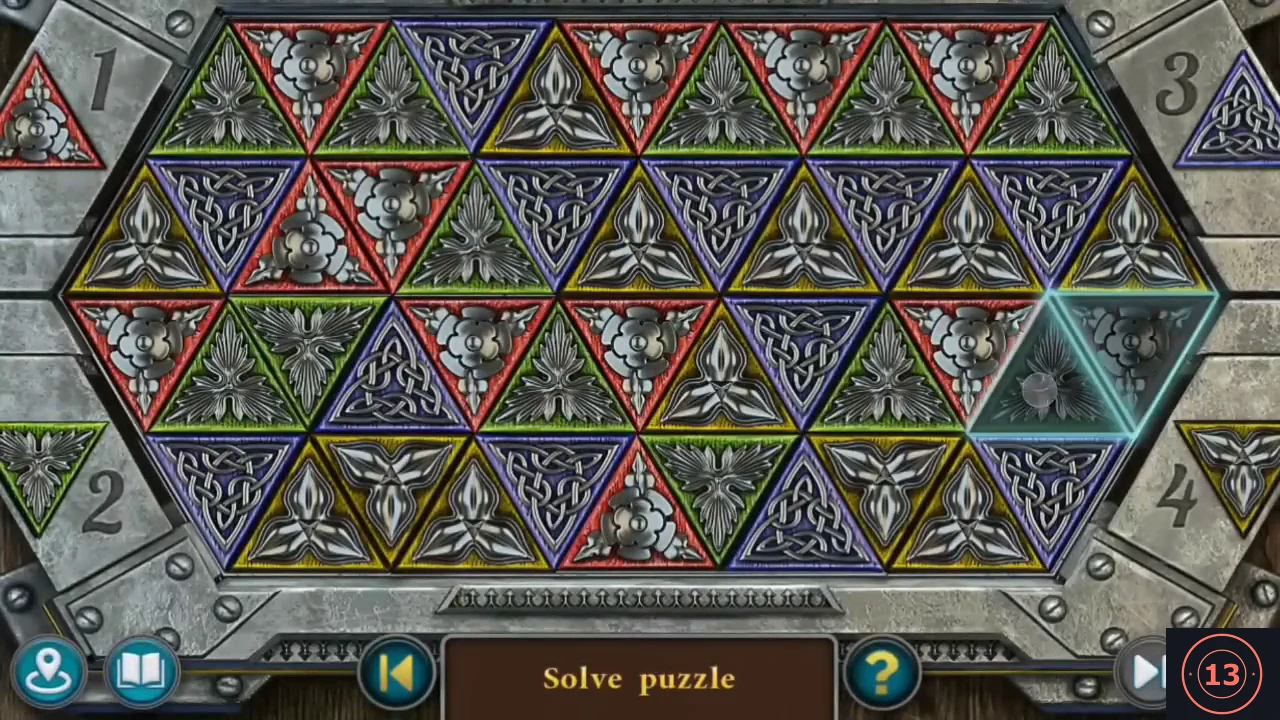
Clear the coloured chains on the cave door in the order red, green, blue, yellow. The chain layout changes between playthroughs, so trace the chains on your own board; our route is given only as an example.
- Put the six PATTERNED TRAPEZOIDS into the hexagonal lock on the mountain-yard door. Rule: "By clicking on the chips, deactivate all chains: red - green - blue - yellow. You can only click on adjacent chips." Clear the chains in that colour order, always clicking a chip next to the previous one. The chain layout differs between playthroughs (the Extras replay of this lock has several versions), so trace the chains on your own board; our playthrough started at the lower right, worked left along the bottom, up the left side and across the top, finishing at the top right.
- Inside is Mora, who has only two limbs: "Please tell me you have water!" Give her the BOTTLE OF WATER from the memorial-sign compartment. She asks you to build her prosthetics and a "rocket carrier" in her workshop from the drawings; new task Mechanisms for Mora.