Courtyard, hall and workshop
Susan arrives at Folnur's mansion. Explore the courtyard, the hall of keys and the workshop, and start gathering the masks for the crypt door. Collectibles found along the way are listed as they appear.
- After the opening scenes (task "Mysterious Mansion"), pick up the Drak Ul figurine glinting in the grass left of the stone path (collection Drak Ul figurine 1/7).
- Zoom on the wooden workshop door on the left: take the MASK from the window ledge and the OCTOPUS KEY from the box under it. The door itself is locked.
- Go to the tall metal door with the tentacle relief on the mansion tower and use the OCTOPUS KEY on it, then walk through into the hall.
- In the hall full of hanging keys, click the shifting morphing object on the left (Morphing objects 1/42), pick up the ghost portrait on the left stairs (Ghosts of the Past: Advisor to Maaron 1/8) and search the pile of keys on the floor for the KEY TO THE BASEMENT.
- Note the collapsed debris blocking the passage (you need something to break it). Zoom on the keys hanging from the ceiling and take the KEY TO THE WORKSHOP.
- Return to the courtyard, open the workshop door with the KEY TO THE WORKSHOP, go in and take the MASK from the workbench area.
- In the courtyard zoom on the small arched tower door with a rope beside it and unlock it with the KEY TO THE BASEMENT; go down into the basement.
- Open the toolbox crate on the left: take the PATTERNED WASHER and a CLAMP (1/8). Zoom on the wooden post with sliding symbol rows (locked, return later) and take the CLAMP (2/8) and the MASK attached to it.
- Pull the red cloth off the stand on the right: it reveals two stone beasts holding a hammer, behind a tower-building mechanism. Zoom on it to start the tower puzzle.
Basement tower-building puzzle
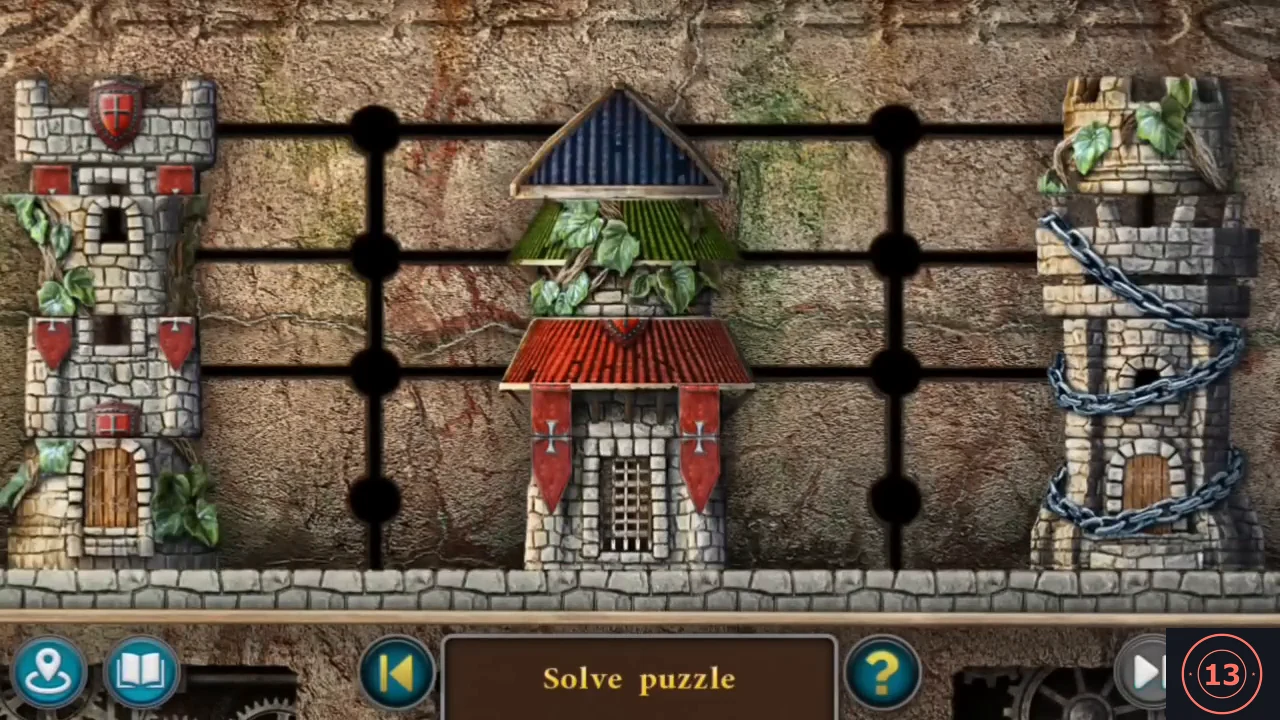
A rail mechanism behind the stone beasts in the basement holds Folnur's hammer. Rebuild the three towers to release it. The Extras replay of this puzzle has several versions, so the segments may start in different places; the method below works for every version.
- Slide the tower segments along the black rails so that each column forms one complete tower: left = the ivy-covered tower with the wooden door and green roof, middle = the red-banner tower with the red roof, topped by the small battlement with the red shield, right = the tower wrapped in blue chains, capped by the blue cone roof (see the solved picture). Segments only move along connected rails, so park unwanted pieces on free rail ends while you build. Finishing quickly earns Lightning (any mini-game under a minute) and Connoisseur (this puzzle under a minute).
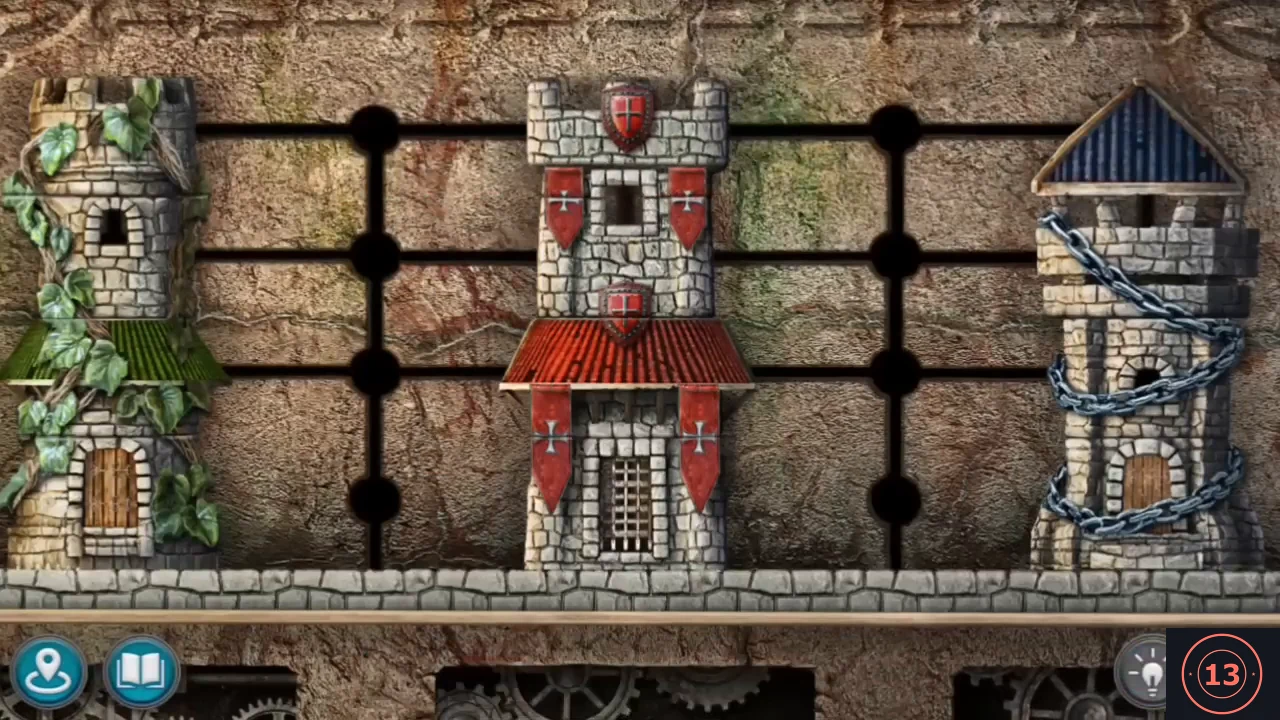
Solved: the ivy tower on the left, the red-banner tower topped by the red-shield battlement in the middle, and the chain-wrapped tower with the blue cone roof on the right. - Take FOLNUR'S HAMMER from the stone beasts and the CLAMP (3/8) from the mouth of the right beast. Back in the main basement view, click the morphing object at the far right edge of the room, just right of the wicker basket below the stone beasts (Morphing objects 2/42).
Clamps, the living room and Kiana
Gather the eight clamps for the broken ladder, clear the debris with the hammer and meet Kiana in the living room.
- Back in the hall, collect the hidden clamps: one among the hanging ceiling keys (4/8), one on the red key board (5/8) and two in the floor key pile (6/8, 7/8).
- Use FOLNUR'S HAMMER on the debris blocking the passage and go through to the living room (the hammer stays in your inventory).
- Watch the conversation: Kiana reveals she found Folnur's diary.
- Take the MASK from the fireplace, click the morphing object on the left (3/42) and pick up the Toto toy on the chair at the right (Toto toy 1/7).
- Zoom on the table under the window: take the MASK lying beside the candle, then read Folnur's diary on the table; take the INSERT WITH A PICTURE from its pages (new task: Secret of the Crypt). The tall cabinet on the right has a lock.
- On the way through the courtyard click the morphing object (4/42). In the hall zoom on the red key board and take the KEY TO THE CABINET.
- In the living room use the KEY TO THE CABINET on the cabinet lock, then place the INSERT WITH A PICTURE in the opened socket to start the animal medallion puzzle.
Living-room cabinet animal medallions
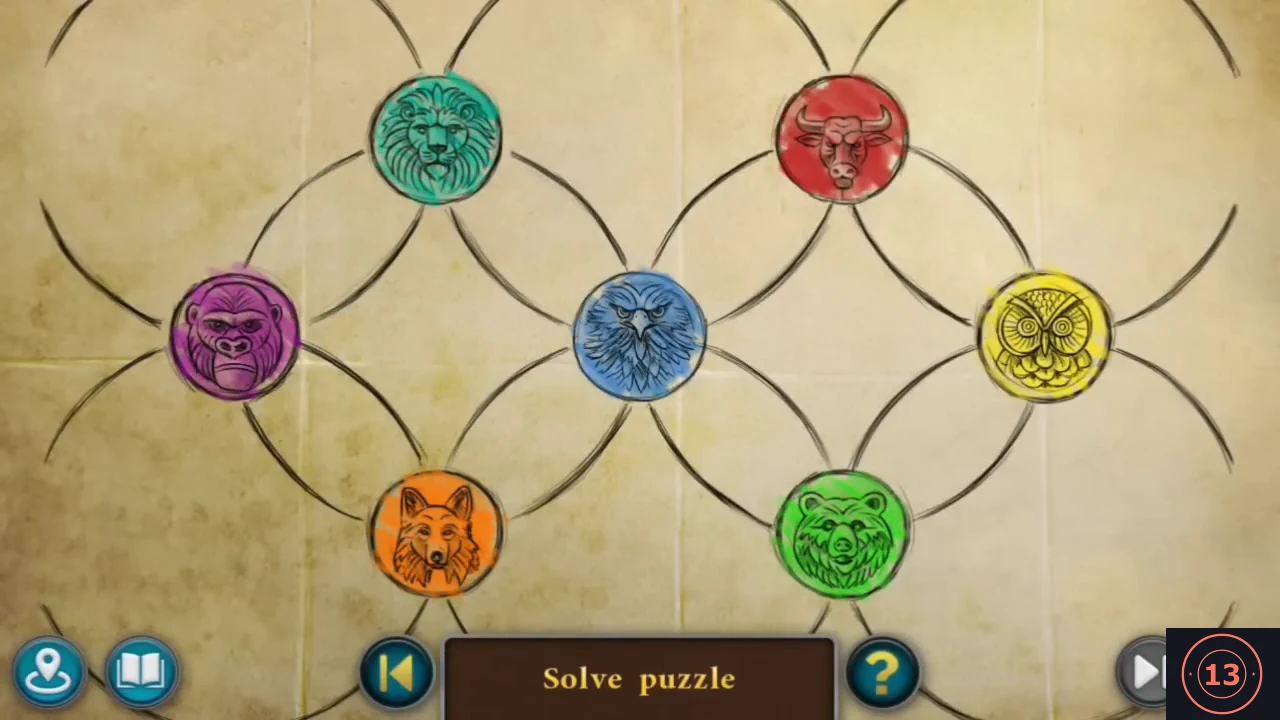
The living-room cabinet opens once the seven animal medallions match the clue sheet that appears with the puzzle.
- Rotate the ring discs to carry the seven animal medallions into the layout on the clue sheet: lion top-left, bull top-right, gorilla middle-left, eagle centre, owl middle-right, fox bottom-left, bear bottom-right. Each rotating disc moves the medallions sitting on its ring; fix one medallion at a time and use the empty slots as buffers.
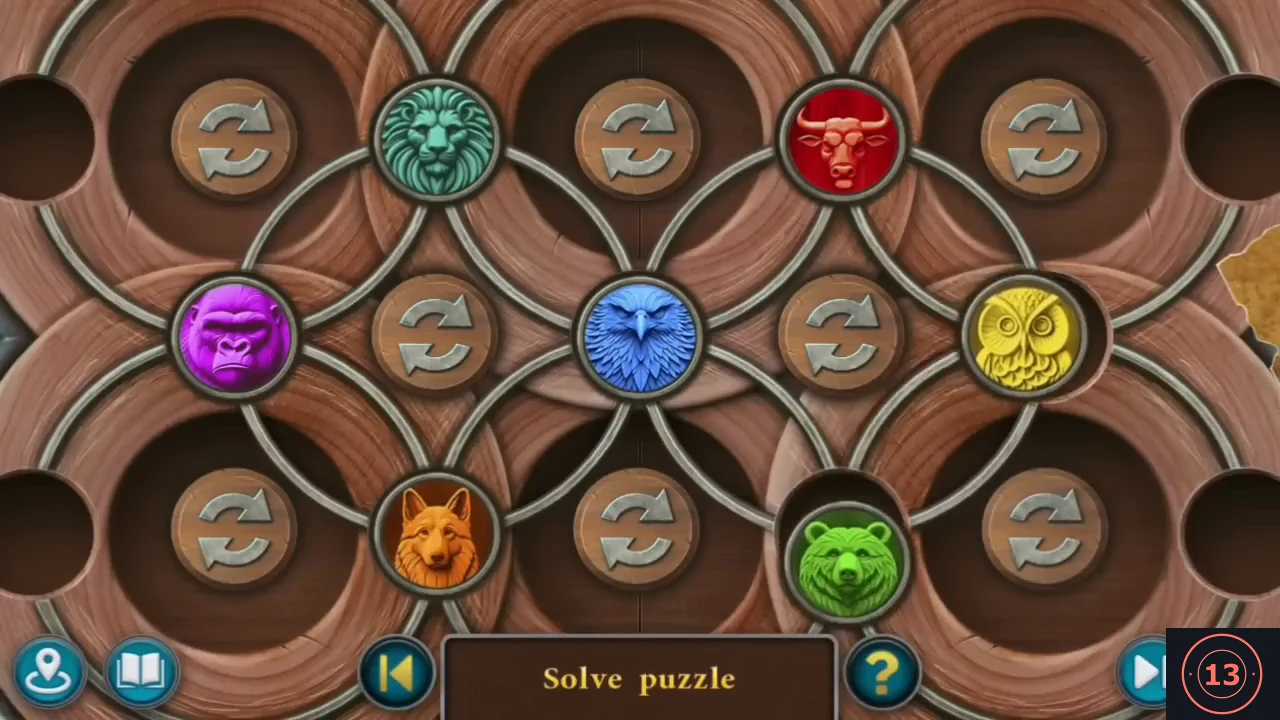
Solved: lion and bull on top; gorilla, eagle and owl in the middle; fox and bear at the bottom, as on the clue sheet. - Inside the cabinet read the Fireplace Electric Igniter sheet, take the CLAMP (8/8), move the picture to take the RAG WITH A DRAWING, then take the manuscript (Folnur Bogro, Manuscripts 1/9) and the MASK beneath.
Making the crypt key
Folnur's workshop has a key-making machine. Collect the parts shown in the workshop's separate parts bar, then use them to cut the key to the crypt.
- Go to the workshop and click the key-making machine on the left workbench ("I can make some kind of key here"). Place the RAG WITH A DRAWING on it. The workshop now shows a separate parts bar with outlines of the items to find here.
- Pick up the small key from the floor at the lower left of the workshop.
- Click the large frame covering the cabinet on the right (too heavy, needs a crane) and the crane above it (no hook). Take the HOOK from among the frames at the back wall.
- Zoom on the mesh key rack at the back right ("Here I can assemble the entire key"): take the KEY BLANK from the crate on the right.
- Zoom on the locked wooden chest at the lower left and open it with the key; take the WINCH LEVER and a CUTTER disc. Take the coil of METAL WIRE from the round drum in the middle of the room.
- Take the CUTTER disc on the right side of the workbench near the magnifying lamp.
- Attach the WINCH LEVER, the HOOK and the METAL WIRE to the crane; it lifts the heavy frame. Take the CUTTER disc revealed behind it.
- Open the cabinet that was behind the frame and take the last CUTTER disc from the lower compartment.
- Zoom on the key machine, mount the four CUTTER discs on the spindle and clamp the KEY BLANK above the drawing to start the key-cutting puzzle.
Key-cutting machine
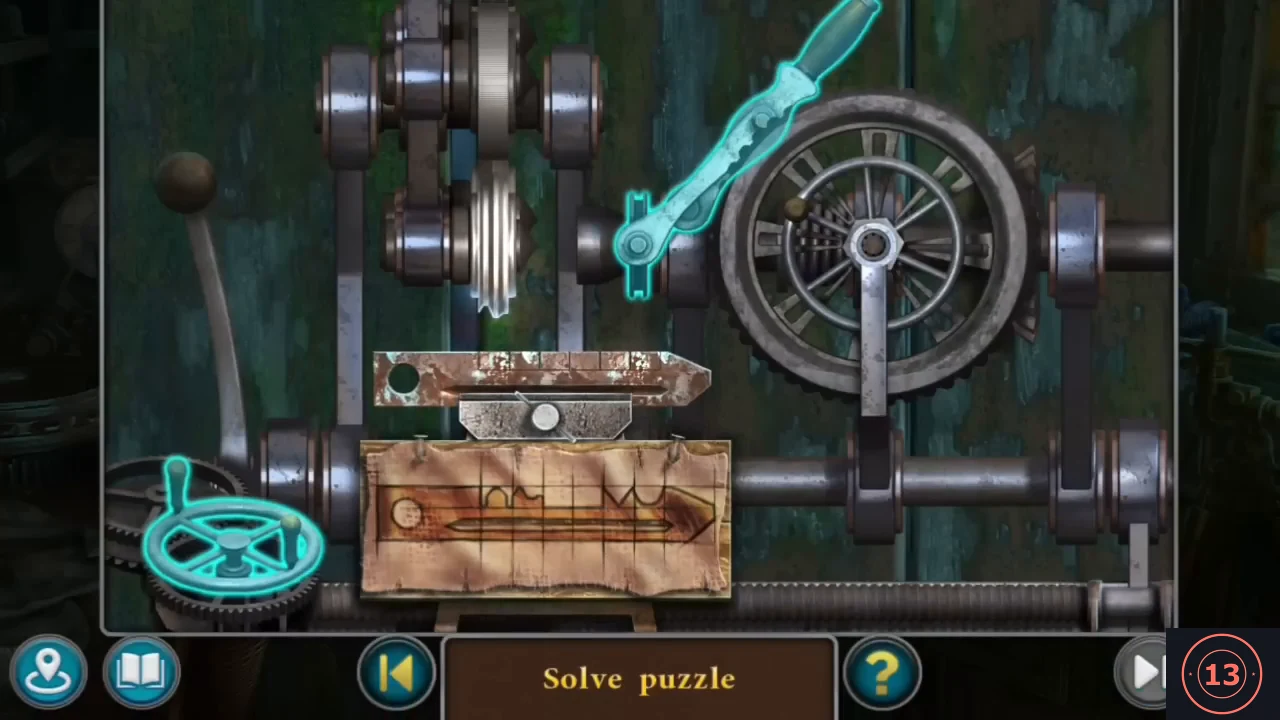
Cut the key blank to match the profile on the drawing, one notch at a time.
- Copy the profile on the drawing onto the blank. The small handwheel at the lower left slides the blank sideways, the arm at the top right switches between the cutter discs, and the long lever on the left lowers the spinning cutter. For each notch on the drawing, choose the matching disc, crank the blank until that notch lines up under the cutter and pull the lever. After each cut compare the blank with the drawing again and keep cutting until every notch matches; a wide notch can need more than one cut side by side. In our game the achievement Clever popped up when this key was finished. Clever is awarded for completing three mini-games in a row without using the Skip button, and this was our third in a row (towers, animal medallions, key), so in your game it may appear at a different puzzle.
- Take the cut blank and place it on the mesh rack where the key bit is assembled; take the KEY TO THE CRYPT.
The crypt
Repair the ladder, place the six masks on the crypt door and open the crypt. The runes on the crypt wall are the code for the basement symbol post.
- In the basement zoom on the ladder lying on the floor (the rungs are loose) and fix it with the eight CLAMPS; take the LADDER.
- Zoom on the wooden post with the four sliding symbol rows again; you still need a code for it.
- In the courtyard zoom on the crypt door with the six-petal rosette. Place the six MASKS; each fits only the petal with its own outline, so a wrong petal gives "Some other item is needed" - try another petal.
- Use the KEY TO THE CRYPT in the centre of the rosette and enter the crypt. Kiana remarks that Folnur is busy in the back room.
- Zoom on the tank on the crypt wall and take the VALVE and the FUEL TANK. Four runes are revealed on the wall behind it - note them. Calling to Folnur does not work (he cannot hear).
Basement symbol post
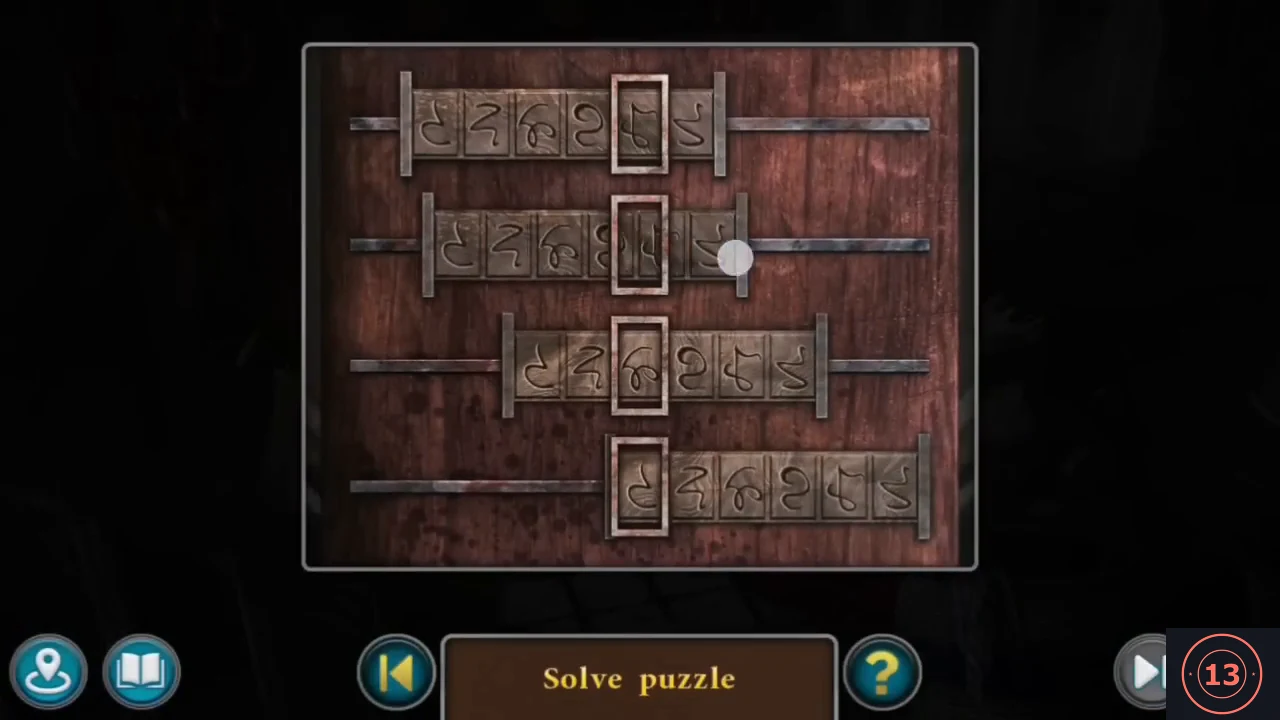
The wooden post in the basement has four sliding symbol rows. The code is the four runes behind the tank on the crypt wall.
- Back in the basement zoom on the symbol post. Slide each row so the symbol in the fixed frame matches the wall runes read left to right, top row first.
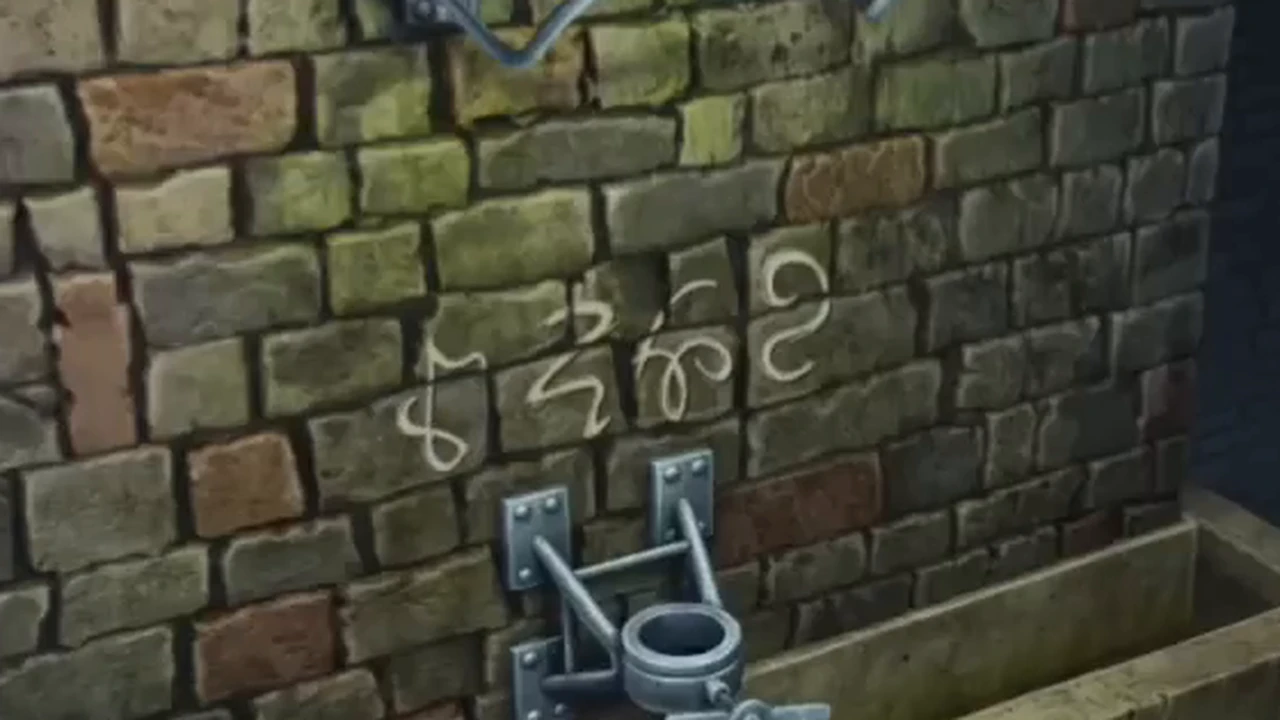
Clue: the four runes on the crypt wall behind the tank, read left to right. They are the four symbols to frame on the post, top row first. 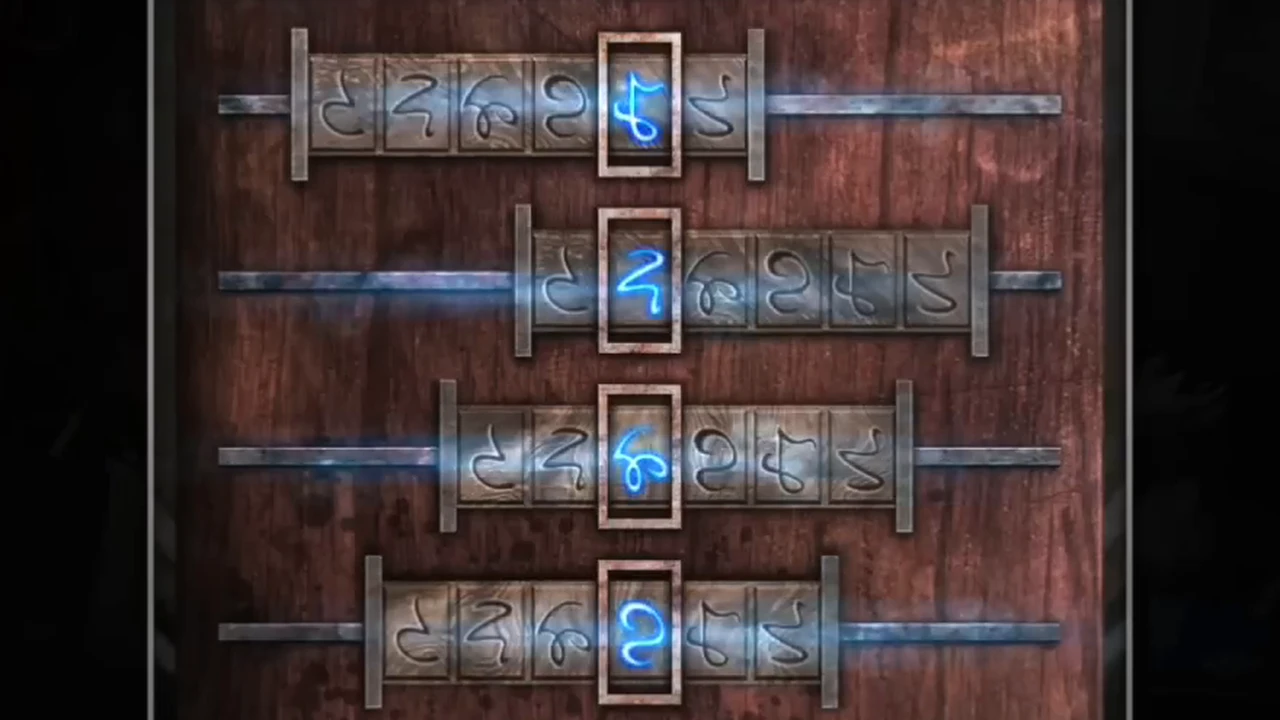
Solved: each row frames its wall rune (top to bottom: the looped 8 shape, the zigzag, the curl, the S shape) and the four runes glow blue.
Cellar barrel chain
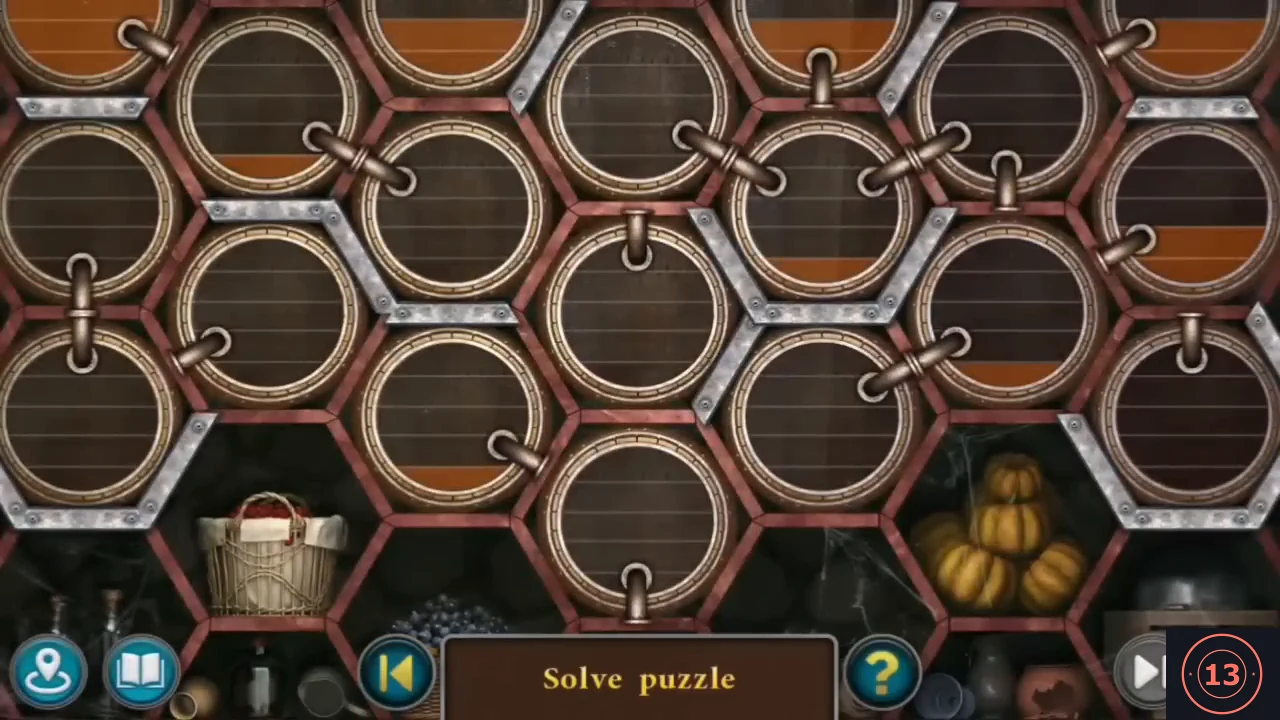
Pour the liquid down a chain of barrels until the bottom barrel is full. This puzzle is long and has many valid move orders, so the step below explains the rules and a practical approach rather than listing every click. Use the reset button if you get stuck.
- Rules: "Fill the bottom barrel to the top by rotating the other barrels and pouring their contents down in a chain." Each barrel has one pipe stub on its rim; clicking a barrel turns the stub to another side. When an upper barrel's stub meets the stub of the barrel below it, the upper barrel empties into the lower one. Grey metal plates block connections. Work the partly filled barrels downward, merging them step by step, until the large bottom-centre barrel is full. Lengthy; the reset button restarts.
- Zoom on the tap under the filled barrel and place the FUEL TANK under it; take the FLAMMABLE LIQUID.
- In the courtyard put the LADDER against the mansion wall (beside the tower) and climb up to the wooden roof hatch.
Roof hatch spoke lock
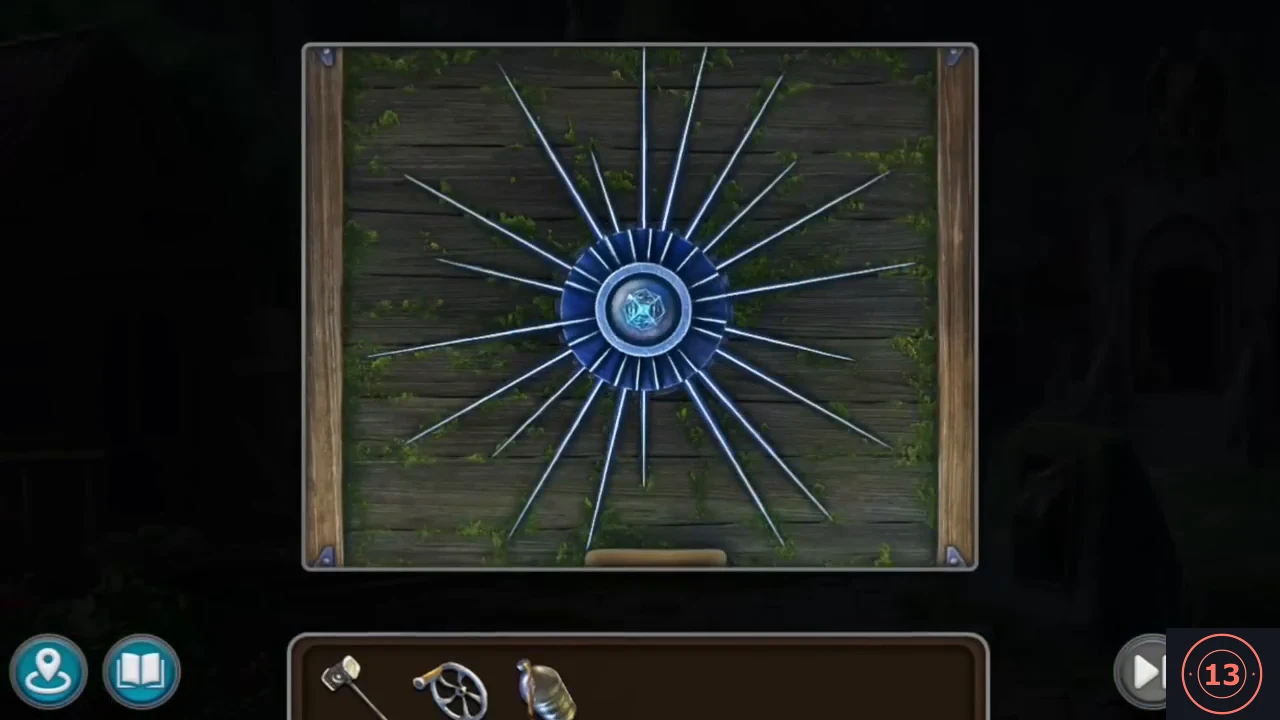
The roof hatch above the courtyard has a spoke lock that opens with the patterned washer. Opening it lets you extend Folnur's lightning antenna.
- Place the PATTERNED WASHER in the centre of the hatch to start the spoke lock. Drag around the hub in circles: this turns the blue disc of short slats around the hub. Keep circling until the short slats line up with the long metal spikes so that every spike forms one continuous ray; the lock then glows and the hatch opens.
- Look inside the hatch: Folnur's lightning antenna must be extended upward to stoke the fireplace.
- In the courtyard the winch on the mossy stone at the right is missing a part: attach the VALVE: the antenna extends and Kiana reports a current charge in the fireplace.