Osbert's Tavern: Heal the Wound
After Chapter 2 the Chapter Selection screen shows Chapters 1 and 2 at 100%; press PLAY next to Chapter 3: Osbert Comes to the Rescue. Osbert, a veteran soldier who keeps a tavern, finds Mira collapsed and wounded on his floor. As she tells him once her wound is treated, witches found the werewolf camp and took many werewolves. Optional pickups in this chapter are Morphing Objects and ship models; the Collectibles part lists every one by room.
- Watch the opening. Osbert says he must clean and anaesthetise Mira's wound and that he had a recipe for a suitable compress in the chest. New task: Heal the wound.
- Zoom into the painted chest under the window on the left. In the close-up, take the green carved Figurines piece (1/2) standing on the window sill just left of the green vase. Zoom into Mira on the bed ('The wound is severe. I need to treat it before Mira regains consciousness'). The Key lies on the striped blanket at the left end of the bed, away from Mira's head; take it. Open the chest with the Key and take the Recipe book (Therapeutic compress recipe), the Rope and the Cloth.
- Zoom into the work table on the right ('I usually make potions here') and take the Flask from the round cutting board. Optional collectible: click the ship model on the floor by the mirror next to the stove.
- Go through to the tavern hall. Zoom into the near end of the long table by the candles. Take the Matches (the small matchbox lying at the left edge of the table, below the loaf of bread) and the Fish figurine (the small grey fish lying between the bread and the two mugs; Fish figurines 1/5). Zoom into the ornate painted chest at the back of the hall, behind the far end of the long table. Click it to open it, then take the Jug and the Garden trowel. Zoom into the counter with the copper mugs on the right side of the hall, in front of the dish shelves. Take the Tube lying on its top. Its drawer has no handle yet ('I need to attach the handle'). The large green bottle on the counter at the far right is sealed tightly. The carved wooden shrine hanging on the back wall can be zoomed into, but nothing could be done with it here in our recording.
The Yard and the Garden
Six pieces of Firewood are scattered around the yard and the garden behind it.
- Go out to the yard. Take the piece of Firewood lying in the grass just right of the front end of the cart of sacks, below the small press (Firewood 1/6). Zoom into the cart of sacks on the left. Take the Nails lying on the cart boards between the wooden bowl and the grey sack on the right. Zoom into the small press in the middle of the yard: take another Firewood, the log lying in the grass behind the press, up to its right (2/6). Dig up the plant at the front right of the press with the Garden trowel to get the Dirty plantain. Zoom into the stone well at the right: 'I can get clean water here.'
- Zoom into the hen house on the left of the yard and take the Firewood (3/6) and the Pitchfork. The carved relief on the bathhouse door shows missing pieces: 'There are not enough broom figurines.'
- Follow the path to the garden behind the house. Take the small piece of Firewood lying at the far end of the stone path, by the steps (Firewood 4/6). Take the log leaning against the wooden crates on the left (5/6). Zoom into the haystack. Click the Bucket sitting on top of it: it rolls down to the foot of the stack, where you take it. Then use the Pitchfork on the hay. Each stroke digs deeper (three strokes in our recording) until a hollow opens with a Fish figurine at the bottom; take it (Fish figurines 2/5). Back in the garden, take the last piece of Firewood: the short plank leaning against the left end of the raised vegetable bed, in the middle of the path in front of the haystack (6/6).
- Zoom into the strawberry bed: take the Dirty fish figurine from the soil and the Dirty strawberries. Zoom into the tree trunk beside the apple basket: take the Figurine in resin ('I usually get maple sap here'). Take the Ladder leaning against the tree at the back of the garden.
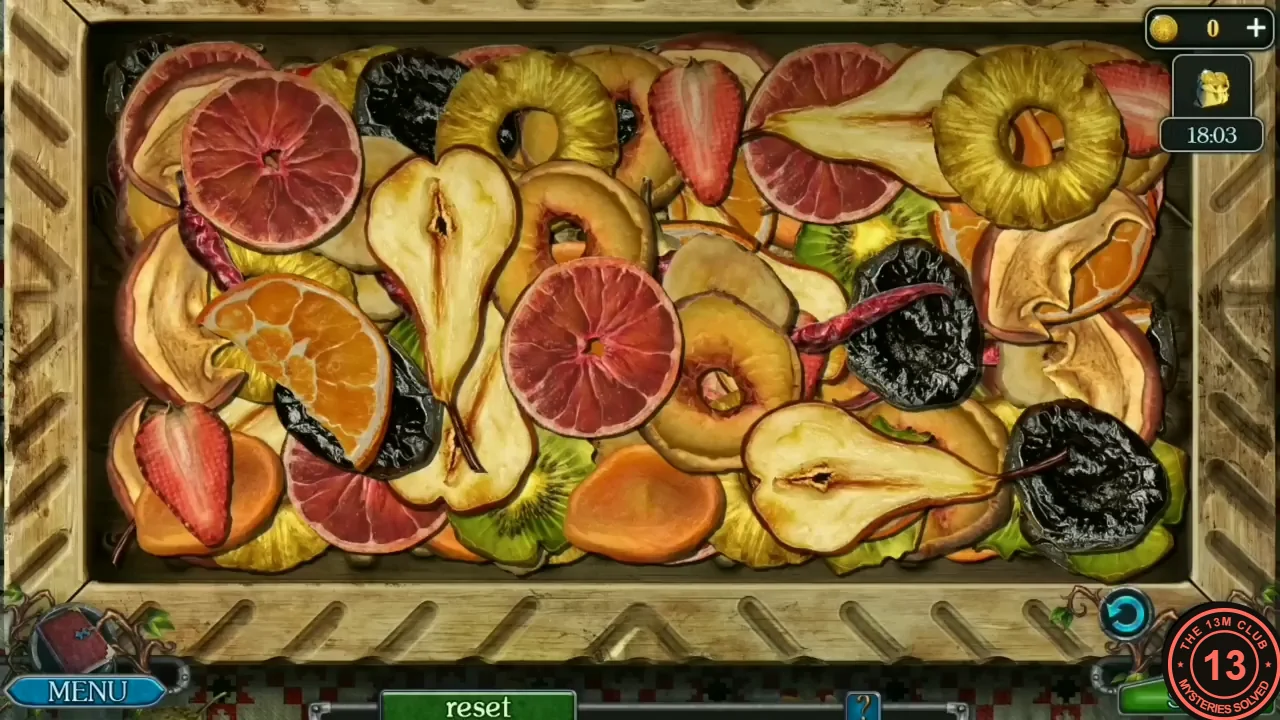
- Zoom into the crates of dried fruit on the left. Puzzle: the tray is piled with layers of dried fruit slices. Click two matching slices (for example the two kiwi slices) to remove them as a pair; slices lower in the pile come into view as the ones above them are cleared. Keep pairing until the tray is empty except for one unmatched piece, the dried tomato. Take the Dried tomato. A reset button is under the tray; it was not used in our recording.
Water and Maple Sap
Back in the yard, the loft above the house and the well supply what the stove and the compress need.
- Return to the yard and put the Ladder against the loft window of the house. Zoom into the loft: take the Gloves and, from the open box, the Hammer.
- Zoom into the well. Put the Bucket on its rim, tie the Rope to it and let it down, then take the Bucket with water.
- In the garden, zoom into the thorny flowering bush on the right. Use the Gloves on it: Osbert, protected by the gloves, picks the red berries, and you get the Rosehip. Use the Gloves on the bush again: they push the branches apart and reveal the Drill lying on the ground at the bottom of the bush. Take it.
- Zoom into the tree trunk by the apple basket. Drill a hole with the Drill, insert the Tube as a spout and hang the Jug under it. Take the Jug with maple sap.
The Stove and the Fish Relief
Five Fish figurines open the carved relief in the tavern hall.
- In the tavern hall, zoom into the sideboard: the handle of its drawer hangs loose from one nail. Use the Nails on the handle to set it back in place, then drive them in with the Hammer. Click the drawer to pull it open and take the Fish figurine (3/5).
- In the kitchen, zoom into the stove. Osbert says 'Once I start the fire in the oven, I'll need to use the oven fork', then 'The stove must be kindled by using small branches first.' Click the bundle of small dry branches at the right end of the counter, behind the oven fork, to lay them in the firebox below. Add the Firewood (6) and light it with the Matches. Put the Figurine in resin on the small blue dish on the counter, then click the oven fork leaning at the right of the stove: it lifts the dish into the hot oven and pulls it back out. Take the figurine from the dish: the resin has melted off and it goes straight into your inventory as a clean Fish figurine (Fish figurines 4/5). It needs no washing.
- Zoom into the wash tub under the hanging kettle. Pour the Bucket with water into the kettle. Use the Dirty fish figurine (the one dug from the strawberry bed) on the tub: the kettle tips by itself and rinses it under the stream, and it joins the others as the fifth Fish figurine (5/5). Use the Dirty plantain on the tub the same way to get the Plantain.
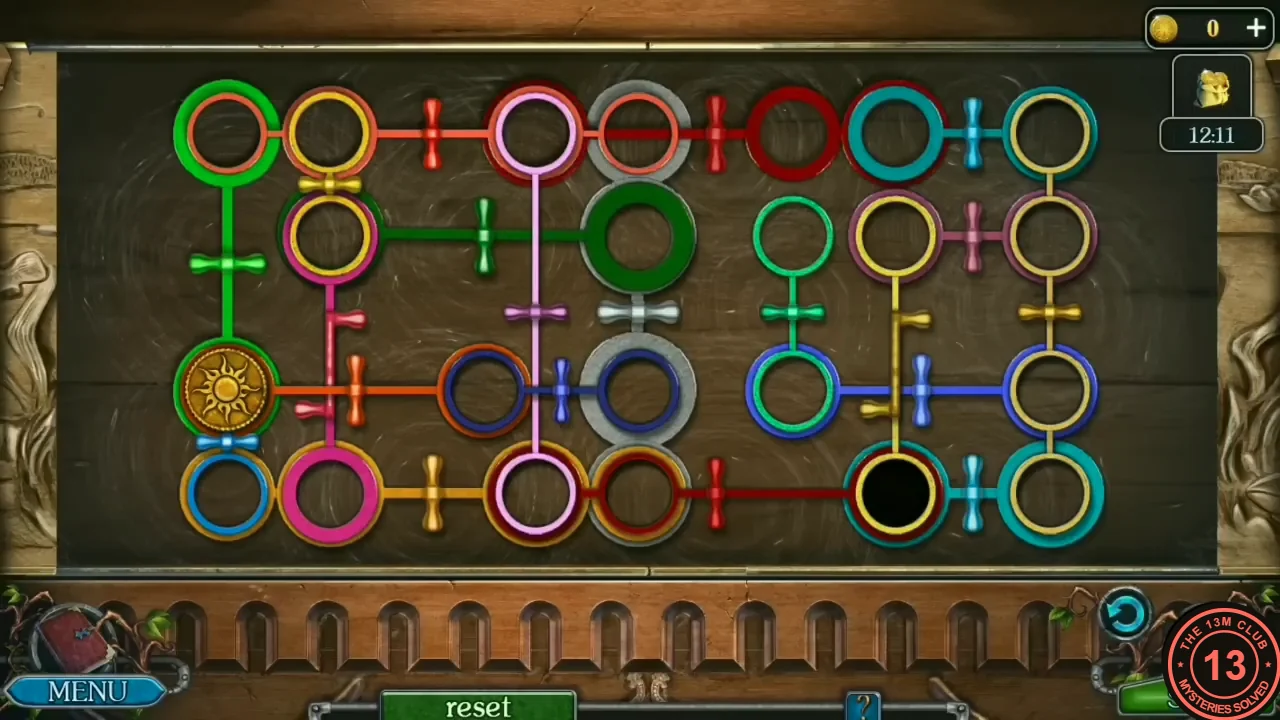
- In the tavern hall, zoom into the carved lake relief on the wall and put the five Fish figurines in its empty spaces. Puzzle: a golden sun token sits in a ring at the left edge, third row. The board is a network of coloured rings joined by coloured bars, and each bar has a small coloured peg in the middle. Click the peg on a bar that touches the token's ring: the bar swings half a turn around its peg, so the two rings at its ends swap places and the token rides with its ring to the other end. The ring that was at the far end moves back to where the token was, so the board changes a little with every move. Goal: bring the token to the black ring in the bottom row, second from the right. Use Reset to restore the board. The route that worked in our game, starting from a reset board: (1) the orange peg right of the token, to the orange-rimmed ring; (2) the blue peg to its right, to the grey ring in the centre; (3) the silver peg above, to the large dark green ring; (4) the green peg to its left, to the yellow ring in the second row, second from the left; (5) the pink peg below it, to the large pink ring in the bottom row; (6) the yellow peg to its right, to the next bottom-row ring; (7) the red peg further right, which sends the token into the black ring. The cabinet below opens. Take the Knife and the second Figurines piece (2/2).
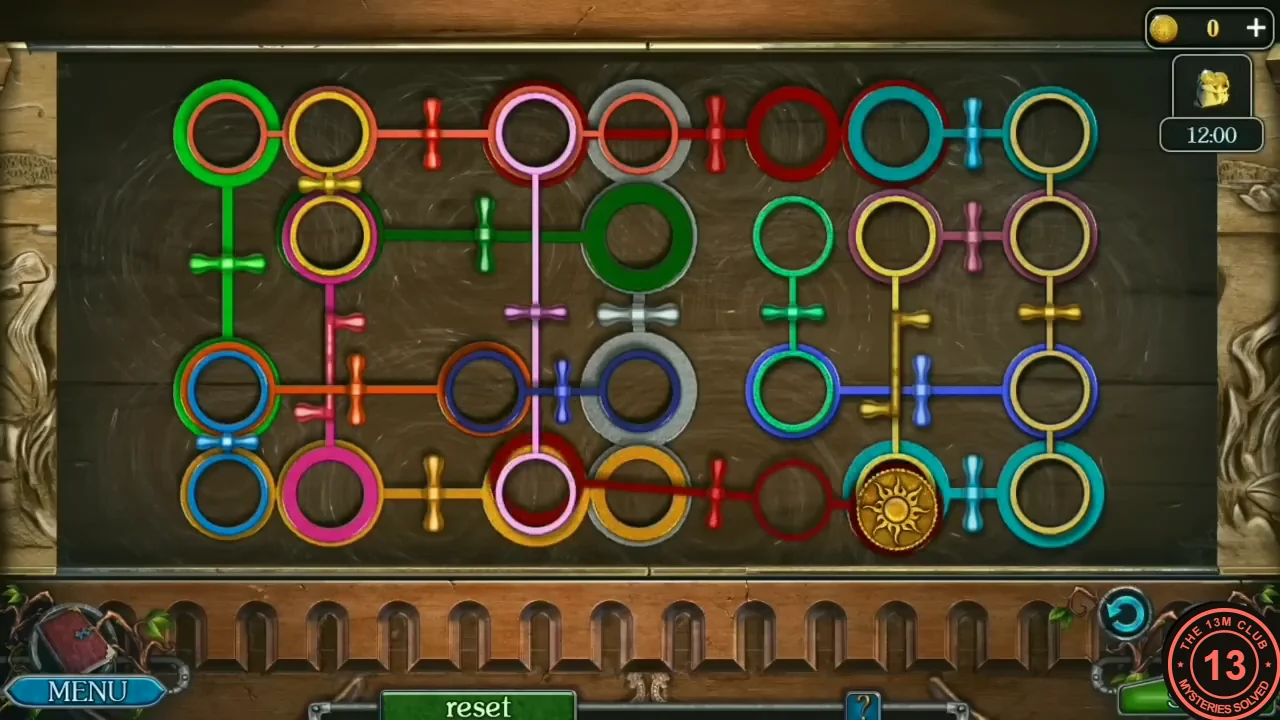
The token on the black ring at the end of a successful run.
The Bathhouse Door
The two carved broom figurines complete the relief on the bathhouse door in the yard.
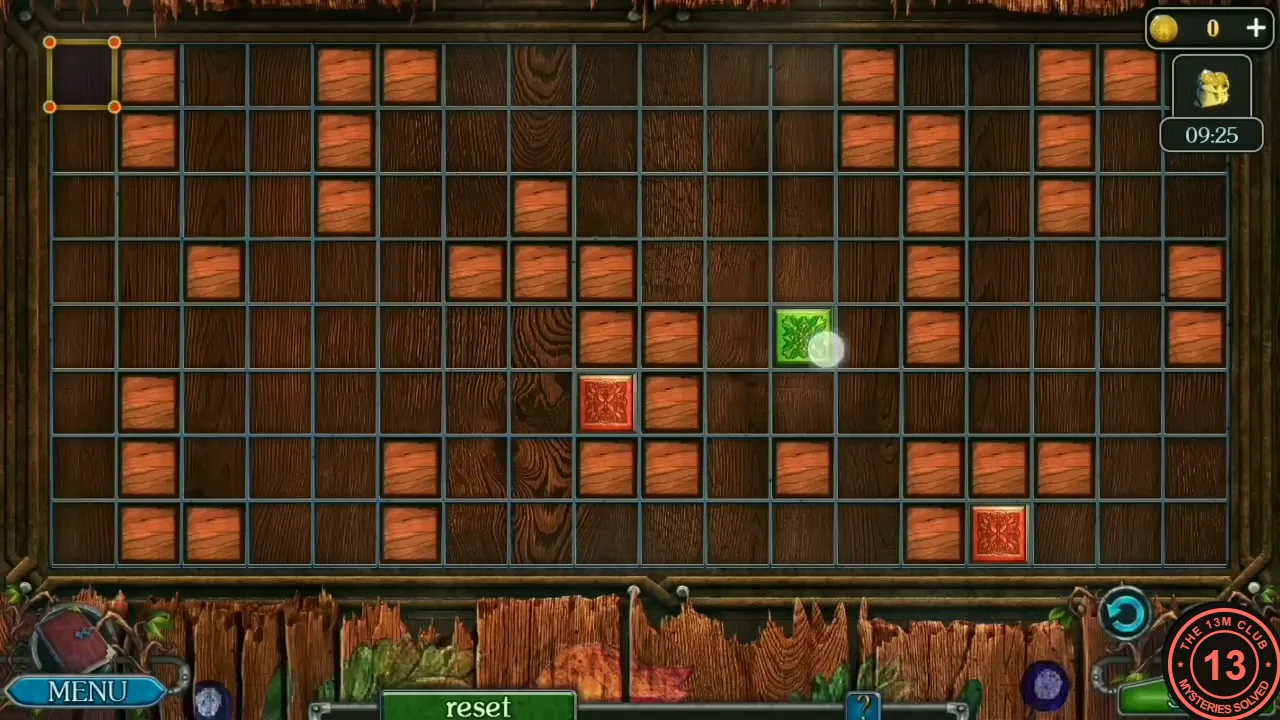
- Zoom into the bathhouse door in the yard and put both Figurines pieces (bath-broom carvings) into the gaps in the relief. The relief opens onto a grid of wooden tiles with one green block, two red blocks and a dark square with gold corners. Goal: stop the green block exactly on the gold-cornered square. Controls: in our recording, a tap just beside the green block, on the side it should move towards, sent it that way. The green block slides until it hits a wooden tile, another block or the edge of the grid. The red blocks slide in the same direction on every move, each until something stops it, even when the green block itself cannot move. They are moving obstacles and do not have to go anywhere; on solved boards they were still on the grid. Method: (1) Look at the gold square and find what could stop the green block there, such as the grid edge, a wooden tile or a red block next to it. (2) From that, work out which row or column the green block must slide along, and get it into that line first. (3) Before each move, check where the two red blocks will end up. They can block your path, or you can park one as an extra stopper. (4) If the board gets stuck, press Reset. There are four boards. Each solved board lights a star on the carved tub, and when all four stars are lit, the doors open. Our recording skips parts of the solving, so we cannot give a complete move list. The board pictures show the starting layouts we had.
Inside the Bathhouse (Hidden-Object Scene)
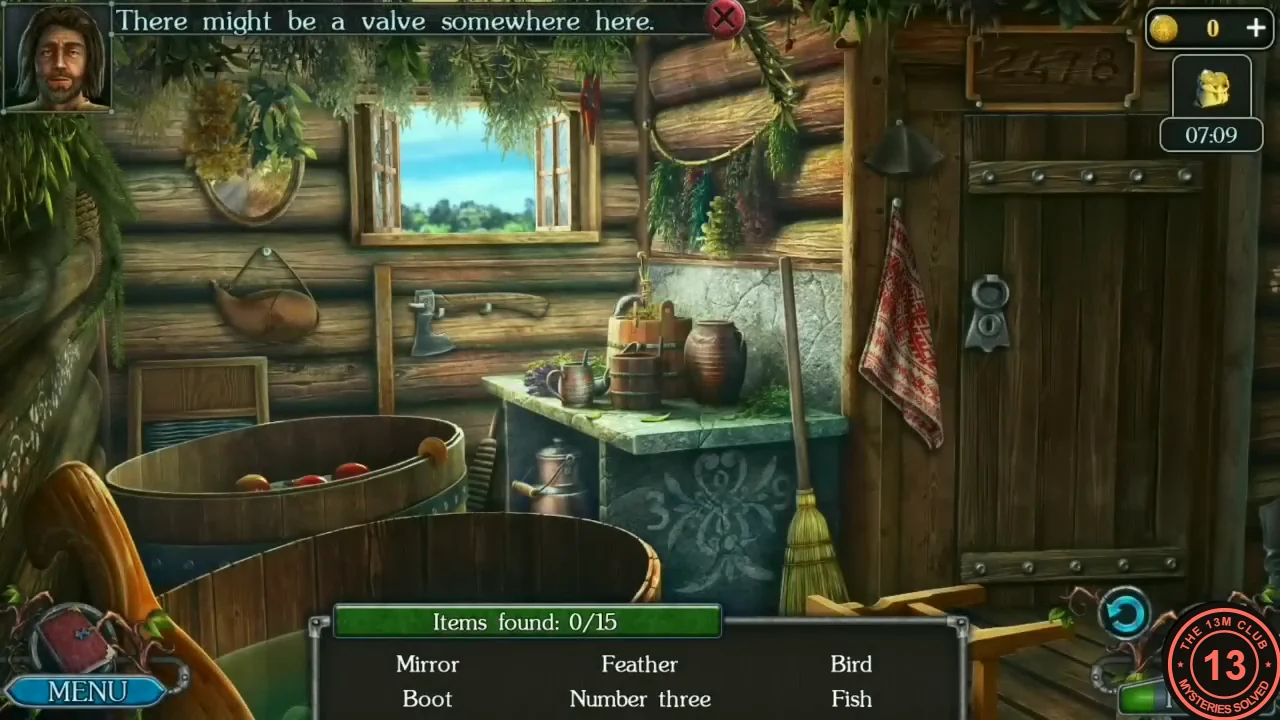
Find the 15 listed items inside the bathhouse.
- Inside the bathhouse, find the 15 items on the list. Only six names show at a time, and each found item is replaced by a new name. Locations in the order we found them: Mirror: the oval mirror on the wall left of the window. Boot: zoom into the tub of floating apples at the lower left and click the dark shape under the water in the middle; the boot rises out. Number three: the small 3 on the grey front of the washstand, left of the carved pattern. Fish: click the open window to close it; the fish is drawn on the glass. Then zoom into the washstand top for four items. Clothespin: clipped to the rim of the wooden tub. Button: the green button on the felt hat at the left. Cheese: the yellow piece on the little mousetrap board at the left. Feather: the feather pattern on the clay jar at the top right. In our recording the tap at the lower edge of the pattern counted, but the picture stayed on the jar. Coin: in the apple tub close-up, the gold coin stuck on the tub rim at the lower right. Axe: hanging on the log wall left of the washstand, below the window. Click the door ring on the right-hand door to open the side room, then zoom into its shelf for four items. Bird: the faint white carved bird high on the back wall, above the wheel. Valve wheel: the wheel lying on the shelf at the left. Comb: the thin brown comb lying on the shelf right of the wheel, in front of the buckets. Antlers: on the trophy plaque in the top-left corner of the close-up. Pinecone: back in the main room, the pine cone hanging in the greenery at the left edge, above the hanging scoop. Afterwards you have the Valve wheel.
The Therapeutic Compress
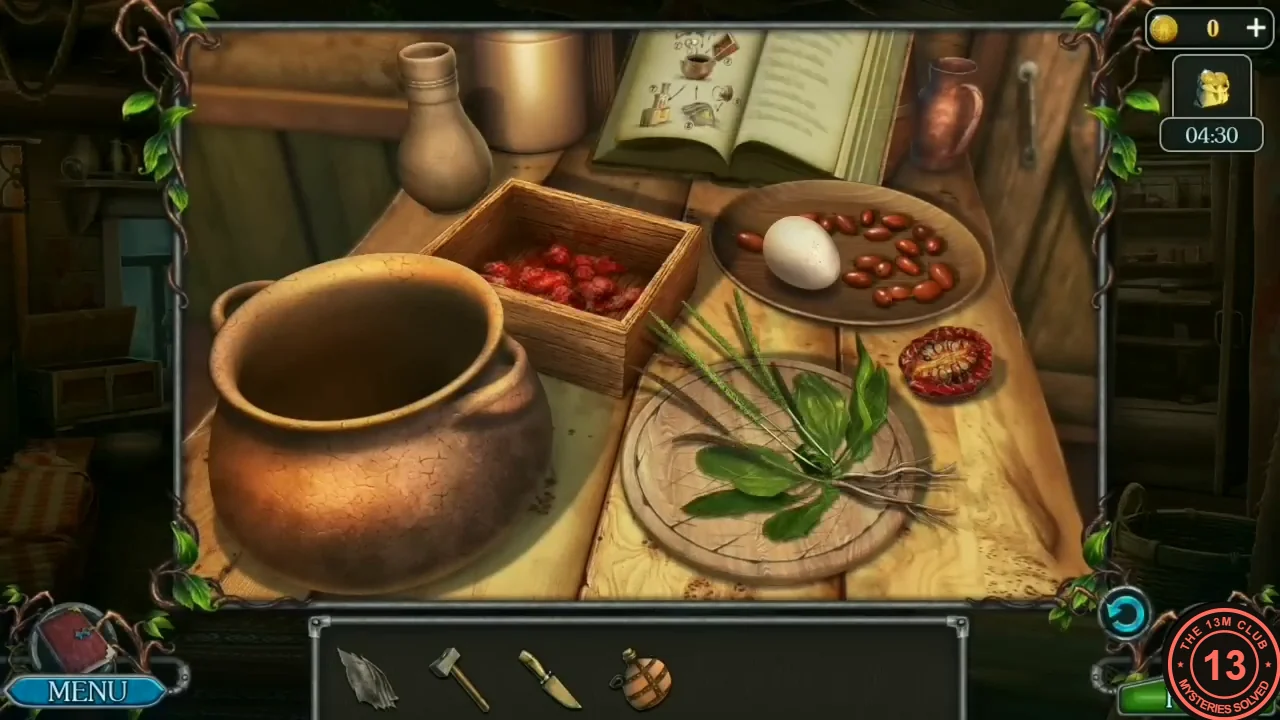
The Recipe book lists ten steps: 1 break one chicken egg; 2 add half a box of crushed strawberries; 3 add a root of plantain; 4 pour a jug of maple sap; 5 pour rose hips; 6 add one dried tomato; 7 boil everything in the oven; 8 moisten the cloth with the solution; 9 add alcohol for disinfection; 10 apply a compress to the wound.
- Put the Valve wheel on the screw press in the yard. The Dirty strawberries must be washed first ('I need to clean the dirt from these berries first'): in the kitchen, put them in the wash tub and tip the kettle over them. Back at the press, put the clean Strawberries in, turn the wheel and take the Crushed strawberries.
- Open the Recipe book and drag the ingredients you already have onto their lines: Rosehip (step 5), Dried tomato (step 6), Plantain (step 3), Jug with maple sap (step 4) and the box of Crushed strawberries (step 2). Each gets a red tick.
- In the yard, zoom into the cart of sacks. Slit the tied sack above the wooden bowl with the Knife so the grain pours into the bowl, then take the bowl of Grain. Zoom into the hen house on the left of the yard and put the Grain on the floor. The hen hops down from her nest on the shelf to eat. Take the Funnel and the Egg from the nest where she was sitting.
- In the tavern hall, zoom into the large green bottle on its stand. Put the Flask on the table under it and the Funnel in the Flask's neck. The bottle's neck is sealed with a red stopper: use the Knife on it to cut the seal off (you keep the Knife). Tilt the bottle and take the Flask with moonshine. Open the Recipe book and add the Egg (step 1); the collected ingredients become Ingredients.
- In the kitchen, zoom into the work table and put the Ingredients there. The recipe book lists ten steps: break one chicken egg; add half a box of crushed strawberries; add a root of plantain; pour a jug of maple sap; pour rose hips; add one dried tomato; boil everything in the oven; moisten the cloth with the solution; add alcohol for disinfection; apply the compress to the wound. Add the ingredients to the clay pot in that order: click the egg on the plate (it cracks into the pot), then the box of crushed strawberries (half of it is tipped in). Use the Knife on the plantain on the round board; the root drops into the pot. Click the maple sap jug behind the pot to pour it, then the plate of rose hips, then the small dish with the dried tomato at the right. Click the pot to take it (it becomes the Cauldron). Zoom into the stove and put the Cauldron on the counter. Click the oven fork: it pushes the pot into the hot oven and brings it back out boiled. 'I need to soak the cloth in this solution': use the Cloth on the pot; the soaked cloth is laid on the counter. Pour the Flask with moonshine into the pot, then take the Compress (the cloth).
- Zoom into Mira and put the Compress on her wound. Watch the conversation: witches found Mira's camp and took many werewolves; she hid the children in a shelter in the camp and asks Osbert to save them. Take the Medallion. New task: Go to the Chantwood. Leave through the yard.
The Foot of the Chantwood
'A few hours later, at the foot of the Chantwood.' Behind the door in the great tree is a system of tunnels; one of them leads to the werewolf camp.
- Watch Osbert ride to the Chantwood. At the tree door Osbert says: 'There is a system of tunnels behind the door in the tree. One of the tunnels leads to the werewolf camp.' Zoom into the lily pond at the left edge of the scene and take the Logs lying across the upper right of the pond (1/6). Take the long log lying across the path right of centre, in front of the door (2/6). Optional collectible: click the ship model among the blue flowers and rocks right of the path, below the tree door. Zoom into the stream on the right: 'Something is glistening at the bottom' (for later).
- Zoom into the purple-flowering rock on the right of the tree door, beside the tree's roots: take the Logs (3/6) and cut the thick vines with the Knife; take the Vines. Go down to the river.
- Optional collectible: click the small ship model standing at the water's edge on the left, between the big tree trunk and the little pine tree. Zoom into the mossy rock and bush beside the path, left of the bridge foot. Click the bush to take the Peanut; the bush disappears. Then take the long log lying diagonally across the mossy rock (Logs 4/6). Back in the river scene, take the long mossy log leaning against the big tree on the right (5/6). Take the short log lying in the grass left of the path, by the red flowers (6/6). Optional: click the Morphing Object in the dark hollow among the roots of the big tree on the right. Zoom into the broken bridge. Lay the six Logs across the frame, then use the Vines to tie them down.
- Cross to the windmill and zoom into its doorway: take the Net hanging inside the door. Inside, click the upright round millstone: it tilts aside and reveals the Rose behind it. Take the Rose. Cut the blue cloth bundle hanging from the beam with the Knife and take the Hand fan.
- Back at the river, zoom into the ornate golden gate across the water, under the stone arch at the back left. Cut the leafy Wormwood plant at the gate's lower right with the Knife. Zoom into the round blue lock at the top of the gate, where the two halves meet: 'There should be feather figurines here' (for later). Zoom into the wild beehive hanging on the big tree at the upper left. Use the Wormwood on the hive: the sprig is waved in front of it and used up. Then use the Knife on the hive: it cuts open the bulge at the upper left of the hive, leaving a dark patch of exposed comb, and you get the Honeycombs. No bees were visible in our recording, so we cannot say what happens if you cut without the Wormwood.
- Return to the tree door. Zoom into the lily pond and catch the Frog with the Net. Zoom into the carved double door: put the Peanut in the bowl under the squirrel, the Honeycombs under the bear and the Frog under the stork. The door opens on the tunnels. New task: Find the entrance to the camp where the children are hiding.
The Tunnel Maze: 11 Fangs
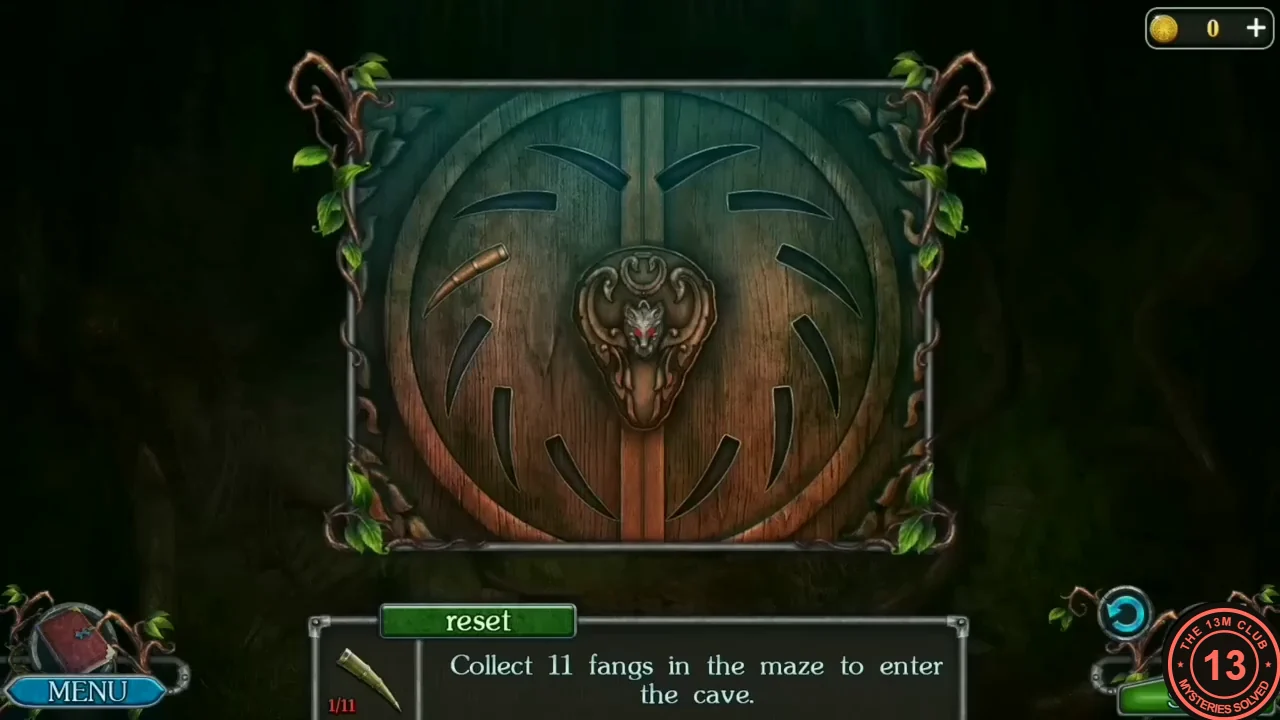
The tunnels form a maze of linked caves. The round serpent door needs Mira's Medallion and 11 fangs. The circular Back arrow at the bottom right always takes you one cave back toward the carved tree door; Reset returns you to the start of the maze. Cave map: the tree door opens into the Red-mushroom fork. The fork's blue opening on the right leads to the Purple-tunnel cave, whose purple-blue tunnel in the middle leads to the Cobweb cave (giant spiral shell on the left, blue sky at the upper right); the blue hole low on the Cobweb cave's left leads to the White-light cave, and that cave's pale white rock opening on the left leads to the serpent door. The blue-sky opening at the Cobweb cave's upper right leads to a dark side cave with teal light at the top. The teal-lit opening on the fork's left leads to the Orb cave (a glassy orb in a central archway). The Orb cave's left side leads to the Blue cave (big blue opening on its left, cobwebs at its upper right), whose blue opening leads on to the Seal pit; the Orb cave's right side leads to the Vine cave, whose bright blue-lit passage on the left leads down to the Lower ledge.
- Enter the tunnels through the carved tree door. From the Red-mushroom fork take the blue opening on the right into the Purple-tunnel cave, click the purple-blue tunnel in the middle into the Cobweb cave, click the blue hole low on the left into the White-light cave, then click the pale white rock opening on the left to reach the serpent door. Zoom into the round wooden serpent door ('I need to insert the medallion Mira gave me in the center') and put the Medallion in its centre. 'The amulet is not enough. I also need fangs.' New goal: Collect 11 fangs in the maze to enter the cave. Close the door close-up by clicking outside it. Then take the fang lying against the far-left wall of the clearing, left of the door and a little above mid-height (1/11).
Fangs 2 to 4 and the Mushroom Seal
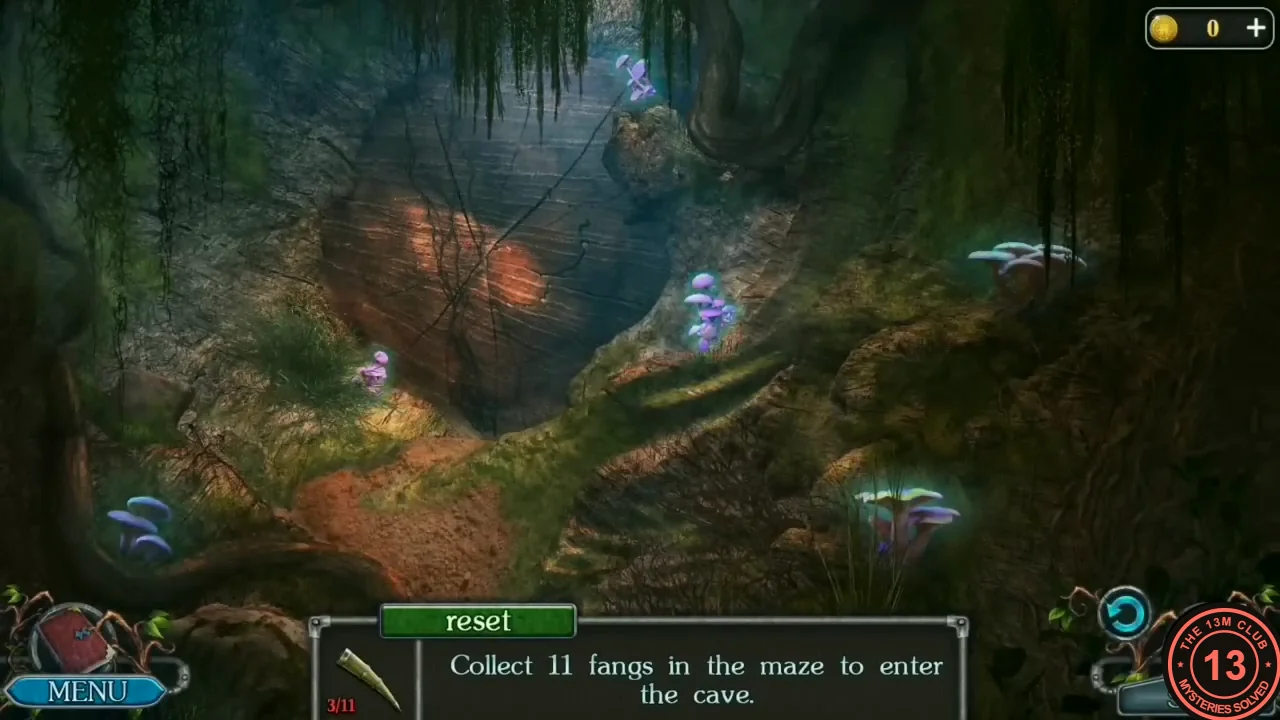
Continue the fang search. This part includes the pit cave with blue mushrooms around a stone seal.
- From the serpent door press Back four times to return to the Red-mushroom fork. Take the fang from the dark crevice in the far-left wall, at the height of the teal-lit opening (2/11). Take the teal-lit opening on the left into the Orb cave, then go left into the Blue cave. Take the fang on the rock wall among the cobwebs, right of centre (3/11). Go through the big blue opening on the left into the Seal pit. Around the patterned stone seal grow six glowing mushrooms: blue ones at the lower left, a cluster at the lower right, a shelf fungus on the right wall, a small one left of the seal, a pink one right of the seal and one above it. Clicking a mushroom changes its light, and some clicks also change neighbouring mushrooms. Keep clicking until every mushroom glows blue-violet. The seal then shines purple and opens; take the fang from the compartment (4/11). In our game the clicks were: lower-left blue mushrooms (they lit up, and so did the right-wall shelf and the small mushroom left of the seal), lower-right cluster (it lit up and the pink mushroom right of the seal turned blue-violet, but the shelf went dark), right-wall shelf (lit again, while the mushroom right of the seal went back to pink), then the small mushroom left of the seal twice. After the second click every mushroom, including the one above the seal, glowed blue-violet. The seal opened about two seconds later, with no further clicks.
The Vine Cave and the Last Fangs
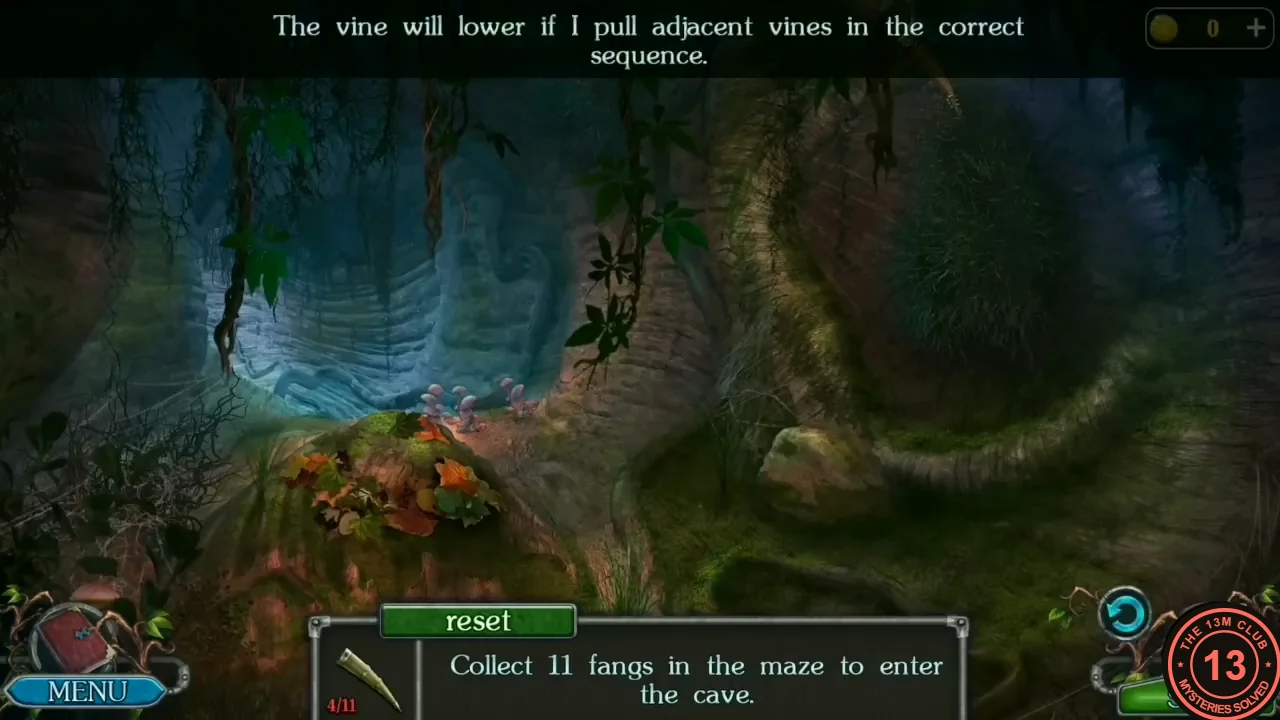
Pull the vines in the right order to drop a fang, then collect the remaining fangs and open the serpent door.
- Press Back twice (Blue cave, Orb cave) and take the right side of the Orb cave into the Vine cave, with hanging vines over a misty drop and a fang caught high at the top right: 'The vine will lower if I pull adjacent vines in the correct sequence.' Three vines hang in the middle of the scene: the left one in front of the blue-lit rock, the twisted middle one and the leafy right one beside the root column. Pull them in this order: left, right, middle, right, middle, left. The vine holding the fang drops; take the fang (5/11). If the message appears again, start the order over from the first pull. Go through the bright blue-lit passage on the left down to the Lower ledge. A pale cracked stone lies on the path in the middle of the slope. Click it: 'I can see the fang I need behind the crack in the stone.' Click the stone again: it tumbles down the slope and the fang falls out onto the path below it. Take the fang (6/11).
- Press Back three times (Vine cave, Orb cave, Red-mushroom fork). Take the fork's blue opening on the right into the Purple-tunnel cave. Take the fang on the path at the lower right, below the right-hand opening (7/11). Click the purple-blue tunnel in the middle of this cave to enter the Cobweb cave. Tapping the ground below the upright red-banded clay pot right of centre gives nothing: tap the pot itself so it tips over, then tap the fang at its mouth (8/11). Take the blue hole low on the left into the White-light cave. Click the mossy rock ledge right of the path to find the fang there (9/11). Press Back to the Cobweb cave and take the blue-sky opening at the upper right into the dark side cave. A fang is caught high in the vines at the upper left ('The fang is entangled high in the vines'). Click the long stick lying on the ground by the small mushroom in the lower middle. It swings up into the vines and knocks the fang down; take it (10/11). Press Back three times (Cobweb cave, Purple-tunnel cave, Red-mushroom fork). Take the teal-lit opening on the left into the Orb cave again, and take the fang in the root wall to the right of the central archway (11/11).
- With all 11 fangs, return to the serpent door. Press Back from the Orb cave to the Red-mushroom fork, take the blue opening on the right into the Purple-tunnel cave, click the purple-blue tunnel in the middle into the Cobweb cave, click the blue hole on the left into the White-light cave, then click the pale white rock opening on the left. At the door, use the Fangs (one inventory stack of 11) on it: all 11 fangs fly into the sockets around the serpent's head by themselves. Its eyes glow red and the door opens onto stone steps leading out to the camp.
The Werewolf Camp and the Lake
The tunnel comes out at the werewolves' camp. The children are hidden in the shelter, but a boulder blocks the way and the shelter is dark. From here the travel map (Tavern, Forest, Druid's house, Lake) is available.
- New task: Open the shelter. The boulder on the right won't move yet ('I need to figure out a way to move the boulder') and the wooden device in the middle must be repaired. Zoom into the campfire ('The coals are already cold'): push the stick aside and take the Hook, then fan the coals with the Hand fan to rekindle the fire.
- Zoom into the shelter doorway on the left. Take the Torch (a bare stick) leaning against the inner wall of the doorway, then click the tipped-over basket of mushrooms on the floor and take the Detail (a dark metal triangle) lying on the mushrooms. Going inside the left shelter shows only a dark storeroom; it is too dark to search for now. The big mossy boulder on the right is in the way ('I need to figure out a way to move the boulder'), and clicking the wooden contraption by the foot of the steps gives 'I can use this device if I repair it.' Optional collectible: click the ship model in the top-left corner, above the left shelter roof. Zoom into the barrel lying on its side on the hill at the top, left of the steps, and take the Ladle hanging inside it. Zoom into the small log hut at the top of the steps: click the stones piled in front of its door to push them aside, open the door and take the Sieve hanging on the back wall inside.
- Travel to the Lake shore. 'This is a statue of a mountain goddess. If I put different types of minerals here, a secret cache with a riddle should open.' Optional: the Morphing Object here is the small white swan floating on the water just left of the dock, near the shore; click it. Zoom into the sandy beach at the lower left, below the shore end of the dock: take the Faucet (a brass tap) lying on the sand right of the hole. Zoom into the far (right) end of the dock and take the Brush lying on the planks. The fishing hut at the upper left has a token-grid lock on its door with a missing piece (for later). Zoom into the wrecked boat on the far shore (top centre-left): take the Pickaxe stuck in the planks on the right; a loose board then drops and widens the breach. Click the steering wheel visible through the breach to look at it ('The element in the center could be silver').
- Travel to the Forest river at the foot of the Chantwood (the stream where 'something is glistening at the bottom'). Pan the stream with the Sieve and take the Gold nuggets.
- Return to the camp and zoom into the barrel lying on its side on the hill at the top left (where you found the Ladle). Fit the Faucet into the side of the barrel and knock it in with the Hammer. Then use the Torch on the tap: oil runs out onto it (Torch with oil). Zoom into the campfire ('I can light something here') and use the Torch with oil on it to light it. Go into the dark shelter on the left. Select the Burning torch in the inventory and use it on the empty wall bracket high on the right-hand wall: the torch is fixed there and lights the cellar.
The Shelter Cellar
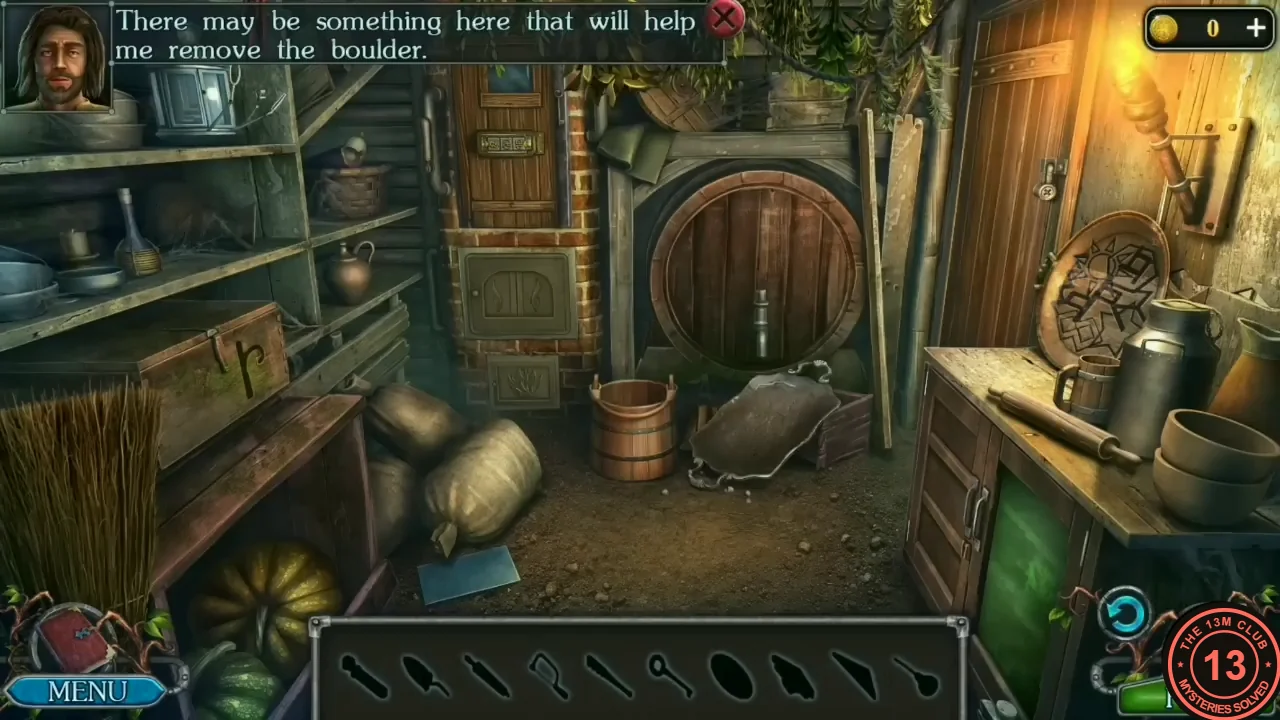
The burning torch lights the werewolves' cellar under the shelter. It works like a silhouette search: the tools you need appear as dark outlines in the inventory bar and fill in as you find them (valve handle, garden trowel, rolling pin, hacksaw, glass cutter, key, green, blue and red glass, oiler). The back door has a three-symbol lock.
- Take the Rolling pin lying on the counter at the right of the cellar; it fills its silhouette in the inventory bar. Zoom into the potato sacks at the bottom left: a blue glass pane leans against the big sack. Use the Rolling pin on the blue pane: it shatters. Click the large broken shard: it slides into the sack and slits it. The Blue glass goes to your inventory; take the Garden trowel from the spilled potatoes.
- Zoom into the lantern on the upper-left shelf: 'The lantern is missing colored glass pieces.' Then zoom into the back door with the three-symbol lock. Click the lower end of the brass pipe running down the left side of the door: a brass Valve handle drops out; take it. Take the Key hanging on the right side of the door frame.
- Zoom into the barrel on the back wall ('I need something to open the faucet'). Attach the Valve handle from the pipe to the barrel's tap. No water comes yet; clicking the dirty tray below only gives 'The tray is covered in dirt.' Now click the fitted Valve handle to turn it: water runs out, washes the tray and uncovers a clover-knot symbol ('This symbol could be a clue').
- Zoom into the counter cabinet on the right and unlock its wooden sliding door with the Key. Take the Oiler from the shelf. The green glass door on the right cannot be opened yet.
- Zoom into the padlocked wall cupboard and pry the hasp off with the Garden trowel (it bends and is used up). Take the Red glass, the Hacksaw and the Glass cutter from the shelves.
- Back at the counter cabinet, cut a round piece out of the green glass door with the Glass cutter and take the Green glass.
- Zoom into the lantern on the upper-left shelf. Put the Green glass in the round, magnifier-shaped lens holder on its front; the Blue glass goes in the large open pane frame on the right (offering it to the small fitting at the right only gives 'This item is unlikely to be of any use in this situation'); the Red glass goes in the small triangular frame at the lower right. Then use the Oiler on the lantern to fill it. Close the zoom. Clicking the wall torch at the top right ('I can light something here') or the lantern ('I need to light it') only gives a hint. Click the bundle of twigs (the broom standing at the lower left): a twig sticks up out of it. Then click the wall torch: the twig catches fire there and carries the flame across to the lantern, which lights up.