The Satyrs' Cave
Inside the cave a seated satyr statue guards something valuable. The witch Skarlett joins Egil here.
- Optional: click the Morphing Object, a faint M-shaped rune carved on the rock wall at the upper left of the cave, above the mossy patch.
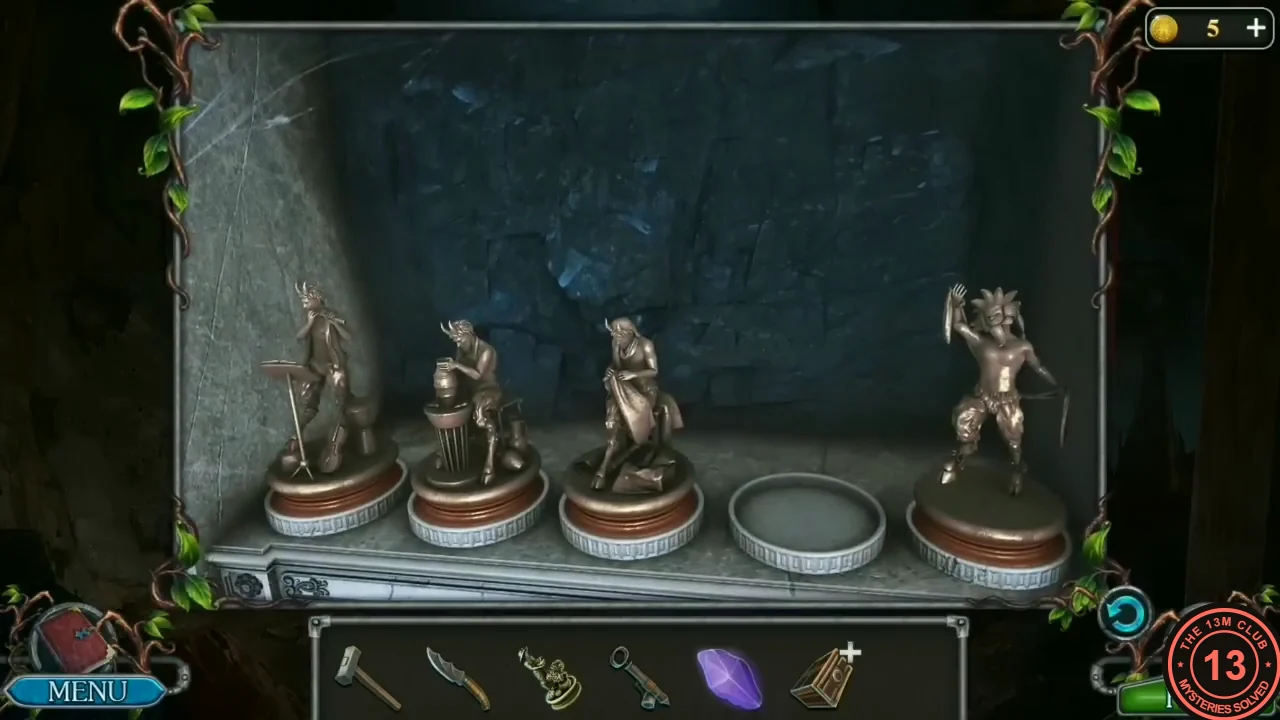
- Zoom into the shelf on the left cave wall and put the Statuette on the empty base (fourth from the left). Read the note on the rug in the mountain tent for the clue: the first satyr taught dancing, the second knitting and weaving, the third making clay dishes, the fourth making music, the fifth growing trees and flowers. Puzzle: click the satyr figurines in the order of the note. The figurines stay where they are, and the base of each correctly clicked figurine turns grey. Click: 1) the dancer (right end), 2) the satyr holding cloth (middle), 3) the potter (second from left), 4) the musician with the music stand and violin (left end), 5) the gardener with plants (the statuette you placed). The figurines come alive and the shelf locks.
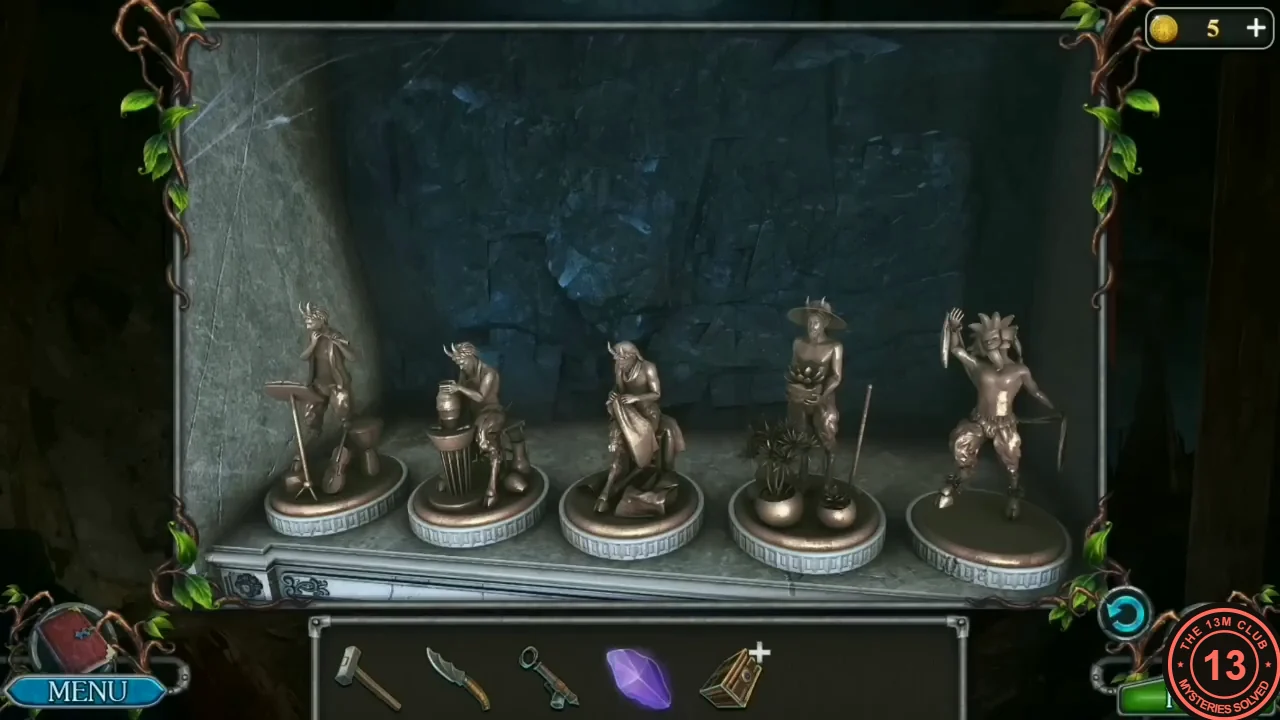
Click order: dancer (right end), satyr holding cloth (middle), potter, musician (left end), gardener. - Zoom into the seated satyr statue at the top of the stairs in the cave. Take the small red Altar lamp standing on the statue beside the box it holds; the box itself is locked for now ('There must be something valuable in this box. How can I open it?'). Walk deeper to meet Skarlett and watch the scene.
- Open Skarlett's bag and take the first Detail insert (1/2) and the Spade. Optional: click the Morphing Object on the ground by the arch.
- Zoom into the glowing stone hearth and fill the Spade with hot coals. Optional: on the cave path, click the pipe leaning against the rocks at the foot of the stone steps on the left. Zoom into the ice wall: a Detail insert is frozen inside it. Use the Altar lamp on the ice just below the insert; the lamp spills a green liquid that spreads over the ice. Then use the Spade with hot coals on that liquid: it flares up and melts the ice. Take the second Detail insert (2/2).
The Star Shrine
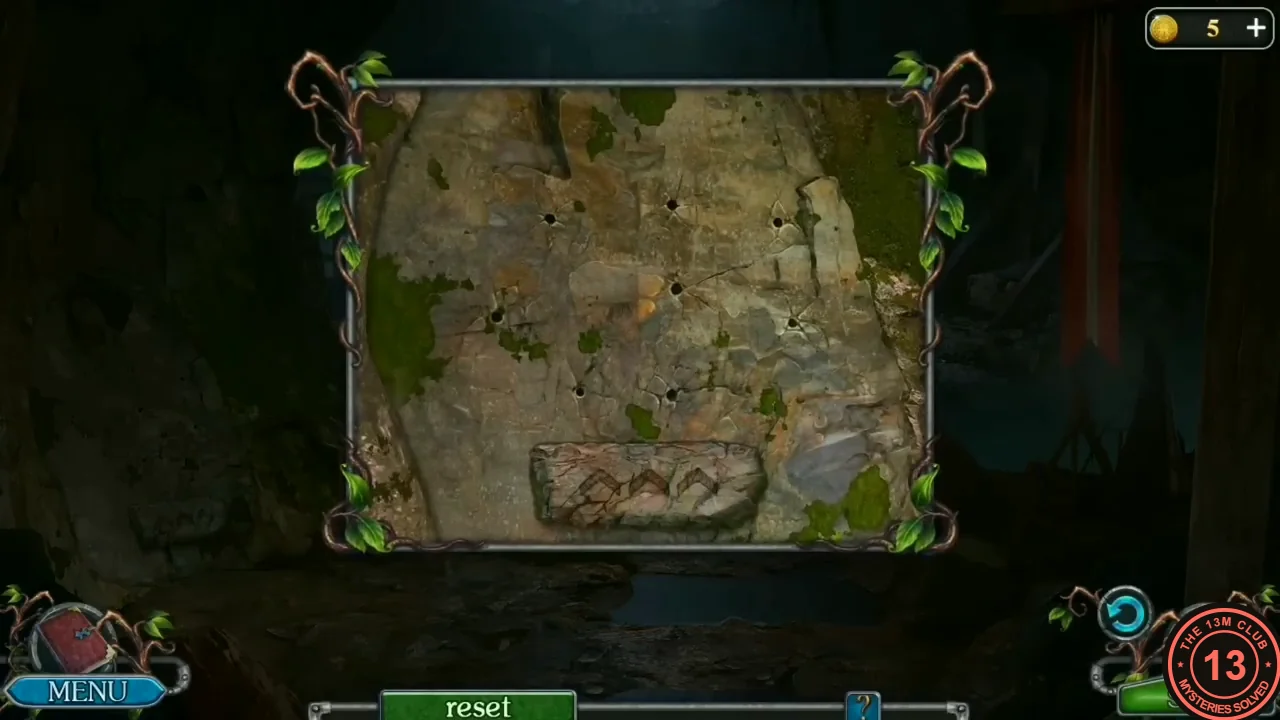
The shrine between the two pillars in the inner part of the Satyrs' cave shows a star figure; you copy it on a rock wall back in the first cave room.
- In the inner part of the cave, zoom into the shrine between the two pillars and put both Detail inserts in the cross-shaped recesses on the pillars. An altar rises with a knife-shaped hollow ('Ah, a Satyr ritual knife is needed here...'); place the Ritual knife in it. A faint blue figure of joined stars appears on the wall above the altar: note its shape (see image). Go back to the first cave room (with the satyr statue on the stairs) and zoom into the rock wall at the far left. Puzzle: tap the stars on the wall one after another; each tap draws a line from the last star you touched. Copy the blue figure. Reset clears the lines. When the figure is right, the wall opens.
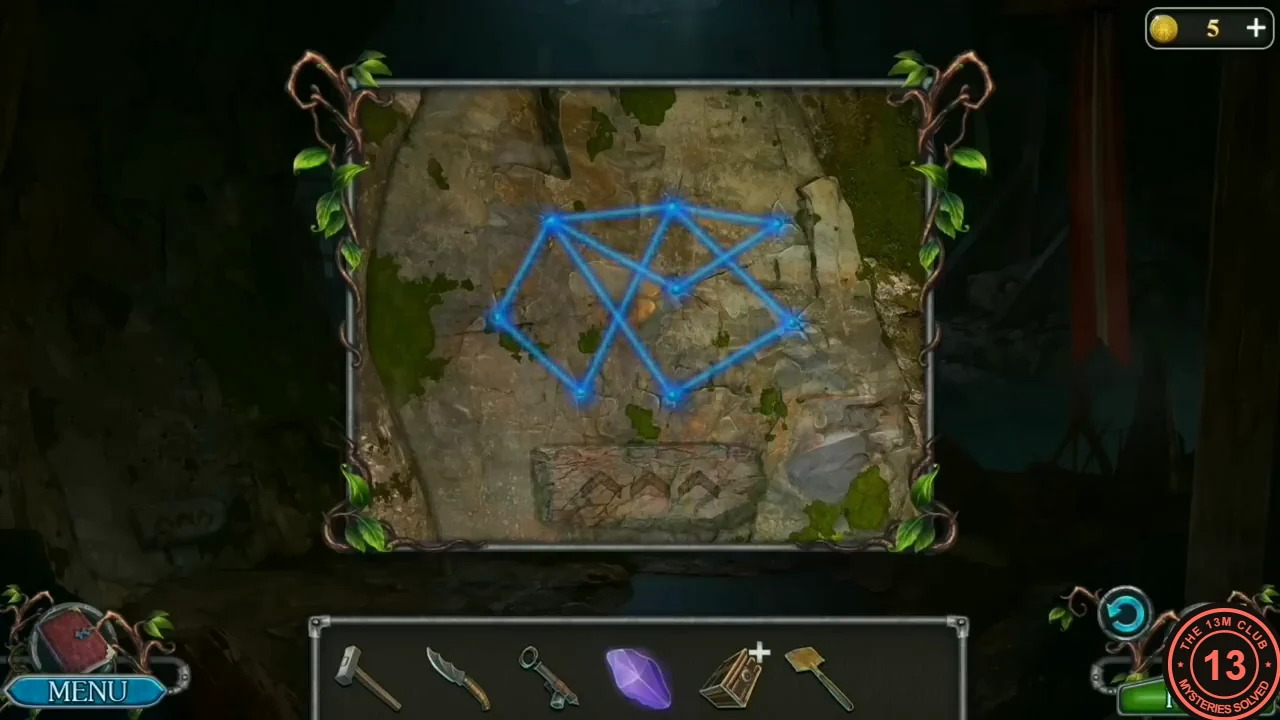
The completed star figure: copy these connections.
The Treasure Chamber Symbols
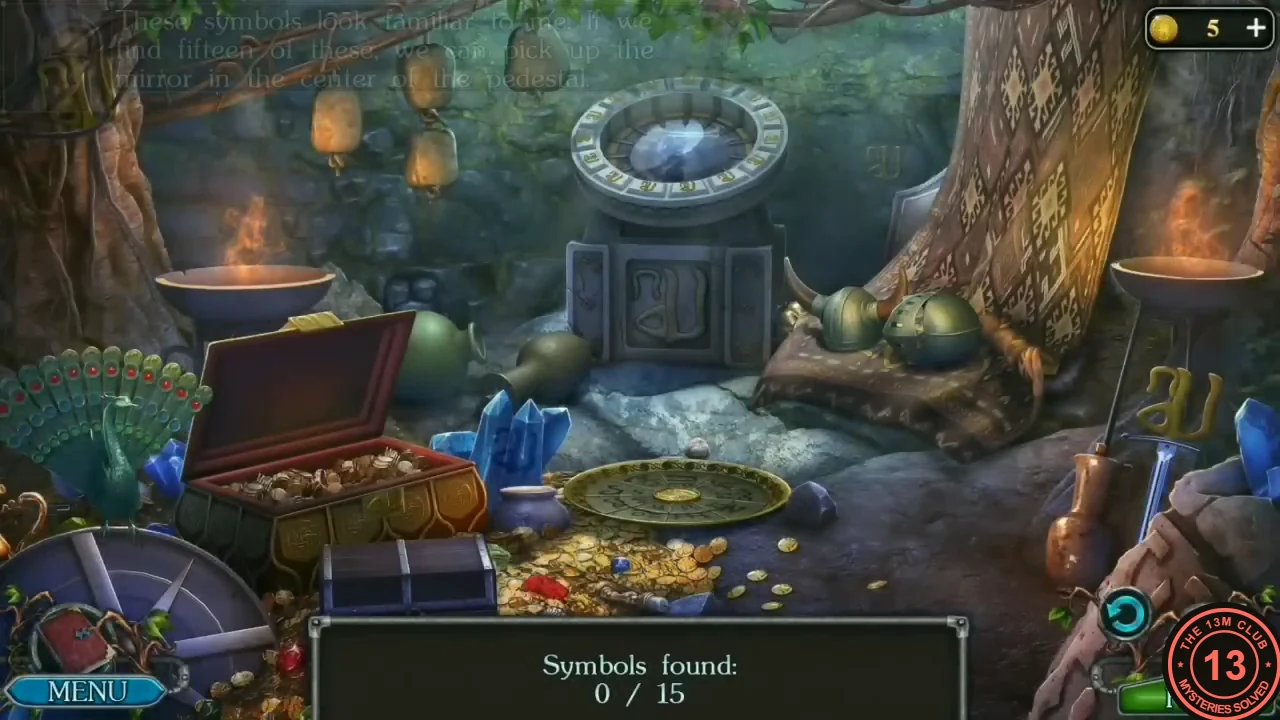
Solving the star wall opens a passage in the left rock wall of the first cave room into the treasure chamber, where you search for 15 glowing symbols.
- Treasure chamber: you need 15 gold “au”-shaped symbols (counter at the bottom); each one glows gold when tapped. Positions in the order the recording found them: (1) the blue metal stand of the LEFT fire bowl; (2) tap the open lid of the big treasure chest to close it, then tap the gold plaque on its front; (3) the front panel of the central pedestal; (4) zoom into the floor at the left foot of the pedestal (by the green teapot), take the small pickaxe lying there and smash the pale jug – tap the symbol inside it; (5) smash the brown jug and then the round carved stone in the wall behind them, and tap the symbol in the hole; (6) the gold symbol on the branch in the top-left corner; (7) the single lantern at the left of the hanging lanterns – in the recording its gold symbol appeared after a tap just under the lower right lantern, then the symbol was tapped; (8) tap the peacock to fold its tail, then tap the faint symbol inside the blue crystal cluster behind the treasure chest; (9) tap the round gold dial on the floor: tapping it turns its inner ring of small glyph halves one step at a time; keep tapping until the half shaped like a rounded “D” with a hook sits in the lower-left sector beside the big hook-shaped outer glyph – the two halves join into a black symbol (about nine taps from the recorded start); (10) tap the horned helmet and the round helmet on the cloth by the tree so they roll aside, then tap the gold symbol on the cloth; (11) the faint carved symbol on the rock wall to the right of the pedestal top; (12) tap the patterned tapestry on the tree so it falls, then tap the symbol on the blue gem at the top of the gold staff; (13) the large gold symbol on the sword hilt by the right fire bowl; (14) tap the lid of the wooden crate revealed under the tapestry to open it, zoom in and tap the symbol on the green gem next to the skull; (15) tap the large blue gem at the bottom left of the crate so it slides aside, then tap the blue tile with the gold symbol under it. With 15/15, take the Mirror from the central pedestal.
- Back in the cave, zoom into the white stone plinth just right of the statue’s stairs (an empty copper wire bracket sits on top of it) and put the Mirror into the bracket. It has no reflective layer yet (“The mirror does not have a reflective layer”).
The Buried Casket and the Disc Lock
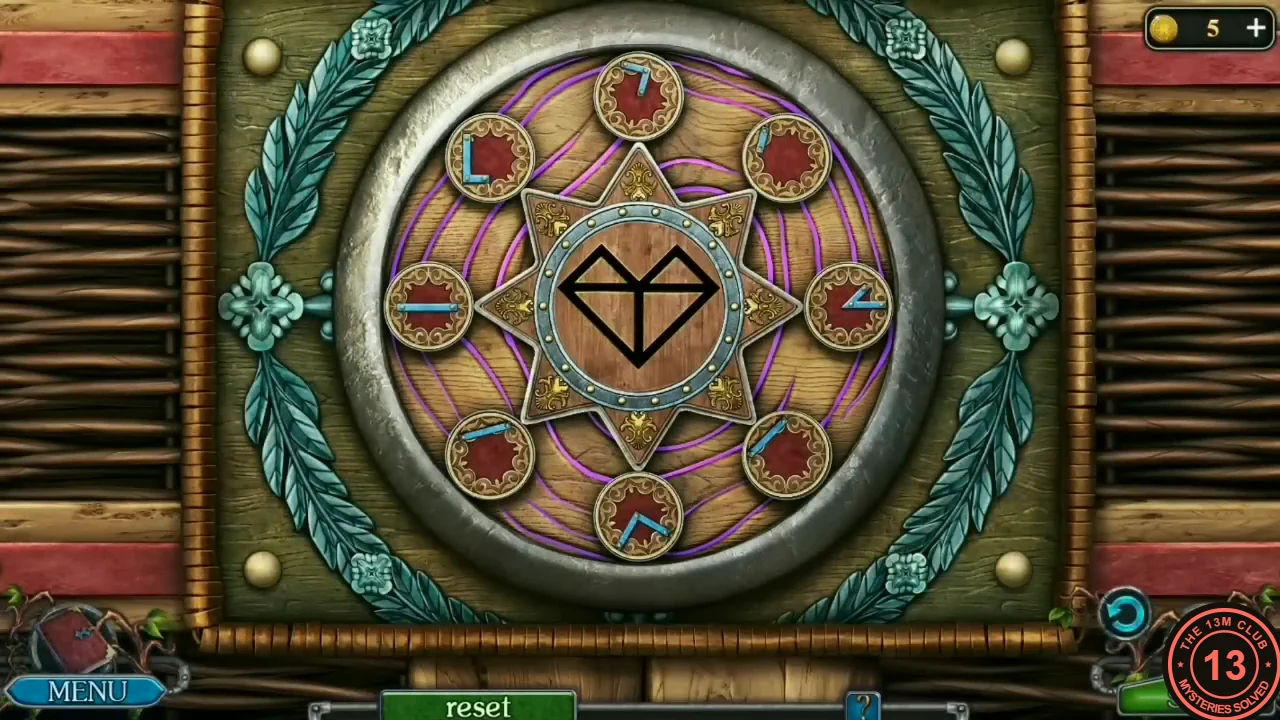
Dig up the dirt mound at the pond and open the casket's disc lock.
- Return to the pond and zoom into the dirt mound on the far bank. Dig it with the Spade and take the star-shaped Detail that appears in the dug-up earth. Open the Casket from your inventory (the item marked with a +) and put the Detail in the round lock on its front. Puzzle: eight small discs surround a heart-shaped figure; tap a disc to turn the blue line on it. A disc darkens when its line matches its piece of the figure, and that piece of the figure turns purple. The solved position in the recording (going clockwise from the top): top disc “^” (upward point); upper right “\” (a diagonal line from top left down to bottom right); right “<” (point to the left); lower right “/” (a diagonal line from bottom left up to top right); bottom “┐” (a corner: line along the top, then down the right side); lower left “\” (a diagonal line from top left down to bottom right); left “—” (horizontal); upper left “L”. The left and upper-left discs already started in this position in the recording. Take the Liquid silver flask from the opened casket.
- In the cave, zoom into the dull egg-shaped mirror in the copper frame (to the right of the statue's stairs, by the green plant) and pour the Liquid silver over it. The mirror now reflects the light onto the satyr statue, and the box it holds opens: take the Chronicle. Go to Skarlett's camp in the inner part of the cave (the room with the fires and her tent), zoom into the stone pedestal at the far end of the path and place the Chronicle on it. Watch the scene: the writing vanishes. New task: Develop symbols.
The Recipe, the Dungeon and the Enchanted Mushroom
The druid explains that the Satyrs protected the Chronicle against witches. He gives Egil a recipe for a special liquid; a mushroom from the dungeon under the mountains must be dipped into it.
- Watch the conversation with the druid. The Recipe and the carved Flower emblem go to your inventory.
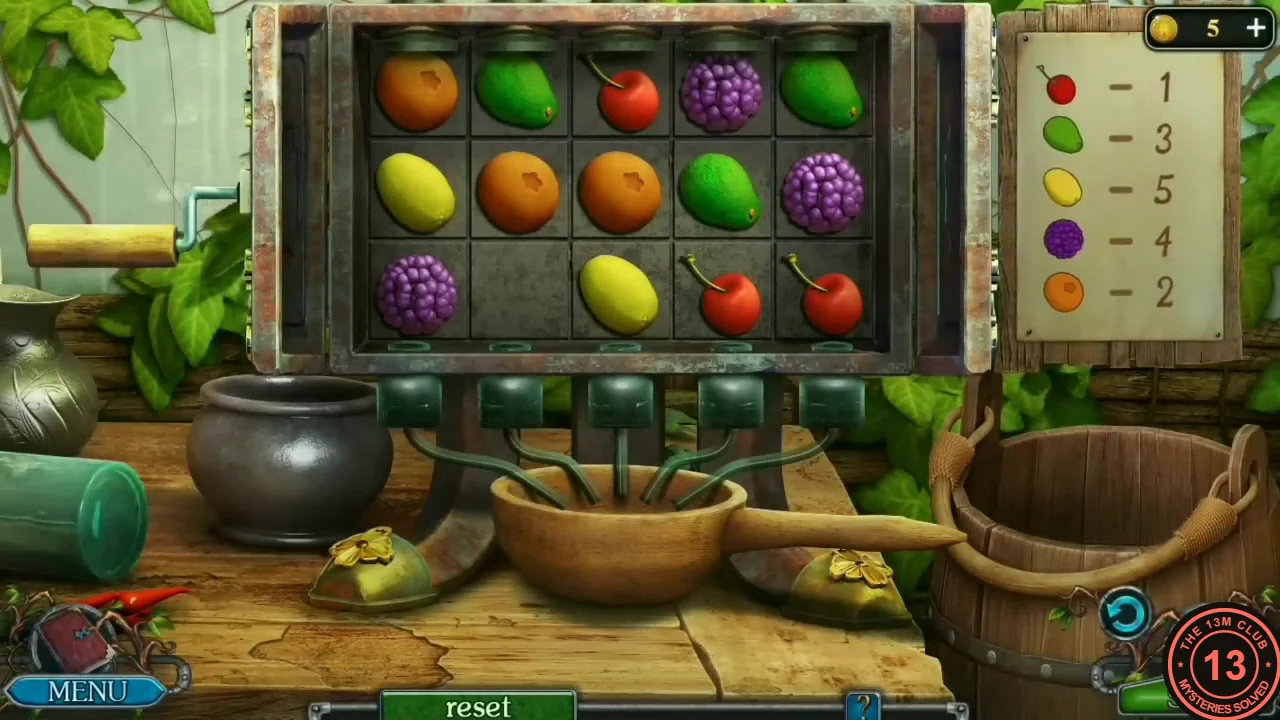
- Go to the greenhouse and zoom into the fruit press on the table. Put the Recipe in the empty frame on the right. It assigns a column number to each fruit: cherry 1, orange 2, green fruit 3, purple berry 4, lemon 5. Puzzle: tap a fruit next to the empty cell to slide it in, one step at a time, until column 1 holds the three cherries, column 2 the three oranges, column 3 the three green fruits, column 4 the three purple berries and column 5 the two lemons (with the empty cell in that column). Method: work from the left, one column at a time. To move a fruit, first bring the empty cell next to it on the side it should go to, then tap the fruit; to bring the next fruit along, walk the empty cell around it again. Finish column 1 (cherries) first and then never move the empty cell back into that column; then fill column 2 (oranges) the same way and leave it alone too. The last three columns are easiest done together: keep sliding fruits round in a loop inside those three columns (each lap moves every fruit on the loop one cell) until each fruit reaches its column. Because several fruits are identical, the board cannot get stuck in an unsolvable position. In the recording the cherry column was complete after about 55 seconds, the orange column a few seconds later, and the last three columns about 12 seconds after that. The machine then pours the liquid into the pan.
- Travel to the mountain camp and zoom into the round wooden door in the rock on the right. Place the Flower in its centre; the door lifts and leaves a dark opening. Select the Crystal (the purple crystal from the rock at this camp) in your inventory and use it on the dark opening; it leaves your inventory and you go in. Watch Skarlett deal with the giant worm in the dungeon.
- In the dungeon, zoom into the round spiked growth on the ground and use the Sprayer on the purple puddle in front of it to get the Sprayer with mucus.
- Use the Sprayer with mucus on the snapping carnivorous plant at the left. Then zoom into the red mushroom patch and cut a mushroom with the Ritual knife.
- Return to the greenhouse, zoom into the table with the fruit press and dip the Mushroom into the glowing blue liquid in the pan under the press. The mushroom comes back as the Enchanted mushroom (red cap with a green rim).
- Go to Skarlett's camp, zoom into the Chronicle on the pedestal and use the Enchanted mushroom on it. The writing reappears and tells the story of the satyr village. After the conversation Skarlett gives Egil her Rope ladder. New task: Get to the island.
The Lakeshore and the Pier Shed
A rope ladder from the tree at the pond leads down to a lake. The island with the statue is out on the water.
- Go to the pond with the stepping stones, zoom into the crooked tree branch at the top right and hang the Rope ladder on it. Climb down to the lakeshore.
- Zoom into the old boat hull lying in the grass at the left and hit the cracked planks with the Hammer until they break open. Take the Disc (metal cog) from inside.
- Zoom into the crane by the pier and take the Chip with a square from the winch.
- Optional collectible: click the small straw doll by the sacks at the right side of the pier shed.
- Follow the path to the fisherman’s cabin. Zoom into the log wall where the ladder leans, just in front of the porch steps, and take the Chip with a line lying at the foot of the wall to the right of the ladder (under the porch window frame). Then zoom into the porch and take the S-hook hanging from the porch roof beam at the upper left.
- Take the Fishing net hanging on the drying line on the right of the yard. Optional collectible: click the pipe at the right edge of the yard.
- Return to the lakeshore, zoom into the reeds at the left and use the Fishing net to pull the floating object out of the water. You get a Small box; it cannot be opened yet.
- Zoom into the pier shed door. The end of a chain from the crane on the pier lies on the boards at the lower left: put the S-hook on the chain end. Then tap the upper right of the door: the hook is fixed there with the chain. Leave the close-up, zoom into the crane at the end of the pier and turn its wheel: the crane pulls the door off. Go inside.
Inside the Pier Shed: the Note and the Stencil
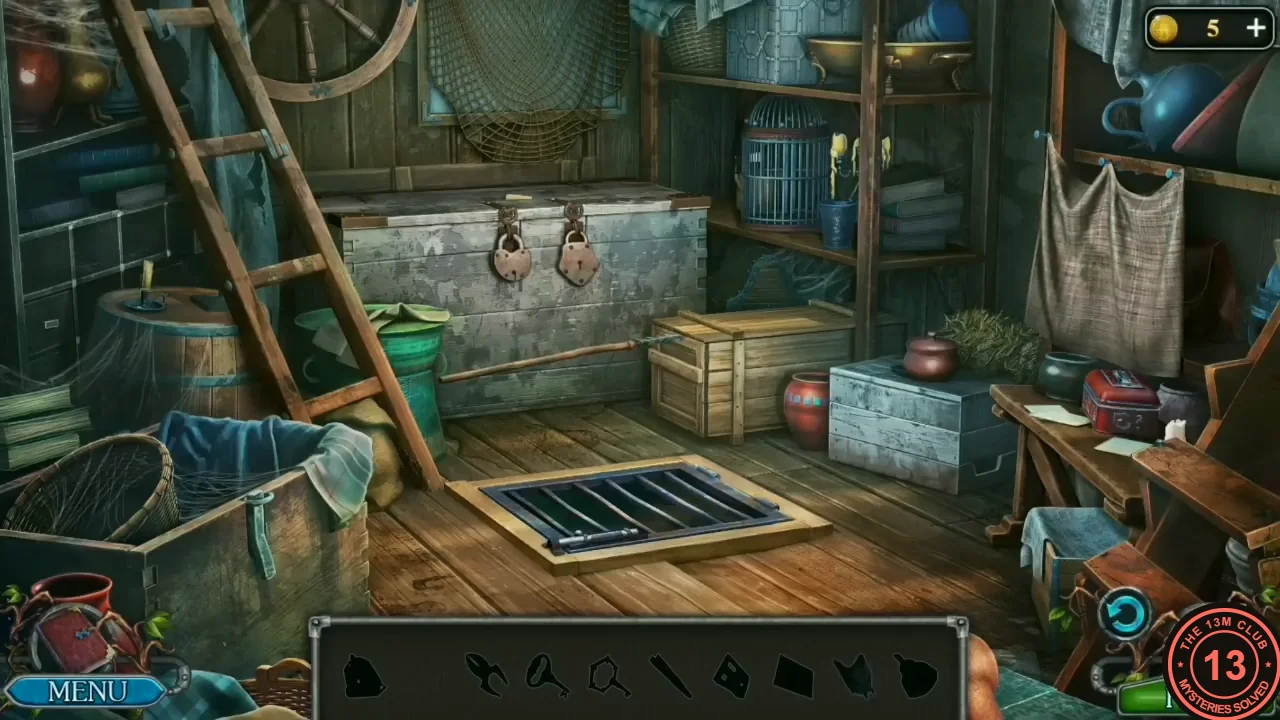
The shed is an interactive item scene: the bar at the bottom shows silhouettes of the objects you need here. Egil needs oars for the boat.
- Hidden-object scene in the pier shed (find the items shown as silhouettes in the bar). Take the Spear leaning against the left side of the ladder at the upper left; its icon in the bar turns from a silhouette into a coloured picture. Then select the Spear in the bar and use it on the light wooden crate standing on the floor in front of and to the right of the big grey chest with two padlocks (back wall): the spear is wedged under the lid and levers it off. Zoom into the open crate. It is full of loose tools, and the Tweezers are hidden: tap the tools in the middle to push them aside (the ring, the pliers and the tongs shift) and tap the purple cloth at the upper right so it slides to the right. The long silver Tweezers lie underneath, along the top middle of the crate: take them. (The round birdcage on the back shelves, above the right end of the grey chest, cannot be opened yet: Egil says a couple of its rods must go.)
- Zoom into the big grey padlocked chest at the back wall and use the Tweezers on the paper caught under its lid to pull out the Note. Then tap the checked cloth hanging on the right wall: it slides aside and reveals a leather satchel on the shelf behind it. Zoom into the satchel, open the flap and take the Stencil.
The Red Box Code Lock and the Oars
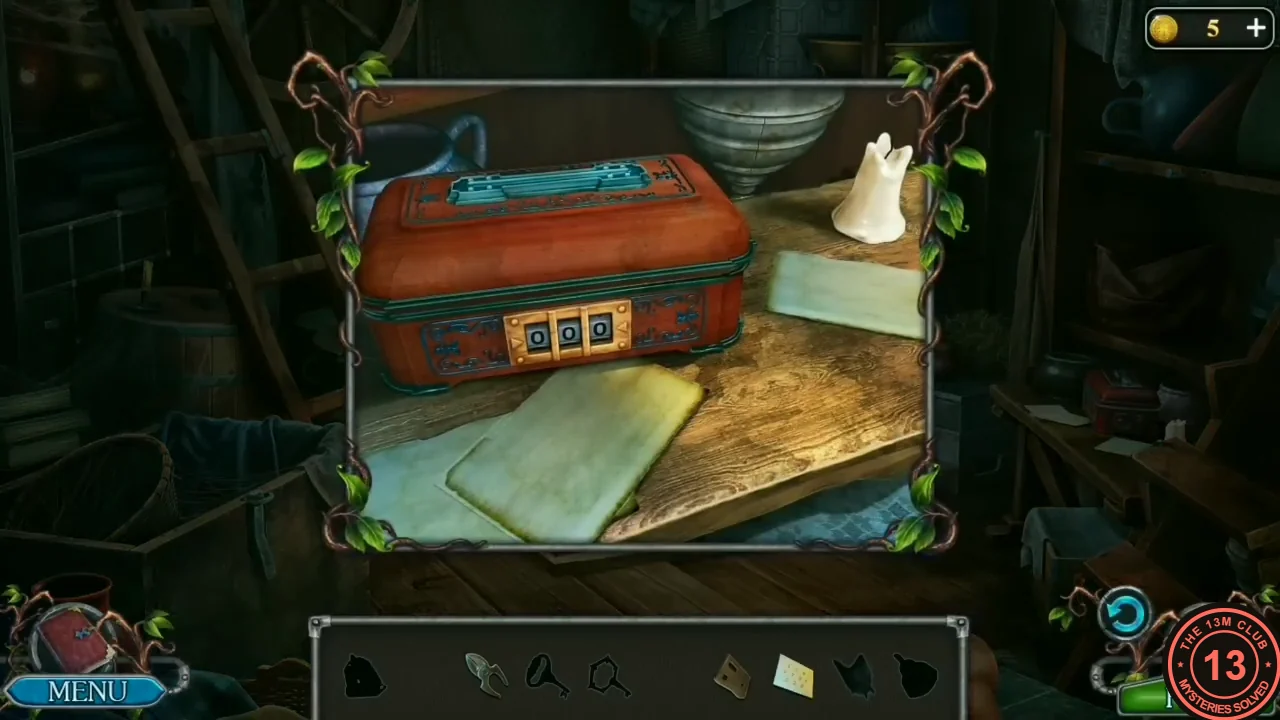
The red box on the shed workbench has a three-digit lock. The Note and the Stencil you just found give the code; the box holds the Weights and the Oiler you need to finish the shed and get the Oars.
- Zoom into the red box with the three-digit lock on the workbench at the right. Put the Note on the table beside it (it shows the digits 1 3 4 / 6 7 0 9 / 5 2 8), then lay the Stencil over the note: its three windows leave only 1, 4 and 5 visible. Zoom into the lock and set 451 (in the recording 541, 145 and 154 were tried first and did nothing; 451 opened it). Take the two metal Weights standing at the left inside the opened box, then the Oiler.CODE451
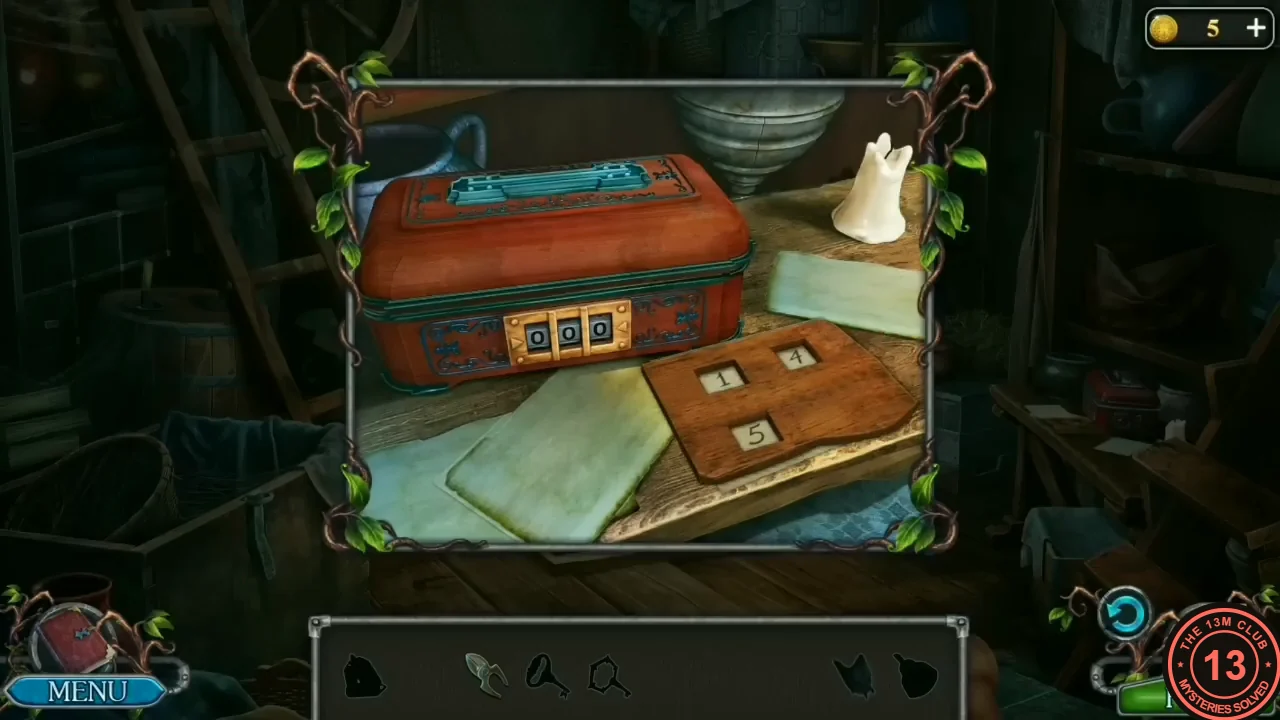
The Stencil on the note reveals 1, 4 and 5; the lock opens with 451. - Use the Weights from the bar on the net hanging high on the back wall above the grey chest (Egil said the net needs more weights at its ends): the weighted net comes off the wall, uncovering a small window, and goes into your inventory as the Net. (In our recording the player first looked into the birdcage close-up on the back shelves, which changed nothing.)
- Zoom into the floor hatch, oil its rusty bolt with the Oiler and slide it open. Scoop the floating bottle out of the water with the Net and take the Wire cutters and the Key.
- Zoom into the round birdcage on the back shelves (above the right end of the grey chest), cut two of its rods with the Wire cutters and take the second Key from inside the cage.
- Open both padlocks on the chest with the two Keys and take the Oars.
- Leave the shed, zoom into the rowing boat moored beside the pier (left of the crane) and put the Oars in it. Egil cries out and the boat ends up floating upside down; he says: “What was that? Awful! How will I make it to the island now?” Go to the fisherman’s cabin: the old woman now sits on the bench by the door. Talk to her – Egil tells her a horrifying creature tipped the boat over as he got in; she explains it is the Water Spirit, that Egil will need a special potion against it, and that she can make the potion if he unclogs her chimney. New task: Help the elderly woman.
The Old Woman's Cabin and the Chimney
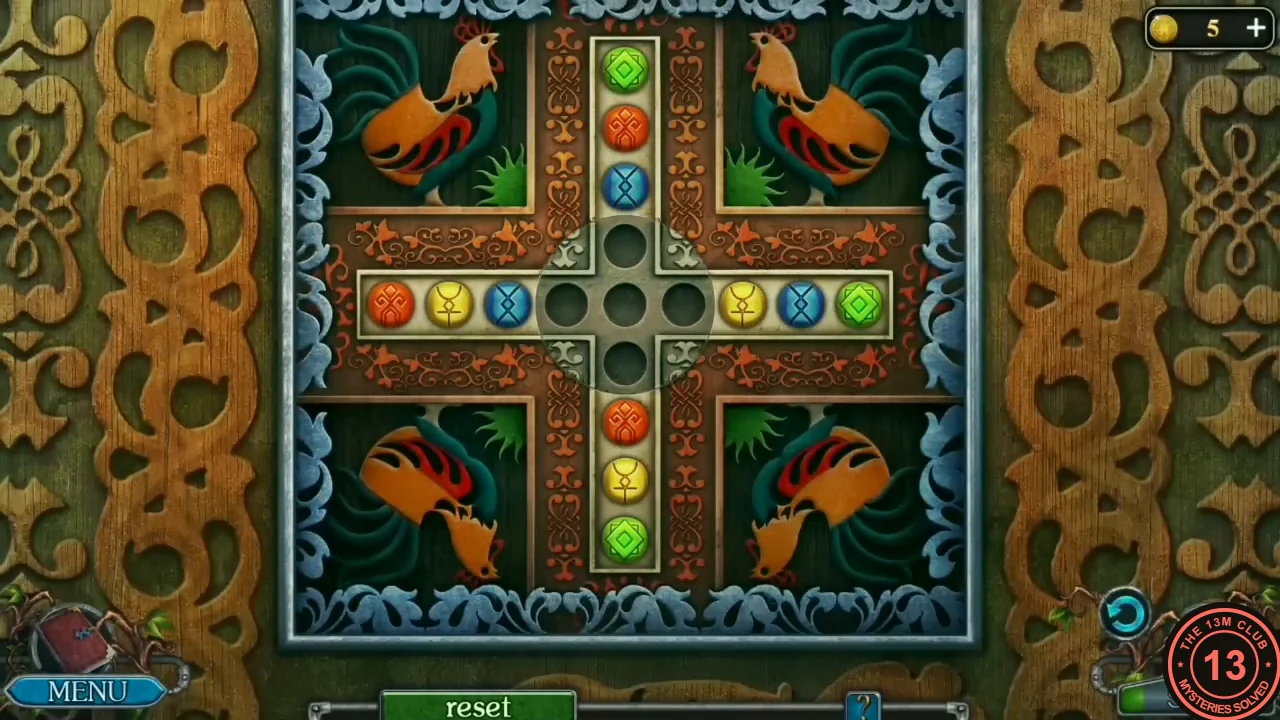
The old woman will brew a potion against the Water Spirit once her chimney is clear. The ladder to the roof is broken and her cabin hides several locked mechanisms.
- In the cabin yard, zoom into the carved wooden totem by the path and place the Disc in its centre. Puzzle: a cross with three holes on each of its four arms and five holes in the centre (the middle hole and one on each side). At the start the centre is empty and the arms hold mixed balls – in the recording: top arm (from the top) green, orange, blue; left arm (from the left) orange, yellow, blue; right arm (from the centre) yellow, blue, green; bottom arm (from the centre) orange, yellow, green. Move a ball by touching it or the empty hole you want it to go to: it slides along its line through the empty holes until it meets another ball or the end of the arm. A ball that stops in the middle hole of the centre can then be sent along the other line, so use the centre to pass balls from one arm to another. Goal: each arm holds three balls of one colour with the centre empty – the arrangement accepted in the recording was orange on the top arm, green on the left, blue on the right and yellow on the bottom. Solving it can award the achievement Specialist. Take the Key from the opened totem.
- Unlock the small woodshed door on the left side of the cabin with the Key and take the Boards.
- Enter the cabin. Zoom into the small wooden cupboard mounted high on the left wall, above the little stair railing and left of the fireplace: its plank door has no handle ('It won't open without a handle.'). Pick up the Fire iron: tap the bundle of upright wooden staves at the foot of the little stair railing on the left, left of the fireplace. Zoom into the spinning wheel: the round carved symbol at the upper right of its rim is lighter than the others – it is a loose chip. Prise it out with the Ritual knife and take the Chip with a triangle. Note the picture on the wall with a missing piece and the box on the table that needs four round chips.
- Go outside and zoom into the broken ladder against the cabin wall. Put the Boards on it as new rungs; they still need to be fixed in place.
- Return to the lakeshore and open the Small box from your inventory by flipping its two latches. Take the Part of the picture.
The Fisherman Picture
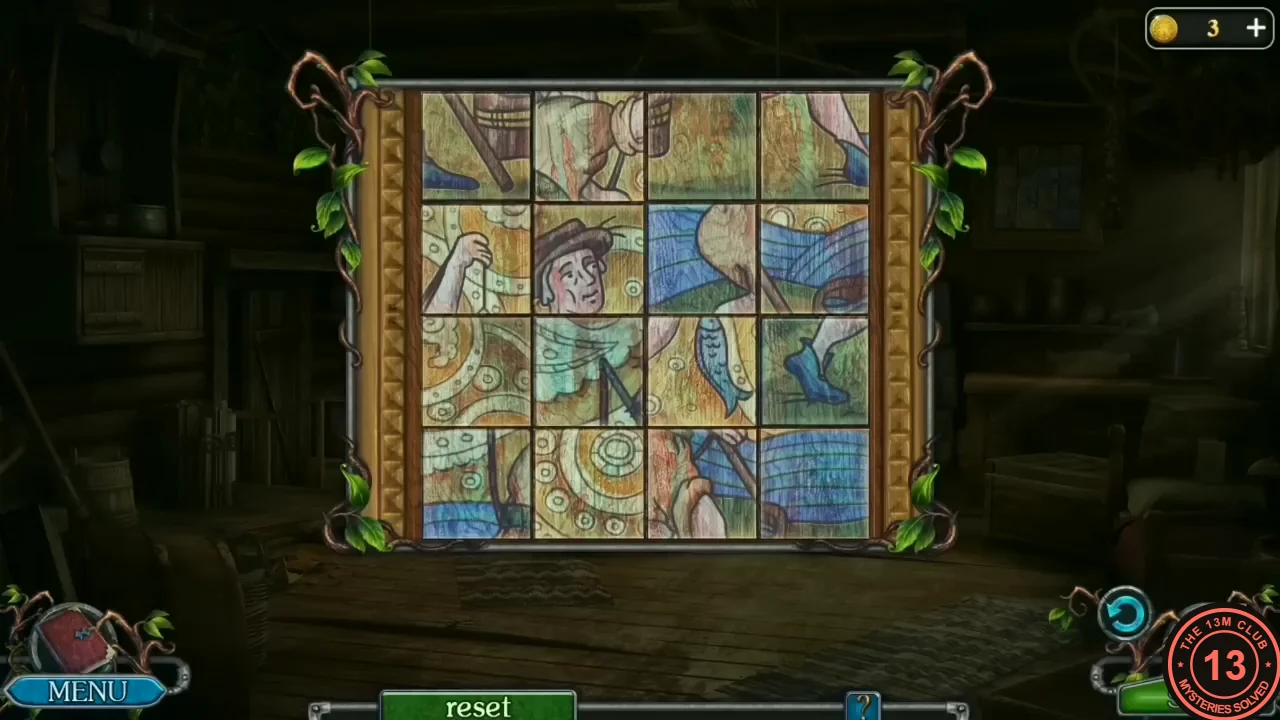
The picture on the cabin wall is a 4x4 tile-swap puzzle.
- In the cabin, put the Part of the picture into the gap of the wall picture. Puzzle: the picture is cut into 16 tiles (4 x 4) that are all mixed up, with no empty space; tap a tile (it lifts up, slightly enlarged), then tap another tile, and the two swap places. The recording solves it by many swaps, so we describe how to approach it rather than list every move (we only saw one opening, so your starting mix may differ). The finished picture shows a fisherman in a brown hat: his head is in the top row, second from the left; to the right of it his raised hand holds up a blue fish; a band of blue river water runs across the third row; his blue boot is at the bottom left and a wooden bucket stands in the bottom row, third from the left. Place these landmark tiles first, then the blue water tiles of the third row, and finally match the swirly background tiles by their edges. Take the Handle from the panel behind the finished picture.
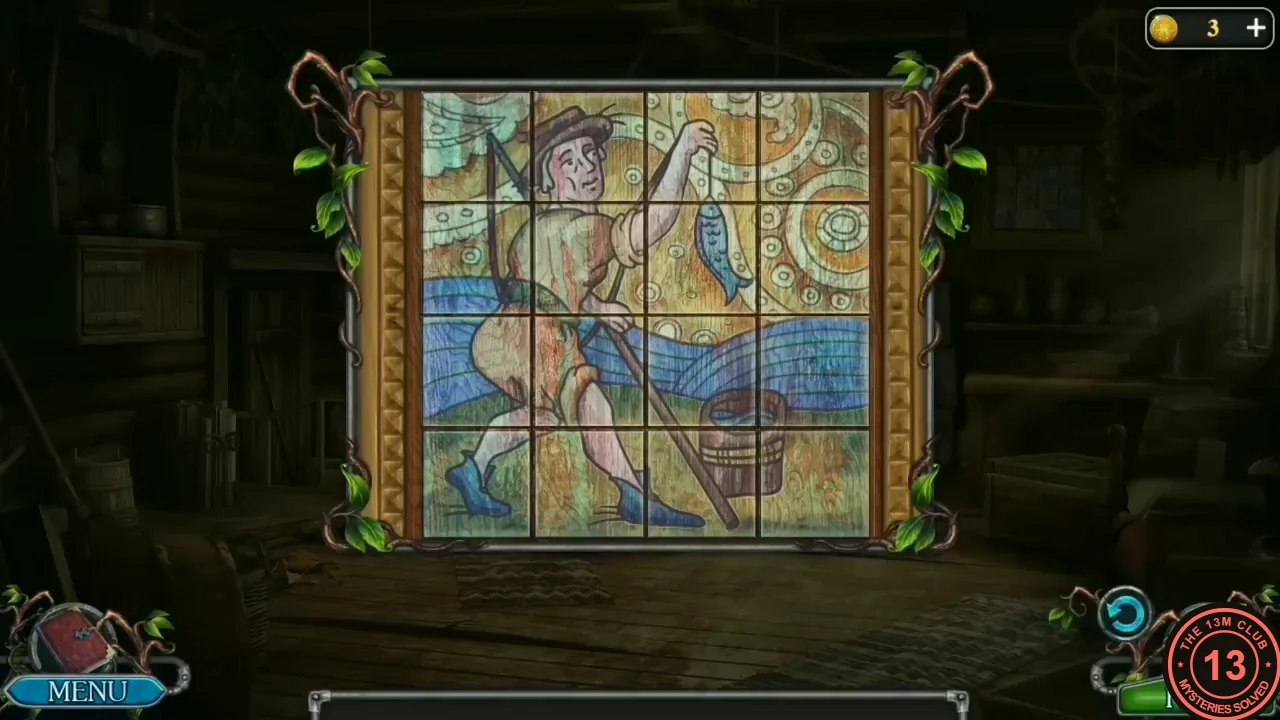
The completed picture: a fisherman holding up a fish, with a bucket at his feet. - Zoom into the small wall cupboard above the stair railing, left of the fireplace. Fit the Handle on the right edge of its plank door, slide the door open and take the Chip with a dot from inside (next to a round pot).
The Token Box
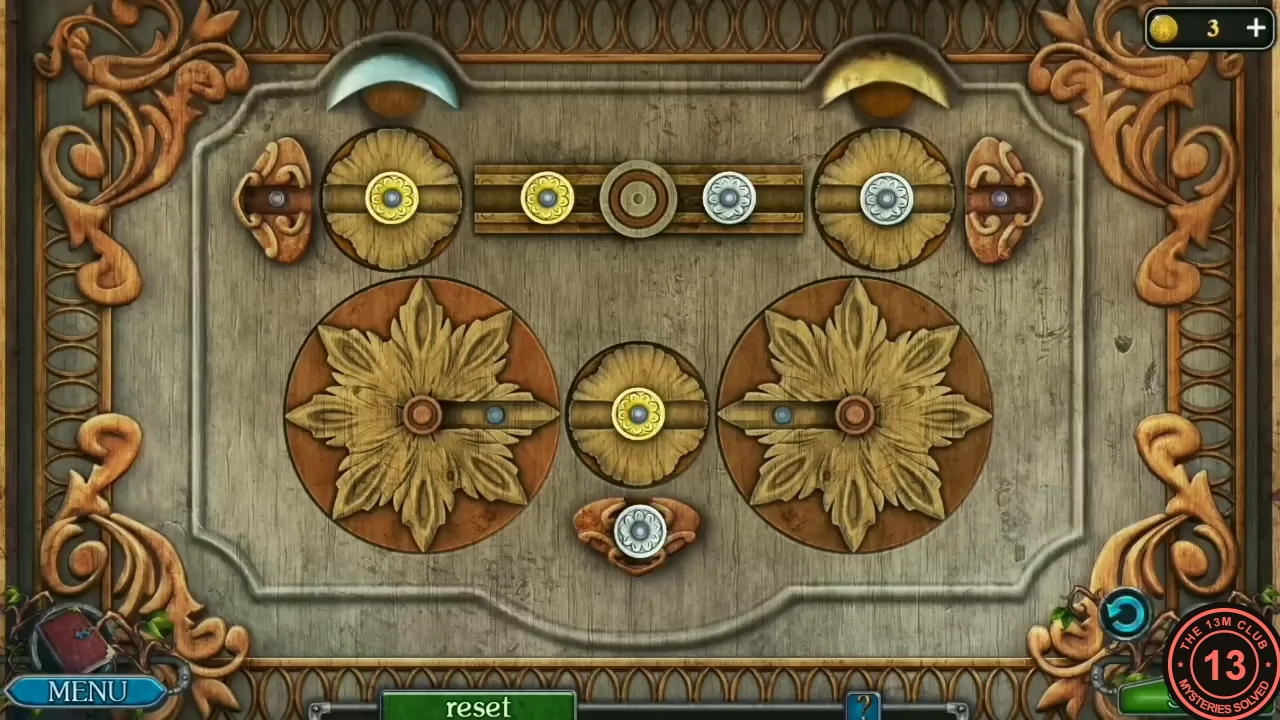
The box on the cabin table opens with four chips and a white and yellow token puzzle.
- Zoom into the box on the table and insert the four chips (square, line, triangle and dot). Puzzle: three white and three yellow tokens sit on a network of turning parts – two small discs in the top corners (under a silver crescent at the top left and a gold crescent at the top right), a top bar in two halves hinged on a central hub, two large flower wheels each with a bar across them, a small disc between the wheels, a niche under that disc and a niche at each outer side of the top discs. Every disc and wheel has a bar that it carries tokens on. In the recording, tapping a token moves it along to a free connected spot; tapping a disc or flower wheel turns its bar (e.g. the middle disc turned upright to drop a white token into the bottom niche, 2541); tapping a token on one half of the top bar tilts that half down onto the flower wheel below, taking the token with it. Goal: put each white token on the top-LEFT disc and turn that disc so its bar points up to the silver crescent – the token slides into the crescent and disappears; deliver each yellow token the same way through the top-RIGHT disc to the gold crescent. Park tokens you are not using in the side and bottom niches while you shuffle the others. Take the Nails and the Stone disc (gold disc) from the opened box.
- Zoom into the ladder leaning against the cabin wall: some of its rungs are loose. Use the Nails on it, then use the Hammer: Egil nails the rungs on. Tap the ladder to climb onto the roof and zoom into the chimney: a wrapped bundle tied with sticks is stuck on the grate. Hook it with the Fire iron and pull it out: you get the Bundle (shown in the inventory as a wrapped package with a +). Egil: 'I cleared the chimney. The stove is ready for use.'
- Talk to the old woman: Egil tells her the chimney is clear; she asks him to collect the plants she needs from her garden while she prepares everything at the stove, and gives you the List of herbs.
The Herb Flowerbed
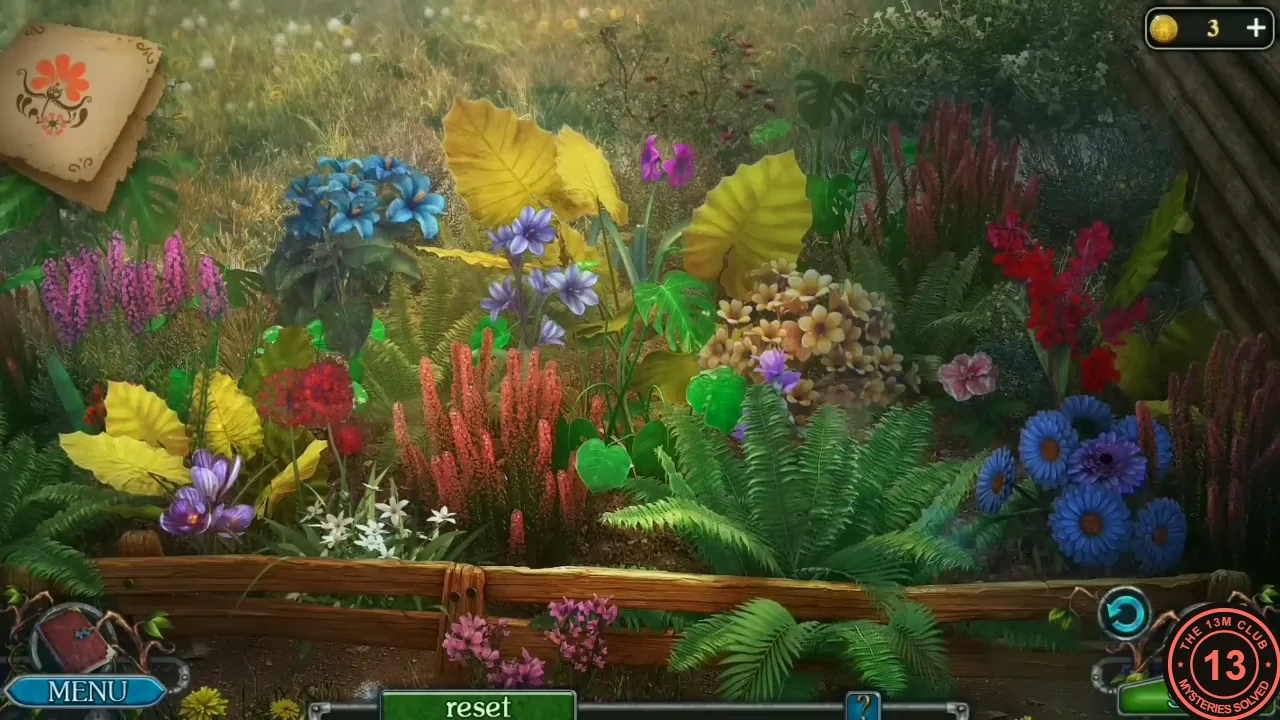
The flowerbed in front of the cabin is a search for the herbs on the old woman's list.
- Zoom into the flowerbed in front of the cabin. Puzzle: open the List of herbs in the top-left corner. It names six plants with a picture of each: Blue lilievik (a blue-violet flower with five pointed petals), Geranievit (small orange-red flowers), Triciss (a single closed bud on a tall green stem), Jademin (white star-shaped flowers), Azala (a pink flower) and Gorberia (a blue cornflower). Tap each plant in the flowerbed; a correct one gets a tick on the list, a wrong one only gives “This plant is not needed for the potion.” Several are hidden. Positions in the recorded order: Blue lilievik – the single larger blue-violet flower at the left edge of the cluster of pale blue flowers at the upper left (tap that flower; the pale blue cluster stays); Azala – first tap the big yellow leaf in the upper middle (just above the peach-coloured flower cluster) so it swings to the left, then tap the pink bloom it uncovers on the right; the bloom rises up on its stem; Gorberia – the large blue cornflowers at the lower right; Jademin – the small white star-shaped flowers at the front, left of centre (in front of the red spiky plants); Geranievit – tap the yellow leaf at the lower left (above the purple crocuses) so it moves aside, then tap the small orange-red flowers behind it; Triciss – at the upper right, near the log wall, tap the dark tall leaf behind the red gladioli: a yellow-green closed bud appears on its stem; tap the bud. With all six ticked, take the Plants.
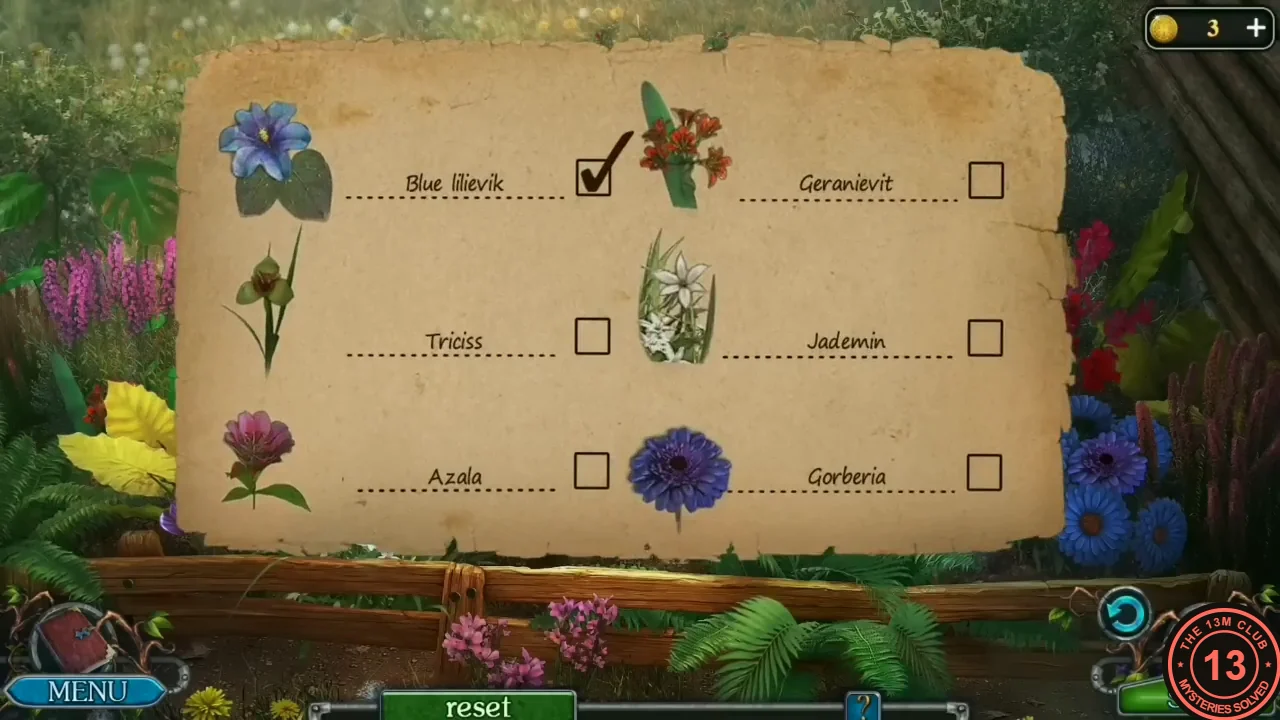
The List of herbs shows the six plants to click (Blue lilievik is already ticked here). - Go into the cabin and give the Plants to the old woman at the stove; she says she will also need the mucus of a Ghost mushroom, but does not know where to get it. Open the Bundle from your inventory (the wrapped package with a +): it is tied with rope. Cut the rope with the Ritual knife (the knife is used up), read the letter inside and take the Diadem.
The Ghost Mushroom and the Old Woman's Secret
The ghost mushroom grows behind a sealed stone panel in the mushroom dungeon under the mountains.
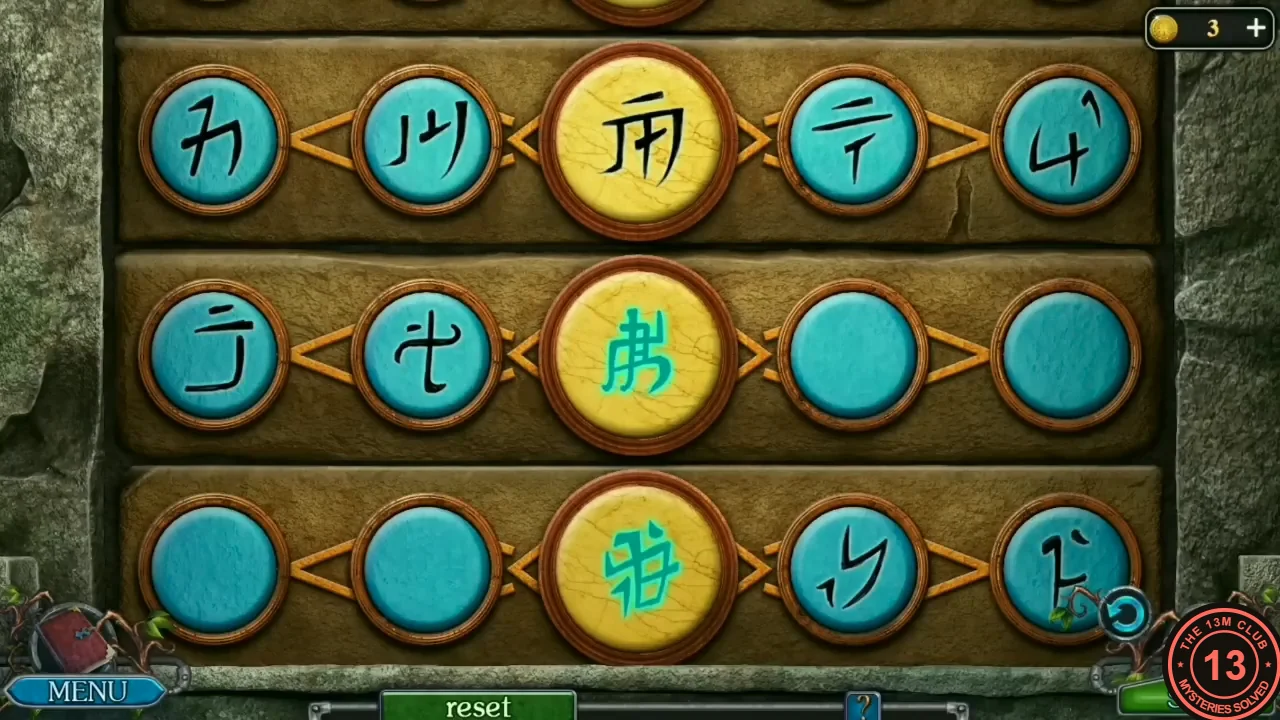
- Travel to the mountain camp and go down into the dungeon. Zoom into the stone panel on the right wall next to the barred door and insert the Stone disc. Puzzle: each row has a gold centre symbol that is missing strokes, with two blue pieces on each side. Tap a blue piece to select it (its glyph turns green), then tap a second piece: both slide into the centre and their strokes are added to the gold symbol. Pick the two pieces whose strokes complete the symbol – they can be both pieces on one side (the recording’s first row used the two left pieces, the second row the two right pieces) or one from each side (the third row used the two inner pieces). A completed symbol turns green and the board scrolls up to bring in a new row. Keep going until the last row is done and the panel glows. There is a Reset button under the board; the recording never needed it, so we cannot say exactly what it resets.
- Zoom into the opened alcove with the skeleton and the glowing blue mushroom. Click the small bowl and hold it under the ghost mushroom to collect the Ghost mushroom slime.
- Return to the old woman’s cabin and give her the Ghost mushroom slime (she stands at the stove). Watch the scene (no dialogue): she works at her table, a round jug falls and spills glowing blue liquid on the floor, and she turns into the Water Spirit. Egil runs into a dark storeroom and turns the wooden latch to shut the door behind him. He then realises: the old woman deceived him – she is the Water Spirit, and he has helped her take the form of a spirit on land too. Task complete: Help the elderly woman.