Mira's Yard: Visit Grandma
After Chapter 1 the Chapter Selection screen opens; press PLAY next to Chapter 2: Little Red Riding Hood. Mira wakes from a nightmare and her mother asks her to take a basket of gifts and supplies from the cellar to her sick grandmother. Optional pickups in this chapter are Morphing Objects, hunting horns and green medallions; the Collectibles part at the end of the guide lists every one by room.
- Watch the opening scenes. New task: Visit grandma. Mira says she needs to find a basket and a key to the cellar to collect supplies.
- Zoom into the snowy bench by the fence on the left and take the Oven fork.
- Try the path over the bridge: it is broken. New task: Find another way. Go into the house.
The Kitchen
Mira wonders where her mother has put the basket. It hangs high under the ceiling, out of reach for now.
- Optional collectible: click the hunting horn lying on its side at the left end of the second shelf from the top of the tall shelves on the left of the kitchen.
- Zoom into the lower cupboard below the shelves on the left side of the kitchen. Its two doors stay closed, but the handle on the right door is loose: tap it to pull it off and take the Handle.
- Zoom into the iron-bound chest by the stove: its lid has four round sockets ('Not enough chips'). You need four Chips.
- Zoom into the stove and take the Ladle.
- Zoom into the table under the window on the right and take the chip lying by the plates (Chips 1/4).
- Click the basket hanging from the ceiling: Mira cannot take it down yet. Go through the doorway into the bedroom.
Mira's Bedroom and the Clock
Mira says: 'Before I go, I need to get dressed. There is a spare key to the wardrobe hidden inside the clock.'
- Optional: click the Morphing Object on the seat of the armchair under the green cloth at the left of the bedroom: a small plush toy that keeps changing shape.
- Optional collectible: click the green medallion on its chain lying at the far edge of the round rug on the right, in front of the wardrobe.
- Zoom into the clock: the pendulum is missing. Zoom into the flower box under the window and take the chip from among the flowers (Chips 2/4).
- Open the chest at the foot of the bed and take the Scoop.
- Look under the bed on the right of the bedroom and use the Oven fork to pull out the Pendulum, which lies far back under the bed. Hang the Pendulum in the clock case: the clock face opens on a leaf puzzle, but Mira needs a hint to remember where the leaves go.
Hot Water, the Window Hint and the Leaf Clock
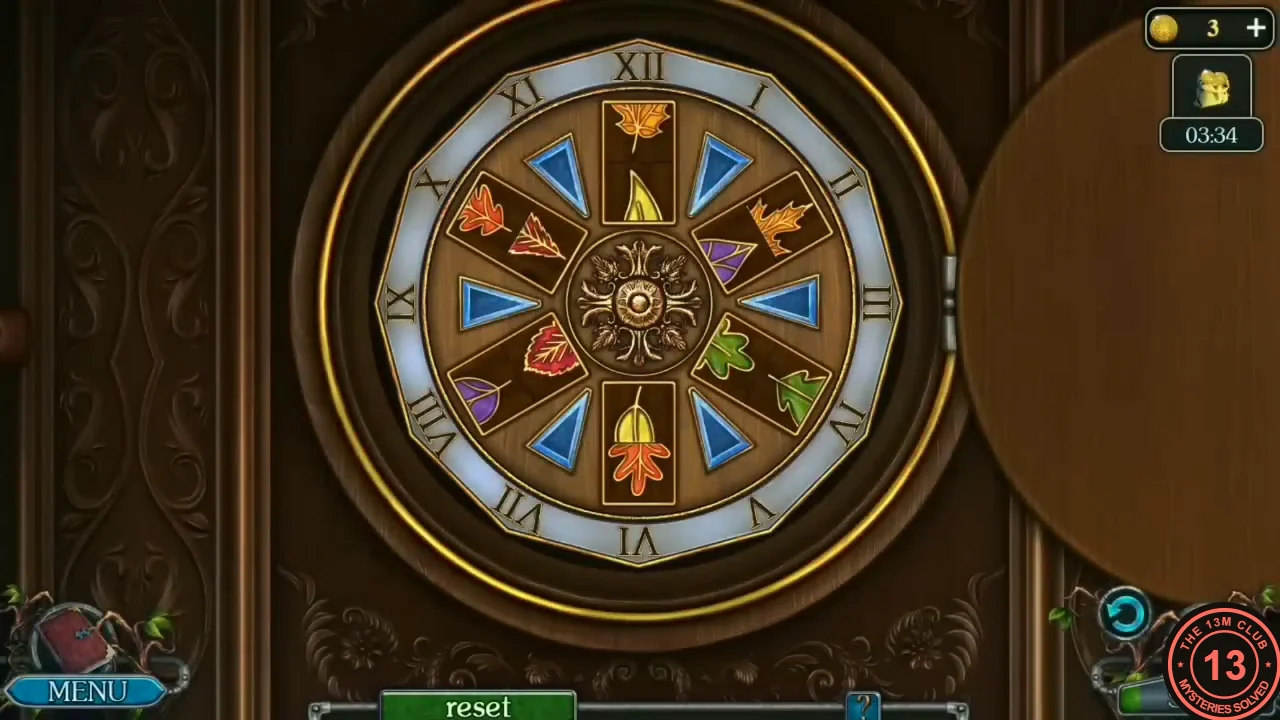
The hint for the clock is hidden on the frosted window above the kitchen table, and the water has to be fetched from the frozen hole in the yard.
- In the kitchen, use the Scoop on the stove fire to get the Scoop with coals.
- Go out to the yard and zoom into the frozen hole in the stream. Melt the ice with the Scoop with coals, then scoop up water with the Ladle to get the Ladle with water. The third chip is in the hole as well (Chips 3/4).
- Back in the kitchen, put the Ladle with water on the stove to get the Ladle with boiling water. Zoom into the table under the window and pour the boiling water on the frosted glass. The steam reveals the hint: the oak leaf goes at 12, the smooth-edged leaf at 8 and the maple leaf at 4.
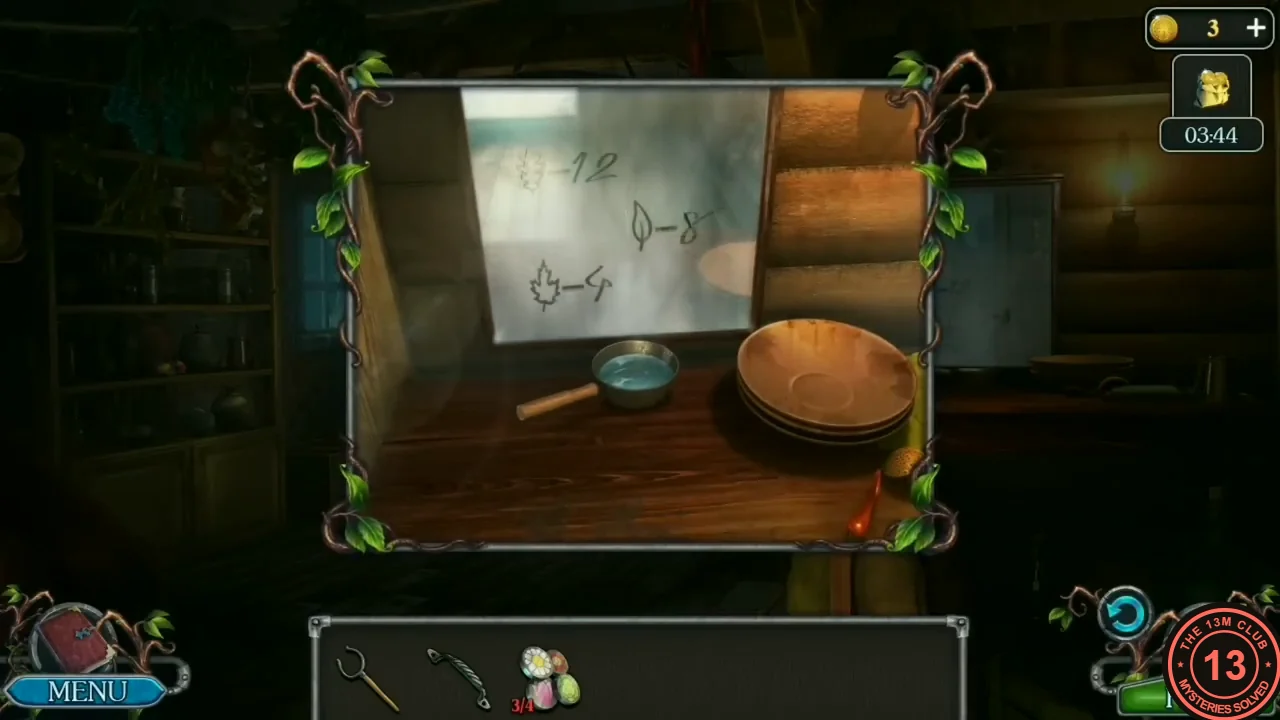
The hint on the steamed window: oak leaf at 12, smooth-edged leaf at 8, maple leaf at 4. - Go back to the clock in the bedroom. Puzzle: six slots sit at XII, II, IV, VI, VIII and X with a blue triangle between each pair of neighbouring slots. Each slot holds two leaf pieces, and tapping a triangle trades pieces between the two slots on either side of it. When both pieces of the same leaf are in one slot, they join into a whole leaf. Make a whole oak leaf in the slot at XII, a whole smooth-edged leaf at VIII and a whole maple leaf at IV, as the window hint showed. How the triangles work: each slot has an outer and an inner half-leaf, and one tap on a triangle moves the four halves of its two neighbouring slots one place clockwise round that triangle (for example, with the triangle between XII and II: XII inner to XII outer, XII outer to II outer, II outer to II inner, II inner to XII inner). Two taps on the same triangle swap the contents of the two slots, and four taps put everything back. Method: the three target slots (XII, IV, VIII) alternate with the three free slots (II, VI, X), so every triangle joins one target slot to one free slot. Use the free slots as parking: bring a needed half into a free slot next to its target slot, then tap the triangle between them (once to three times) until both halves of the right leaf sit together in the target slot. Park unwanted halves in the free slots, and once a target slot is finished, avoid its two triangles. In our recording, three taps on the triangle between XII and II (about 3724-3726 s) brought two orange halves together into a whole leaf at XII, and the whole puzzle took under 40 seconds. The three leaves glow green when they are right, and the other three slots don't matter (in our recording they still held mixed leaves). The clock opens: tap the Key lying in the cobwebs behind it to take it.
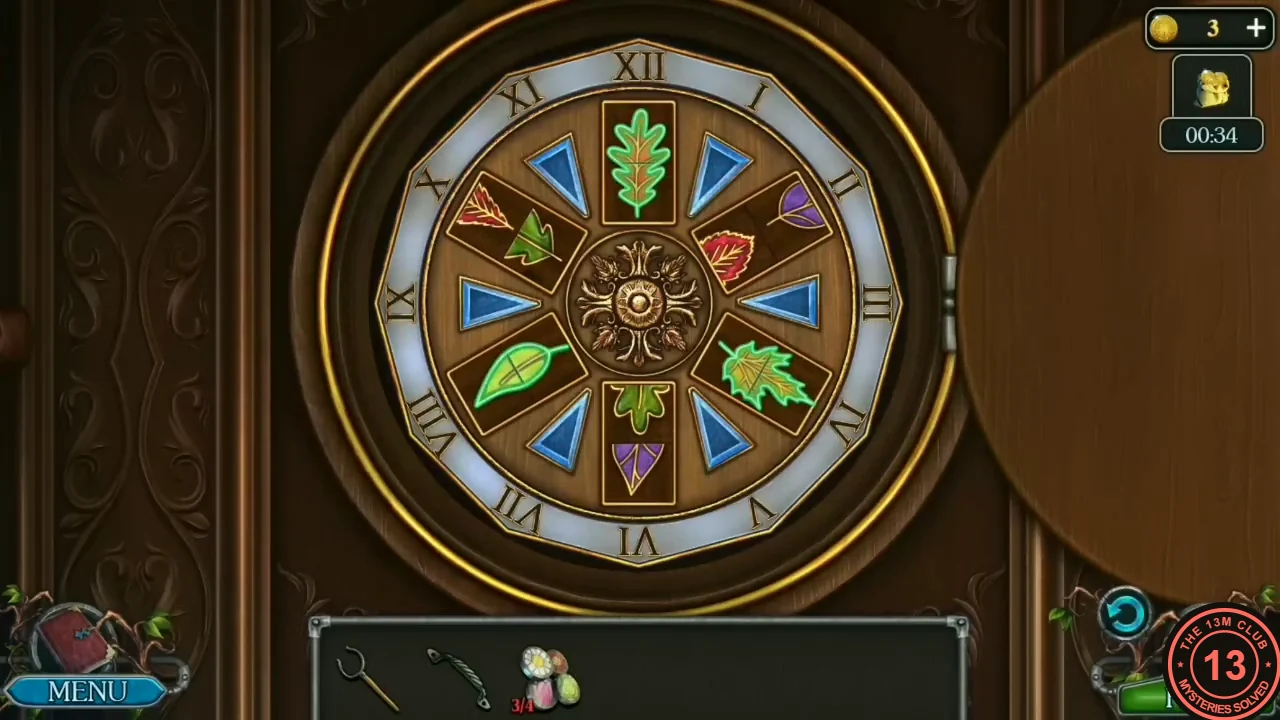
Solved: the three hint leaves sit at XII, VIII and IV and glow green.
The Wardrobe (Hidden-Object Scene)
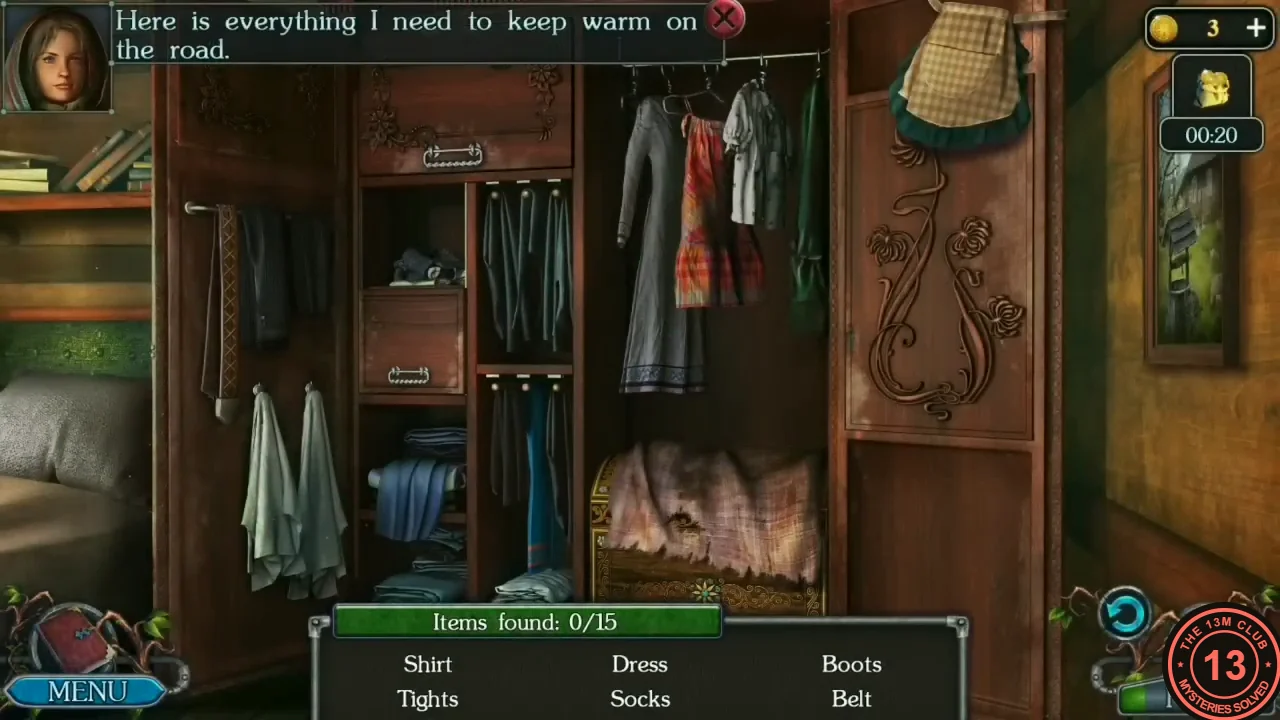
Mira's wardrobe holds the warm clothes for the journey.
- Unlock the wardrobe with the Key. Hidden-object scene: 'Here is everything I need to keep warm on the road.' Find the 15 listed clothes; the list shows six names at a time. On the hanging rail: the Dress is the long grey dress at the left, the Shirt is the white shirt at the right and the Petticoat is the red-and-orange checked garment. The Apron is the checked apron draped over the top of the right-hand door. Tap the inside of the right-hand door to swing it open: the Red cape hangs on the hooks behind it. Lift the cloth off the trunk at the bottom and open the trunk: the Boots are inside, and the Scarf is the blue scarf in the wicker basket there. Tap the dark carved panel high on the inner left wall to swing it open: the red ribbon Bow hangs behind it. On the left inner wall, the Belt is the long patterned strap hanging from the upper hook. Zoom into the top shelf with the pillows: tap the large blue pillow at the left so it moves aside, then take the gold rose-shaped Brooch lying on the white pillow it uncovered, and the grey Bonnet is the pillow-like cap at the right. The Tights hang from the hooks in the upper middle compartment, and the Vest is the long blue garment hanging in the lower middle compartment. Zoom into the small compartment in the middle column: a wooden panel with a metal handle at its bottom edge, below a shelf of folded clothes. The Mittens are the blue-and-white patterned pair lying on that shelf. Tap the panel and it slides upward, exposing a compartment below; tap the dark folded cloth in it so it moves aside, then take the pink Socks lying on the grey cloth underneath. (Tap the panel again to lower it if you still need the Mittens.) Mira gets dressed when the list is complete.
The Kitchen Chest and the Cat
The fourth chip is under the kitchen floor.
- In the kitchen, zoom into the crack in the floorboards and lever the board up with the Handle. Take the last chip (Chips 4/4).
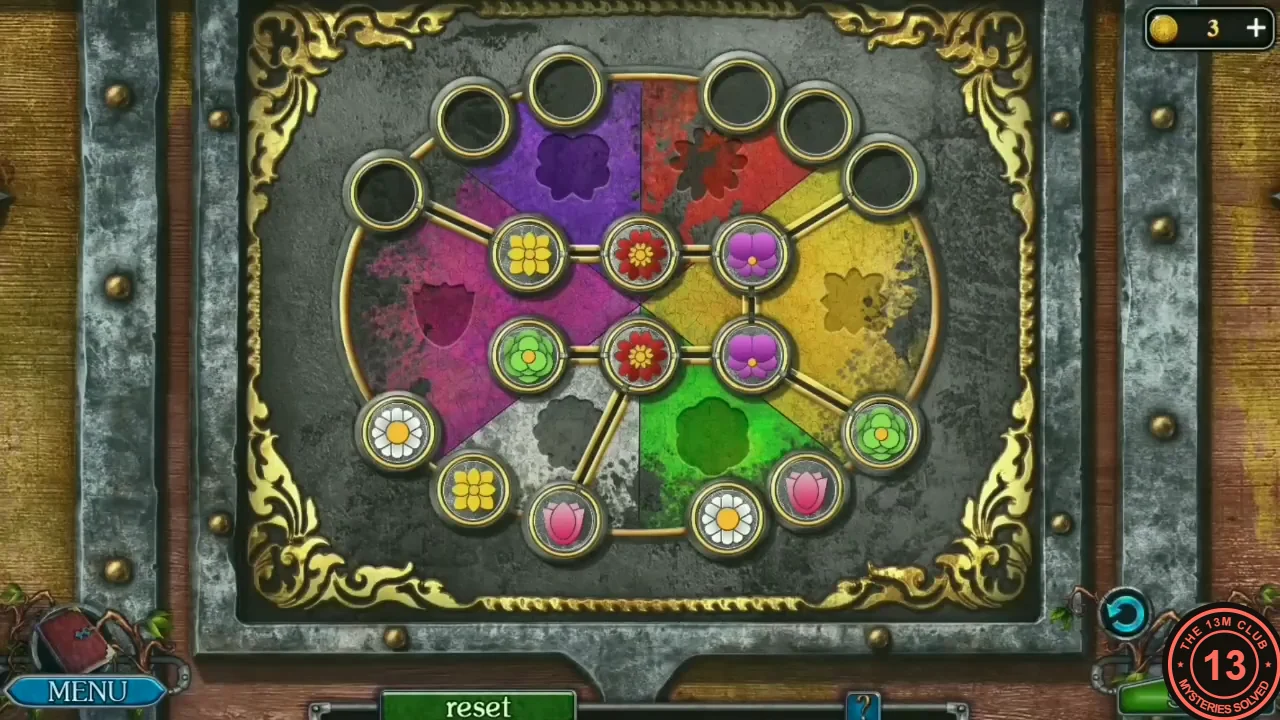
- Put the four Chips into the sockets on the iron chest. Puzzle: flower tokens sit on circles connected by lines over a six-coloured background. Tap a token to pick it up: the empty circles it can reach along the lines (through other empty circles) show a faint copy of it. Then tap one of those circles to move it there. Goal: each outer circle must hold the flower that matches its coloured sector: purple pansies, red flowers, yellow flowers, green flowers, white daisies and pink tulips. A token in the right outer circle gets a glowing ring. Method: there are twelve outer circles (two in each coloured sector) and six inner circles in two rows of three, and a flower can only travel through empty circles. Keep the two inner rows as clear as you can, because they are the corridors between the sectors. Send home first any flower that has an open route to its own sector, and fill one sector pair at a time. When a flower is in the way, park it for now on an empty inner circle or on an empty outer circle of a sector you will fill last, and move it on once its own sector is free. In our recording (start 3858 s) the first pansy, both red flowers and both green flowers went home first (by about 3906 s). A yellow flower was parked on the empty outer circles of the pink sector while the white daisies and the other yellow reached their sectors (about 3910-3920 s). The second pansy, the parked yellow and finally the two pink tulips went home last (about 3924-3940 s). Solving it can award the achievement Brilliant. The starting layout is not the same in every game (our two recordings start differently), so check each outer circle's coloured sector to see which flower belongs there.
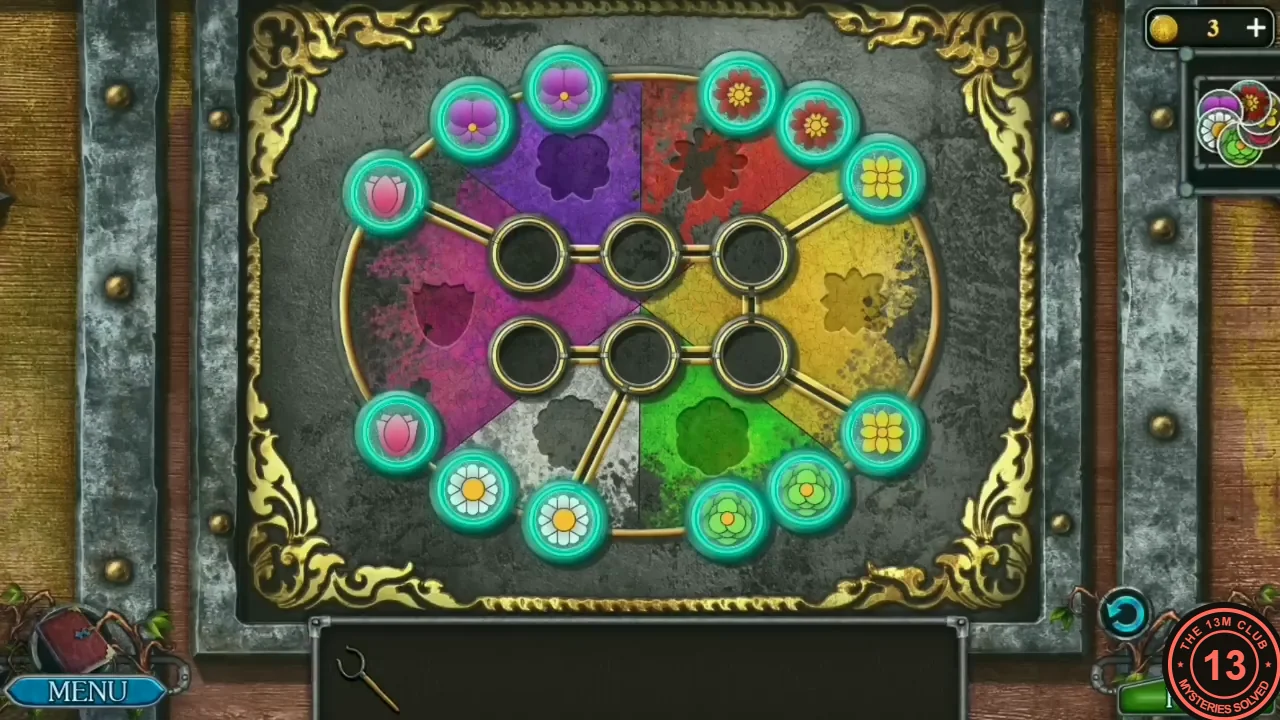
Solved example: every flower sits in its own colour sector and glows. Your starting layout may differ. - Take the Valerian from the opened chest.
- Go out to the yard and zoom into the bench with the cat. Pour the Valerian into the bowl; the cat leaves its spot. Take the Key and the small gold Figurine that were under it (Figurines 1/3).
- Zoom into the padlocked cellar door on the left side of the yard and open it with the Key.
- Optional: click the Morphing Object on the left fence post in the yard.
- In the kitchen, use the Oven fork to unhook the basket hanging from the ceiling and take the Basket.
The Cellar (Hidden-Object Scene)
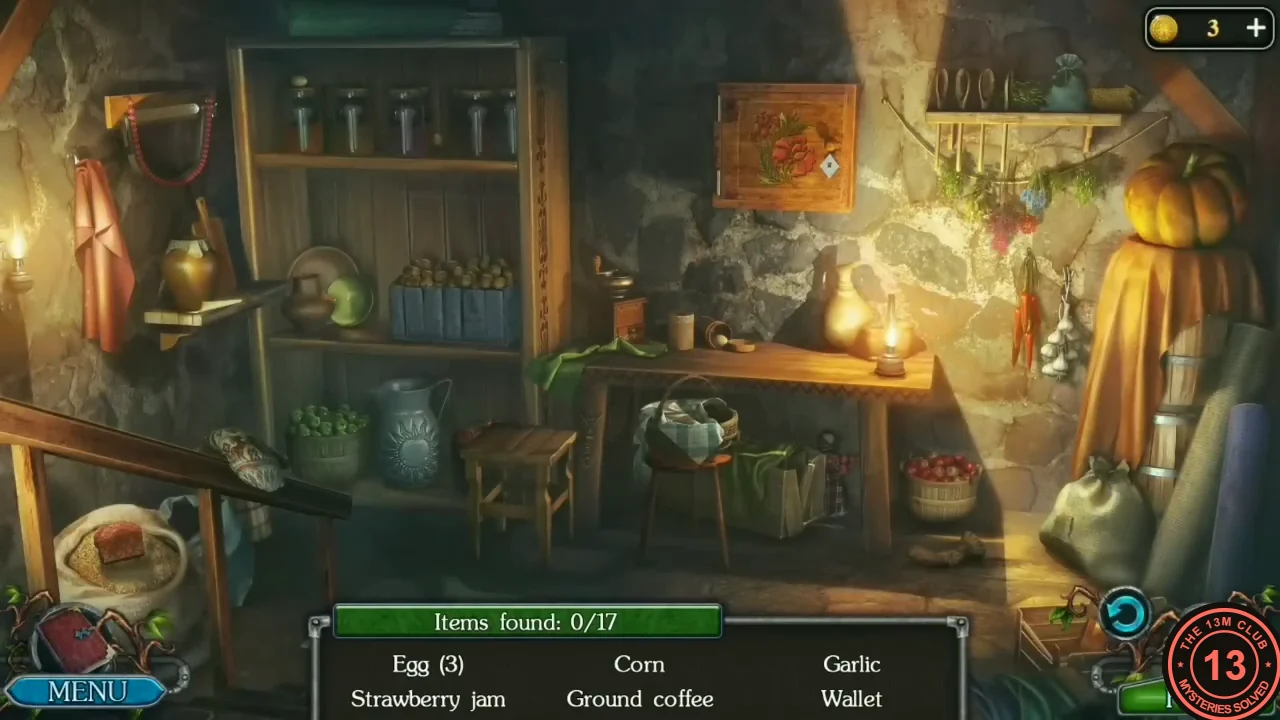
Collect the gifts and supplies for Grandma in the cellar.
- Enter the cellar. Hidden-object scene with 17 gifts and supplies; the list shows six names at a time and new names appear as you find items. The room is a little wider than the screen: drag right to see the far right corner. Locations in our recording: Zoom into the small coffee mill at the left end of the table. An Egg is in the tin lying on its side there. For the Ground coffee, tap the upright tin to take off its cup, which tips the beans into the mill. Turn the crank, then pull out the mill's drawer; tap the tin it empties into to collect the Ground coffee. On the stone wall at the upper left, tap the red cloth hanging on a hook to move it: a small key hangs behind it. Use the key on the little wall cupboard with the painted door above the table and take the Green potion from inside. The Wallet lies on the grain in the open sack at the bottom left. The Corn is the cob on the high shelf at the upper right, and the Garlic is the string of garlic bulbs hanging on the right wall. The Red apples are the tub of apples under the bottom shelf, left of the table. Zoom into the jar shelf at the top of the left-hand cupboard: one Egg lies on the lid of the left jar and another is hidden behind the jars (move the middle jar to see it). The red jar is the Strawberry jam. The Letter is a folded paper on the small wall shelf under the honey pot at the left. The Sun is the blue jug with a sun pattern on the lower cupboard shelf. The Mittens are the grey patterned pair lying on the stair handrail (they look like one object until you tap them). The Beads are the red bead string hanging on the hook at the top left. The Doll is the rag doll in a checked dress standing behind the crate with the green cloth, under the table. The Fish is the hardest to see: a large dried fish hanging on the stone wall left of the honey-pot shelf, where the red cloth was, almost the same colour as the stones. After dragging the view to the right, the Onion lies on the floor at the foot of the sack in the right corner. Task complete: Collected gifts and supplies; the filled basket goes into your inventory.
Snowy Forest Path Puzzle
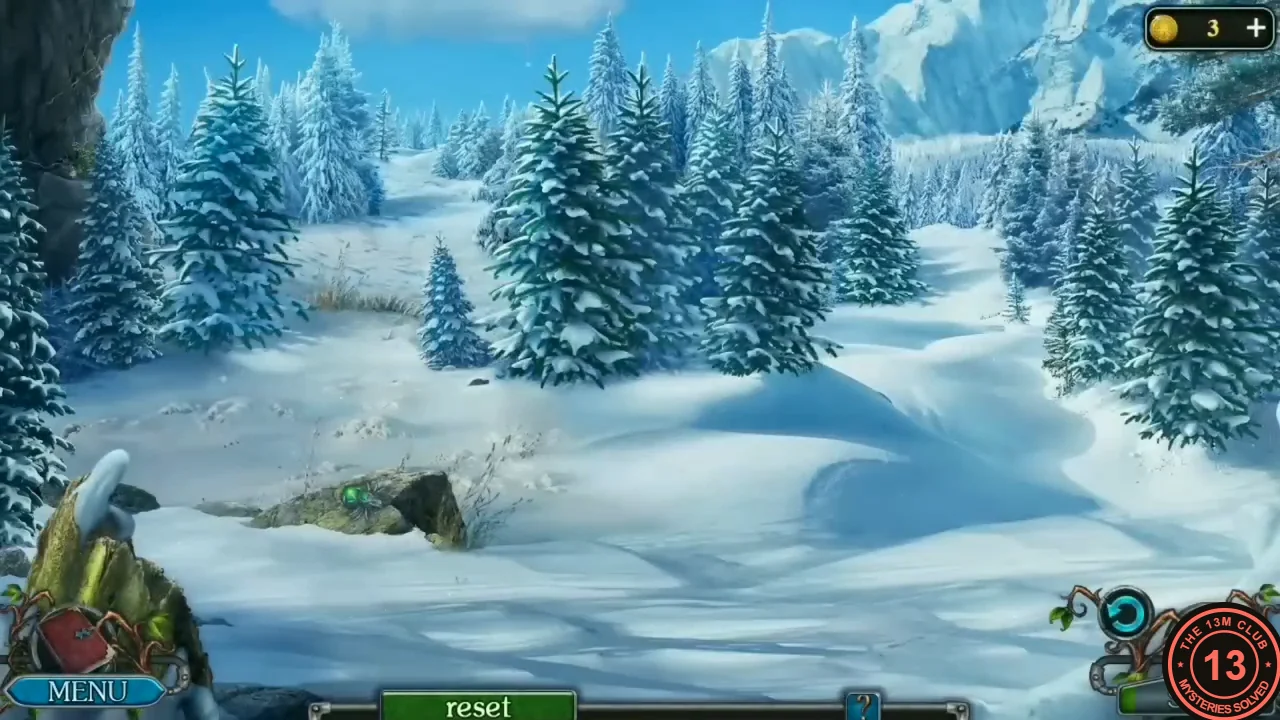
Between Mira's yard and the hunter's camp you must pick the right way through five forest screens.
- Leave the yard by the path past the broken bridge, then tap the snowy path beyond the bridge to walk into the forest. A navigation puzzle starts: a Reset button appears in the bar at the bottom.
- The forest has five screens; on each one, tap the gap in the trees where you want to walk. Our route: (1) Wide snowy clearing with a flat mossy rock and a green-eyed spider at the lower left: tap the gap in the trees LEFT of the large pine cluster in the middle (upper left of the screen). Tapping the rock only gives 'Yuck, I don't like spiders.' (2) Snowy slope with a big snowy pine at the left edge and a group of pines in the middle: tap the gap just LEFT of the middle pines. (3) Snow-capped mountain behind the trees at the upper right and a pair of tall pines left of centre: tap RIGHT of that pine pair, towards the mountain. (4) Tall pines in the middle and sledge tracks in the snow at the bottom: tap the gap at the far RIGHT, between the middle pines and the trees on the right edge. (5) The camp is visible ahead, with stone steps and a carved totem behind fallen branches: tap forward towards the totem. You arrive at the hunter's camp. A wrong turn can lead to a dead end ('It seems to be a dead end.'); in the second recording we checked, the player who went right on the first screen reached such a dead end. We never saw Reset used, so we cannot say exactly what it does.
The Hunter's Camp
Mira says: 'The way to grandmother's house lies through the creepy cave.' The camp has a carved totem, a snow-covered hut, a frozen fire pit and a covered wagon. On the travel map this area (with the spider cave and the frozen lakeshore) is listed under Witch forest.
- Optional: click the Morphing Object at the foot of the carved wooden totem pole in the middle of the camp: a small branch lying in the snow that keeps changing shape (into a fir sprig). Optional collectible: the hunting horn lies in the snow on the right side of the same scene, just left of the snow-covered broken stump at the foot of the big tree on the right, below the frosted bushes. Only its curved body and gold mouth show; click it.
- Go to the hut. Zoom into the frozen fire pit and take the Cauldron (the iron pot lying on its side). The knife in the pit is frozen into the ice.
- Zoom into the leather satchel hanging in the hut, open it and take the rune (Runes 1/2) and the Beak.
- Zoom into the striped mattress inside the hut: something is sticking out from under the fabric of the patch. Tap it to take the Chisel. Zoom into the frozen fire pit again and use the Chisel on the ice beside the frozen knife. Then tap the loose grey stone lying on the snow at the upper right of the close-up, outside the ring of stones: it hammers the Chisel several times and frees the knife. Tap the Chisel (it leaves the ice; it stays in your inventory) and take the Blade.
- Mira notes the wagon is covered with cloth that she will have to cut. Pick up the board lying in the snow on the right (Boards 1/4).
- Optional collectible: click the green medallion on its chain in the snow at the foot of the tree trunk at the right edge of the hut scene, just above the fern. Optional: click the Morphing Object, a cluster of reddish cones in the snowy fir at the upper left of the hut scene.
- Back at the totem area, tap the dark opening in the rock face at the top of the stone steps, just right of the hollow tree with the owl, to zoom in. Take the second rune lying on the tree root inside (Runes 2/2). Zoom into the carved panel on the totem and put the two Runes into its round sockets.
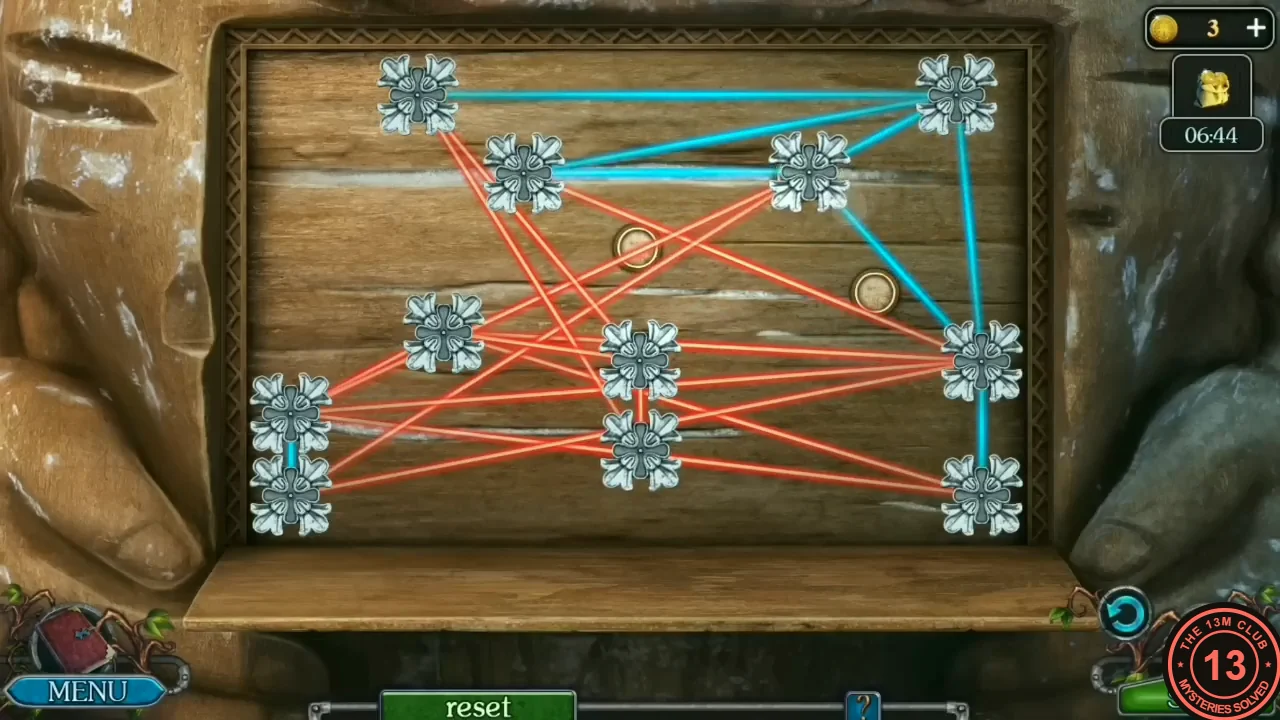
- Puzzle: eleven silver snowflake nodes are joined by lines; red lines cross another line and blue lines don't. Press and drag a node to any free spot on the board, and its lines follow it. Move the nodes until no lines cross and every line is blue. The board then clears and the panel opens. Tip: separate one node with many lines first and build outward from it, pushing nodes towards the edges of the board. There is a reset button under the board; we didn't see it used. It can take a while. The starting layout isn't the same in every game (our two recordings start differently), but the no-crossings rule is the same.
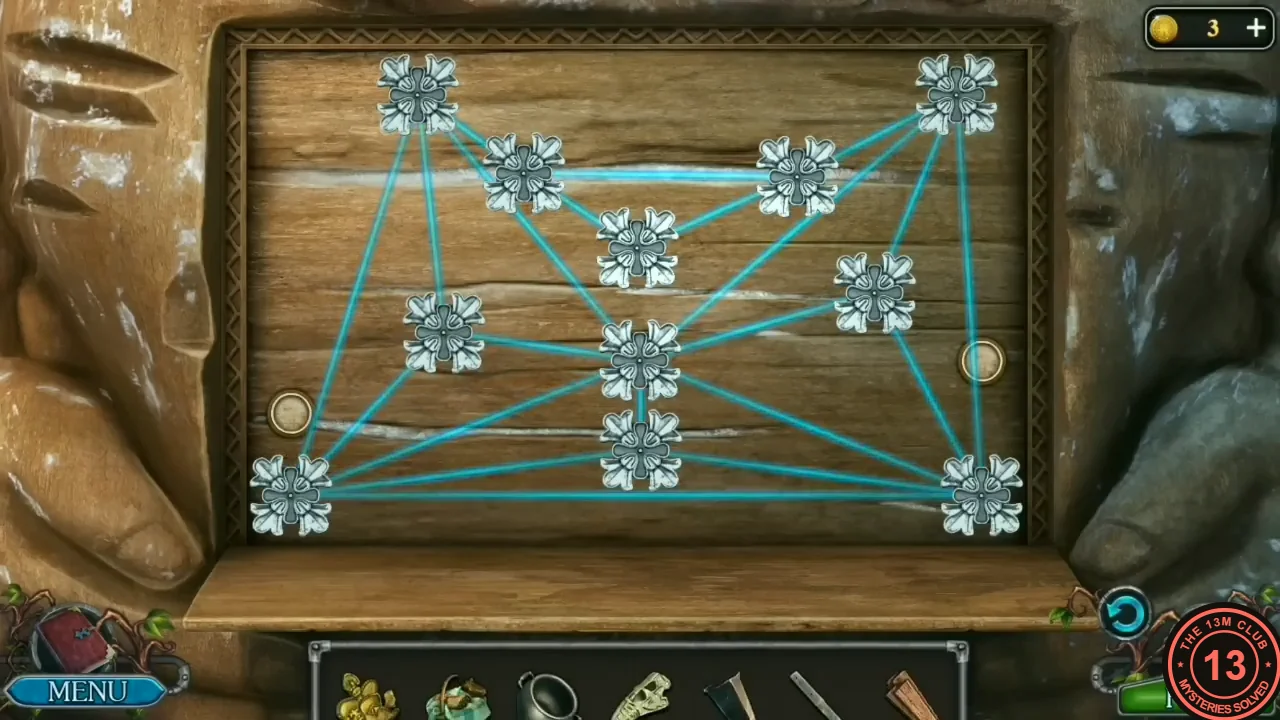
One finished layout: no lines cross and all of them are blue. Your nodes may start in different places. - The opened niche holds a beautiful knife handle. Attach the Blade to it to get the Knife.
The Wagon and the Rope
With the Knife you can open the hut mattress and the covered wagon.
- Zoom into the patch on the hut mattress again and cut it open with the Knife. Take the Lynx figurine.
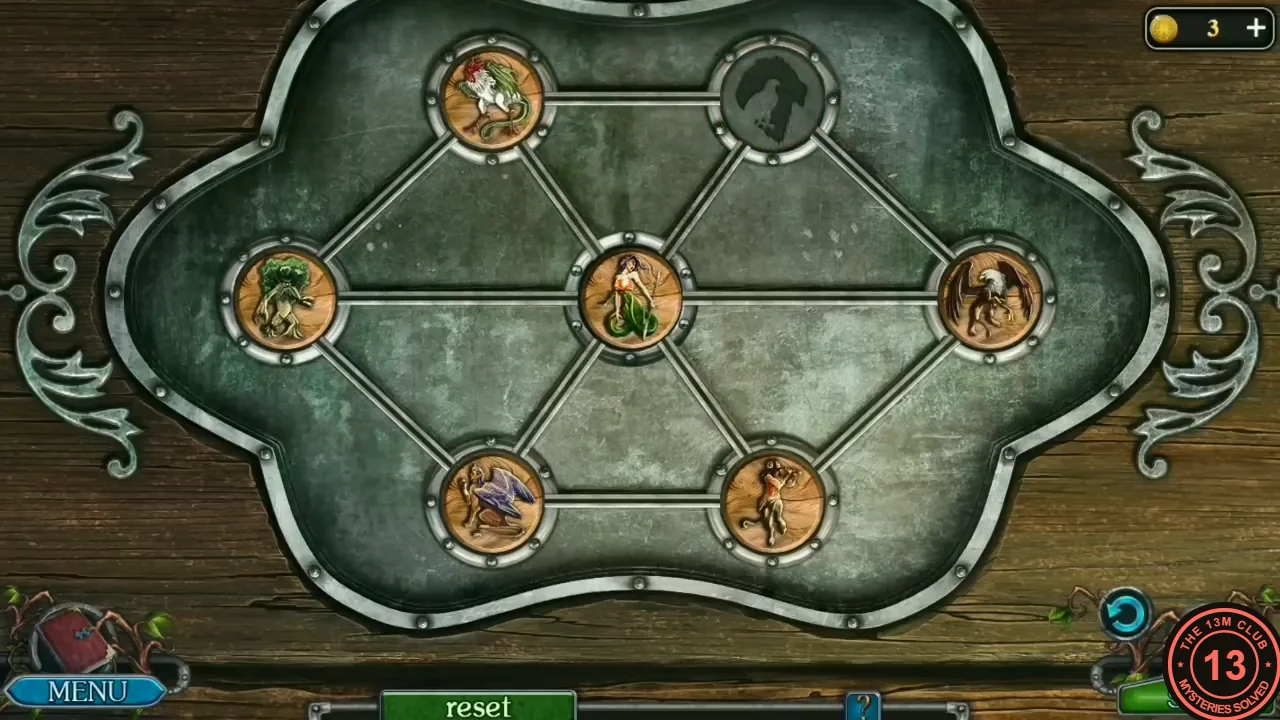
- Zoom into the wagon and cut the cloth cover with the Knife. Zoom into the opening. Puzzle: six round tokens with creatures sit on a board of seven circles joined by tracks: six outer circles around one centre circle. Each outer circle is engraved with a creature's silhouette, and one circle is always empty. Tap a token on a circle joined by a track to the empty circle, and it slides along the track into it. Move the tokens until each one rests on its matching silhouette and the centre is empty; the tracks light up when it is done. The finished board (the same in both our recordings): the white-and-red rooster-headed winged serpent at the top left, the brown eagle-headed griffin at the top right, the horned piper (satyr) at the left, the green beast at the right, the winged lion with purple wings at the bottom left and the snake-tailed woman at the bottom right. Use the reset button under the board to restart.
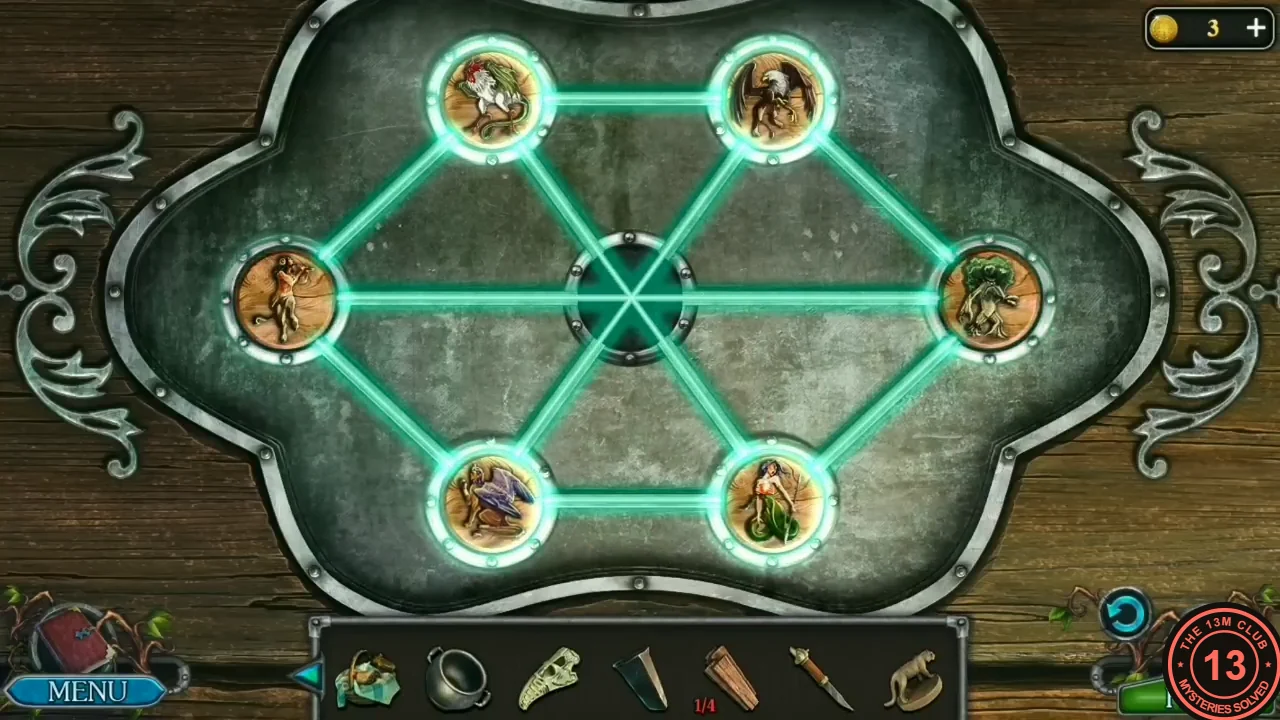
Solved: every creature rests on its silhouette and the tracks light up. - Zoom into the wagon again and open the wooden chest inside. Take the Signs (two wooden boards that go into the inventory as one item marked 2), the second gold Figurine (Figurines 2/3) and the Broom leaning in the chest's right corner. Zoom into the wagon opening once more and take the Cloth (the cut cover).
- Use the travel map to go back to Mira's house. In the yard, zoom into the wooden post at the right with the ropes running from it, and cut the ropes with the Knife to take the Rope. Travel back to the Witch forest.
- Use the travel map to go to the Witch forest. In the scene with the carved totem, zoom into the dark opening at the upper left, near the top of the stone stairs: it is a hole under a big tree root. Use the Rope on the root: Mira ties it on and climbs down into the cave, where a giant dead spider hangs over a web-covered door.
The Spider Cave
'How horrifying! It's a giant mountain spider! It's a good thing it's dead.' The way on is sealed by a panel with ten empty spider sockets.
- Optional: click the Morphing Object on top of the wooden post on the left: the round ornament on its top keeps changing shape. Optional collectible: click the green medallion tied into the rope binding lower down on the same post.
- Zoom into the barred wooden cell on the left and take the Old torch and the board (Boards 2/4).
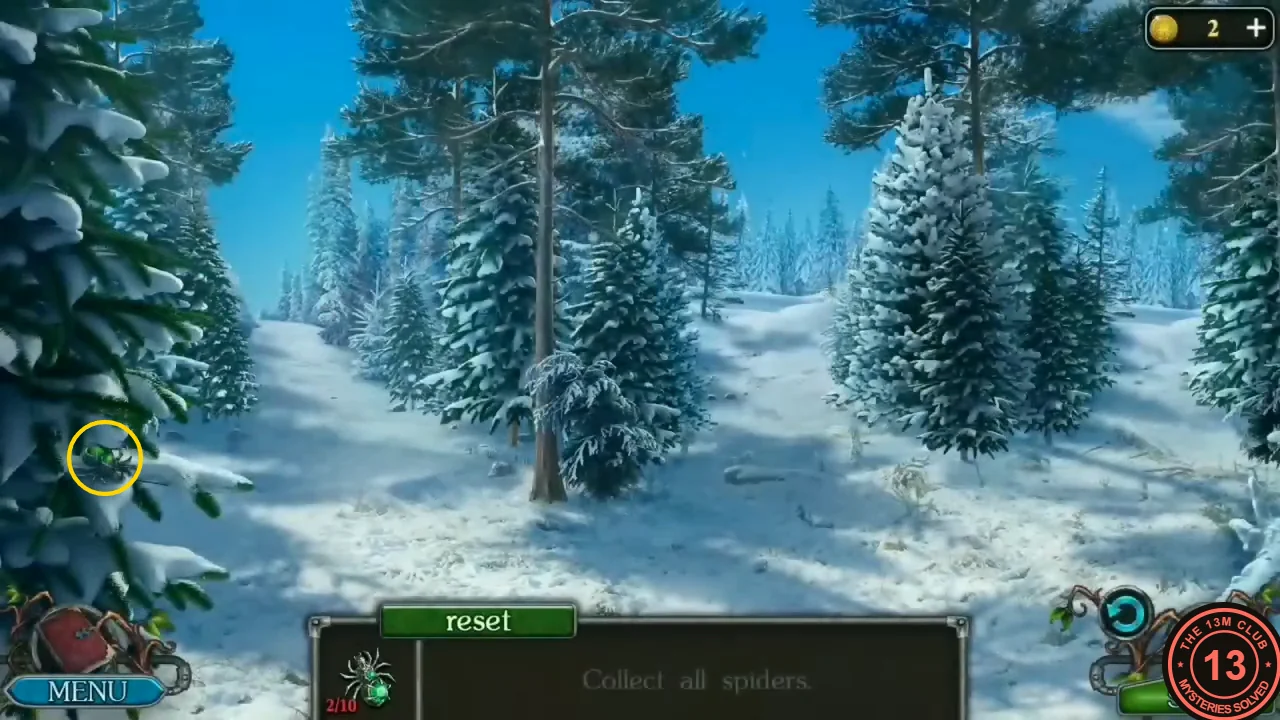
- Zoom into the webbed panel behind the spider: 'I saw these spiders on the way here. I need to collect them all.' Task: Collect all spiders. Close the panel by clicking outside it, then press the back arrow (bottom right) twice: once to leave the cave for the camp, and once more at the camp to enter the snowy spider forest. The forest is made of connected clearings; some are dead ends ('It seems to be a dead end'). The counter at the left of the bottom panel shows the spiders found (x/10). The blue circular-arrow button at the bottom right steps back one clearing toward the forest exit, and each move fades through black to the next clearing. The panel also has a reset button; we never used it. The forest branches like a tree, so the route below visits each branch and then steps back. Start clearing (stone steps and a carved wooden totem in the background): spider 1 sits on the fallen twigs at the lower left. Now press the back arrow four times (in the footage this walks you to the rock clearing). You pass an open clearing with snow dunes, a clearing with a big snowy mountain behind the trees, and a snowy slope with a big snow-covered pine at the left, and you arrive at the clearing with a flat grey rock at the lower left and a mossy stump in the bottom-left corner. Spider 2 sits on that flat rock. Avoid the lower left of this clearing: it leads out of the forest to the bridge. If you end up there, walk back in. Your spiders stay counted and you return to this rock clearing.
- From the flat-rock clearing, tap the gap between the trees on the right (about two-thirds of the way across, mid-height). You reach a clearing with two big pines and a thin bare trunk in the middle. Spider 3 is on the snowy pine branch at the far left edge, a little below the middle. This clearing has three onward paths. The one to a long fallen tree resting on a stump is an empty dead end. For the next spider, tap the gap just left of the big snow-covered pine group on the right, a little above the middle of the screen (about two-thirds of the way across, toward the distant trees). This takes you to a narrow trail between leaning pine trunks. Spider 4 is on the thin trunk at the far left edge, next to a snowy bush. Tap the lower-middle path to reach a big fallen log lying across the snow. Spider 5 is on the log, near its broken right end. Press back twice to return to the two-pines clearing. Then tap far to the right, about mid-height, to reach the dead end with thick, curved, snow-covered branches. Spider 6 is on the dark log under the snow at the far left. Press back twice to return to the flat-rock clearing.
- From the flat-rock clearing, go back up the snowy slope (the clearing with the big snow-covered pine at the left). Tap the path at the right of the slope, a little above the middle. You reach a clearing with a big pine left of centre, a tree trunk at the right edge and small white snow mounds. From there, tap left of centre, a little above the middle, to reach two crossed fallen logs. Spider 7 is on the snow below the long log, left of centre. Press back. Tap the gap between the trees at the right, mid-height, to reach mossy boulders. Spider 8 is on the right side of the big boulder at the right. Press back twice to return to the snowy slope. From the slope, tap the gap between the trees left of centre, in the upper third, to reach the mountain clearing (big snowy mountain behind the trees). From the mountain clearing, tap the snow at the far left, a little below the middle, to reach a clearing with a big dark-green pine at the right edge. The far left of that clearing, at mid-height, leads to an empty dead end of snow-covered rocks. The other, the trail just right of the centre, leads to a dead end of tangled fallen branches. Spider 9 is on the fallen trunk, left of centre. Press back twice to return to the mountain clearing. Then tap the gap between the trees on the right, a little above the middle (about two-thirds of the way across), to reach the open clearing with snow dunes. From there, tap the snowy trail just left of centre, a little below the middle, to reach the dead end in front of a snowy rock wall with logs on the ground. Spider 10 is on the rock wall above the logs, just right of the centre, at about one third of the height. With 10/10, the spiders go to your inventory and you return to the webbed panel.
The Spider Tower
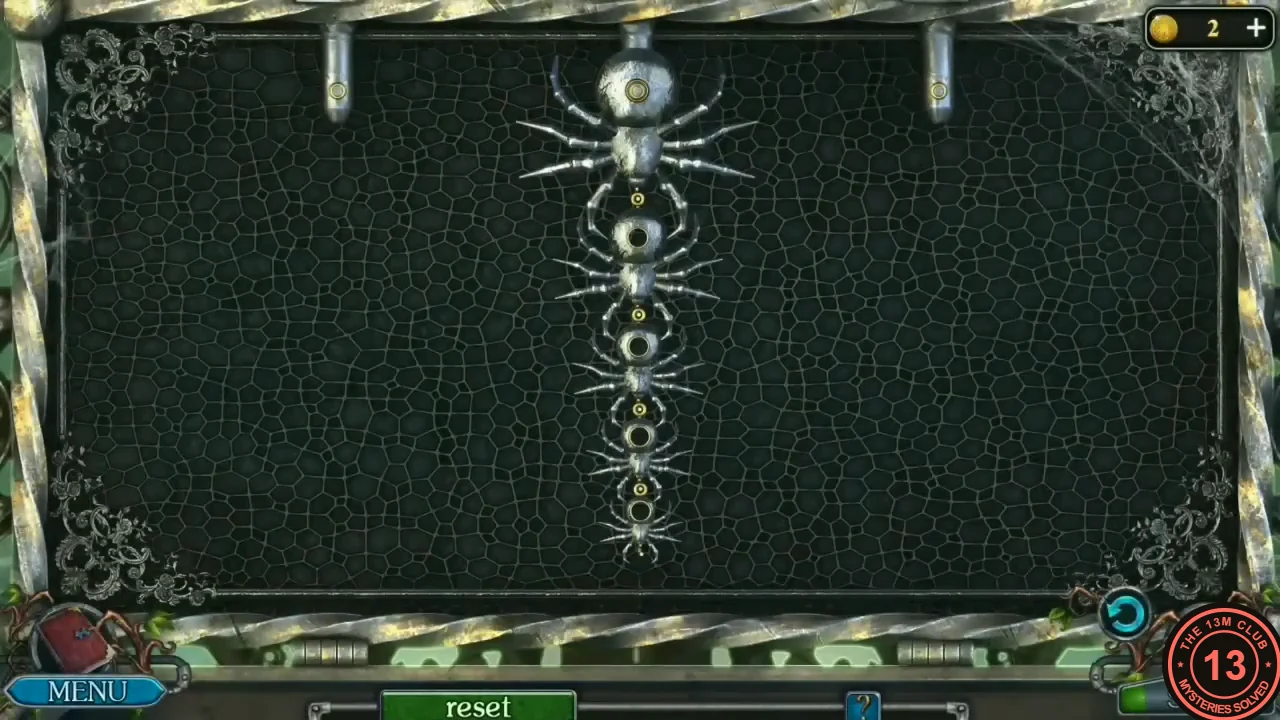
With all ten spiders collected, the webbed panel opens on a tower puzzle.
- Place the ten Spiders in the sockets of the webbed panel; it opens on a puzzle. Puzzle: six metal spiders of different sizes hang in one chain from the middle of three hooks, with the largest at the top and each smaller one hanging below it. Only the lowest spider of a chain can be moved, and a spider can only hang below a larger one (or straight from an empty hook). Move them one at a time to rebuild the whole chain on the left hook. This is a Tower of Hanoi puzzle: with six spiders the shortest solution takes 63 moves. Work from the bottom up: move the five smaller spiders to the right hook, move the largest spider to the left hook, then move the five smaller spiders back below it, solving each smaller group the same way.
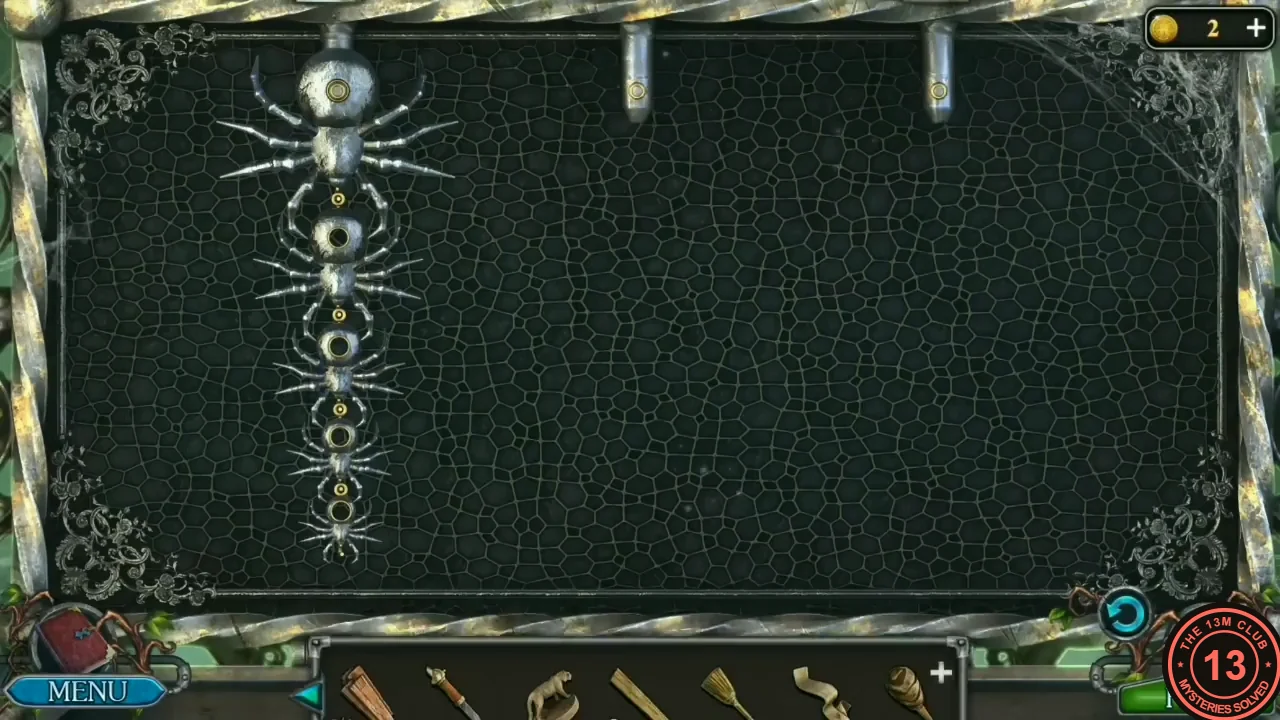
Solved: the whole stack rebuilt on the left hook.