The Elder's Cabin
Egil the herbalist is called to the dying village elder. Start here after choosing Play on the main menu. Optional pickups in this chapter are Morphing Objects (scenery that slowly changes shape), pipes and straw dolls; steps marked Optional point them out, and the Collectibles part at the end of the guide lists every one by room.
- On the main menu choose Play, then press Play beside Chapter 1: Egil and the Disease on the first page of Chapter Selection. Watch or skip the opening scene. A box then asks whether you want to play the interactive tutorial (Full Tutorial or No Tutorial). Pick either; the steps in this guide work the same way.
- Click the elder in the bed. Egil decides a compress would ease the fever.
- Optional: click the Morphing Object (a small object that keeps changing shape) on the seat of the chair at the right end of the table.
- Open the leather satchel on the table. Take the Detail from its side pocket, put the Detail on the satchel lock, then take the herbs and the Book of recipes from inside.
- Optional collectible: click the Pipe leaning upright against the chest of drawers at the far left of the room, by the stool.
- Open the painted wardrobe on the left and take the Hammer, the Mechanical Hand and the roll of cloth.
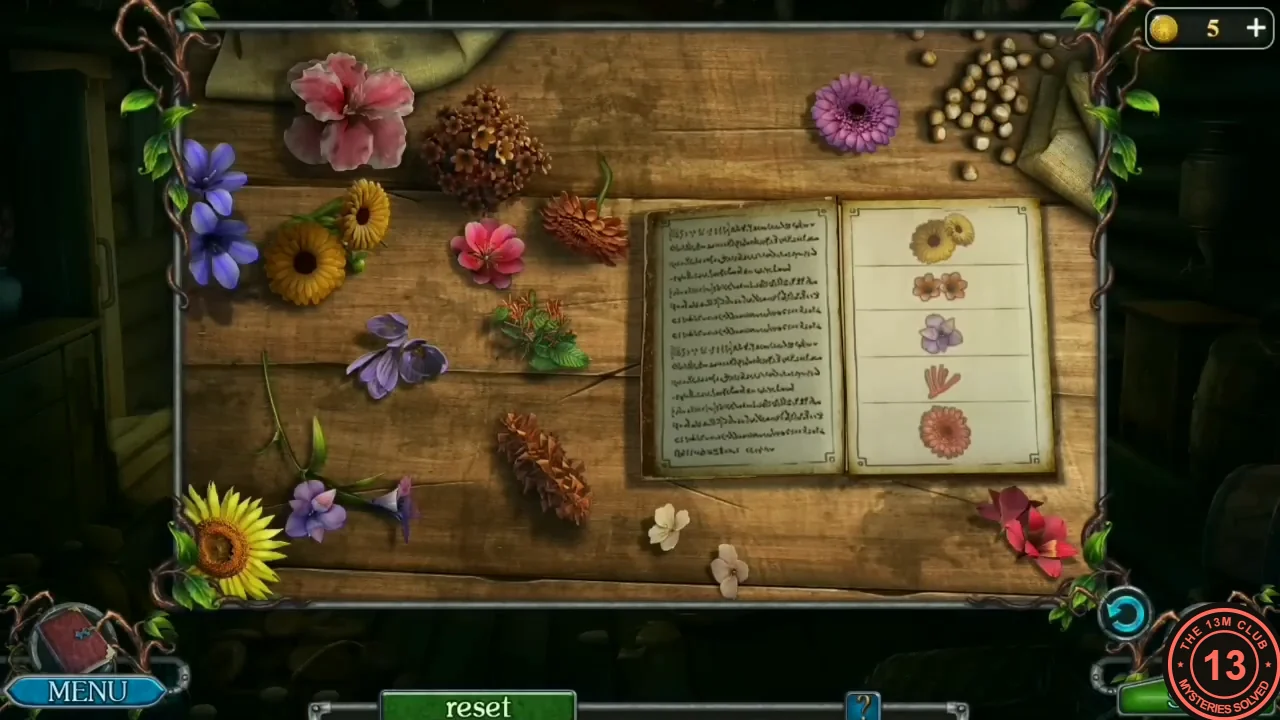
- Click the table, place the Book of recipes on it, then place the herbs. Puzzle: drag onto the open book the five plants pictured on the right-hand page (yellow daisies, small orange blossoms, a lilac flower, a red coral-like sprig and an orange aster). Take the Herbal preparation.
The Yard and the Porch Cabinet
Leave the cabin through the door to reach the yard.
- Go outside. Zoom into the tree stump and hit the wedged blade with the Hammer until it comes loose; take the Axe blade.
- Optional collectible: in the full yard view (no zoom needed), click the hay bales on the porch at the foot of the log wall, between the cabin's blue door and the grey wooden shed door on the right. The straw doll is hidden in the hay.
- Zoom into the wire-wrapped latch on the grey shed door (right of the hay bales). Place the Axe blade against the wire and strike it with the Hammer to cut the wire.
- Zoom into the goat pen and take the Valve lying in the straw at the lower left, below the rails. The goat blocks the basin inside.
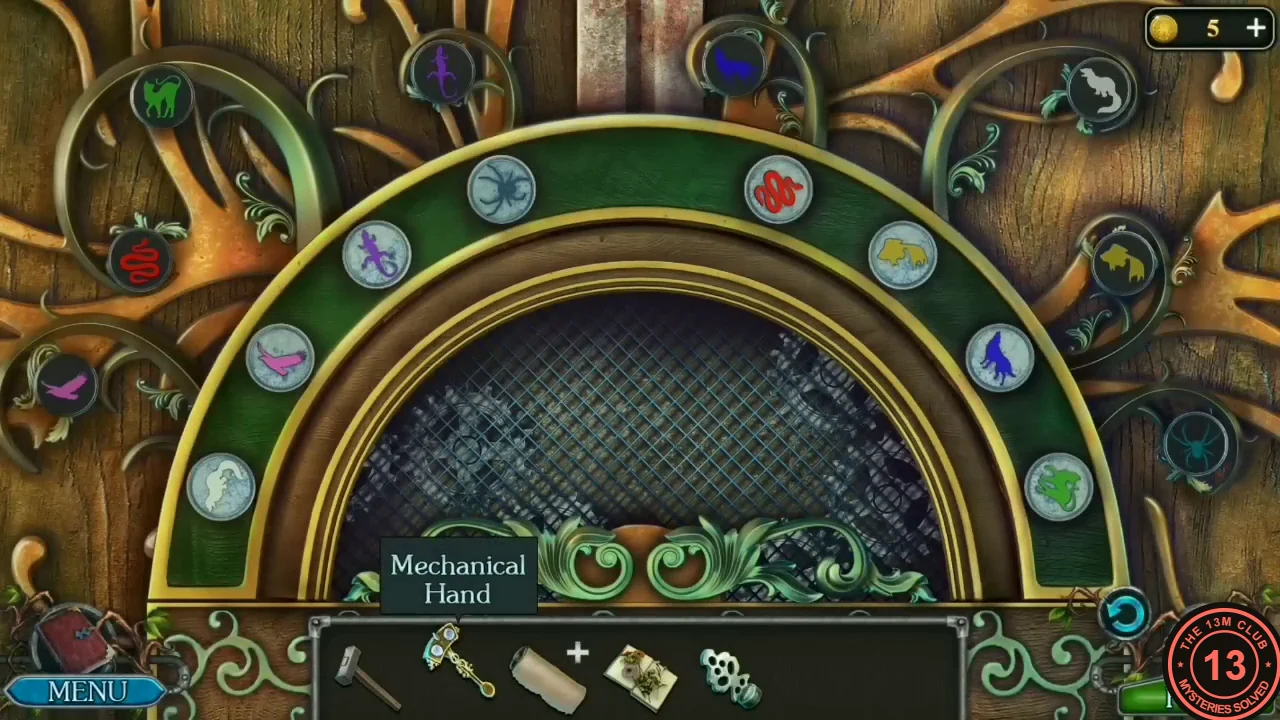
- Zoom into the locked double cabinet on the porch and place the Mechanical Hand. Puzzle: eight animal discs sit in slots around the green arc, and a yellow gripper with two pockets rides on it. Tap the small arrow at either end of the gripper to slide it along the arc. Tap the hand symbol on the gripper to swap: the discs it is holding drop into the two slots beneath it and the discs that were in those slots go into the gripper (an empty pocket or slot simply swaps with nothing). Use this to carry the discs around until they follow the same order as the eight animal emblems on the frame outside the arc; from bottom-left going clockwise: bird, snake, cat, lizard, wolf, ferret, fish, spider. Each outer emblem lights up when its disc is in place. The emblem order was the same in both playthroughs we compared, but check it against the emblems on your own frame.
- Take the Scissors from the opened cabinet.
- Zoom into the hanging mesh basket, cut its cord with the Scissors and take the Corn.
- Give the Corn to the goat in the pen and take the Basin.
- Return to the cabin and zoom into the washstand. Place the Basin under the tap and attach the Valve to the top of the tap. Then click the fitted Valve to turn it: water runs out and fills the Basin.
- In the same view use the Scissors on the roll of cloth to cut a piece and take it. Add the Herbal preparation to the water in the basin, then put the cloth in. Take the Compress.
- Put the Compress on the elder. He tells Egil to fetch the settlement medallion from the casket in the side room; its key is on the windowsill.
The Side Room and the Medallion
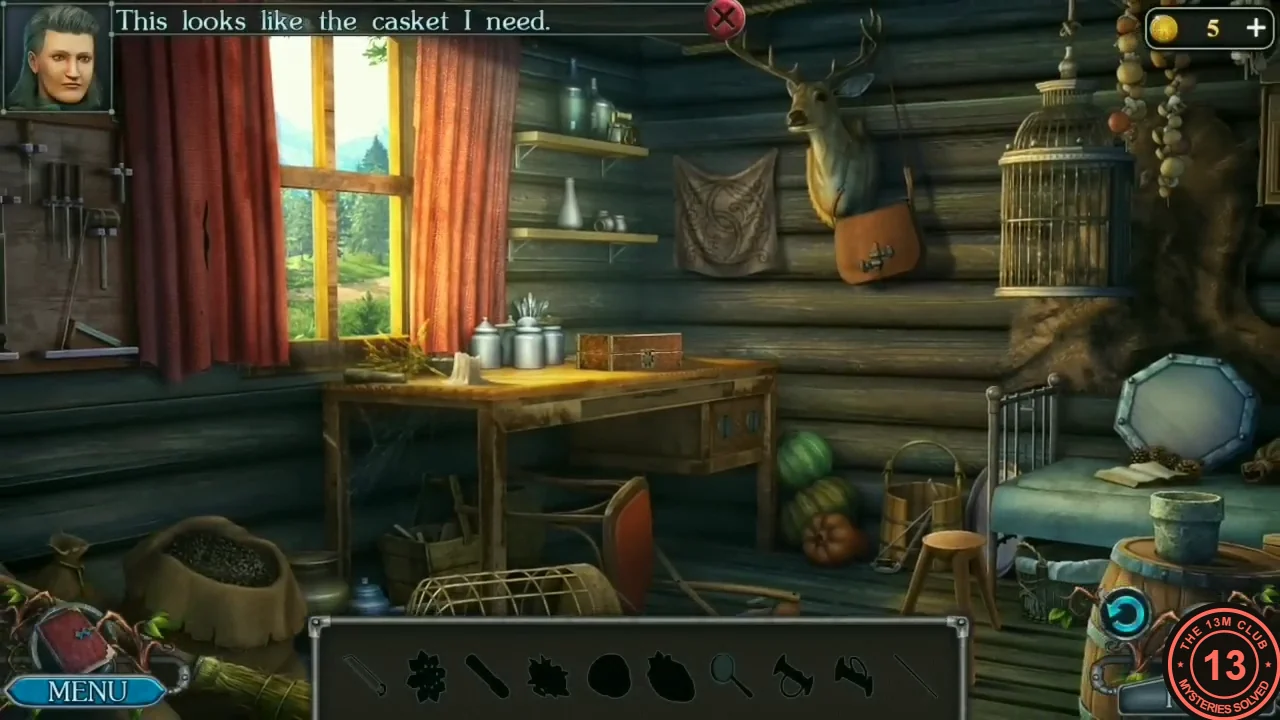
The side room is an interactive item scene: the bar at the bottom shows the silhouettes of the items to collect, and several need extra actions.
- Take the Key from the windowsill by the red curtain and use it on the painted door at the back of the cabin.
- Take the seeds from the open sack on the floor and the pestle from the window table. Put the seeds in the stone mortar on the barrel, crush them with the pestle and take the Oil.
- Zoom into the tool board on the left wall and take the Hacksaw blade hanging on it. Then zoom into the wooden tub beside the chair ('The hacksaw is broken'), fit the blade to the broken hacksaw lying in it and collect the repaired Hacksaw.
- Oil the stiff buckle on the satchel hanging below the deer head, open it and take Drawer handle 1/2. Then cut the metal bed rail with the Hacksaw and take Drawer handle 2/2.
- Zoom into the drawer below the window table: it has two empty handle sockets. Fit both Drawer handles, one in each socket, and open the drawer. Take the magnifying glass and the wax-covered object (Decoration in wax).
- Use the magnifying glass in the sunlight on the window table to light the candle, then hold the wax-covered object over the flame to free the Decorative flower.
- Zoom into the casket and put the Decorative flower in the round recess on the clasp at the front of the casket. Open it and take the Medallion. Click the elder: he tells Egil to take it to the druid in the forest.
The Witch Forest Clearing
After the meeting with Mira and Hjalmor, Mira gives Egil one rune; the portal in the ruined tower needs four. New task: Find a druid.
- Watch the scene in the forest clearing. Mira introduces herself and Hjalmor, the baby's father, and explains that the druid's portal in the ruined tower opens with four runes. She gives Egil her rune; the other runes must be found.
- Zoom into the campfire and take the Ladle. Zoom into the stream on the right, fill the Ladle with water and take the rune lying by the log.
- Pour the Ladle with water on the campfire and take the Key from the ashes.
- Open the padlocked chest on the cart with the Key and take the Torch. Light the Torch in the campfire to get the Burning torch.
The Ruins of the Ancients
Follow the path ahead into the ruined courtyard. The stone door at the back needs all four runes.
- Optional: click the Morphing Object at the far left of the ruins courtyard: a small greenish shell-like object lying on the big tree root, just below the toppled red pillar.
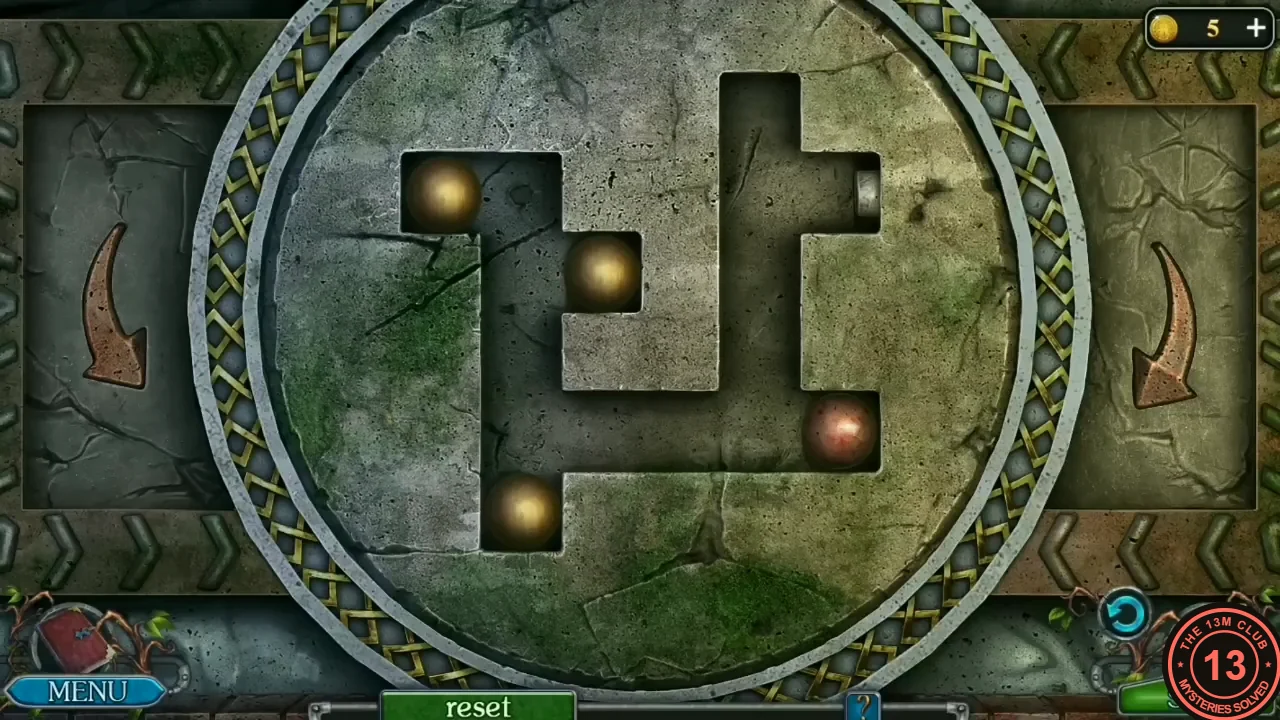
- Click the hole in the courtyard floor. Puzzle: a stone disc with channels holds one copper ball and several gold balls. Tap the curved arrow on the left or right of the disc to turn it a quarter turn; after each turn the balls roll downward along their channels until something stops them. The gold balls block the copper ball, so you can use them to stop it part way. Goal: get the copper ball into the dead end that has a small silver stub at its end. Reset restores the start. Take the rune that appears.
- Zoom into the collapsed doorway at the back of the courtyard, right of centre behind the broken pink slab, and take the Hand saw (Egil says the passage is about to collapse and needs the slabs supported). Then zoom into the small rubble pile at the back centre of the courtyard, just left of the broken pink slab: a long branch is pinned under the stones. Use the Hand saw on the branch and take the first Stick (1/2).
- Optional collectible: click the brown wooden pipe lying in the shadow under the right end of the fallen, cracked pink stone slab, just left of the wooden cabinet on legs.
- Return to the clearing and knock the wooden bar off the fence post with the clay pot using the Hammer to get the second Stick (2/2).
- Back at the collapsed doorway, place both Sticks under the sagging stones and hammer them in, then take the Rope.
- Open the Rope in the inventory (the + sign) and tie it into a Lasso.
- Zoom into the bare tree on top of the wall and throw the Lasso to pull down the Honeycomb Cutter.
- Go back to the stream in the clearing and use the Honeycomb Cutter on the mossy log to get the Dry moss.
- In the ruins zoom into the wooden beehive, put the Dry moss under it and light it with the Burning torch. Take the fourth rune once the smoke drives the bees away.
The Rune Door
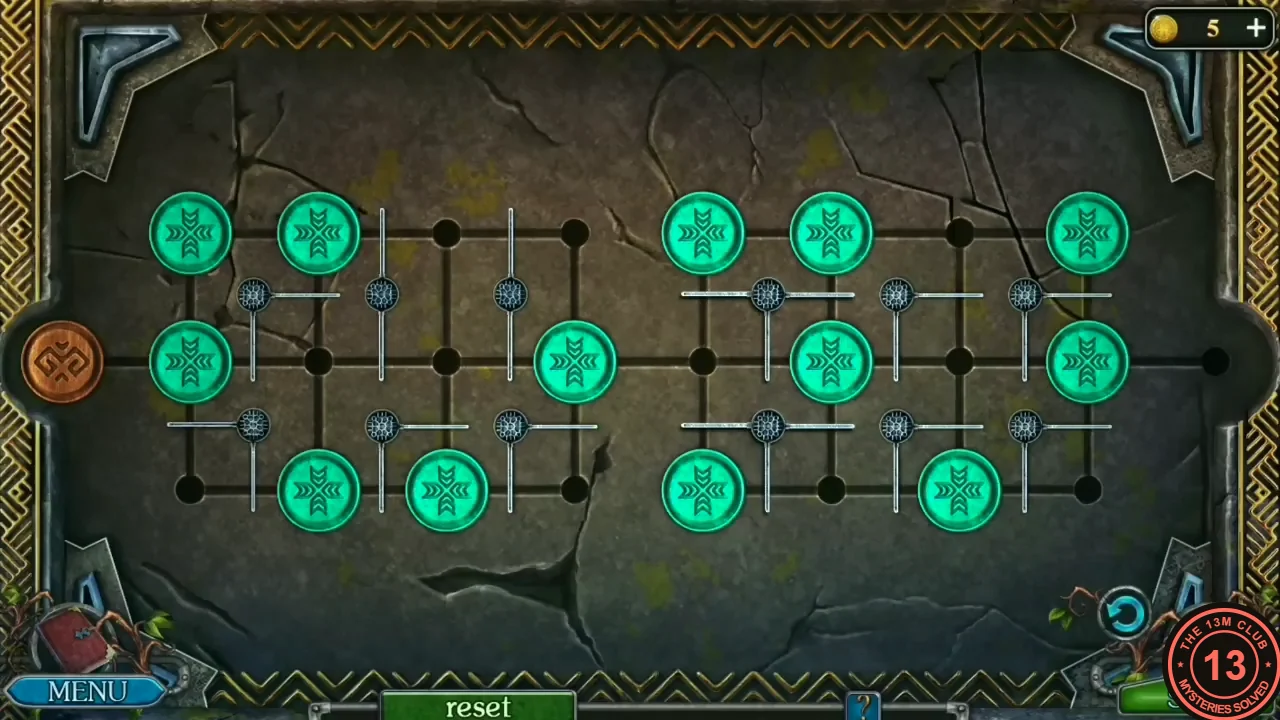
The stone door at the back of the ruins takes the four Runes and opens with a long token-sliding puzzle.
- Place the four Runes in the holes of the stone door at the back. Puzzle (long): the board has three rows of spots (top, middle, bottom) in eight columns, numbered 1-8 from the left. Tap a token to slide it along a line into an empty neighbouring spot. Goal: bring the orange token from the socket at the left end of the middle row to the socket at the right end. Small silver pivots between the lines carry metal bars that lie across some lines. A token can pass through a bar: the bar is pushed and its pivot turns a quarter turn in the direction of travel, so its bars swing onto other lines (and can close a route you just opened). As a bar turns it swings across the corner spot between its old and new position. In our recording the player always emptied that corner spot before pushing a token through the bar (we did not see what happens if it is occupied): at the start the bottom-left token went up before the token above column 2 was pushed down through the bar. Practical approach: get the orange token to the middle row of column 4, then clear the middle row to the right. In our recording the player parked the orange token one spot down (bottom row, column 4) and rolled the middle-row token from column 6 left, spot by spot, to column 3. They then moved the orange token back up and ran it right along the middle row. Before each push through a bar they emptied the corner spot in the top row that the bar would sweep (top row column 7, then column 8). In the end the orange token slides into the right socket. Your starting layout may differ. Finishing it can award the achievement Clever.
- Click the blue portal in the doorway to travel to the druid's home.
The Druid's House
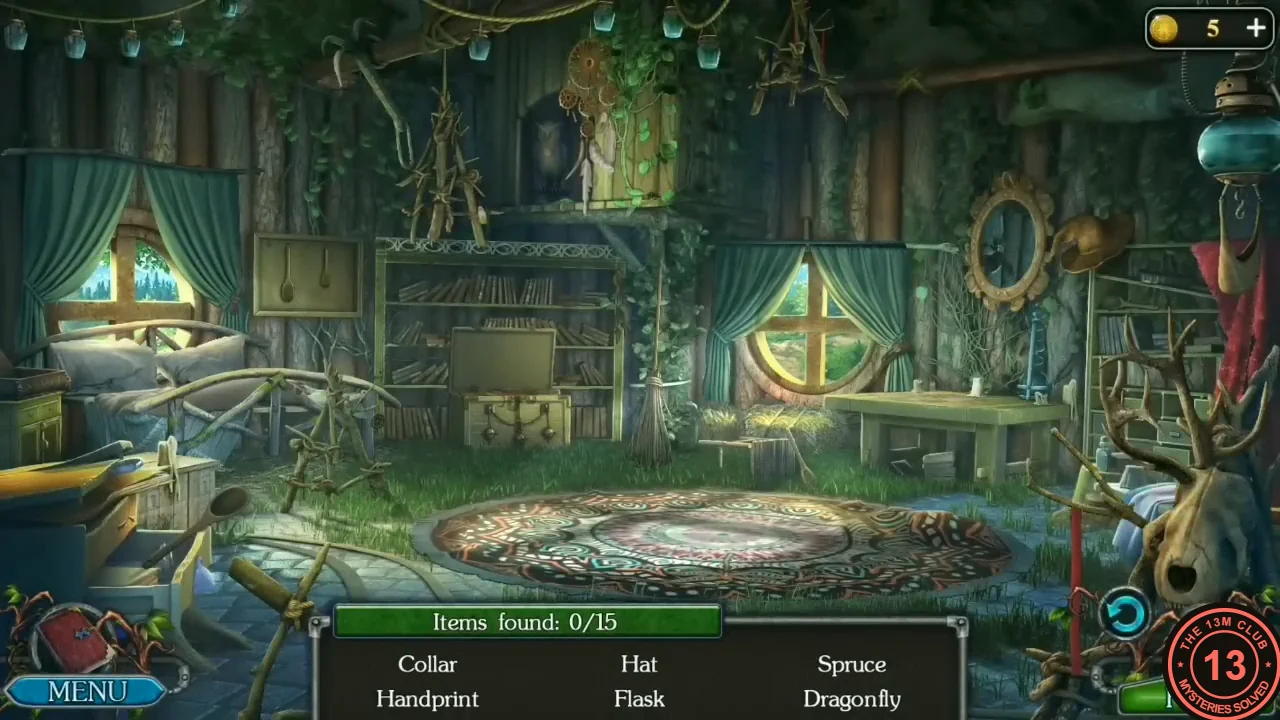
Show the druid the settlement medallion. He sends Egil to the Satyrs' cave in the mountains and asks him to take a ritual knife from his house.
- A horned druid stands at the door of the hut on the left (Egil: 'Might this be the druid? I need to show him the medallion.'). Use the Settlement's medallion on him and watch the conversation. He introduces himself as Svarog, sends Egil to his ancestors' cave in the mountains to find the Satyrs' chronicle, promises to open a portal in the forest and tells Egil to take a ritual knife from his house. New task: Enter the Cave of the Satyrs.
- Enter the round hut on the left. Hidden-object scene (Items found x/15): six names are listed at a time, and each found item is replaced by a new name. Four spots open close-ups: the table under the round window on the right, the rug, the bookcase at the back and the bed on the left. Locations in our playthrough: Handprint: the red handprint on the papers in the table close-up. Collar: the studded band tying back the left curtain in the same close-up. Hat: the brown hat hanging on the wall just right of the round mirror. Dragonfly: in the rug close-up, the dragonfly pattern at the bottom edge of the rug. Flask: in the rug close-up, fold back the upper-right part of the rug; the flask stands in a hollow in the floor. Antlers: the antlers on the big skull in the right foreground. Owl: the pale owl figure in the dark arched niche above the bookcase. Bird skull: in the bookcase close-up, the small skull hanging on the right-hand post. Snake: in the bookcase close-up, the S-shaped snake on the front of the wooden chest on the bottom shelf. Fish: in the bookcase close-up, the fish shape in the blue metal frieze along the top. Spoon set: the spoons hanging on the small wooden board on the left wall. Rolling pin: standing upright against the wall just above the curtain rod of the round window. Spruce: in the bed close-up, the little spruce tree seen through the window behind the bed. Beetles set (two beetles): in the bed close-up, pull back the blanket to find a beetle on the blue cloth on the right. Lift the right pillow to find the second beetle on the mattress. Grappling hook: it hangs too high under the ceiling at the upper left, so the hero says 'The grappling hook is too high. I need something to move it from there.' Tap the broom leaning at the right end of the bookcase, and the broom knocks the hook down. Finishing the list gives the Ritual knife.
- Back outside, cut open the tied sack near the hut entrance with the Ritual knife and take the Corn.
- Put the Corn in the wooden bird feeder by the pond. A bird comes to eat and drops a Detail onto the stone path in front of the hut (the bird stays on the feeder). Click the Detail on the path to take it.
The Druid's Ring Chest
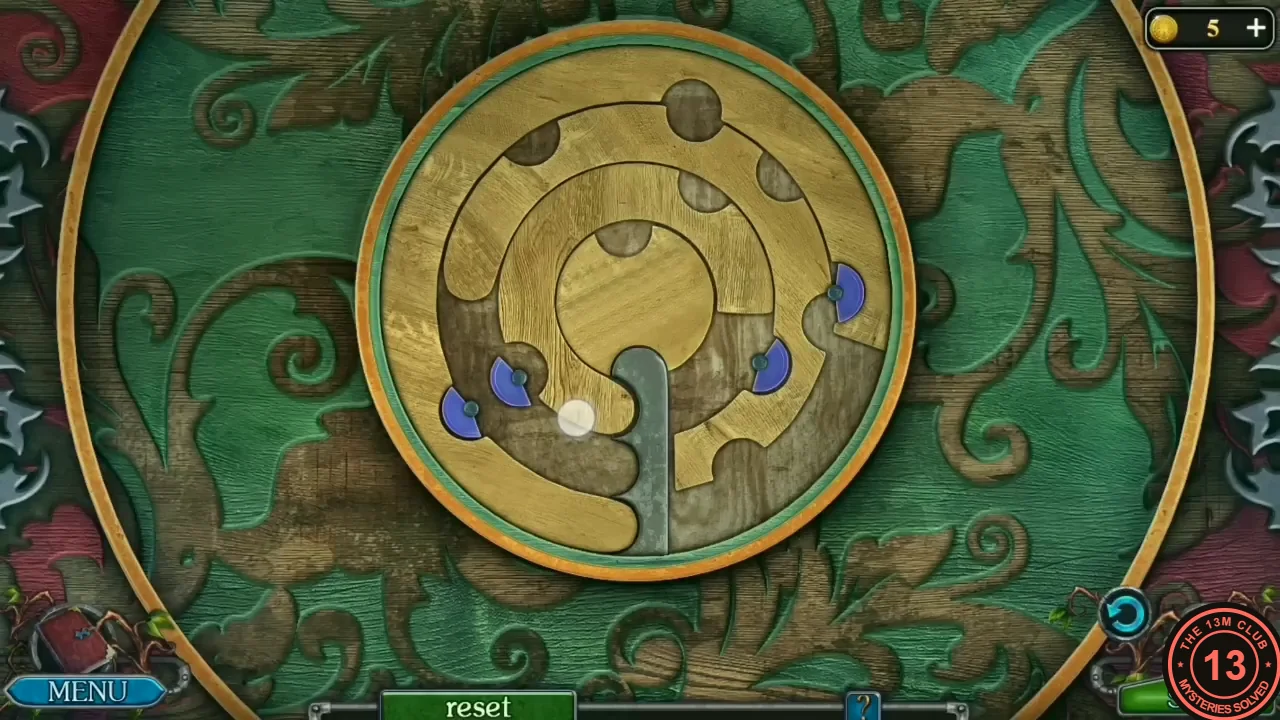
The red chest beside the druid's hut opens with the Detail and a puzzle of concentric rings.
- Zoom into the red chest by the hut and insert the Detail in the centre of the lid. Puzzle: three broken wooden rings (outer, middle and inner) surround a centre disc. Tap a ring to turn it. A grey locking bar runs from the centre disc straight down to the bottom edge, with three round bumps on its left side. Blue half-discs sit on fixed pins between the rings and swivel as the rings turn past them. Aim to clear the dark area to the left of the lower half of the grey bar (where its bumps point): in our recording the bar slid down out of the centre and the lock opened right after the last ring was turned out of that area. We did not test other end positions. In the solved position in our recording, all three rings start at the right-hand side of the bar. They wrap round the right side and over the top, and their open ends finish on the left at about 8 to 9 o'clock. (The white dot that appears in recordings of this puzzle is the touch indicator, not a puzzle piece.) Solving it can award the achievement Lightning.
- Open the chest and take the Key; open the sack inside and take the Statuette.
- Zoom into the door of the yellow greenhouse on the right and unlock its leaf-shaped lock with the Key, then go in. Take the Sprayer lying on the path in the foreground (lower left) and pick the purple Gralang fruit hanging among the plants on the right.
The Mountain Camp and the Four Tokens
Go back to the forest clearing and step through the druid's blue portal on the path to reach the mountains. The stepping stones across the pond need four tokens.
- Return to the forest clearing (the path with the campfire and the cart). The druid speaks a spell ('Sum gurani... Sumtumal ani senth on...'), and a blue portal flashes at the far end of the path where he stands. He says 'The portal is open. Good luck. Be respectful to the legacy of my ancestors.' Tap the far end of the path to go through the portal to the mountain camp.
- The tent's entrance is laced shut. Select the Ritual knife in your inventory and use it on the laced front of the tent to cut it open (the knife stays in your inventory). Search the opened tent: read the note lying on the rug (it is the clue for the satyr figurines later) and take the Spear.
- Zoom into the rock with blue crystals and strike the large crystal with the Hammer. Take the Token (1/4) and the crystal.
- Zoom into the wooden wheel on poles: one tambourine with an arrow is missing.
- Optional collectible: in the full mountain-camp view (no zoom needed), click the small pale straw doll lying in the grass just below the right end of the large boulder, below the left edge of the round door in the rock. Zooming into the door shows it cannot be opened yet.
- Walk forward to the pond (Egil: 'This should be the right cave. But how can I cross the river?'). Optional: click the Morphing Object in the bottom-left corner: a small reddish object in the grass at the foot of the big tree trunk with the emblem.
- Zoom into the hollow log in the water and throw in the Gralang to lure the predatory fish away. Take the Token (2/4).
- Back at the mountain camp, look at the top of the tent: a small round Token is perched on the tip of the long pole that sticks up out of the tent at the upper left. Throw the Spear at it to knock it down, and take the Token (3/4). The Spear stays in your inventory.
- Travel back to the druid's yard. Optional: click the round window with the wooden X on the left of the hut (left of the door): it is a Morphing Object. After the Morphing Object popup the window shows a purple tambourine skin behind the cross; click the window again to take the Tambourine. The window is left as an empty hole.
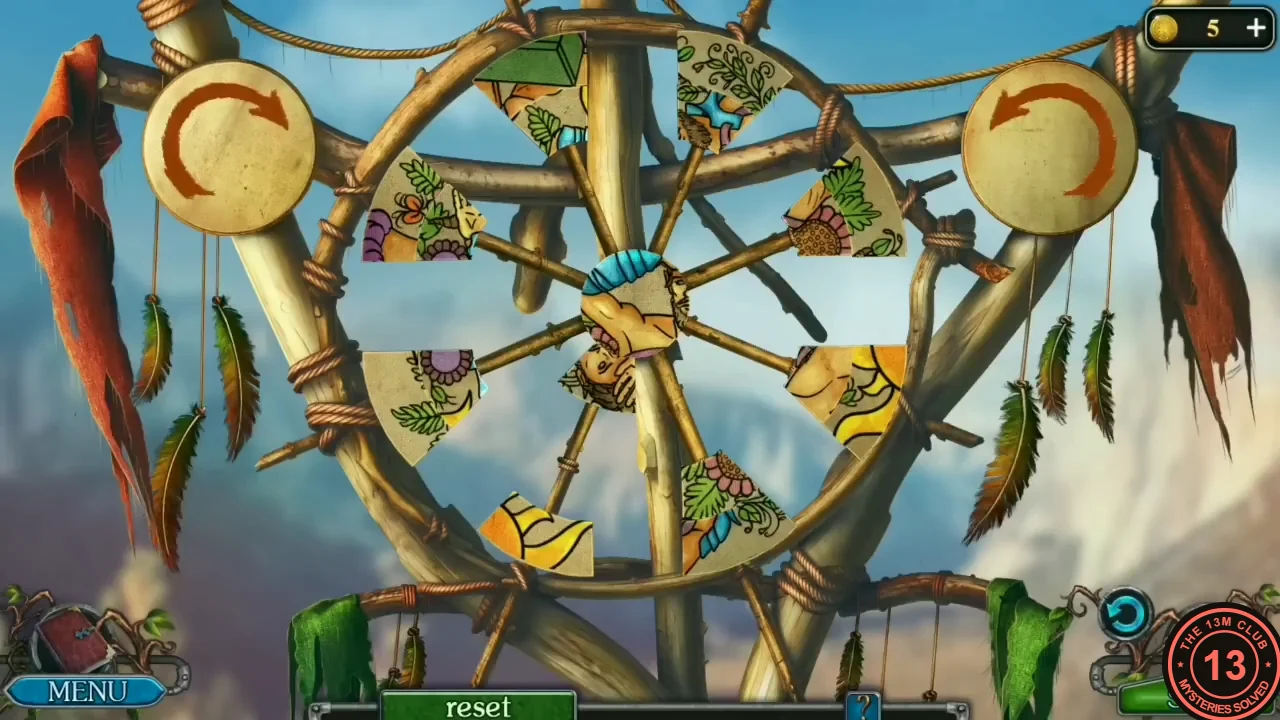
- Return to the wheel at the mountain camp ('One tambourine with an arrow is missing.') and put the Tambourine in the empty upper-right slot. Puzzle: picture pieces sit around the rim of the wheel, and the round picture is built up on the hub in the centre. Tap the left or right tambourine arrow button to turn the centre (the picture and its spokes). Tap a rim piece to slide it along the spoke in front of it into the centre; turn the centre first so the piece joins the picture in the right place. Continue until the round picture of a man among flowers is complete and the rim is empty. Take the Token (4/4) from the opened centre.
The Pond Stone: Fire, Water and Leaf
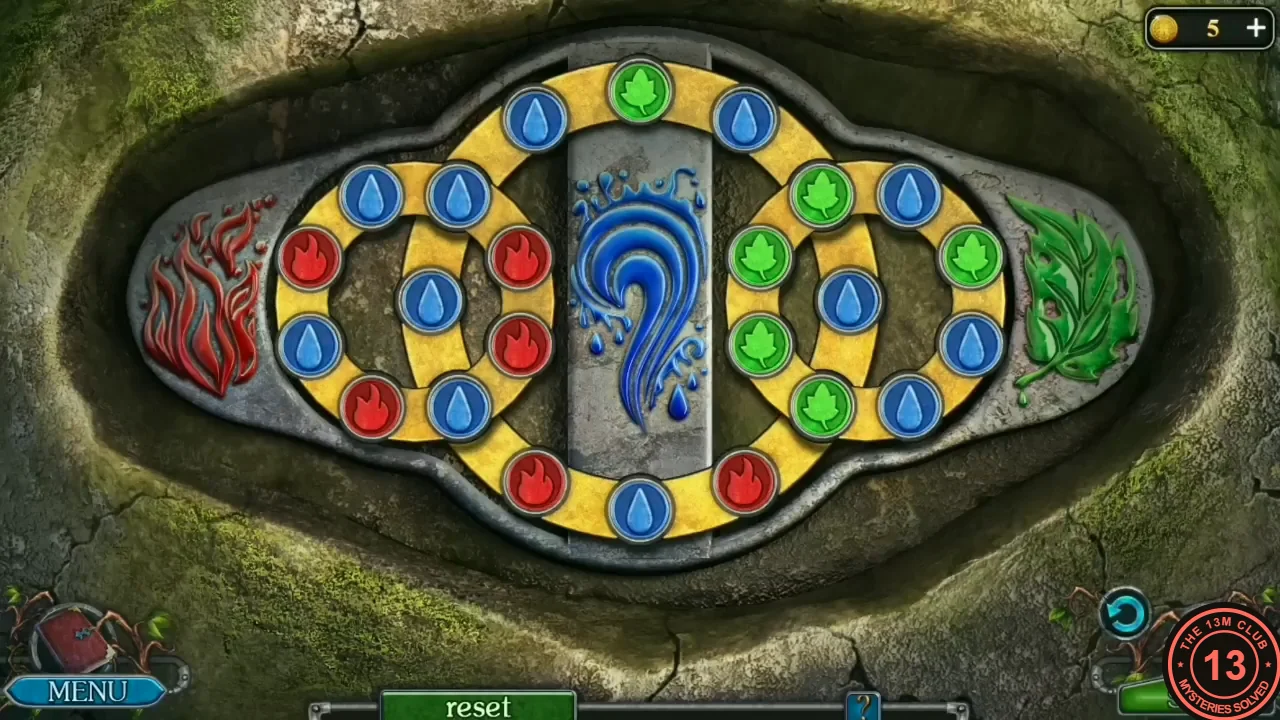
The carved stone at the pond takes the four Tokens and opens with a ring puzzle.
- At the pond, zoom into the stone with the fire, water and leaf carvings and place the four Tokens. Puzzle: three yellow rings carry coloured drops (red fire, blue water, green leaf). The middle ring crosses the left and right rings, so the drops on those crossing spots belong to two rings. Tap a drop on a ring to turn that whole ring one step (the ring lights up while it turns). Turn the rings until all red drops are on the left ring by the fire carving, all green drops on the right ring by the leaf carving, and the blue drops fill the middle ring. Work from the colours you see on your own stone; the goal is the same whatever the number of turns.
- Cross the stepping stones. Zoom into the base of the big tree across the pond, just left of the dirt mound: its roots have grown around a casket. Cut the roots with the Ritual knife and take the Casket. (The dirt mound itself only says someone buried something there recently; it is used later.) Walk on to the cave entrance (Egil: 'This is the cave I need. How can I get to the other side?'), zoom into the leaning stone column at the right, and use the Spear on its base to lever it over so it bridges the water.