The Shipwreck Shore and the Phoenix Chest
Chapter 6 (Bonus) The Captain of the Ship is the last entry on page 2 of the Chapter Selection screen; its PLAY button becomes active once Chapter 5 is finished (100%). You play the bearded ship captain. The witch queen pays him 50 gold to bring her a radictis, one of the little green creatures hiding on Eltay Island. Three counters run through this chapter: Boards (x/6) for a bridge, Blue stones (x/4) for the phoenix chest, and the optional ship models, which continue the set started in Chapter 3. Places are reached through the travel map, which has two tabs: Jungle and Lake.
- Press PLAY next to Chapter 6 (Bonus) The Captain of the Ship. Watch the cutscene: a crowned woman on a throne tells the captain to find someone on Eltay Island. He thought it was uninhabited, but her scouts report that a tribe of radictis, the little green creatures, is hiding there. She thinks they may be different from the useless ones found in her forests; the captain replies that he has heard stories that some radictis can even do magic, and she offers a reward: 'If you bring me one, there's 50 Gold in it for you.' 'A few days later, on the shore of Eltay Island', the captain stands among the wreckage of an old ship on the beach.
- On the wrecked deck, take the loose board (Boards 1/6). Zoom into the water by the big shell: take the teal stone lying next to the pink coral. The game notes that Coastal Corals grow here; you will need one later. New task: Find Radictis. Use the teal stone on the old crate on the deck to open it, and take the Machete and Blue stone (1/4).
- Zoom into the ornate chest on the sand at the back of the shore. Its phoenix lock needs four blue stones, so come back once you have all four. Use the Machete on the thorny branches blocking the path to open the way into the jungle.
The Jungle Path and the Bridge Crate
The jungle path leads to a broken bridge. A crate on the bridge holds the tools you need to repair it.
- On the jungle path, tap the hollow fallen log at the lower left, then zoom in and take Blue stone (2/4). Take the Protective suit, the yellow hat and clothes hanging on the post at the right. Zoom into the dark tunnel behind the bushes in the middle and take the stick wrapped in cloth from the close-up. Pick up two boards (Boards 3/6): the plank leaning among the yellow flowers on the left side of the path, and the plank lying flat on the ground farther up the path on the left, in front of a small earth mound. Zoom into the beehive hanging in the tree at the top left and use the Machete to cut it down. It falls into the bushes on the left side of the path. Zoom into the fallen hive there, put on the Protective suit, open the hive and take Blue stone (3/4). The tunnel is too dark to enter for now.
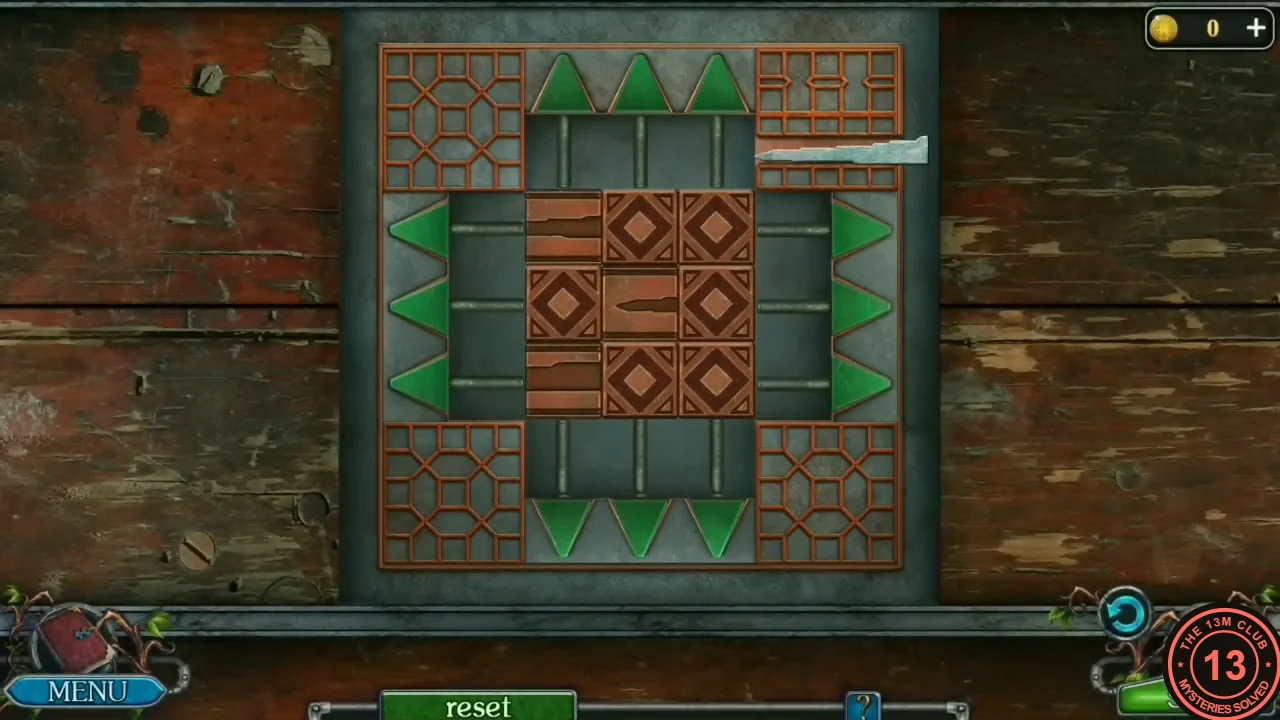
- Zoom into the locked crate on the bridge to start a sliding-tile puzzle. Nine tiles sit inside a frame with an empty channel on each side. Three of the tiles have a groove cut across them, and a metal blade sits in a slot at the top right. Each green arrow shifts its whole row or column one space in the arrow's direction. Goal: line up the three grooved tiles side by side in the top channel, level with the blade, so the groove runs straight to it. What worked for us: first get the three grooved tiles into one row. Use that row's side arrows to centre it under the three top arrows. Make sure no other tile sits above a grooved tile in its column. Then press each of the three top arrows once so each column moves up one space. When the groove is complete, the blade slides in and the crate opens. A reset button sits under the board (not used in our recording). Take the Nails and the Hammer from the open crate.
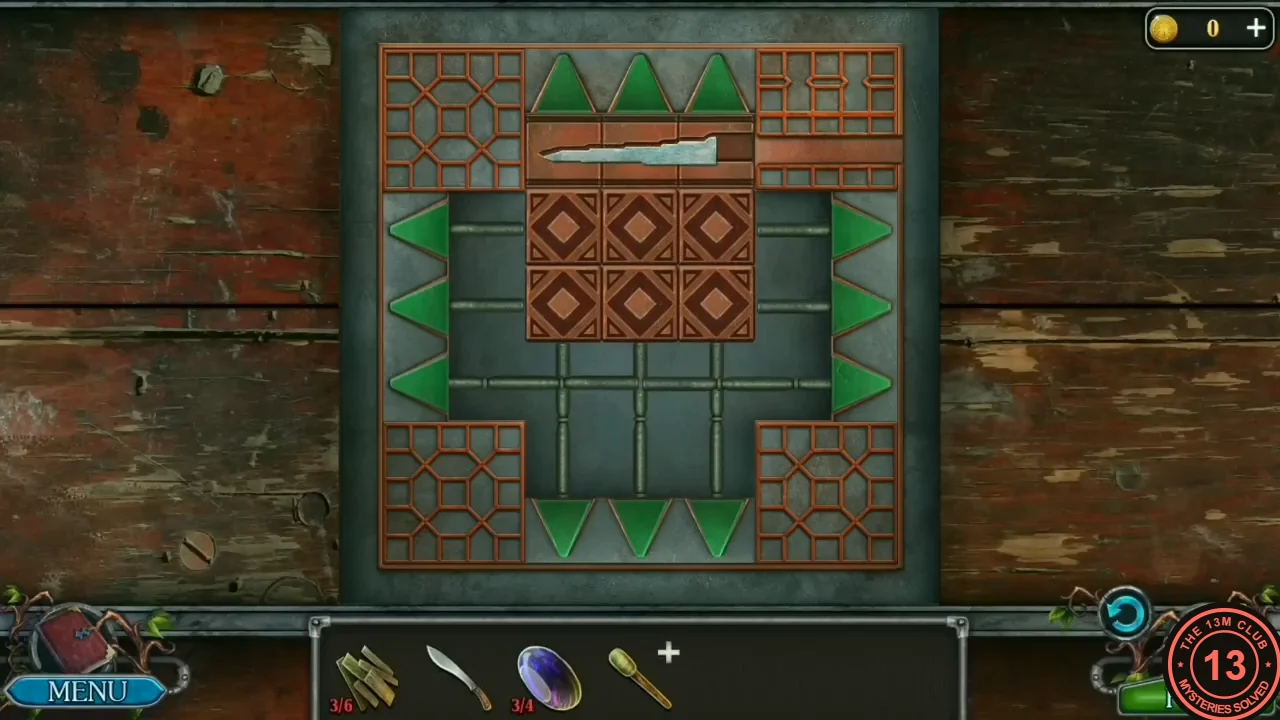
Solved: the grooved tiles sit in the top channel and the blade has slid into the groove. - Collect the remaining boards. On the shipwreck deck, zoom into the loose plank on the deck in front of the cannon and pry it up with the claw of the Hammer (Boards 4/6). Zoom into the boarded cabin door on the left ('Nailed down tight') and pry off the slanted board with the Hammer (Boards 5/6). The cabin itself stays locked. Optional: click the little ship model on the rocks in the water, beyond the broken railing (Collection items 10/22). Back on the jungle path, you can also click the little ship model half-hidden at the foot of the bushes on the left side of the path (11/22). Take the last board, the plank leaning diagonally against the low wooden rail at the right of the path (Boards 6/6).
- At the bridge, use the boards, the Nails and the Hammer to repair it, then cross to the totem clearing.
The Totem Clearing and the Triangle Chest
The totem clearing has a campfire, a carved totem with an empty slot and a grated cave. Get the fourth blue stone here, then open the phoenix chest on the shore.
- In the totem clearing, zoom into the campfire on the left and take the Oil bottle standing by the stones. Zoom into the carved totem on the right: it has an empty slot (you'll fill it later). Take the Brushwood (1/4), the twigs lying on the path just in front of the mossy stone, below the carved stone block. Optional: click the little ship model on the right end of the carved stone block (Collection items 12/22). Zoom into the boulder at the back left: take the Stick lying diagonally on the ground at the left of the close-up ('there is a passage behind this stone. How can I move this boulder?'). The grate at the back has no way to open it. The campfire needs dry branches ('I need to add a few dry branches'). Tap the stick wrapped in cloth in the inventory (it is marked with a +) to look at it closely, then use the Oil on its cloth end to make an oiled torch ('It remains to fire it up'). In the boulder close-up, take Blue stone (4/4) from beside the small grey rock at the bottom.
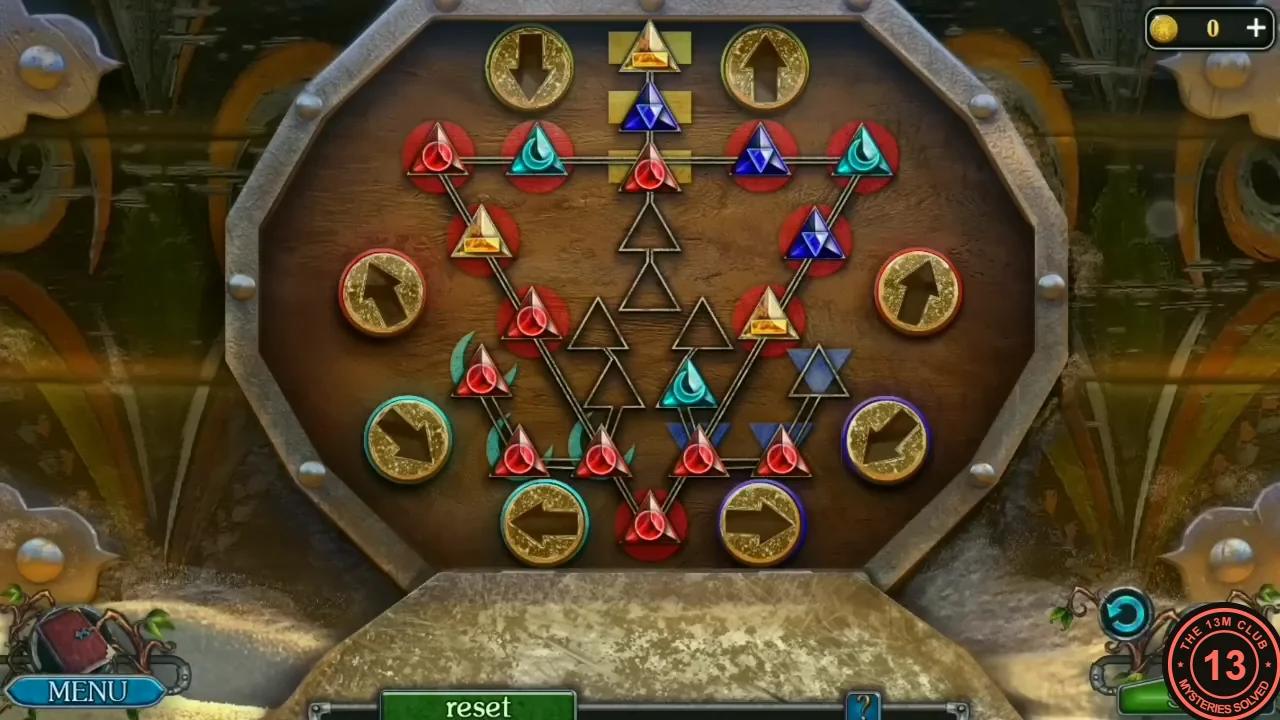
- Go back to the shore and zoom into the phoenix chest. Put the four blue stones into it (they light up and the lid opens to a token puzzle). The board is a large upside-down triangle of red circles, and coloured tokens sit on it. The tokens can move along four loops. The outer triangle is the red loop. It is turned by the two red-rimmed arrows at the left and right sides: the left arrow moves the tokens clockwise and the right arrow anticlockwise. The yellow loop is the vertical line in the top centre with yellow squares, and the two arrows at the top move it. The small triangle at the lower left is the teal loop, moved by the two teal-rimmed arrows next to it. The small triangle at the lower right is the blue loop, moved by the two purple-rimmed arrows. The loops share crossing points, so a token can be carried from one loop to another. Goal: every token must sit on a marker of its own colour. The three yellow tokens must finish in the TOP three positions of the yellow top-centre column (the yellow squares at the very top); in our recording the chest did not open while they sat lower down the column, only once one more upward move brought them to the top three, red tokens on the red circles of the outer triangle, teal tokens on the teal marks of the lower-left triangle and blue tokens on the blue marks of the lower-right triangle. How to swap tokens: turn one loop until the token you want to move sits on a crossing point. Then turn the other loop to carry the token away. Fill one colour at a time. A reset button sits under the board; our recording did not use it. The start and finished layouts are in the images. Take the Matches and the drawing of weapons from the chest ('What could this drawing mean?'). Your tokens may start in different places; the images are only an example.
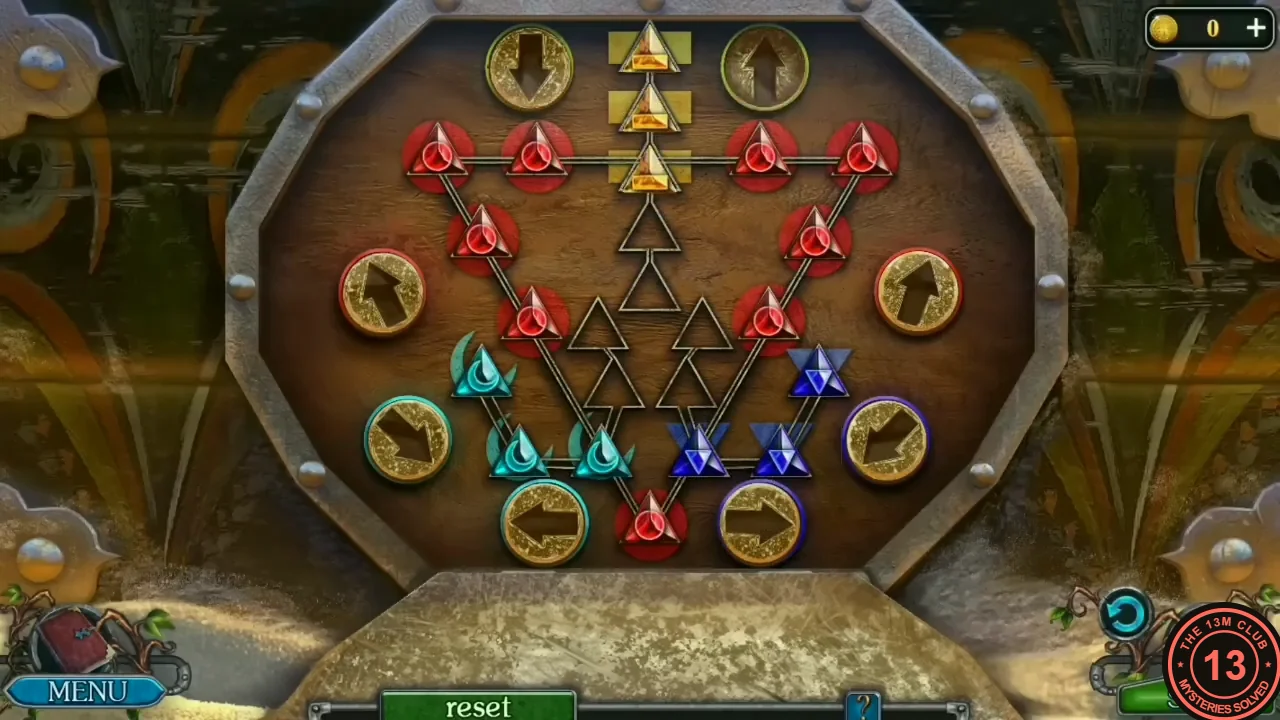
Accepted layout: the three yellow tokens in the top three positions of the yellow column, red on the outer triangle, teal lower left, blue lower right. The board lights up a moment later. - Light the oiled torch with the Matches to get a Burning torch. Put it in the bracket in the dark jungle tunnel and go through to the ruins.
The Ruins, the Radictis Dwelling and the Coloured Discs
The ruins hold a sarcophagus, a stone knight statue and a carved gate. Behind them is the little radictis's dwelling.
- In the ruins, optionally click the Morphing Object near the sarcophagus. Take the shovel blade from the door. Combine the Stick, the shovel blade and the Machete to make a Shovel. Peek through the door of the radictis dwelling to find a radictis (Task complete: Find Radictis).
- Back in the totem clearing, zoom into the boulder at the back left and use the Shovel on it: the shovel is pushed under the boulder, which rolls aside from a dark passage. Take the Disc with a pattern (1/2) lying on the ground in front of the passage. Go round to the back of the radictis dwelling. Zoom into the dark corner at the lower left, where an old wooden chest stands, and take the Brushwood (2/4) lying in the shadow just right of the chest; the chest itself was not opened. Zoom into the mossy patch among the red flowers at the front right and cut the moss away with the Machete to get the second Disc with a pattern (2/2). Zoom into the small window high on the right and take the red Stone (1/2) lying on its sill. Tap the window to peek through it: 'It's the same creature! I must've gone around its dwelling to the other side.'
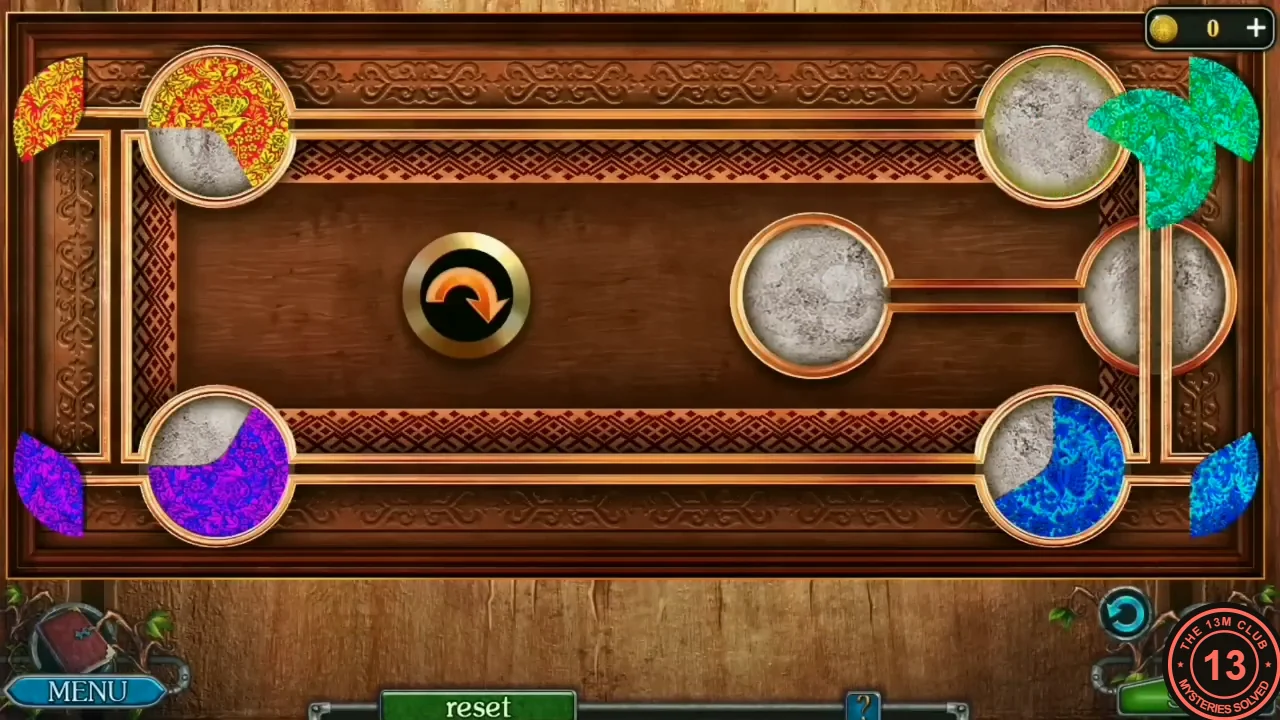
- In the totem clearing, zoom into the totem and put both Discs with a pattern into its two round slots. A puzzle board opens. Six circles are joined by lines: four in the corners and one in the middle of the right side, which are all on the outer frame, and one more in the centre that is connected only to the right-side circle. Four discs are partly filled with colour: orange, green, purple and blue. Each disc has a grey gap where one piece is missing. The missing pieces wait as leaf-shaped pieces outside the corners: orange at the top left, green at the top right, purple at the bottom left and blue at the bottom right. Controls: tap a disc to select it (it lights up), then tap an empty circle; the disc slides there along the lines, passing through empty circles on the way. Moving never turns a disc. The round arrow button left of the centre turns only the disc standing in the centre circle a step clockwise with each tap. A piece joins its disc when the disc stands in that piece's corner with its gap facing the piece, and a whole disc stays whole wherever you move it later. So for each colour: bring the disc to the centre, tap the arrow until the gap faces the direction of its leaf piece (up-right for green, down-right for blue, up-left for orange, down-left for purple), then move it back to its corner. In our solve: green went from the top right to the centre, was turned and went back to the top right, where its piece joined. Blue did the same from the bottom right. For orange, first clear a way: green to the right-middle circle, orange from the top left to the top right, purple from the bottom left to the top left, blue from the bottom right to the bottom left, green to the bottom right. Then orange to the centre, turn it, back to the top right, and reverse the shuffle (green to the right-middle, blue to the bottom right, purple to the bottom left) so orange can go to the top left, where it becomes whole. Purple works the same way: shuffle the other discs one circle round the frame until purple can reach the centre, turn it, then shuffle back until purple reaches the bottom left. When all four discs are whole the board sparkles and the puzzle is solved; the whole discs don't have to be in their corners at the end. Press Reset to start again if needed. Your gaps may start facing other ways; the start and finished layouts in the images are one example. Take Stone (2/2).
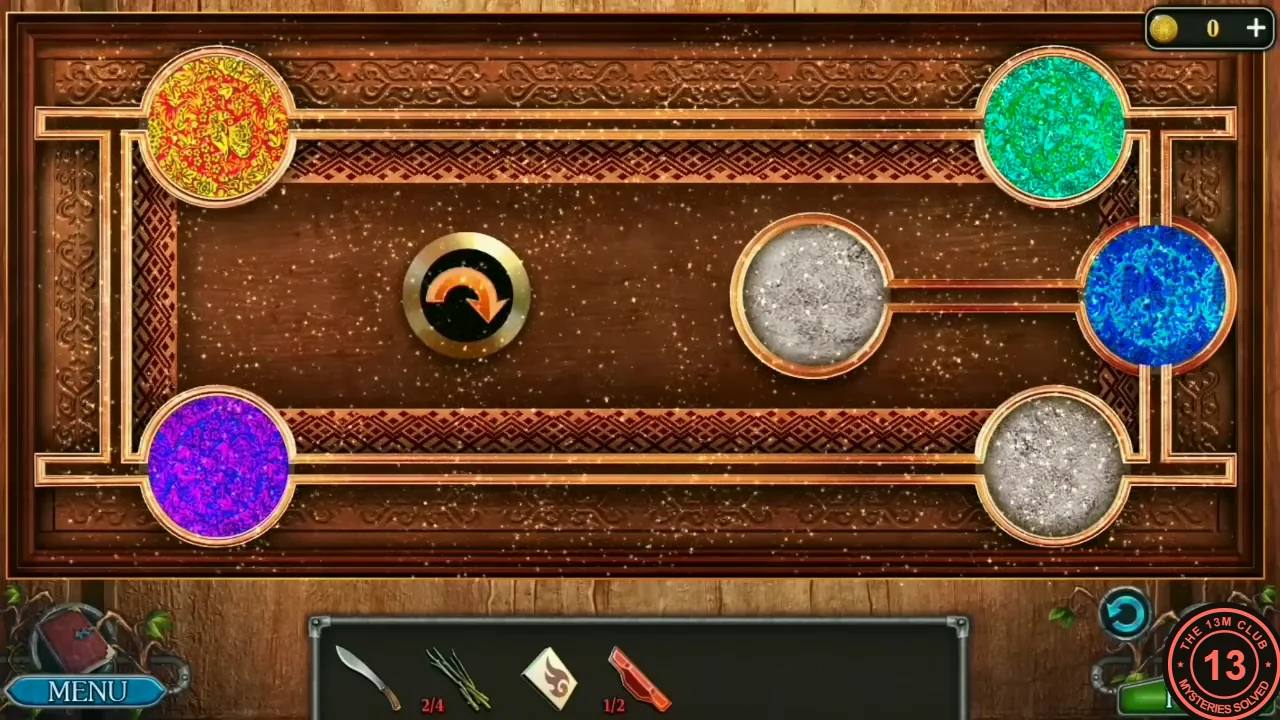
Solved: orange, green, blue and purple discs complete.
The Sarcophagus and the Smoke Bomb
The two stones open the sarcophagus. What's inside lets you catch the radictis, and it shows you the way to the gold.
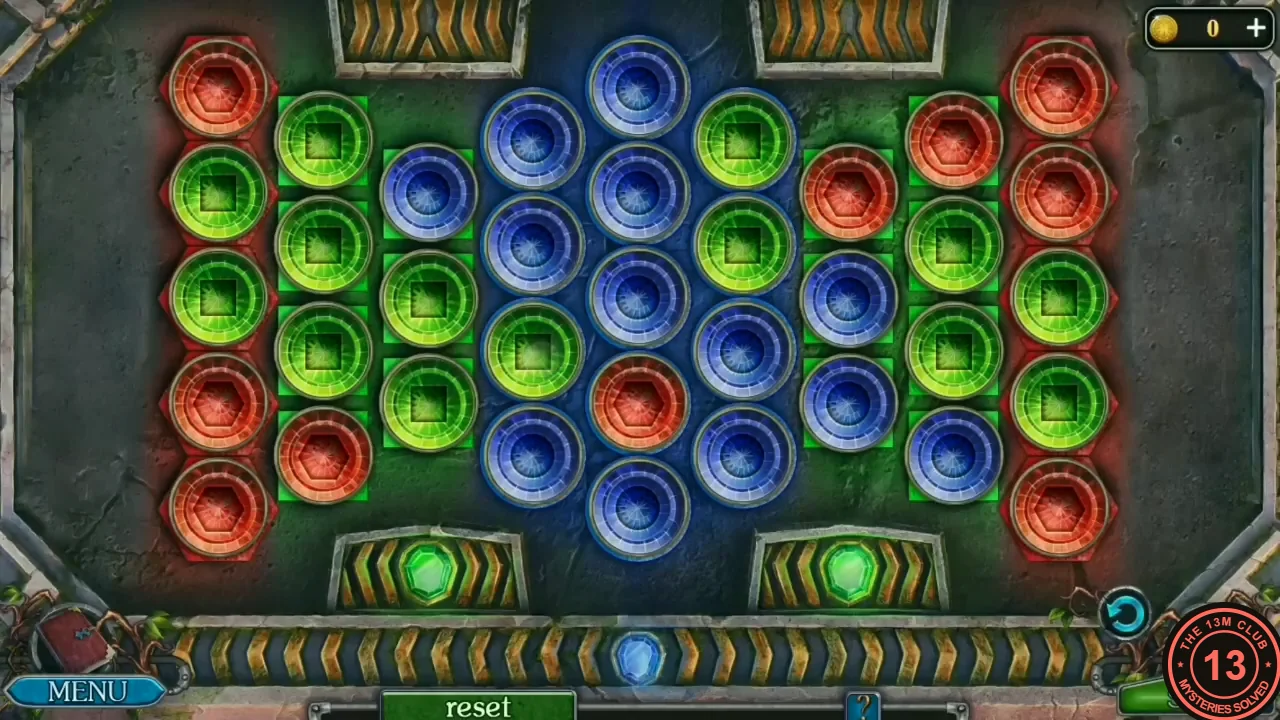
- In the ruins, zoom into the sarcophagus: put the two Stones into the two slots on its lid ('It won't open' before that). A gem board opens. The background has coloured bands: red at the two outer edges, green next to them, and blue in the middle. Gems sit in a honeycomb pattern. Tap a gem: the six gems around it light up and turn one step around it, and the tapped gem stays put. Use these turns to carry each gem into the band of its own colour. The red gems go in the outer columns, the green gems in the next columns in, and the blue gems in the centre. It is easiest to work from the outside in. Fill the red edge columns first, then the green columns, and the blue centre will mostly sort itself. A reset button sits under the board; it was not used in our recording. When every gem matches its band, the board flashes and the lid opens. Inside the sarcophagus, take the Pattern part (1/2) and the Smoke bomb ('It's a smoke bomb! I can smoke the little green guy out'). Your gems may start in different places; the start and solved boards in the images are one example.
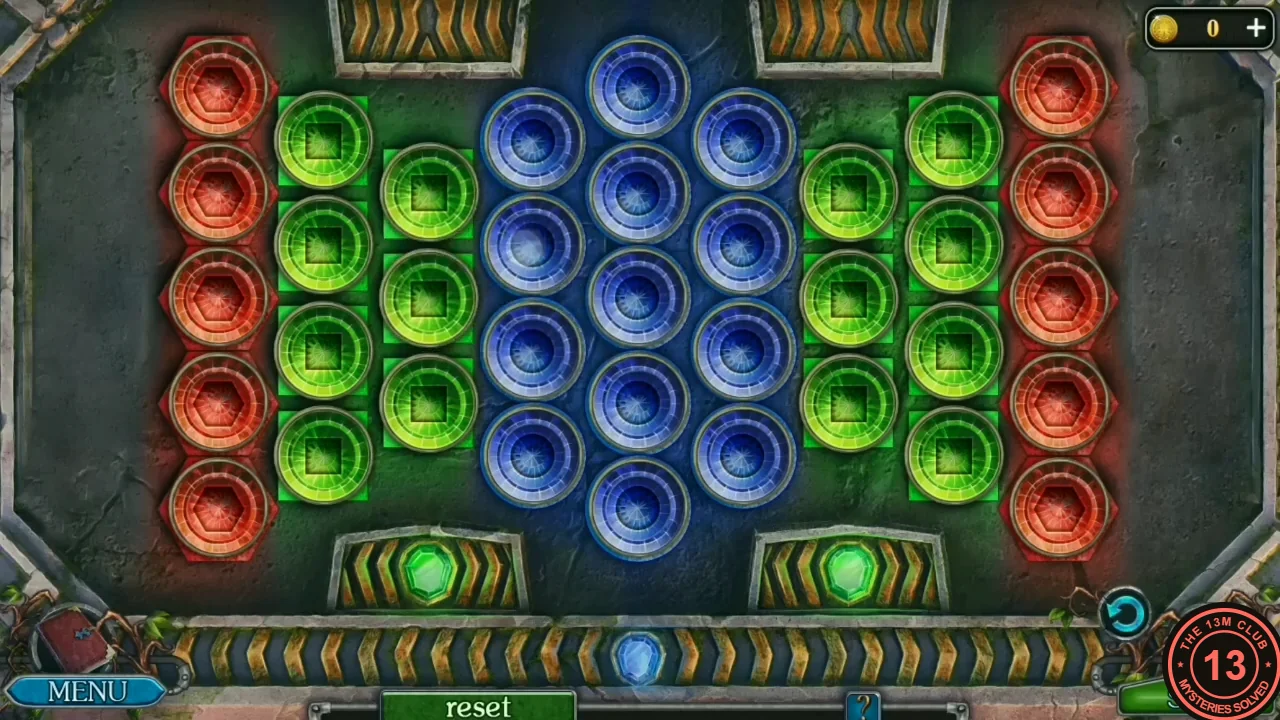
Accepted: red outside, green next, blue in the centre. - Zoom into the window behind the radictis dwelling and place the Smoke bomb inside through it. Then use the Matches on the placed bomb to light its fuse. The captain says he needs to run to the entrance and catch the radictis before it realizes what happened. Go back round to the front: in our recording through the totem clearing and the jungle path to the ruins in front of the dwelling. There, click the radictis standing at the left of the ruins to start the cutscene: the radictis runs out and is caught. It offers a deal: it gives you one of the two keys to the gate and says there's a fortune behind it. Take Pattern part (2/2). New task: Find gold.
The Wolf Gate
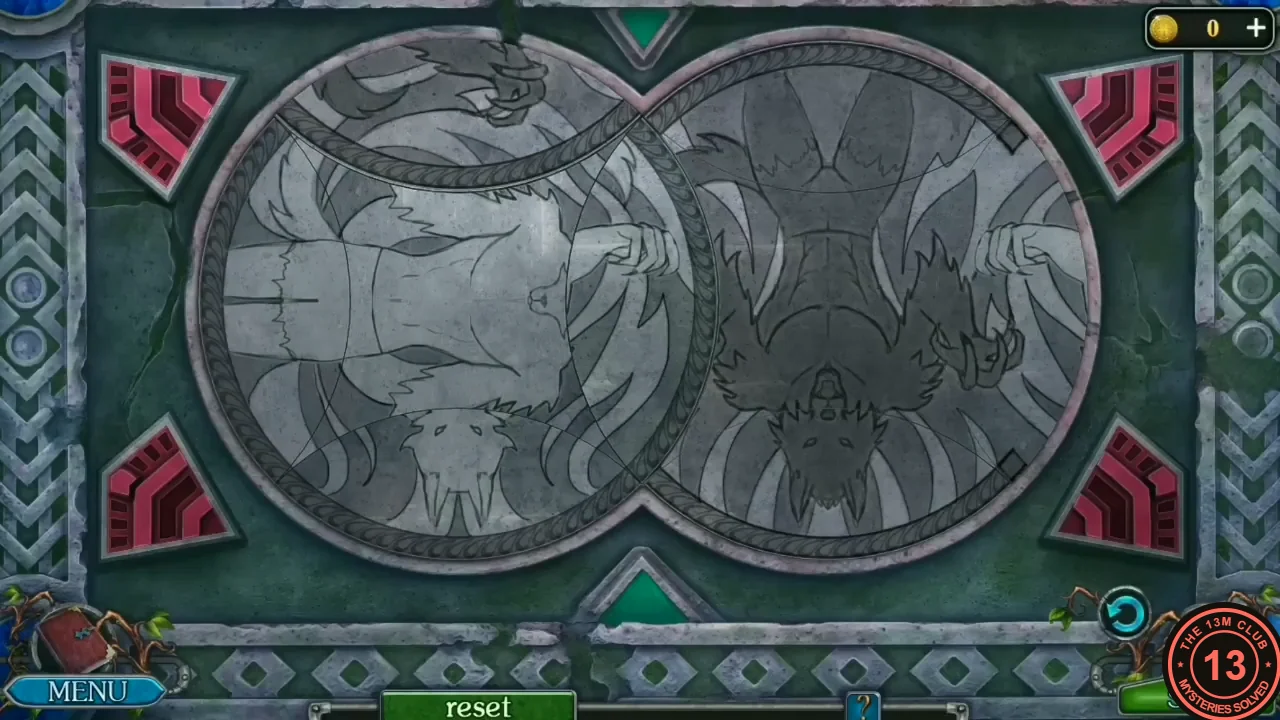
Both pattern parts go into the carved gate in the ruins, which opens with a disc-rotation puzzle.
- Put both pattern parts into the oval slot on the carved gate in the ruins (new task: Find gold). Puzzle: two overlapping stone discs, a wolf on the left and a werewolf on the right. The four red arrow plates in the corners turn the discs a quarter turn each tap. The two plates on the left side turn the left disc, and the two on the right side turn the right disc, one clockwise and one anticlockwise. The lens-shaped piece where the discs overlap belongs to whichever disc you turn. That is how picture pieces swap between the two discs. Turn the discs until both pictures are whole and upright: the light-grey wolf standing upright in the left disc and the dark werewolf standing upright in the right disc. Tip: four quarter turns bring a disc back to where it started, so you can undo a turn by tapping the opposite arrow on the same side. A reset button sits under the board; it was not used in our recording. The finished state is in the image. The gate opens on the way to the lake. Your pieces may start in different positions; the image shows the finished state.
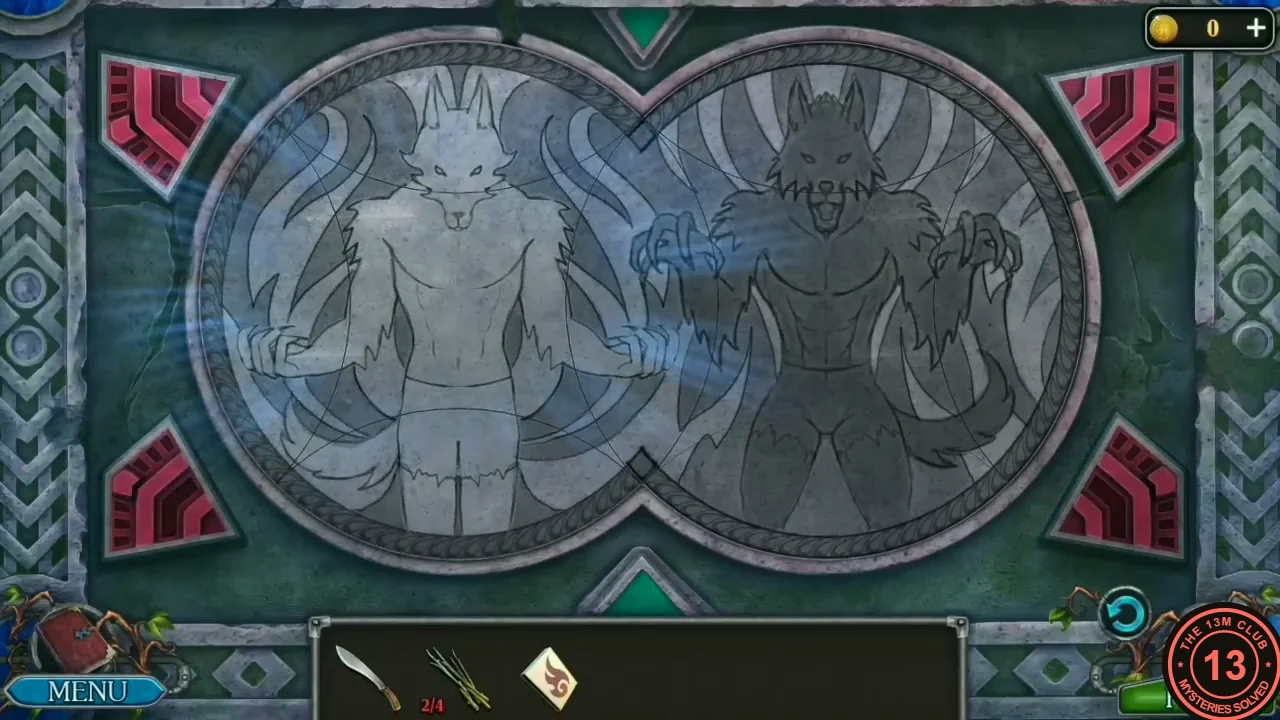
The finished state.