The Lake, the Campfire and the Burning-Tree Fruit
The radictis said the gold lies underwater. Collect the winch parts, a fire, and the fruit of the burning tree.
- At the lake shore ('here is the lake that the radictis was talking about'), zoom into the broken stone slab in the front right. Tap the flat stone slabs and the loose rocks lying over the long spear to clear them away; the pieces fall onto the ground in front. Take the Spear (a long pole with a yellow tip). Then take the Brushwood (3/4), the twig lying among the fallen pieces in front of the slab. Zoom into the small wrecked boat in the middle of the beach. Take the Key lying on the folded paper, look at the sketch on that paper (a winch on a pier lowering something underwater), and take Gears (1/3), the cogwheel at the lower left of the boat close-up. Zoom into the pond under the purple tree on the left and take the Pot with water, the metal pot lying in the water. The red swamper flower and blue fruit also grow there ('This is a rare red swamper flower'). The round grate under the water by the pier can't be reached yet ('...not particularly eager to swim and even more leery to dive'). The winch on the pier needs repair ('I will need to repair the winch mechanism').
- Use the travel map to go to the back of the radictis dwelling. Open its chest with the Key to get the Lever and Gears (2/3). The barrel there is corked and you need a tool to open it.
- In the totem clearing, zoom into the campfire ('I need to add a few dry branches') and hang the Pot with water on the spit over it. Use the travel map to go to the lake. Zoom into the broken winch on the pier and take Brushwood (4/4), the twigs lying on the boards below it. Return to the totem clearing, zoom into the campfire, put the Brushwood into it and light it with the Matches; the pot of water starts to heat.
- Go back to the pond under the purple tree at the lake and cut the blue fruit off with the Machete to get the Fruit of burning tree. The underwater grate is still out of reach ('I'm not particularly eager to swim and even more leery to dive'). Optional: click the ship model on the sand.
Inside the Radictis Dwelling
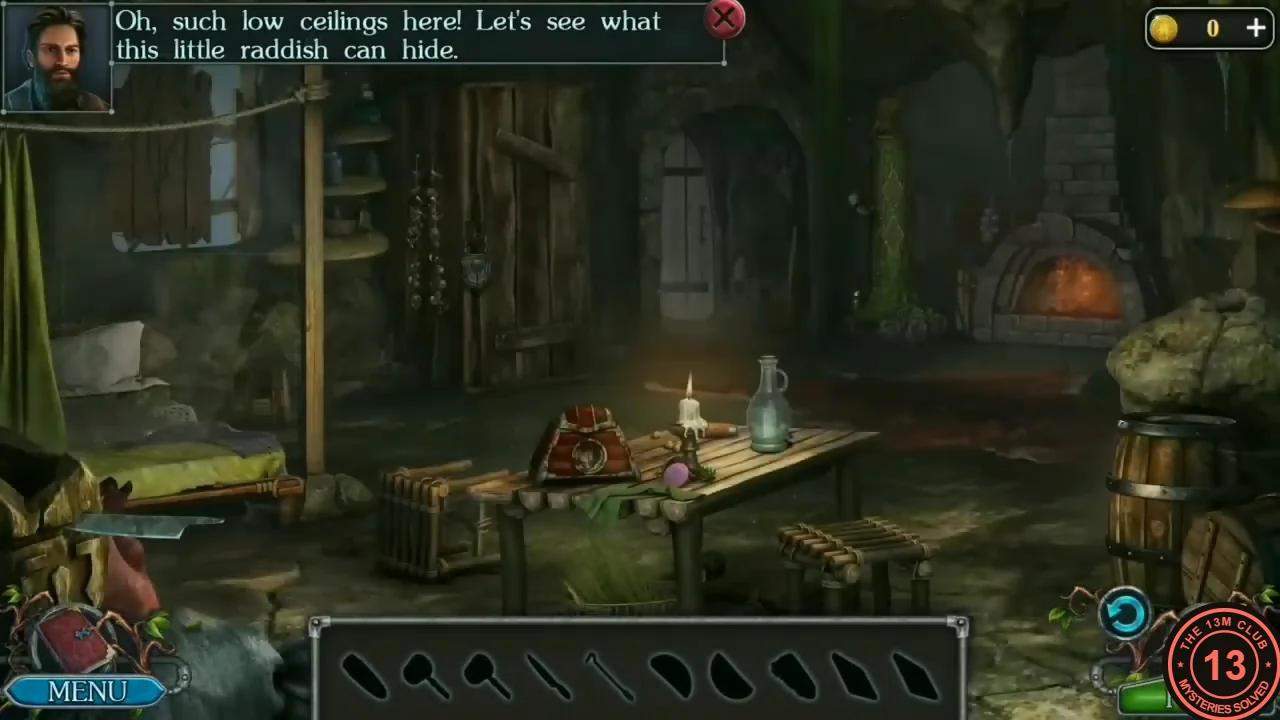
Inside the dwelling ('Oh, such low ceilings here! Let's see what this little raddish can hide'), the bar at the bottom shows silhouettes of the items you need in this scene. Each one fills in as you collect it.
- Inside the radictis dwelling ('Oh, such low ceilings here! Let's see what this little raddish can hide.'), the bar shows dark outlines of the items you can find here. Zoom into the table and take the Handle, the wooden knife handle lying at the far end of the table, just behind the candle. Back in the room, use the Handle on the broad blade lying on the edge of the bed at the lower left to get the Knife. The box on the table won't open ('...does not open, more than likely because of the dirt'), and the tall wooden door at the back of the room is padlocked ('Locked').
- Zoom into the tree trunk in the middle of the room: two diamond-shaped notches are empty ('Something is missing from these notches'). Take the Ladle hanging on the wall to the left of the trunk. Zoom into the water barrel beside the big mossy rock on the right and dip the Ladle in it (Ladle with water). Zoom into the hearth at the back right and pour the water on the fire. When the fire is out, take the Pattern part, the blue-green half-disc on the right inner edge of the hearth arch, and the Detail, the dark diamond-shaped piece lying among the burnt logs.
- Cut open the pillow on the bed with the Knife to get the second Detail. Put both Details into the notches on the tree trunk; a hiding place opens: take the Brush and the Fire iron from inside. Use the Fire iron to pry open the padlocked cupboard door and take the second Pattern part from the middle shelf, between the big brown jug and the glass jar (the crate of produce is on the bottom shelf below it).
- Clean the box on the table with the Brush, then put both Pattern parts into the round recess on its lid. The box opens. Take the Air potion recipe: 'So that's how this guy explored underwater tunnels. I'll give it a try too.'
The Air Potion and the Lake Winch
The Air potion lets you hold your breath for 10 minutes or more. Its five ingredients are spread across both travel-map tabs.
- Collect the five ingredients for the Air potion recipe ('Allows you to hold your breath for 10 minutes or more'). Coastal coral: on the shipwreck shore, zoom into the water by the big shell and take the small red coral. Clay mushroom: on the jungle path, zoom into the hollow fallen log at the lower left and take the yellow mushroom. Red swamper flower: at the lake, zoom into the pond under the purple tree and take the red flower. Wolfberries: at the lake, zoom into the small wrecked boat and take the bowl of dark berries. Sand seaweed: back on the shipwreck shore, zoom into the open phoenix chest on the sand and take the seaweed from inside. Open the Air potion recipe from the inventory and put each ingredient onto it. Each one is ticked off, and together they become Ingredients.
- In the totem clearing, put the Ingredients into the boiling pot over the campfire. The flask beside it fills automatically: take the Air potion.
- At the lake shore, tap the water under the pier to look at the round grate in the submerged stone wall, and use the Air potion there. In the underwater close-up, take the gear lying at the lower left of the grate, outside the bars (Gears 3/3). Then take the loose rope hook resting on the right edge of the grate frame and hook it onto the grate bars. Go to the winch at the far right end of the pier, put the Gears on its side and then fit the Lever; it turns and pulls the bars out of the grate. Swim through the open grate.
Underwater: Find a Path to the Temple
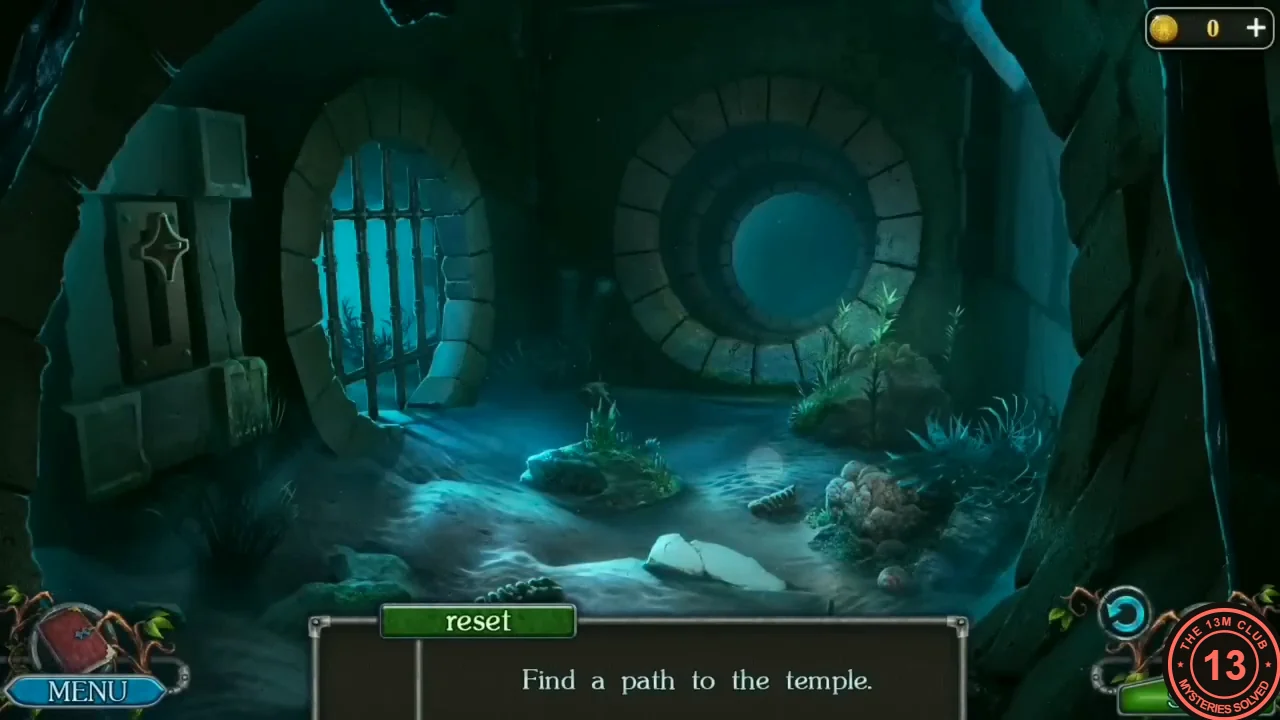
The underwater tunnels are a navigation task, 'Find a path to the temple', with a reset button. Move between the chambers by clicking the openings.
- You arrive in an underwater chamber with a stone panel on the left wall, a barred round opening next to it and a large round tunnel. Go into the large tunnel to a grate with a padlock and take the Lever arm: the metal handle leaning against the rock at the left edge of the grate. Back in the first chamber, put the Lever arm into the slot of the stone panel on the left wall and pull it: the bars of the round opening next to it rise. Go through. In the tunnel with the big boulder ('There is another tunnel under the stone'), go on to the room with the stone well and the hanging chain ('The chain has a broken link'). Take the Metal rod from the sand there. Return to the boulder and use the Metal rod on it: it is levered into the square pit beside it and uncovers a round shaft. Go down the shaft. The Key lies on a stone block in the upper-left part of the shaft wall, about a quarter of the way in from the left edge and a third of the way down: tap it to take the Key.
- Go back to the padlocked grate in the large tunnel and open it with the Key. Behind it is a room lit from a grate in the ceiling; take the Chain with hook from the floor on the left. From this room you can reach a round pipe with a sunken chest and a cavern with a sleeping lizard ('it is better not to approach it') and a room with three barred windows. Go to the well room and hang the Chain with hook between the end of the broken chain and the iron ring in the floor at the lower right. Pull the lever on the left wall: the stone lid lifts off the well and the barred gate at the back rises. Take the Net from the passage behind the gate. In the room with three barred windows ('Dead end'), catch one of the fish swimming past with the Net.
- Give the Fish to the lizard (a crocodile-like creature) in the sandy cavern: it eats it and swims away through the hole in the ceiling. Go through the green-ringed round opening on the right of the cavern wall. In the room with the clay jars, tap the large jar on the right: it breaks, and you take the Key lying among the shards. Open the sunken chest in the round pipe with the Key and take the Wire cutters. Go back to the cavern and through the other round opening (the one in the middle of the wall, left of the green-ringed one). Cut the wire mesh there with the Wire cutters and go up the steps into the temple.
The Temple Chest and the Captain's Cabin
The temple has four golden warrior statues and a skeleton next to a chest. The key from that chest opens the cabin of the wrecked ship on the shore.
- In the temple ('it looks like a temple of some ancient civilization. But where is the gold?') a skeleton lies in the middle of the floor beside a small iron chest. Tap the chest: take the Corkscrew lying on its lid. Optional: click the Morphing Object at the foot of the carved pillar just right of the smaller statue on the left. Use the Fruit of burning tree on the chest's lock; it dissolves the lock. Open the chest and take the Key.
- Use the travel map to go to the back of the radictis dwelling (bottom-centre picture on the map page). Optional: click the Morphing Object, a small round barrel lid leaning against the clay pots left of the large barrel. Tap the large barrel and use the Corkscrew on the bung in its side: the liquid runs out and a Gemstone rolls onto the ground. Take the Gemstone.
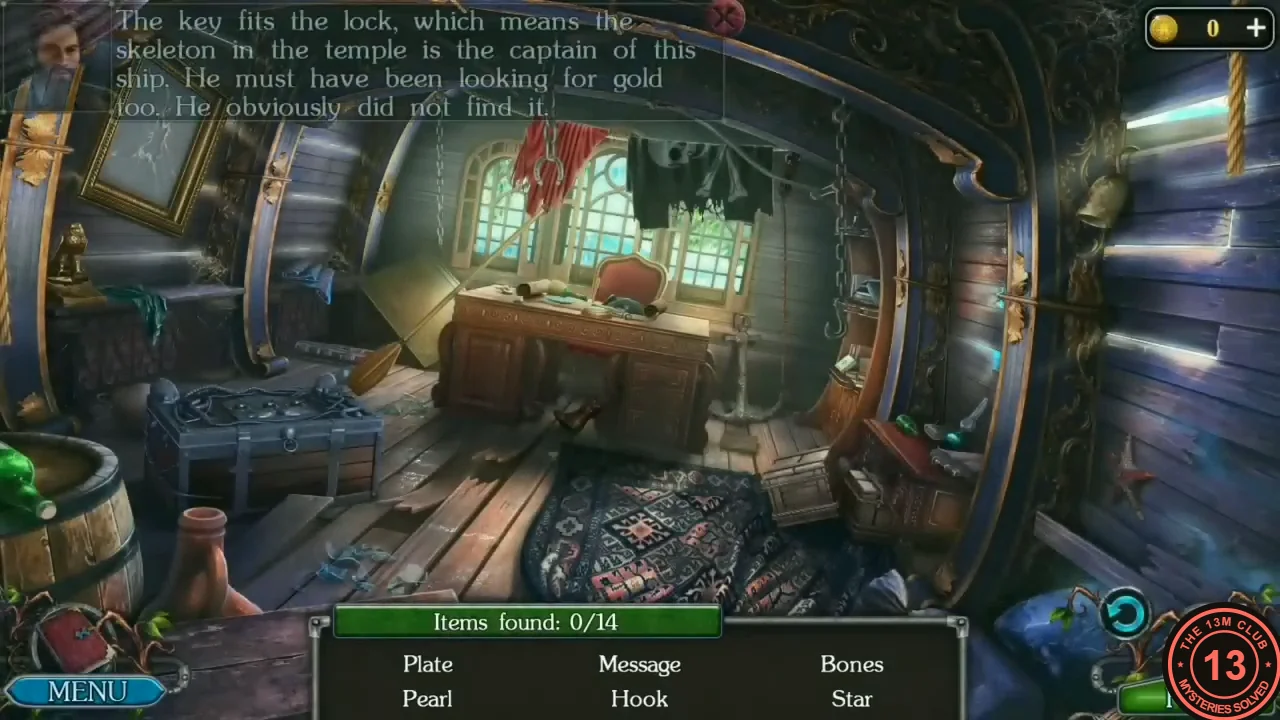
- On the shipwreck deck, unlock the cabin door with the Key: 'The key fits the lock, which means the skeleton in the temple is the captain of this ship.' Hidden-object scene (Items found x/14): six names are listed at a time, and each found item is replaced by a new name. Several items are inside close-ups that open when you tap a spot. Locations in our playthrough: Plate: tap the floor at the front edge of the rug (centre of the room); in the close-up the pieces of a broken plate come together on the boards, then take the Plate. Message: tap the desk under the window and open its drawer. Tap the corkscrew in the drawer: it pulls the cork out of the green bottle lying on the desk. Then tap the tweezers beside the bottle to pull the rolled message out of the bottle, and take the Message from the desk. Oar: the oar leaning against the left end of the desk. Star: the red starfish on the right-hand wall. Hook: the small metal hook hanging just right of the brass bell, high on the right-hand wall. Wine glass: lying beside the open book in the desk close-up. Sword and Sickle: inside the locked sea chest on the left (see the next section). Magnifying glass: tap the cabinet on the right; in the close-up it leans against the books on the right-hand shelf. Horseshoe: hanging from the chain in front of the red cloth at the window. Letter N and Pearl: tap the foreground at the lower left, right of the barrel and the clay jug, to open the chart table. Tap the compass for the Letter N. Then tap the closed mussel shell: the fork on the chart prises it open, and you can take the Pearl. Bones: the crossed bones on the black pirate flag hanging at the window (our player zoomed in on the window to find them). Anchor: the small anchor standing on the floor right of the desk. When all 14 items are found, the scene ends with the reward: the Sword.
The Sea Chest Lock
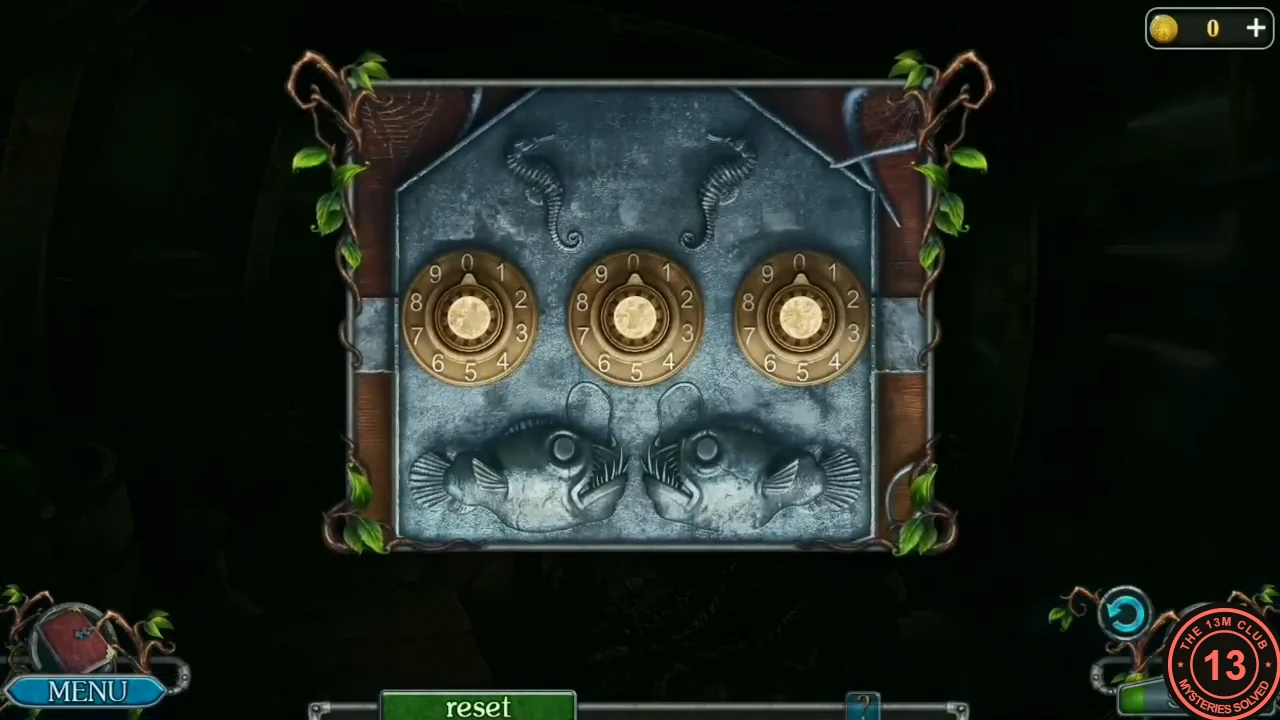
The sea chest in the captain's cabin has a three-dial lock; the code is scratched on the cabinet.
- During the cabin search, tap the cabinet on the right. In the close-up, tap the yellow book standing on top of the cabinet: it moves back and reveals the code 2-7-3 scratched into the wood where it stood, and the cabinet doors open. Then tap the sea chest on the left. Its lock has three numbered dials (0-9) with a pointer; tap a dial to turn it until its pointer shows the number you need. Set the left dial to 2, the middle dial to 7 and the right dial to 3: the dials glow and the chest opens. Take the Sword and the Sickle from inside for the list. Find the remaining items from the previous section; with all 14 found you receive the Sword.CODE2-7-3
The Four Statues
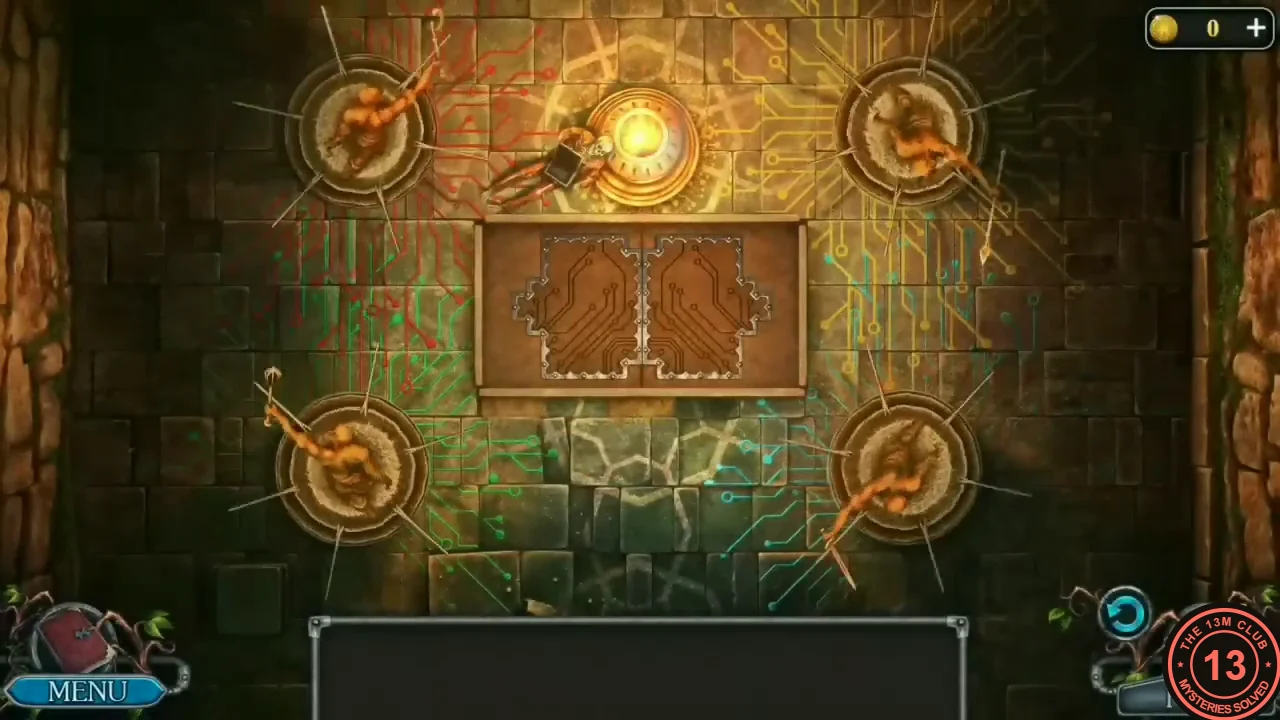
Three of the four golden statues in the temple have empty hands. Arm them and point their weapons correctly; this opens the floor tile grid (next section).
- In the ruins, put the Gemstone into the stone knight statue's gauntlet. It releases its Axe.
- In the temple, give the Spear, the Sword and the Axe to the three unarmed statues. Puzzle (top-down view): click the statues to turn them until each weapon points at the next statue, forming a loop. Top-left points down, bottom-left points right, bottom-right points up and top-right points left. The statues light up the channels.
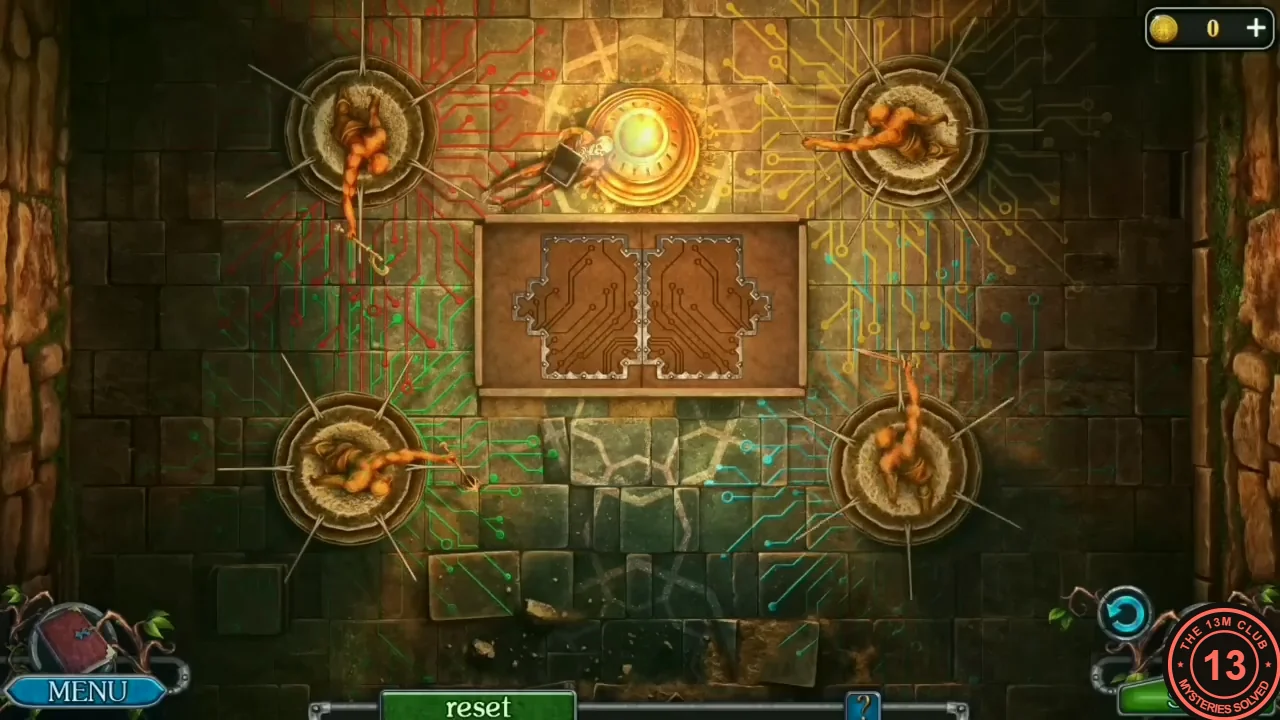
The final arrangement, a moment before the board accepted it: the weapons form a loop.
The Tile Grid and the Gold
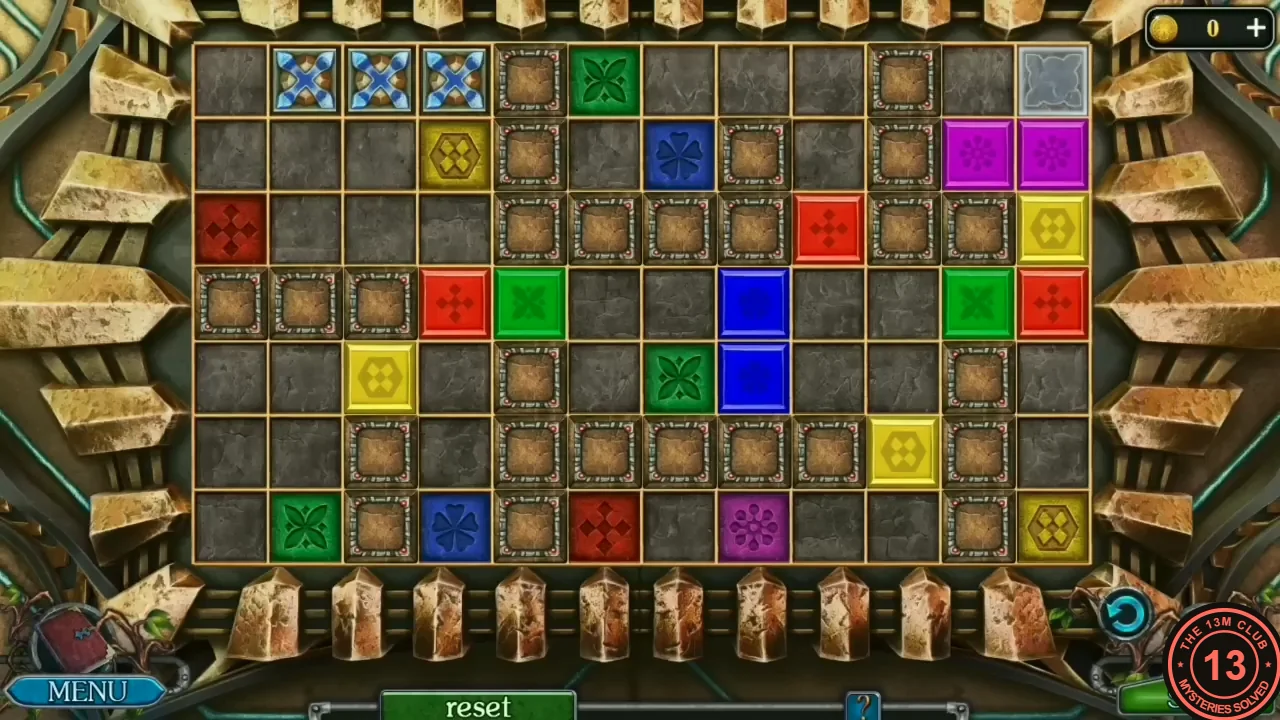
When the statues are solved, a tile grid opens on the temple floor.
- A tile grid opens on the floor. Goal: move one of the three cross tokens (blue X on gold) into the grey target square in the top-right corner. Drag a cross token with your finger along free cells: it travels over the grey cells and the coloured switch tiles (our player dragged the first token down two cells and then left onto the red switch at the left edge). Brown framed blocks never move. The bright, raised coloured blocks bar the way, but the darker coloured tiles with an engraved symbol (leaf, clover, cross, hexagon or flower) are switches: while a cross token sits on a switch, every raised block of that colour sinks and can be crossed, and the blocks rise again as soon as the token leaves (in our recording the green blocks sank when a token was parked on the green switch at the bottom left, and rose again when that token was moved up one cell). So park the other cross tokens on the switches whose colours block the route, then move the third token through to the corner. The start and final layouts are in the images. The gold rises from the floor: 'Wow, there's a fortune here! The kid wasn't lying!' (Task complete: Find gold). Your starting layout may not match ours, so check which colours block your route. A reset button sits under the board; we did not see it used.
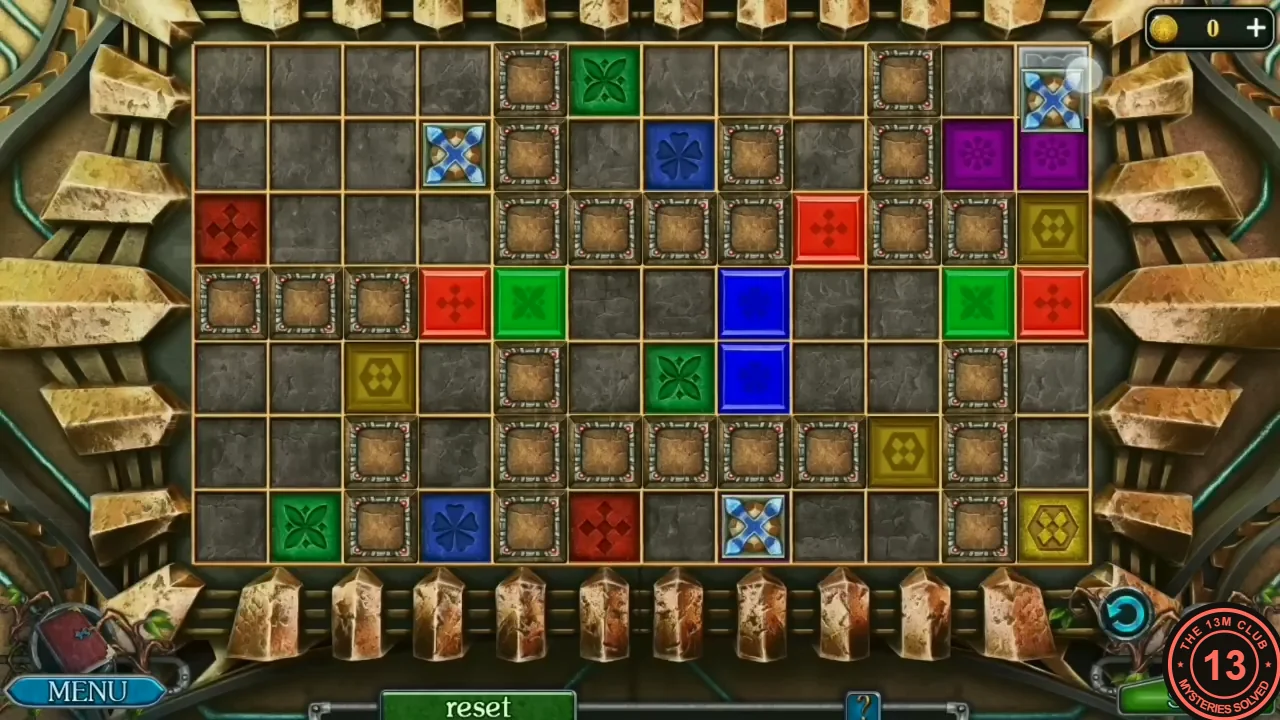
Solved in the example game: a token reaches the top-right square. - Watch the ending: the captain keeps his word and frees the radictis. The radictis says they don't need the gold and asks to be left in peace. The captain warns that the witches will keep searching the island and advises the radictis to hide even better. After the final cutscene the Puzzle Lover achievement appears.