The foam machine
A foam machine by the runway is clogged and smoking.
- Open the Plastic Straw in the inventory (marked with a plus) and attach the Spring to make the Homemade Ramrod.
- Open the red foam machine on the runway and push the Homemade Ramrod into its nozzle. A clipboard pops out: a list of designer shoes shipped without customs clearance to the Dry Cleaners from a Shell Company, to be handed to Mike and paid in cash. You receive the Shady Deliveries Information.
Two-part search: the shoe storage
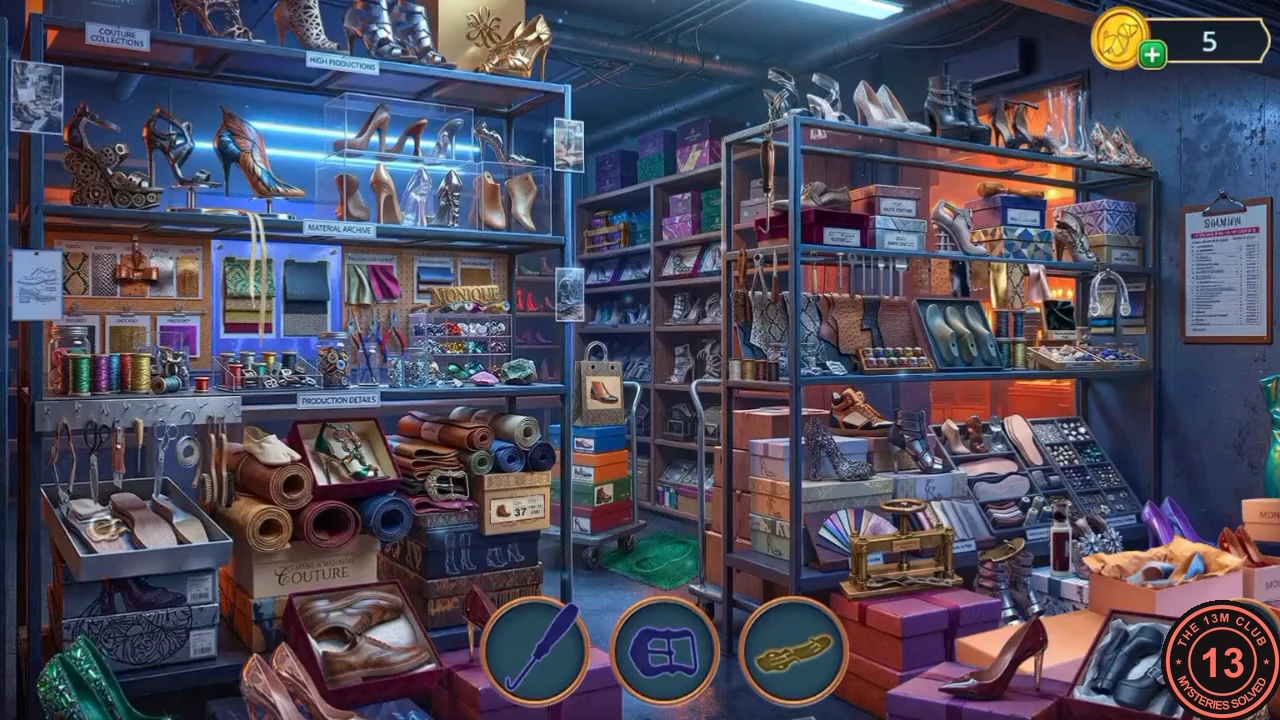
The delivery list points back to the shoe boxes in the Fashion House Backyard.
- Travel to the Fashion House Backyard, open the shoe-box shelf and put the Shady Deliveries Information there. A search of the shoe storage starts.
- 'Where is the second part?' Each of the three slots at the bottom shows one part of an object. Find its matching second part in the scene to complete it; new objects keep replacing completed ones until the search ends with the Shoehorn.
The garment bag and the rooftop power box
A purple garment bag hangs from the overhead rail in the Fashion House Backyard.
- Open the overhead rail with the purple garment bag and use the Shoehorn on its zipper. Take the Relay and the Broken Umbrella from inside.
- Travel to the Rooftop, open the electrical box and put the Relay into the empty socket on the left. A wiring puzzle starts.
Wiring puzzle: the rooftop power box
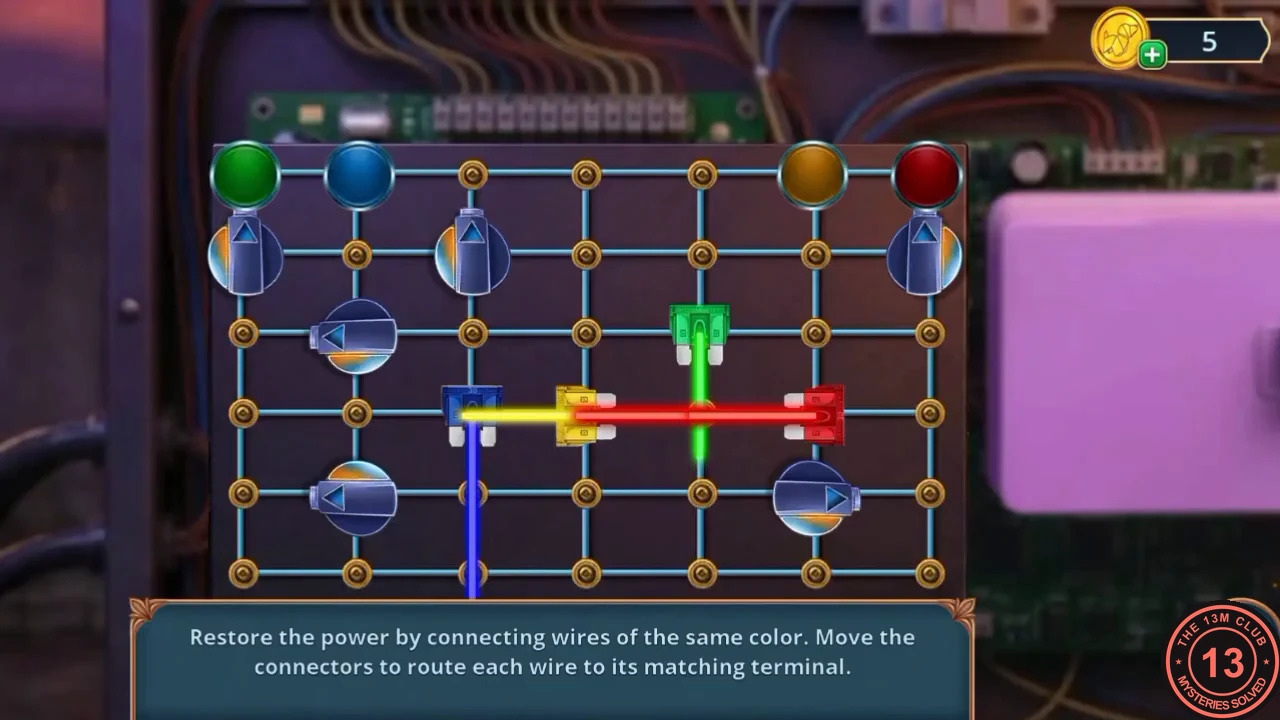
'Restore the power by connecting wires of the same color. Move the connectors to route each wire to its matching terminal.' The board is a grid of 7 columns and 6 rows of points. The four coloured terminals sit in the top row: green in column 1, blue in column 2, yellow in column 6 and red in column 7. Four plugs sit inside the grid: green in row 3 of column 5, and blue, yellow and red in row 4 of columns 3, 4 and 6. Tap a plug to turn the direction its wire shoots. Drag the six round connectors onto grid points; a wire that reaches a connector turns 90 degrees there. This layout appears to be fixed.
- Blue: turn the blue plug to point up and place a connector on the top row directly above it (column 3), so the wire bends left into the blue terminal.
- Yellow: turn the yellow plug to point up, place a connector in row 2 of column 4 and another in row 2 of column 6, so the wire runs up, right along row 2 and up into the yellow terminal.
- Red: turn the red plug to point right and place a connector at the right edge of row 4 (column 7), so the wire turns up into the red terminal.
- Green: leave the green plug pointing down, place a connector in row 5 of column 5 and another in row 5 of column 1. The wire runs down, left along row 5 and up into the green terminal, and the power comes back.
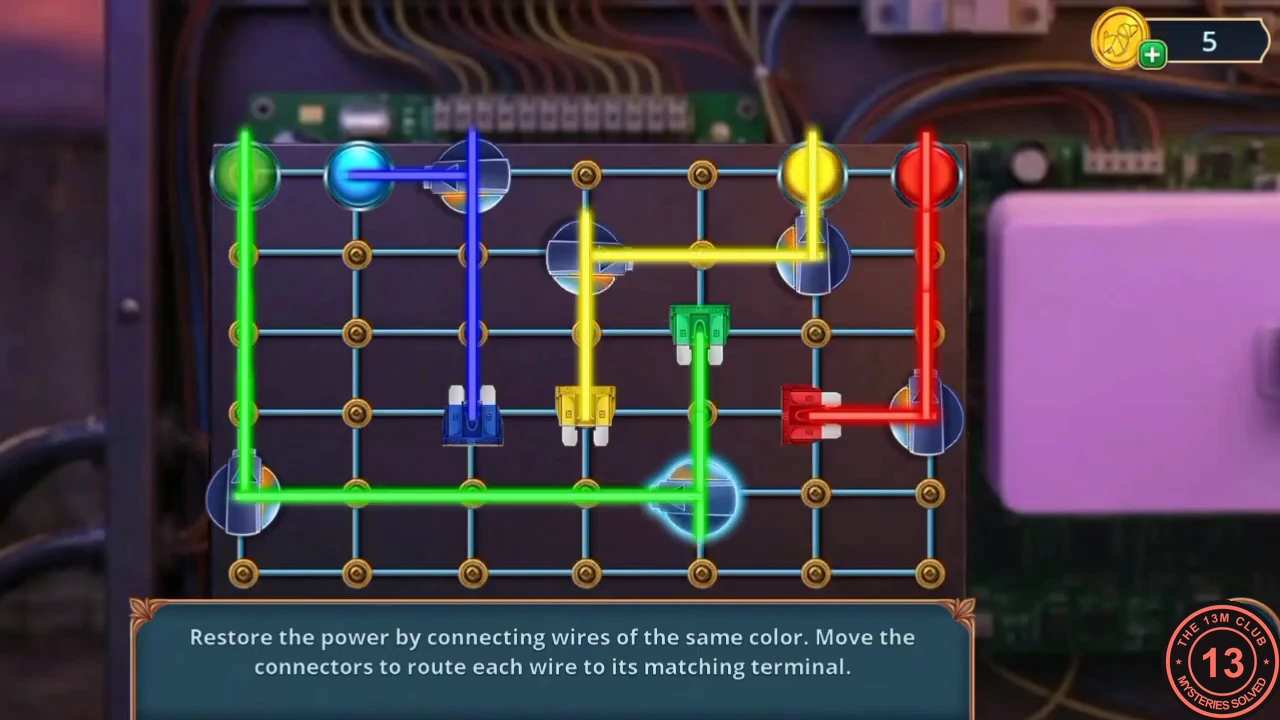
Solved: all four wires reach the terminal of their own colour.
The clippers and the tailor's chalk
With the power on, the purple device in the electrical box opens.
- Take the Clippers from the opened purple device in the electrical box.
- Open the red case under the antenna and cut the rope with the Clippers. Take the Tailor's Chalk.
- Travel to Monique's Office, open the drafting table and place the Tailor's Chalk on the pattern sketch. A chalk-route puzzle starts.
Chalk-route puzzle: the drafting table
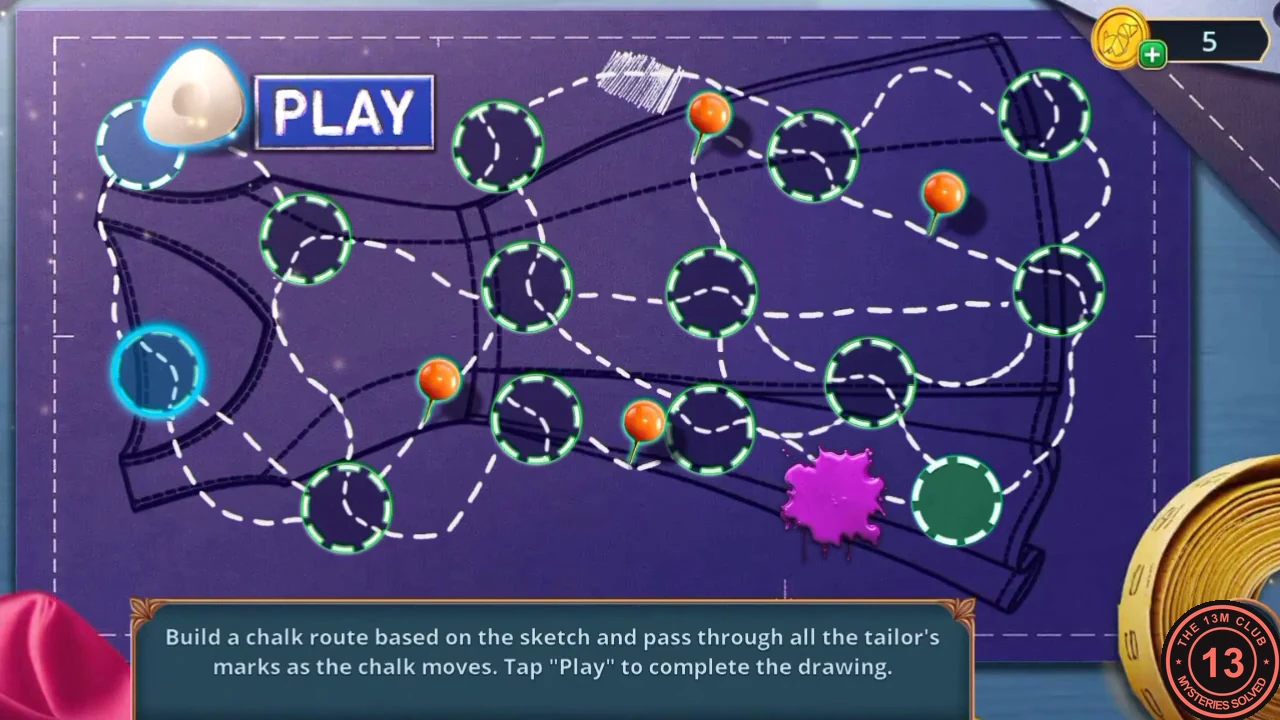
'Build a chalk route based on the sketch and pass through all the tailor's marks as the chalk moves. Tap Play to complete the drawing.' The chalk starts on the blue circle at the top left and must finish on the green circle at the bottom right. Four orange pins (the tailor's marks) sit on the pattern: at the top centre, at the upper right, at the left centre and in the centre. Each dashed circle contains a short curved piece of path; tap a circle to turn that piece. This layout appears to be fixed.
- Tap Play. The chalk keeps moving along the dashed path, and you can keep turning circles while it travels, so steer it by turning the next circle ahead of it. A pin is collected as soon as the chalk passes it and stays collected. Example order: take the centre pin first, then the upper-right pin, then the left pin while looping round the left side, then the top-centre pin, and finally steer the chalk down the right side into the green circle.
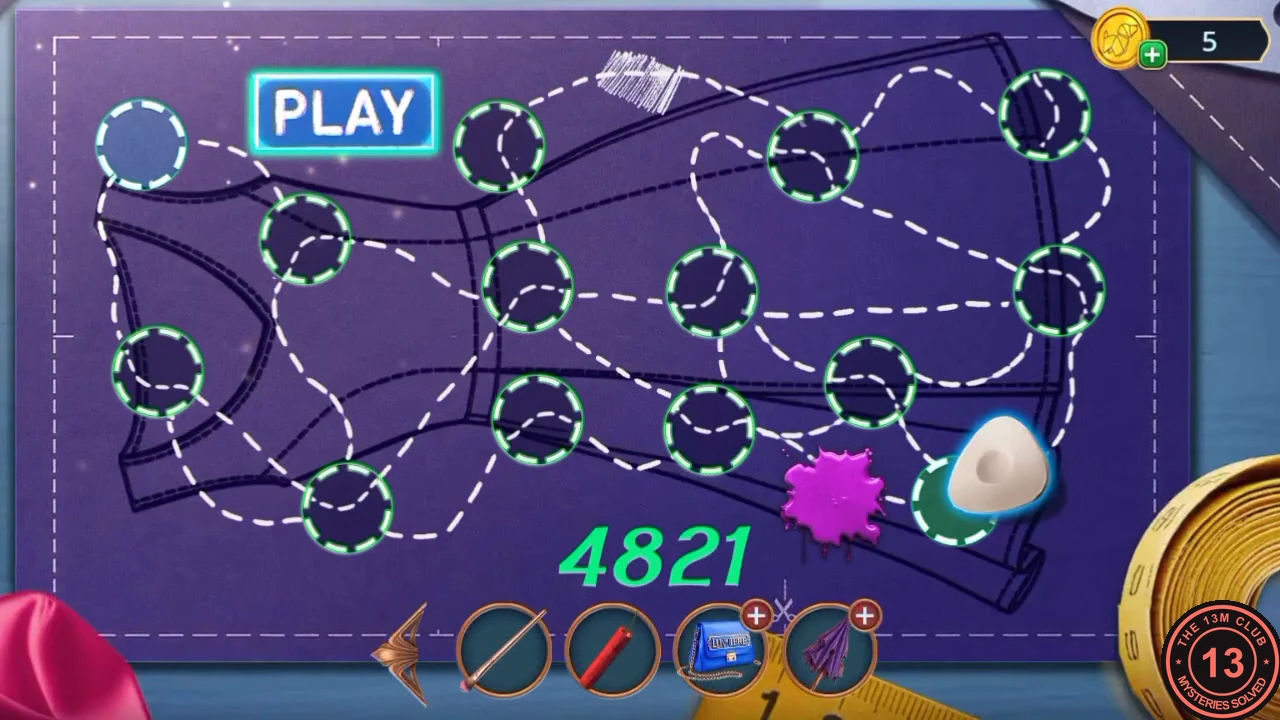
The finished chalk drawing reveals the code 4821. - The finished drawing shows the code 4821. Tap the gold keypad box on the drafting table; it opens with that code. Take the Milling Cutter.
Monique's fingerprint
The silver case beside the armchair on the runway has a fingerprint scanner.
- Open the ballerina relief in Monique's office and use the Milling Cutter on the copper lotus bud at the bottom. Take the lotus bud. Keep the Milling Cutter.
- Travel to the Podium, open the flower table and put the lotus bud into the pot. The metal flower opens; take the Stand Screw.
- Open the spotlight and fit the Stand Screw on its side so the lamp tilts. Then press the Duct Tape on the lens to lift a print. You receive the Fingerprint.
- Open the silver case beside the armchair and hold the Fingerprint to the scanner. The case opens; take the Brand Promo Card.
Make-up scene: Monique's mannequin
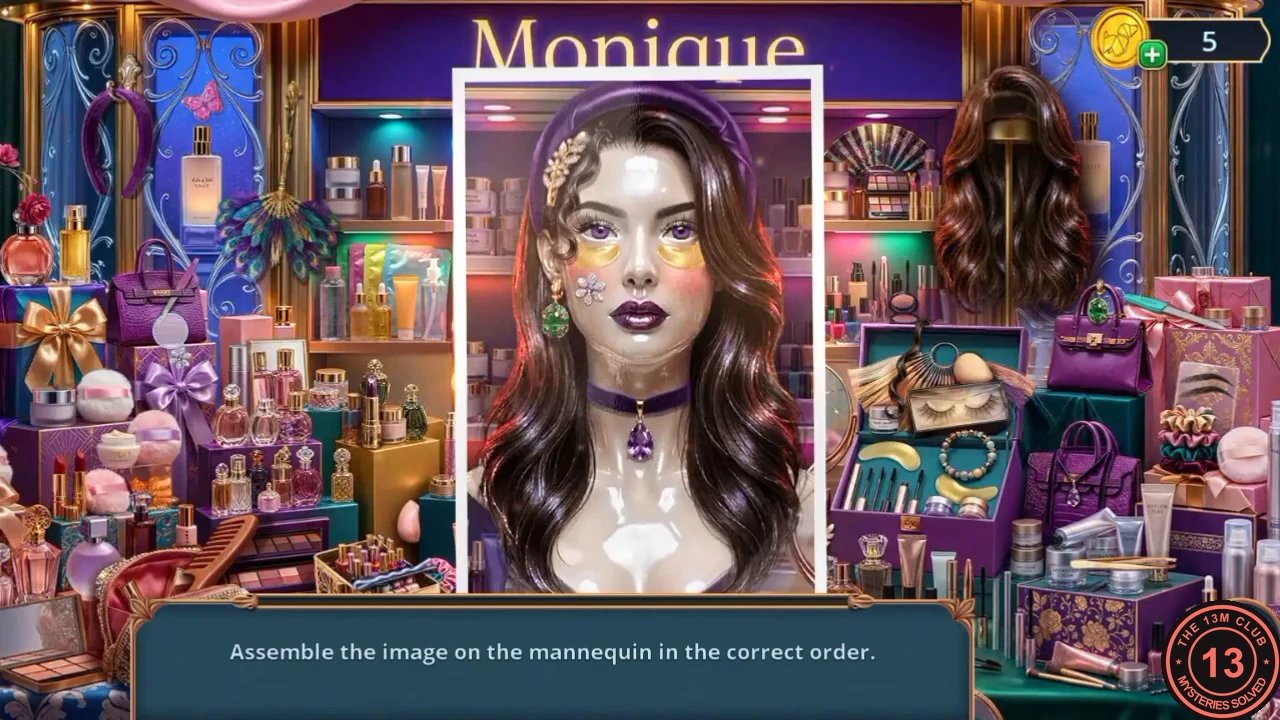
The perfume display in the Gallery Show reads: 'Demo available only with a brand promo card.'
- Travel to the Gallery Show, open the perfume display and put the Brand Promo Card on the reader. A make-up scene starts.
- 'Assemble the image on the mannequin in the correct order.' The finished look is shown first and then stays as a small portrait in the bottom-left corner. Find each matching piece in the scene and tap it to put it on the mannequin. Work from the base outwards in this order: purple headband, purple lipstick, eye colour, gold under-eye patches, the purple choker with its pendant, eye make-up, orange blush, and finally the gold hair clip and the green earring. When the look matches the portrait you receive the Spiral Shell.
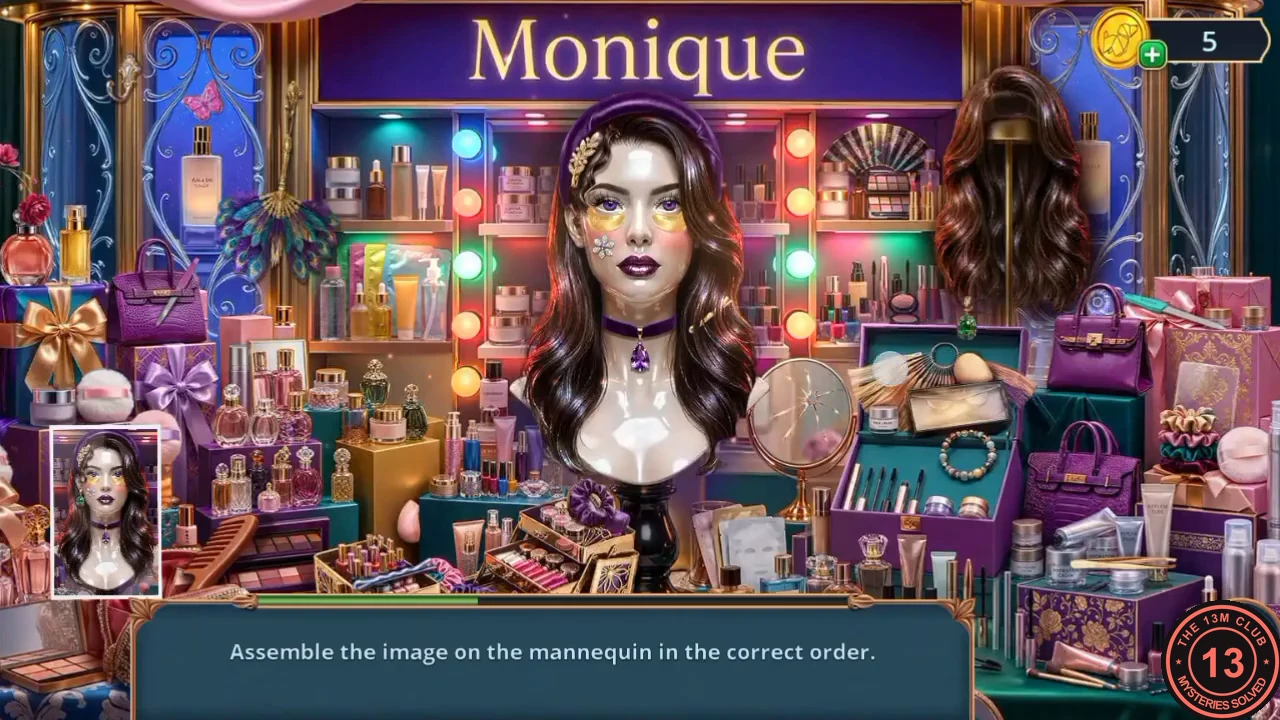
The finished look: match the small portrait in the bottom-left corner.
The third decoration
The packet under the terrace wicker chair is still out of reach.
- In the Gallery Show, open the buffet with the blue-and-white dome. Fit the Spiral Shell on the dome as a handle and lift the dome. Take the Funnel and the Stick from the plate.
- Travel to the Open Terrace, open the wicker chair and hook the packet out with the Stick. Take the third Decorations star.
- Open the folding screen with the star rail and place the Decorations. A token puzzle starts.
Token puzzle: the folding screen
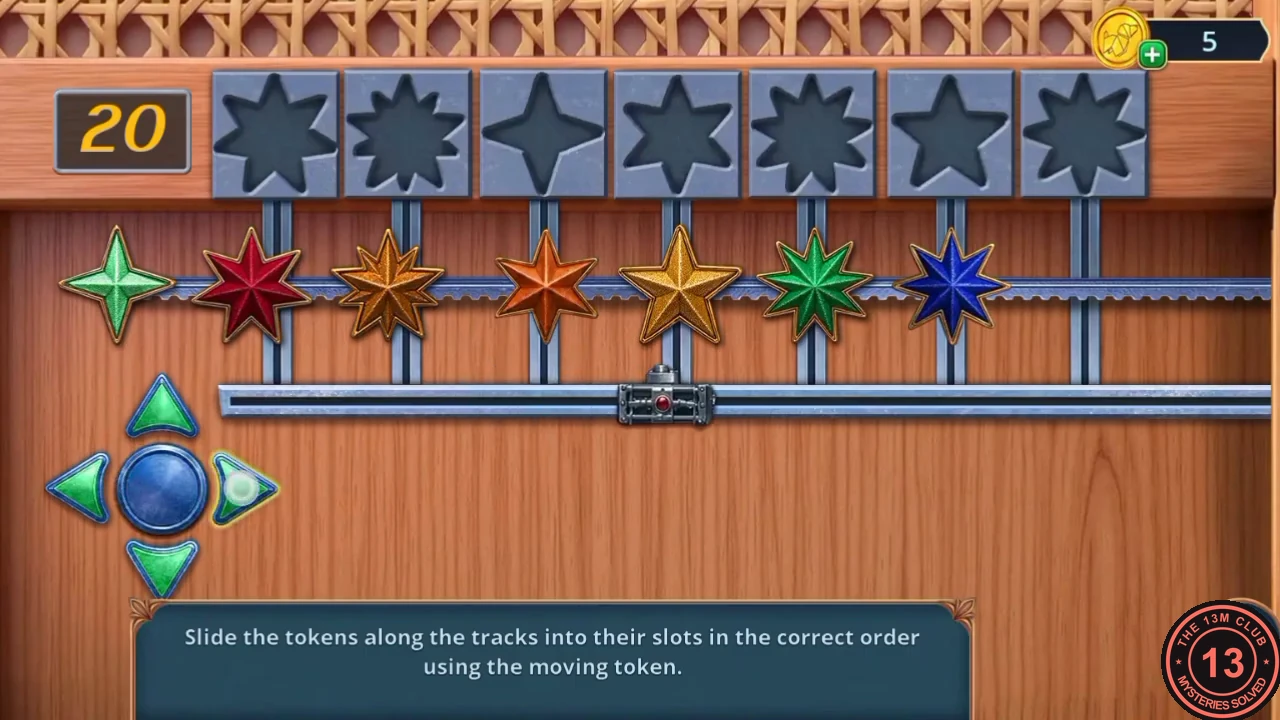
'Slide the tokens along the tracks into their slots in the correct order using the moving token.' Seven star-shaped slots run along the top. Below them, seven stars hang on a toothed rack: from left to right light green (four points, hanging just left of the first column), red, bronze, orange, gold, green and blue, with the last column empty. Each slot's outline matches one star, and the finished order is red, bronze, light green, orange, green, gold, blue. Use the arrow pad to drive the small moving token along the lower rail. Pressing up under a star pushes it into the slot above; pressing up under an empty column lifts the token onto the rack, and pressing right then drags the whole rack one column to the right. The counter shows the moves left and starts at 20; the order below finishes with one move to spare, so follow it exactly.
- Push up the green star (fifth column), the bronze star (second column) and the red star (first column); they already sit under their slots.
- The token now stands on the rack in the first column. Drag the rack one column right: the orange star lines up with the fourth slot and the blue star with the seventh. Push both up.
- Climb onto the rack again and drag it one more column right so the gold star sits under the sixth slot; push it up. Drag the rack right once more so the light-green star reaches the third column, then push it up. The screen opens.
The magnetic probe and the photo booth
The open screen holds a tool that can reach the metal objects in the lava lamp.
- Take the Magnetic Probe from the opened folding screen.
- Open the grey lava lamp on the terrace table and lower the Magnetic Probe into it. Take the Screwdriver and the purple Lighter it pulls out.
- Travel to La Mode Boulevard, open the photo booth and unscrew the camera panel with the Screwdriver. Take the Wire.
- Open the round housing by the fountain and connect the Wire to the circuit inside. A picture-ring puzzle starts.
Picture-ring puzzle: the fountain housing
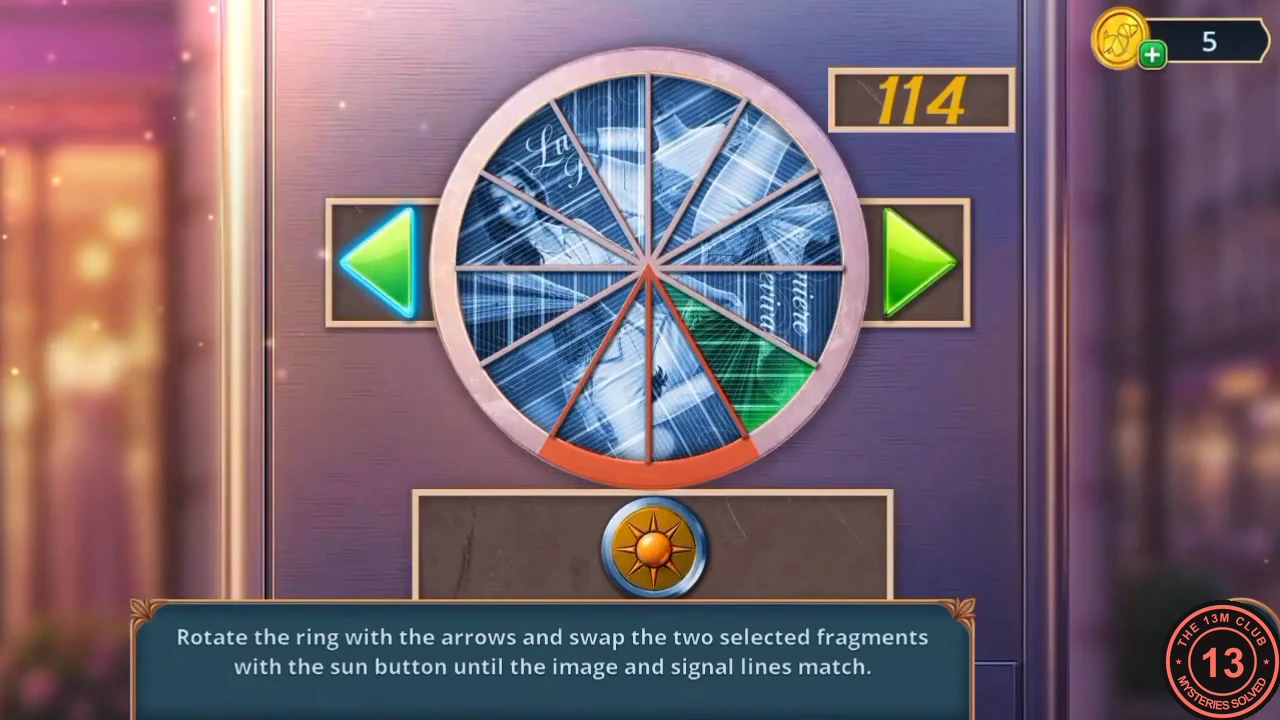
'Rotate the ring with the arrows and swap the two selected fragments with the sun button until the image and signal lines match.' The picture is cut into 12 wedges. The green arrows turn the whole ring; the sun button swaps the two wedges that sit over the orange arc at the bottom. A timer starts at 120 seconds. The finished picture is a green Lumiere Revival poster of a woman in a white gown.
- Turn the ring until a wedge that belongs elsewhere sits over the orange arc next to the piece it should change places with, then press the sun button. Wedges that are in the right place light up green, so work round the ring fixing one wedge at a time, and finish with every wedge green and the poster upright. Fixing one wedge at a time is quick enough to finish well inside the 120 seconds.
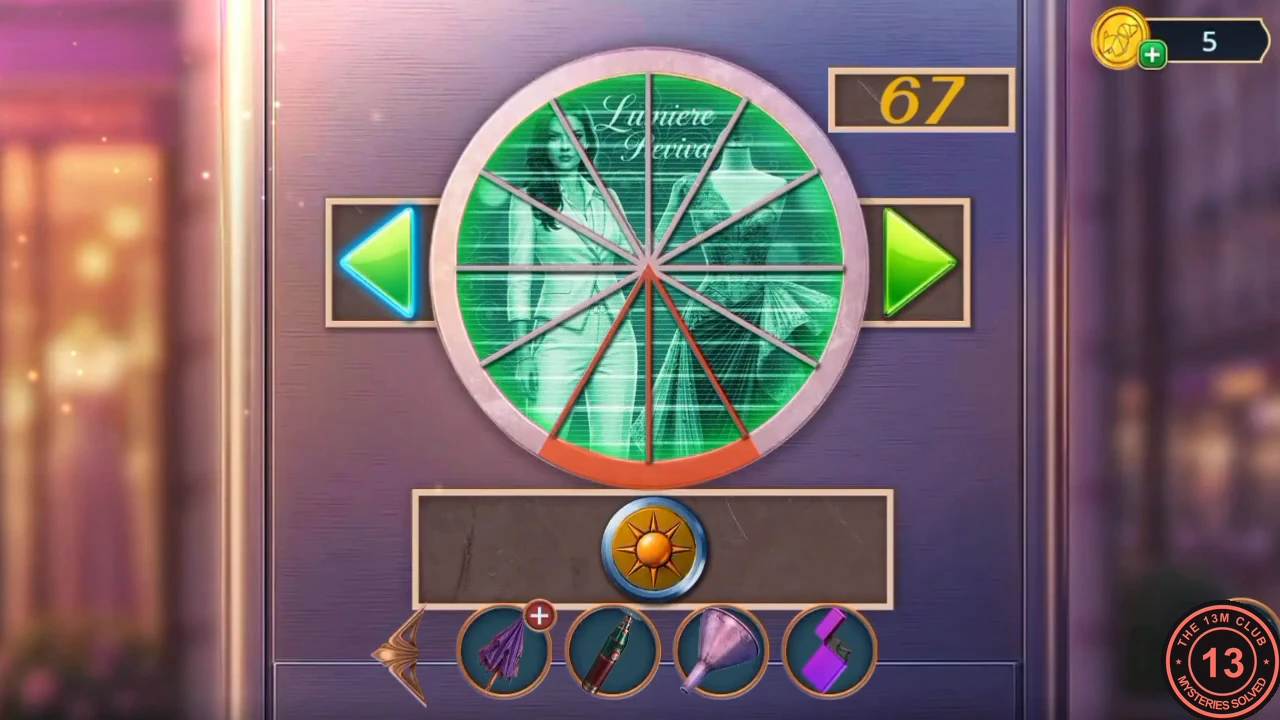
Solved: every wedge is in place and the whole ring turns green.
The tablet key, the foil and the antenna
The opened housing holds a key for the photo booth's reader.
- Take the Diamond Ring and the Tablet Key from the opened housing by the fountain.
- Open the photo booth again and put the Tablet Key on its reader. Take the Foil.
- Open the Broken Umbrella in your inventory and wrap the Foil over it to make a foil-covered umbrella dish.
- Travel to the Rooftop, open the red case under the antenna and fit the foil umbrella onto it. A signal puzzle starts.