Getting into the boutique
Move the dumpster out of the way so you can get inside.
- Open the red box beside the electrical panel. Use the Hair Dryer on the glued Monique poster to soften the glue and peel it off, then take the Wheel from the compartment behind it.
- Open the dumpster close-up, put the Wheel on the dumpster's missing wheel mount and push the pencil lying on the pavement through it as an axle. The dumpster rolls aside and you can enter the boutique.
- Answer Edgar's phone call. He has heard that Monique keeps old sketches in a spare wardrobe room. Choose either 'All right. I'll check the wardrobe...' or 'I'd rather focus on Monique's office.' The wardrobe answer is worth 1 decision point and this guide follows it: the double door to the wardrobe room then opens. The office answer is not covered here, so pick the wardrobe to keep to this route.
The wardrobe room
The map marks this room with its Bonus Location icon. Build a robot vacuum to clear the spilled soil.
- Open the close-up of the purple and orange boxes and read the note: slightly acidic water revives faded writing. The orange box has faded writing; remember this for later.
- Open the close-up of the blue wall safe and take the Pedal and the Robot Vacuum Cleaner Body lying in front of it.
- Open the close-up of the metal trash can, attach the Pedal and step on it to open the lid. Take the vacuum's orange-and-blue battery and the Shoe Heel.
- Return to the boxes close-up and use the Shoe Heel as a hook on the top shelf behind the grating. Take the Wheel (a blue robot-vacuum wheel) that falls onto the boxes.
- Open the Robot Vacuum Cleaner Body in the inventory and fit the blue Wheel and the battery to assemble the Robot Vacuum Cleaner.
- Open the close-up of the spilled soil beside the curtains and put the Robot Vacuum Cleaner on the floor. It cleans up the soil; take the Heat-Shrinking Tube and the Gold Needle Amulet it uncovers.
Boutique reception
Search the reception counter, the peacock statue and the computer desk.
- Go back to the reception. Open the counter close-up (aquarium and wooden box). Read the Fitting Schedule if you like: Alice cancelled her fittings twice. Take the copper peacock feather attached to the camera (Copper Feathers 2/2), then take the Camera Body.
- Place the Gold Needle Amulet on the spool of thread on the wooden box. The box opens; take the Washing Band.
- Open the close-up of the golden peacock statue beside the locked double door. Put the Copper Feathers into the gaps in its tail; the tail moves and you can take the Ring from the magazines.
- Open the Show Schedule screen on the wall and take the Suction Cup from its top-left corner.
- Open the computer desk (ENTER PASSCODE screen). Use the Suction Cup on the glass cover of the compartment beside the keyboard, then take the Pump and the WD-40 Spray.
- Go out to the street and open the bicycle close-up. Spray the WD-40 on the rusty seat spring and take the Spring.
Pairs search: the boutique window
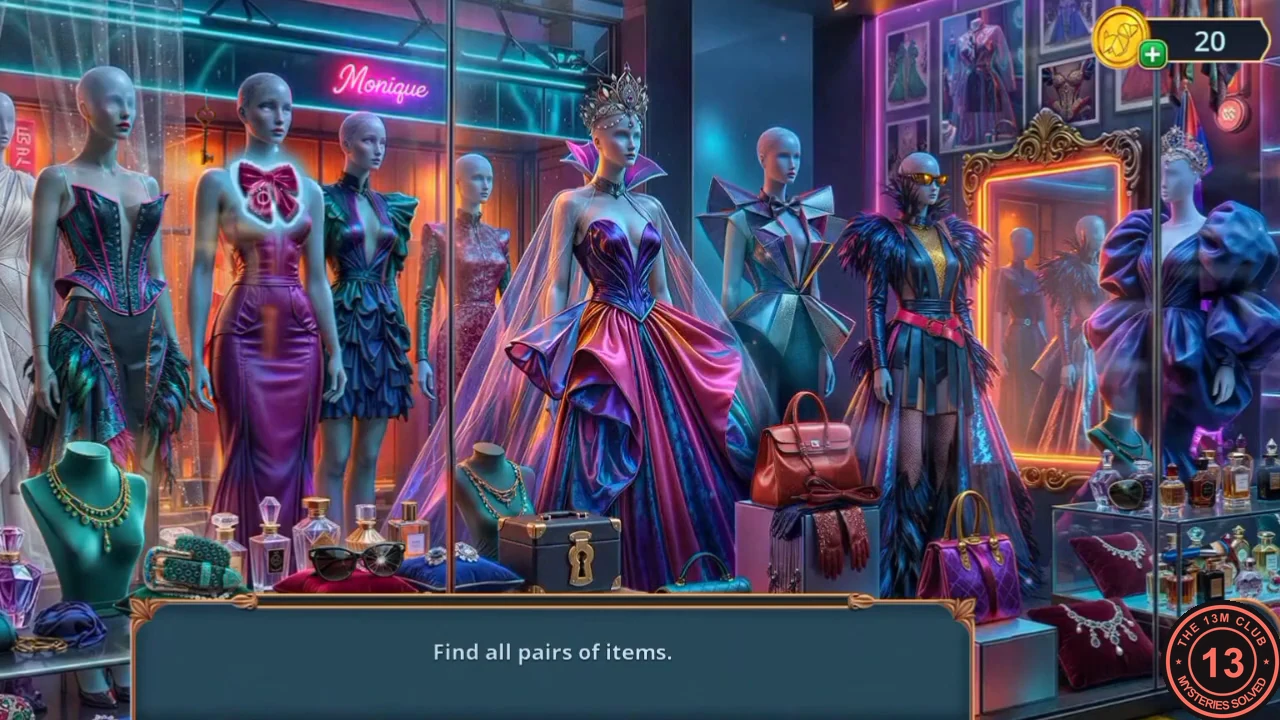
The window display opens again as a different kind of search: 'Find all pairs of items.' Tap two matching objects to remove them as a pair.
- Tap the boutique window on the street and match every pair of identical objects. When all pairs are gone you receive the Remote.
The locked double door
The key is stuck behind the cracked lock plate of the double door.
- Go back into the reception, open the Show Schedule screen and use the Remote on it. When the screen goes blank, take the Ribbon from below it.
- Open the double-door close-up beside the peacock statue ('I can even see the key... I have to hook it up somehow.'). Push the Ribbon into the crack beside the lock plate, then attach the Spring to it to hook the key. The key drops to the floor: 'Great! Now, I have the key!'
- Pick up the key and turn it in the lock. The double door opens into the workshop (the map calls it Vivienne's Workshop).
Vivienne's Workshop: building the camera
The map calls this room Vivienne's Workshop. Edgar texts back first; then assemble a camera to read a hidden code.
- Edgar replies by text and asks whether you have found anything. Pick either answer: 'You can count on me.' or 'Maybe it's not related. Maybe I'm wasting my time.' 'You can count on me.' costs 60 coins; its button shows one star, but the chapter summary credits it with 2 decision points. The other answer is free and worth none. The story continues the same way.
- Open the sewing machine close-up on the left. Take the Coin from the cardboard box and then the Boxes with Fittings (1/2).
- Still in the sewing machine close-up, fit the Sewing Machine Wheel onto the side of the machine. It still needs more parts ('This machine is missing some parts').
- Open the desk with the 3D printer and microwave. Read Vivienne's 'Tasks for the week' note, then take the round purple camera lens beneath it (the game names this item Belt).
- Back in the sewing machine close-up, open the folded quilted jacket and take the Amber with Flower from its pocket.
- Open the blue handbag hanging on the red-dress mannequin. Put the Amber with Flower into the flower-shaped clasp to open the bag, then take the Memory Card (a Brooch collectible is also inside the bag).
- Open the Camera Body in the inventory. Insert the Memory Card into the SD slot and attach the lens to complete the camera.
- Go to the reception counter close-up. The aquarium glass shows mirror-image writing; use the Camera on it to get the Photo with Code (the word Lumiere).
- Open the computer desk and place the Photo with Code by the ENTER PASSCODE screen. The password is refused ('Access is denied') and a security-bypass puzzle opens.
Computer security puzzle
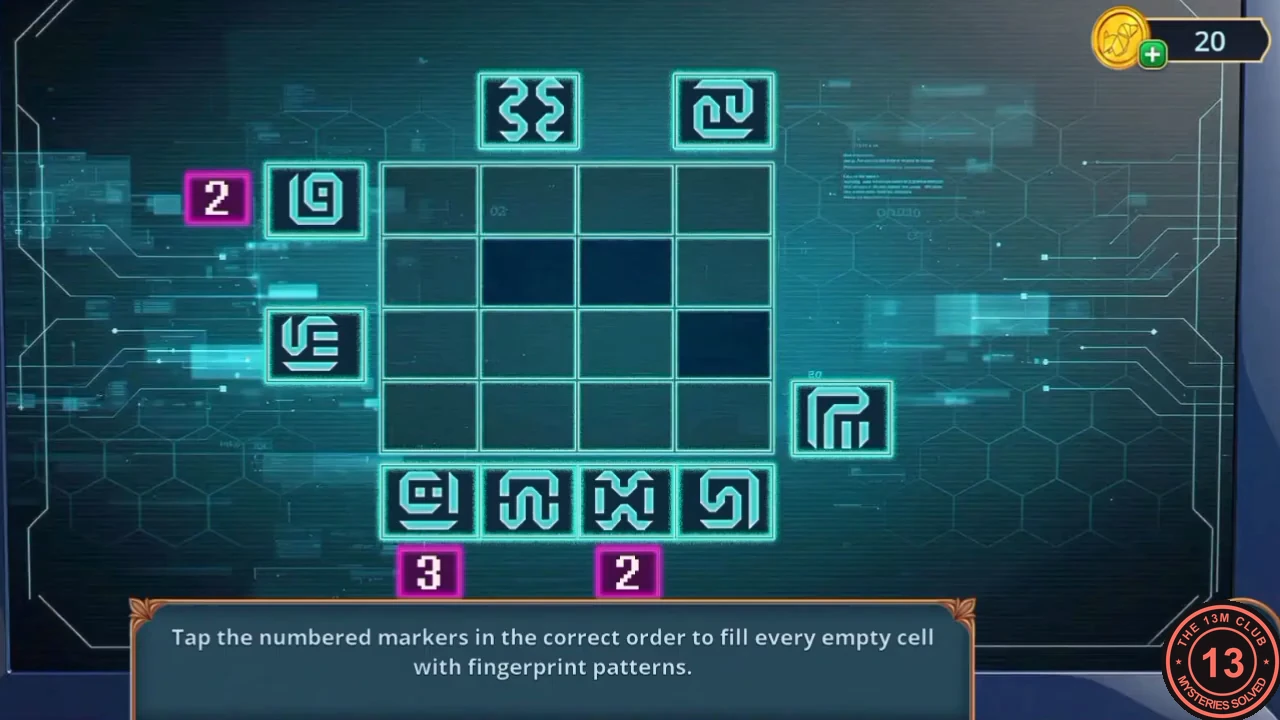
'Tap the numbered markers in the correct order to fill every empty cell with fingerprint patterns.' The 4x4 grid has three dark cells that can never be filled. Pattern tiles wait outside the grid. Tapping an outside tile pushes it one cell into the grid, and everything already in that row or column moves one cell along with it. A pink number shows how many tiles are stacked at that spot. Fill all 13 empty cells.
- Use this tap order (rows and columns counted from the top-left; outside tiles named by where they sit). (1) Bottom tile under column 4. (2) Bottom tile under column 3 (marked 2). (3) Bottom tile under column 2. (4) Right tile beside row 4. (5) Bottom tile under column 3 again. (6) Bottom tile under column 1 (marked 3). (7) Left tile beside row 3. (8) Top tile above column 2. (9) Bottom tile under column 1 twice more. (10) Left tile beside row 1 (marked 2) twice. (11) Top tile above column 4. The screen shows 'Password Entry: Lumiere - Access granted'.
The closet, the raccoon and the clockwork diver
Open the workshop closet and win over the raccoon at the riverbank.
- Take the Closet Key from the unlocked computer desk.
- Go to Vivienne's Workshop, open the padlocked closet door at the back and unlock it with the Closet Key. Take the Popcorn from inside.
- Open the desk close-up, put the Popcorn in the microwave and take the popped Popcorn.
- Use the map to travel to the Riverbank. Open the raccoon close-up at the tree roots and give it the Popcorn. It runs off with the bag; take the Coil and the Wind-Up Diver it was guarding.
- Travel to Inside Fashion House, open the reception counter close-up and put the Wind-Up Diver in the aquarium. It dives and brings up the Stapler.
Stapler repairs and the citric acid
The Stapler is used twice: once in the wardrobe room and once in the workshop.
- Travel to the Wardrobe. Open the metal trash can close-up and use the Stapler to fix the torn handle of the drawer beneath it. Open the drawer and take the Water Bottle and the Tie Clip.
- Travel to Vivienne's Workshop and open the blue handbag close-up. Use the Stapler on the flat cardboard box beside the bag to put it together; you now have Boxes with Fittings 2/2.
- Open the closet with the fabric rolls. Use the Tie Clip to pull the packet out from between the rolls and take the Citric Acid.
- Place the Boxes with Fittings on the empty shelf space in the closet to start the packing puzzle.
Closet packing puzzle
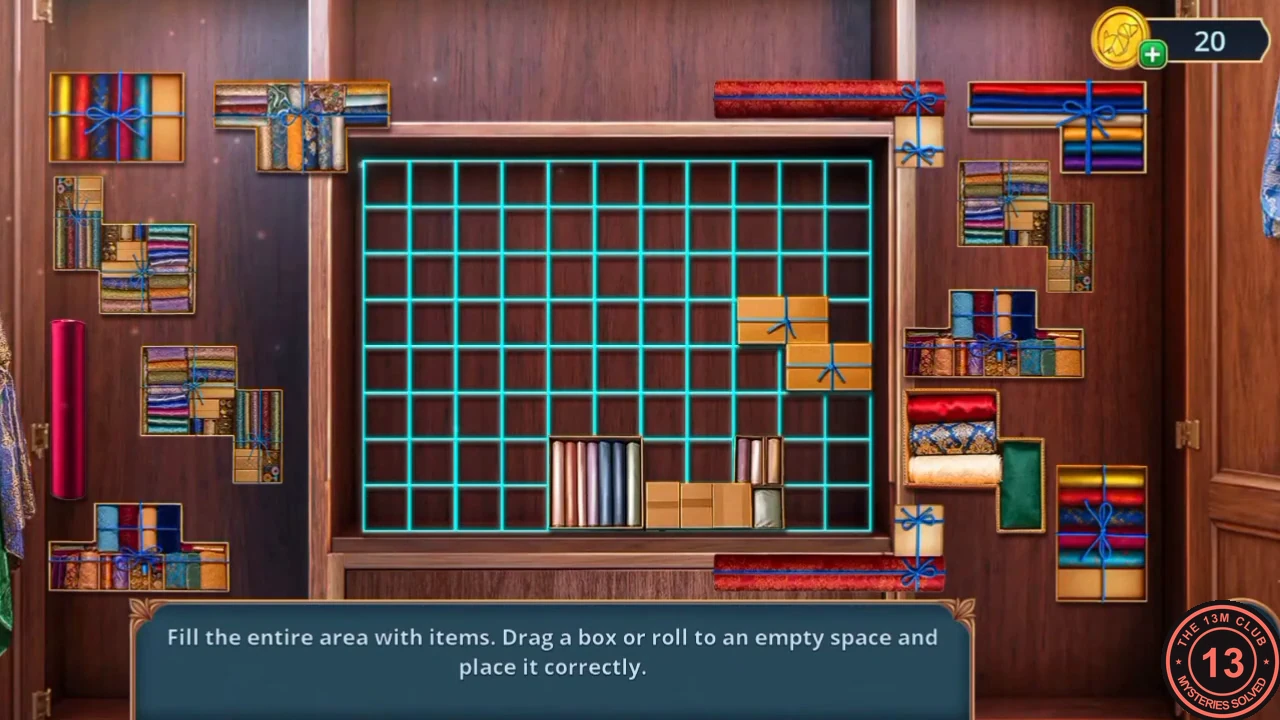
'Fill the entire area with items. Drag a box or roll to an empty space and place it correctly.' Boxes and fabric rolls of different shapes lie on both sides of a grid. Every cell must be covered and nothing may overlap.
- Drag the pieces into the grid. Start with the longest rolls and the L-shaped stacks along the edges and corners, because they fit in fewest places. Keep the gaps you leave rectangular, then fill them with the small boxes. If a piece won't fit, drag it back out and try another position. The solved grid is shown here for reference. When the area is full, the shelf slides away; take the Winding Key from the compartment.
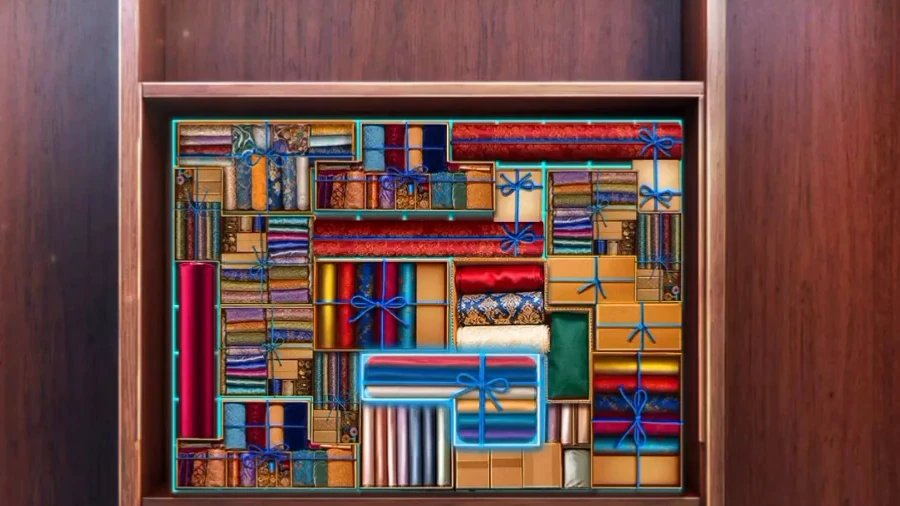
The solved closet grid: every cell is filled and no piece is left over.
The flash drive and the wardrobe safe
Wind the music box, then revive the faded writing and get the wardrobe safe working.
- Open the sewing machine close-up and put the Winding Key into the dress-form music box. Its drawer opens; take the USB Flash Drive.
- Travel to the Wardrobe and open the boxes close-up. Sprinkle the Citric Acid on the orange box, then pour the Water Bottle over it. The faded writing comes back, and you can take the Hint (a torn piece of card showing pairs of symbols).
- Open the blue wall safe. The cable on its left is cut and sparking. Put the Heat-Shrinking Tube over the break, then use the Hair Dryer to shrink it. Use the Hair Dryer on the frosted screen as well; a grid of symbols appears.
- Place the Hint on the safe to start the symbol-connection puzzle.
Safe puzzle: connect the pairs
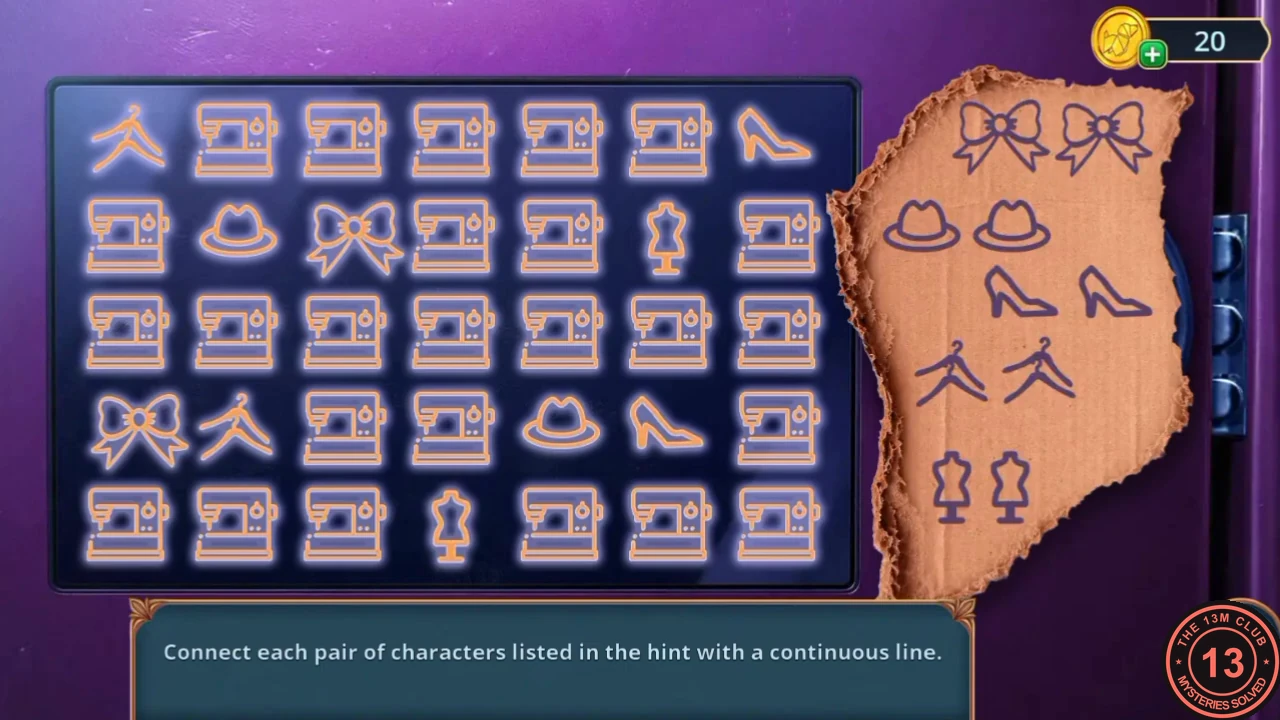
'Connect each pair of characters listed in the hint with a continuous line.' The hint lists five pairs: bows, hats, high heels, hangers and dress forms. Draw a line from one symbol to its twin through the sewing-machine squares. Lines cannot cross or share a square.
- Drag from a symbol to its matching twin. Route the pairs that sit far apart around the outer edge first, then fit the short links inside. If a line blocks another pair, redraw it. If you reach a dead end, clear the lines and start again. The puzzle is solved when all five pairs are connected; the safe then opens.
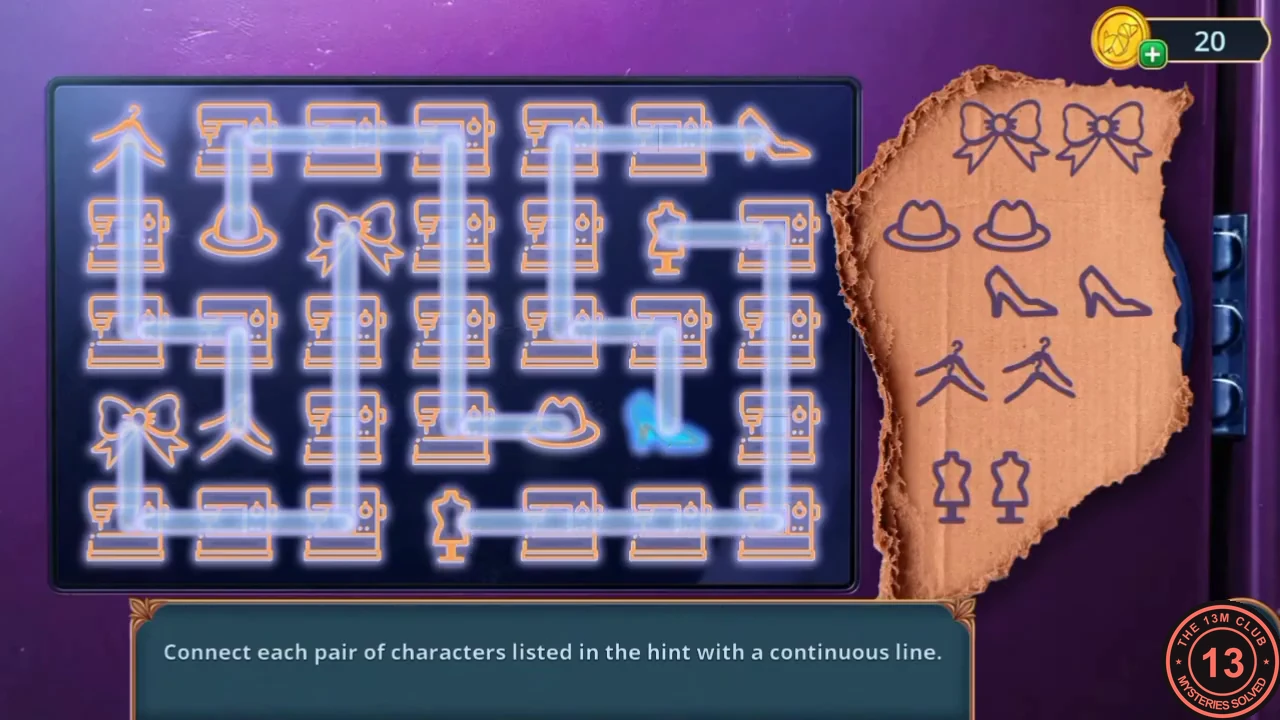
One solution: all five pairs joined by lines that never cross. - Look through the papers in the open safe: someone is buying up fashion houses, but there is no information on who or why.
3D printer puzzle and Alice's note
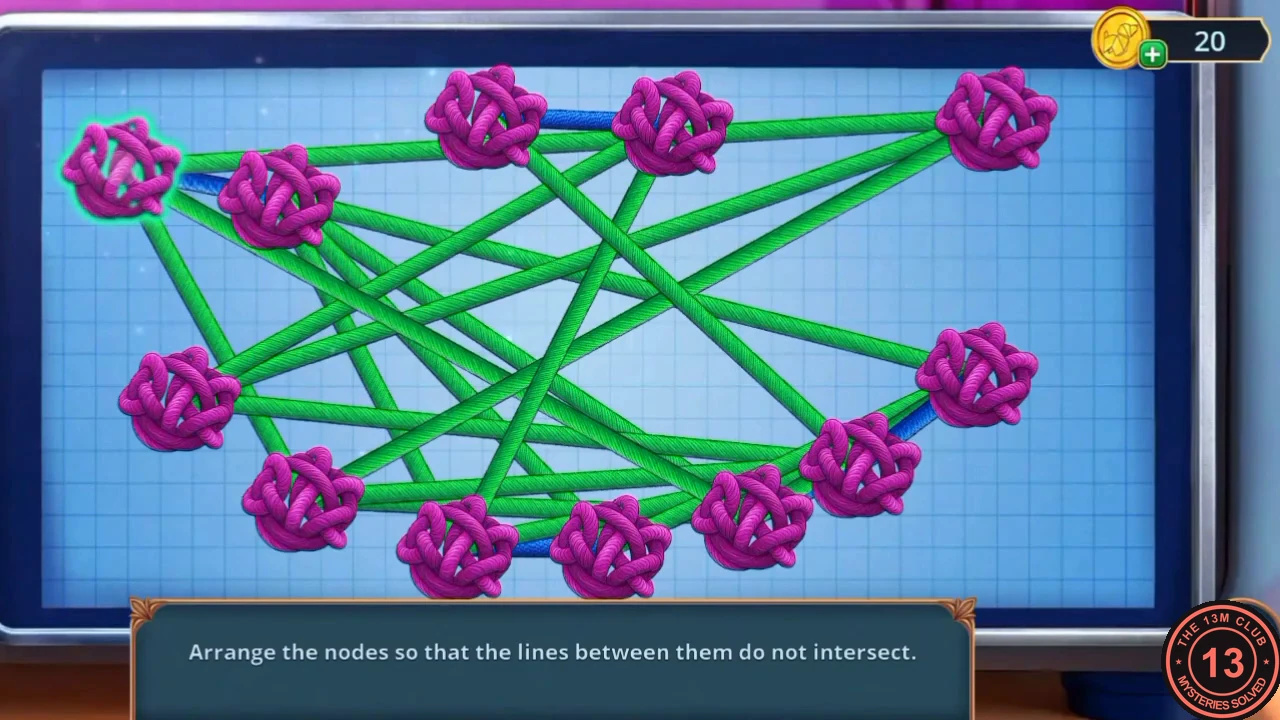
Load the 3D printer in Vivienne's Workshop. The printer screen then asks you to 'Arrange the nodes so that the lines between them do not intersect.' A green line is crossing another line; a blue line is clear.
- Travel to Vivienne's Workshop and open the desk close-up. Insert the USB Flash Drive into the 3D printer's port and mount the Coil (the red filament spool) on its side. The node puzzle opens.
- Drag the knots around until no lines cross. Pull the outermost knots to the edges to form a frame, then move the knots with the most links into the middle. Next, move every knot whose lines are still green until those lines turn blue. The layout is free; any arrangement without crossings is accepted.
- Take the printed red drawer handle, attach it to the desk drawer and open it. Read Alice's note to Vivienne: she is being watched and threatened and will meet Vivienne at her place tomorrow night. Will: 'Darn! She's in danger!'