Hidden-object scene: matching pairs in the limousine
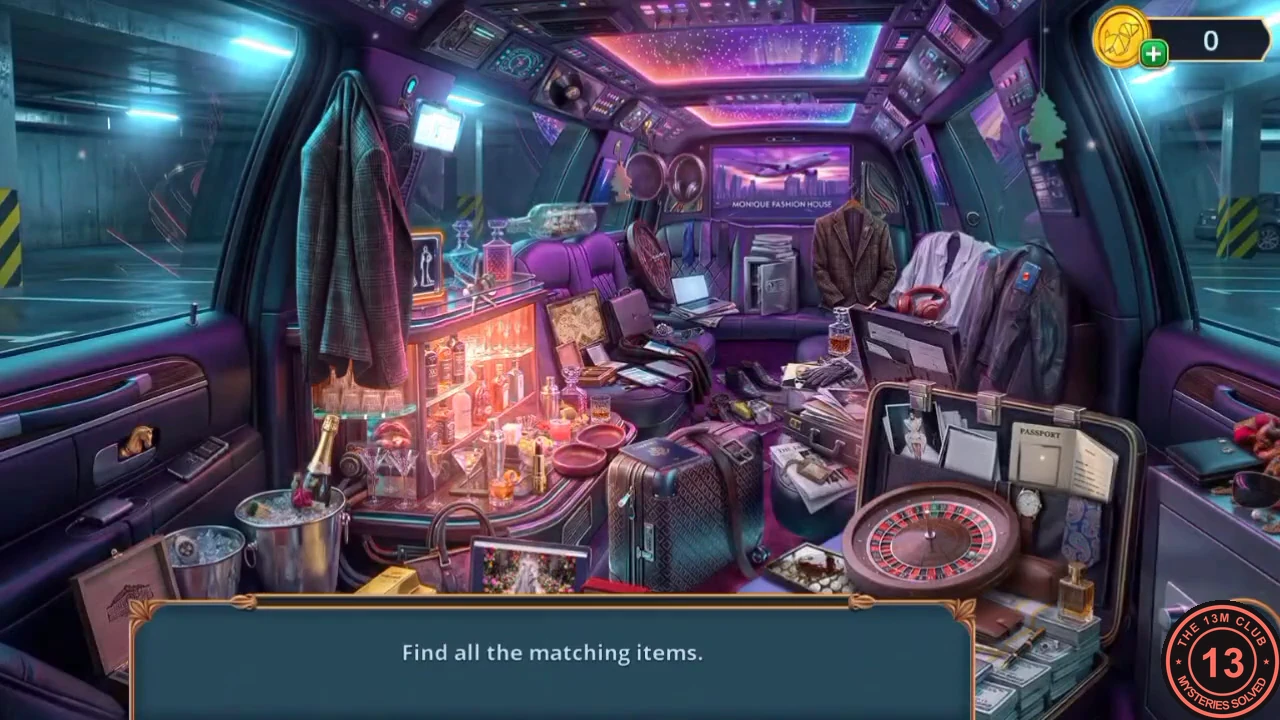
The car alarm opens the limousine, which is full of paired objects.
- 'Find all the matching items.' Each object in the limo has a twin somewhere else in the scene; tap both to remove the pair. Two of the pairs have to be repaired before they can be matched.
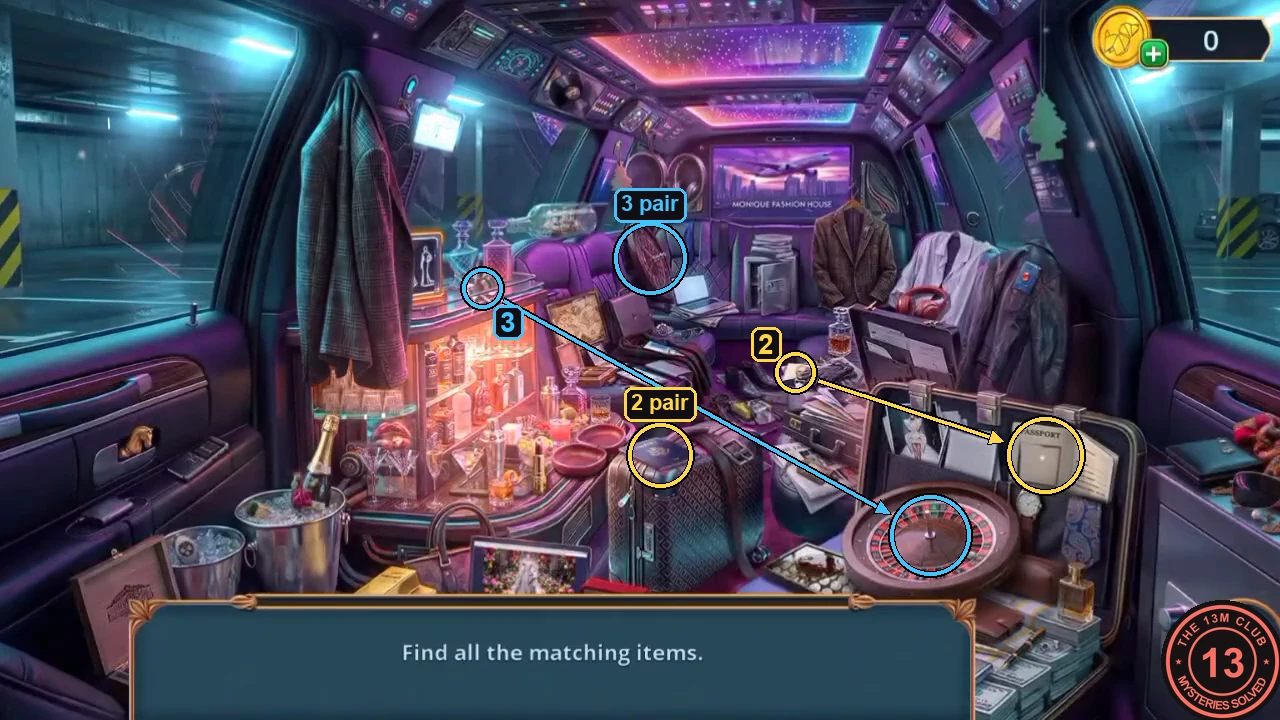
The two repairs: 2 = photo into the passport, 3 = spindle into the roulette wheel. "Pair" marks the twin to match each repaired object with. - The open passport in the lid of the foreground suitcase (right, behind the roulette wheel) has an empty photo space ('An identity without a face is just a name on paper.'). Take the small portrait photo of a white-haired man in a tuxedo lying on the black leather gloves beside the half-open black briefcase, and put it into the passport. Then match the completed passport with the dark passport lying on top of the patterned suitcase in the middle.
- The roulette wheel in the foreground has no centre handle ('The wheel spins, but something's off! It feels... incomplete.'). Take the small silver spindle lying on the glass top of the bar, in front of the blue glass decanter, and fit it into the centre of the wheel. Then match the wheel with the roulette wheel standing on its edge on the purple seat behind the bar, to the left of the laptop.
- Match the remaining pairs. When every pair is gone you receive the VIP Card.
The VIP door and the broken staircase in the lobby
The VIP Card opens a door in the garage that leads to a luxurious lobby with a broken staircase.
- In the garage, use the VIP Card on the 'VIP ACCESS ONLY' card reader by the door between the stacked boxes and the CYBER-SNACK vending machine (just left of the machine). The light turns green and the door opens. Go through to the lobby.
- Open the desk with the monitor (left) and take the second Metal Steps (2/3). Look at the staircase: 'There's a gap in the staircase - a few missing steps.'
- Open the big window. Take the Chain Part and the Wine Glass with Fingerprint. The glass panel is cracked but not open ('Something hard and sharp might be able to cut through it.'): use the Diamond Ring to cut a circle out of it, then take the Ballerina Amulet behind it.
- Open the fallen gold crystal lantern. Take the third Metal Steps (3/3) leaning against it. The lantern's chain is broken ('Time to repair that chain.'); you will fix it later. Put the Ballerina Amulet into the lantern's panel: it opens and gives you the Cold Weld.
- Go to the staircase and fit the three Metal Steps into the gap, then apply the Cold Weld. A screw puzzle appears.
Puzzle: the coloured screws on the staircase
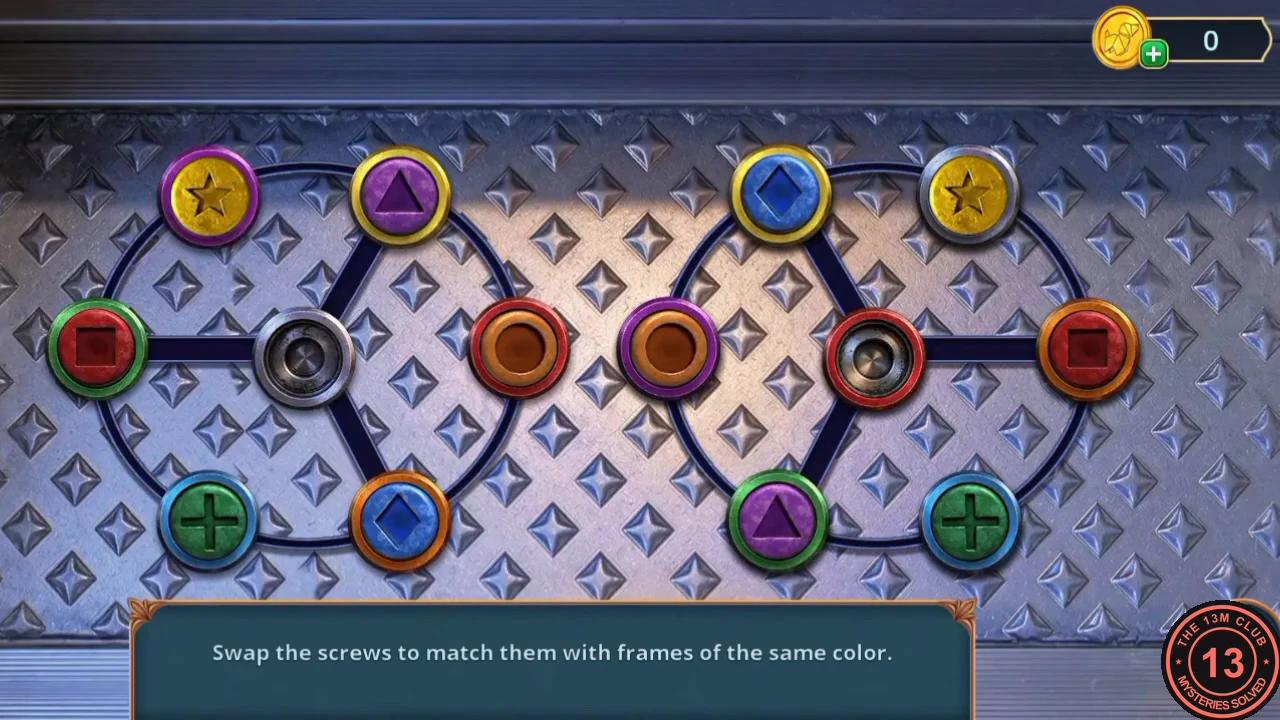
'Swap the screws to match them with frames of the same color.'
- There are two wheels. Each one is a ring of six sockets around a centre socket, joined to the centre by three spokes. Every socket has a coloured frame, and the twelve screws come in pairs: yellow star, purple triangle, red square, orange circle, green plus and blue diamond. Two sockets have silver frames and must stay empty. Tap a screw to slide it along a line into an empty neighbouring socket. Target layout, left wheel: top-left purple, top-right yellow, left green, centre empty (silver), right red, bottom-left blue, bottom-right orange. Right wheel: top-left yellow, top-right empty (silver), left purple, centre red, right orange, bottom-left green, bottom-right blue. Use the empty sockets to shuffle screws round each ring until every screw sits on a frame of its own colour.
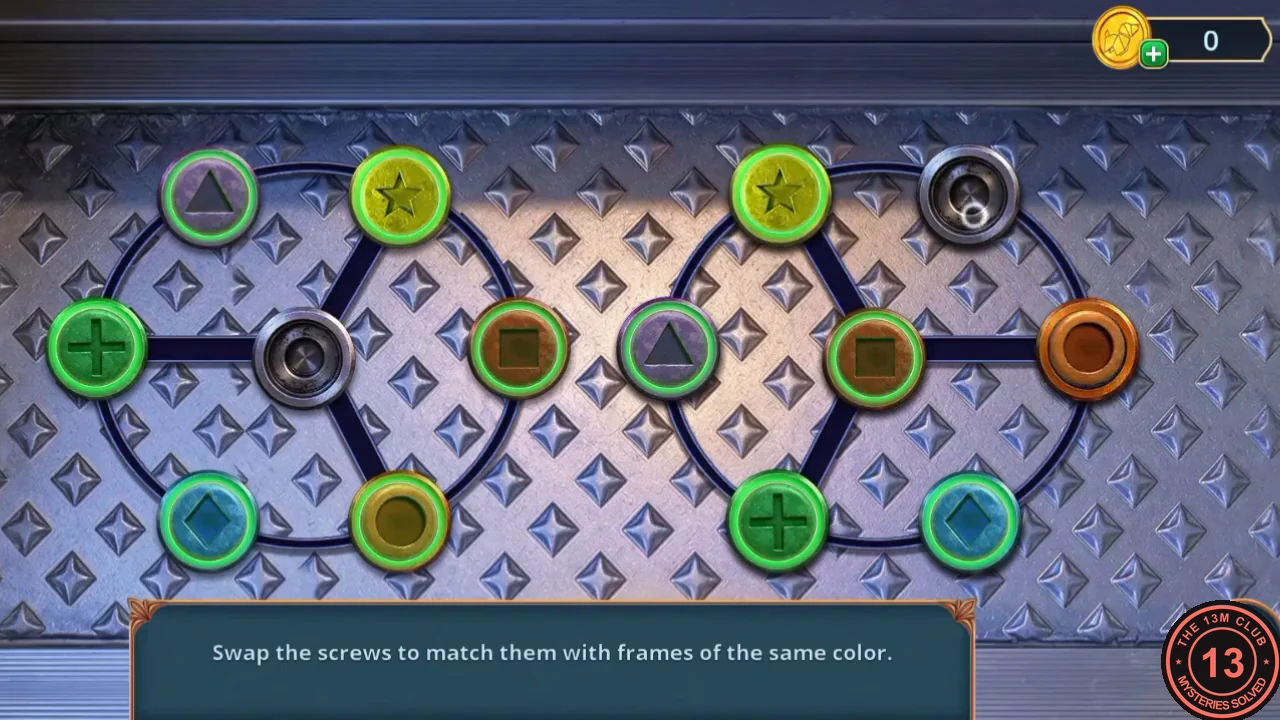
Solved: every screw sits on its own colour (the frames glow green) and the two silver sockets are empty.
Up the stairs: the selfie stick and the rubber gloves
The repaired staircase leads backstage to a technical room with a huge orange fan, stage lights and a conveyor grate (the map calls it the Lighting Grid).
- Climb the lobby staircase to reach the technical room behind the stage.
- Open the conveyor grate in the floor. Take the Telescopic Selfie Stick. An orange rubber glove is stuck under the grate ('I need something very flat and thin here.'): slide the Casino Chip into the gap to free it and take the Rubber Gloves.
- Open the electrical box and use the Rubber Gloves on the wires. Sparks fly, then a sparkle appears in the room: tap it to start a hidden-object scene.
Hidden-object scene: associations in the technical room
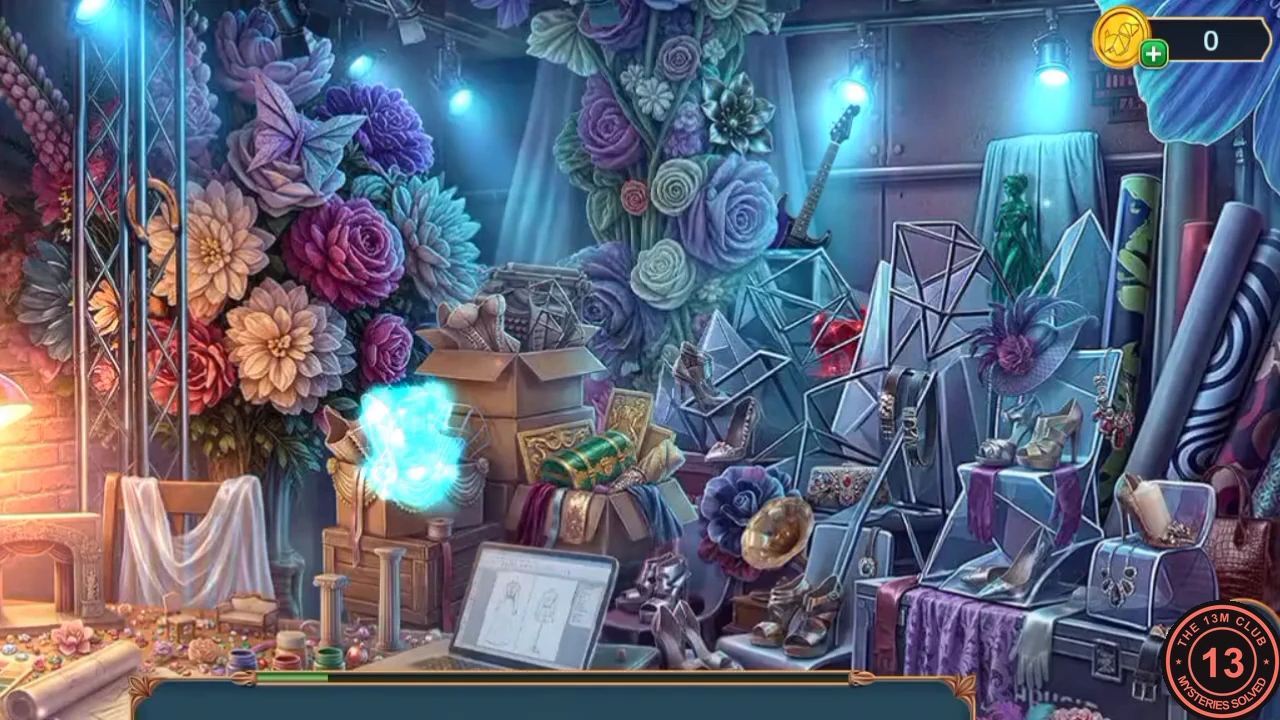
Each clue combines two words ('A + B = ?'). Find the one object that links them. The clues appear one at a time and the scene pans.
- Answers in the order they appeared: Fire + Hose = the red fire extinguisher on the back wall, top right. Axe + Cigar = the small guillotine cigar cutter in the cardboard box by the big flowers. Britain + Tea = the white teapot on the desk beside the wooden globe. Record + Pipe = the gold gramophone horn among the shoes right of the laptop. Smoke + Lips = the smoking pipe on the desk by the scissors. Light + Candlestick = the white candle on the clear handbag right of the shoes. Button + Letters = the small typewriter in the open cardboard box among the flowers. Shield + Sword = the knight sketch on the left of the sketch wall. String + Music = the electric guitar on the back wall. Horse + Boot = the gold horseshoe hanging on the metal truss among the flowers. Ear + Hook = the gold earring on the small round box on the side table by the eclair. Scroll + Package = the grey document tube behind the cardboard box, bottom right. You receive the Gear.
The conveyor, Vivienne's call and the lighting control panel
The Gear restarts the conveyor and opens the way to the Lighting Room above the stage.
- The electrical box still needs a wiring diagram ('The wiring inside is a mess. Where is the diagram?'). Open the conveyor grate again and fit the Gear into the mechanism on the right. Then tap the sparkle over the stage to go up to the Lighting Room: 'Great! I can watch the show from here! I just need to raise these shutters.'
- Vivienne calls: 'Will! I'm glad you're okay. Sterling's here somewhere. He caught me with Monique. I... I'm not sure what... I don't know what to do!' Scored decision: 'I'll be there to have your back!' (60 coins, +2 points) or 'You're overreacting.' (free, 0 points). The task 'Find a secluded spot' is completed and the new task is 'Get a view of the catwalk'.
- Open the control panel on the desk. Take the Drone (it can be opened in the inventory). Put the Anchor Keychain into the anchor-shaped slot: a compartment opens with Scotch Tape. Panel buttons are missing: 'A panel without its controls is just a blank face. Replace the missing pieces, and the lights will respond once more.'
- Open the pile of torn paper on the floor ('The diagram is in pieces.') and use the Scotch Tape on it to start a puzzle.
Puzzle: taping the torn paper
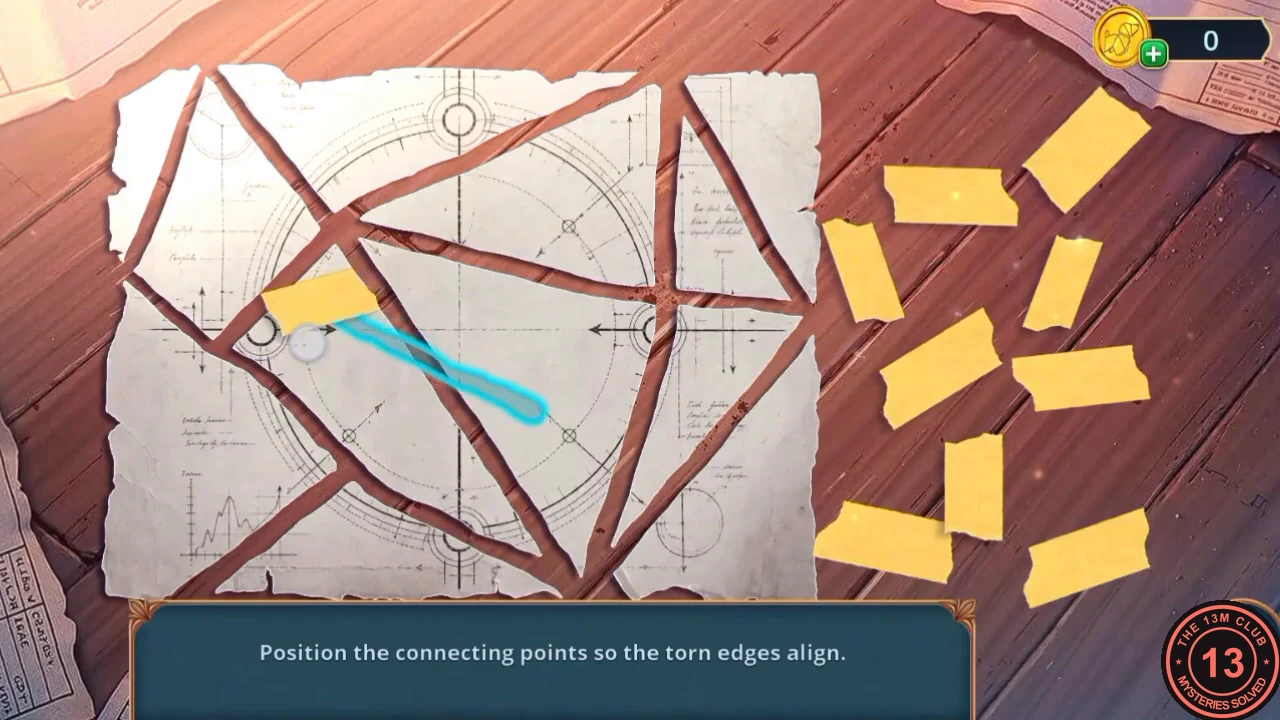
'Position the connecting points so the torn edges align.'
- The paper is torn into pieces, and strips of tape lie to the right. Drag a strip of tape onto a point where tear lines meet. Each tear line it connects correctly turns blue. Keep placing and adjusting the strips until every tear line on the sheet is blue. The repaired note reads '70 10 80'. Take it as the Wardrobe Code. Underneath is a blank notepad ('I think there is a hidden message. How to read it?'), which you will read later.
The pencil sharpener, the first control button and the safe
Still in the Lighting Room.
- Open the pencil sharpener on the wooden door ('Ah, sharpener. What should be sharpened, though?') and take the blue Control Button (1/3). The control panel needs all three buttons before you can use it.
- Open the leather armchair and the safe beside it. Put the Wardrobe Code ('70 10 80') on the safe. It opens: take the Fingerprint Kit. A brooch is also inside.
Underground parking: the fingerprint on the limousine
The map now lists Underground Parking, Lobby, Lighting Grid and Lighting Room for Will.
- Use the map to travel to the Underground Parking. You can open the Drone in the inventory ('It's time to start fixing drones.'), but its two slots stay empty for now.
- Open the Wine Glass with Fingerprint in the inventory and use the Fingerprint Kit on it to lift the print onto a card (achievement 'Super Detective'). Apply the print to the handle of the limousine's rear door to open another hidden-object scene.
Hidden-object scene: the list in the limousine
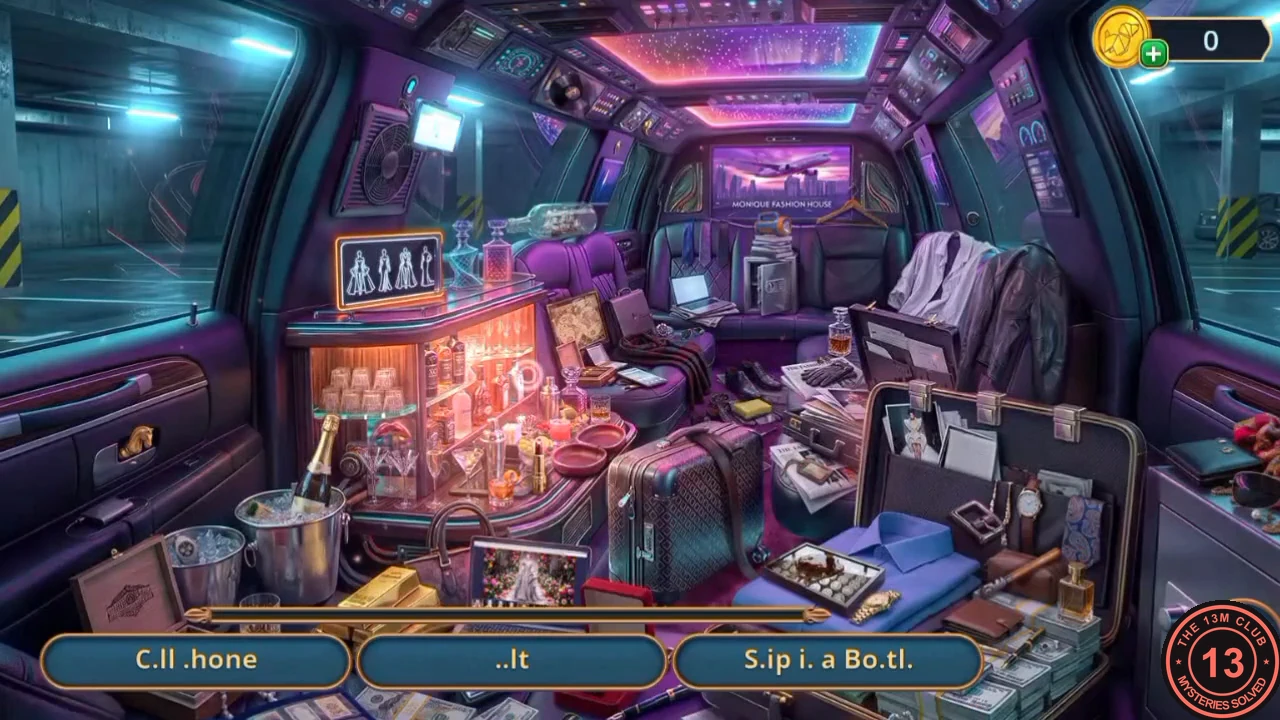
This time it is a word list, and some of the names have missing letters.
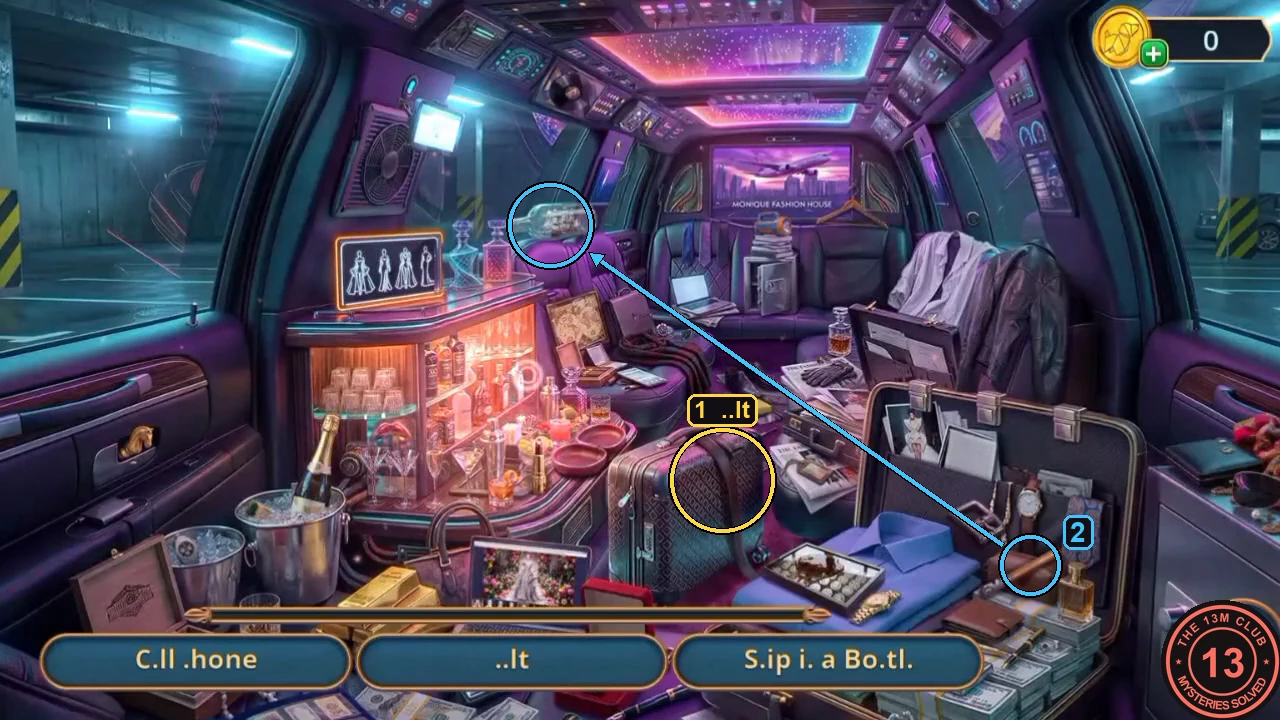
- Find the listed objects in the limousine. Only three entries are shown at a time, with letters missing from their names. The list includes the Cell Phone, Ship in a Bottle, Leather Jacket, Lipstick Print, Chess Piece, World Map, Airplane Drawing, Flashlight, Luggage Tag, Coin Collection and Navigator. The entry shown as '..lt' is the dark strap draped over the patterned suitcase in the middle: tap it.
- For the Ship in a Bottle, take the long brown rod lying across the brown leather pouch in the open suitcase in the foreground and use it on the bottle lying on top of the back-left purple seat. The bottle breaks: take the ship.
- Find the rest of the listed objects. When the list is finished you receive the Hatch Key.
The floor hatch and the fan rotor
The Hatch Key fits the square hatch in the parking garage floor.
- Open the square hatch in the parking garage floor and turn the Hatch Key in its lock. Take the Rotor.
- Use the map to go to the Lighting Grid. Open the big fan next to the red fryer and fit the Rotor onto the fan's hub. An arrow puzzle starts.
Puzzle: the coloured pieces and the jumping arrows
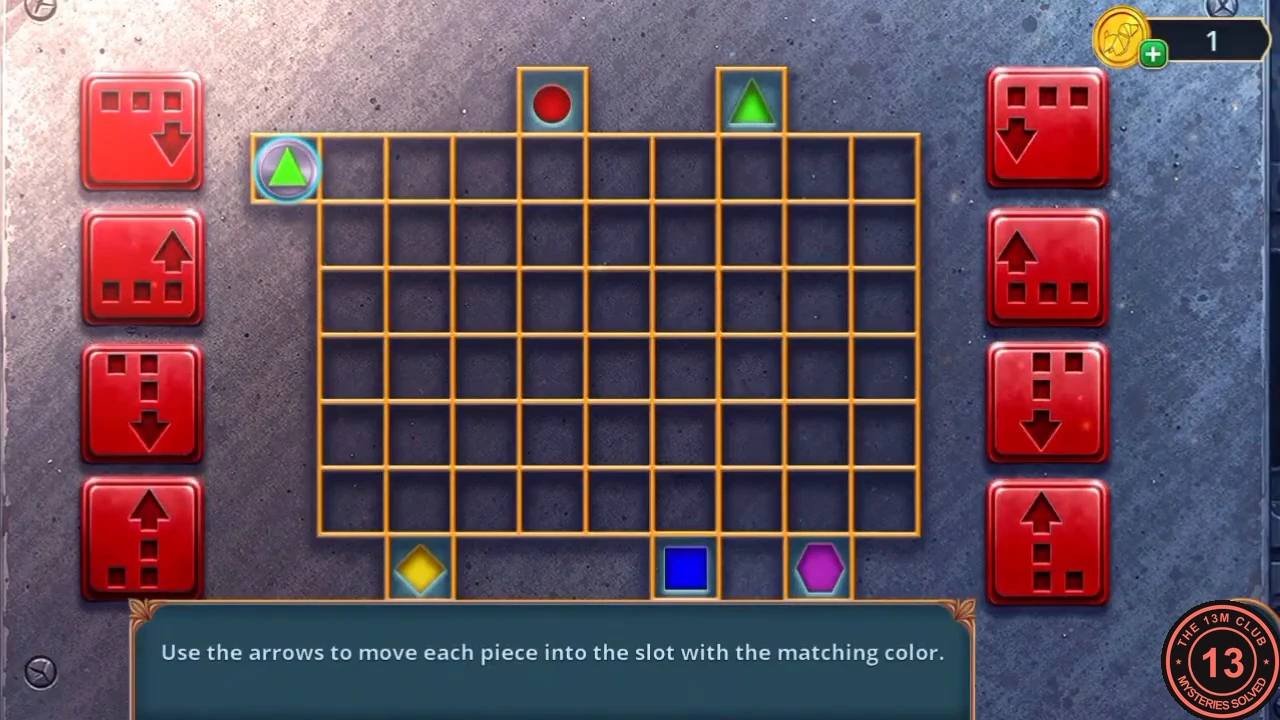
'Use the arrows to move each piece into the slot with the matching color.'
- The board has 9 columns and 6 rows. Pieces enter one at a time from the cell left of the top row. Slots: above the board, red circle over column 4 and green triangle over column 7. Below the board, yellow diamond under column 2, blue square under column 6 and purple hexagon under column 8. Each of the eight red buttons moves the piece in an L-shaped jump, shown by the dots and arrow on the button. Left column, top to bottom: L1 = 2 right, 1 down; L2 = 2 right, 1 up; L3 = 1 right, 2 down; L4 = 1 right, 2 up. Right column, top to bottom: R1 = 2 left, 1 down; R2 = 2 left, 1 up; R3 = 1 left, 2 down; R4 = 1 left, 2 up.
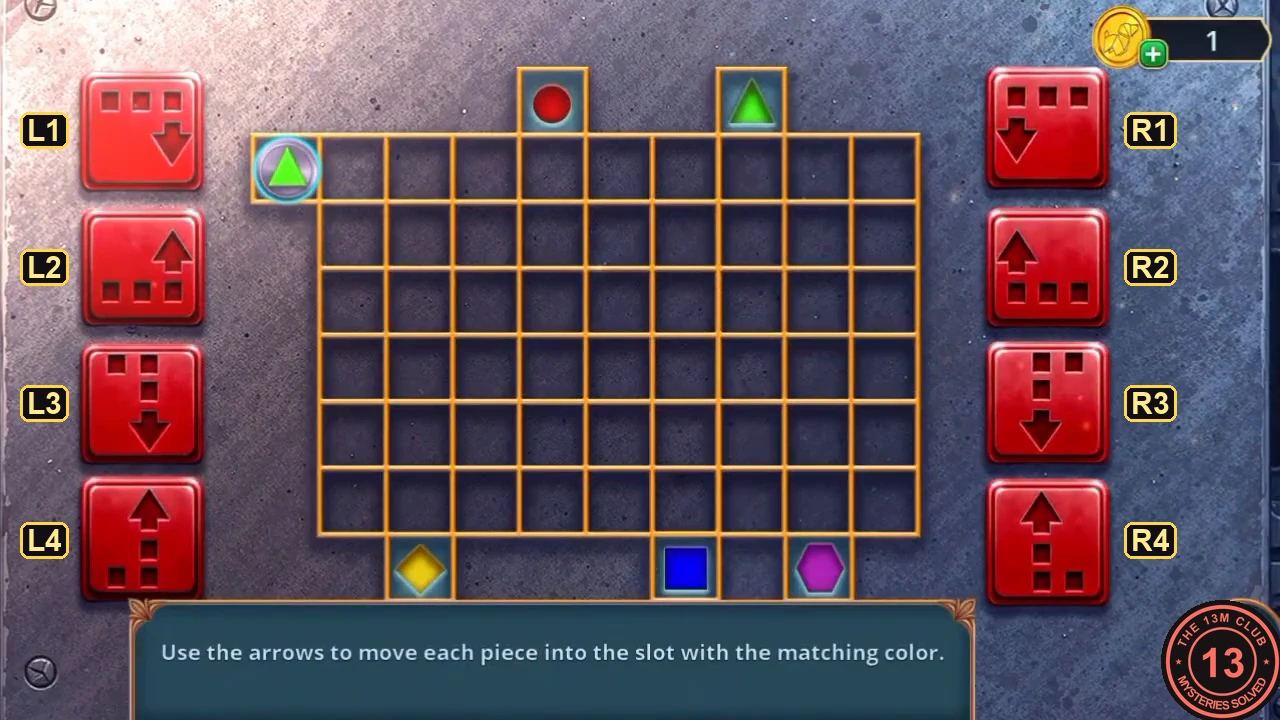
Button names used in this guide: L1 to L4 on the left, R1 to R4 on the right. - Button presses that solve each colour (listed in the order the pieces arrived in this solve): green L1, L2, L1, L4; blue L1, L1, L1, L1, R1, R4, R3, L1; purple L1, L1, L1, L1, R1, L1; yellow L1, L1, R3, R3; red L1, L2, R3, L2, R4. If your pieces arrive in a different order, use the sequence for the piece's colour. Each one starts in the same entry cell. When all five pieces are in their slots the fan starts and drops the Crate Key.CODEGreen: L1 L2 L1 L4 | Blue: L1 L1 L1 L1 R1 R4 R3 L1 | Purple: L1 L1 L1 L1 R1 L1 | Yellow: L1 L1 R3 R3 | Red: L1 L2 R3 L2 R4
The crate, the selfie stick and the remote outside the window
The red fryer next to the fan has no basket yet ('Where is the basket?').
- Open the wooden crate with the padlock (a brown rat sits beside it). Use the Crate Key on the padlock and take the Selfie Stick Mount.
- Go to the Lobby. The drawer of the desk is bolted from inside: 'The drawer is secured with a simple bolt from inside. A magnet might be able to slide it open.' Open the Telescopic Selfie Stick in the inventory and attach the Selfie Stick Mount to it.
- Open the window with the circular hole cut in it. A purple remote control lies on the ledge outside under autumn leaves. Push the mounted selfie stick through the hole to start a leaf mini-game.