The Indian figurine and the wet wipes
The robot vacuum has finished cleaning and left a couple of finds in its dock.
- Open the vacuum dock again. Take the Blood Pressure Tube and the Statuette Shard. The dock is missing a button ('Where is the button?').
- Open the Broken Figurine in your inventory. Put the Statuette Shard in one empty place and the Silicone Gun in the other to glue it. Take the Indian Figurine.
- Open the shelf with the lucky cat (top right of the hallway). Put the Indian Figurine in the gap between the other two figurines. A drawer opens: take the Wet Wipes.
- Travel to the Living Room and open the table with the spilled wine ('I wish I could wipe this stain off.'). Use the Wet Wipes on the stain. A search starts.
Fragment search: the living-room table
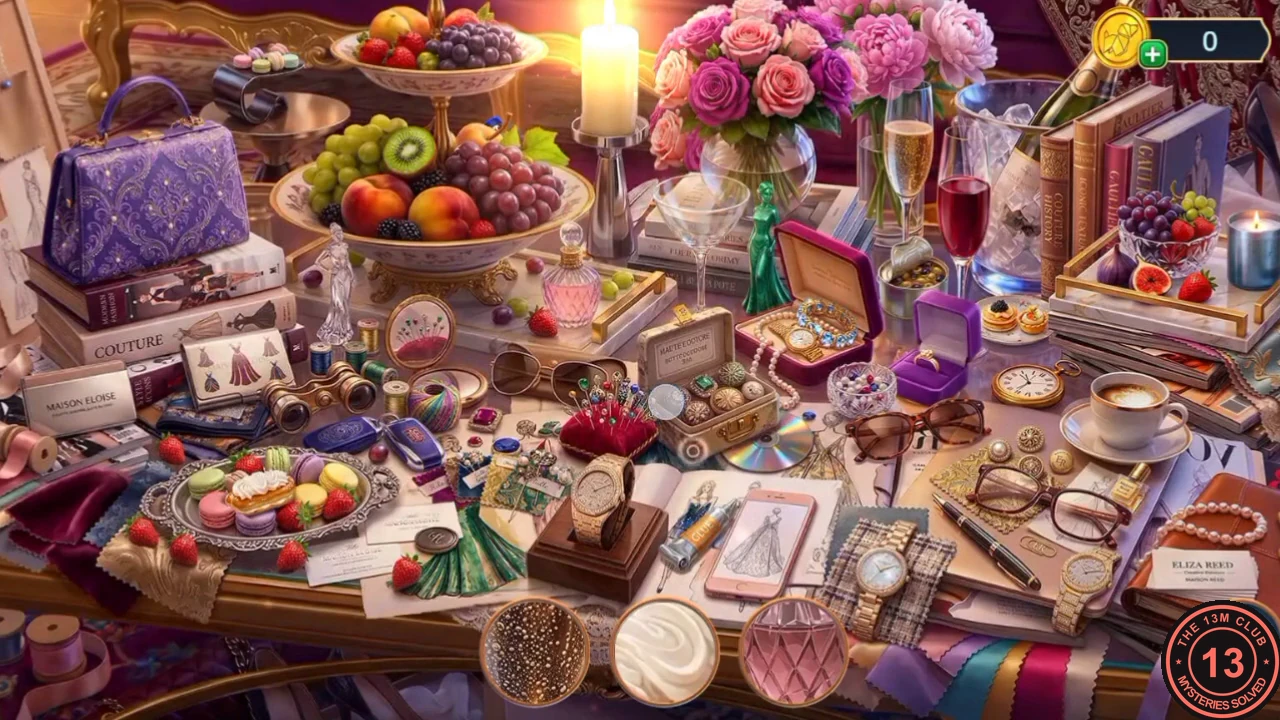
Three round slots at the bottom show close-up fragments of objects on the cluttered table instead of names.
- Find the object each round fragment comes from; each find is replaced by a new fragment. The search gives the Thermal Brush.
The third feather
The last phoenix feather is stuck in something sticky in the living room.
- In the Living Room, open the side table with the fishbowl. Run the Thermal Brush over the pink sticky mass to melt it. Take the Coffee Machine Filter and the Phoenix Feather (3 of 3). The fishbowl needs a net (not yet).
- Travel to the Driveway to Monique's House and open the griffin statue on the right. Give it the three Phoenix Feathers; a disc puzzle appears on its chest.
Disc puzzle: the griffin's chains
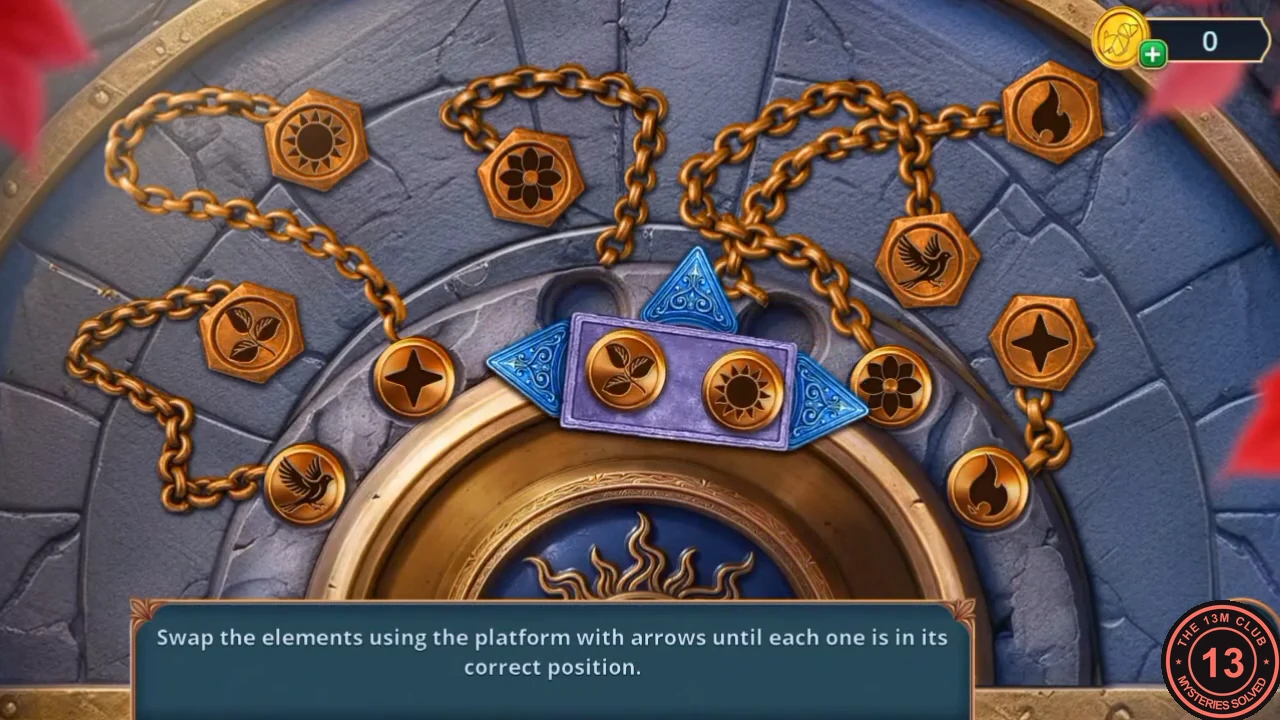
'Swap the elements using the platform with arrows until each one is in its correct position.' Six round discs sit on an inner arc, and each is chained to a hexagonal plate higher up showing a symbol. A purple platform under the discs picks up two neighbouring discs and carries them around the arc with the arrow buttons. At the start the discs read, from left to right: bird, star, leaf, sun, flower, fire.
- Follow each chain from its disc to the plate it hangs from; each disc must show the same symbol as its plate. Use the platform to move the discs until they read, from left to right: leaf, sun, flower, fire, bird, star. The griffin opens: take the Claw Ring.
A new mouse for the office computer
The stapled parcel in the mailbox finally opens.
- Open the mailbox and use the Claw Ring to pry the staples out of the parcel. Take the New Mouse.
- Travel to the Large Office, open the computer desk and connect the New Mouse. The security-camera desk opens as a list search.
List search: the security desk
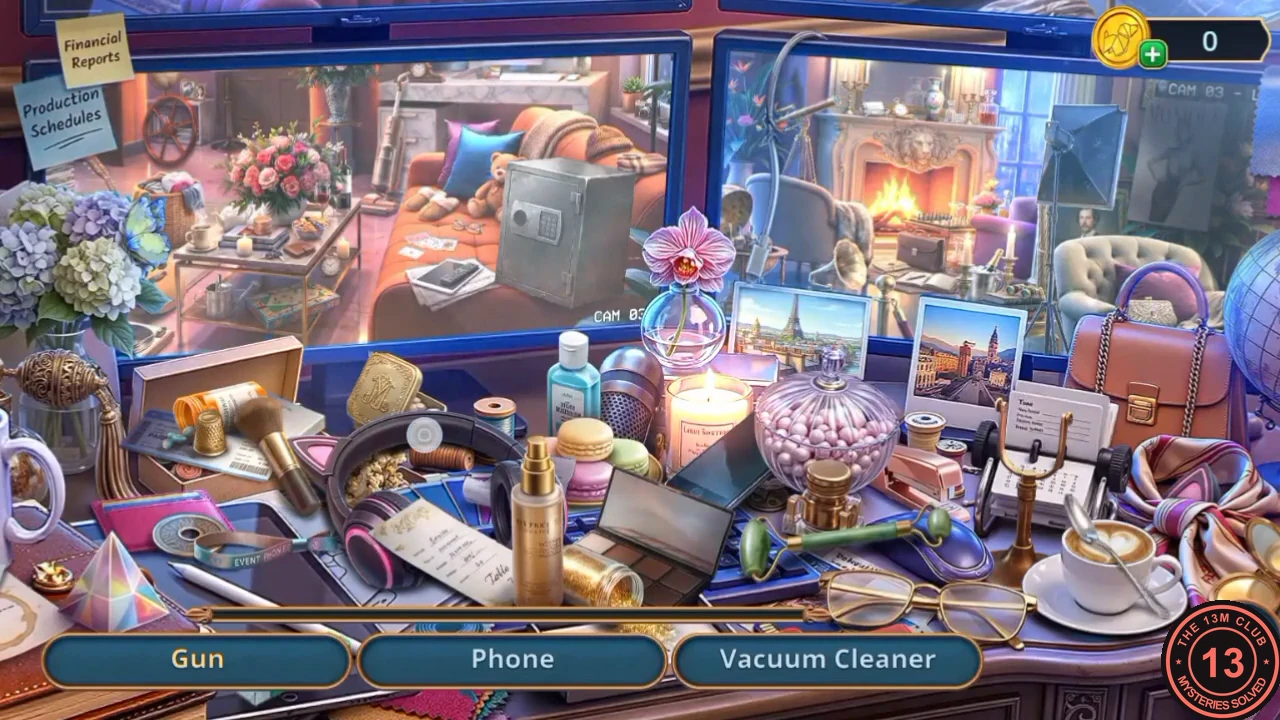
A list search on Monique's desk in front of the security monitors. The list starts with Gun, Phone and Vacuum Cleaner.
- Find the objects named in the three slots; each find is replaced by a new name (Pills, Stapler, Card Holder, Butterfly, Microphone, Lion, Heart, Monique Poster, Headphones and more). At the end the cameras show the portrait of Monique's father holding a pool cue and a trophy: 'Hmm... it seems Monique's father was an avid pool player. So the code in his painting is clearly related to pool...'
- The computer's disk tray is now open ('I need to insert a disk here.'). Take the Collectible Coin lying beside it.
The toolbox screw and the garden rake
The coin is just right for turning the toolbox's missing screw.
- Open the orange toolbox on the billiard table. Fit the Screw into the empty hinge hole, then turn it with the Collectible Coin. The lid opens: take the Garden Rake.
- Travel to the Greenhouse near the House and open the flower bed on the left. Rake the flowers with the Garden Rake. A fragment search starts.
Fragment search: the flower tables
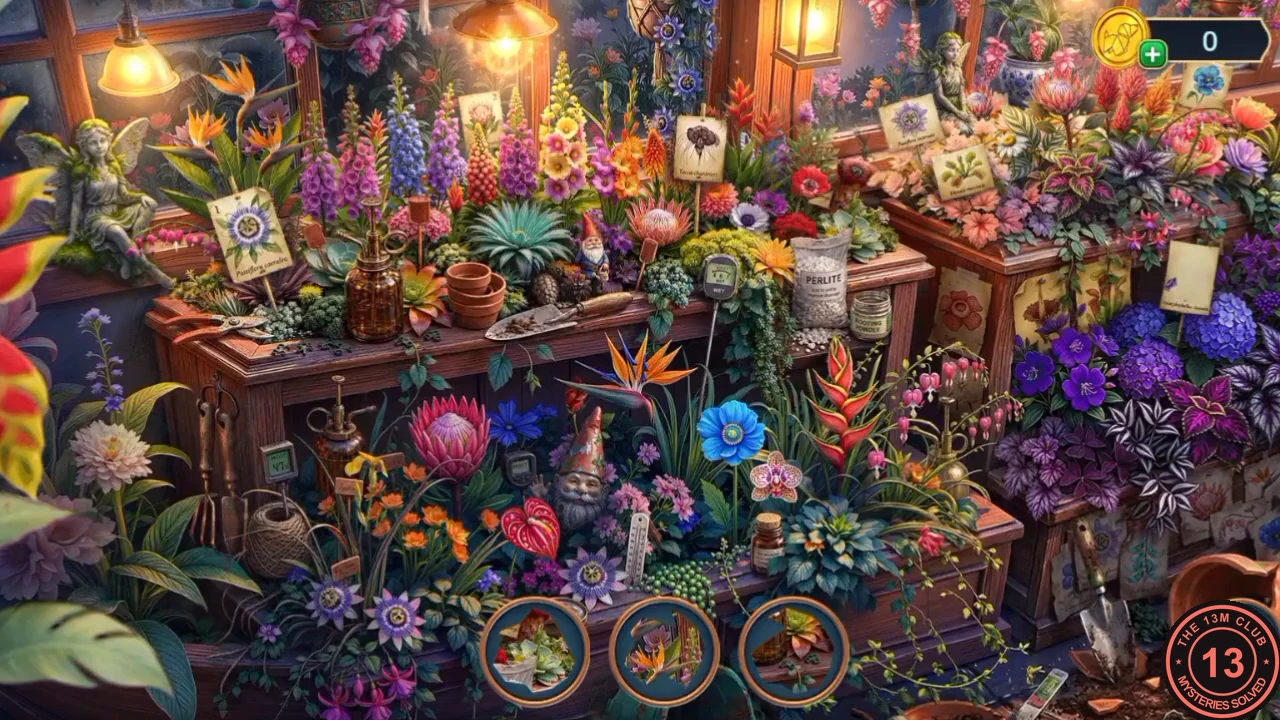
Three round slots at the bottom show close-up fragments of objects hidden among the potted flowers.
- Find the object each round fragment comes from. The search gives the Bangle Bracelet.
- Open the window with the gold astrolabe and the hanging flower basket. Hook the Bangle Bracelet onto the pulley to lower the basket. Take the small jar and the Battery from it. (Vivienne wonders how to tune the astrolabe; that comes later.)
Powering the windmill
The Battery finally powers the Microcurrent Massager, and the massager's current wakes up the windmill birdhouse.
- Open the Microcurrent Massager in your inventory and put the Battery in it.
- At the Driveway, open the windmill birdhouse and hold the Microcurrent Face Massager to the panel at its base. An electricity puzzle starts.
Electricity puzzle: the windmill
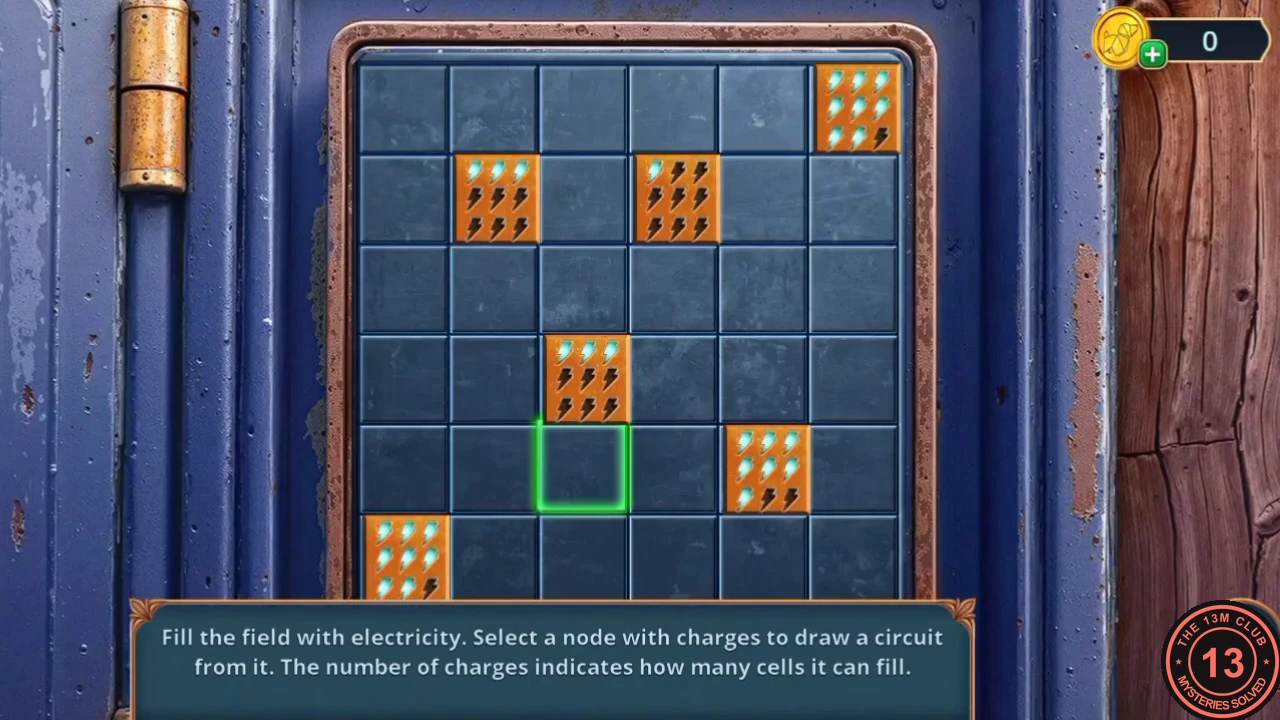
'Fill the field with electricity. Select a node with charges to draw a circuit from it. The number of charges indicates how many cells it can fill.' The field is 6 by 6 with six orange nodes. Counting rows from the top and columns from the left, the nodes and their charges are: row 1, column 6 (8); row 2, column 2 (3); row 2, column 4 (1); row 4, column 3 (3); row 5, column 5 (7); row 6, column 1 (8). The 30 charges fill the 30 empty cells exactly. A node's charge runs in straight lines away from it.
- Fill the cells from each node as follows. Row 1, column 6 (8): left along row 1 to column 1, and down column 6 to row 4. Row 6, column 1 (8): up column 1 to row 3, and right along row 6 to column 6. Row 2, column 2 (3): one cell left (row 2, column 1) and down column 2 to row 4. Row 5, column 5 (7): left along row 5 to column 2, one cell right (row 5, column 6), and up column 5 to row 2. Row 4, column 3 (3): up column 3 to row 2, and one cell right (row 4, column 4). Row 2, column 4 (1): the cell below it (row 3, column 4). The windmill opens; take the Branch Cutter.
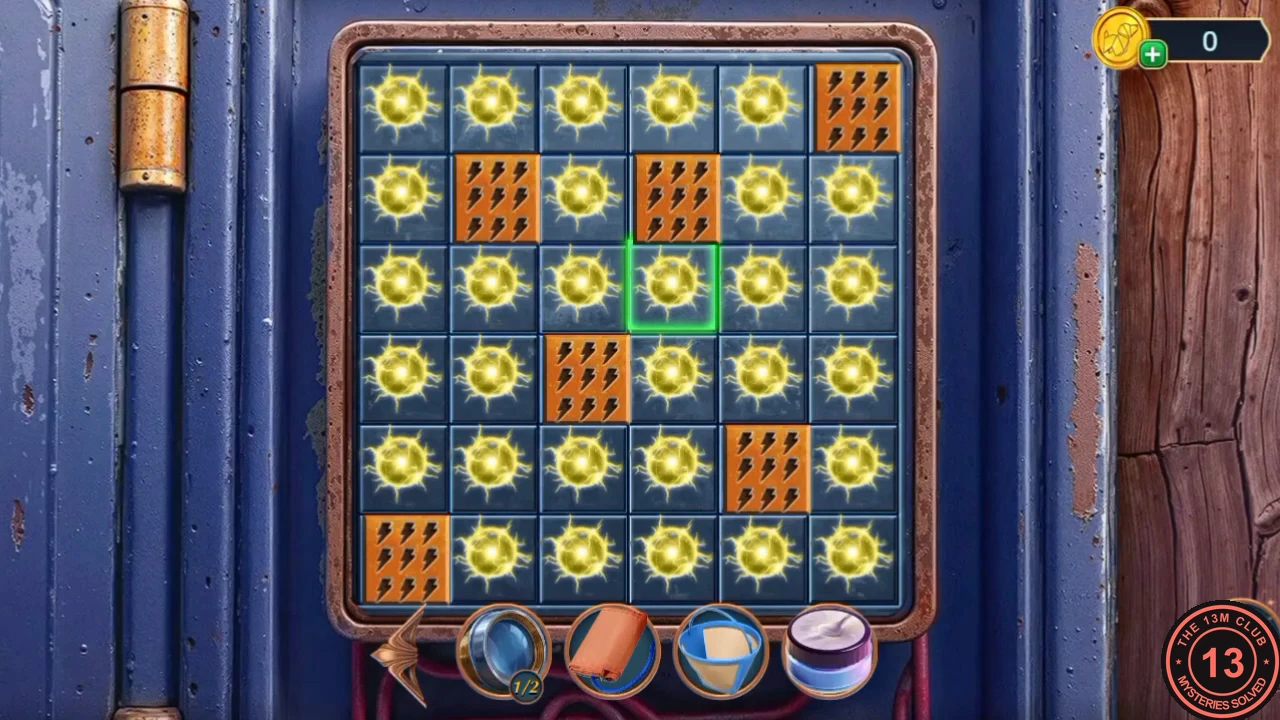
Solved: every cell of the field is lit.
Fixing the blood pressure monitor
Vivienne never thought she'd be fixing blood pressure monitors, but the cabinet in the living room needs one.
- Open the griffin statue again and cut the vines at its base with the Branch Cutter. Take the Blood Pressure Cuff.
- Open the Blood Pressure Monitor in your inventory and attach the Blood Pressure Tube and the Blood Pressure Cuff. Take the Working Blood Pressure Monitor.
- In the Living Room, open the cabinet with the big speaker and put the Working Blood Pressure Monitor in front of it. The cabinet door opens: take the Blush Brush and the Coffee Beans.
- Open the coffee machine and put in the Coffee Machine Filter and the Coffee Beans. A flask puzzle starts.
Flask puzzle: the coffee beans
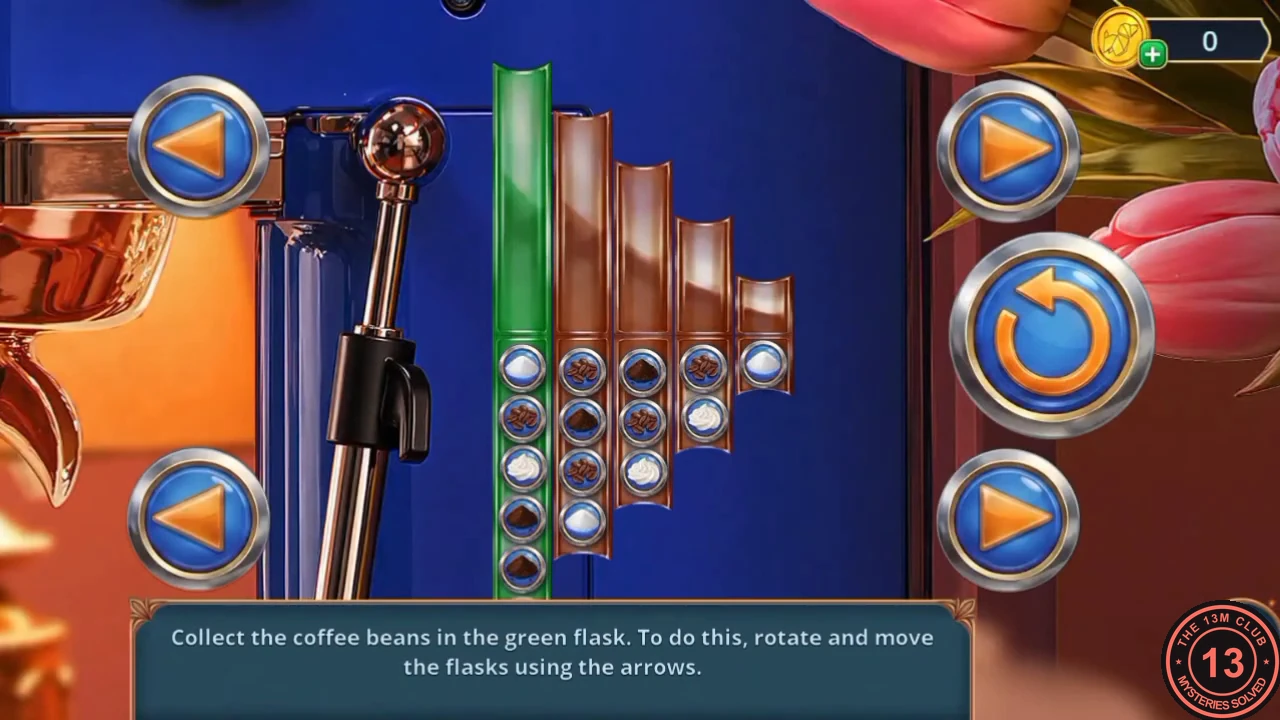
'Collect the coffee beans in the green flask. To do this, rotate and move the flasks using the arrows.' The rack has five columns. Each column is an upper tube sitting on a lower holder, and the green flask is split the same way into a green tube and a green holder. The two arrows at the top slide the whole upper row of tubes one column left or right, and the tube at the end wraps round to the other side. The round button turns the whole rack upside down, so the upper and lower rows swap places (and left becomes right) and everything falls downwards. Pieces that don't fit stay in the tube above, and they drop into any column with room as you slide the row. Your goal is to fill the green holder with the five coffee beans (the ridged brown beans, not the brown powder mounds), keeping the white powder, cream and brown powder out of it. The starting layout was the same in every playthrough we checked, so the sequence below works from the start. It uses only the top arrows and the round button; the two lower arrows aren't needed. Pieces drop on every slide, so press the buttons in exactly this order. Columns are counted from the left, and the position of the green tube in the top row lets you check you're on track.
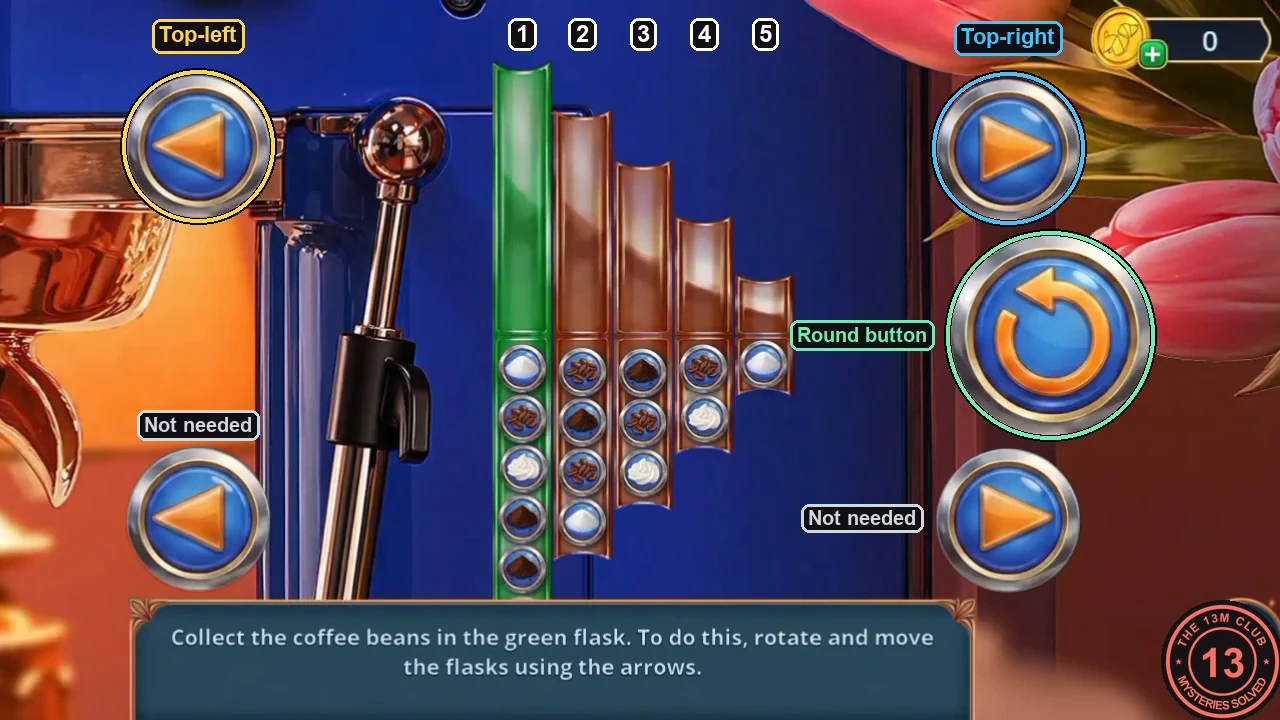
- Press the top-right arrow four times, so the green tube is at the far right (column 5). Then press the round button.
- Press the top-left arrow four times and then the top-right arrow once, leaving the green tube in column 2. Press the round button.
- Press the top-right arrow twice and the top-left arrow once (green tube in column 1). Press the round button.
- Press the top-right arrow twice (green tube in column 4). Press the round button.
- Press the top-right arrow four times and the top-left arrow once (green tube in column 4). Press the round button.
- Press the top-left arrow once, the top-right arrow twice and the top-left arrow twice (green tube in column 3). Press the round button.
- Press the top-left arrow four times. The last coffee beans drop into the green holder in the middle column, which now holds all five beans (see the solved picture), and the green tube ends at the far right. The machine brews: take the Hot Coffee.
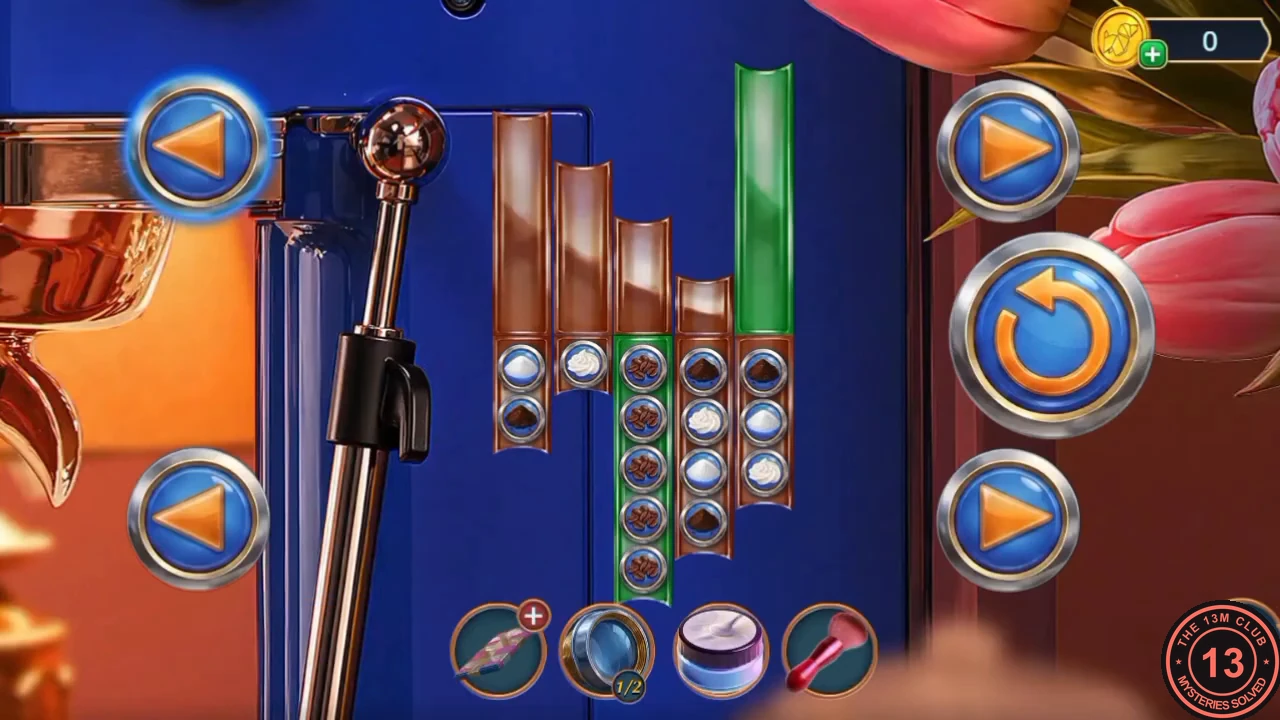
The solved picture: the green holder in the middle column holds all five coffee beans, and the green tube is at the far right.
Melting the ice: the lucky cat's paw
A broken nitrogen tank has frozen the hallway window.
- Travel to the Second Floor Hallway and open the frozen window ('Where did this ice come from? Oh, the nitrogen tank broke. I need to melt it...'). Pour the Hot Coffee over the ice and take the Vacuum Cleaner Filter Button.
- Open the robot vacuum dock and fit the Vacuum Cleaner Filter Button. The compartment opens: take the Lucky Cat's Paw.