The lucky cat and the second lens
The Lucky Cat's Paw belongs to the cat figurine on the hallway shelf.
- In the Second Floor Hallway, open the shelf with the lucky cat and the three figurines. Attach the Lucky Cat's Paw to the cat. When it raises its paw it drops the second telescope lens (Telescope Magnifying Lenses 2 of 2) and an Earring: take both.
- Travel to the Greenhouse near the House and open the brass telescope by the left window. Fit the two Telescope Magnifying Lenses and look through it. A star puzzle starts.
Star puzzle: the telescope
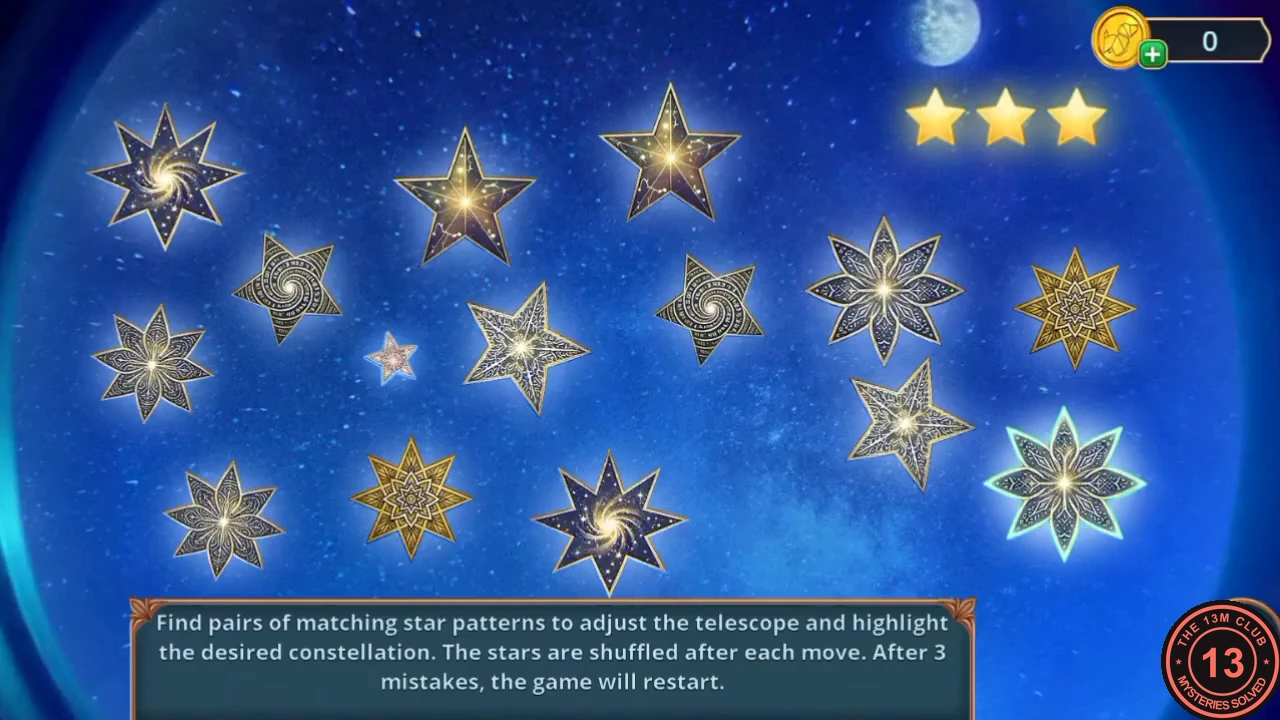
'Find pairs of matching star patterns to adjust the telescope and highlight the desired constellation. The stars are shuffled after each move. After 3 mistakes, the game will restart.' The sky is full of ornate stars with different inner patterns, and three gold stars in the top-right corner count your remaining mistakes.
- Tap two stars with exactly the same pattern. Each correct pair lights one star of the constellation, and then the remaining stars are reshuffled, so look again before each pair. Watch the inner pattern (spiral, flower, plain point and so on), not just the outline. Keep pairing until the constellation is complete: it is the Big Dipper. Take the Big Dipper Constellation card that appears on the telescope table.
The astrolabe box and the MP3 player
The constellation card fits the box under the greenhouse astrolabe.
- Open the window with the gold astrolabe and the hanging flower basket. Put the Big Dipper Constellation card into the slot of the gold box below the astrolabe. The box opens: take the MP3 Player with USB Drive and the blue phone with a flat battery (you will charge it in Chapter 4).
- Travel to the Living Room and open the cabinet with the big speaker again. Plug the MP3 Player with USB Drive into the speaker. Read the rules and press START.
Memory puzzle: the stereo system
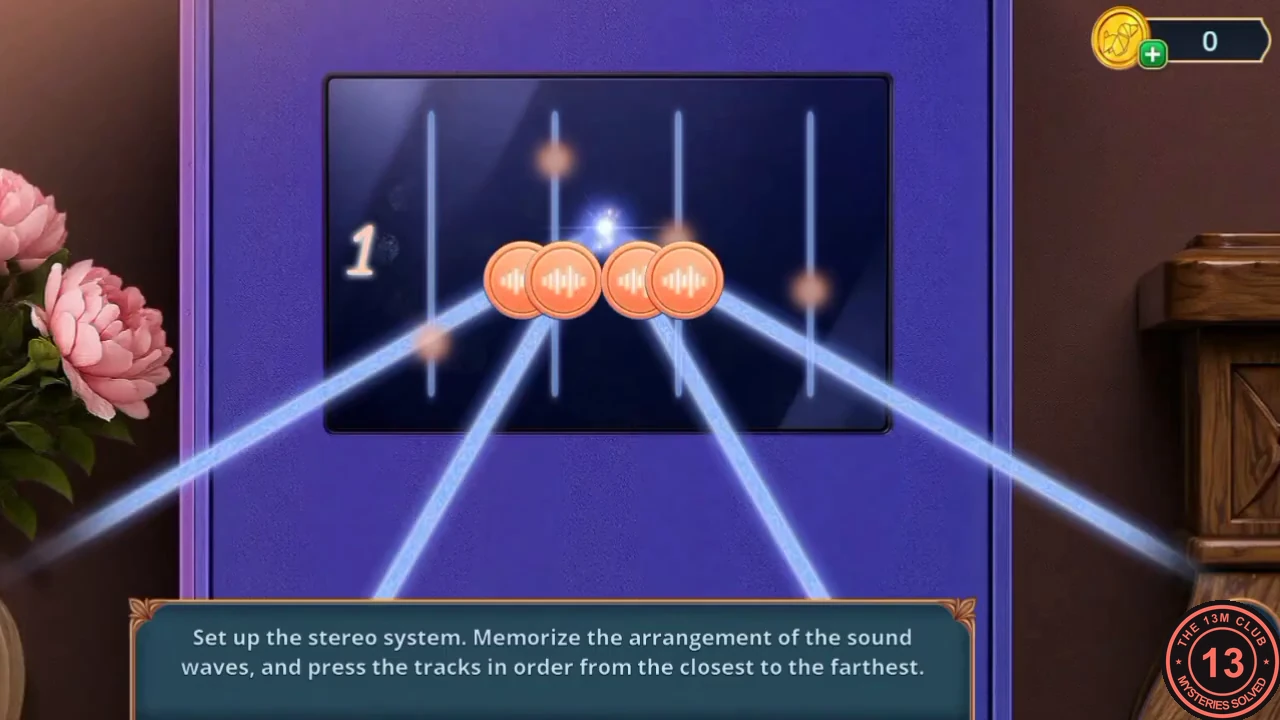
'Set up the stereo system. Memorize the arrangement of the sound waves, and press the tracks in order from the closest to the farthest.' Each round first shows a row of vertical tracks, each with one glowing dot at a different height. Then the tracks fold into a fan of round buttons, one per track, in the same left-to-right order. There are three rounds, with four, five and six tracks. The dot heights can differ each time, so read your own rounds.
- While the tracks are shown, memorize the height of each dot. The lowest dot is the closest track and the highest is the farthest. When the buttons appear, press them from the lowest dot to the highest; each correct press turns green. Example: if the four dots are (left to right) lowest, highest, middle and second lowest, press the first, fourth, third and second buttons. Repeat for the five-track and six-track rounds. The speaker cabinet opens: take the Wig Cap.
Fishing out the spring and fixing the wire winder
The fishbowl in the living room needed a net, and the Wig Cap will do.
- In the Living Room, open the side table with the fishbowl. Use the Wig Cap as a net to scoop out the Spring.
- Travel to Show's Backstage and open the broken wire winder on the floor next to the metal box ('How to wind the wires? Oh, with the help of this coil... Which is broken. Excellent.'). Fit the Spring as the new coil, then attach the Earring as its handle. The winder rolls up the loose wires and the metal box opens as a wiring puzzle.
Wiring puzzle: the symbol sheet
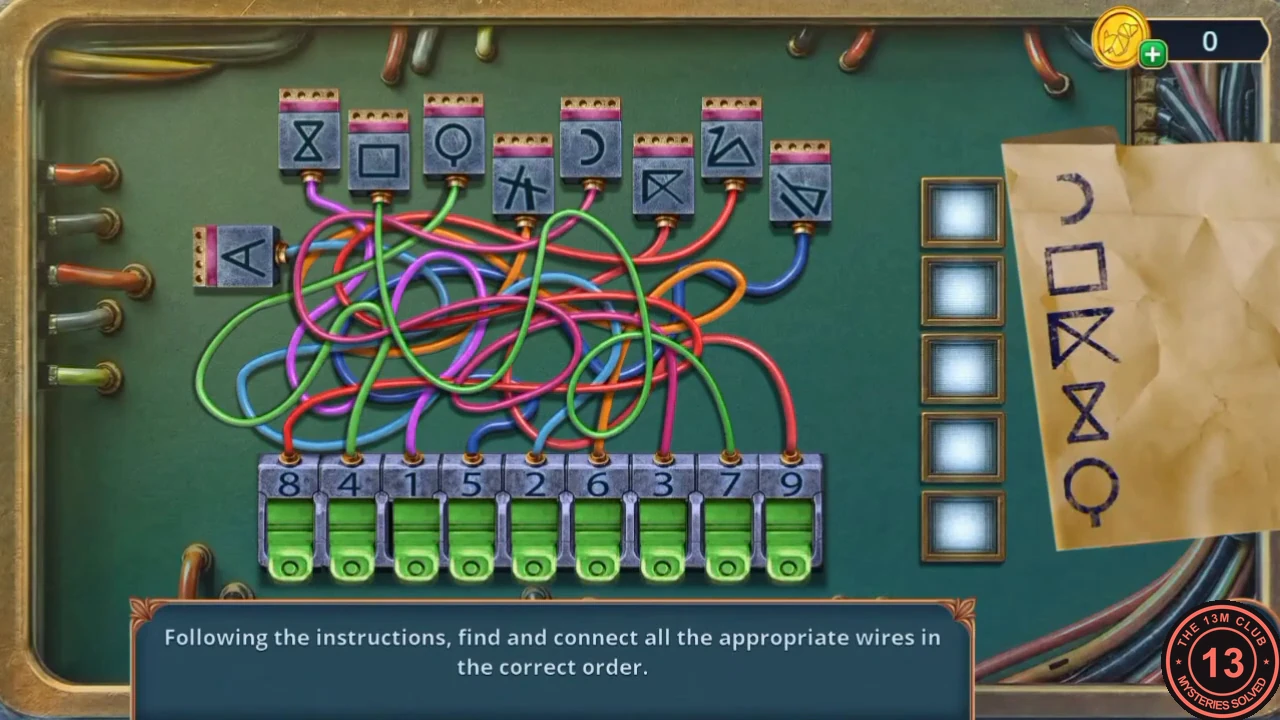
'Following the instructions, find and connect all the appropriate wires in the correct order.' Nine plugs at the top carry symbols, and a tangle of wires leads from them to nine green switches at the bottom, numbered 8, 4, 1, 5, 2, 6, 3, 7, 9 from left to right. The paper on the right lists five symbols from top to bottom: a crescent, a square, a boxed K-like mark, an hourglass and a circle with a tail. Five empty boxes beside it fill with your answers.
- Follow the wire from each listed symbol down to its switch, and press the switches in the order of the list: 3 (crescent), 7 (square), 9 (boxed mark), 1 (hourglass), 4 (circle with a tail). The box opens: take the Hot Hair Straightener and the Hanger.
The painted jacket and the mysterious disk
The hot straightener is the heat the old paint on the jacket needed.
- Still in Show's Backstage, open the clothes rack with the paint-covered jacket and the red wig. Run the Hot Hair Straightener over the paint. Take the Eyebrow Razor that comes free.
- Travel to the Large Office and tap the taped parcel on the coffee table. Cut the tape with the Eyebrow Razor. Read the note inside ('Boss, we've deleted the camera footage as you requested. We left a copy of the recording on this disc. Mike') and take the Disk from Mysterious Package.
- Open the computer desk and put the Disk from Mysterious Package into the open disk tray. A spot-the-difference puzzle starts on the security desk.
Find the differences: the security desk
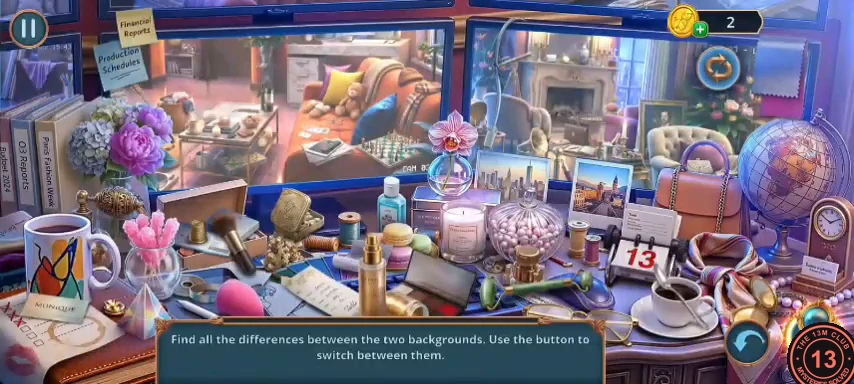
'Find all the differences between the two backgrounds. Use the button to switch between them.' The scene is Monique's cluttered desk in front of the security monitors. The round button at the top right swaps between the two versions; tap each spot that changes.
- Switch back and forth and tap the 12 differences: the teal cushion on the sofa in the left monitor; the bouquet on the coffee table in the left monitor; the hydrangeas at the far left; the chessboard on the sofa in the left monitor; the fireplace in the right monitor; the postcard behind the orchid vase; the candle; the brown handbag on the right; the card file next to the coffee cup; the gold tassel by the perfume atomizer on the left; the make-up palette at the bottom centre; and the wristband ticket by the tablet at the bottom left. The disk then plays the deleted camera footage: a man wiping something in Monique's living room. 'He's wiping away... blood? The date and time are exactly after the murder! Oh my God, I need to find some evidence and show it to the police!' Back at the desk, take the red Billiard Ball.
The pool code in the portrait
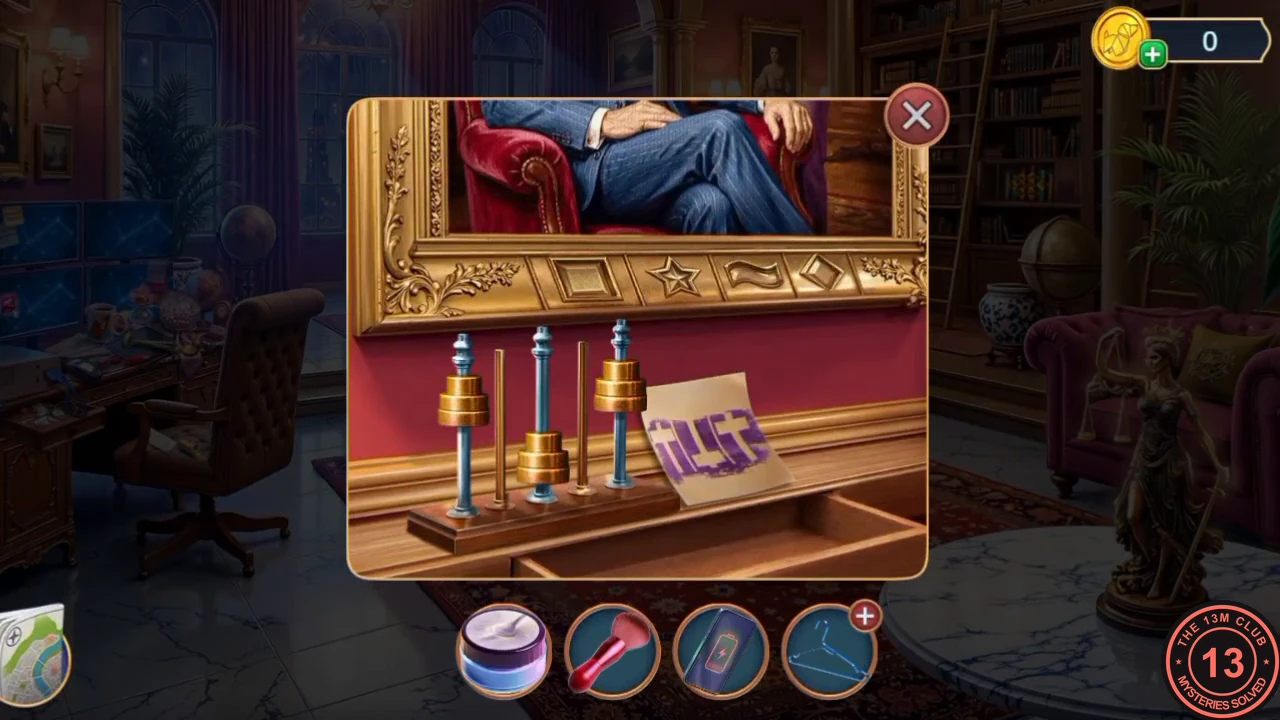
Monique's father loved pool, and the code for his painting is on the billiard balls.
- Open the billiard table and put the Billiard Ball in the empty place in the rack. The four balls turn to show symbols, left to right: star (yellow), square (blue), waves (red) and diamond (purple).
- Open the base of the father's portrait (the frame with four raised symbols above the stand with the Imprint). Press the frame symbols in this order: square, star, diamond, waves. The portrait slides up and opens a hidden niche. Look through the photos and cards inside (Martha, Alice, Linda and Vivienne, with dates and the words 'consult Sterling Wainwright first'). Vivienne: 'He killed and framed innocents so that Monique could become a star... We must stop him before it's too late.' The task 'Find clues in the office' is complete.
Sterling Wainwright
Sterling Wainwright catches Vivienne in the office with the evidence.
- Choose how Vivienne faces Sterling. 'Freeze in fear' is free and worth no decision points; 'Threaten to call the police' costs 30 coins and is worth 3; 'Be brave' costs 60 coins and is worth 6. Whatever you choose, Sterling draws a gun and Vivienne has to run. New task: Escape!
Sliding puzzle: escape from the house
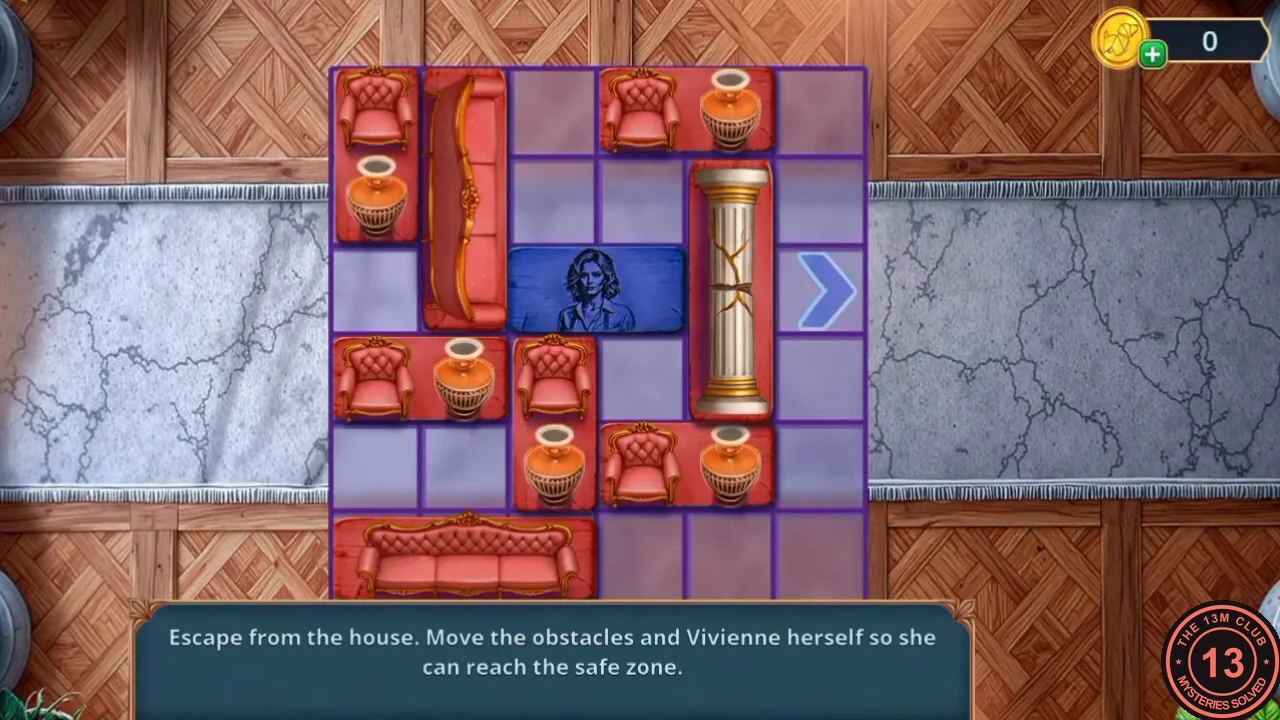
'Escape from the house. Move the obstacles and Vivienne herself so she can reach the safe zone.' The board is 6 by 6. Pieces slide only along their length and never turn. Counting rows from the top and columns from the left, the start is: armchair-and-vase pieces (two squares) standing upright in column 1 rows 1-2, lying in row 1 columns 4-5, lying in row 4 columns 1-2, standing in column 3 rows 4-5, and lying in row 5 columns 4-5; a long sofa standing in column 2 rows 1-3; a long sofa lying in row 6 columns 1-3; a stone pillar standing in column 5 rows 2-4; and Vivienne (blue, two squares) lying in row 3 columns 3-4. The exit arrow is at the right end of row 3.
- Slide the pieces in this order (each move slides one piece as far as stated): 1 the top armchair-and-vase (row 1) left 1 square; 2 the pillar up 1; 3 the bottom sofa right 3; 4 the upright armchair-and-vase in column 3 down 1; 5 the armchair-and-vase in row 4 right 3; 6 the upright armchair-and-vase in column 1 down 3; 7 the upright sofa in column 2 down 3; 8 the top armchair-and-vase left 2 more, into the top-left corner; 9 Vivienne left 2; 10 the column-3 armchair-and-vase up 4, to the top; 11 Vivienne right 2; 12 the column-2 sofa up 1; 13 the row-4 armchair-and-vase left 1; 14 the row-5 armchair-and-vase left 1; 15 the bottom sofa left 2; 16 the pillar down 3, to the bottom; 17 Vivienne right 2 to the exit.
Chapter 3 brooch locations
Chapter 3 has 13 brooches worth 35 in total. They are listed in the order you reach them, and the number in brackets is how much each one adds to your total out of 140. After this chapter a complete collection shows 105/140.
- Costume room behind the stage, at the start of Chapter 3: in the open jewellery trunk on the left. (+3)
- Costume room: in the close-up of the coat rail, top-right corner beside the rail. (+2)
- Dressing room with the victim: in the close-up of the carved jewellery box (opened with the pendant), between the box and the blue tubes. (+2)
- Night street: on the trunk of the big tree on the left. (+3)
- Night street: in the close-up of the toy box on the moped, bottom-left corner. (+2)
- Mansion gate: on the driveway beside the flower bed on the right. (+3)
- Mansion gate: in the close-up of the griffin statue, bottom-left corner. (+2)
- Greenhouse: in front of the left flower bed, bottom centre-left. (+3)
- Living room with the blue sofa: on the rug at the right end of the coffee table. (+3)
- Second Floor Hallway (the upstairs room with the frosted bay window, the grandfather clock and the lit figurine display): on the bottom shelf of the figurine display to the right of the door, among the animal figurines. (+3)
- Second Floor Hallway: in the close-up of the frosted window with the broken flower pot, at the top-right edge by the plant. (+3)
- Monique's office: on the round glass coffee table in front of the pink sofa. (+3)
- Greenhouse: in the close-up of the window with the gold astrolabe (where you hook the Bangle Bracelet onto the pulley), on the cushion at the bottom right. (+3)
Chapter 3 results: decision points
The chapter ends with the decision-point summary and an outcome scene.
- Chapter 3 has four scored choices, worth up to 12 points, and every one of them costs coins: Monique at the body ('Believe her.' +2; summary 'Check Monique'), the police officer ('Tell a compelling story.' +2; summary 'Answer honestly'), Will's text about the cufflink ('No, but I'm sure I've seen a cufflink like that somewhere before...' +2; summary 'Recall the initials') and Sterling ('Threaten to call the police' +3 or 'Be brave' +6, only one of them). The 0 card shows Sterling outside his lit house and the 10 card a dark-haired woman in front of it. Recordings at 0 and at 12 points play the same scene afterwards: Vivienne hides in the bushes, terrified, and Sterling walks out of the house: 'Ah, whatever. Even if the police find out, I'll handle it!' Chapter 4 follows. A total of 4 to 9 points earns the 4 card, for example 'Believe her.' and 'Tell a compelling story.' (4 points) or 'Be brave' alone (6 points). No public recording we could find scores in that range, so its scene is not described here.