Hidden-object scene: the neon collage again
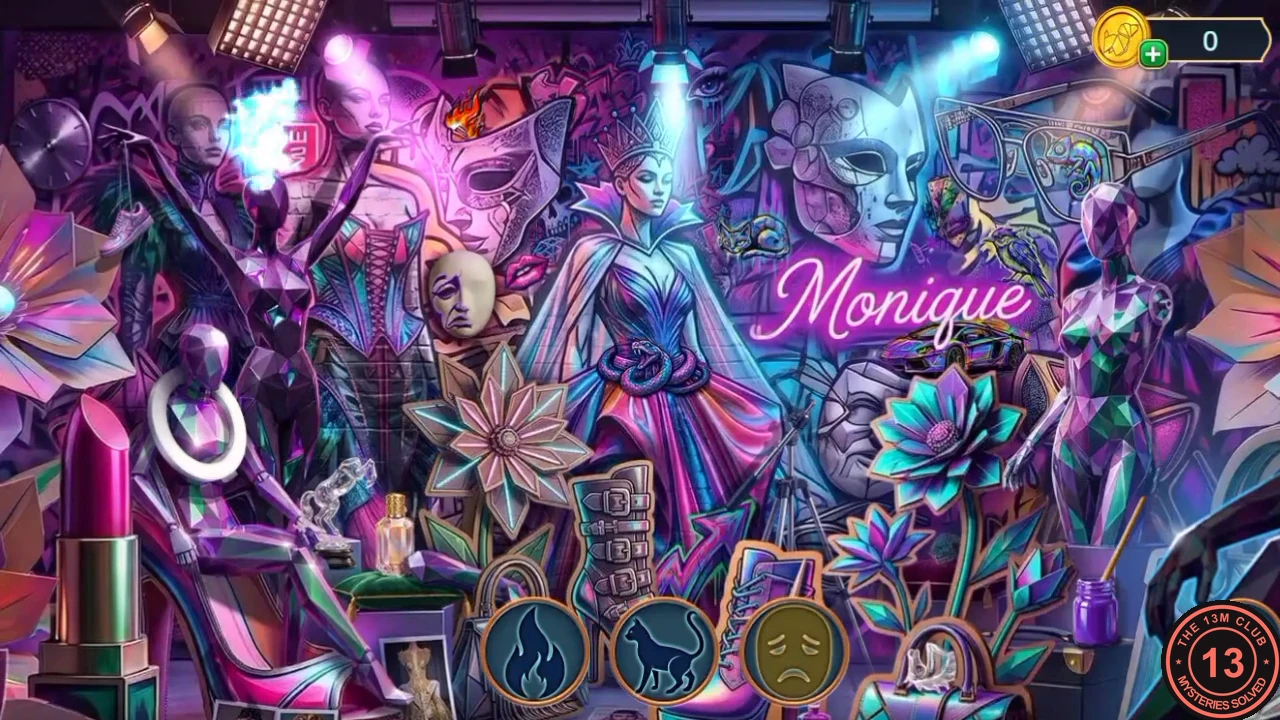
The polarizing filter reopens the neon collage as a silhouette scene with some interactive objects.
- Find the objects shown as outlines in the round slots. Some need an extra action first: a figure is missing a part ('She's missing something.'), a horse has no head ('A noble steed without a head? That's just cruel. Let's fix this.') and a clock needs its hands ('The clock is ticking, but not telling time. It needs its hands to speak.'). Find the missing part elsewhere in the scene and put it back. At the end you receive the Metal Bracelet.
The pliers and the radio antenna
Travel to the VIP Lounge Backstage. The red radio by the bar needs an antenna.
- Open the drawer of the bar counter and fit the Metal Bracelet as its handle. Open the drawer and take the Pliers.
- Open the Hanger in the inventory and bend it with the Pliers to make an Antenna.
- Open the red radio and attach the Antenna. A signal game starts.
Signal game: the radio screens
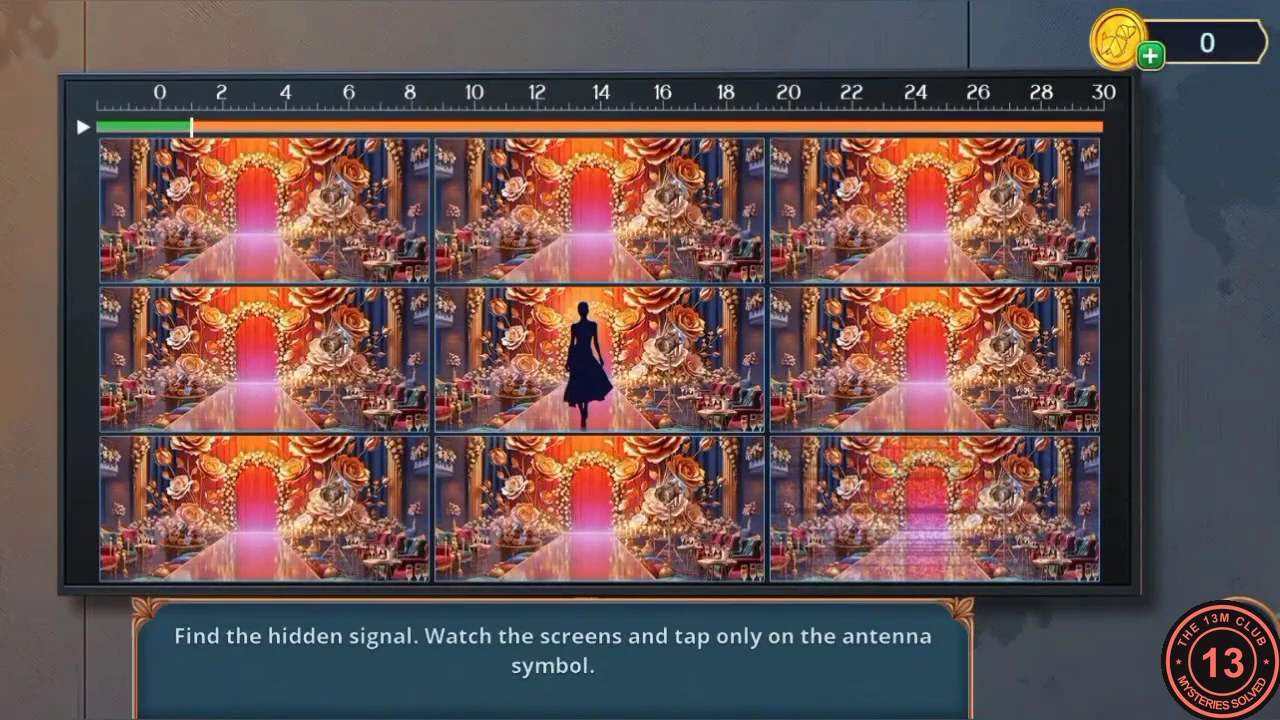
'Find the hidden signal. Watch the screens and tap only on the antenna symbol.' A 3x3 wall of screens shows flickering images, with a 30-second bar along the top.
- Watch the nine screens. Whenever a green antenna symbol flashes on a screen, tap it quickly. Do not tap screens showing a woman's silhouette. Keep catching antenna symbols until the bar fills. A compartment opens beside the radio: take the Lens and the Spoon.
Coconut flakes and coconut oil
The spoon solves the fridge's coconut request.
- Open the mini fridge with the fruit basket and scrape the coconut with the Spoon. Take the Coconut Flakes.
- Open the Portable Blender in the inventory and add the Coconut Flakes. Blend them to get Coconut Oil.
- Vivienne notes 'Hmm, there must be something else in that safe.' Open the floor safe under the glass table again to start a second hidden-object scene.
Hidden-object scene: the rubies
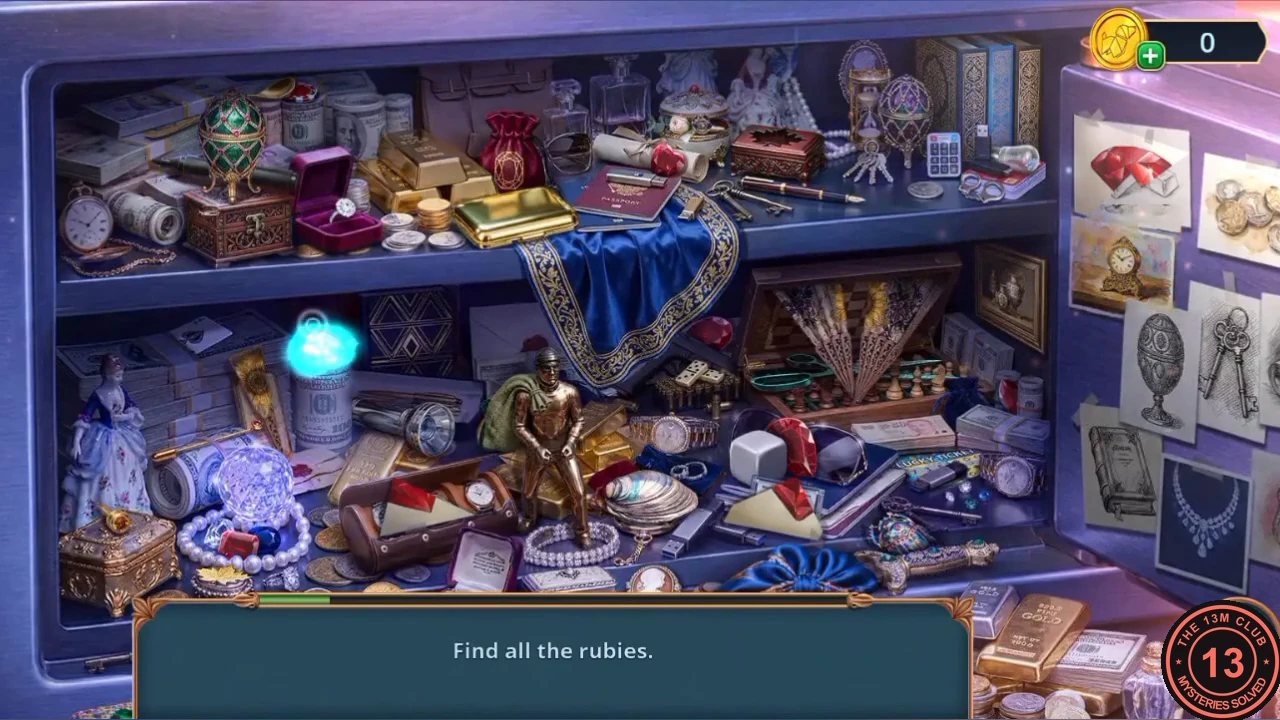
'Find all the rubies.' The safe scene returns with rubies hidden across it.
- Tap the rubies lying in plain view on both shelves of the safe. The rest are hidden and are revealed by the actions below.
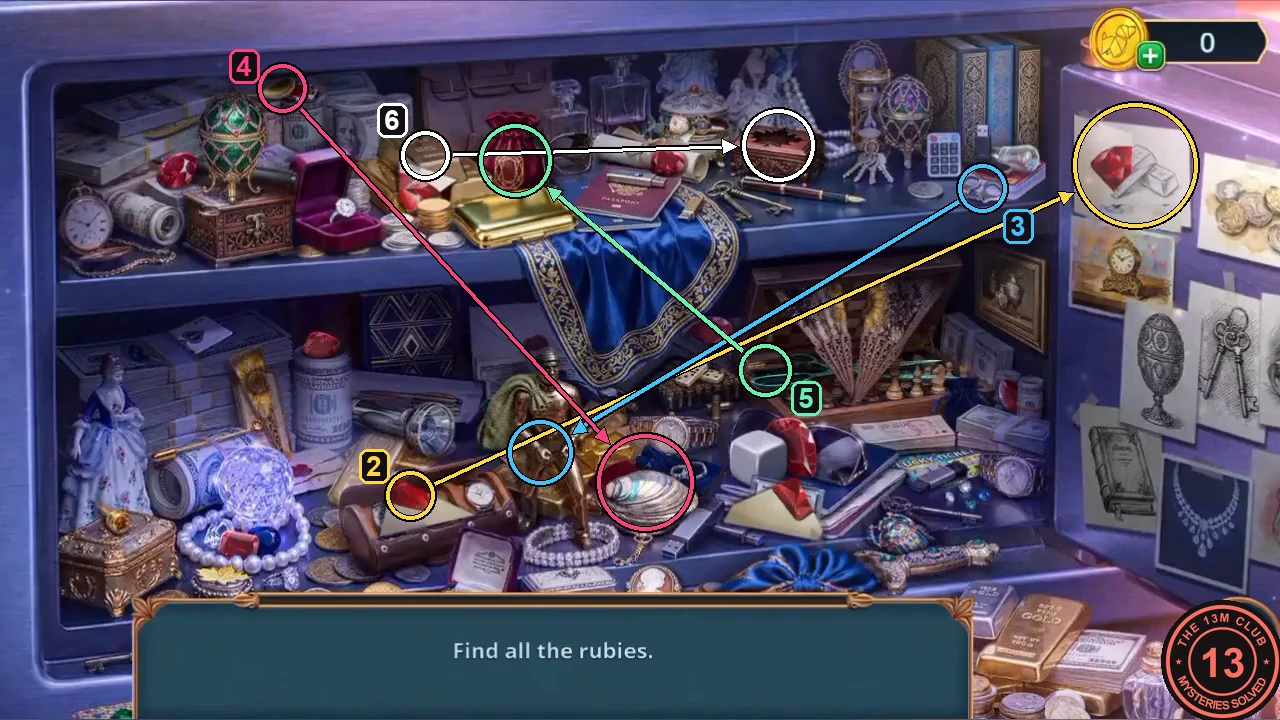
Hidden rubies, as the scene first appears: each number is a step above; the arrow runs from the object to pick up to where it is used. The unmarked red gems are rubies in plain view. - Pick up the torn red-and-white paper corner lying on the wooden watch case to the left of the bronze statue and put it on the ruby drawing pinned at the top of the right-hand wall. The completed drawing counts as a ruby.
- The hint here is 'Every criminal must be arrested.' Take the small silver handcuffs lying on the upper shelf at the far right, in front of the red card stack with the black flash drive (just right of the silver coin), and put them on the bronze statue's wrists. Take the ruby that appears at the statue's left foot.
- Take the gold spoon tucked behind the top of the green jewelled egg on the upper shelf (left) and use it on the pearly clam shell to the right of the statue. The shell opens: take the ruby inside.
- Take the green-handled scissors lying in front of the open wooden box with the fan and the chess pieces (lower shelf, right of the blue cloth) and use them on the red velvet drawstring bag on the upper shelf. The bag opens: take the ruby.
- Take the gold leaf ornament lying on top of the gold bars to the left of the red bag and fit it into the slot on the lid of the carved brown box on the upper shelf (right of the rolled scroll). The box opens: take the last ruby. When all the rubies are found you receive the Temperature Regulator.
The frozen fridge and the bar counter
The regulator unfreezes the mini fridge.
- Open the mini fridge and fit the Temperature Regulator. The ice melts and the door opens: take the Water.
- Open the bar counter and place the Water, the Enzyme Powder and the Flask on it. A test-tube puzzle starts.
Test-tube puzzle: the fabric cleaner
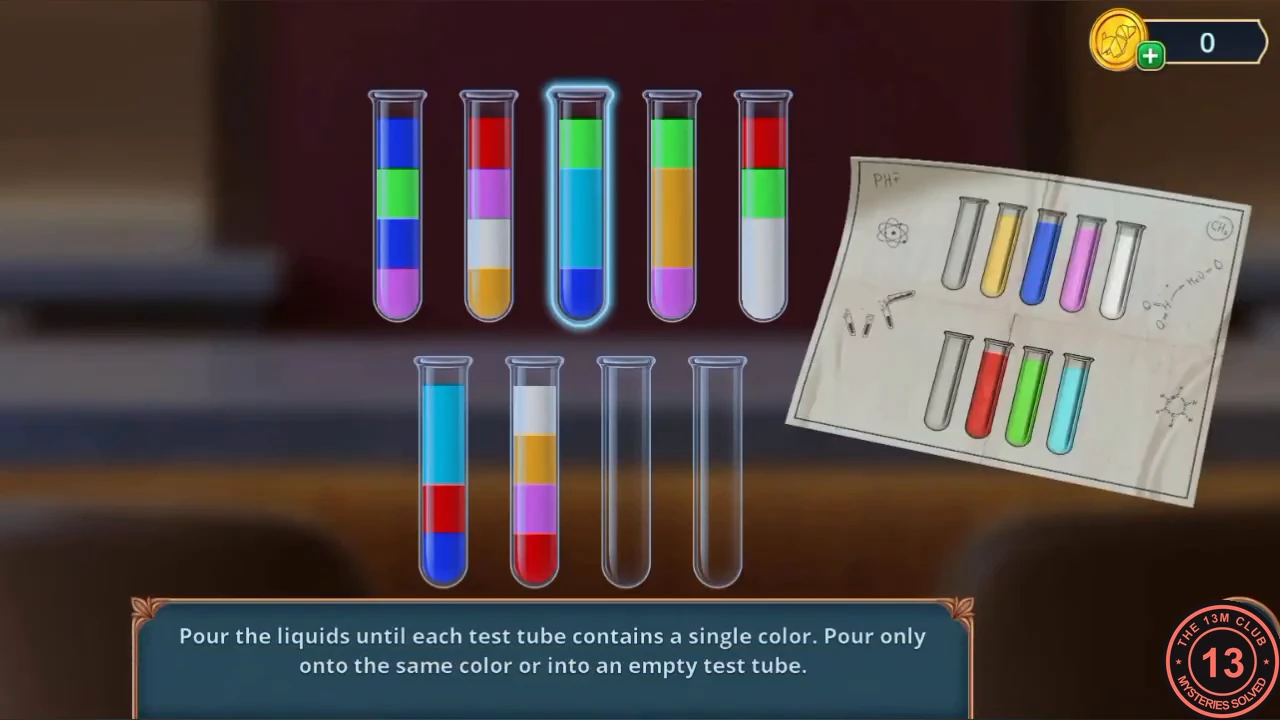
'Pour the liquids until each test tube contains a single color. Pour only onto the same color or into an empty test tube.' Nine tubes: tubes 1-5 in the top row and 6-9 in the bottom row, left to right. Start (top layer first): 1 blue, green, blue, purple; 2 red, purple, white, orange; 3 green, cyan, cyan, blue; 4 green, orange, orange, purple; 5 red, green, white, white; 6 cyan, cyan, red, blue; 7 white, orange, purple, red; 8 and 9 empty.
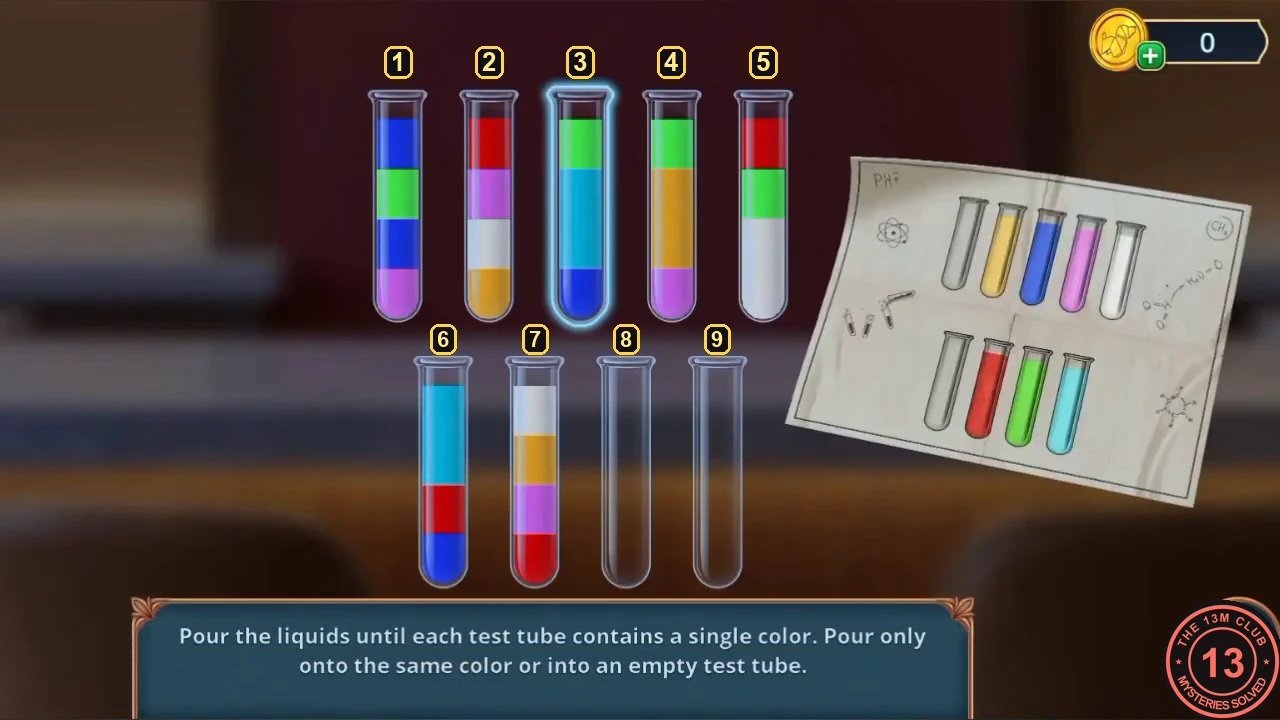
- Pour (from -> to): 3->8, 3->9, 1->3, 1->8, 1->3, 4->8, 6->9, 2->6, 1->2, 5->6, 5->8, 7->5, 7->4, 2->7, 2->5, 4->2, 7->4, 6->7, 3->6. Each tube is then one colour. Take the Fabric Cleaner.CODE3-8, 3-9, 1-3, 1-8, 1-3, 4-8, 6-9, 2-6, 1-2, 5-6, 5-8, 7-5, 7-4, 2-7, 2-5, 4-2, 7-4, 6-7, 3-6
The red shoebox and the fabric roll
Travel to the Show Dressing Room.
- Open the red shoebox on the floor in the middle of the room. Pour the Fabric Cleaner on the stuck clasp, then pry it open with the Dielectric Screwdriver. Take the Fabric Scrap.
- Open the fabric rolls ('I need to compare the color and texture of this roll to a similar fabric.') and hold the Fabric Scrap against them. Take the matching Fabric Roll.
- Open the torn dress on the mannequin and use the Fabric Roll and the Sewing Kit on it. A dress puzzle starts.
Dress puzzle: restore the gown
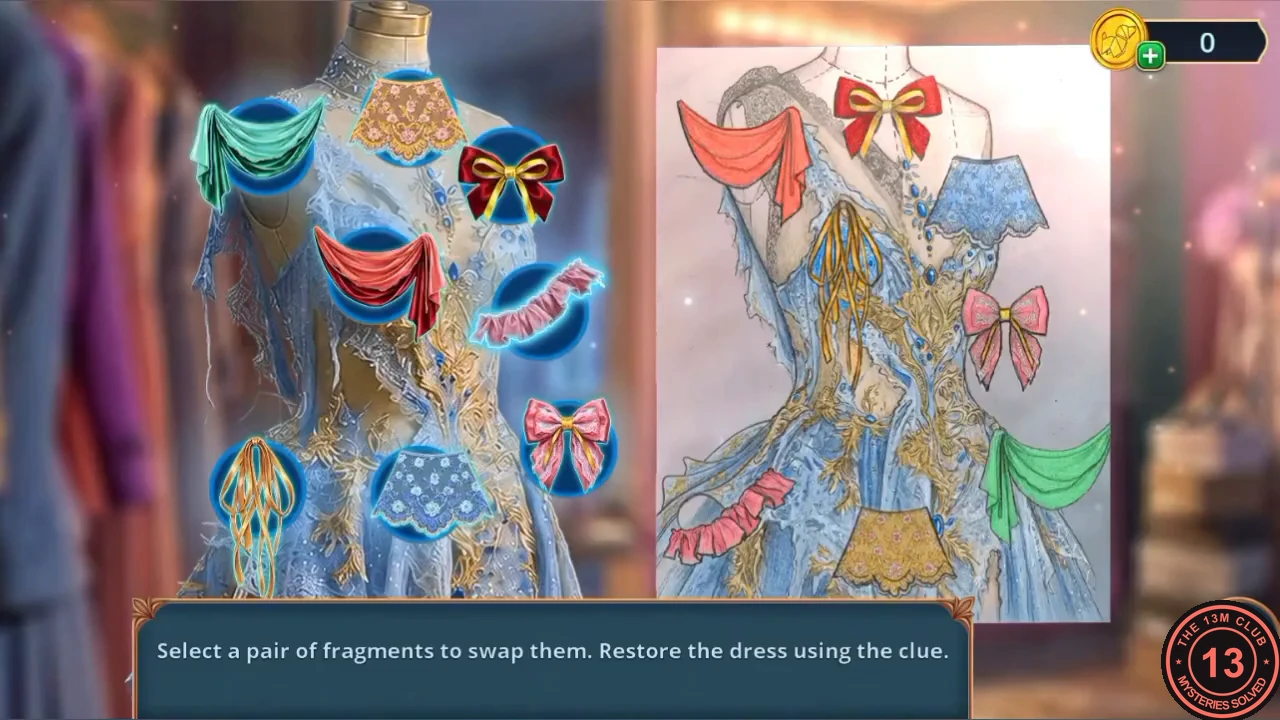
'Select a pair of fragments to swap them. Restore the dress using the clue.' Eight decorations sit on the dress; the sketch on the right shows where each belongs.
- Tap two decorations to swap them until the dress matches the sketch: red drape on the left shoulder, red-and-gold bow at the neck, blue lace on the right shoulder, gold ribbons down the left of the bodice, pink bow on the right of the bodice, pink ruffle at the lower left, gold lace at the bottom centre and green drape at the lower right. The dress is restored. Then open the mannequin and take the Finished Dress and the flower pin.
The flash and the camera on the tripod
Travel to the Photo Studio.
- Open the orange suitcase with the wireless charger and fit the flower pin as the zipper pull. Open the suitcase and take the Flash.
- Open the Camera in the inventory and attach the Lens and the Flash.
- Put the Finished Dress on the mannequin on the stage ('Great, the dress is on. Now I need to position it correctly and take a photo.'). Then open the tripod and mount the Camera. A photo game starts.
Photo game: the required pose
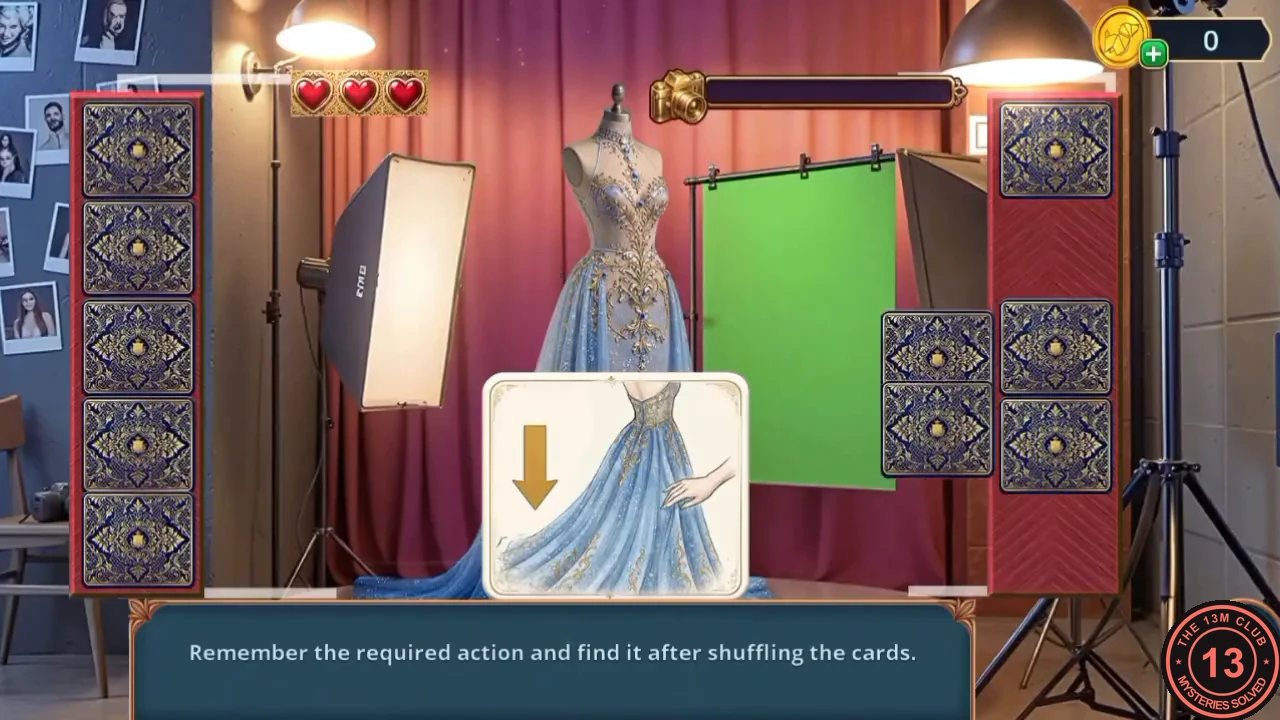
'Remember the required action and find it after shuffling the cards.' The centre card shows the dress with an arrow (the pose you need). Two columns of five cards on the sides are shown face up, then turned over and shuffled. Three hearts at the top left are your mistakes; a bar at the top shows progress.
- Before the side cards turn over, note which card shows the same pose and arrow as the centre card. Follow it while the cards shuffle, then tap it. A wrong card costs a heart. Repeat for each new pose until the progress bar is full. Monique is delighted ('Amazing!').
Vivienne confronts Monique
Vivienne tries to stop the show: 'Monique, stop! I know you've been working on this show for years but only you can help me solve all these murders!'
- Choose 'Accept Monique's decision' (free), 'Ask her to stay calm' (30 coins, +3 decision points) or 'Appeal to her conscience' (60 coins, +6). Monique answers 'The most important thing right now is my collection, and nothing else!' The story then switches to Will in the garage.
Will in the garage: the recycling bin and the limo
You now play as Will in a garage with a limousine and a 'CYBER-SNACK VEND-O-MATIC'. Vivienne doesn't answer his call: 'There's half an hour until the show starts. I hope Vivienne managed to convince Monique! But I have to back her up and find a secluded spot!'
- Open the vending machine and recycling bin on the right. Take the Anchor Keychain and the first Metal Steps (1/3). The bin is padlocked ('A small explosive might be enough to break it open.'). Put the Firecracker on the padlock and light it with the Lighter. The bin bursts open: take the Battery.
- Open the square hatch in the floor ('There's a square hatch in the floor with an unusual lock. It clearly needs a specific key to turn it.') and take the Dead Car Alarm. Open the Dead Car Alarm in the inventory and insert the Battery.
- Open the limousine's driver door and press the car alarm remote. The door unlocks and a hidden-object scene starts inside the limo.