HIDDEN OBJECTS
Under-Bridge Shelter
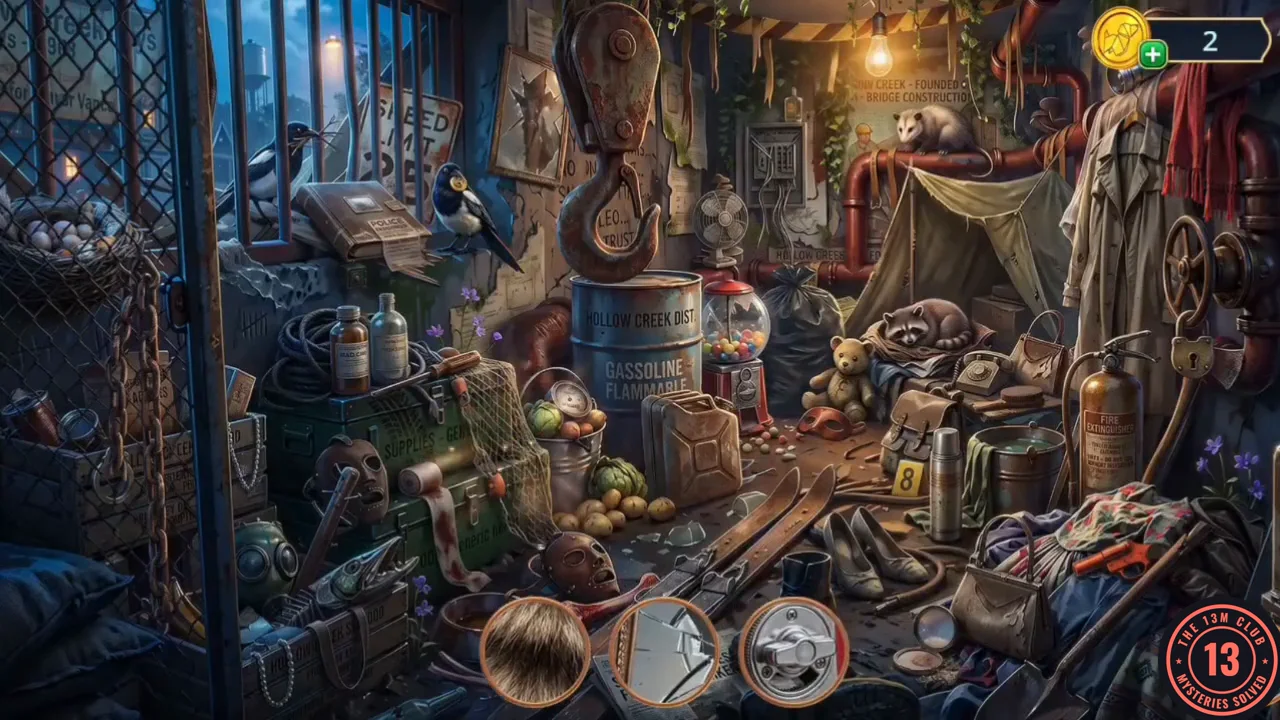
Blow the padlock off Cole's desk drawer, build a platform for the creek bank and get past the bolted storm-drain grate.
- In Sheriff Cole's Office, zoom into the padlocked desk drawer. Pour the Shell with Gunpowder into the padlock, push the Wick (the green cord from the bridge) into it and light it with the Lighter. The padlock blows open. Open the drawer and take the Trowel and the Lock Cylinders (1/2).
- Under the Bridge, zoom into the creek bank by the algae ("The bank is soft and uneven. I'll need something to stand on"). Dig the mud with the Trowel and take the last of the Planks (3/3). Open the red Board in your inventory and add the Planks, the Nails and the Heeled Boot (used as a hammer) to make the Improvised Platform. Lay it on the bank. Vivienne sees that the water's edge is choked with algae and something is tangled beneath it.
- Zoom into the DANGER storm-drain grate ("bolted down tight... But I know a trick with a stick and some rope"). Tie Eleanor's Scarf around the bars and twist it with the Walking Cane. The grate opens onto a shelter full of junk. Find each object pictured in the tray at the bottom; the last one to find is a pliers-shaped silhouette. You receive the Insect Spray.
PUZZLE
Bicycle Bag Gem Lock
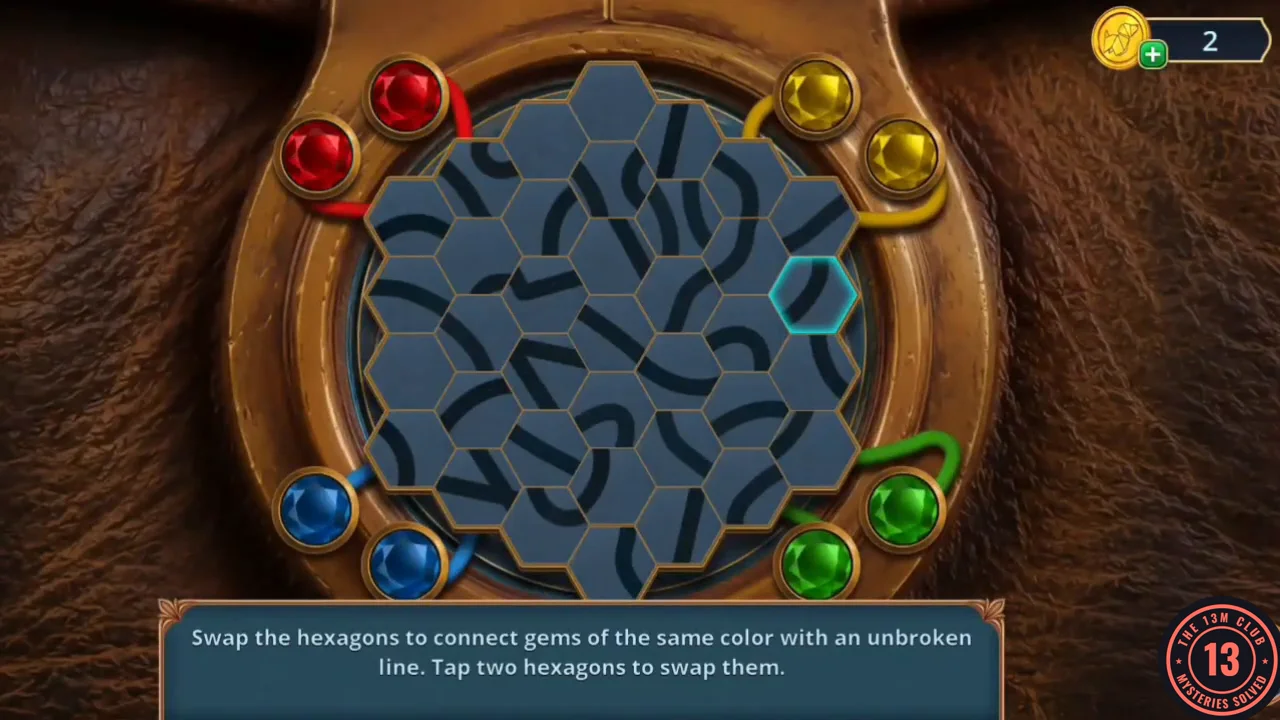
Swap the hexagons to connect gems of the same colour with an unbroken line. Tap two hexagons to swap them.
- As you leave the shelter, bats flutter out and the task changes to proving that the sheriff falsified the records. Zoom into the rusty bucket and spray the red ants with the Insect Spray. Take the Stick leaning against the bucket and the Bicycle Token. Put the Bicycle Token into the lock on the bicycle bag.
- Eight gems sit around the rim in pairs: red at the top left, yellow at the top right, green on the right and blue at the bottom left. Swap hexagons until the line segments on them form one continuous line between the gems of each pair. In the solved board the red line curls down through the left side, the yellow line snakes across the top right, the green line loops through the centre right and the blue line is a short arc at the bottom left. The bag opens, showing a glimpse of a safe. Take the Paint Thinner.
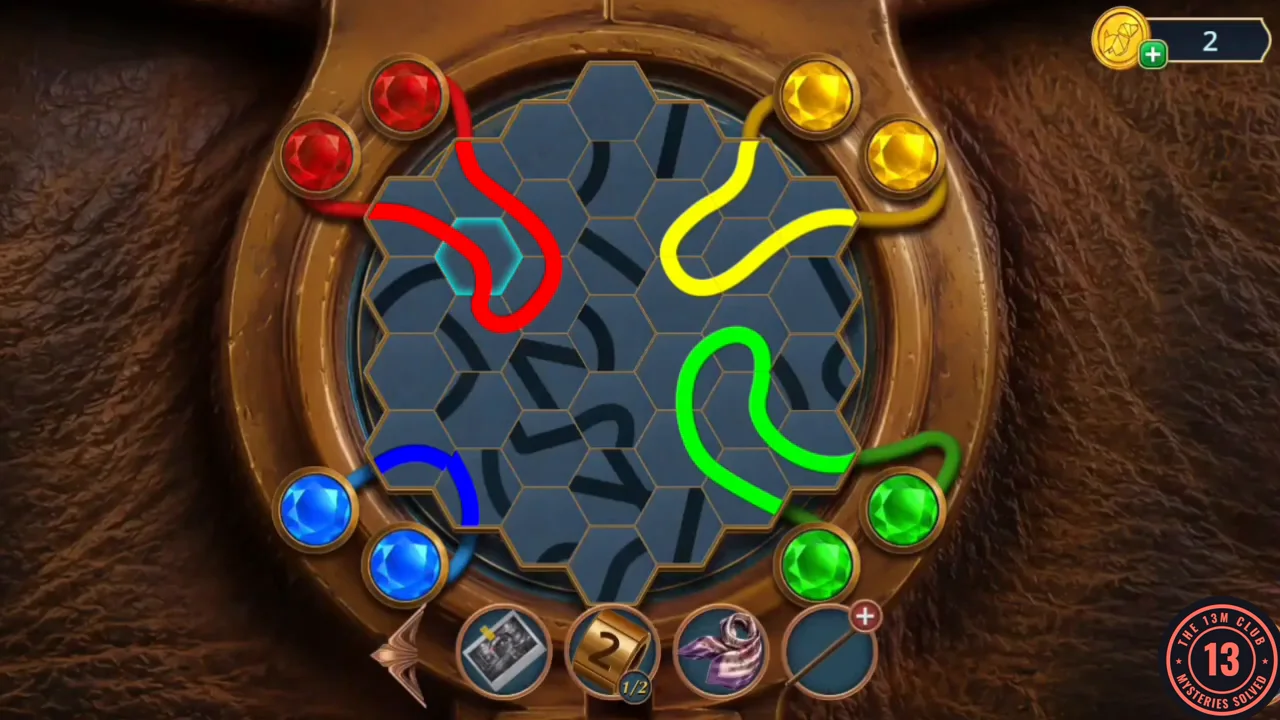
Solved gem lock: each colour pair is joined by one unbroken line.
HIDDEN OBJECTS
Front Office Pairs
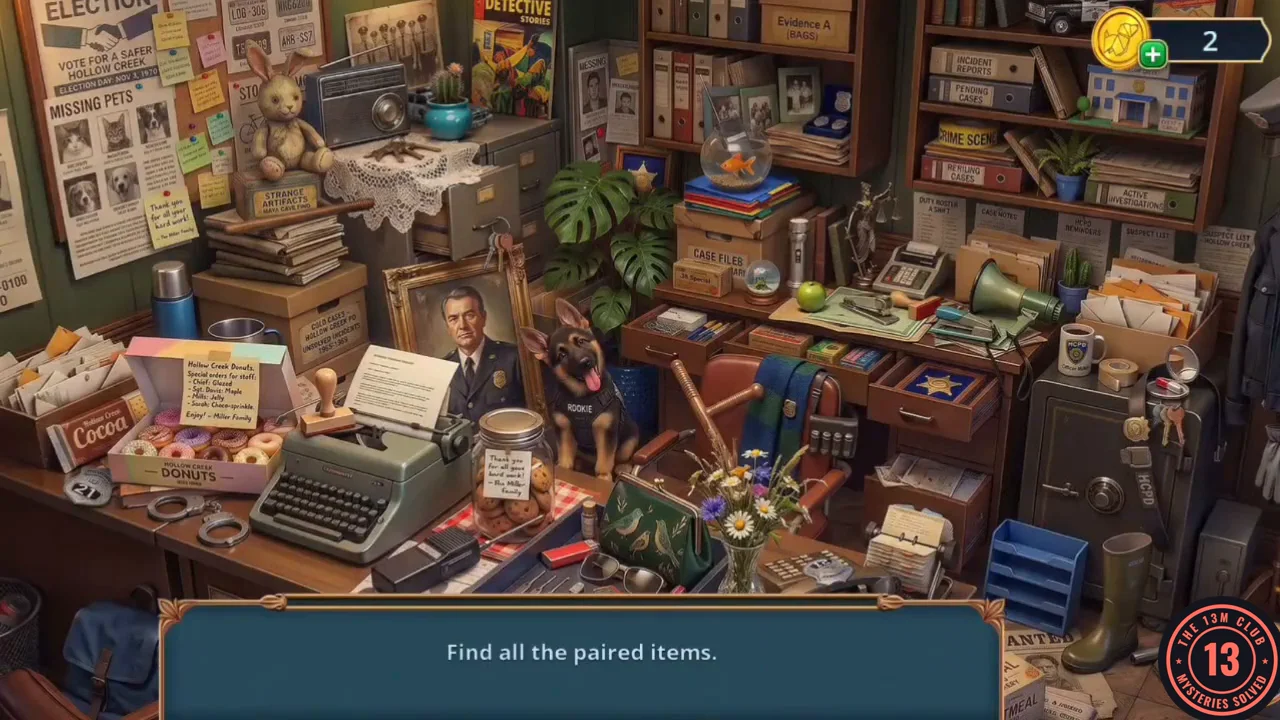
Find all the paired items.
- Open the Stick in your inventory and add the Metal Comb as its head (Eleanor's Scarf does not fit: "I'll try something else"). One slot is still empty, so keep the Stick for later. In the Darkroom, zoom into the lower shelf of the cupboard ("Someone painted over this on purpose"). Pour on the Paint Thinner and wipe the paint away with Eleanor's Scarf. Take the Lemon Juice and the Magnetic Roller.
- In the Sheriff's Station front office, zoom into the LOGBOOK tray on the desk and sweep up the spilled push pins with the Magnetic Roller. The desk opens as a hidden-object scene: find both items of every matching pair. You receive the Police Car Emblem.
PUZZLE
Algae Strands
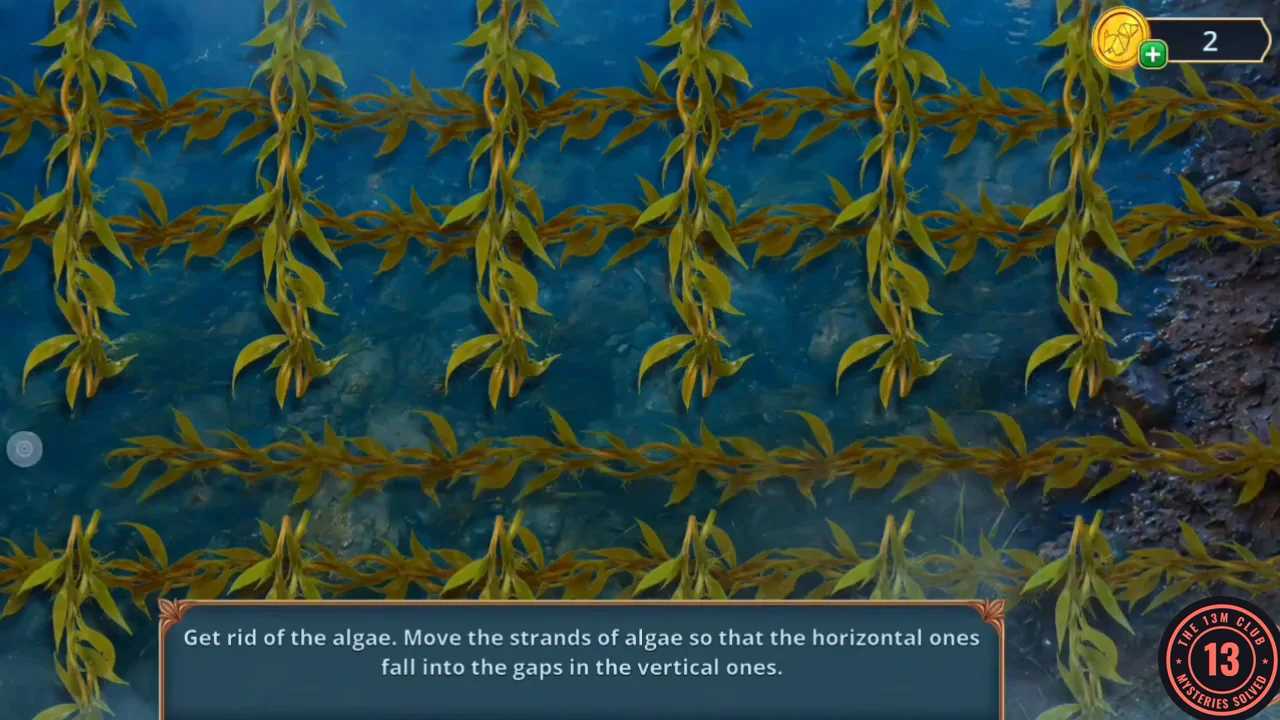
Move the algae strands so the horizontal ones fall into the gaps in the vertical ones.
- On Main Street, zoom into the blue case on the bench by the pigeon. Press the Police Car Emblem into its lock. A flashback shows a Hollow Creek map with a route drawn on it. Take the Liquid Nitrogen and the Wire from the case. Add the Wire to the Stick to bind on the comb-shaped head and make a rake. Under the Bridge, use the rake on the algae at the water's edge.
- Tap a vertical strand to select it (it turns blue) and slide it up or down. Each vertical strand has gaps in it. When every vertical strand has a gap level with the same horizontal strand, that horizontal strand drops through and disappears. Shift the strands strand by strand until all the horizontal ones are gone. Vivienne realises that the station "wasn't hiding stories. He was hiding bodies. Cole just gave them new identities." Take the Glow Stick from the cleared water.
HIDDEN OBJECTS
Shelter Riddles
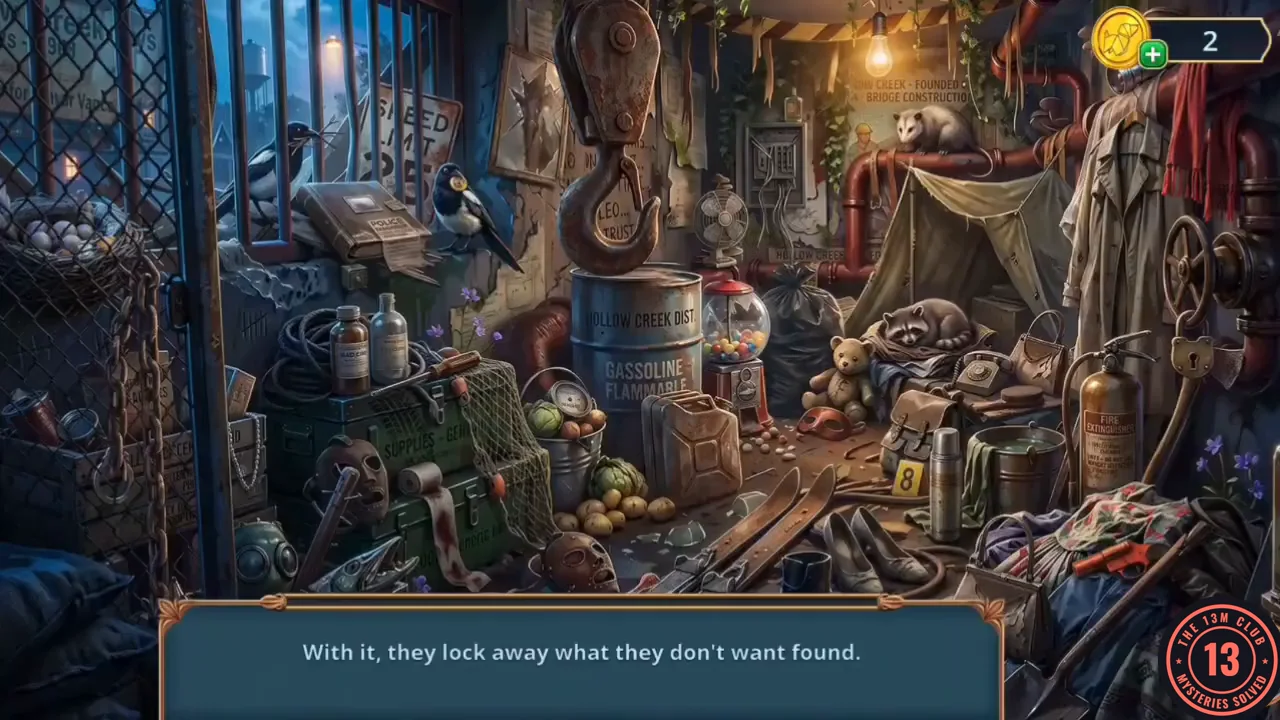
Answer each riddle with an object in the shelter.
- Under the Bridge, drop the Glow Stick into the dark storm-drain shelter to light it up. The shelter becomes a riddle scene: one clue appears at a time at the bottom, and you tap the object that answers it. In the order they came up here: "With it, they lock away what they don't want found": the padlock hanging from the red pipe valve on the right, beside the fire extinguisher. "It bears the weight, but it doesn't choose the load itself": the rusty chain hanging by the mesh fence at the far left. "Wet, but still official": the soggy POLICE paper sticking out of the brown book on the window ledge, left of the magpie. "Writes a route without ink": the tyre-tread print on the lid of the green SUPPLIES box at the left. "An empty shell of someone else's story": the yellow evidence marker 8 on the floor beside the satchel and the thermos. "Measures the water pressure": the pressure gauge in the metal bucket of vegetables, right of the SUPPLIES box. "The last light before the darkness": the orange flare gun on the pile of clothes at the bottom right. "It's put on weight to make it someone else's": the black rubbish bag behind the gumball machine. "It hides the trail, but leaves folds itself": the canvas tarp draped over the red pipe behind the sleeping raccoon. "Without gasoline it's useless, but the smell gives itself away": the rusty jerry can in front of the GASSOLINE barrel. "Warns of danger when the danger has already happened": the SPEED LIMIT sign behind the window bars at the top left. "It hangs in a place where the cargo was removed long ago": the big rusty crane hook hanging at the top centre; removing it reveals a message from Leo on the wall. The last answer gives you Cole's Safe Key.
PUZZLE
Cole's Office Comparison
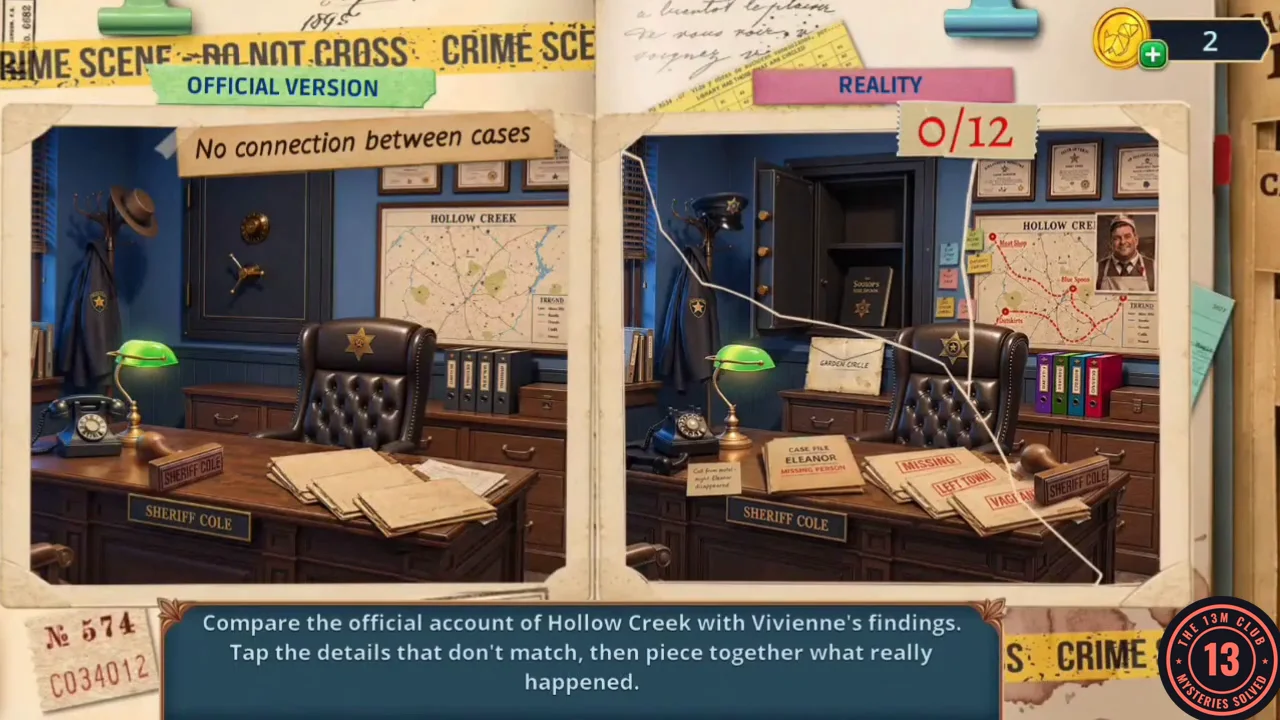
Compare the official account of Hollow Creek with Vivienne's findings and tap the 12 details that don't match.
- In Sheriff Cole's Office, open the wall safe above the desk with Cole's Safe Key. Inside is a notebook with a Garden Circle note ("Outsiders: move them along..."). Take the Silicone Pot Holder. The comparison opens.
- The left page is the "Official Version" and the right page is "Reality". The 12 differences: the hat on the coat rack; the open safe with Cole's book inside; the sticky notes beside the map; the red route drawn on the map; the photo pinned to the map's top right; the Garden Circle card on the chair; the coloured binders; the telephone; the small note at the front of the desk; the Eleanor MISSING PERSON folder; the stamped MISSING / LEFT TOWN / VAGRANT files; and the SHERIFF COLE stamp on the right of the desk. Vivienne concludes: "Tom chose the victims. The sheriff made them look like they'd just left town, and kept the Garden Circle connection locked in his safe."
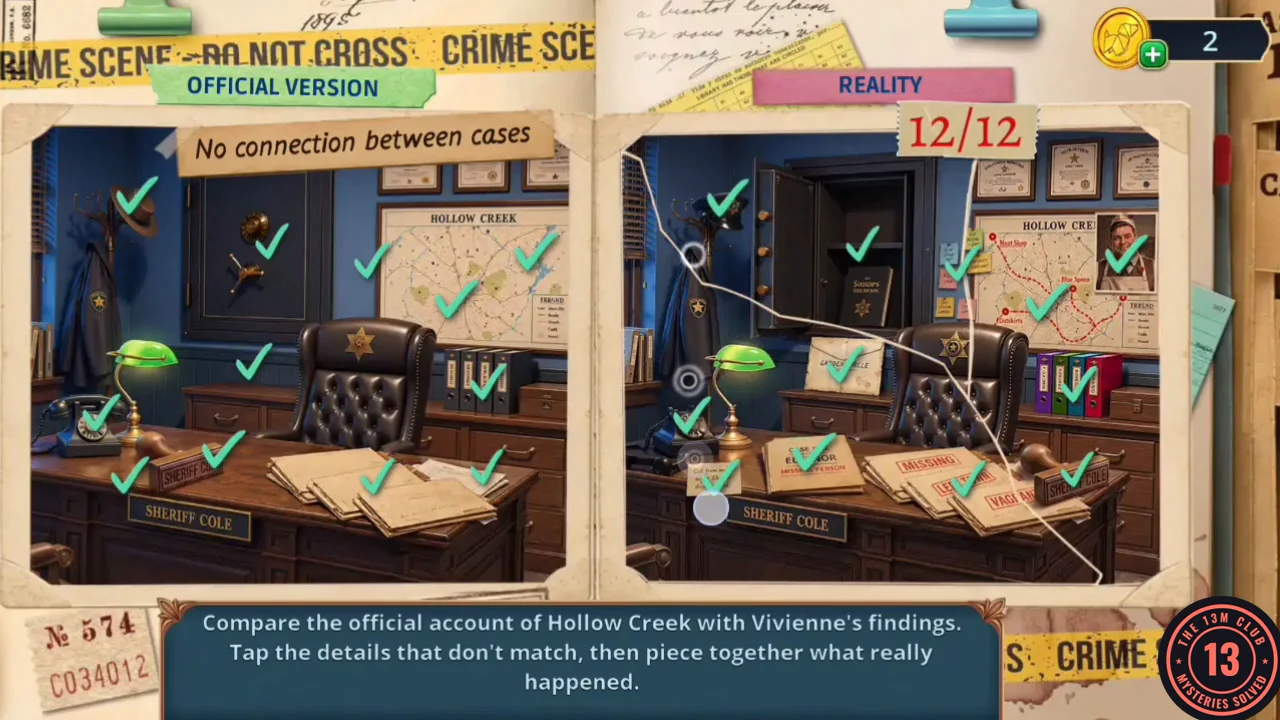
All 12 differences found in Cole's office.
CHAPTER 3
Confronting Sheriff Cole
Face the sheriff with what you know.
- Decision: "Press him with the evidence." (60 coins, +2) or "Accuse Cole directly." (free, 0). This walkthrough takes the free option.
CHAPTER 3
Chapter 3 Decision Points
The chapter's decision tree and outcome panels.
- Chapter 3 decisions and values: sheriff – Request a report on Eleanor 0 / Mention Mabel and the Blue Spoon 2; Lucas – Ask what he's doing at the station 0 / Ask how he got in 2; hallway window – Get scared 0 / Take cover behind the window shutter 2 / Hide behind the window frame 6; Cole – Accuse Cole directly 0 / Pressure him with evidence 2. Following this walkthrough's choices scores 0/12, which unlocks the 0-point outcome.