Hollow Creek Bus Stop
Vivienne arrives in Hollow Creek looking for her aunt Eleanor. Collect the starting items around the bus stop and repair the torn town map.
- Decline the tutorial prompt if you do not need it. Zoom into the bench and take the Pocket Mirror and the Duct Tape. A Reporter's Token sits in the lower right of the same close-up; tap it (2/140).
- Back in the bus stop scene, tap the Reporter's Token lying on the floor inside the phone booth (4/140).
- Zoom into the brick signpost and take the Luggage Strap. Use the Luggage Strap on the signpost to pull the sign down, then take the Map Fragment and the Rusty Spoke that it uncovers.
- Zoom into the payphone. The spoke cannot turn the stuck screw, so use the Rusty Spoke on the coin return. Collect the Coin, the gold wheel part that drops out, and the second Map Fragment beside the cord.
- Zoom into the red suitcase by the bench; one wheel is missing. Fit the gold wheel part to it and take My Suitcase. Then collect the Coins, the Lighter and the Piece of Wire that were underneath.
- In the inventory, combine the Piece of Wire with the Luggage Strap to make a Belt with Hook. Use it in the circular gap under the bench to pull out the third Map Fragment and the Carabiner.
- Zoom into the notice board. Place the three Map Fragments into the torn gap, then use the Duct Tape on them to start the road-map puzzle.
Torn Map Road Pieces
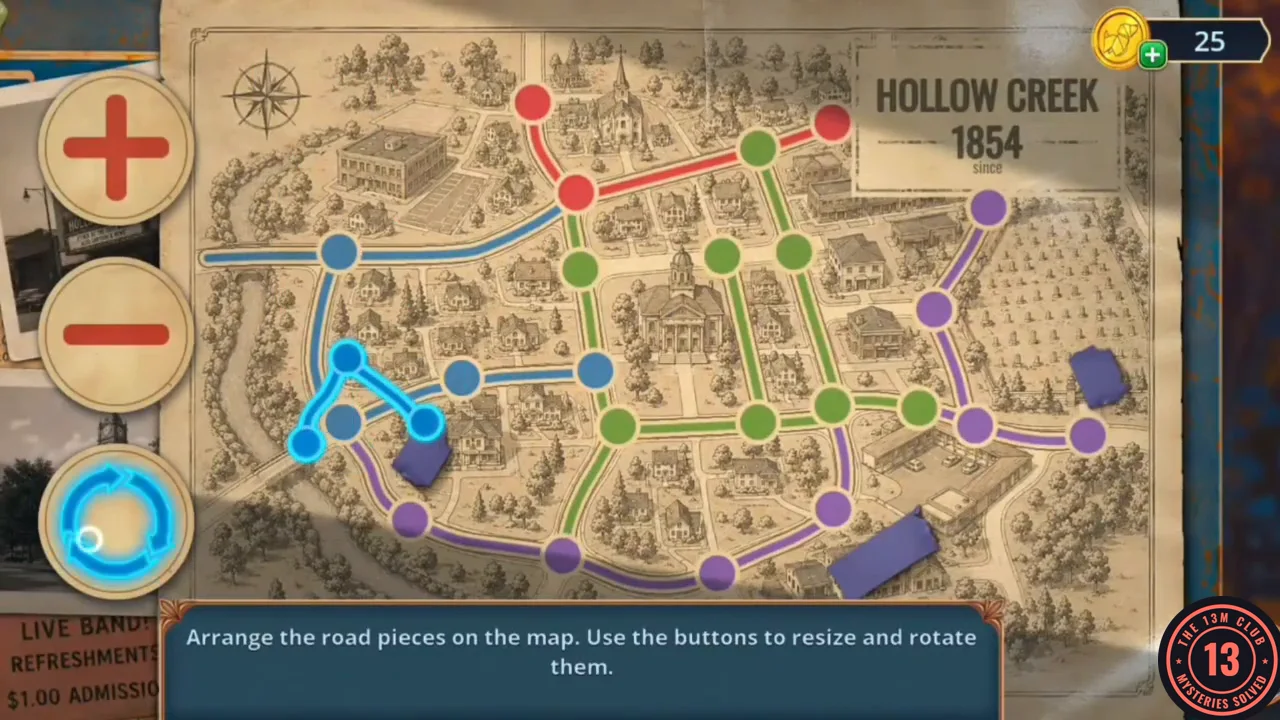
Arrange the road pieces on the map. The buttons on the left enlarge, shrink and rotate the selected piece.
- The map shows coloured routes (red, green, blue and purple) made of dots and lines. Each glowing cyan piece is a copy of one stretch of those routes. Select a piece, use plus/minus to match its size and rotate to match its angle, then drag it so every dot sits on a printed dot. When every piece lies on a matching stretch, the routes are covered in cyan and the puzzle ends.
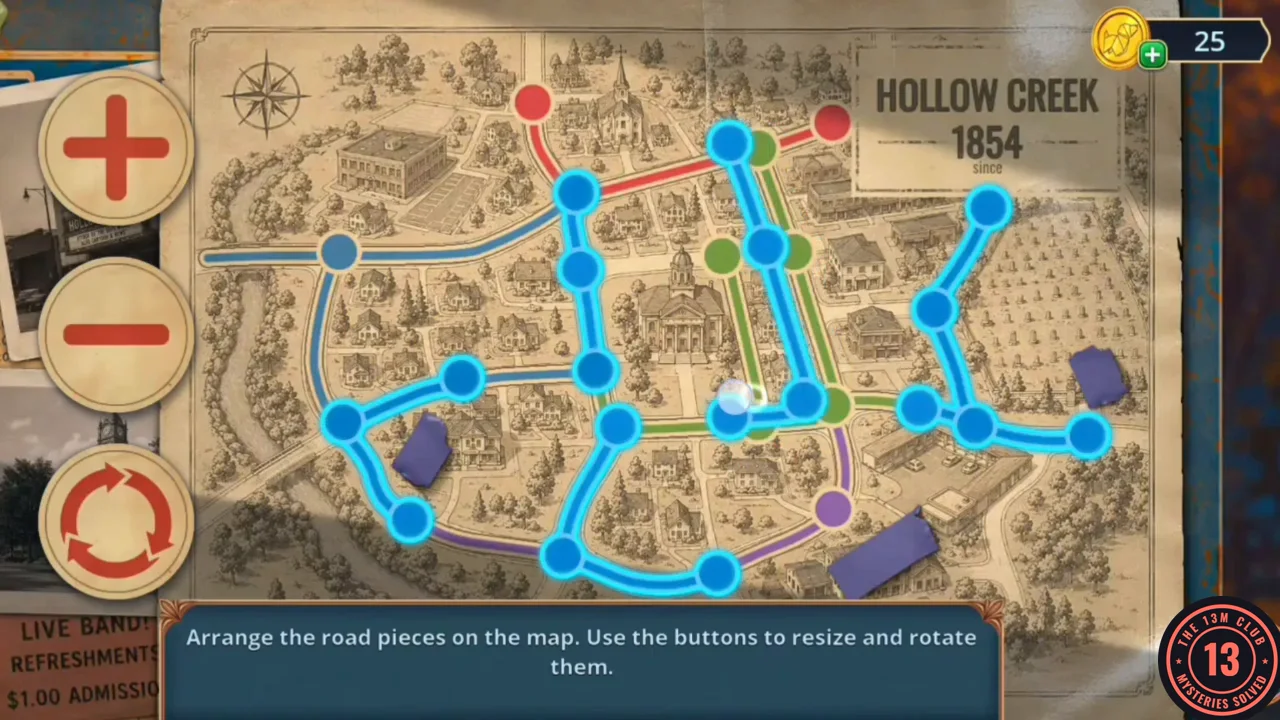
Completed map: every road piece lies on its matching stretch of route. - The Duct Tape returns to the inventory and you receive the Hollow Creek Map, with the motel circled in red.
Fenley Street
Travel to the motel on Fenley Street.
- On Fenley Street, tap the Reporter's Token on the wet pavement at the feet of the woman in the blue dress, beside the newspaper box (6/140).
- Zoom into the newspaper box. Take the Metal Pushpin and the Chain from the hinge, and tap the Reporter's Token at the top of the box (8/140).
- Zoom into the winch by the lamp post and use the Chain on it to lower the hanging flower basket. Take the purple Rubber Gloves from the basket.
- Zoom into the green electrical box and open it. The wires spark, so put on the Rubber Gloves (use them on the box) to start the wiring puzzle.
Electrical Box Wires
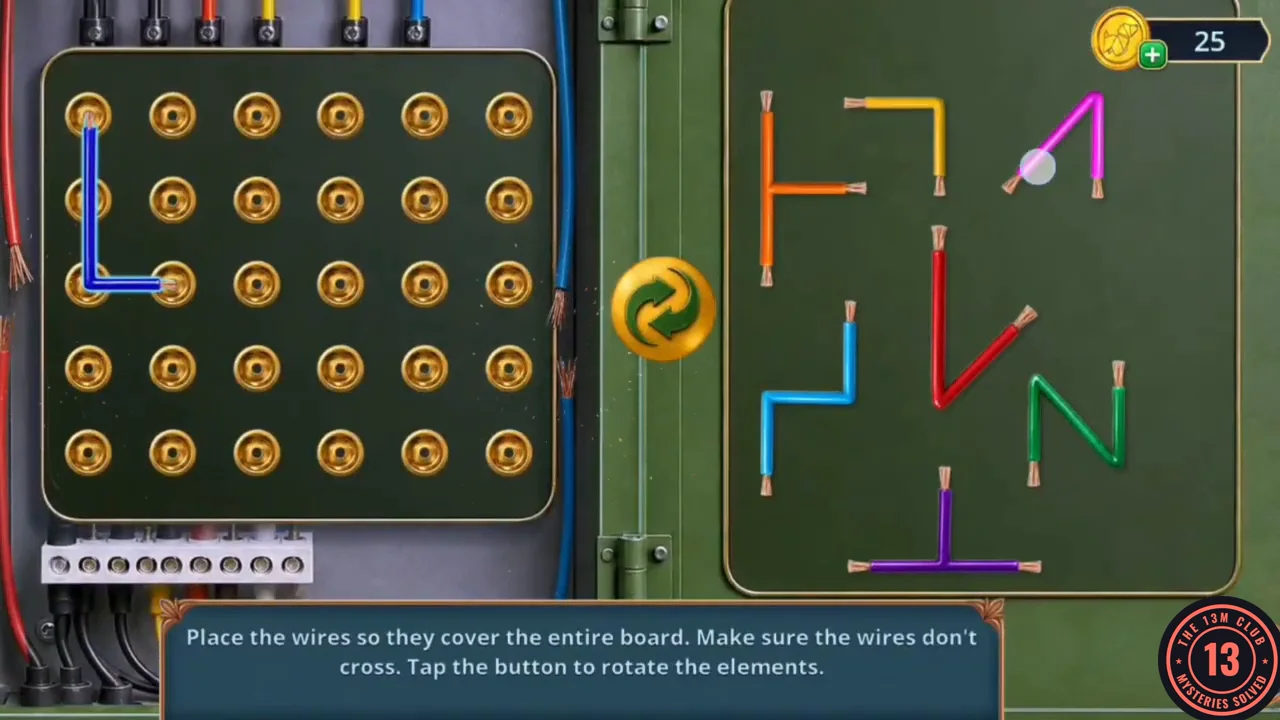
Place the wires so they cover the entire board without crossing. Tap the button to rotate the elements.
- Drag each coloured wire from the right panel onto the peg board; select a wire and tap the round button to rotate it. Every one of the 30 pegs must be covered and no wires may cross. Start with the shapes that only fit along an edge (the long L along the left side and the T along the top) and fill the interior last. One working layout: blue L down the left edge, yellow corner in the top-left gap, purple T along the top right, green N in the middle, orange down the right edge, magenta V in the bottom-left corner, red along the bottom and light-blue Z in the bottom right (see the picture below).
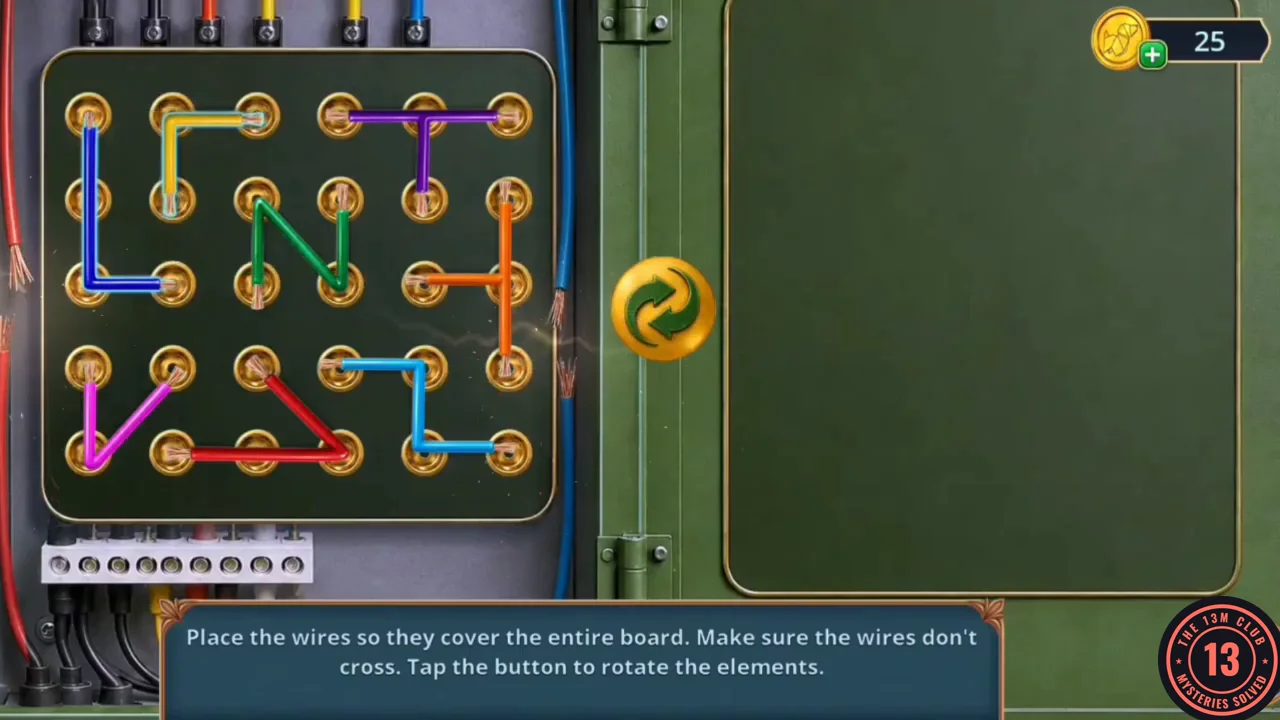
The finished wire layout used in this walkthrough: all eight wires placed, every peg covered and no wires crossing.
Hollow Creek Motel Lobby
Check in at the motel and make your first decision.
- Zoom into the reception desk and take the Motel Number card.
- In the same reception-desk close-up, tap the Reporter's Token at the left edge, beside the lowest key cubby on the left (number 8) (10/140).
- Back in the lobby scene, tap the green Reporter's Token on the small side table at the lower right, beside the alarm clock and the newspapers (12/140).
- Talk to the receptionist. Decision: "Mention Aunt Eleanor's letter" (free, +2 Decision Points) or "Say you're a reporter" (free, 0 points). This walkthrough takes the letter option, which is free.
- Take the Guest Card. Zoom into the cloak closet and tap the sparkling area to start the Lost and Found hidden-object scene.
Lost and Found Closet
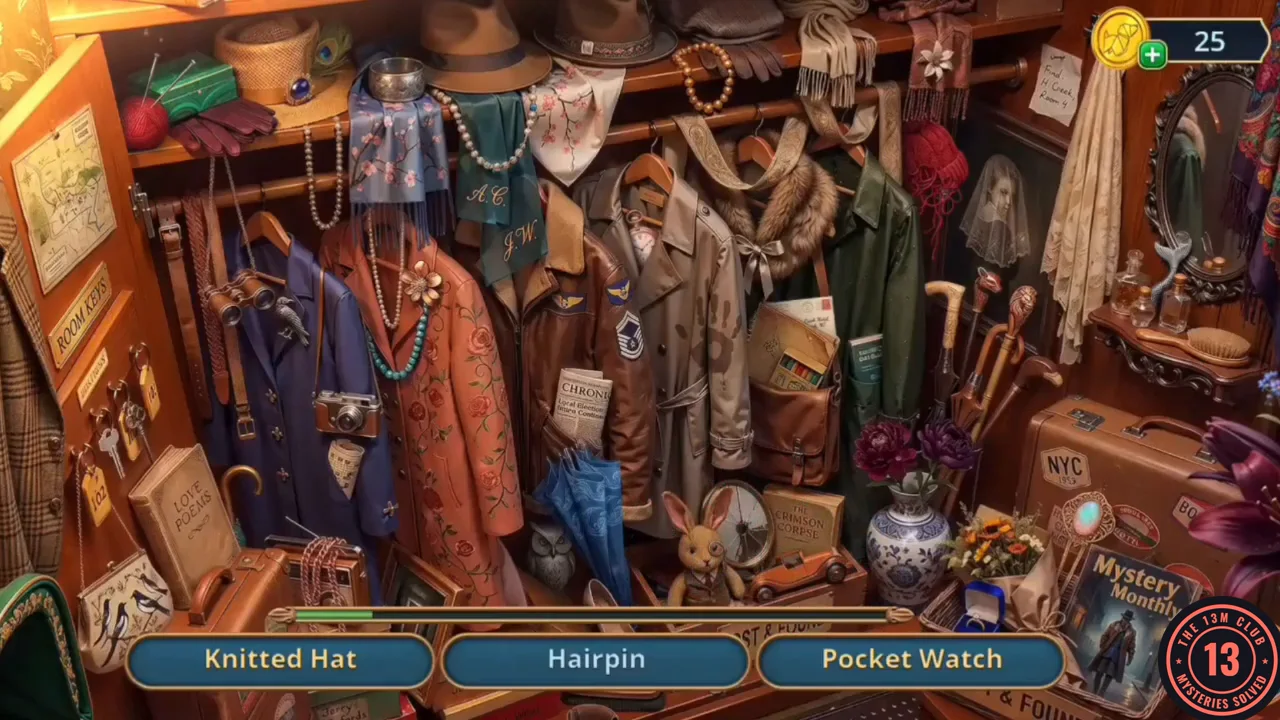
Find the listed items in the cloak closet.
- The list at the bottom shows three names at a time; each name you find is replaced by a new one. Items include the Knitted Hat, Hangers, Pocket Watch, Children's Book, Hairpin, Binoculars, Letter, Turquoise Beads, Blue Umbrella, Poetry Book, Veil and Peonies. When the list is cleared you receive the Lady's Hat.
Guest Card and Upstairs Hallway
Fill in the guest card, then head upstairs.
- Zoom into the coffee table and put the Lady's Hat over the smoking ashtray. Take the Flashlight and the Reporter's Token on the table (14/140).
- Take the Pen lying on the table beside the ashtray. Something is wedged inside the fishbowl, but it is too deep to reach yet.
- Open the Guest Card in the inventory and use the Pen on it. Give the completed card to the receptionist to receive the Room 3 Key.
- Upstairs in the Motel Hallway scene, tap the green Reporter's Token on the floor by the front leg of the green armchair (16/140).
- Go upstairs to the Motel Hallway. Zoom into the bicycle and birdcage and collect a Battery (1/2), the Antenna, the Light Bulb and the Reporter's Token (18/140).
- Zoom into the maid cart's wheel and use the Lighter to burn away the tangled threads. The cart-packing puzzle starts.
Maid Cart Packing
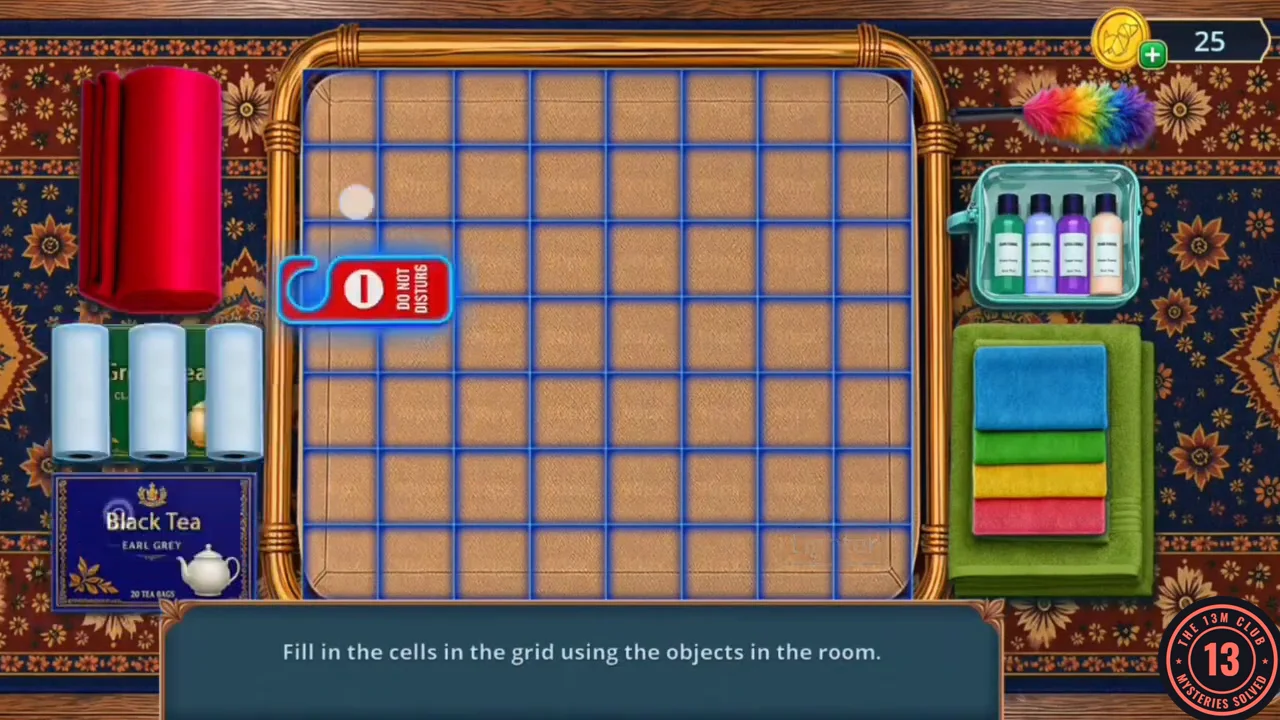
Fill in the cells of the grid using the objects in the room.
- Drag the objects onto the cart grid so every cell is filled. A layout that works: Do Not Disturb hanger in the top-left corner with the feather duster to its right and the rainbow towel stack in the top-right corner; the three paper rolls in a row under the hanger with the toiletry basket beside them; the Green Tea and Black Tea boxes stacked in the lower-left; the red rolled towel in the lower middle and the green towel in the lower-right.
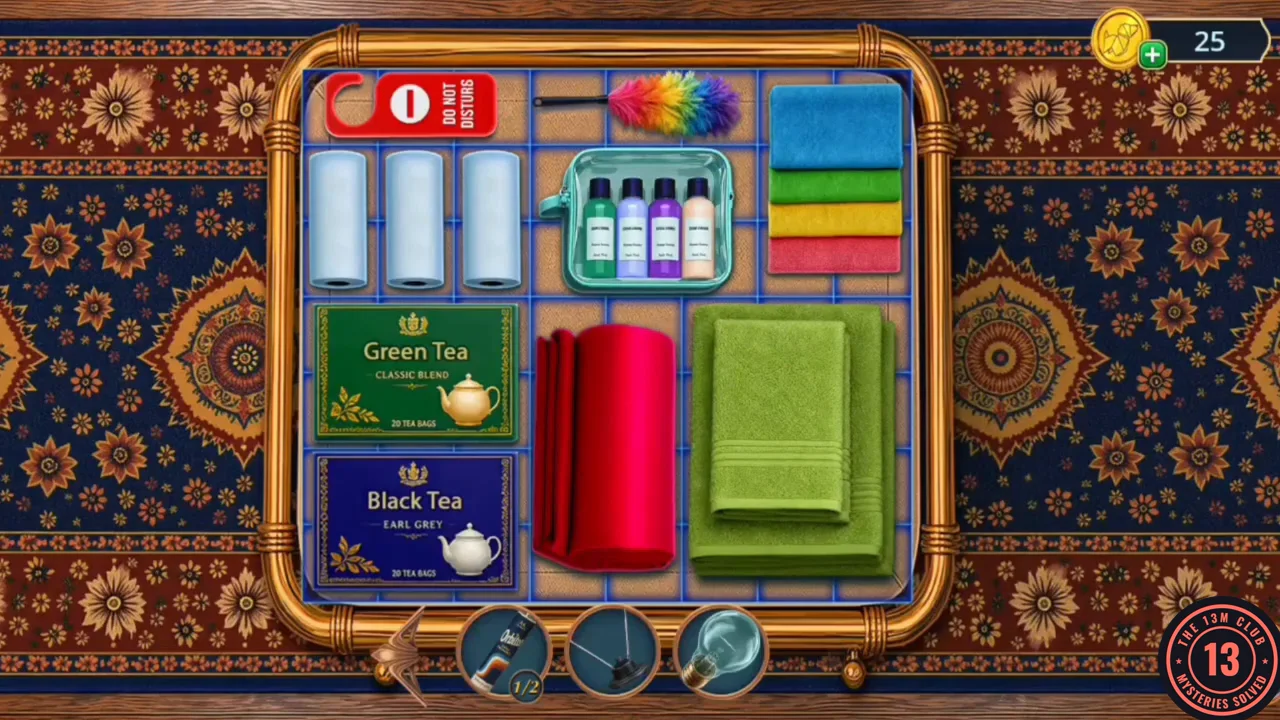
The packing layout described above, with every cell filled.
Room 3
Settle into your own room and search it.
- Use the Room 3 Key on the door of Room 3 and enter.
- Zoom into the desk. Open the satchel to get the Dead Recorder, take the Books (1/3), and screw the Light Bulb into the green lamp.
- Zoom into the TV dresser and take the Reporter's Token by the mug (20/140). Place the Antenna on top of the TV; it shows only static and has no sound yet. Use the Lighter on the candle wax dripping over the left drawer to melt it, open the drawer and take the Lip Balm.
- Zoom into the bed and place My Suitcase on it. Use the Lip Balm on the stuck zipper to open the suitcase and start a hidden-object scene.
Vivienne's Suitcase
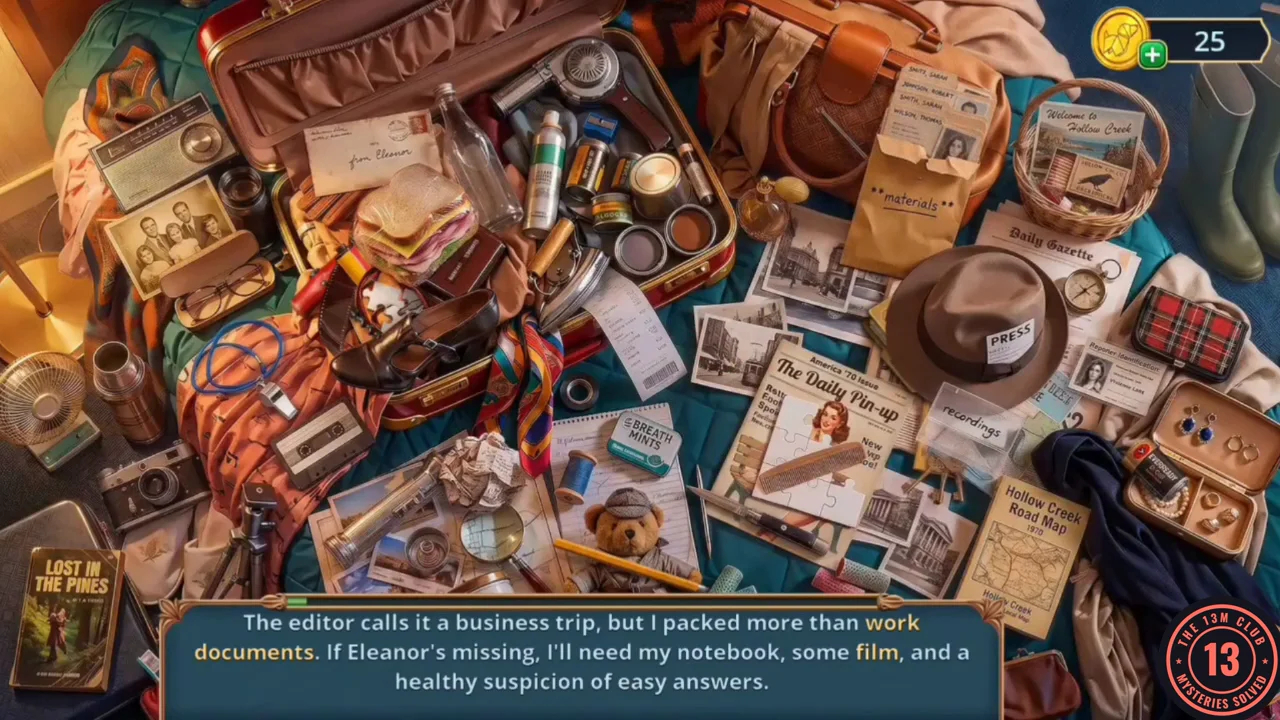
Each list entry is a riddle; the highlighted word points to the object.
- Three riddles appear one after another; tap the object named by each highlighted word. Riddle 1: work documents, notebook and film. Riddle 2: postcards, newspaper reports and press pass. Riddle 3: the tape with the report, the camera (lower left) and the comb (lying on the Daily Pin-up magazine). For the tape, tap the clear "Recordings" case to the right of the magazine: Vivienne says the box is missing its contents. Drag the cassette tape lying on the orange shirt near the whistle (lower left) into the case, then tap the filled case. When all nine are found, a yellow folder appears by the press hat; tap it to receive the Editorial Files.
Official Account versus Vivienne's Findings
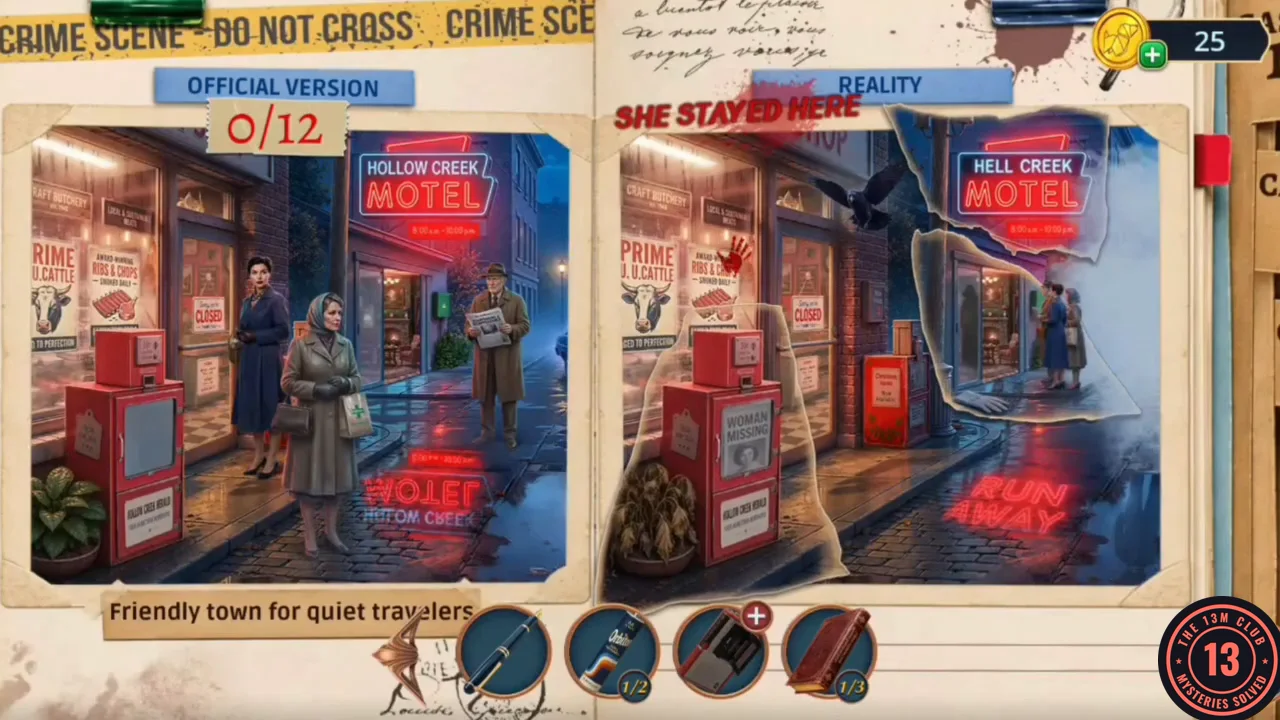
Compare the official account of Hollow Creek with Vivienne's findings and tap the 12 details that do not match.
- Use the Editorial Files on the desk to open the comparison.
- Tap the 12 places where the Official Version on the left disagrees with Reality on the right. Each correct tap tears open a patch of the Reality picture. The solved board marks: the top-left corner under the Official Version tag (the caption above Reality reads "She stayed here"), the Craft Butchery window (a crow in Reality), the Hollow Creek Motel sign ("Hell Creek" in Reality), the Prime U. Cattle / Ribs & Chops poster (a red handprint in Reality), the man reading a newspaper, the woman in the headscarf, the lit motel doorway, the pavement in front of that doorway, the red newspaper box, the potted plant (withered in Reality), the neon reflection in the puddle ("Run Away" in Reality) and the lower-right pavement. Vivienne concludes Eleanor stayed at the motel in an unknown room and that she needs the guest register.
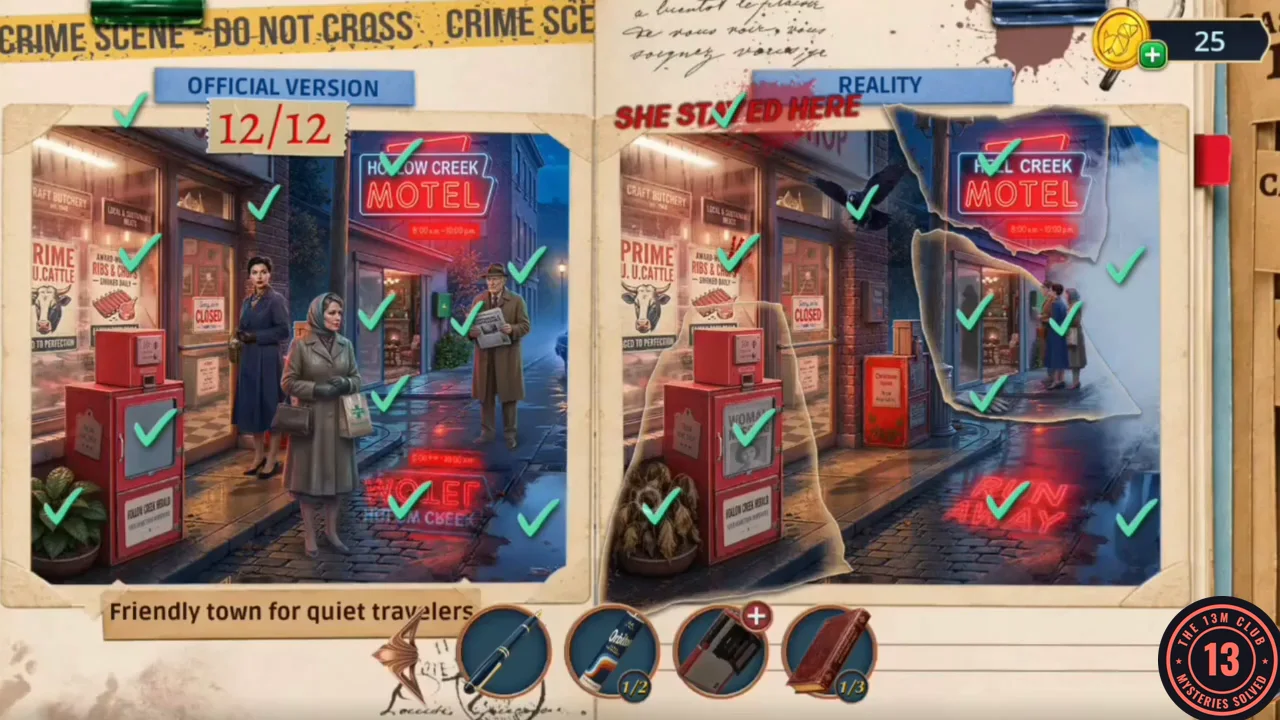
All 12 differences found on the motel street. - Take the Empty Tape from the desk.
Distracting the Receptionist
The receptionist refuses to reveal Eleanor's room number.
- Ask the receptionist which room Eleanor Lane stayed in. Decision: "She's family. Please help me." (60 coins, +2 Decision Points) or "Tell her your editor sent you." (free, 0 points). This walkthrough takes the free option: the receptionist still refuses, and Vivienne is then handed Tea. The guide doesn't cover what the paid reply changes.
- Zoom into the fireplace by the armchair and pour the Tea over the coals to put out the fire. Take the Lock Picks (1/2) and the Lost and Found Box Token from the ashes.
- Use the token on the cloak closet to start a second hidden-object scene.
Lost and Found Closet (Silhouettes)
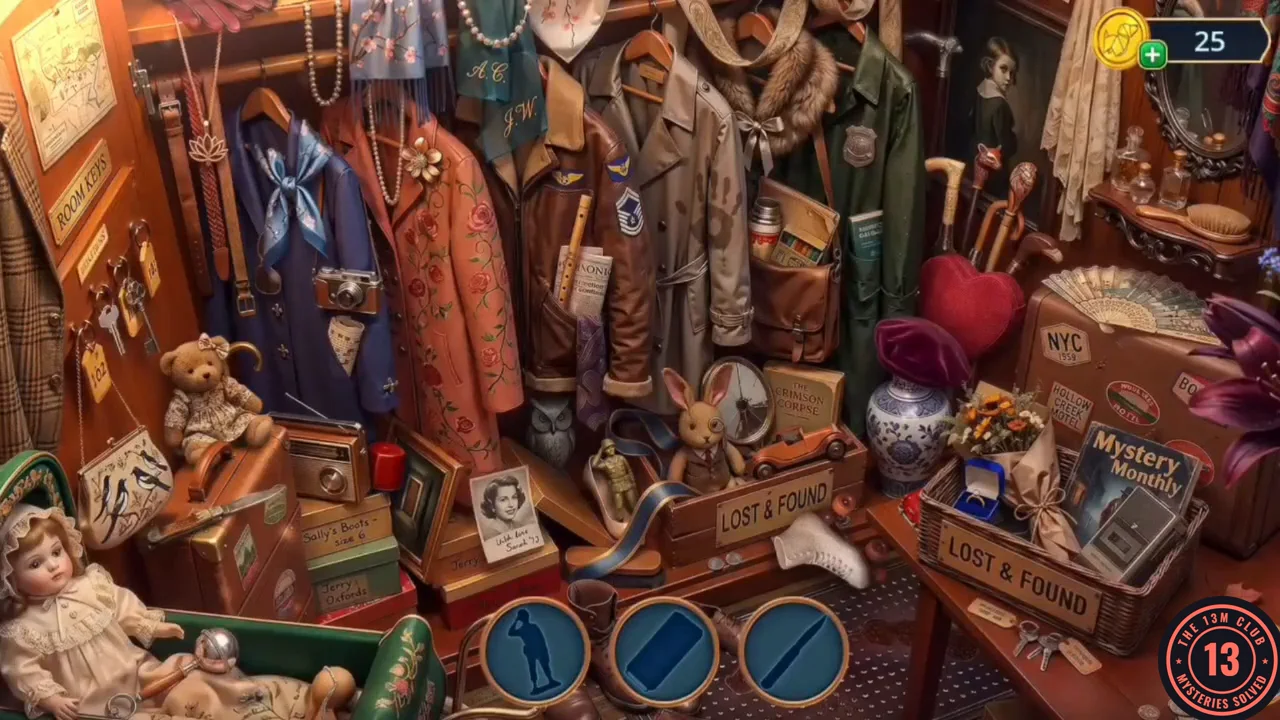
This time the list shows silhouettes of the objects to find.
- Find each object matching the silhouettes at the bottom of the screen; new silhouettes replace the ones you find. When the scene is complete you receive the Remote Control Car.