Storeroom Broken Boards
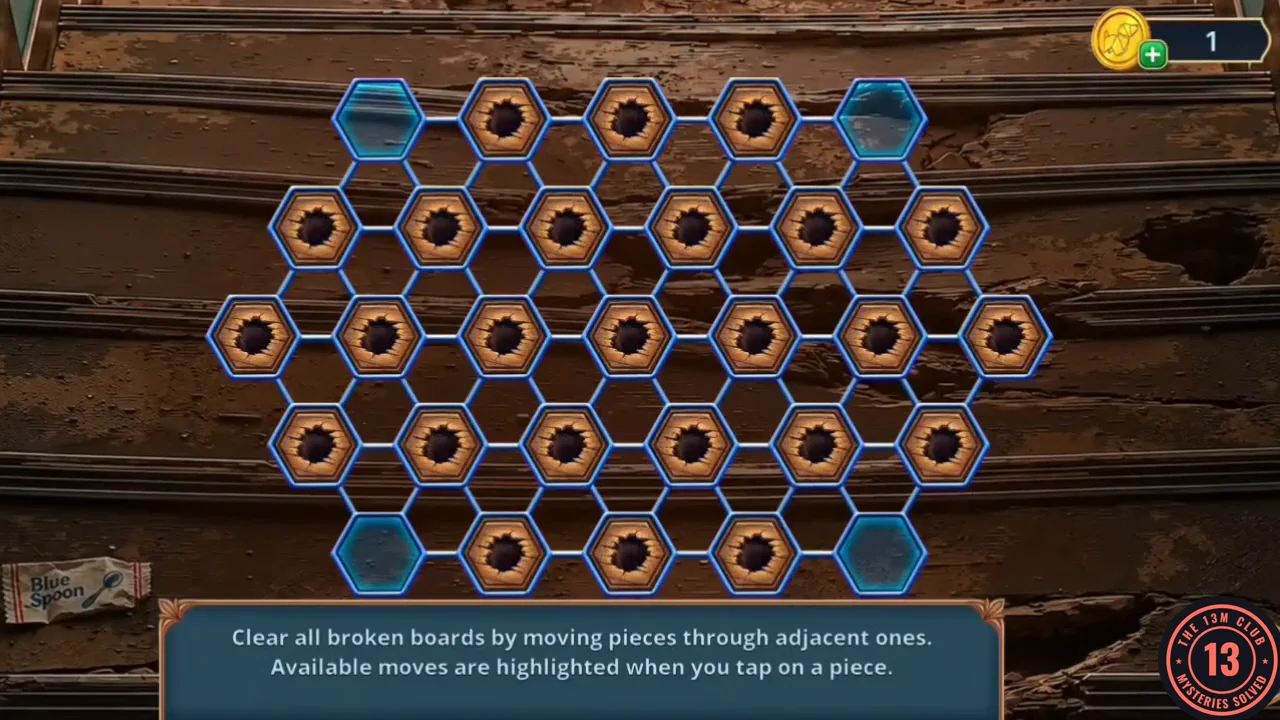
Clear all broken boards by moving pieces through adjacent ones. Tapping a piece highlights its available moves.
- This works like peg solitaire on a hexagon of 29 boards (rows of 5, 6, 7, 6 and 5). At the start, the four corner boards of the top and bottom rows are intact and all other boards are broken. Move a broken board by jumping it over an adjacent broken board, in a straight line, onto an intact board; the board you jump over is repaired. Number rows 1–5 from the top and boards from the left in each row (R3-1 = row 3, first board). A sequence that leaves one broken board: 1. R1-3 → R1-5; 2. R3-1 → R5-1; 3. R2-2 → R4-1; 4. R2-4 → R2-2; 5. R1-2 → R3-2; 6. R2-6 → R2-4; 7. R3-3 → R3-1; 8. R3-4 → R1-4; 9. R4-4 → R2-5; 10. R5-3 → R3-3; 11. R1-5 → R3-5; 12. R3-1 → R1-1; 13. R5-1 → R5-3; 14. R5-4 → R5-2; 15. R4-5 → R2-4; 16. R1-4 → R3-4; 17. R5-2 → R3-2; 18. R4-1 → R2-2; 19. R3-7 → R3-5; 20. R3-4 → R3-2; 21. R1-1 → R3-3; 22. R3-2 → R3-4; 23. R3-4 → R3-6; 24. R4-6 → R2-5.
Fuelling the Forklift
The forklift in the storeroom has no fuel.
- In the basement storeroom scene, tap the Reporter's Token on the potato sacks at the lower left (74/140).
- In the basement storeroom, zoom into the potato sack swarmed by flies. Open the sack and take the Hose and the Hex Bolts (the flies stay for now).
- Go out to Conway Boulevard and zoom into the garbage truck's fuel tank. Put the Hose into the tank and hold the Empty Canister under it to get the Canister of Gas. Back in the storeroom, use the Canister of Gas on the red forklift's tank.
Forklift Loading
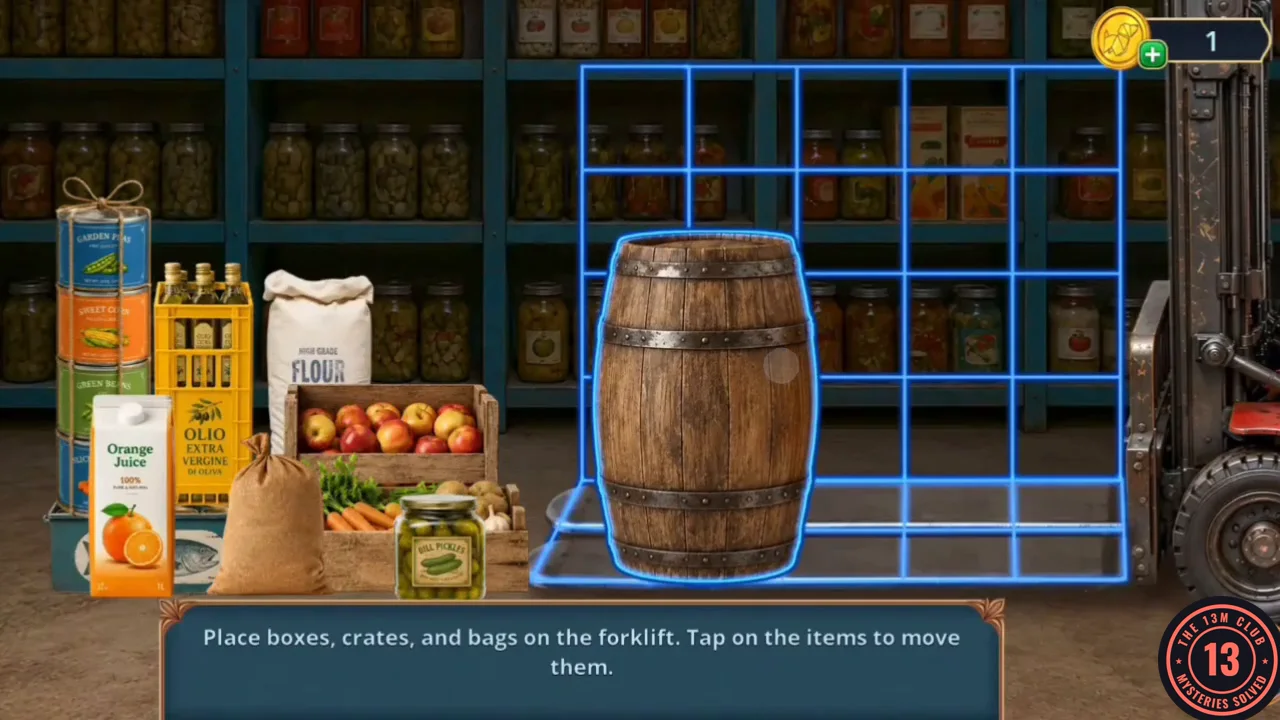
Place boxes, crates and bags on the forklift. Tap an item to move it.
- Fill the forklift's grid so nothing sticks out. One layout that fits: put the barrel at the bottom left and the apple crate to its right, and fill the right-hand column with the tied bundle of four cans topped by the olive oil crate. Stand the Flour sack and the Orange Juice carton on the barrel. Put the carrot and potato crate on the apple crate and the fish tin on top of that. Finish with the burlap sack and the pickle jar on top of the fish tin.
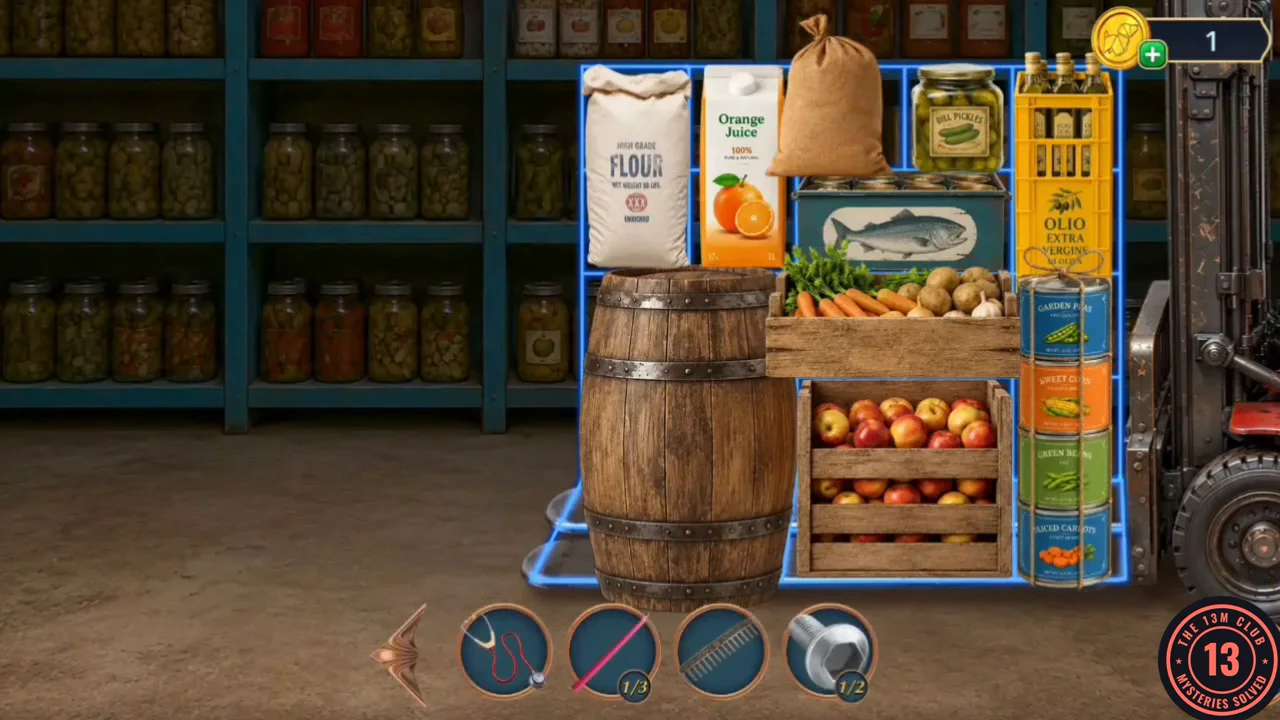
One loading layout that fits. - Where the forklift stood, take the Paper Napkin (the blue cloth) and the Spray Nozzle. In the inventory, fit it onto the Broken Anti-Corrosion Spray (Rostex rust inhibitor) to get the Anti-Corrosion Spray.
- Zoom into the rusted latch of the EMPLOYEES ONLY door. Spray it with the Anti-Corrosion Spray, then scrub it with the Metal Sponge. The door opens onto the pantry.
Pantry Riddles
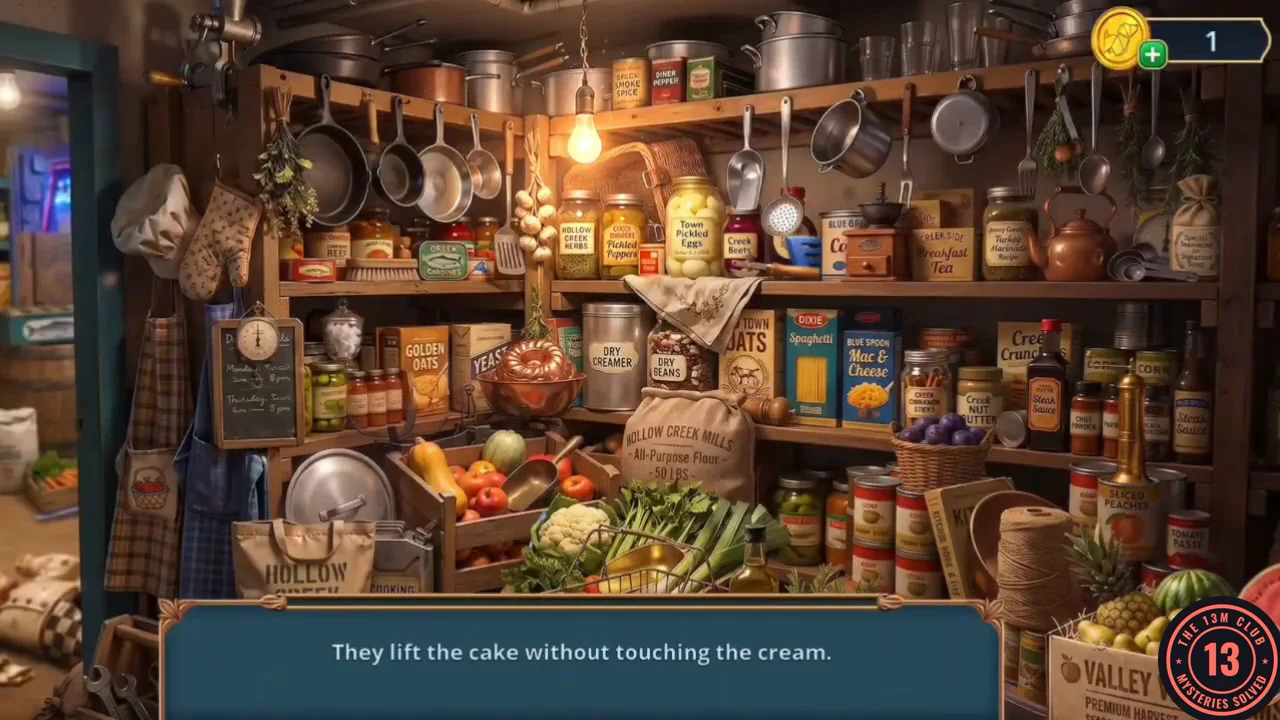
Answer each riddle by finding the object it describes.
- Twelve riddles appear one at a time at the bottom; tap the object each one describes to move on. The scene scrolls sideways, so drag to look along the shelves. In the order they came up here: "They lift the cake without touching the cream": the slotted spatula hanging beside the string of garlic. "It falls white, but it’s not snow": the Hollow Creek Mills All-Purpose Flour sack. "It holds the lid tighter than a housewife keeps a secret": the wooden-handled jar-lid tool lying in front of the Creek Beets jar. "A small glass house for a pickle": the glass Turkey Marinade jar next to the copper kettle. "Used to bake delicious pies": the copper ring-shaped baking tin sitting in the copper bowl beside the YEAST box. "Used to tie up boxes and other people’s promises": the ball of twine by the Valley fruit crate. "Sweetened coffee sand": the glass jar of sugar cubes to the right of the scale and chalkboard. "Rings when dropped from a shelf": the silver pot lid behind the Hollow Creek Co-op bag. "Makes soup taste better": the small sack labelled Special Seasoning for Signature Soup. "Protects the hands from heat": the oven mitt hanging at the top left. "Hides odors better than words": the jar of Creek Cinnamon Sticks above the basket of plums. "Removes stickiness from knives": the scrub brush beside the Greek Sardines tin. Your reward is the Scalpel, and Vivienne realises the real crime scene was upstairs.
Chef Benny Figure
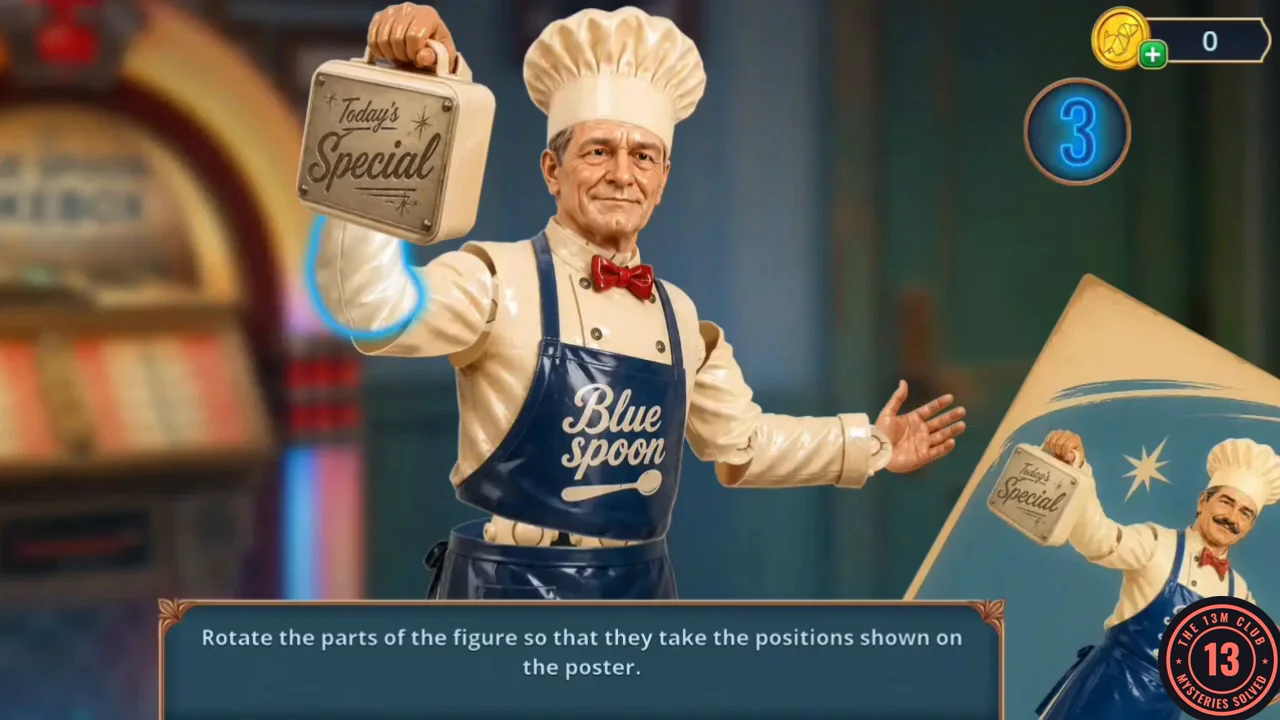
Rotate the parts of the figure so they take the positions shown on the poster.
- In the Diner Hall, zoom into the jukebox and use the Scalpel to cut the Chef Benny poster off its side. You get the Promotional Flyer with Chef. (The Candlestick can't be lit yet because you have only one of three Candles.)
- Zoom into the Chef Benny figure beside the jukebox and give it the flyer. Tap a part (torso, the arm holding the box, the box itself, the other forearm) to rotate it. The blue number counts how many parts are still wrong, and the poster in the corner shows the target pose. Match the poster: torso upright, the Today's Special box lifted beside his head with the front facing you, and the other arm raised with the hand open (the counter drops to 0).
- Take the second Hex Bolt (Hex Bolts 2/2) and the Folding Corkscrew from the figure's box.
Office Safe Rings
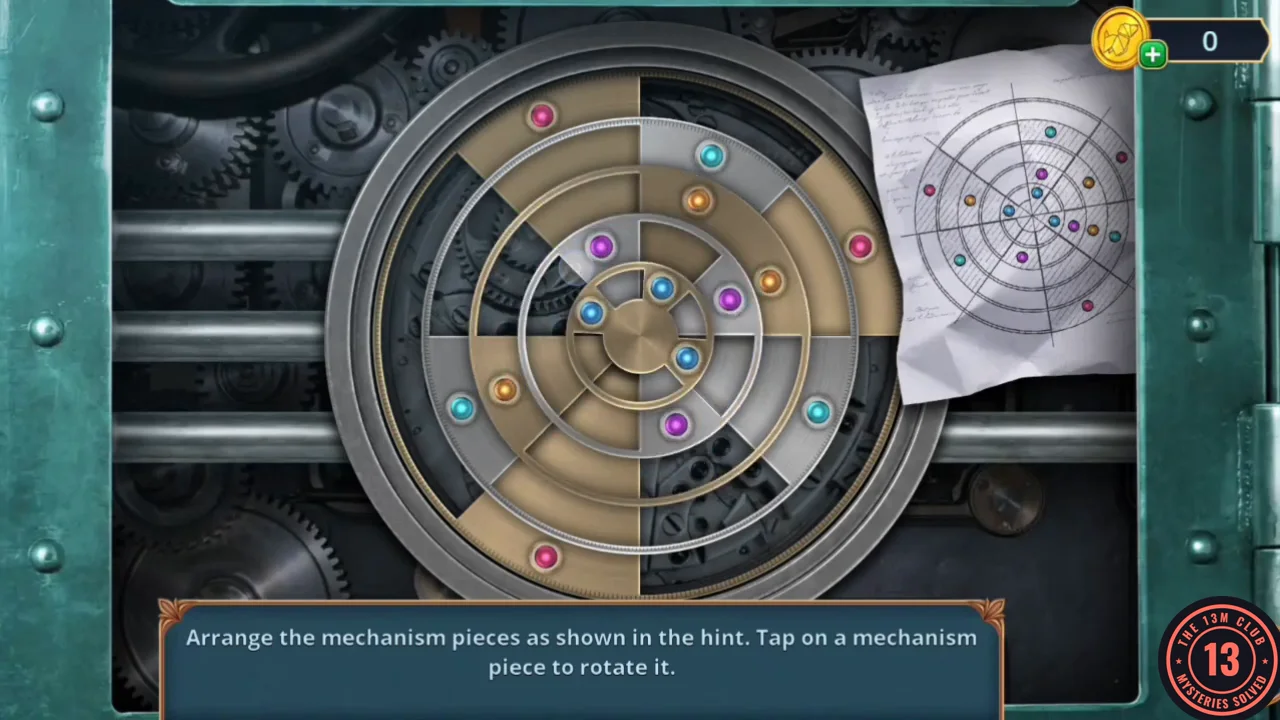
Arrange the mechanism pieces as shown in the hint. Tap a piece to rotate it.
- In the Diner Kitchen, zoom into the stove. Fit the Folding Corkscrew as a handle on the drawer under the stove, open it and take the Metal Safe Handle and the Diamond Ring.
- Zoom into the flour shelf and use the Diamond Ring to cut the glass of the small frame on the wall. Take the Old Photo of Olivia's Office.
- Go to Olivia's Office and use the Old Photo on the room. It shows a wall safe where Olivia's poster now hangs. Zoom into the poster and move it aside. Attach the Metal Safe Handle to the safe door, then listen with the Stethophonendoscope to open the lock mechanism.
- The disc has five rings, each with three coloured studs. Tap a ring piece to rotate it until the studs match the dots on the hint sheet. Read clock positions from the centre. Example solved state, from the outside in: pink studs at about 12:45, 5:15 and 9:40; cyan at 12:45, 3:50 and 8:10; orange at 2:20, 3:50 and 9:40; purple at 12:45, 3:55 and 6:45; blue at 12:50, 3:55 and 9:30. The safe opens; take the Fluorescent Tube and the Button.
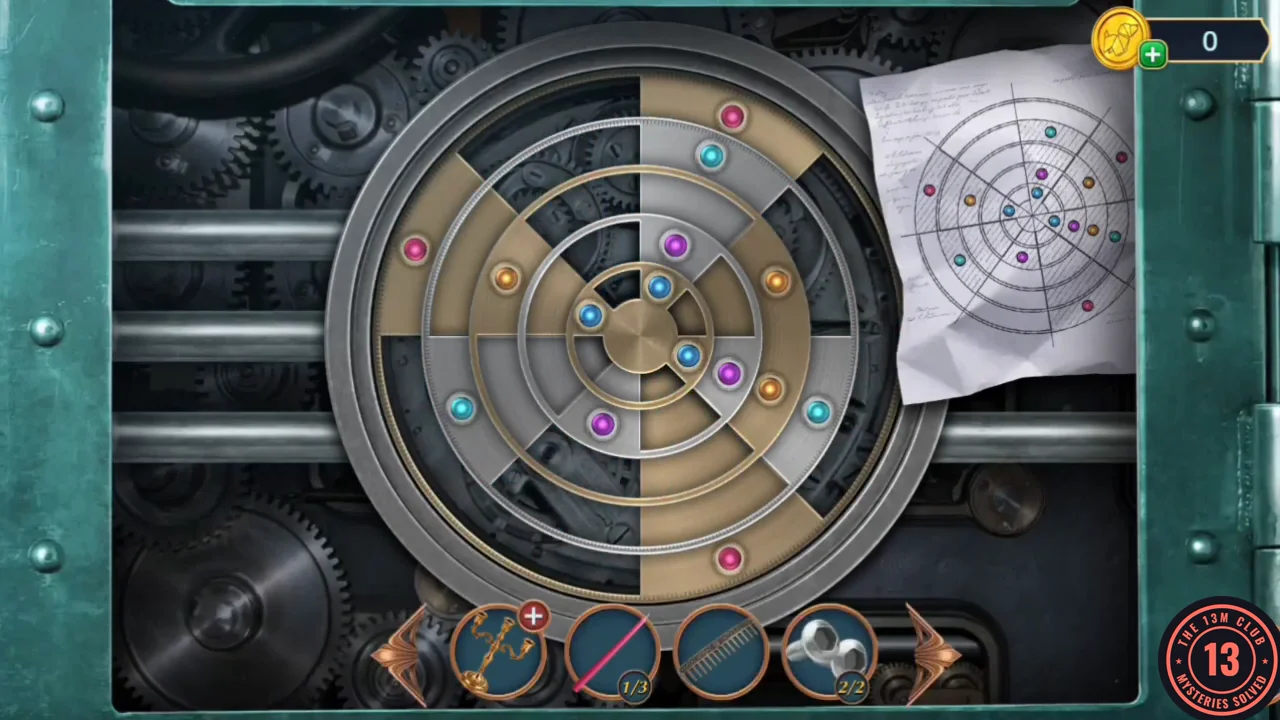
Solved safe rings, matching the hint sheet on the right.
The UV Light and the Knife
Build a UV light to find the blade in the restroom vent.
- In Olivia's Office, fit the Button into the Broken Vacuum Cleaner in the inventory. The Hex Bolts don't help: Vivienne notes that the button and the cord both need fixing before it will work, so keep it for later.
- Go to the Diner Restroom. In the inventory, put the Fluorescent Tube into the Broken UV Lamp ("The UV lamp's missing a bulb. A long one.") to get a working UV lamp, then place it in front of the floor vent by the sinks.
- Zoom into the lit vent and take the Hex Key. Vivienne sees the blade but asks what she could grab it with, so use the Paper Napkin to take the Bloody Butcher Knife.
- Zoom into the wobbly ladder by the stalls and tighten its bolt with the Hex Key. Climb up to look into the closed stall and take the Long Scarf and the Air Freshener. The comparison scene opens.
Restroom Comparison
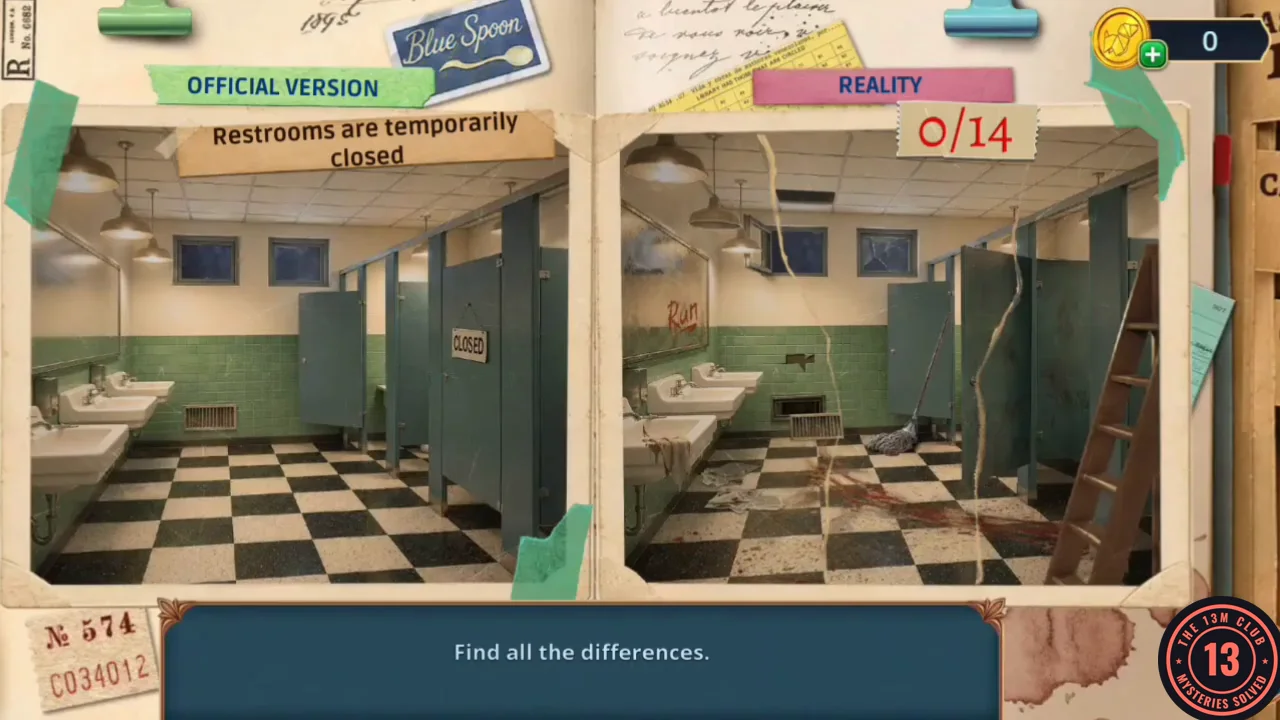
Find the 14 differences in the restroom.
- Tap each difference in the Reality picture (right). The 14 differences: 1) a missing ceiling lamp at top left; 2) the open ceiling vent; 3) the left window pushed in/open; 4) the cracked right window; 5) "Run" written on the mirror; 6) the hole in the wall tiles below the windows; 7) the tap on the second sink; 8) the vent grille knocked off; 9) the mop leaning on the first stall; 10) the second stall door; 11) blood on the front sink; 12) the rags on the floor; 13) the bloodstain on the floor; 14) the ladder on the right. The result: Mabel was killed in the restroom and the kitchen fire was a cover-up.
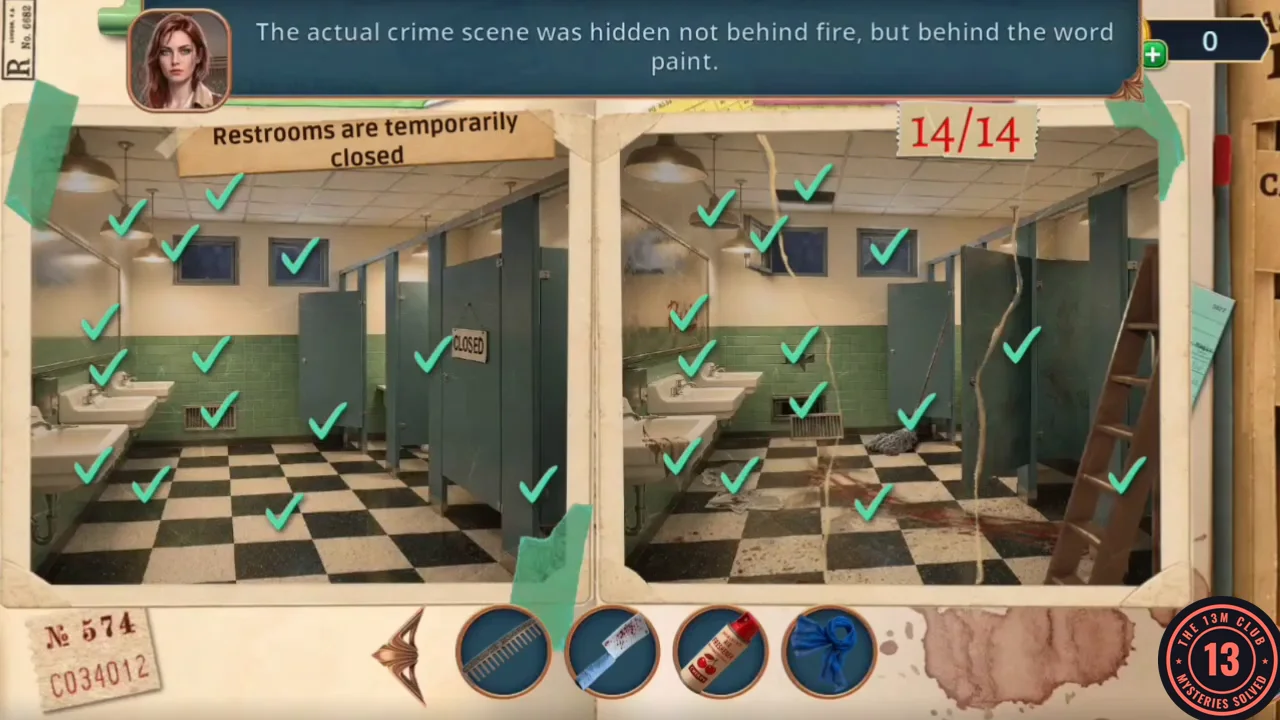
All 14 differences found in the restroom.
Pantry Counting Scene
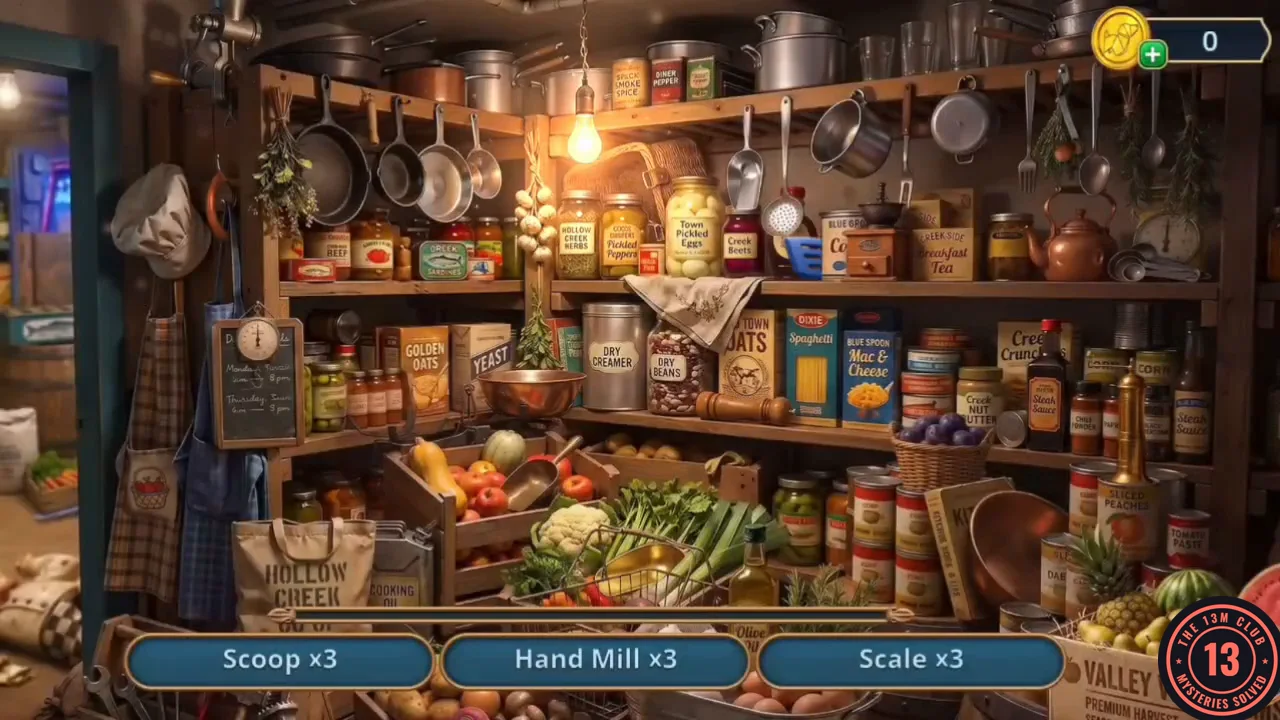
Find three of each listed item: Scoops, Hand Mills, Scales and Baskets.
- Go back to the storeroom and zoom into the potato sack. Spray the flies with the Air Freshener, then take the Duct Tape from the sack's padlocked box. In the inventory, wrap the Duct Tape around the Broken Vacuum Cleaner's sparking cord. Zoom into the EMPLOYEES ONLY doorway and plug the vacuum into the wall socket; it clears the dust in the pantry.
- The bottom bar lists Scoop ×3, Hand Mill ×3 and Scale ×3, and Basket ×3 replaces a finished entry. Three items need an extra step: one hand mill "is unusable without its crank", so find the crank and put it on; one basket's handle "has come loose", so find the handle and attach it; and the scale on the left of the shelves, below the YEAST box, has "One pan is missing from the scale", so drag the loose copper pan lying on the right, in front of the fruit crates, onto it. When every count reaches zero you receive the Kitchen Spatula.
Office Bookcase Symbols
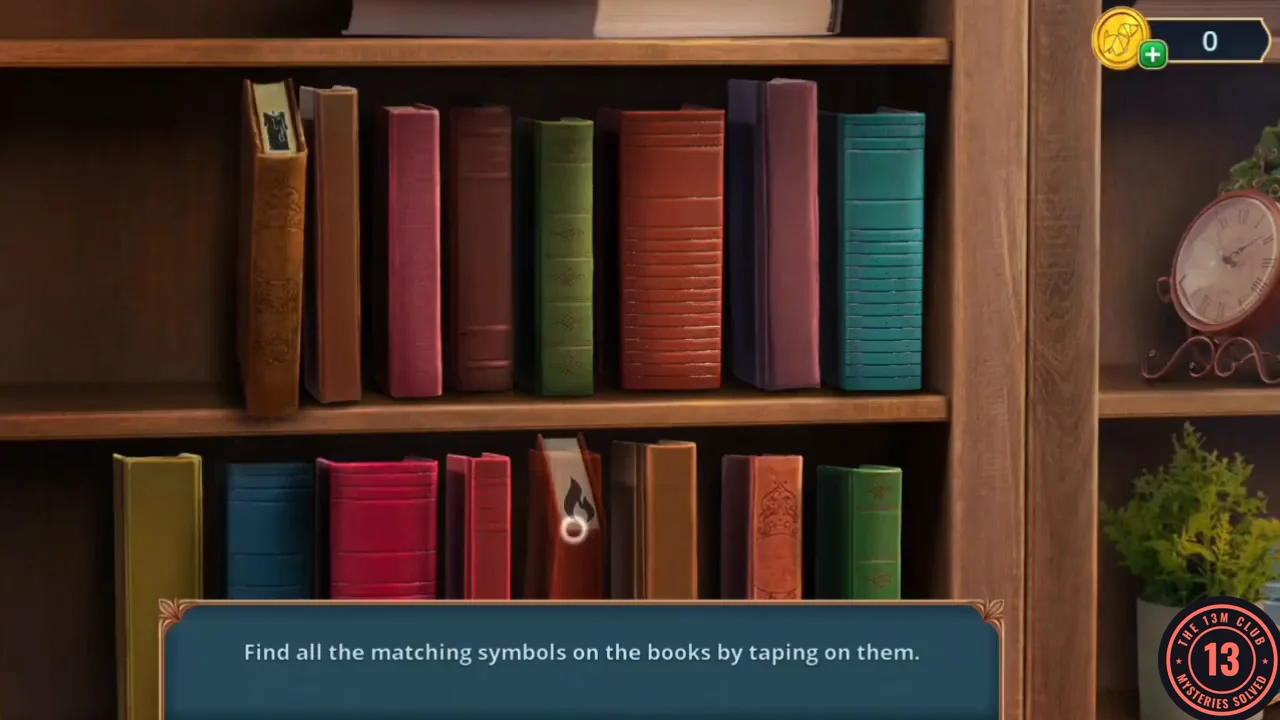
Find all the matching symbols on the books by tapping them in pairs.
- In the Back Alley, zoom into the Blue Spoon crate below the pallets. Dig in the spilled soil with the Kitchen Spatula and take the Torn Book Spine and the Metal Rod. Then zoom into the drain grate beside the trash barrel: push the Metal Rod through the grate, tie the Long Scarf to it and pull up the Gear.
- In Olivia's Office, zoom into the gap on the lower bookcase shelf and put the Torn Book Spine back. Now play the memory game: tap a book to tilt it and see the symbol on its spine, then find the other book with the same symbol. Matched pairs stay open. The books' positions may differ in your game, so remember which symbol is where. When every pair is found, a red book slides out.
- Open the red book. It is hollow and holds the remaining Candles (3/3). Open the Candlestick in the inventory and fit the three Candles. The Lighter is already in its slot if you tried it earlier; otherwise add it now. The candles light. Place the lit Candlestick on the dark end of Olivia's desk to search it.
Olivia's Desk (Second Search)
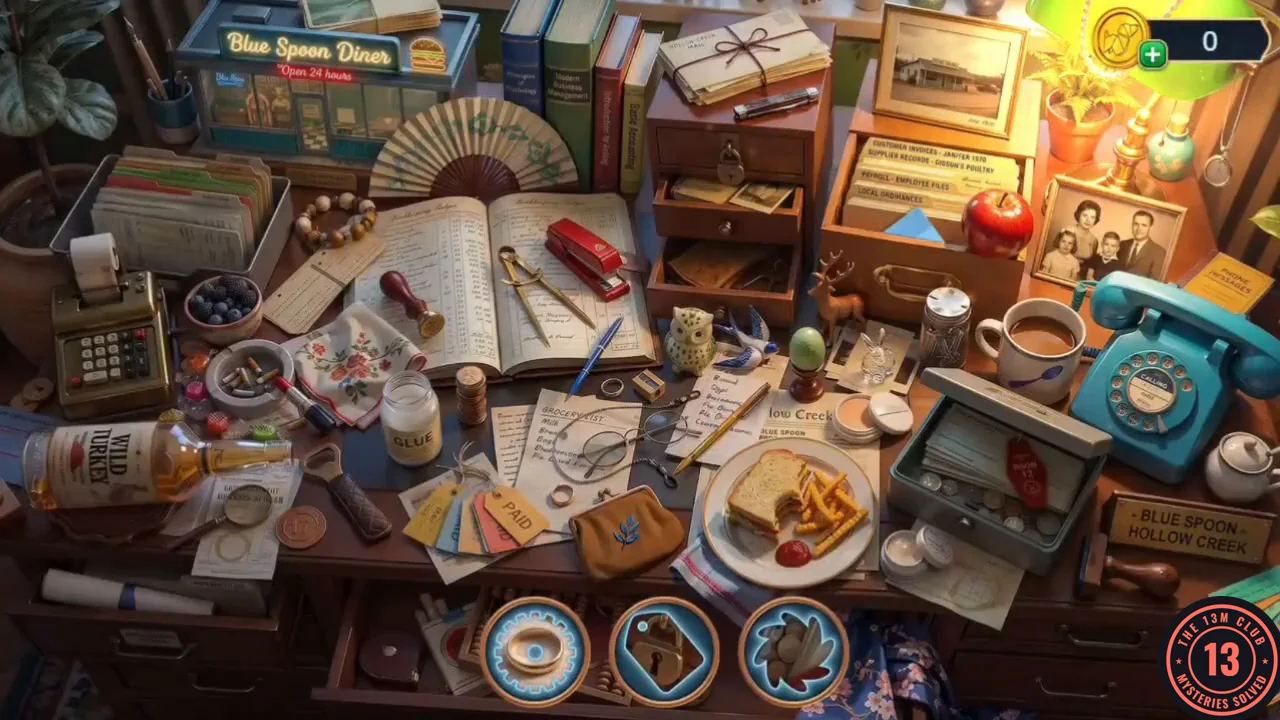
Find the objects shown by the icons.
- Three outline icons at the bottom show the objects to find; each one you find is replaced by a new icon. The icons are shapes such as a ring, a leaf, a hexagon and a star, and some objects (for example the drawer box at right) need an extra tap. When the list is empty you receive the Code note: 6302.CODE6302
- In the storeroom, enter 6302 on the keypad lock of the box under the potato sack. Inside is a bag labelled "Mabel"; take the Glue. Vivienne wonders whether Mabel was down here all along.CODE6302
Diner Hall Comparison
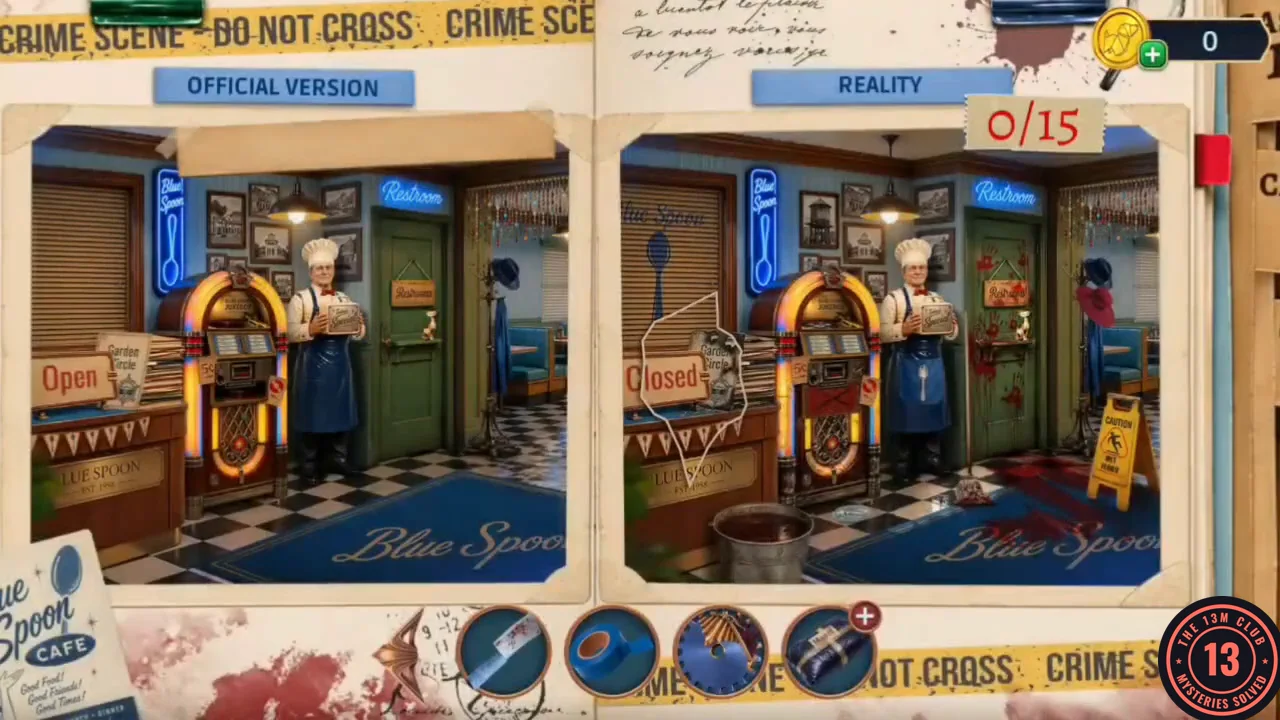
Find the 15 differences in the diner hall.
- In the Diner Hall, zoom into the box held by the Chef Benny figure, glue the broken vinyl record together and take the Fixed Vinyl Record. Put it on the jukebox turntable. The song plays and the comparison scene opens.
- Tap the 15 differences in the Reality picture (right): the "Closed" sign instead of "Open", the Garden Circle note on the counter, the Blue Spoon logo on the blinds, the changed wall photo, three spots on the jukebox (the top, the taped X on the front and the base), the spoon emblem on Chef Benny's apron, the bloody handprints on the restroom door, the red hat on the coat rack, the footprints to the door, the bloodstain on the rug, the yellow caution sign, the glass on the floor and the bucket. Footprints, Mabel's note, Olivia's papers and the sheriff's seal show that Mabel stayed after closing and that the fire was a cover-up.
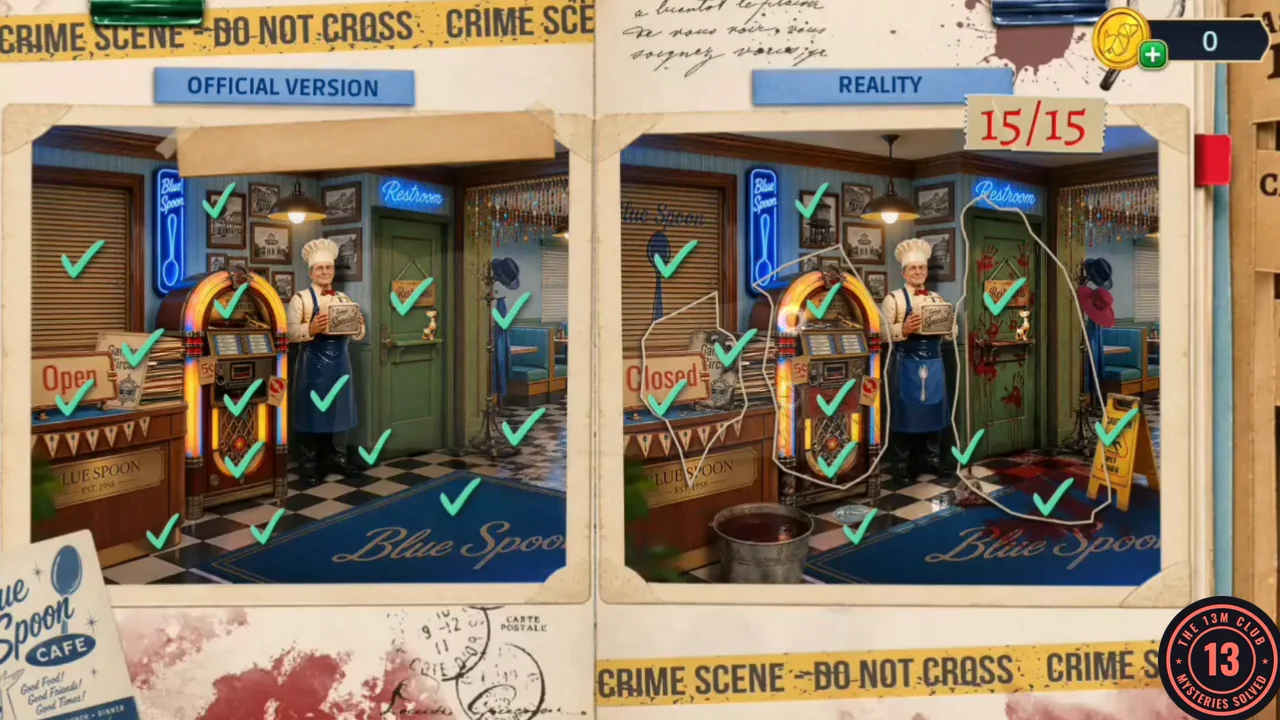
All 15 differences found in the diner hall.
Chapter 2 Decision Points
The chapter's decision tree and outcome panels.
- Chapter 2 decisions and values: sheriff – Come for coffee 0 / Wound pride 2; Olivia – Ask about aunt 0 / Press on the invoice 2; Mabel's photo – Catch on a contradiction 0 / Show the photo 2 / Ask directly 6; Lucas – Question the story 0 / Show belief 2. Following this walkthrough's choices scores 2/12, which unlocks the 0-point outcome.
- A cutscene reviews the case file and plays Mabel's voice recording from the jukebox.