CHAPTER 2
Diner Kitchen
The kitchen looks surprisingly intact for a room that supposedly burned.
- In the kitchen scene, tap the Reporter's Token in the top bowl of the dish stack in the sink on the right (60/140).
- In the kitchen, zoom into the flour shelf by the red tiles. Take the Metal Sponge, the Pot and the Reporter's Token (62/140). Stretch the Mesh Fabric over the metal bowl as a sieve, pour the flour through it and take the Lighter caught in the mesh.
- Zoom into the frozen freezer door. Place the Lighter and then the Hairspray in front of the iced handle; the spray flame melts the ice and the door opens.
HIDDEN OBJECTS
Kitchen Freezer
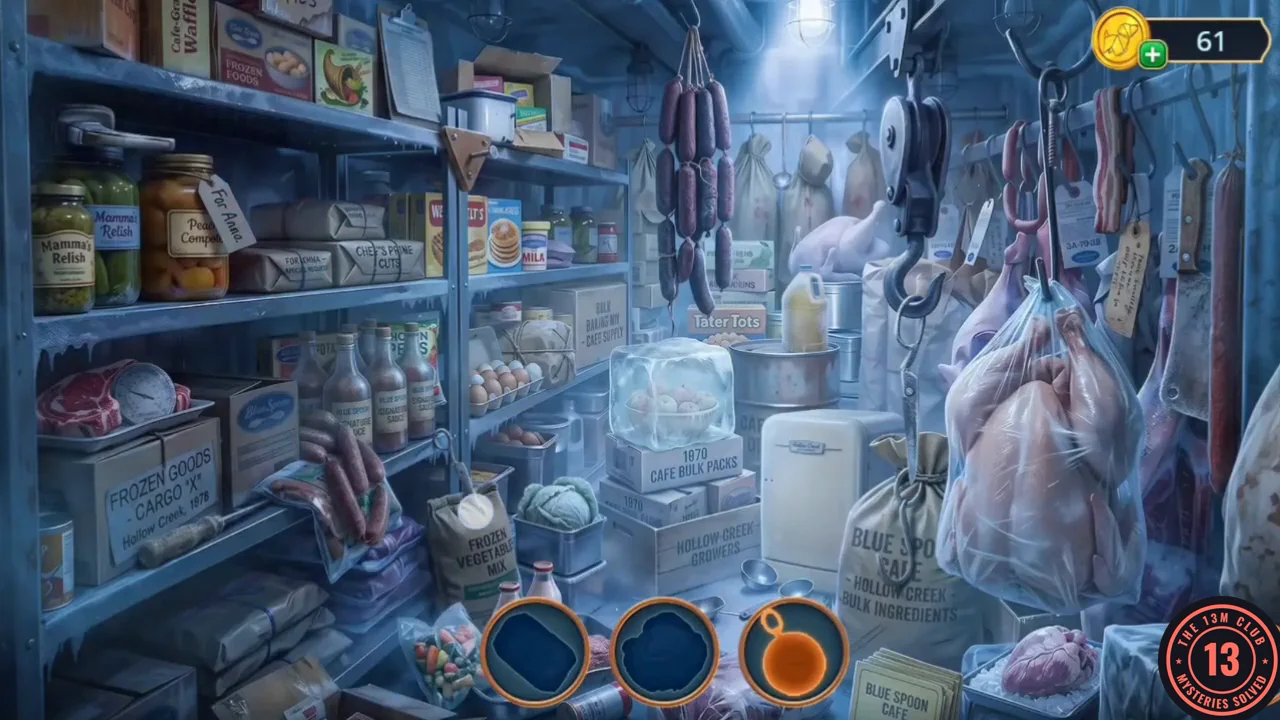
Find the objects shown by the icons.
- This scene shows silhouettes instead of names: three shapes at a time at the bottom of the screen; when you find one, a new shape replaces it. Match each silhouette to an object on the freezer shelves (examples seen: a round tag on a ring, scissors, a cleaver, a shoe). When the last silhouette is found you receive Ice.
CHAPTER 2
The Stove
Use the stove to free what is stuck in ice.
- Zoom into the stove and tap the Reporter's Token at the right edge of the close-up, beside the round wicker trivet (64/140).
- Zoom into the stove. Vivienne needs something to put over the burner: place the Pot on the burner, put the Ice in the pot and light the burner with the Lighter. When the ice melts, take the Metal Nail File from the water. Open the Chopsticks in the inventory (+) and use the Metal Nail File on their tips to make the Improvised Crochet Hooks.
- Go back to the flour shelf and use the Improvised Crochet Hooks on the tangled blue net lying on the counter to start the untangling puzzle.
PUZZLE
Tangled Net
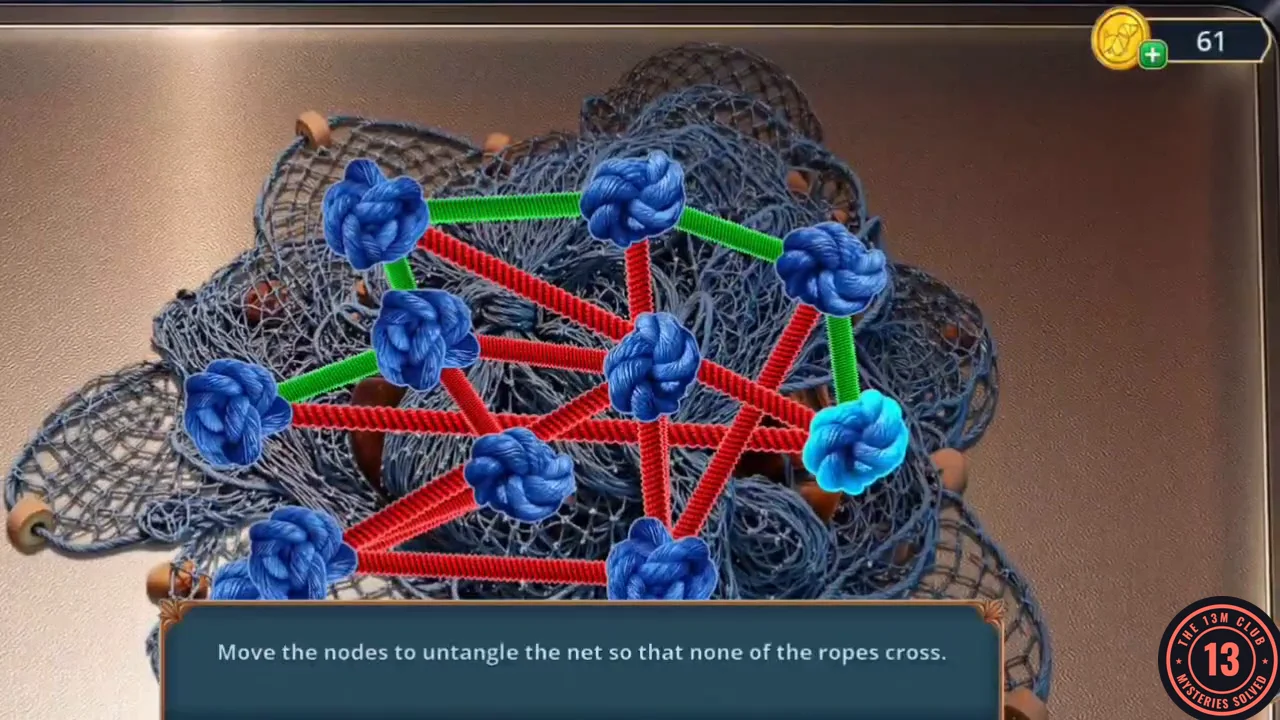
Move the nodes so that none of the ropes cross.
- Red ropes are crossing, green ropes are clear. Drag the knots one at a time: first spread the outer knots into a large ring around the edge, then place each inner knot between the knots it is tied to until every rope turns green. Any layout without crossings is accepted.
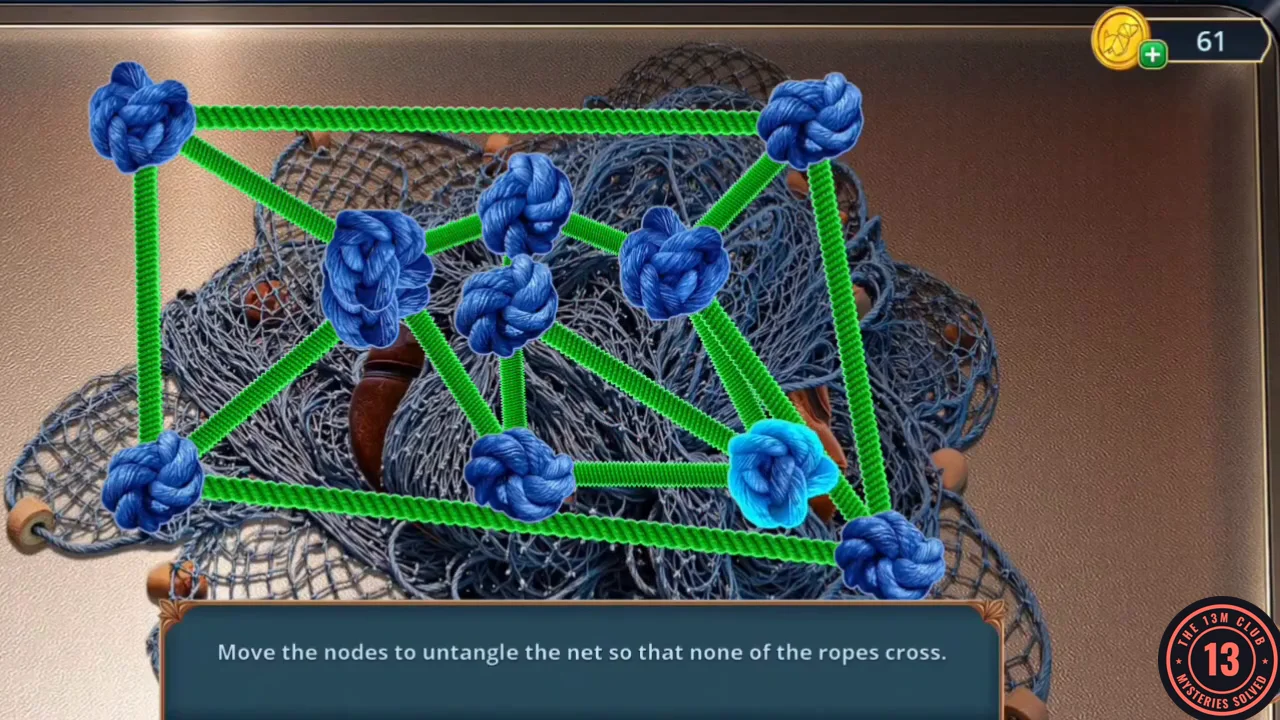
Example untangled net with no crossing ropes. Any layout without crossings works.
CHAPTER 2
Back Alley Items
Gather the items for the old man in the alley.
- Take the Deflated Ball that was hidden under the net.
- In the Back Alley, zoom into the dumpster. Push the Deflated Ball into the gap of the wedged crate, then use the Hand Pump on it; the ball inflates and bursts the boards apart. Take the Broken Vacuum Cleaner (purple) and the Sun Figurine from the crate.
- On Conway Boulevard, zoom into the bench by the red 3 COINS box. Place the Sun Figurine in the round emblem lock of the green bag marked "M. WARD". Take the Wind-Up Mouse and the Broken Anti-Corrosion Spray from the bag.
- In the Dining Area, zoom into the counter where the black cat sits. Put the Wind-Up Mouse on the counter; the cat chases it away and the counter hidden-object scene opens.
HIDDEN OBJECTS
Dining Area Counter
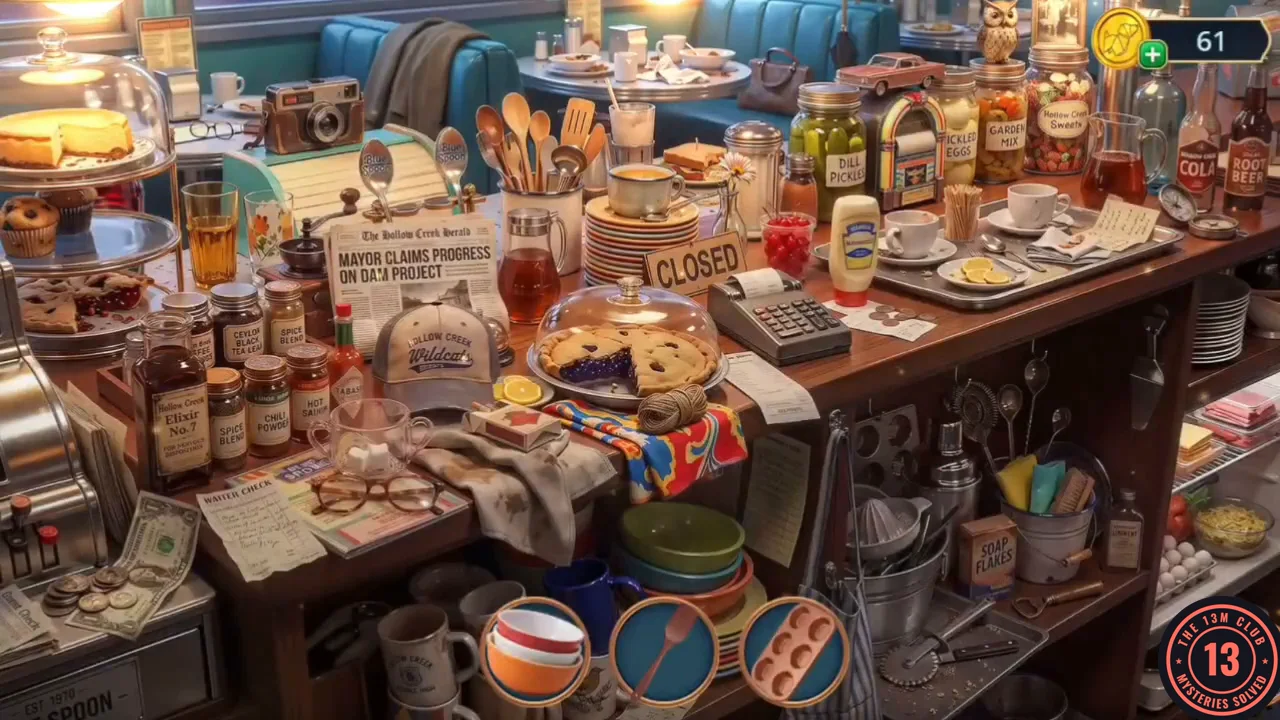
Find the objects in the second counter scene.
- This scene shows pictures of the objects, three at a time; each found object is replaced by a new picture. Pictures include a ball, a daisy, a mustard bottle, a cork, chocolates, lemon slices, sugar cubes, a pink jug and a slice of pie. Finishing without wrong taps earns an accuracy achievement. You receive the Soda.
CHAPTER 2
Lucas in the Alley
The old man collecting bottles knows more than he lets on.
- Give the Soda to the old man in the Back Alley. He says there was no fire, not the way Olivia tells it.
- Decision: "Let Lucas know you believe him." (60 coins, +2) or "Question his story." (free, 0). This walkthrough takes the paid option, which costs 60 coins and uses up nearly all the coins gathered so far.
- In the Back Alley, zoom into the Blue Spoon trash barrel and tap the Reporter's Token at the top right of the close-up (66/140).
- Zoom into the Blue Spoon trash barrel in the alley. Take the Compass and the round orange disc lying among the burnt scraps; the comparison puzzle opens and the torn fragments of the real scene fly into place.
PUZZLE
Back Alley Comparison
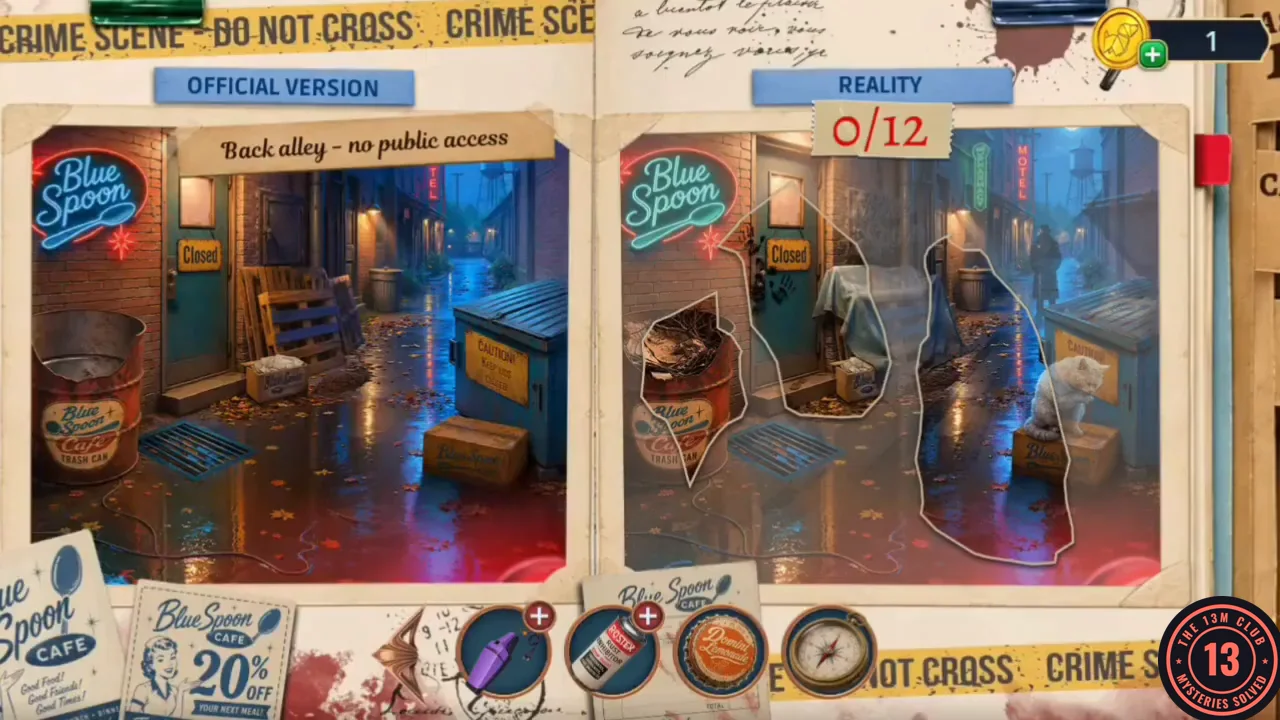
Find the 12 differences between the two alley pictures.
- Tap the details in the Reality picture that differ from the Official Version. The 12 differences: the Blue Spoon neon sign (green instead of blue), the handprints on the door, the faded Blue Spoon lettering on the wall above the pallets, the tarp thrown over the pallets, the green vertical neon sign further down the alley, the dark figure at the end of the alley, the open dumpster lid with a box on top, the burnt papers in the trash barrel, the box on the doorstep, the wet pavement in the middle of the alley, the white cat on the box by the dumpster and the dark object beside the drain grate. Vivienne concludes papers were burned in the alley after closing: it was not a kitchen fire.
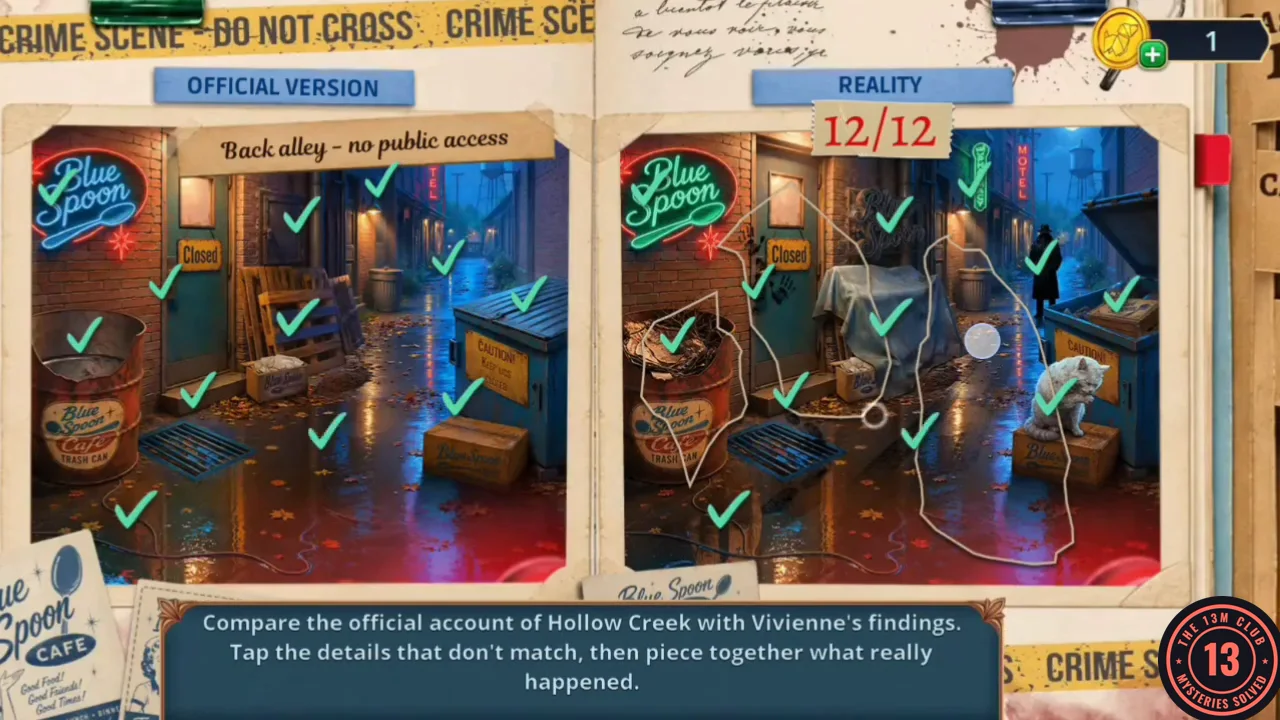
All 12 differences found in the back alley.
CHAPTER 2
Olivia's Office
Open Olivia's locked office.
- Check the fuel tank of the garbage truck outside (you will need a hose later).
- In the Diner Hall, place the Compass in the centre of the red jewel box on the counter and take the Opener.
- Zoom into the office door beside the Blue Spoon poster and use the Opener to cut a hole in the damaged wooden panel. Vivienne needs a way to see the other side: push the long-handled Mirror (from the bench outside the diner) through the hole. The close-up shows the bolt on the inside; slide it open and the door opens.
- In Olivia's Office, tap the Reporter's Token on the seat of the desk chair (68/140). Zoom into the cuckoo-clock box on the floor by the desk and take the Candlestick, the Stethophonendoscope and the Reporter's Token at the top left of the close-up (70/140). The clock's bird is missing.
- Zoom into the rail at the foot of the sliding bookcase: one of its wheels is missing ("Something round is clearly needed here"; the orange disc does not fit). Take the Reporter's Token (72/140) and leave the bookcase for later.
- Zoom into the desk, which is covered in broken glass. Use the Work Glove to clear the glass; the riddle hidden-object scene opens.
HIDDEN OBJECTS
Olivia's Desk (Riddles)
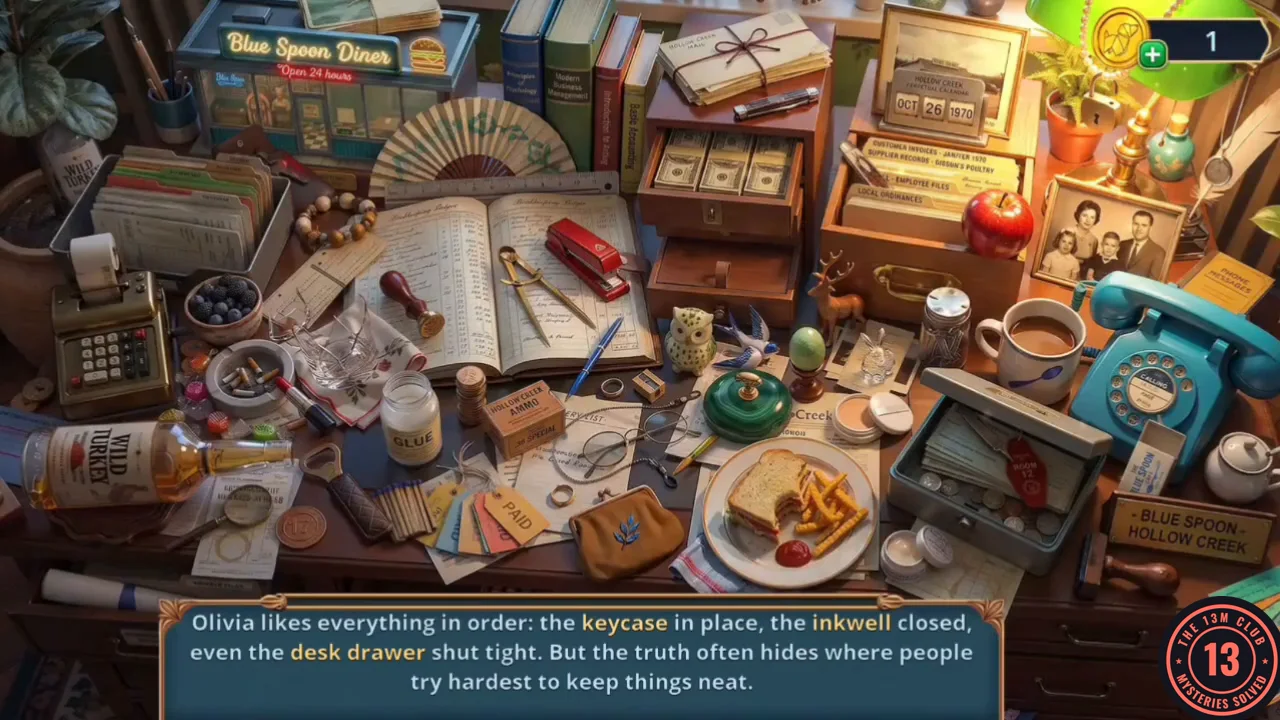
Each riddle highlights the words that name the objects to find.
- Four riddles appear one after another; the highlighted words are the objects to find. Riddle 1: the keycase, the inkwell and the desk drawer. Riddle 2: the broken glass, the empty bottle and the matches. Riddle 3: the metal ruler, the paperweight and the bullet box. Riddle 4: the calendar, the letter opener and the secret lid. Finding the secret lid reveals the reward: the Starter Pistol.
CHAPTER 2
The Restroom Stall
Scare off the crow and reach the hidden bag.
- In the restroom, fire the Starter Pistol to scare away the crow.
- Now that the crow is gone, zoom into the top of the broken ladder by the stall ("Doesn't work for technical reasons") and take the Metal Spinning Top.
- Return to Olivia's Office and place the Metal Spinning Top on the bookcase rail as the missing wheel. The bookcase slides aside; take the Fishing Line with Hook from behind it.
- In the restroom, zoom into the sink and lower the Fishing Line with Hook into the drain. Take the Earring it brings up.
- Zoom into the green wall panel with the ten symbol buttons that you opened earlier; the leather bag sits inside it. Its zipper has no pull: attach the Earring as a zipper pull and open the bag. Take the Candles (1/3) and the Chewing Gum.
- In the kitchen, zoom into the freezer door's button panel; the button is missing. Press the Chewing Gum into the socket, then stick the Domini Lemonade soda cap (the round orange disc from the alley barrel) onto it ("not exactly a real button, but it might work"). Press it to open the freezer again.
HIDDEN OBJECTS
Kitchen Freezer (Second Search)
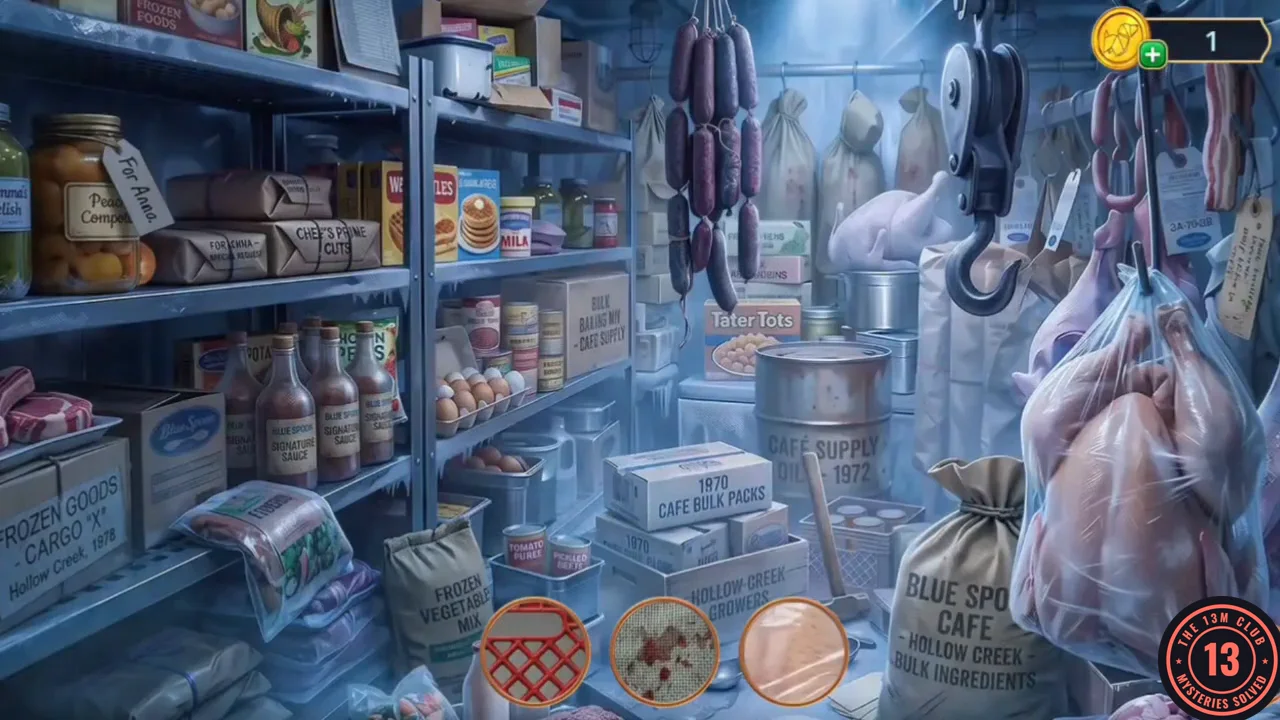
Find the objects in the freezer again.
- This search shows pictures of the objects, three at a time (examples seen: a cookie, a gold coin, a black-and-white cow-pattern item, eggs, a ribbon-tied parcel and a bacon strip). After the last object you receive the Wooden Cuckoo.
CHAPTER 2
The Chained Kitchen Door
The cuckoo clock in the office holds the keys to the chained door.
- In Olivia's Office, place the Wooden Cuckoo in the cuckoo-clock box on the floor by the desk. The clock opens; take the Keys and the Metal Comb.
- In the kitchen, zoom into the chained teal door and use the Keys on its padlock. Behind it, the stairs down are broken: "This ladder didn't break on its own. Someone dragged something heavy through here." Tap the broken steps to start the board puzzle.