Baker's Butcher Shop
Eleanor's letter said to start with the butcher. Get inside his shop.
- On Fenley Street, zoom into the empty red newspaper box and place the Hollow Creek Magnet on the round Hollow Creek emblem on its sign. The sign panel swings open; take the Awl from behind it. Then zoom into the butcher shop door ("Sorry, we're closed"). Slide the Poster under the door, then push the Awl into the keyhole: the key on the inside drops onto the Poster, Vivienne pulls it through and unlocks the door.
- Inside the Butcher Shop, tap the Reporter's Token pinned to the BEEF CUTS poster on the back wall, to the right of the cash register (30/140).
- Zoom into the meat display case and open its door to start a hidden-object scene.
Meat Display Case
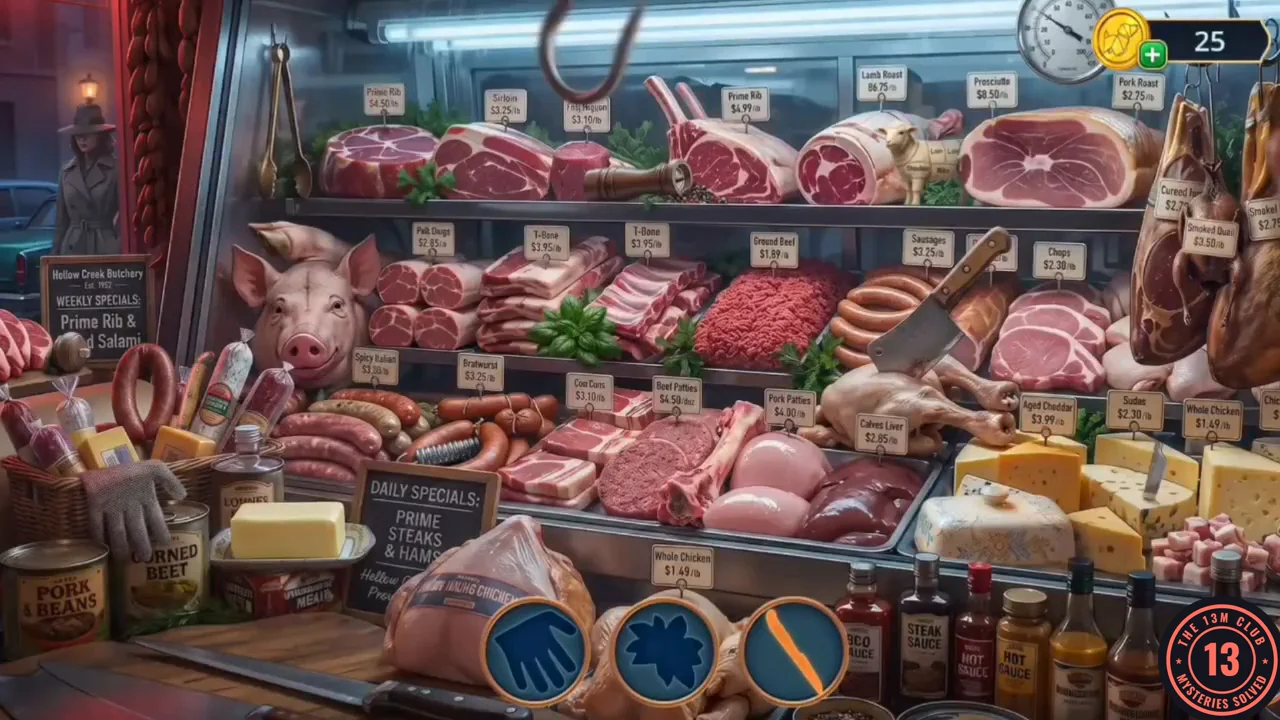
Find the objects matching the silhouettes. Some must be completed first; for example, one item needs its lid.
- Find every silhouetted object; some need an extra step first (Vivienne asks where the lid for one item is, so find the lid and add it). When the scene is complete you receive the Butcher's Apron.
Searching the Shop
There is blood on the back door handle. Collect what the shop offers.
- Zoom into the cash register. A torn picture of a cold-storage room flashes up; then take the Chef's Hat from the register. A broken key stump is stuck in the register's lock ("I need to grab this stump of a key"). The floor in front of the back door is wet and slippery: drag the Butcher's Apron from your inventory onto the wet patch by the Caution sign so Vivienne can step there. Then zoom into the back door, note the blood on the handle and take the Rib Spreader.
- In the cash register close-up, tap the purple Reporter's Token at the top right, beside the Butcher #1 mug (32/140).
- Zoom into the wall shelf with the clock and take the Empty Box and the Reporter's Token (34/140).
- In the Motel Hallway, zoom into the birdcage on the bicycle and use the Rib Spreader to pry its bars apart. Take the Clock Hand and the second of the Colored Cufflinks (2/2).
- Go to Eleanor's Room and zoom into her red suitcase on the bed. Use the Colored Cufflinks (2/2) on the double clasp: their jewels fill the clasp and the chains puzzle starts.
Suitcase Chains
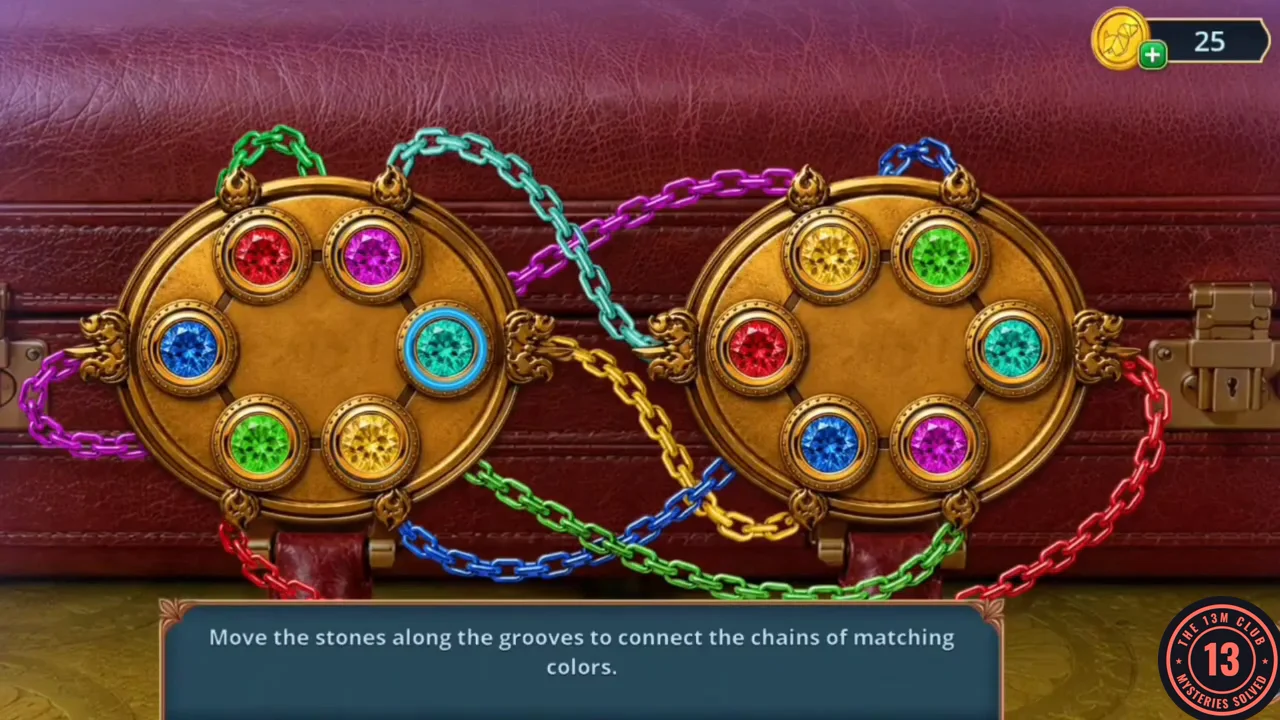
Move the stones along the grooves to connect the chains of matching colours. Every socket holds a stone, so stones change places by swapping.
- The clasp has two gold plates, each with six coloured stones. Coloured chains (green, cyan, magenta, yellow, blue and red) run from the edges of the plates. There are no empty sockets: tap a stone to select it (it gets a blue ring), then tap a neighbouring stone on the same plate and the two swap places. Bring each stone next to the end of the chain of the same colour; a correctly placed stone gets a green ring. When every stone is ringed in green the suitcase unlocks.
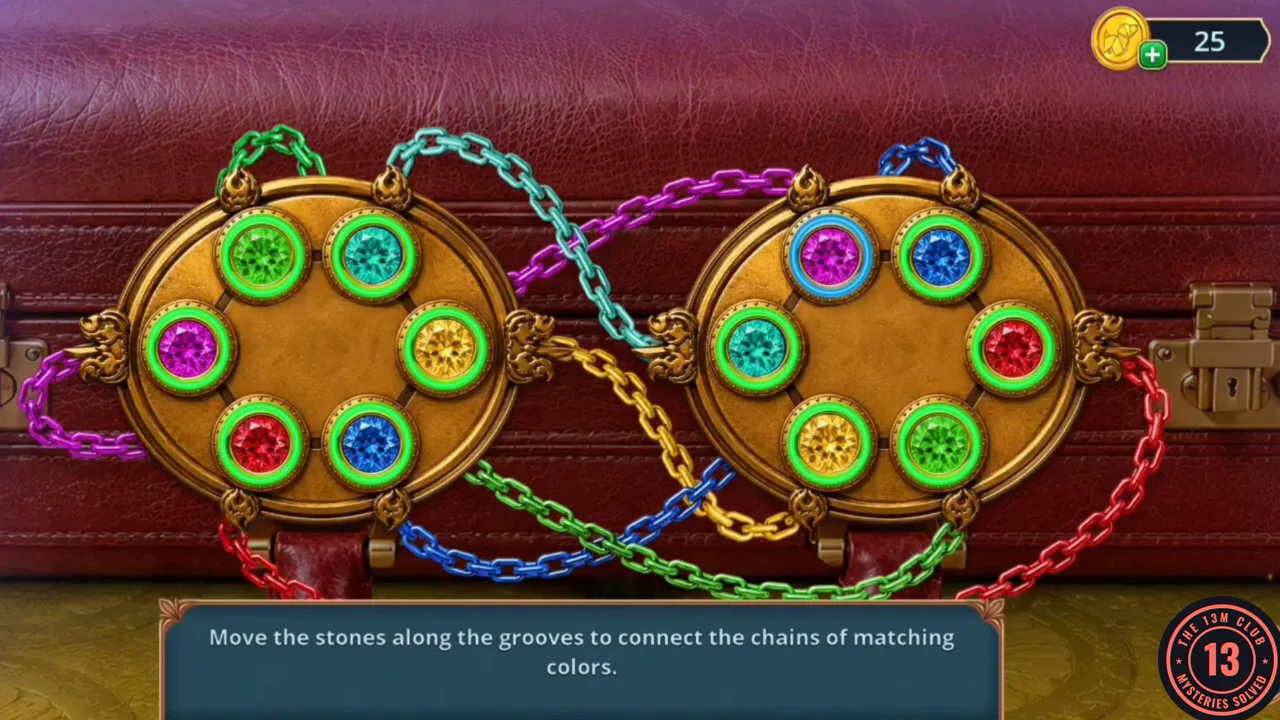
Solved clasp: every stone sits by its matching chain. The last stone moved still shows its blue selection ring. - Search the open suitcase: take the Fan and the Reporter's Token (36/140).
Sailing the Paper Boat
Send the paper boat down the gutter outside Eleanor's window.
- In Eleanor's Room, zoom into the window. Put the Paper Boat in the rain gutter outside the mesh and use the Fan to blow it along; it drifts to a red Clothespin caught in the grate and brings it back. Take the Clothespin.
- Return to the Butcher Shop and zoom into the wall clock: fit the Clock Hand onto it. Vivienne says it still can't tick without all its parts, because a number is missing. Zoom into the cash register and clamp the Clothespin onto the broken key stump in its lock; pull it to open the drawer and take Number 7. Put Number 7 on the clock to start the clock puzzle.
Butcher Shop Clock
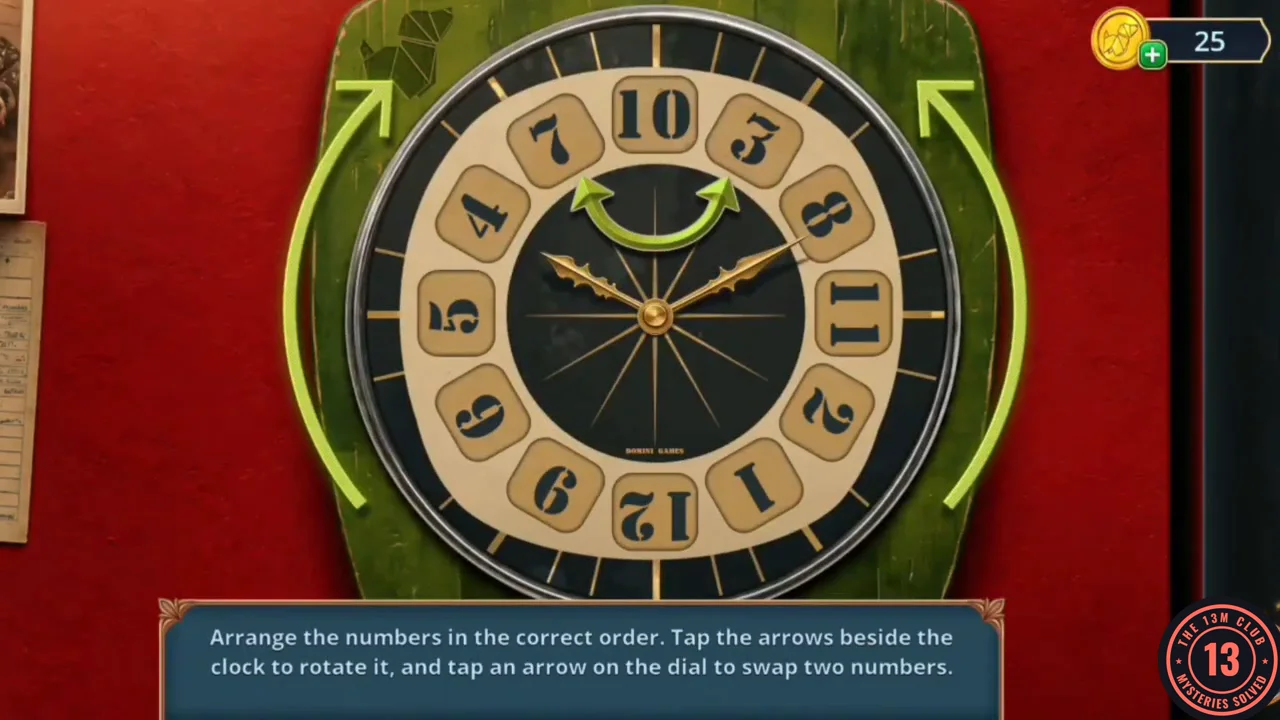
Arrange the numbers in the correct order. The big arrows beside the clock turn the whole ring of numbers. The small curved arrow at the top of the dial swaps the two numbers at its ends, one place either side of the top position; the number at the very top stays where it is.
- The swap arrow never moves, so use the side arrows to turn the ring until a number you want to move sits at one end of the arrow, then tap the arrow: it trades places with the number two positions away, skipping the number at the top. For example, 10, 3, 8 across the top become 8, 3, 10. Because a swap always moves a number two places, the odd numbers stay in alternate slots and the even numbers in the slots between them; you only need to put the six odd numbers in order among themselves, and the six even numbers among theirs. Keep turning and swapping until the numbers run 1 to 12 clockwise, then turn the ring so 12 is at the top. Solving the clock gives you the Butcher's Heavy Stamp.
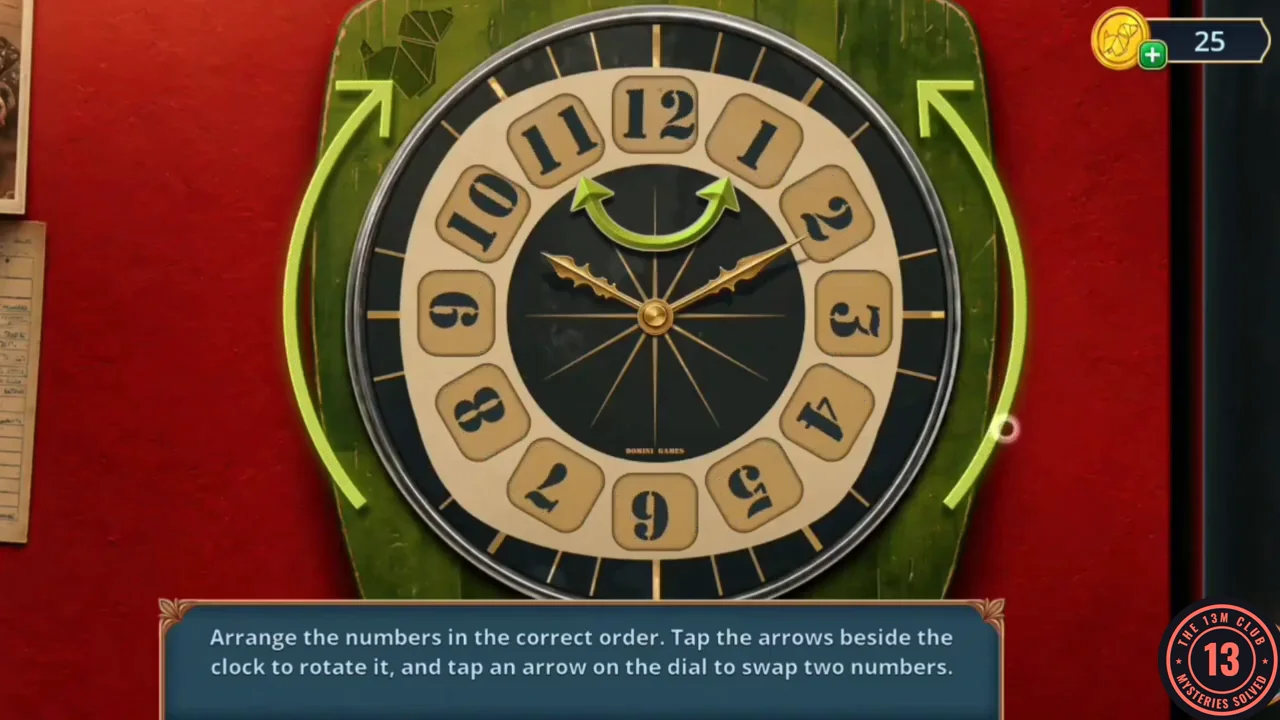
Solved clock: 1 to 12 clockwise with 12 at the top.
The Back Room
Open the back door and investigate what Tom keeps behind it.
- Use the Butcher's Heavy Stamp on the back door lock and enter the back room. Vivienne finds a locked cell.
- In the back room, tap the Reporter's Token on the steel counter in front of the red meat grinder, to the right of the Caution sign (38/140).
- Zoom into the shelf on the left wall and shine light on it: the number 379 is written on a tray (Vivienne wants to copy it). Take the Meat Hook from the shelf.
- Zoom into the cell padlock and take the Slingshot Base and the Clamp lying beside it.
- Zoom into the steam pipe beside the poster on the back wall. Put the Chef's Hat over the end of the pipe and fix it in place with the Clamp to stop the steam. Tear down the Hollow Creek's Finest Meats poster to uncover a wall safe, then take the Poster and the 5 cents.
- Zoom into the floor drain where the rat sits and tap the Reporter's Token in the bottom right corner of the close-up (40/140).
- Zoom into the floor drain where the rat sits. Use the Meat Hook to lift the grate, then take the Pesticide from underneath.
Tom Baker's Back Room
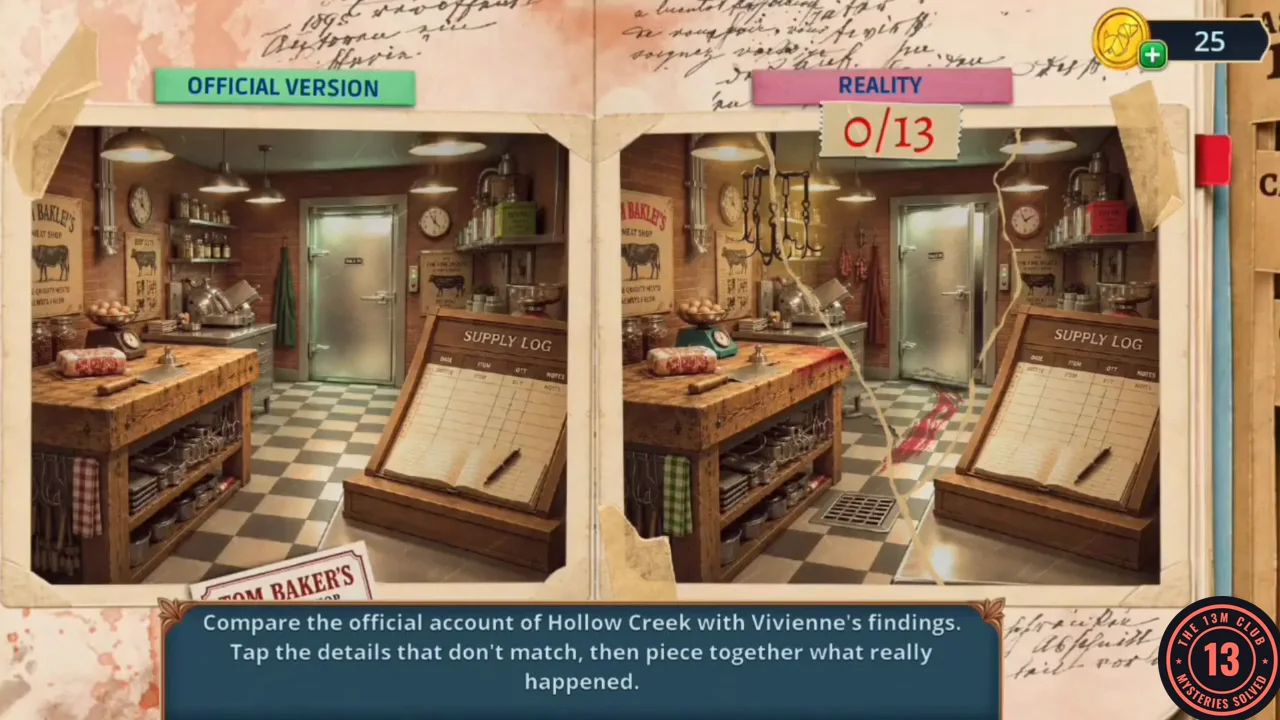
Compare the official account of the back room with Vivienne's findings and find the 13 differences.
- The comparison opens by itself after you take the Pesticide. Tap the 13 places where Reality differs from the Official Version: the Tom Baker poster on the left wall, the rack of meat hooks hanging from the ceiling, the sausages hanging left of the cold-room door, the apron beside the door (red in Reality, green in the Official Version), the cold-room door (ajar in Reality), the wall clock on the right, the red tin on the top-right shelf (green in the Official Version), the scale on the counter, the blood on the edge of the chopping block, the floor between the block and the door, the blood trail on the floor, the checked towel under the block (green in Reality, red in the Official Version) and the floor drain. The torn note concludes that Tom is hiding the fact that he works nights at the shop, and that the back room is connected to what Eleanor was trying to check before she disappeared.
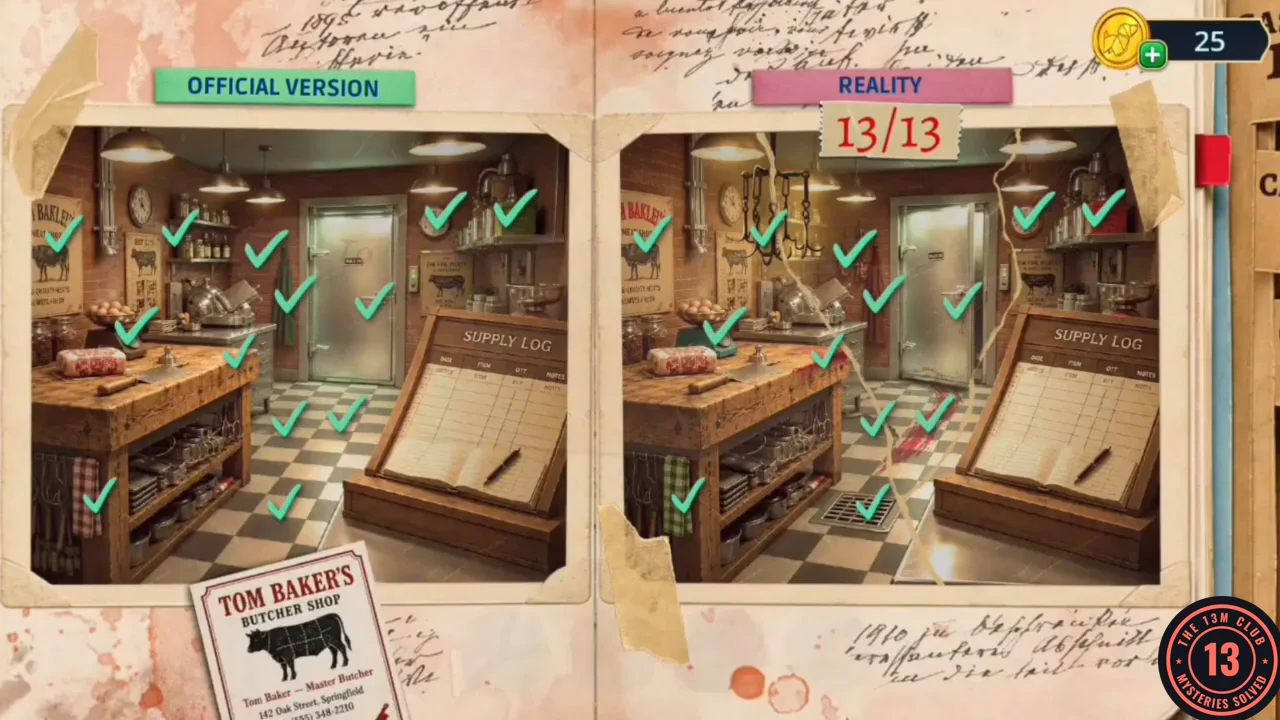
All 13 differences found in Tom Baker's back room.
Making a Net
Something lies too deep in the bus stop barrel to reach by hand.
- On Fenley Street, zoom into the hanging flower basket and spray the Pesticide on the plant. When it withers, take the Oiler and the Wire that were hidden in it.
- Open the Embroidery Hoop in the inventory and add the Piece of Mosquito Net, the Piece of Mop (as the handle) and the Wire to make the Improvised Scoop Net.
- At Hollow Creek Bus Stop, zoom into the red barrel full of murky water and use the Improvised Scoop Net to fish out a small cleaver and the Tongs.
- In the Butcher Shop, zoom into the meat display case. Use the Tongs on the hanging light bulb; it shatters. Use the Tongs again to lift the broken glass off the left meat hook. A hidden-object scene opens.
Back-Room Shelves
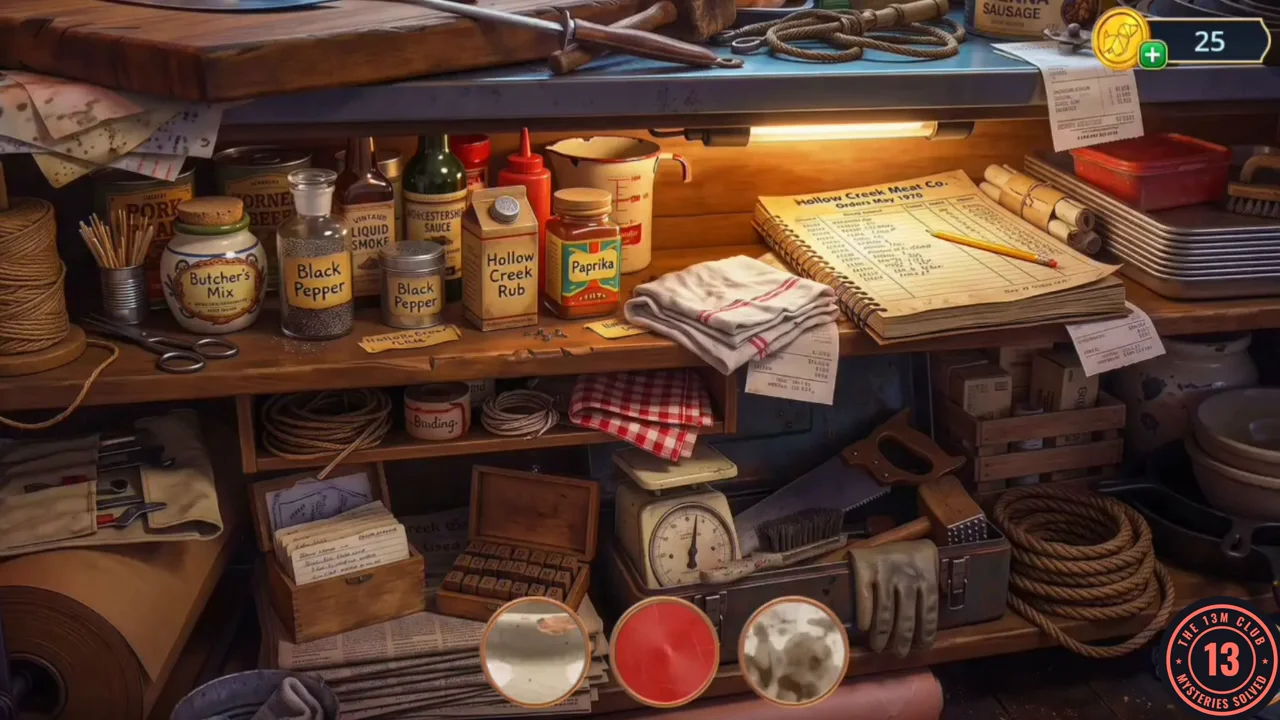
A panning scene: drag the view to find all silhouetted objects.
- Drag the view left and right to pan across the shelves and find every silhouetted object. When the scene is complete you receive the Piece of Cheese.
The Rat and the Safe
Build a trap and open Tom's safe.
- In the Butcher Shop, zoom into the paper-wrapping station with the twine roll on the wall. Use the small cleaver from the barrel on the twine to cut off a length, and take the Piece of Rope.
- Open the Empty Box (Steak Mate) in the inventory and add the Piece of Rope and the Slingshot Base: the box is propped up on the Y-shaped base with the rope attached, making a Mousetrap.
- In the back room, zoom into the drain where the rat sits. Set the Mousetrap down and bait it with the Piece of Cheese; the box drops over the rat. Take the Scotch Tape and the Marker from the ledge where it was sitting.
- Zoom into the left shelf where the light shows 379 on the tray. Put the Poster on the shelf and use the Marker to copy the number onto it. You receive the Safe Code: 379.CODE379
- Zoom into the wall safe beside the steam pipe and use the Safe Code (379) on its dial. Open the safe and take the Bunch of Keys. Use them on the cell padlock.
Cell Padlock Key Wheel
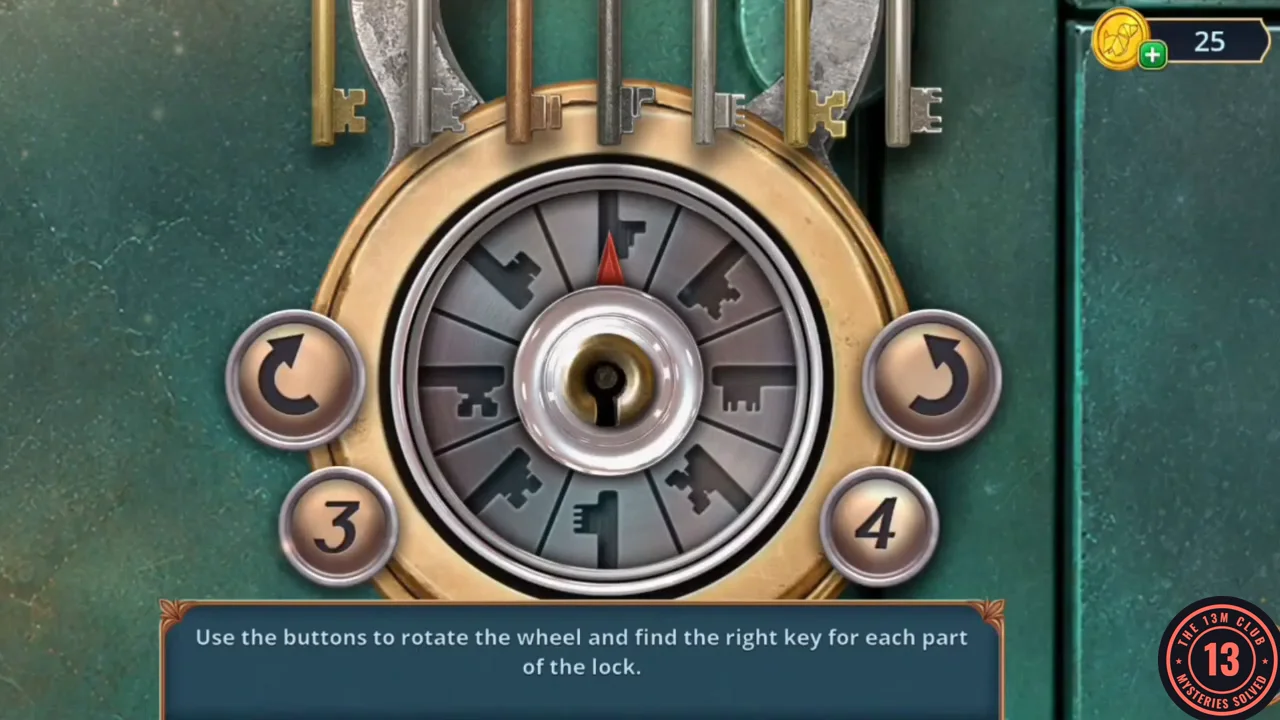
Seven keys hang above a wheel of ten key-shaped slots. Use the buttons to move the red pointer and find the right slot for each key.
- Tap one of the curved arrows to choose a direction (the chosen arrow gets a blue ring), then press 3 or 4 to move the red pointer that many slots in that direction. Work from the leftmost key to the right: compare the next key's bit with the slot shapes and stop the pointer on the matching slot. The key then glows blue. When all seven keys glow, the padlock turns and the cell opens.
Chapter 1 Decision Points
At the end of each chapter, a tree shows the Decision Points you earned (out of 12) and which outcome panel (0, 4 or 10 points) you reached.
- Chapter 1 decisions and their values: receptionist – Introduce yourself as the editor 0 / Tell about Eleanor's letter 2; room number – Refer to the editor 0 / Pressure using a personal connection 2; Eleanor's Room – Make no conclusions 0 / Document all details 2 / See things from a fresh angle 6; Fenley Street – Ask directly 0 / Talk through local rumors 2. Following this walkthrough's choices scores 2/12, which unlocks the 0-point outcome.
- A cutscene shows Vivienne opening the cold-room door. Inside, a uniformed officer crouches by a large wrapped bundle on the floor and opens it: it holds meat, and its tag reads ELEANOR MEAT CO., Item: BEEF CARCASS.