Recording the News
Use the TV news to lure the receptionist away from her desk.
- In Room 3, use the Remote Control Car in the circular gap under the fridge. It drives out with the TV Remote and a second Battery: take both (Battery 2/2). (A store rating prompt may appear; it is not part of the game.)
- Open the Dead Recorder in the inventory. It has two empty slots: insert the Batteries (2/2) and the Empty Tape to make a working Recorder.
- Zoom into the TV (the Antenna is already in place). Place the Recorder on the dresser beside the TV, then use the TV Remote: the news reports a major accident on a local highway and asks for vehicles to be moved away from the hospital entrance, and the Recorder captures it.
- Go to the bus stop payphone and place the Recorder with Recording on it to open the dialling puzzle.
Payphone Dial
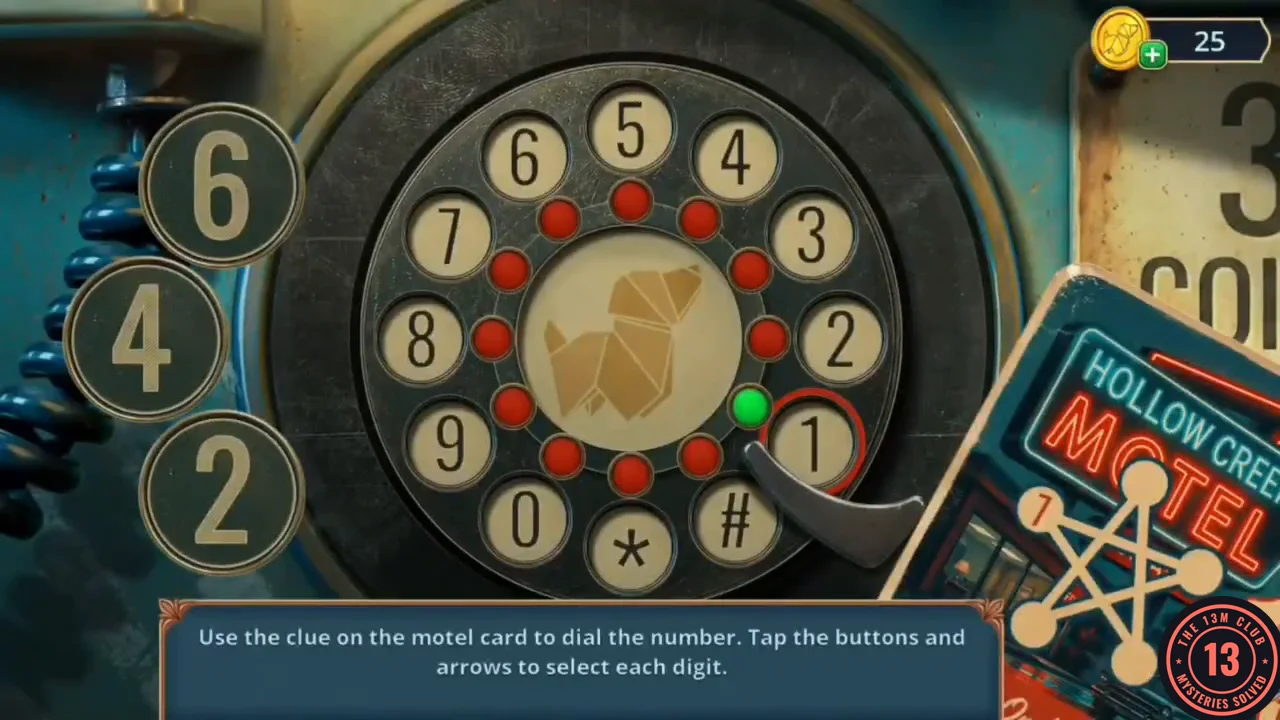
Use the clue on the motel card to dial the number. Tap the buttons and arrows to select each digit.
- Tap the motel card to read it: the number reads 1 5 _ 3 7 _ with two digits rubbed out, and a five-pointed star is drawn starting from a point marked 1. The dial starts with the 1 circled and lit. On the dial, the digits that make that star are 1, 5, 9, 3 and 7, so the full number is 1‑5‑9‑3‑7‑1 (the last line of the star returns to 1). Tap a step button on the left (6, 4 or 2), then tap one of the two red arrows to turn the dial that many places in that direction; each digit you reach lights its green lamp. The left arrow turns the dial clockwise. One working sequence is 4, 4, 6, 4, 6, pressing the left (clockwise) arrow after each number; that lights 1→5→9→3→7→1. A 6-place turn lands on the same digit whichever arrow you use, but the 4-place turns must go clockwise.CODE159371
- The news recording plays down the line and the receptionist leaves the lobby.
The Guest Register
With the desk unattended, find out where Eleanor stayed.
- In the empty lobby, zoom into the desk and open the Motel Guest Register. Turn to the newest page: the only entry is Eleanor, Room 7. A torn picture of a shop door with a Closed sign drops onto the page; tap it away, then take the small seam-ripper tool tucked in the binding.
- Zoom into the armchair by the fireplace and use the seam ripper on the stitched seam of the cushion. Take the Chinese Coin and the Flower Amulet hidden inside.
- In the Motel Hallway, zoom into the bicycle bag and place the Flower Amulet on its clasp to open it. Take the Shawl and the second Lock Pick (Lock Picks 2/2).
- Zoom into the lock on the taped-up Room 7 door and use the Lock Picks (2/2) on the keyhole; the ring-lock puzzle starts.
Room 7 Ring Lock
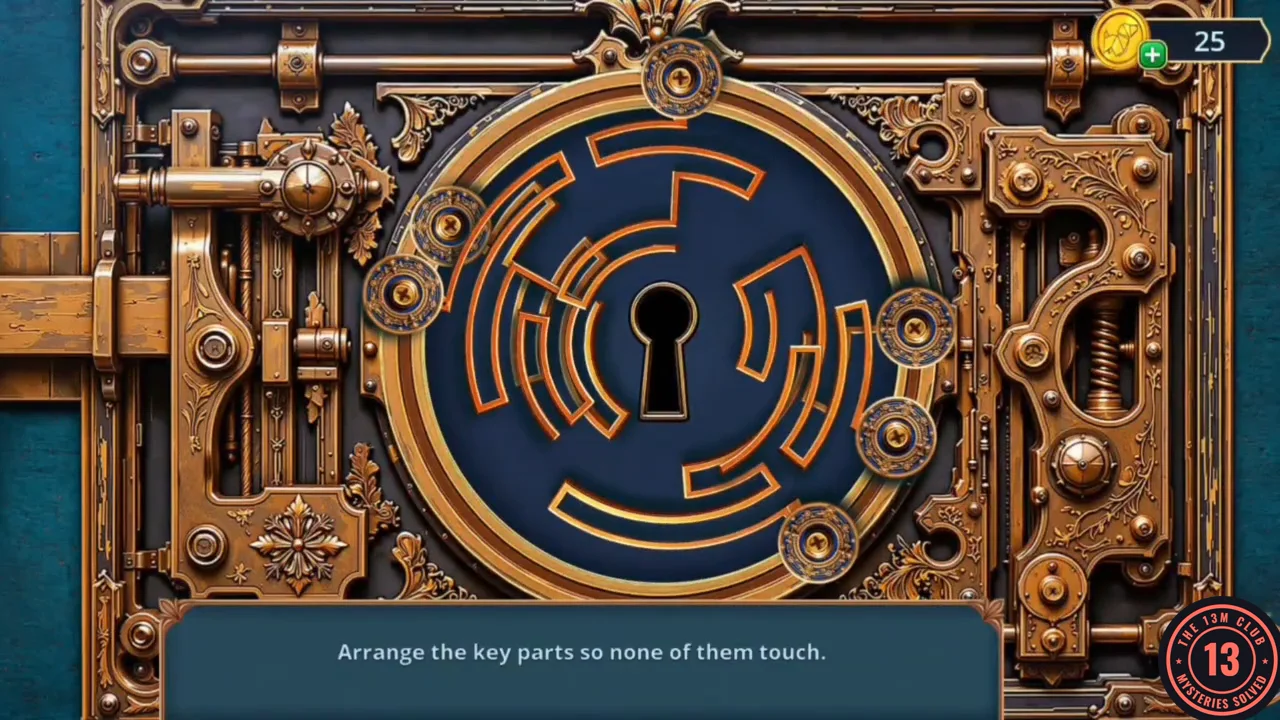
Arrange the key parts so none of them touch. The knobs rotate the ring segments; a placed part turns green.
- Six brass knobs sit around the lock (top, upper left, upper right, left, lower right and bottom); each one swings its own maze-shaped key part around the keyhole. Tap a knob to turn its part and stop when the part turns green, meaning it touches no other part. Parts can block each other, so free the outer ones first and come back to any that stays orange. In the solved state every part is green and the parts nest as separate rings around the keyhole.
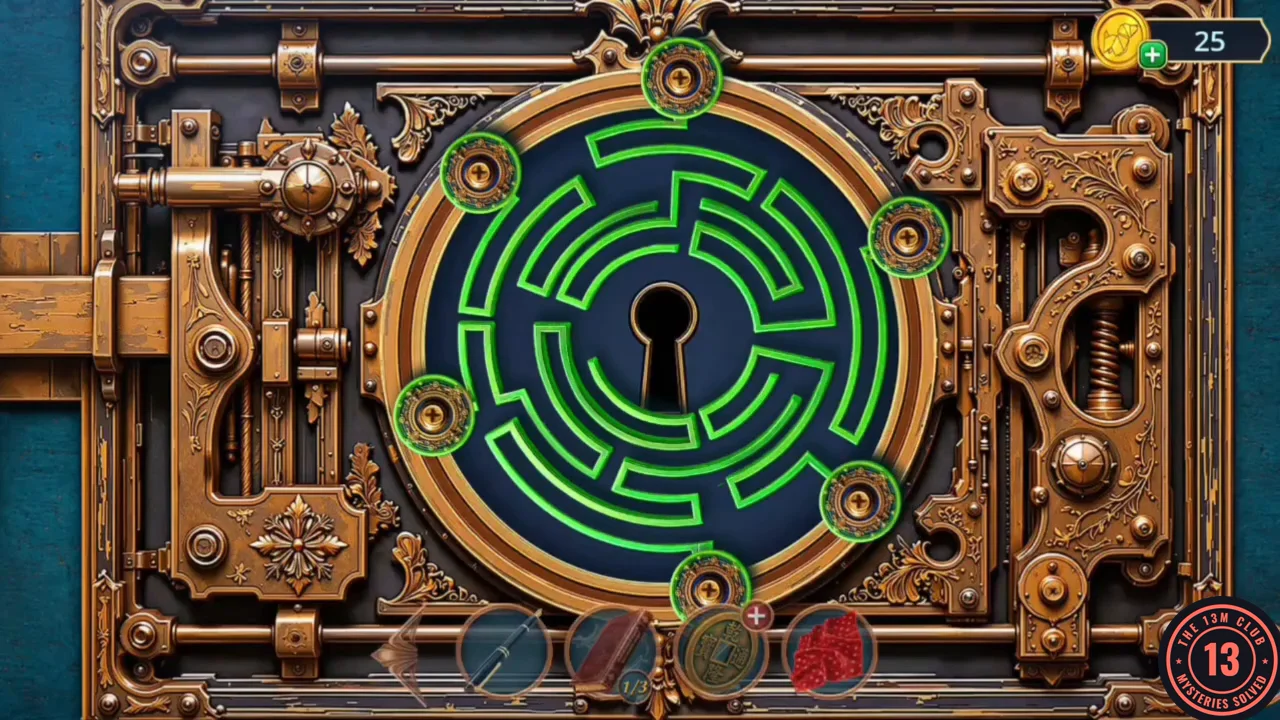
Solved: all six key parts are green and none touch. - The Lock Picks turn in the keyhole, the police tape comes away by itself and the door opens. Enter Room 7: it is dark, so use the Flashlight to light it.
Eleanor's Room
Search the room Eleanor left behind.
- During the cutscene, decide how Vivienne examines the room: "Make no conclusions" (free, 0 points), "Document all details" (30 coins, +2) or "Spot the hidden pattern" (60 coins, +6). This walkthrough takes the free option.
- Zoom into the red phone: its display shows "Tom B.", a name Eleanor left on purpose.
- Tap the Reporter's Token on the bedside desk under the window, to the left of the water bottle (22/140).
- Zoom into the window. Take the book on the sill (Books 2/3) and the Small Plate under it, then raise the blind and take the Cupboard Key from the sill. Behind the window is a wire mesh with something stuck in it; Vivienne notes it needs cutting ("Cut, cut, cut!"), which comes later.
- Use the Cupboard Key on the cupboard to open the shelves scene.
Eleanor's Cupboard
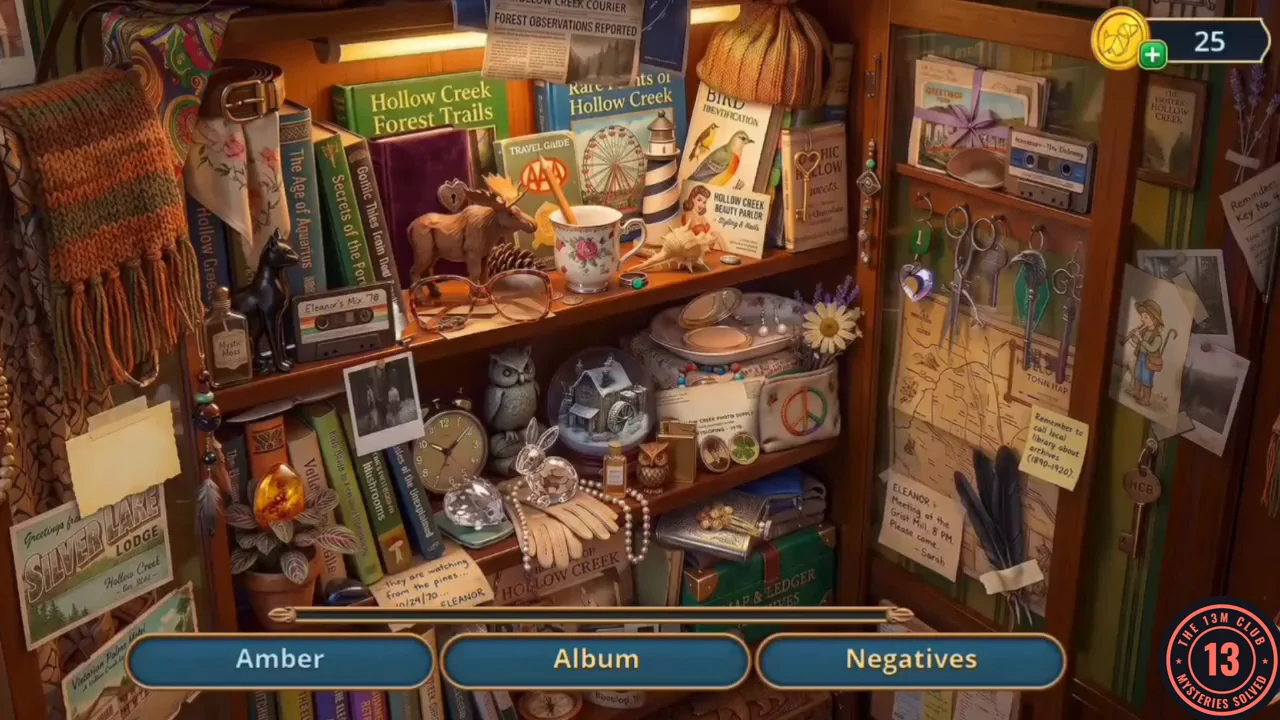
Find the listed objects on the cupboard shelves.
- Tap the objects named in the scrolling list at the bottom, for example Album, Negatives, Autograph, Scissors, Pin, Scarf and Glasses. Some are incomplete at first: the Glasses need their missing lens found elsewhere on the shelves before they count. When the list is cleared you receive the Long Hairpin.
Eleanor's Code
Find the hidden message Eleanor left.
- Zoom into the nightstand; its open drawer looks empty. Use the Pocket Mirror below the drawer to look at its underside, then use the Long Hairpin there to release the false bottom. Open the envelope inside and read the letter, then take the Staple Remover and Eleanor's Code: a list of book page, line and word references.
- Zoom into the evidence box by the sofa and use the Staple Remover on the staples to open it. Take the Embroidery Hoop and the green book under it (Books 3/3).
- Return to Room 3 and use Eleanor's Code and the Books on the desk to start the letter puzzle.
Eleanor's Letter
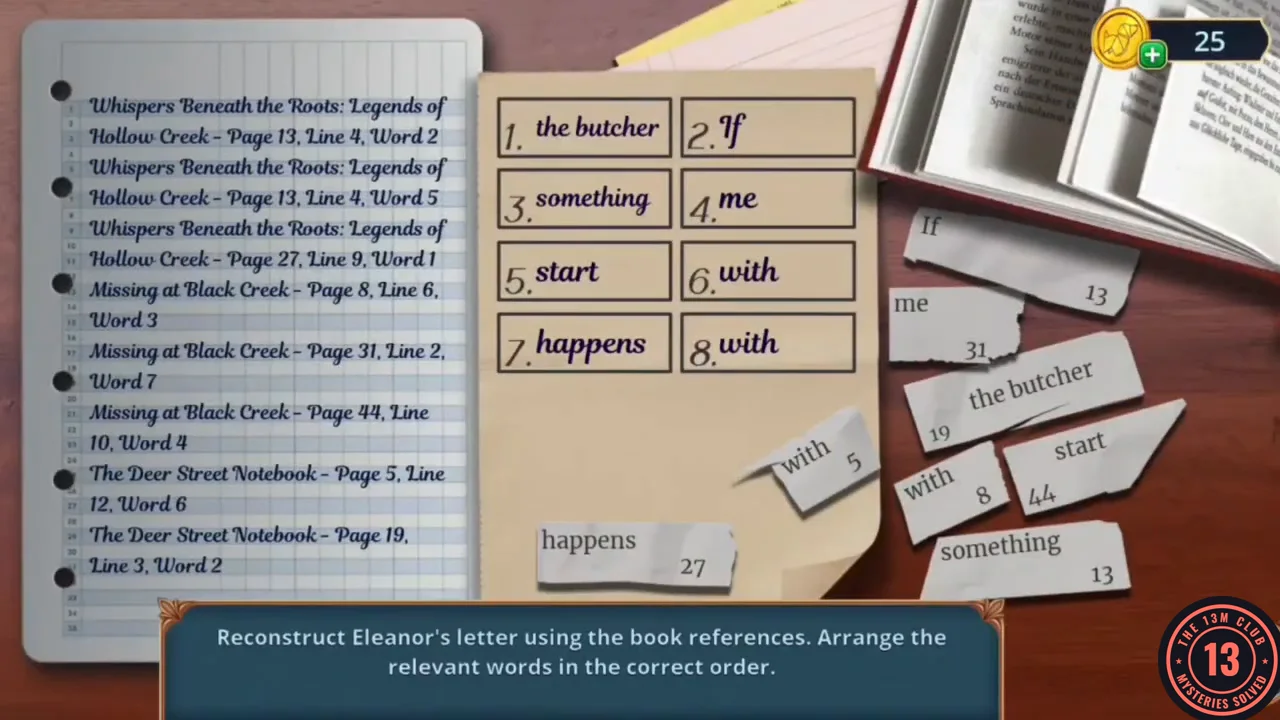
Reconstruct Eleanor's letter using the book references. Arrange the relevant words in the correct order.
- Each torn word scrap carries a page number. Match the scraps to Eleanor's list (left) by book and page and fill slots 1–8 in list order: 1 If (Whispers Beneath the Roots, page 13), 2 something (page 13), 3 happens (page 27), 4 with (Missing at Black Creek, page 8), 5 me (page 31), 6 start (page 44), 7 with (The Deer Street Notebook, page 5), 8 the butcher (page 19).
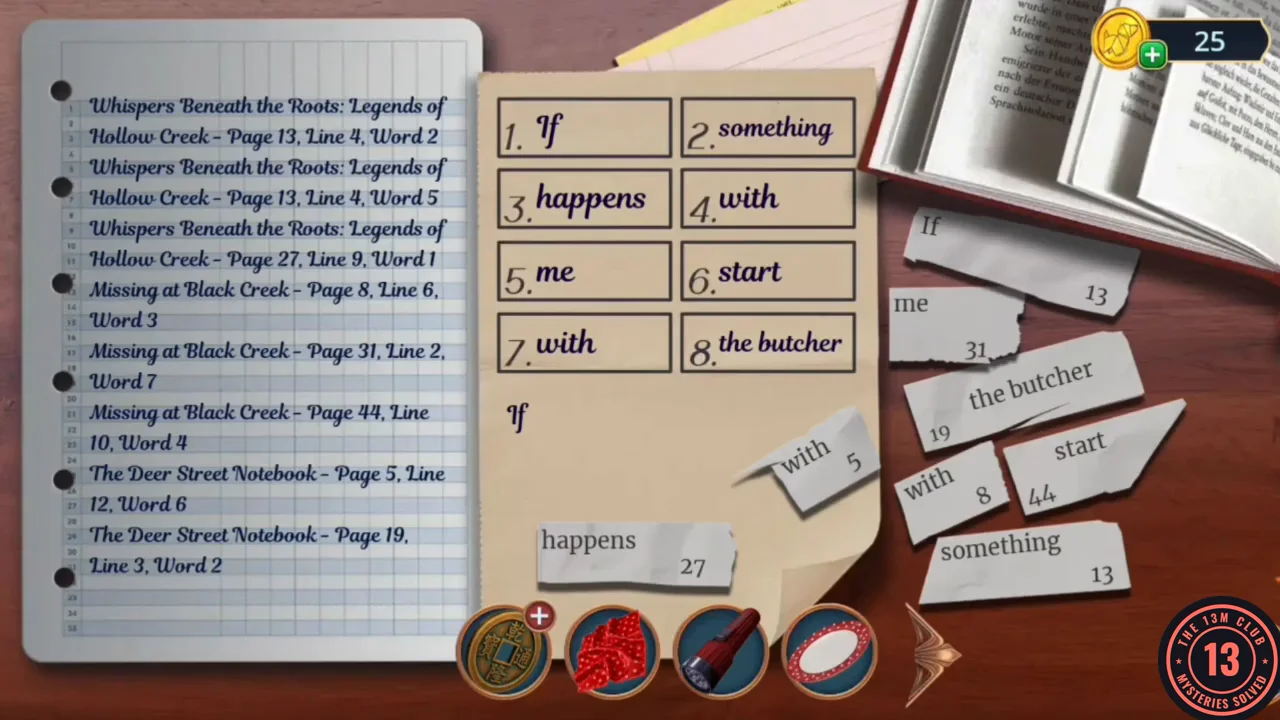
The eight words in list order. - The words form "If something happens to me, just start with the butcher..." and the book opens to a hollow holding a handful of Colourful Candies; take them.
The Raccoon and the Payphone
Find a way to make a call from the bus stop payphone.
- In Room 3, zoom into the open fridge. The floor in front of it is covered in sticky goo: lay the Shawl over it, then take the Empty Tin Can from the fridge shelf. Open the tin in the inventory and drop the Colourful Candies inside to make a Rattling Can.
- At the bus stop, use the Rattling Can on the raccoon in the barrel to scare it off. Take the Paper Boat, the Fishing Line and the Reporter's Token (24/140).
- Open the Chinese Coin in the inventory and thread the Fishing Line through its square hole to make a Coin on Fishing Line. Use it on the bus stop payphone to make a call; the caller asks whether Vivienne is still in Hollow Creek, and she decides to find out for herself who the butcher is.
Eleanor's Cupboard (Silhouettes)
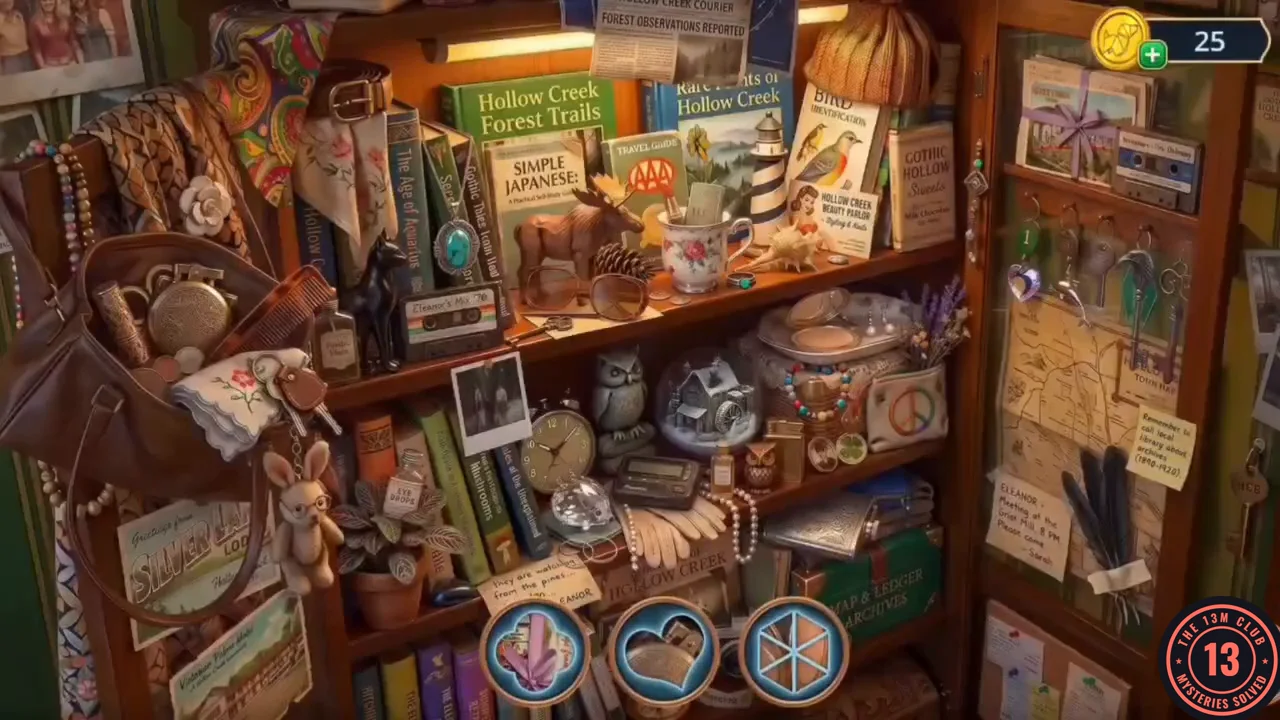
The cupboard can be searched again; find the objects matching the silhouettes.
- Return to Eleanor's Room and search the cupboard again, this time finding the objects that match the silhouettes. When the scene is complete you receive the Small Scissors.
- Use the Small Scissors on the window mesh to cut it. Take the Scoop that was caught in it and the Piece of Mosquito Net.
Newspaper, Cufflinks and the Cat
Gather what you need around Fenley Street and the motel.
- On Fenley Street, zoom into the hanging flower basket and dig in the soil with the Scoop. Take the brass knob you uncover and then the Metal Pin. Zoom into the red newspaper box, put the Metal Pin into its empty hinge and open the door; take the Clothes Brush and the Newspaper (front page: The Mysterious Disappearance of Eleanor Lane in Hollow Creek).
- In the lobby, zoom into the fireplace beside the armchair and sweep the ashes with the Clothes Brush. Take the first of the Colored Cufflinks (1/2), the Wind-Up Turtle and the Reporter's Token (26/140).
- Zoom into the fishbowl on the lobby coffee table and drop the Wind-Up Turtle into the water; it swims down and brings up the Bucket Amulet.
- In the Motel Hallway, zoom into the maid cart's roll-top cabinet, which has a bucket-shaped slot next to a mop. Fit the Bucket Amulet into the slot to open it, then take the Cleaning Solution and the Piece of Mop.
- In the same roll-top cabinet close-up, tap the Reporter's Token at the bottom right, under the cabinet (28/140).
- In Room 3, zoom into the fridge and spray the Cleaning Solution on the sticky goo, then take the Bottle of Milk from the shelf. Zoom into the open suitcase where the black cat is sitting, set down the Small Plate and pour the Bottle of Milk into it. The cat drinks and leaves, and the suitcase can be searched.
Combination Riddles
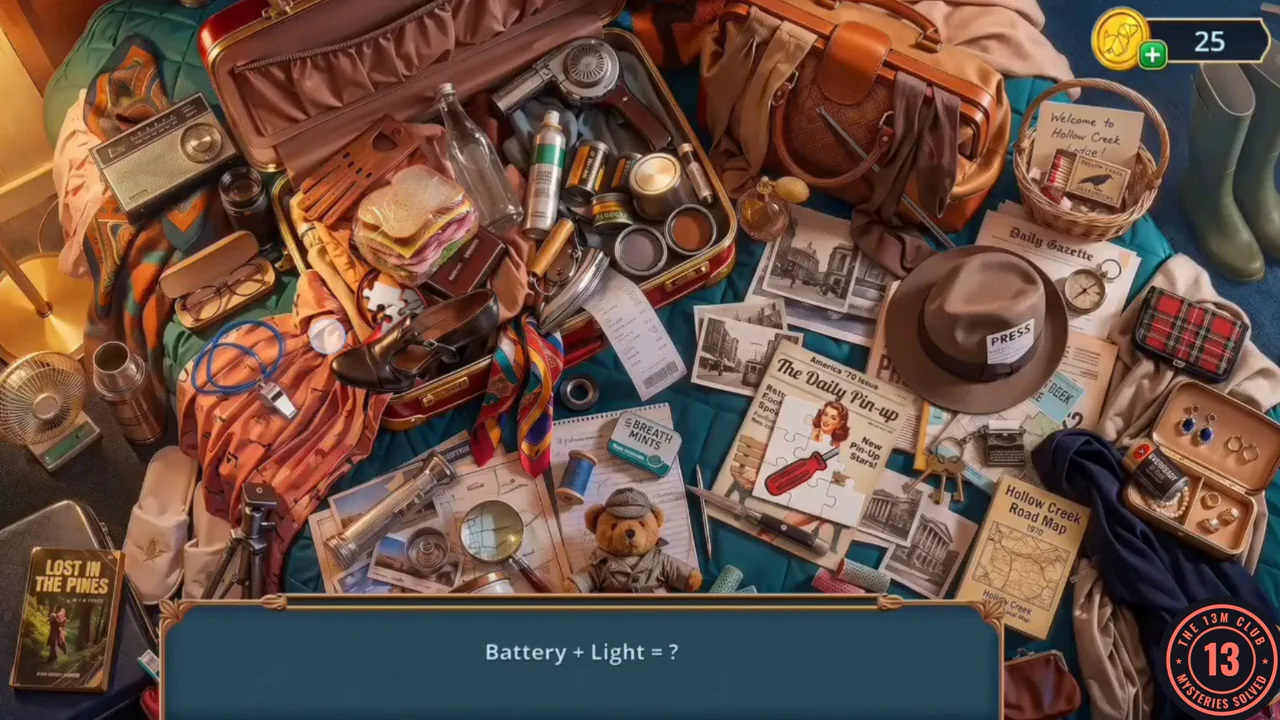
Each clue names two things; find the object that combines them.
- One clue at a time appears in the bar; tap the object in the scene that combines its two ideas. Three of the objects must be completed first. The clues came up in this order: Battery + Light: the silver flashlight lying on the map at the bottom. Steam + Container: the thermos at the left edge beside the desk fan. Vivienne says it is open and losing heat, so first drag the gold-topped lid off one of the round tins at the top right of the open suitcase onto the thermos; that completes the answer. Screw + Handle: the red screwdriver pictured on the Daily Pin-up magazine. Its jigsaw is incomplete, so drag the two white jigsaw pieces onto the picture. Both are in the small round open case just below the sandwich, next to the black shoes; the second piece lies under the first, so drag the top one over, then the one beneath it. Bottle + Drop: the empty glass bottle in the suitcase beside the sandwich. Antenna + Voice: the portable radio in the top-left corner. A radio without an antenna picks up nothing, so tap the slim brass-capped tube to the right of the tins in the suitcase and drag the antenna from it onto the radio. Road + Paper: the Hollow Creek Road Map at the lower right. Fire + Box: the matchbox in the "Welcome to Hollow Creek" basket at the top right. Lips + Sound: the whistle on the blue cord at the left. Perfume Pump + Glass Vial: the perfume atomizer at the top-right edge of the suitcase. Check + Roll: the long receipt hanging over the front of the suitcase. Needle + Thread: the blue spool of thread above the teddy bear. Number + Key: the keys with a round number tag to the right of the magazine. After the last clue you receive the Corkscrew.
Baker's Butcher Shop Accounts
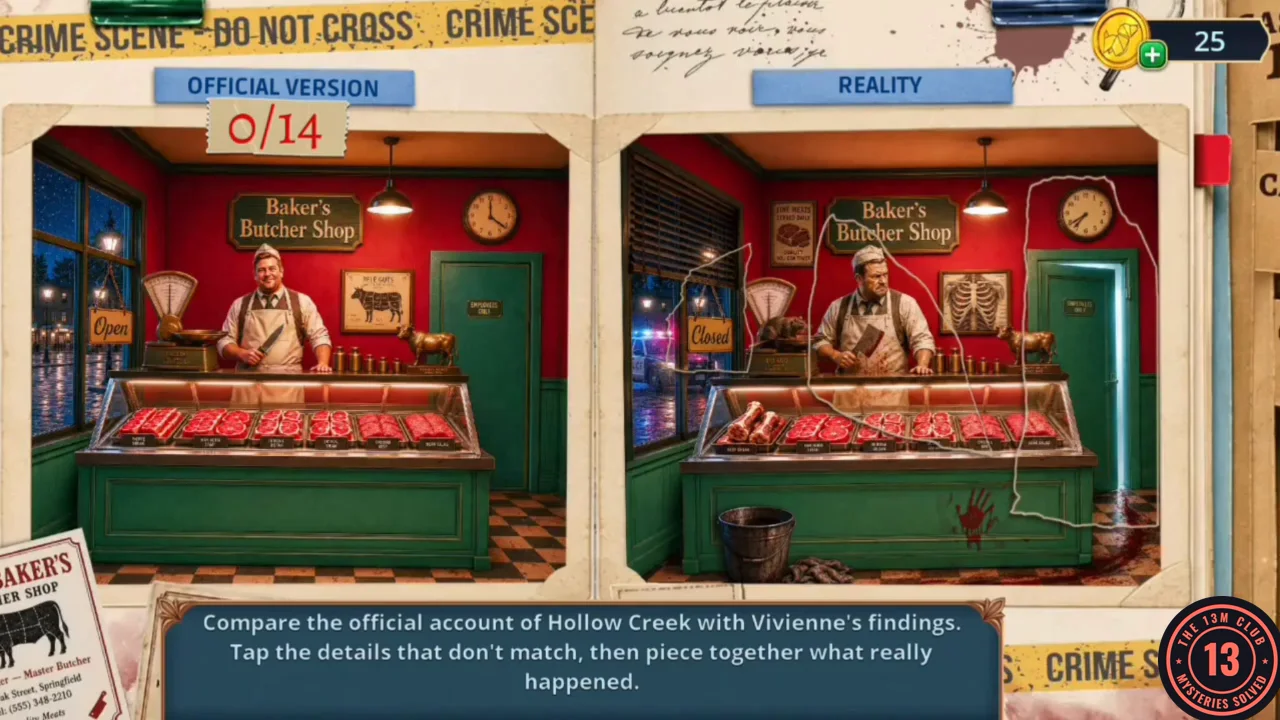
Compare the townspeople's story with the evidence about Tom Baker's shop and find the 14 differences.
- In Room 3, zoom into the TV dresser and use the Corkscrew on the right-hand drawer to pull it open. Take the Hollow Creek Magnet from inside.
- On Fenley Street, talk to the passer-by. Decision: "Ask what people say about Tom." (60 coins, +2) or "Ask when the shop closed." (free, 0 points). This walkthrough takes the free option. You receive a Poster.
- After the conversation the comparison opens by itself. Tap the 14 places where Reality differs from the Official Version: the top of the window (blinds in Reality), the bottom of the window (police lights in Reality), the window sign (Open versus Closed), the wall poster beside the window, the scale on the counter, the butcher's face, the knife in his hand (a cleaver in Reality), the beef chart (a ribcage X-ray in Reality), the wall clock, the back door (ajar in Reality), the left end of the meat display, the counter front (a bloody handprint in Reality), the floor below the counter on the left (a bucket in Reality) and the floor at the lower right (blood in Reality). The torn note concludes that the townspeople say Tom closed up early, but the photo and witness accounts show his shop was open the night Eleanor disappeared.
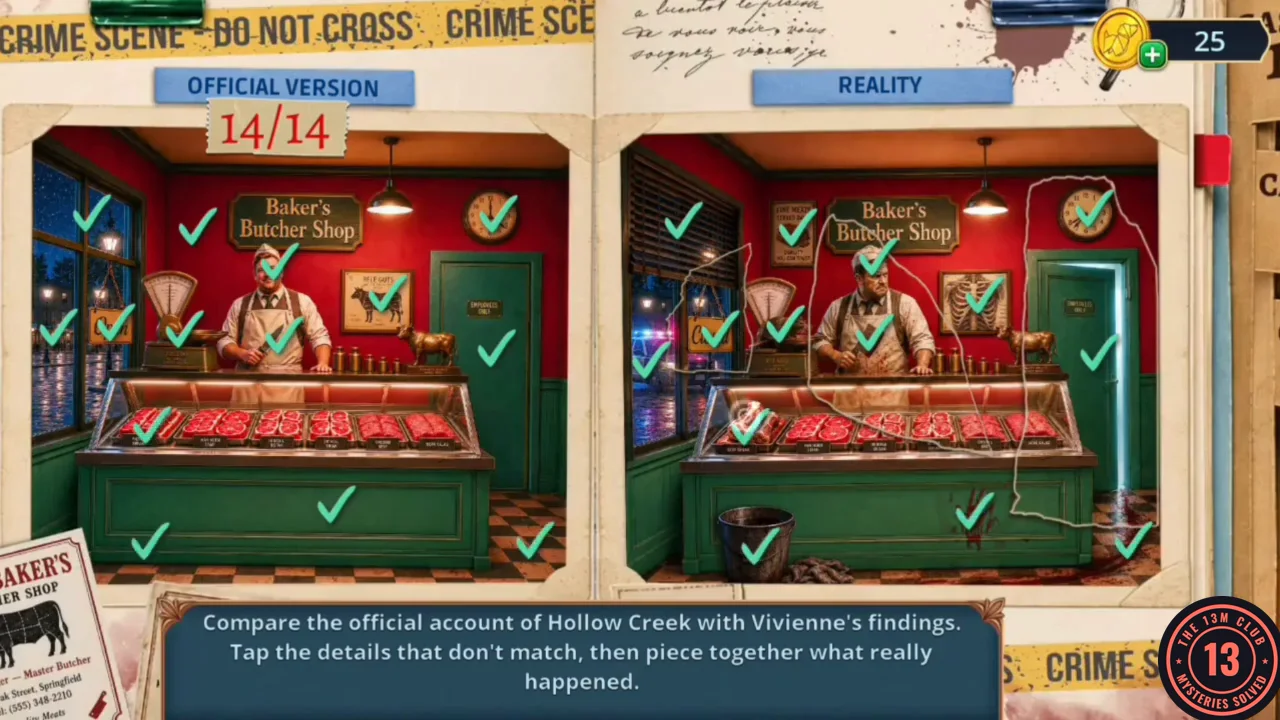
All 14 differences found in the butcher shop.