PUZZLE
Knight Statue Chains
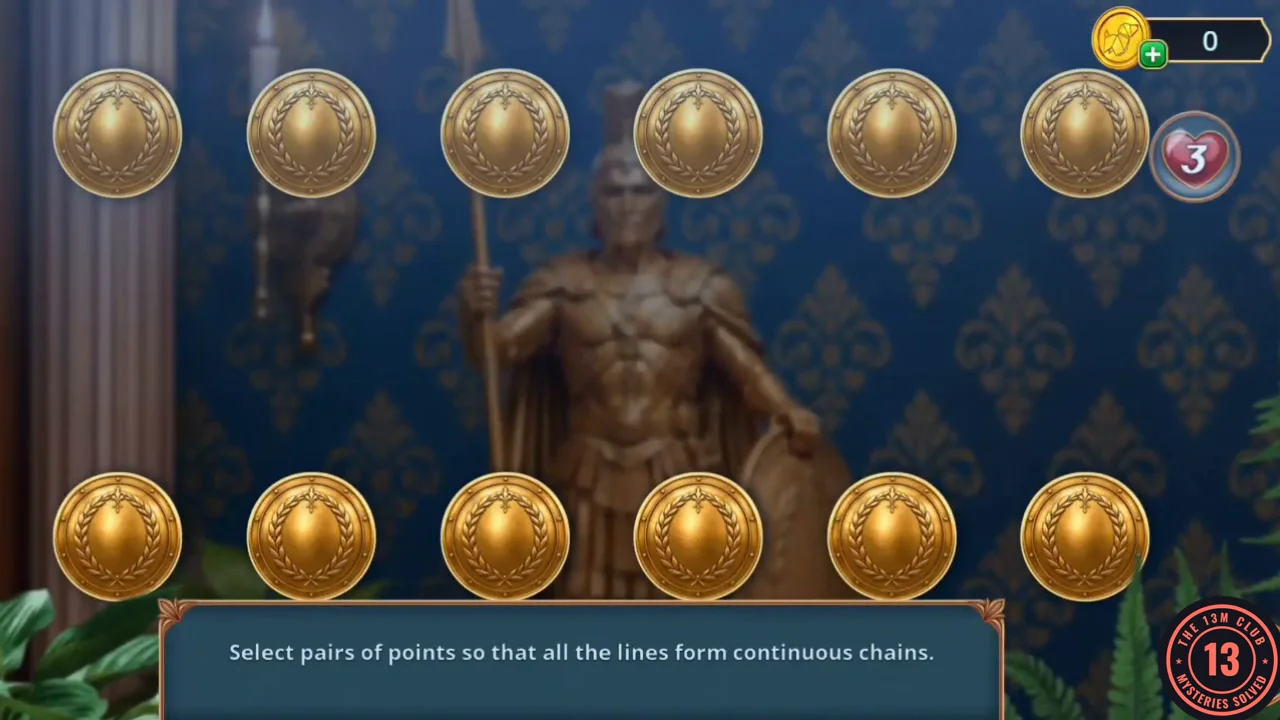
Select pairs of points so that all the lines form continuous chains. You have 3 lives.
- In the club lobby, zoom into the right armchair with the fruit bowl and spray the bees with the Antiseptic; they fly off. The purple bag is now empty, so nothing else is needed here. In the library, zoom into the open safe niche beside the knight statue to start the chain puzzle.
- Six coins sit in a top row and six in a bottom row; number them 1–6 from the left. Tap a top coin and a bottom coin to link them with a dashed line. A correct pair disappears, a wrong one costs one of your 3 lives. One working order of pairs: bottom 1 – top 2; top 1 – bottom 4; bottom 2 – top 4; top 3 – bottom 5; bottom 3 – top 6; top 5 – bottom 6. The statue's niche opens; take the Bust Parts (2/2) from inside.
CHAPTER 4
Star Amulet and Clock Hands
Cast a plaster amulet, recover the second clock hand and open the portrait clock.
- In the library, zoom into the bust shelf and fit the Bust Parts onto the white bust. Its drawer opens; take the Shell.
- In the Motel Storeroom, zoom into the fan shelf where the BOOKSHOP Bag sits. Scrape the damaged wallpaper with the Shell to expose the bricks, then take the Bag of Plaster.
- Return to the casting setup on the library desk, where the star-shaped Form is already placed. Pour in the Bag of Plaster and the Water bottle. The plaster sets into the Star Amulet and the plaster-amulet achievement unlocks.
- In My Room, zoom into the bed headboard and fit the Star Amulet into the star-shaped slot. The panel opens; take the Arrow (2/2), the second clock hand.
- In the club lobby, zoom into the clock in the "Mrs. Vale and King" portrait and fit both Arrows as its hands. The clock opens; take the Carriage Lever.
- Go to My Room and zoom into the typewriter by the window. Fit the Carriage Lever on its right side.
HIDDEN OBJECTS
Library Riddles
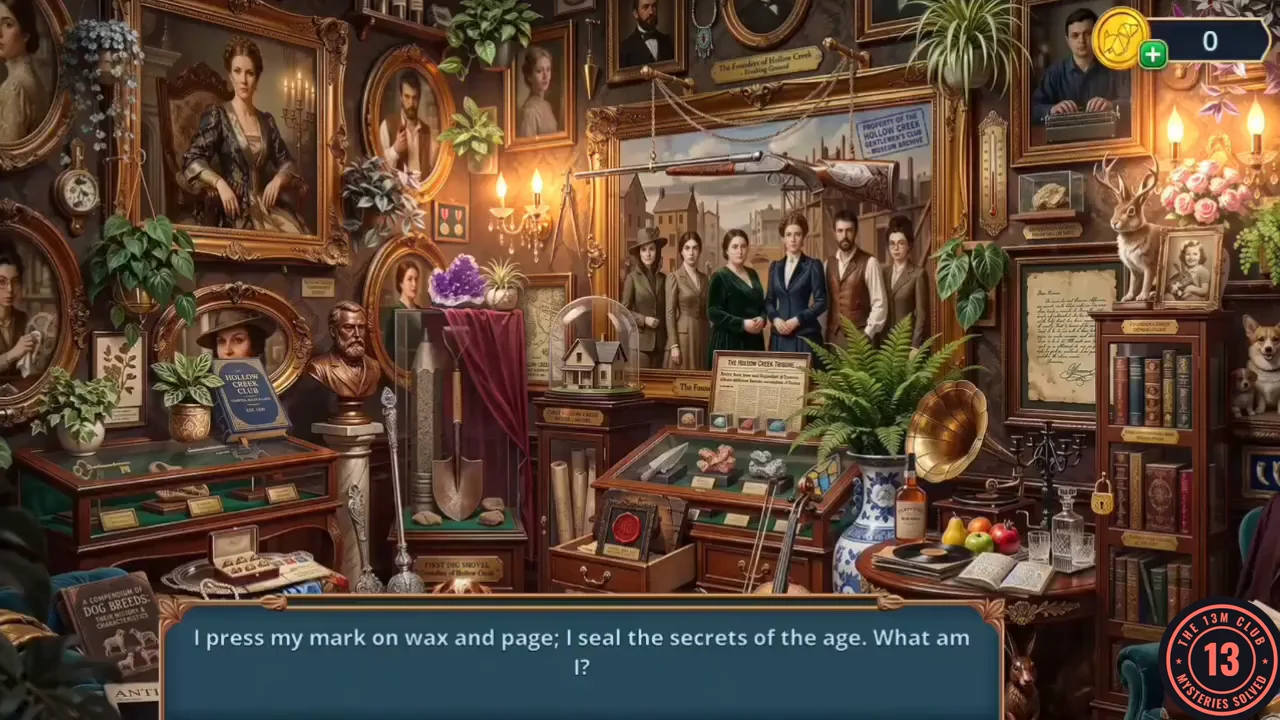
Read each riddle and tap the object it describes.
- In the library, Vivienne decides to check one more time; tap the sparkling wall area to open the scene. Twelve riddles appear one at a time at the bottom; tap the matching object. Riddles in order, with answers: wax and page – the red wax seal in the open drawer below the mineral case; a moment caught in a frame – the photo of a smiling girl beside the jackalope (upper right); yesterday's news – the framed Hollow Creek Tribune clipping behind the mineral case; lock and doors – the brass key in the left glass case; words on folded sheets – the handwritten letter on the right wall by the gramophone; mark the date – the blue "Property of the Hollow Creek Gentlemen's Club" stamp on the founders painting; tiny flame – the lit candelabra in the lady's portrait (upper left); notes and thoughts – the open notebook on the round table (lower right); roads and trails – the map behind the purple geode; grey and black marks – the tall pencil beside the bronze bust; message sealed inside – the envelope on the silver tray (bottom); old stories and lore – the blue Hollow Creek Club book. The reward is the Ballerina Figurine.
PUZZLE
Restoring the Typewriter
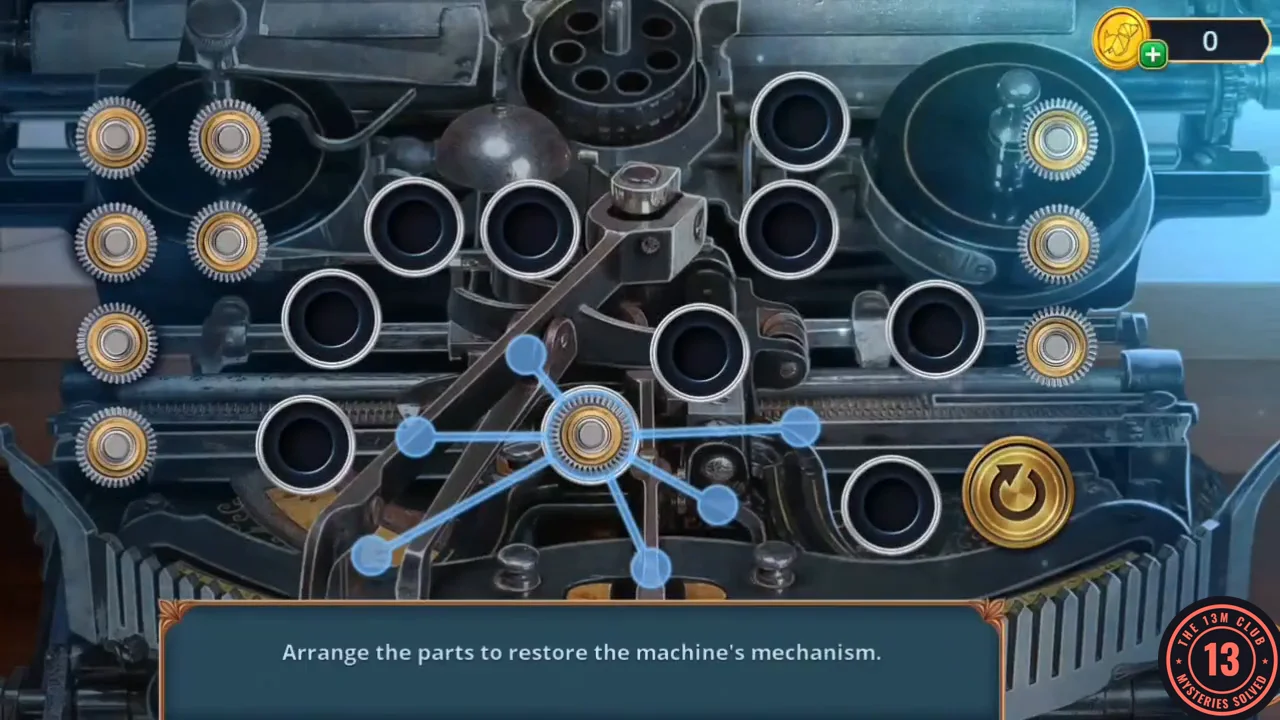
Arrange the parts to restore the machine's mechanism.
- In My Room, zoom into the nightstand and stand the Ballerina Figurine on the music box. It plays and its lid opens; take the Hammer (a typewriter typebar).
- Zoom into the typewriter again and fit the Hammer. The mechanism puzzle opens.
- The machine has ten sockets. One part already sits in the centre socket; nine loose parts wait in the side columns (six on the left, three on the right) for the nine empty sockets. The parts look alike, but each has its own pattern of blue connector arms, shown while you drag it. To turn a part, drag it onto the gold circular-arrow button in the lower right and tap the button; each tap turns its arms to a new position. Then drag the part to the socket where its arm ends meet the dots of the parts around it. When all ten sockets are filled, the arms form one connected network and the typewriter is restored.
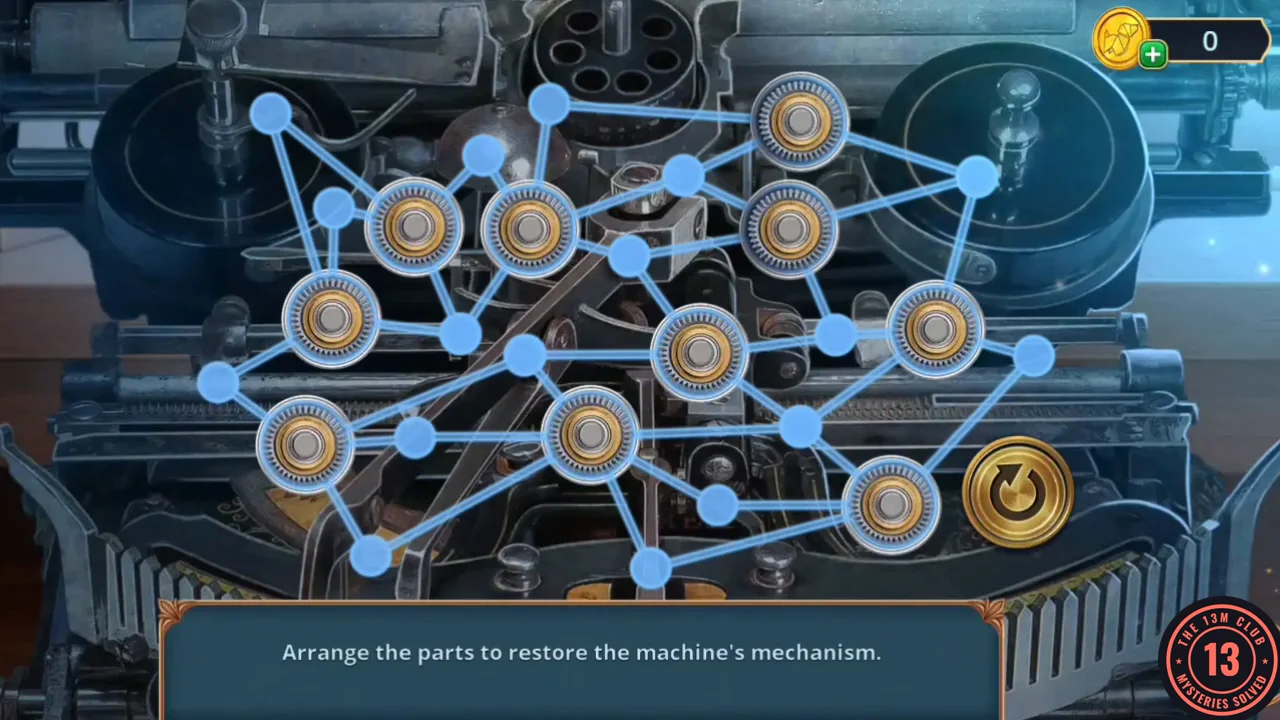
Restored mechanism: all ten parts in place, with their arms forming one network.
CHAPTER 4
Chapter 4 Decision Points
The final decision tree.
- Chapter 4 decisions and values: Mrs. Vale – Don't let her in on the plan 0 / Trust Mrs. Vale 2; car – Handle it myself 0 / Ask for a vehicle and backup 2; library call – Don't drag her into this 0 / Call Vale and warn her 2; safe – Get out now 0 / Capture its essence 3 / Gather all the evidence 6. The choice prompt at the safe shows +2 for "Capture its essence", but this tree lists it as 3. This walkthrough takes the 0-point option every time and scores 0/12, so only the 0-point outcome picture (Vivienne at her typewriter) is unlocked; the 4- and 10-point panels stay greyed out.
ENDING
The Article
Vivienne writes her report.
- Vivienne types the article "The Missing People Hollow Creek Refused to Search For": she cannot accuse them outright, but people will know what happened to those who disappeared. The final title card appears.
EXTRAS
Reporter's Tokens and Decision Points
Two optional systems run through all four chapters: the Reporter's Token collection and the Decision Points score that decides each chapter's outcome picture. Some token steps and all full-score scenes in this section come from a second complete recording of the free-to-play game, because the main recording doesn't collect every token or reach the higher outcomes.
- Reporter's Tokens are small collectible pins hidden in the scenes. Tap one to collect it; a notification shows your total out of 140, and each token adds 2 to the counter. The walkthrough steps above mark every token in route order, so following them collects all 140 by the knight statue in the Chapter 4 library. When the counter reaches 140, the usual notification appears and play continues with no extra reward or message in that recording.
- Each chapter has four decision moments, and every option is worth 0, 2, 3 or 6 Decision Points. Each chapter's Decision Points section lists them. At the end of a chapter, a tree adds up your total out of 12. Below it are three outcome panels marked 0, 4 and 10, and only the panel your score reaches shows its picture. In the main recording, the higher options cost 30 or 60 coins, and the walkthrough above takes the free option almost every time. In the second recording, the high-value prompts checked show only their point value with no coin price, and the coin balance doesn't drop when those options are picked (it reads 135 in Chapters 1 and 2 and 120 from late in Chapter 3). This guide can't say why the two recordings differ, so check the prompt in your own game before choosing.
- Chapter 1 full score (12/12): Tell about Eleanor's letter (2), Pressure using a personal connection (2), See things from a fresh angle (6), Talk through local rumors (2). The 10-point panel shows the wrapped bundle with its tag. In this run's cutscene, Vivienne finds the bundle tagged "ELEANOR" in the cold room and phones the police from the motel: "There's a body at Baker's shop." An officer opens it to reveal meat from Eleanor Meat Co., and Sheriff Cole warns her he could arrest her for trespassing and filing a false report. Vivienne then finds a Blue Spoon delivery slip in the drain and decides the diner is her next lead.
- Chapter 2 full score (12/12): Wound pride (2), Press on the invoice (2), Ask directly (6), Show belief (2). The 10-point panel shows Vivienne holding papers in the closed diner. In this run's cutscene, Mabel's recording on the jukebox says the town should be grateful because some people just disappear so the rest can live in peace. Vivienne concludes that Mabel didn't die in the fire and that the fire covered up what happened to her, then heads to the police department.
- Chapter 3 full score (12/12): Mention Mabel and the Blue Spoon (2), Ask how he got in (2), Hide behind the window frame (6), Pressure him with evidence (2). The 10-point panel lights up. The following cutscene begins with the same scene as the 0-point run: Sheriff Cole says Tom prefers outsiders with no family or roots, and when Vivienne answers that Eleanor wasn't an outsider, he replies that's why they had to make her disappearance look different. Tom Baker then appears, and Vivienne decides to ask Mrs. Vale at the club.
- Chapter 4 full score (12/12): Trust Mrs. Vale (2), Ask for a vehicle and backup (2), Call Vale and warn her (2), Gather all the evidence (6). The 10-point panel unlocks. This run's ending goes further than the 0-point ending above: after the article, Vivienne reports that state police arrested Tom Baker and that Sheriff Cole was suspended and left Hollow Creek while investigators look into his role. An envelope is then left at her door holding a newspaper headlined "New Disappearance in Neighboring Town" and a note: "Your next story is already waiting."
- By the panel labels, a chapter total of 4–9 points should unlock the middle (4-point) panel instead. None of the nine recordings checked for this guide finishes a chapter with 4–9 points; they score 0, 2 or 12. So this guide can't show the 4-point pictures or say whether they come with different scenes.