Garden Circle Club Lobby
The sheriff and Tom are working together. Mrs. Vale has been at the club longer than anyone; talk to her.
- Talk to Mrs. Vale. Decision: "Eleanor trusted you. If you know what I should watch out for, tell me." (60 coins, +2) or "I'll find the way myself." (free, 0). This walkthrough takes the free option. Take the Storage Key.
- Collect the Reporter's Tokens in the lobby: one on the left armchair (110/140), one on the gramophone table (112/140) and one on the right armchair with the fruit bowl (114/140). The bees there are "way too interested in that fruit", so leave the bag for now.
- Zoom into the storeroom door by the stairs. Take the Screwdriver and the Vinyl Record from the DOMINI magazine; a photo slips out: "The tower is still here." Live wires hang over the padlock ("No way I'm reaching past it barehanded"). Put the Vinyl Record on the lobby gramophone ("The record's here, but the gramophone can't play it. What's missing?"). Back at the door, push the wires aside with the Silicone Pot Holder, take the Lipstick, and put the Storage Key into the padlock.
Storeroom Padlock Arrows
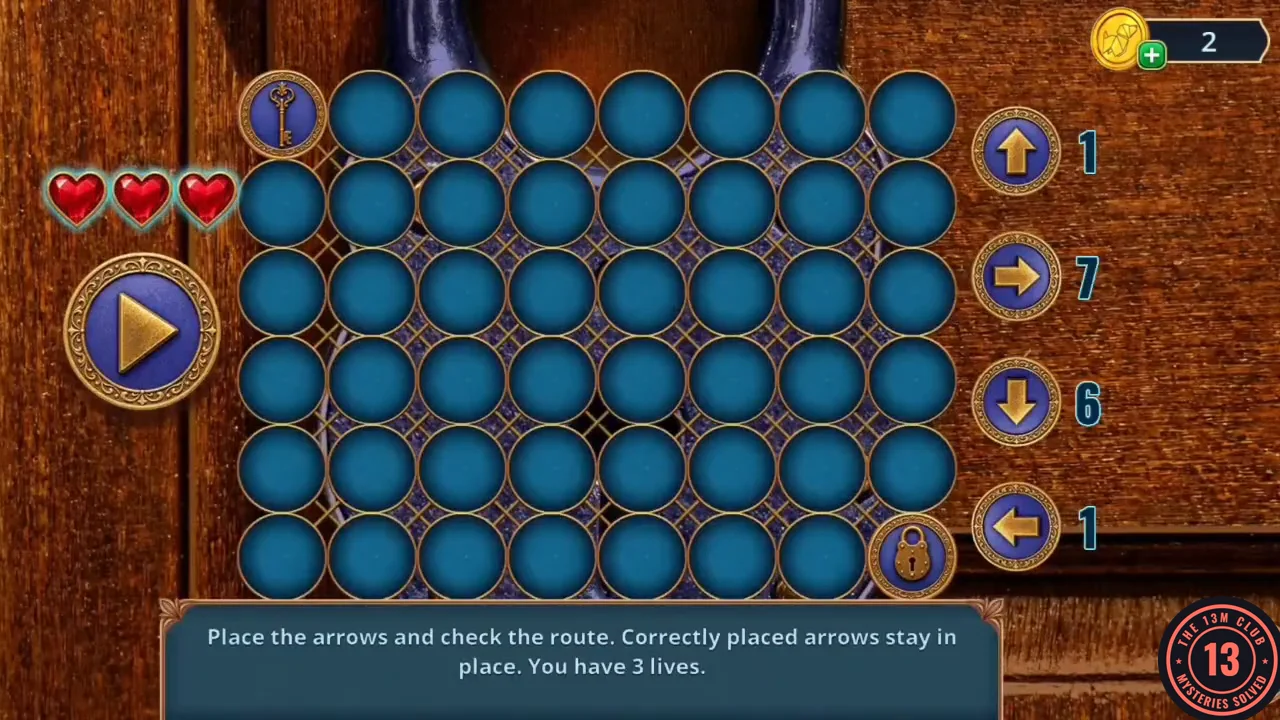
Place the arrows and check the route. Correctly placed arrows stay in place. You have 3 lives.
- The key starts in the top-left hole of an 8 × 6 grid and must reach the padlock in the bottom-right hole. The counters give you 1 up, 7 right, 6 down and 1 left arrow. Place them, press Play and watch the key follow them; wrong arrows cost a life. One working route, numbering rows top to bottom and columns left to right: row 1 col 2 right; row 1 col 3 down; row 2 col 3 down; row 3 col 3 right; row 3 col 4 down; row 4 col 4 left; row 4 col 3 down; row 5 cols 3, 4, 5 and 6 right; row 5 col 7 up; row 4 col 7 right; row 4 col 8 down; row 5 col 8 down into the padlock. The storeroom opens.
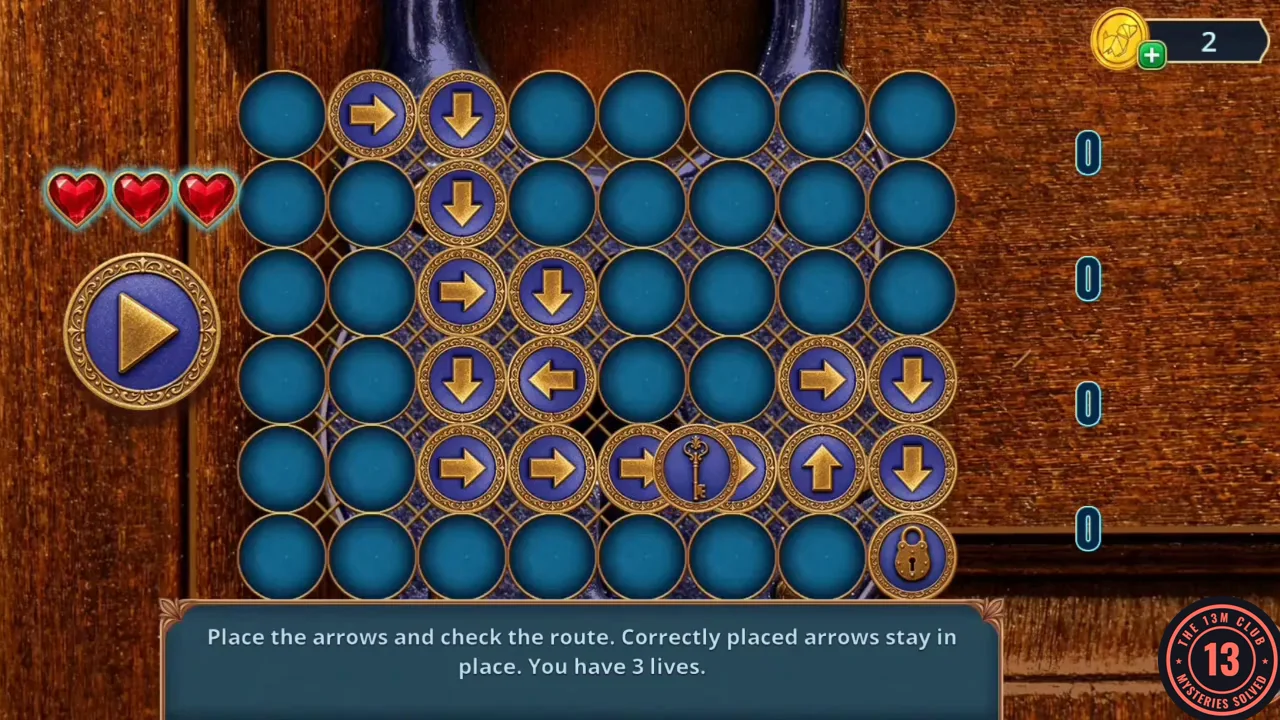
The working arrow route, with the key on its way to the padlock.
Motel Storeroom
Eleanor's suitcases are here.
- In the Motel Storeroom scene, tap the Reporter's Token in the open cardboard box on the lower shelf, to the right of the "512" parcel (116/140).
- In the storeroom, zoom into the spinning wall fan. A photo shows a road: "They removed the turn, but not the road." Vivienne decides: "If I can't stop it... maybe I can jam it." Jam the blades with the Screwdriver, then take the Hose and the Heavy Statuette (a raven) from behind the fan.
- Zoom into the wooden box by the mouse hole. Freeze its padlock with the Liquid Nitrogen; a rat pops out of the hole ("something in there with teeth. Nope. I'm covering that up"). Smash the frozen padlock with the Heavy Statuette. Take the last Lock Cylinder (2/2) and the Skateboard from the box.
- Zoom into the suitcases tagged "E. White". Fit the Lock Cylinders into the combination lock on the brown case; it opens ("So she really was here... Guess whoever tried to get in didn't finish the job"). Take the Form (a blue star-shaped mould) and the Local Area Map.
- Open the Local Area Map in your inventory: it is in Eleanor's handwriting, but "almost faded away". Rub the Lemon Juice over it to reveal a red route to the "Garden pavilion" and a photo of the Garden Circle gate: "This is where the old road used to lead." The comparison opens.
Outskirts Map Comparison
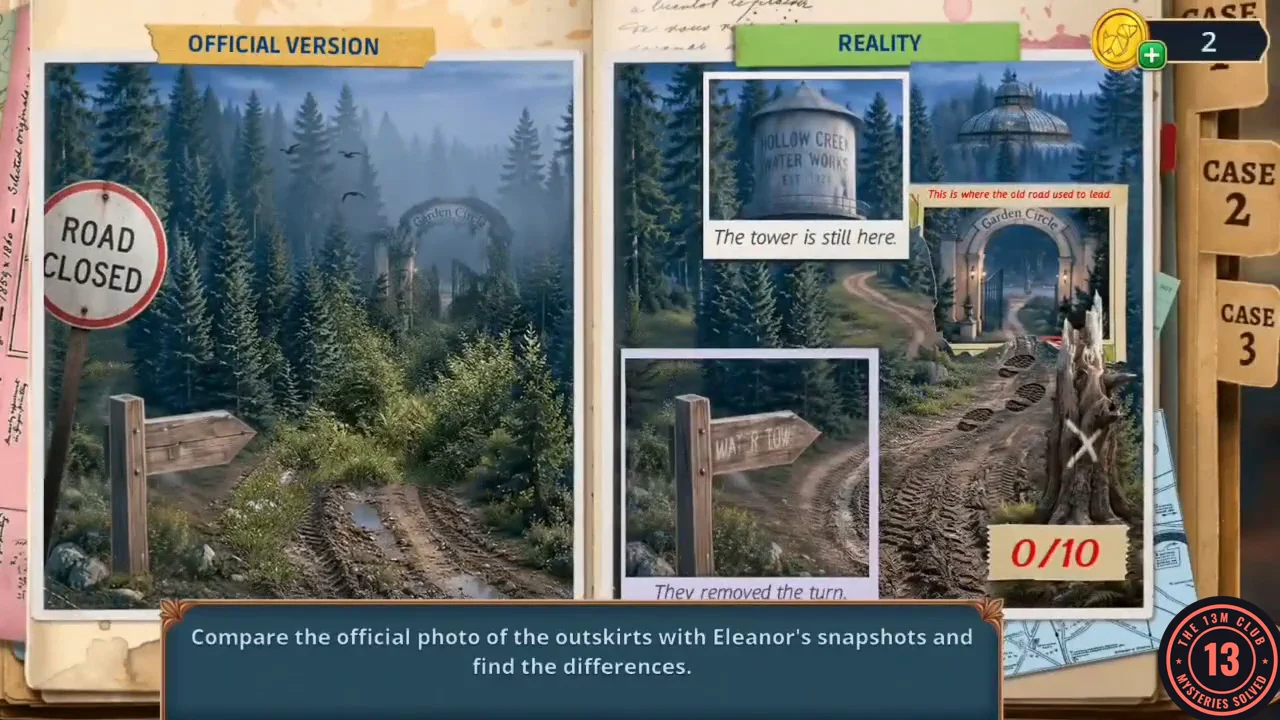
Compare the official photo of the outskirts with Eleanor's snapshots and find the 10 differences.
- The left page is the "Official Version" (with a ROAD CLOSED sign) and the right page is "Reality". The 10 differences: the water-tower photo ("The tower is still here"); the glass pavilion dome at the top right; the missing ROAD CLOSED sign; the dirt road through the trees; the Garden Circle gate photo; the footprints on the road; the WATER TOWER signpost; the turn in the road; the X-marked tree stump; and the tyre tracks at the bottom. Result: "Eleanor found the road Hollow Creek tried to erase. It leads to the water tower, then to the abandoned Garden Circle pavilion. The official maps leave it out completely."
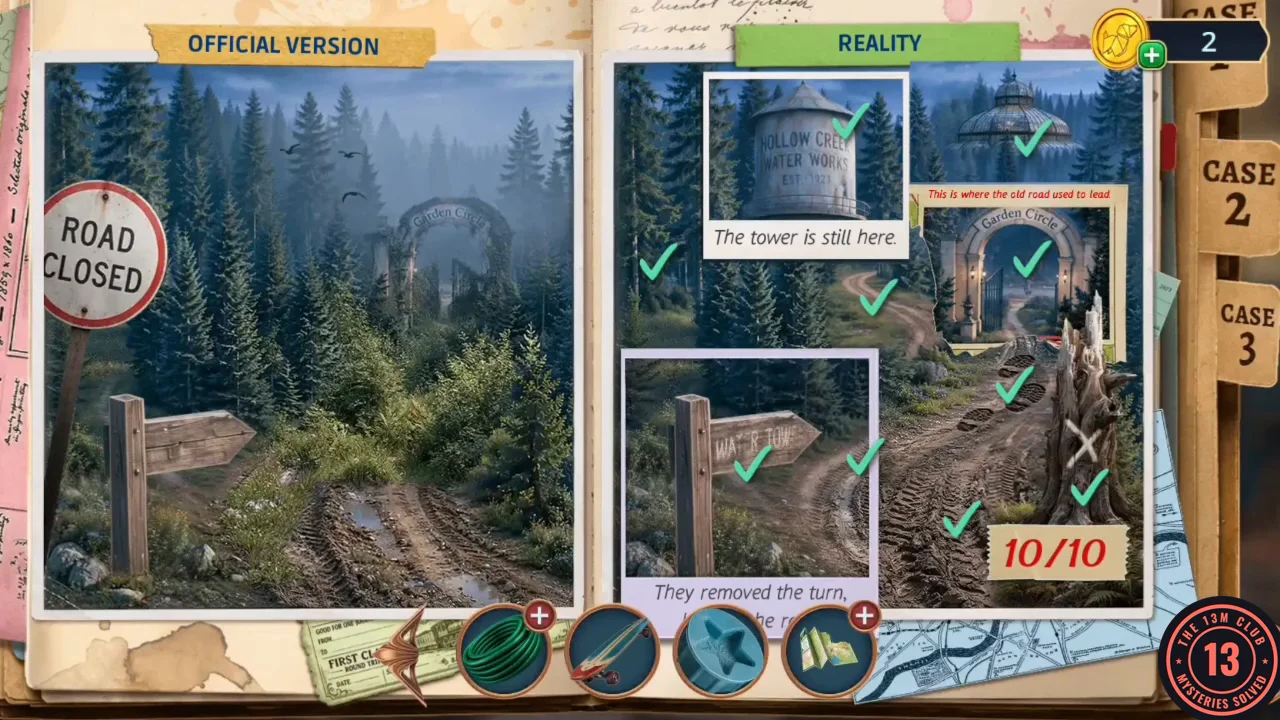
All 10 differences found on the outskirts map.
Mrs. Vale's Car
Get a car to reach the water tower.
- Back in the lobby, zoom into the right armchair with the fruit bowl and the purple bag. Rub the Lipstick along the bag's stuck zipper, open it and take the Wallet. The bees stay on the fruit.
- Talk to Mrs. Vale: "I shouldn't have given you that key. Eleanor asked questions, too. Then she vanished." She still hands over the Car Keys. Decision: "If you want me to come back, tell me anything that might help me get there unnoticed." (60 coins, +2) or "Thanks for the key." (free, 0). Following this walkthrough you have no coins left by now, so take the free option: "The car's in the parking lot. Bring it back if you can."
- On Carson Street, tap the Reporter's Token on the pavement corner in front of the souvenir window, beside the bollards (118/140).
- Go to Carson Street (the pharmacy). Zoom into the red NO TRESPASSING container. Take the Folding Umbrella from the top, the Lion Statue Pieces (1/2) and the Chainsaw (it needs parts before it will work). The container is "missing a wheel. That explains why it's not going anywhere". Push the Skateboard under it and roll it aside. Behind it is a pipe wrapped in wire ("No chance I'm unwinding that by hand. A bolt cutter would do it"); take the Motel Billboard leaning there. Lay the Billboard over the green slime on the pharmacy doorstep to get into the pharmacy.
Pharmacy Window
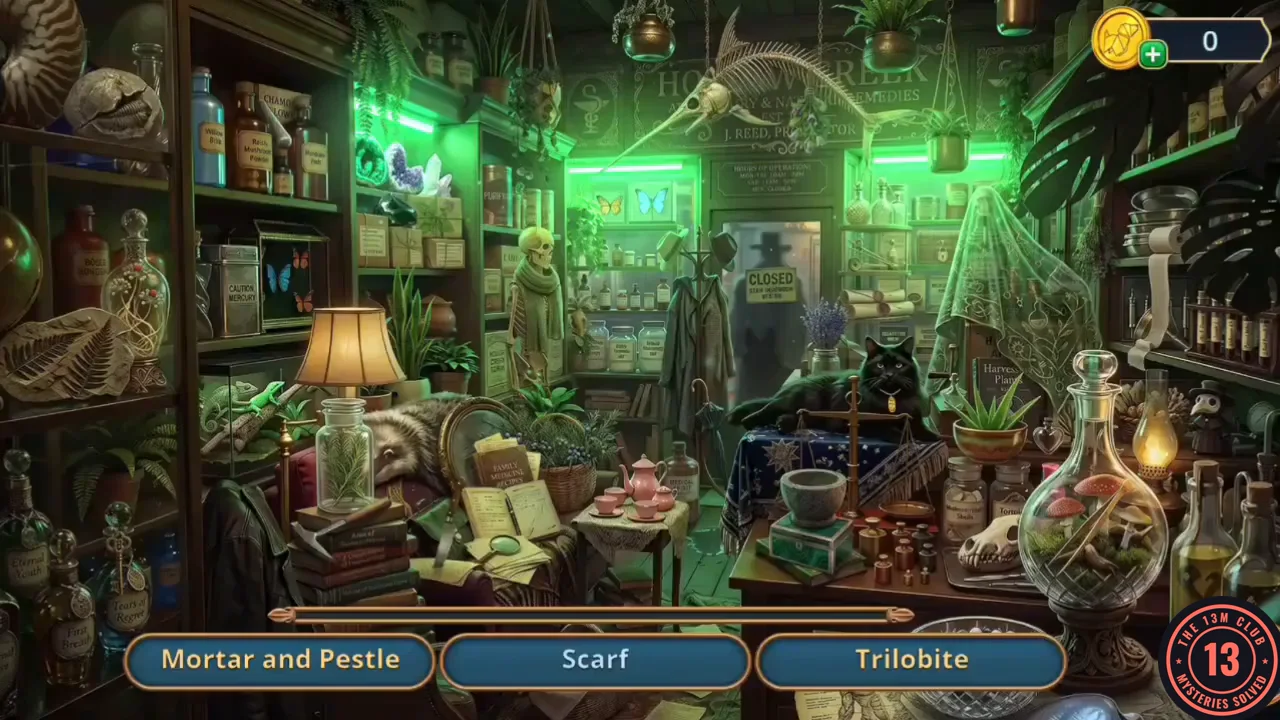
Find the listed objects.
- Find the words shown at the bottom; as each is found, a new one replaces it. The list: Scarf, Mortar and Pestle, Bone Tincture, Trilobite, Alcohol, Dog, Thermometer, Chameleon, Medicine Recipes, Bandages, Obsidian and Tweezers. The Trilobite is hidden inside a rock on the upper-left shelf, beside the large nautilus shell: tap the rock (Vivienne notes its strange seam), then tap the small hammer lying on top of the stack of books under the table lamp. The hammer splits the rock open; tap the trilobite fossil inside. Finally, find the round object shown as a silhouette. You receive the Magnet.
Finding a Bolt Cutter
Collect the parts needed to cut the wire on Carson Street.
- In the Motel Storeroom, zoom into the shelf cupboard and tap the Reporter's Token at the lower left of the close-up, beside the suitcases (120/140).
- In the Motel Storeroom, zoom into the shelf cupboard and pull its door open with the Magnet. Take the Gramophone Needle. In the lobby, fit the needle on the gramophone with the Vinyl Record. The drawer underneath opens; take the Carriage and the Cover.
- Open the Folding Umbrella in your inventory and fit the Cover onto it to make the Umbrella. In the storeroom, hook the blue Staple Remover off the top of the cupboard with the Umbrella. Pull the staples out of the "512" parcel next to the suitcases with the Staple Remover. Take the Planks, the blue brush and the Bolt Cutter from inside.
- On Carson Street, use the Bolt Cutter on the wire wrapped round the pipe behind the container.
Wire Cutting
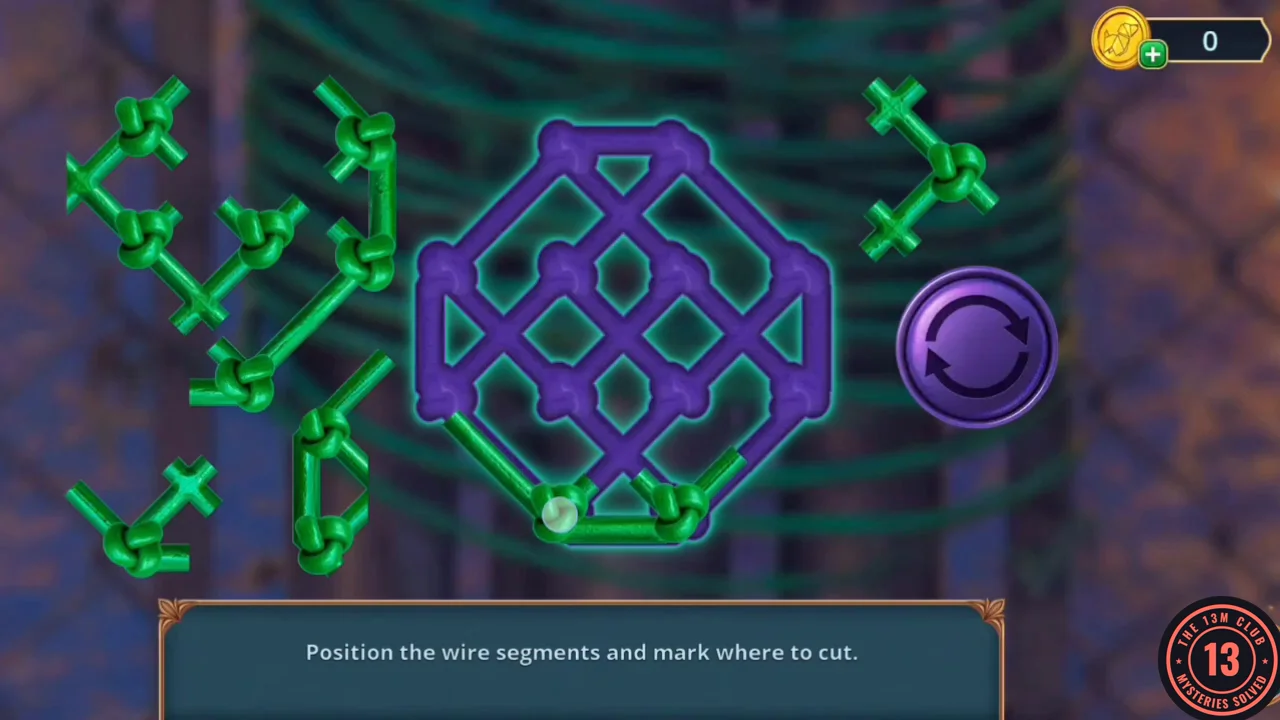
Position the wire segments and mark where to cut.
- A purple octagonal lattice sits in the middle, with green wire pieces scattered on both sides. Drag each green piece onto the lattice. Press the round button to rotate (it turns gold when active) until a piece lines up with the purple lines it should cover. When the lattice is completely green, the wire is cut and a new path opens from Carson Street to the Parking Lot.
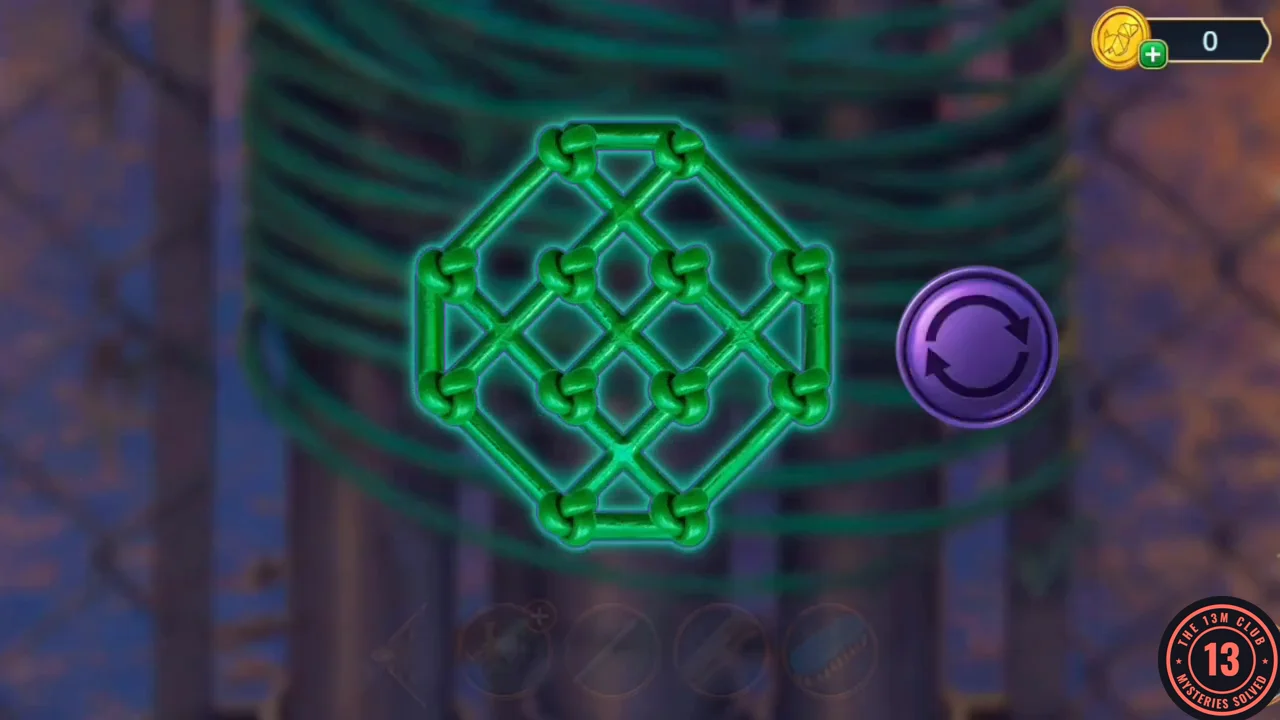
Solved: every part of the lattice is covered by green wire.
Drive Through the Fog
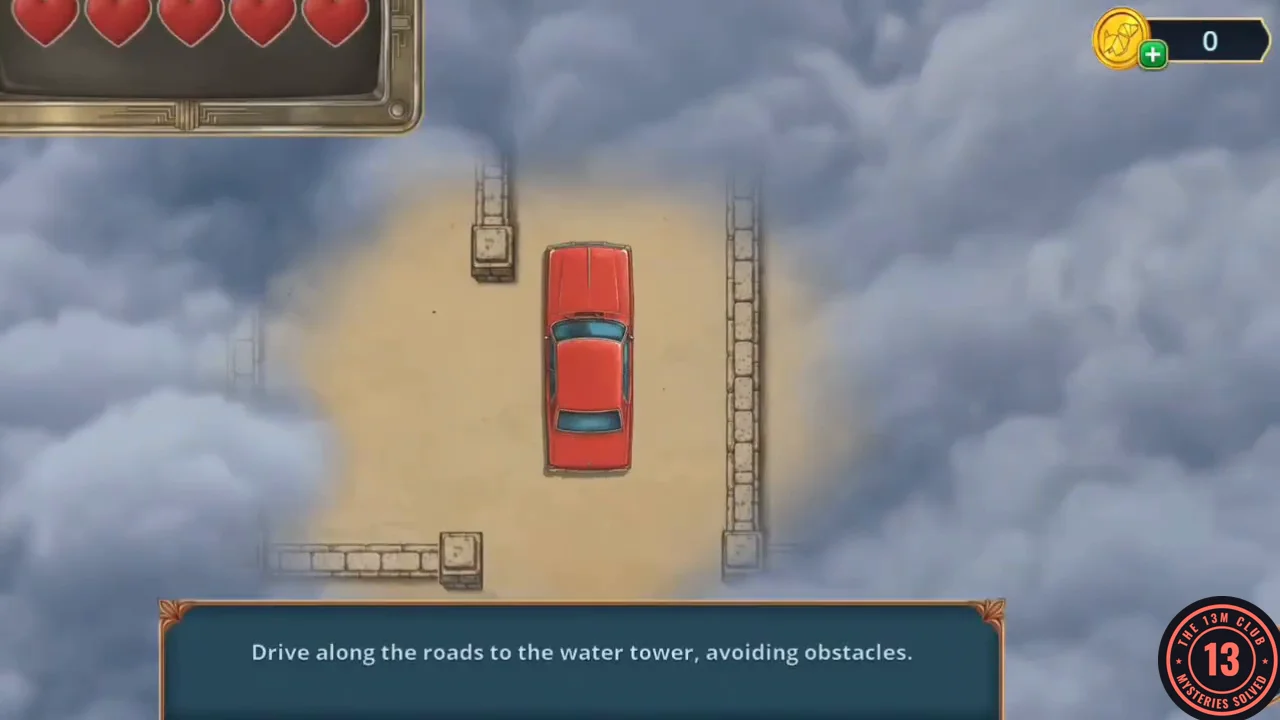
Drive along the roads to the water tower, avoiding obstacles.
- Go to the Parking Lot ("...right there. Only one way to find out if it still works") and use the Car Keys on the red car.
- You see the car from above, with only a small patch of road visible through the fog. Steer it between the wooden kerbs and around the obstacles: the road passes rubbish bins, a parked police car and a tyre pile. Keep following the open road until the water tower appears at the top. Vivienne: "The water tower. Just like on the old map. Auntie was here. Now I just need to find a way into the Garden Circle."
The Water Tower
Eleanor was here. Find the way into the Garden Circle.
- At the Water Tower, zoom into the barrels by the fence. Take the Reporter's Token (122/140) and the Clothes Hanger. Pick up the Reporter's Token near the tower (124/140), then zoom into the tower ladder: the bottom rungs are gone ("Too high. I can't reach it from here").
- Open the Hose in your inventory and tie the Clothes Hanger to it to make the Hose with Straps. Hang it from the ladder and climb up to the tank hatch. Inside, a COLLINS packet floats on the green water ("Something in the water... Let's fish it out"); for now take the Awl lying on the rim.
- Back at the HOLLOW GREEN barrel ("something thin to crack this baby open? Coming right up"), pry the lid off with the Awl. Take the Deck Chair Fabric and the pliers-like tool from inside (this guide doesn't have its in-game name). The Awl is used up: "I hate when that happens."
- In the Motel Storeroom, zoom into the mouse hole. Pull the Nails out of the floor clutter with the pliers-like tool ("That's not the result I was hoping for" if you try something else). Lay the Planks over the hole to start the board puzzle.
Covering the Burrow
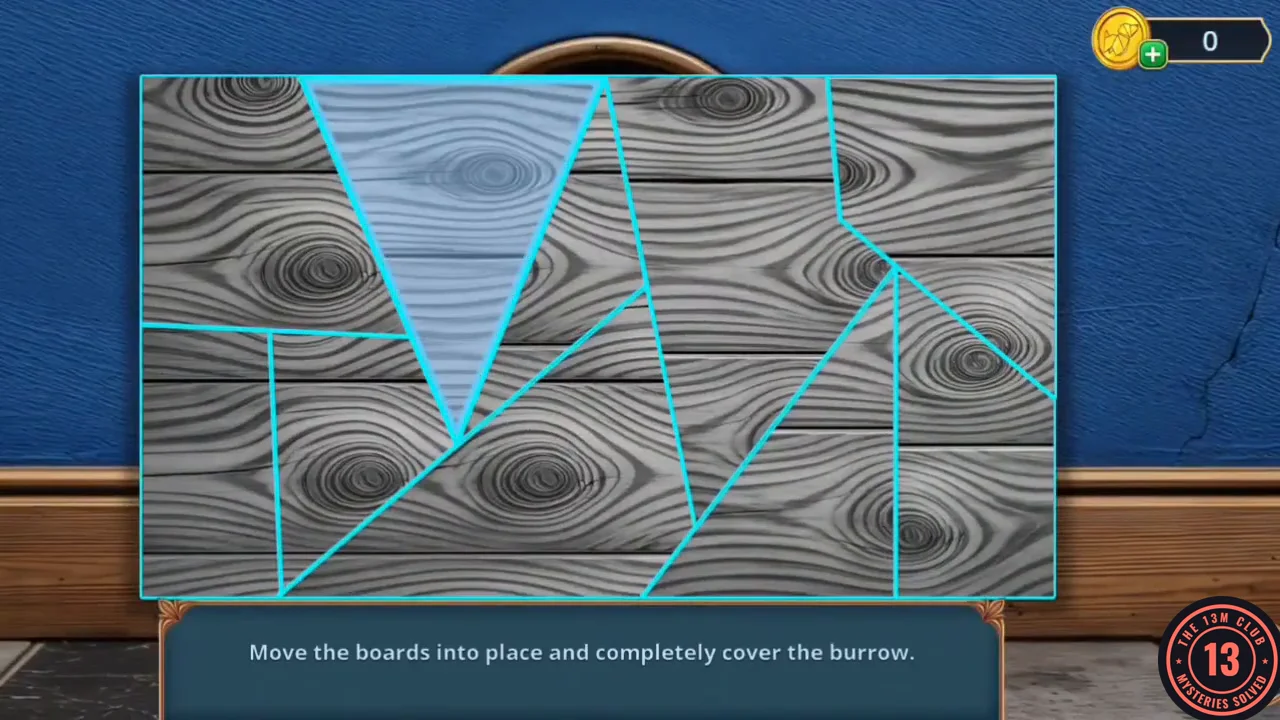
Move the boards into place and completely cover the burrow.
- The rectangle is already filled by angled wooden pieces, and their cyan outlines stay the same throughout; what is wrong is the wood pattern inside them. Drag one piece onto another to swap their contents. Keep swapping until the picture shows three straight horizontal planks running across the whole rectangle: each seam between planks is one continuous straight line, and the grain lines and knots flow unbroken from piece to piece. At the start, the seams step up and down and several knots are cut off at the piece edges. Use the solved picture below as your target. When every piece matches, the boards are nailed over the hole and you receive the Pendant Hook.
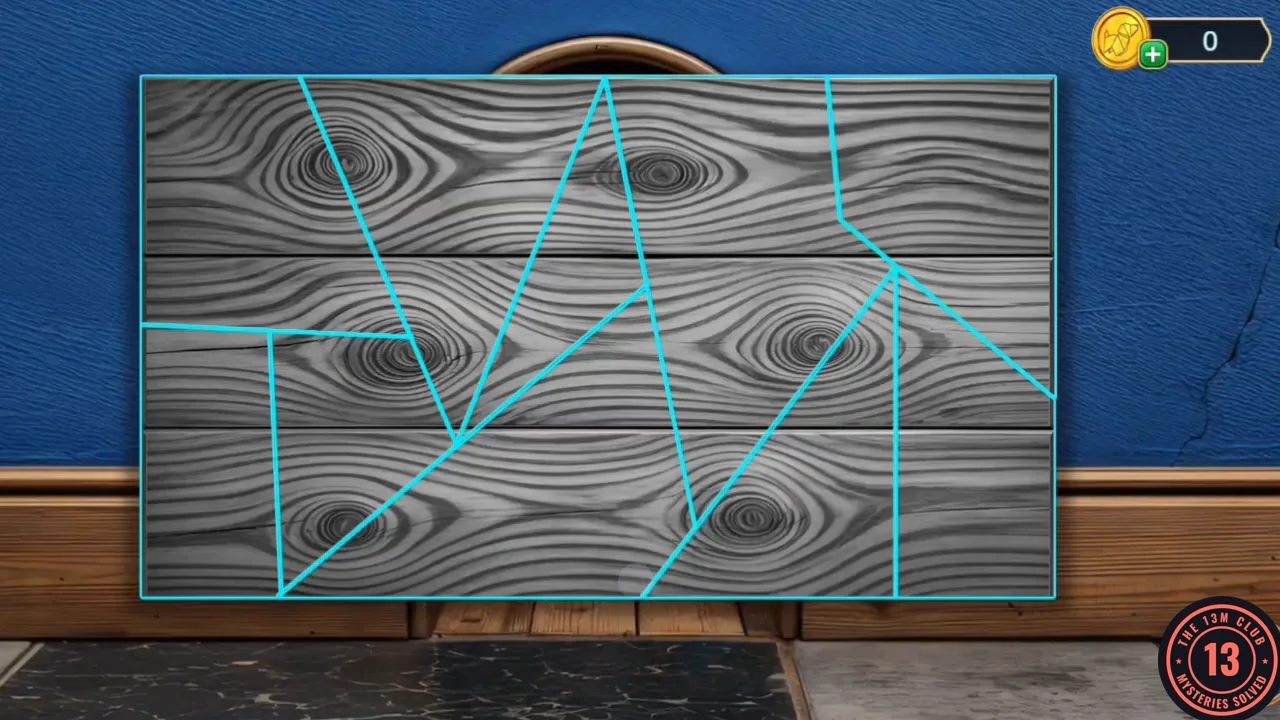
Solved boards: the plank seams, grain and knots line up across every piece.
Parking Lot Slingshot
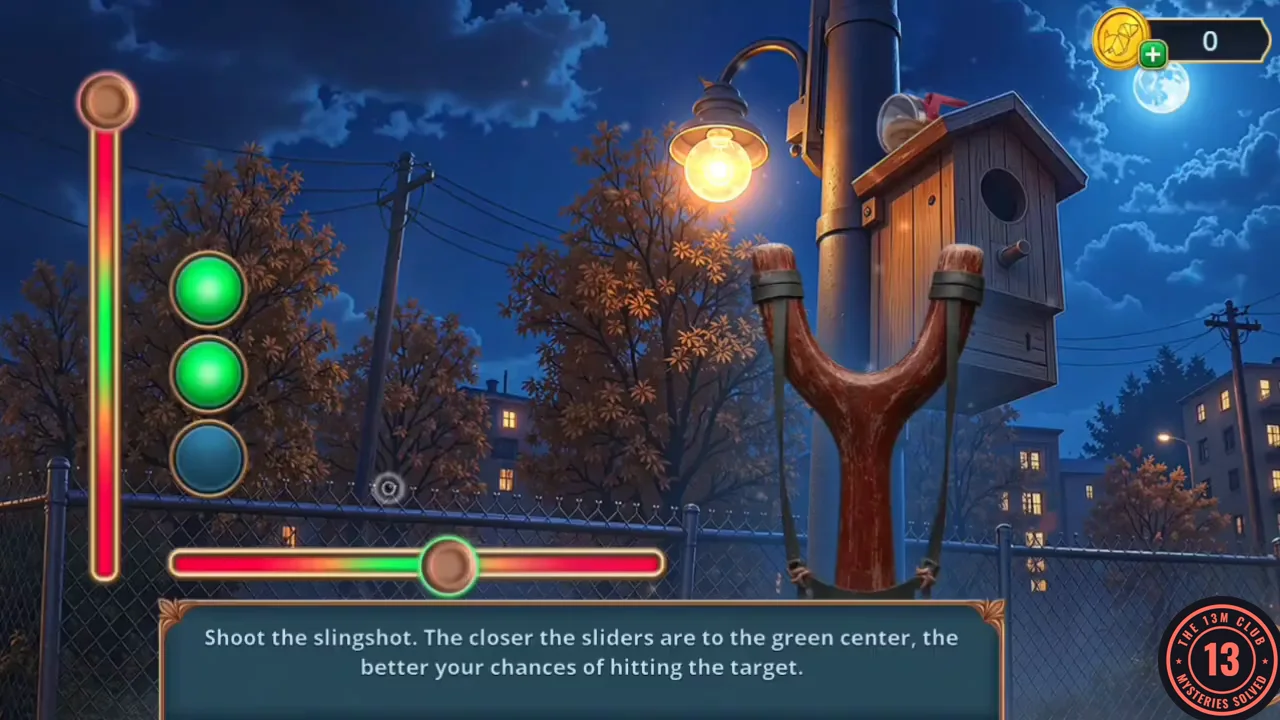
Shoot the slingshot. The closer the sliders are to the green centre, the better your chance of hitting the target.
- In the Parking Lot, zoom into the storm-drain grate by the stairs and tap the Reporter's Token at the lower right of the close-up (126/140).
- In the Parking Lot, zoom into the storm-drain grate by the stairs. Lower the Pendant Hook through the bars and fish out the Slingshot. Zoom into the birdhouse on the lamp post and use the Slingshot on it. A vertical and a horizontal slider move back and forth: stop each one as close to the green middle as you can; the three lights on the left show how good the shot is. Three green lights mean a hit.
- The shot knocks loose a cloth embroidered with a "G.C." laurel monogram, which goes into your inventory (this guide doesn't have its in-game name). Take the red Flashlight from the birdhouse ("Okay... and what exactly am I supposed to do there?"). At the Water Tower, shine the Flashlight under the purple tarp beside the tower; the junk pile beneath starts to sparkle.
Water Tower Junk Pile
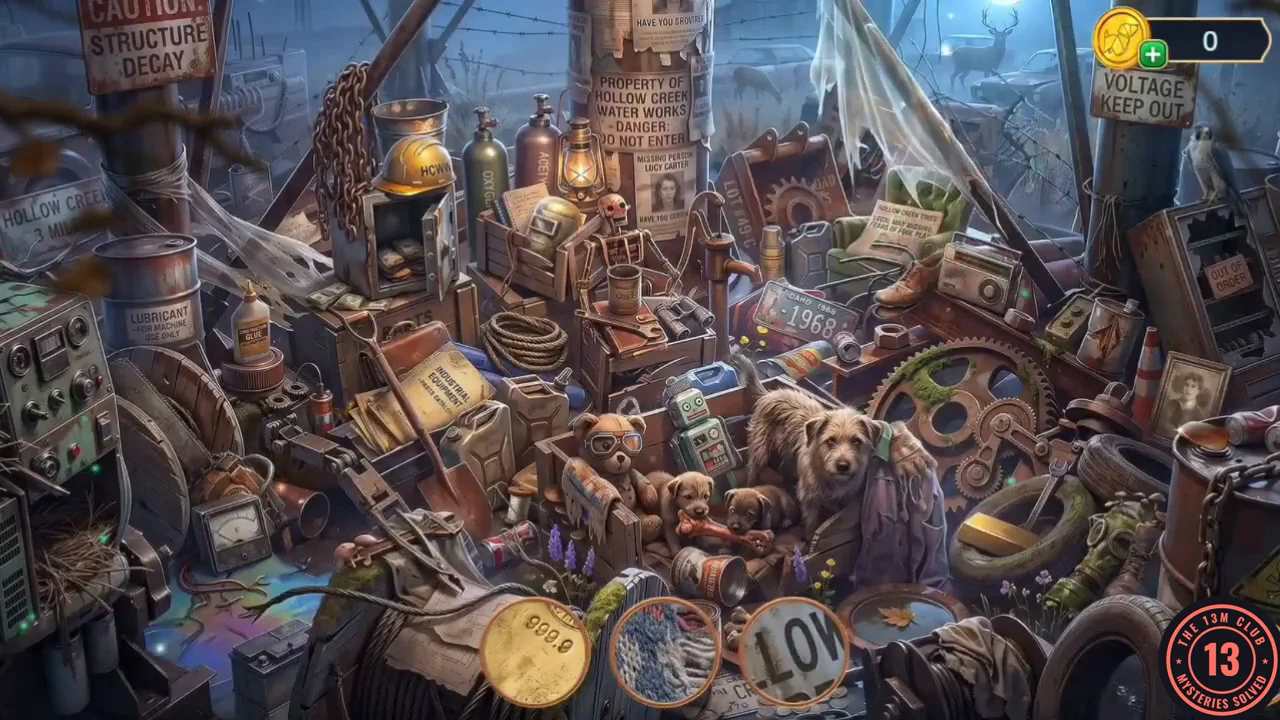
Find the objects shown by the icons in this panning scene.
- Find each object shown as an icon in the tray; the scene is wider than the screen, so scroll it sideways. When the last icon is found, you find Eleanor's note: "The water tower isn't just a tower. There's a pavilion behind it. That's where they meet. If you're reading this, I can't tell you myself anymore. Find the Garden Circle. Find the person wearing the badge. Stop at nothing." The achievement "Letter from the Past" unlocks, and you receive the Bottle Opener.