The Darkroom
Develop Eleanor's film under safe red light.
- In the Darkroom, take the Reporter's Token on the left (98/140). Zoom into the enlarger table and take a second token (100/140). Vivienne explains: "Negative goes in the carrier, paper under the lens, and the timer counts it out." Put the Negative Film in the carrier and stand the Mechanical Timer beside it. Take the Reporter's Token on the right of the room (102/140).
- Zoom into the vent shelf and take the Clamp and the Light Bulb. In the inventory, spray it with the Can of Red Paint to get the Red Light Bulb. Screw it into the green lamp above the developing trays. The vent's screws need a hex wrench, so leave it for now.
- Back at the vent shelf, cut the tight twine on the box with the Manicure Scissors. Take the Photo Paper and the Glass Cutter. Put the Photo Paper under the enlarger lens.
Photo Enlarger Focus
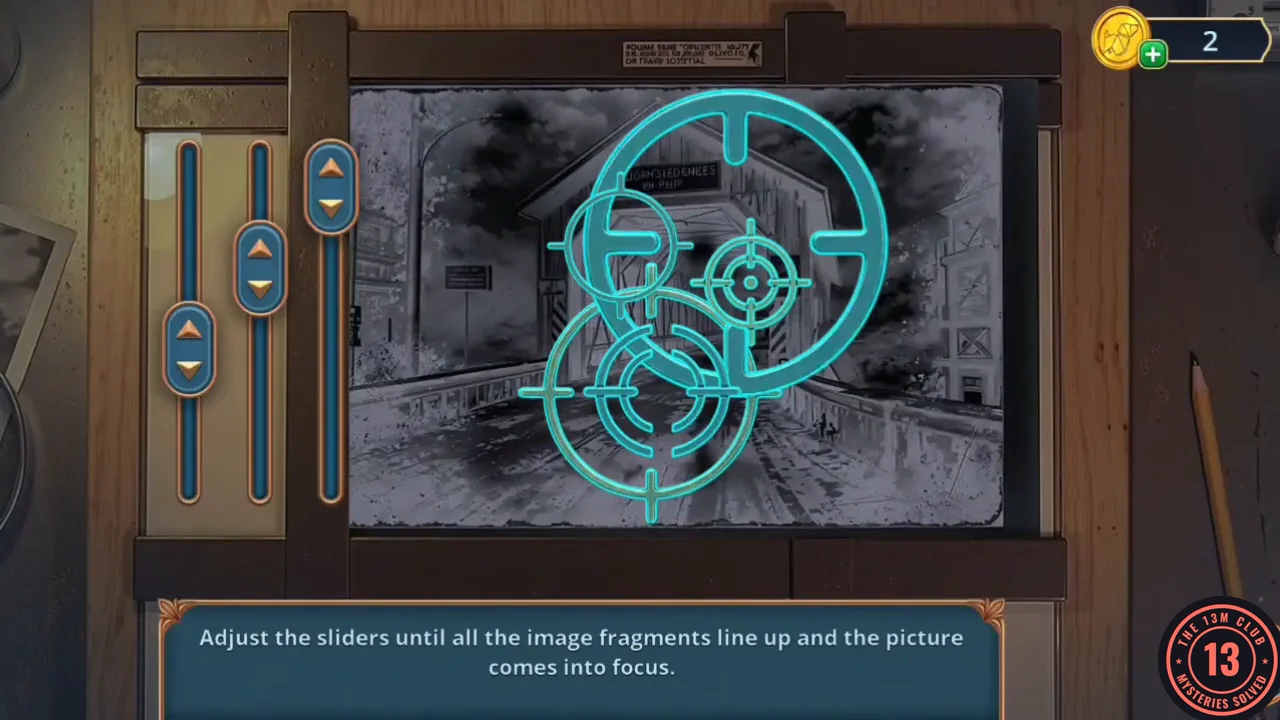
Adjust the sliders until all the image fragments line up and the picture comes into focus.
- Each slider moves one of the three target rings. Slide them until all the rings sit one inside the other over the bridge in the picture, then fine-tune until the image is sharp.
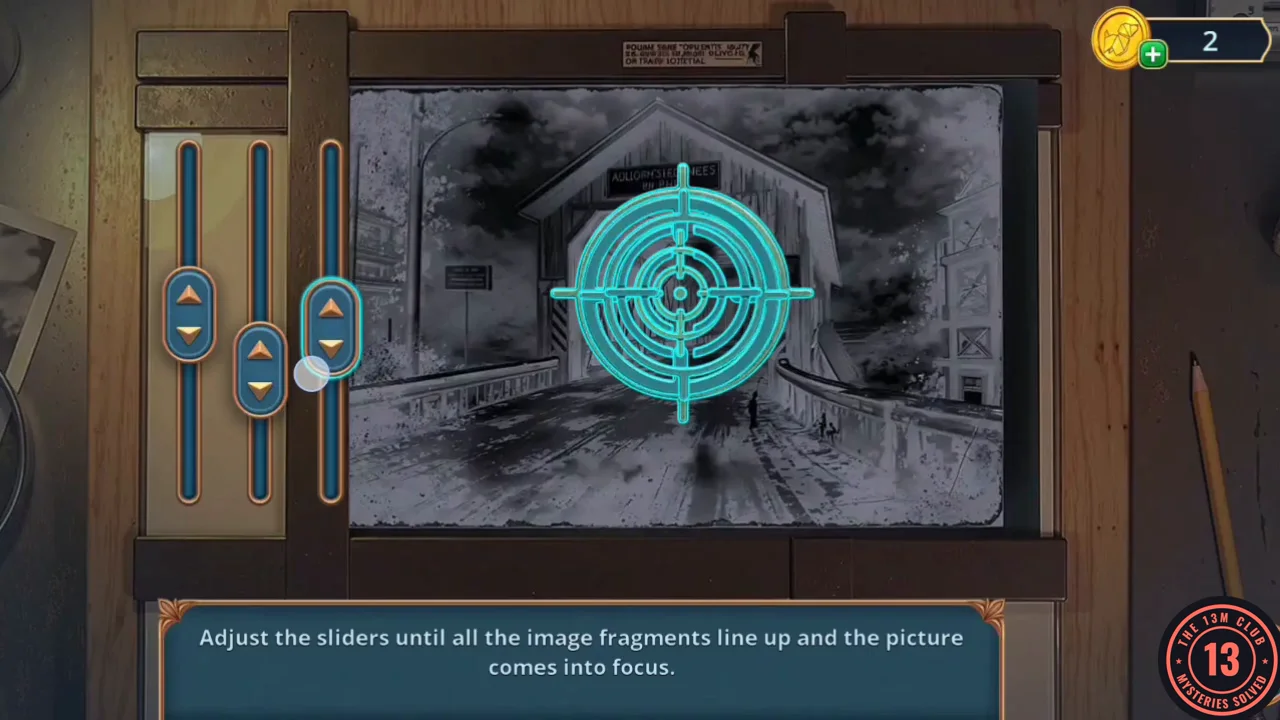
Solved enlarger: the rings are nested and the bridge photo is sharp. - Pick up the exposed paper with the tweezers from the enlarger table (Tweezers with Photo Paper). Dip it in the developing tray under the red lamp, then hang it on the line with the Clothespin. The print shows a covered bridge; take the Photo of Hollow Creek Bridge.
Fixing the Motorbike
Find out where the photo was taken and get a vehicle.
- On Main Street, zoom into the town map board. Cut the glass with the Glass Cutter and hold the Photo of Hollow Creek Bridge up to the map. The bridge is marked on it, so peel off that part of the map to get the Bridge Route Map. Then take the Motorcycle Key tucked into the lower-left corner of the board.
- In the Police Yard (Backyard), zoom into the motorbike. The side panel shows what it needs: the Canister of Gas (already placed), a wrench and the key. Give it the Motorcycle Key and the Wrench; Vivienne tightens the wheel, fills the tank and rolls the bike out onto Main Street. Keep the Clamp for later. On Main Street, zoom into the motorcycle ("needs a destination") and give it the Bridge Route Map.
Motorcycle Route to the Bridge
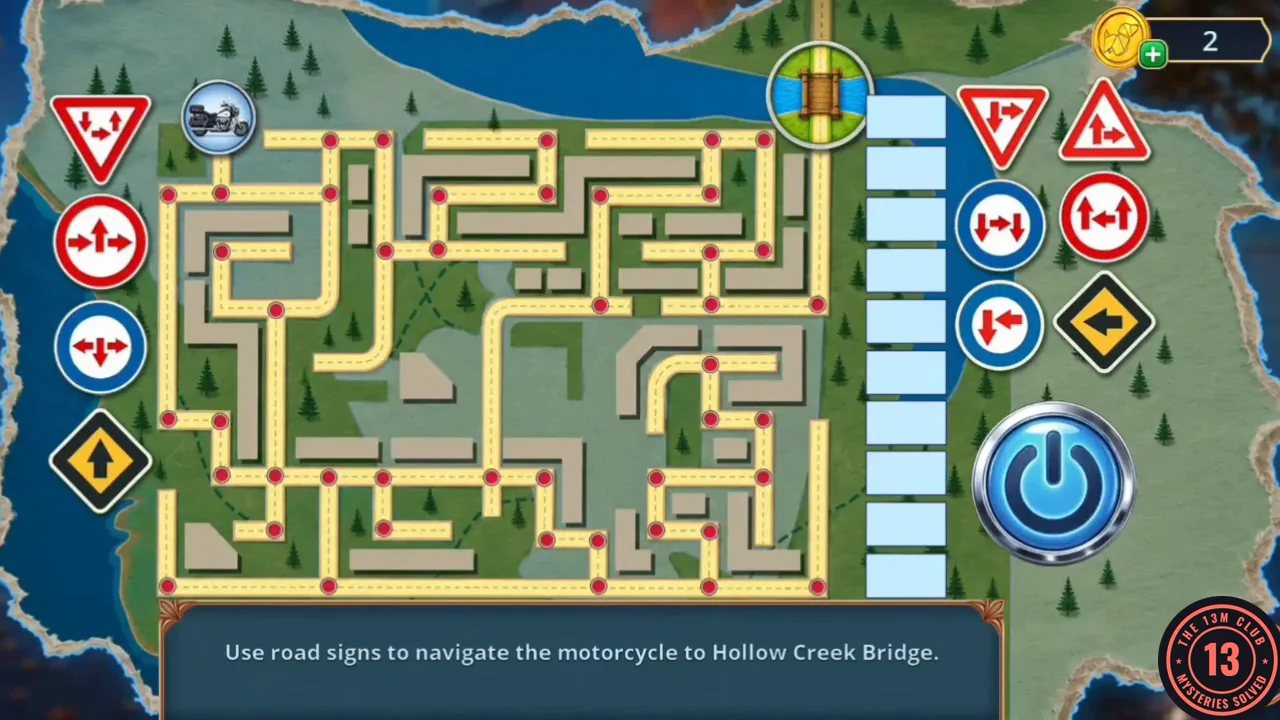
Use road signs to navigate the motorcycle to Hollow Creek Bridge.
- Tap the road signs on both sides to fill the ten-slot column; each sign adds its arrows (map directions) to the column. Press the power button and the motorcycle follows the arrows from its start at the top left. Example column, top to bottom: ↓→↓, ←↓→, ↓→↑, ←, ↑←↑, →↑→, ↑→, ↓→, ↓→, ↑, which drives the bike through the town to the bridge at the top right: down, right, down, left, down, right, down, right along the bottom, up and left, up and left, up the long middle road, right, up, right, up, right, down, left, down, right and up to the bridge. If the bike takes a wrong turn, check which slot it was on and swap that sign.
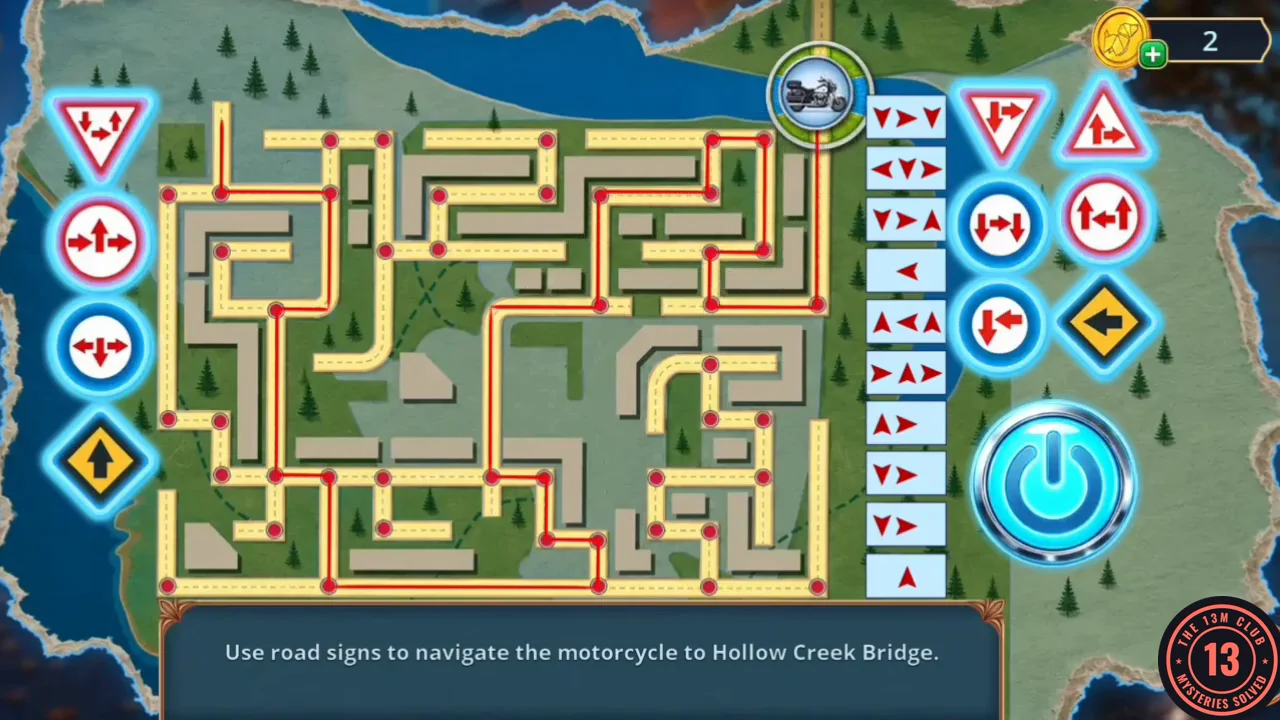
Example sign column and the route it drives to the bridge.
Hollow Creek Bridge
If this was Eleanor's last stop, someone may remember.
- On Hollow Creek Bridge, zoom into the guard rail on the left. Take the Wick (a green cord) from among the leaves, then the Screw. Zoom into the roof beams: a blue bundle is "way out of reach", so pull it down with the Telescopic Pointer. Take the Bundle from the deck. Vivienne notes a loose deck board but has nothing to pry it up with yet.
- Open the Bundle in the inventory. Read Eleanor's note ("Vivienne, if you're reading this... Don't trust the first report...") and take the green Hollow Creek motel key tag. Vivienne realises Eleanor had found how Cole made people disappear.
- Go to Evidence Storage and zoom into the blue duffel in the cage. Hang the green key tag on its zipper and unzip it; the comparison scene opens.
Evidence Storage Comparison
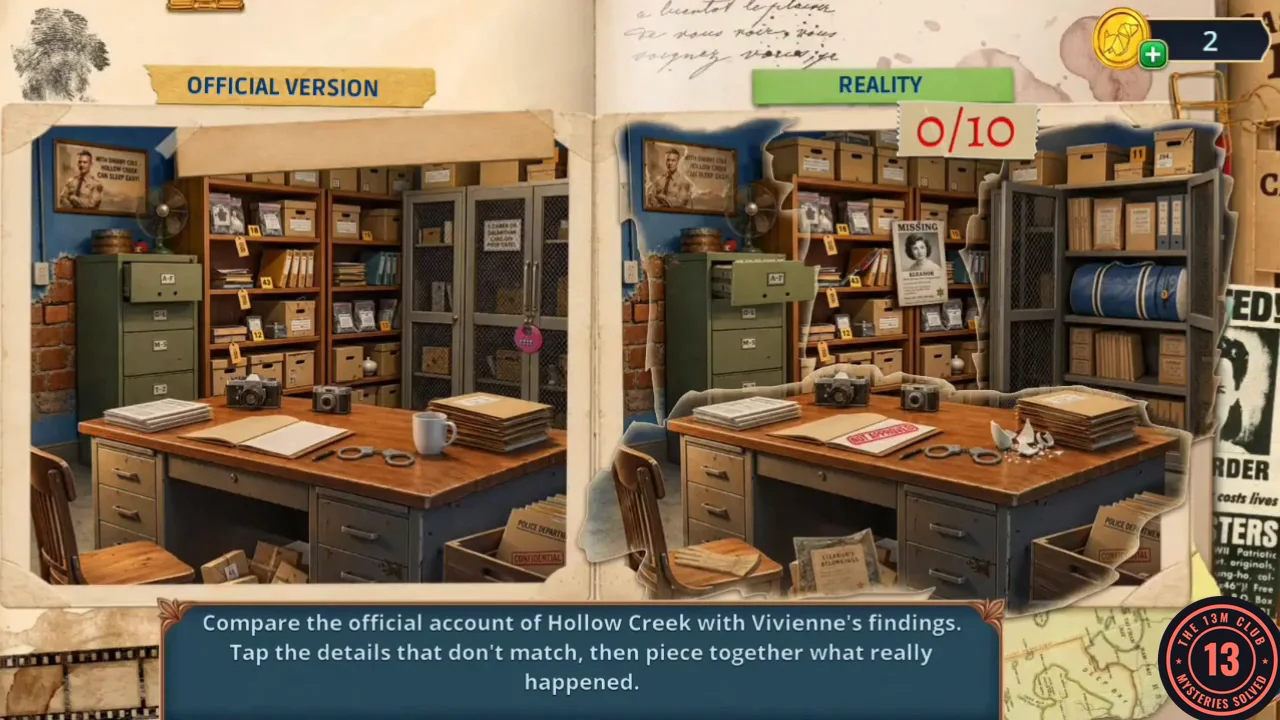
Find the 10 differences.
- Tap the details in the Reality picture (right) that don't match the Official Version (left). The 10 differences: the wanted poster on the blue wall, the exposed brick at the left edge, the open file-cabinet drawer, the evidence books on the shelf, Eleanor's MISSING poster, the folder with the red stamp on the desk, the broken mug, the blue duffel in the cage, the papers on the chair seat and the bundle of files under the desk. The result: Eleanor's report was ready, and her belongings were in evidence, before she was reported missing.
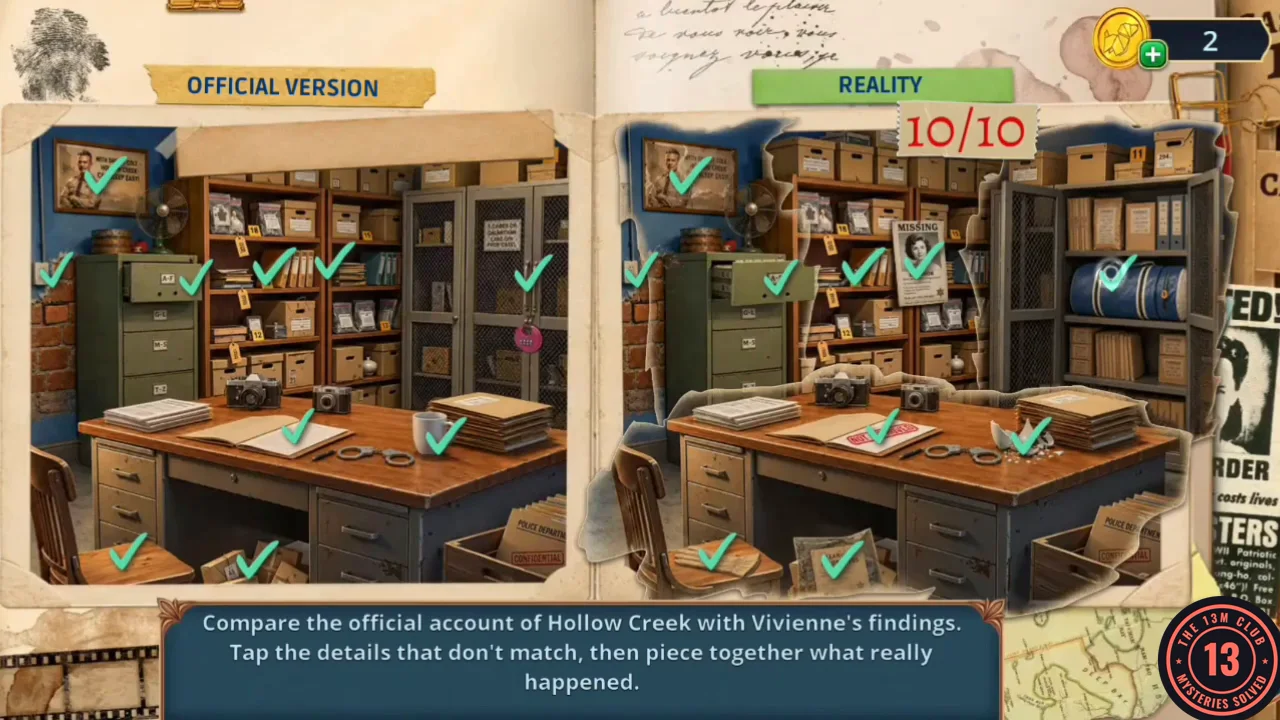
All 10 differences found in evidence storage.
Cole's Closet Riddles
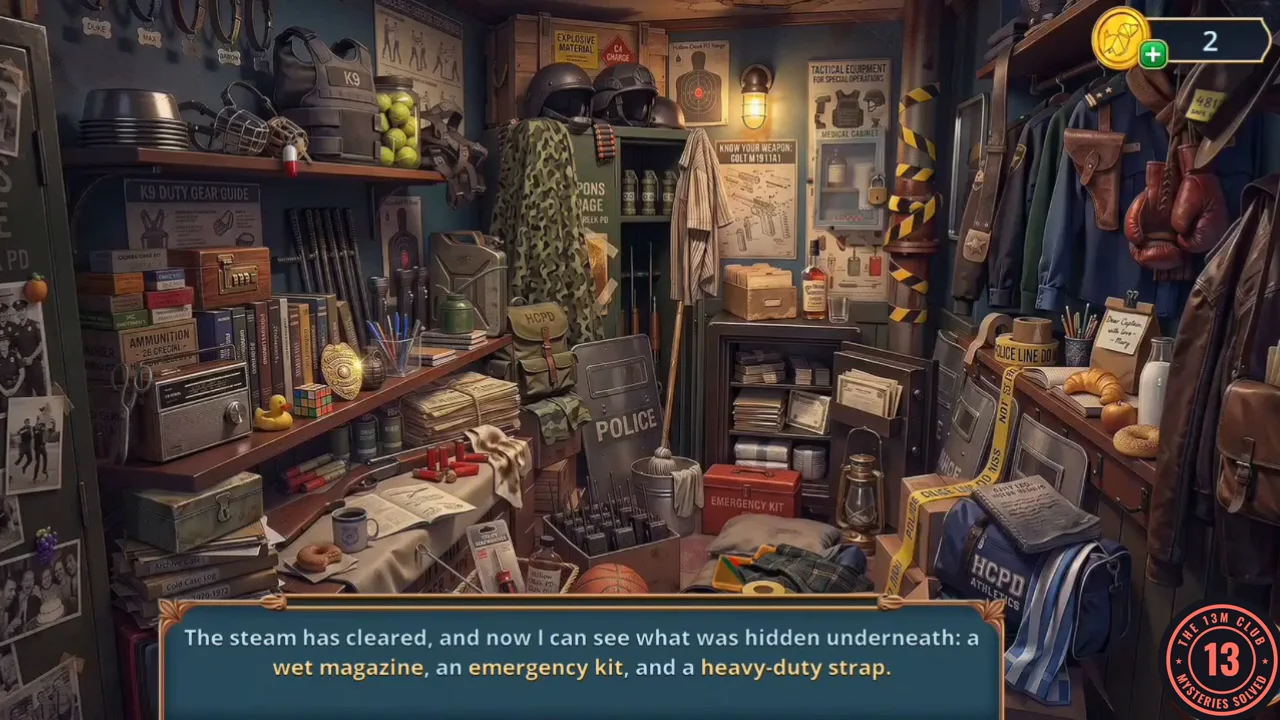
Each riddle lists three objects to find.
- Take the Awl from the open duffel. Zoom into the A–F cabinet, pry out the loose brick in the wall beside it with the Awl and take the Rubber Patch. In Sheriff Cole's Office, zoom into the steaming pipe by the closet. Wrap the Rubber Patch around the leak and fasten it with the Clamp. The steam clears and the closet scene opens.
- Each clue at the bottom names three objects, highlighted in yellow. Find them all to move to the next clue: 1) a wet magazine, an emergency kit and a heavy-duty strap; 2) rags, an oil can and a small screwdriver; 3) bandages, a spare holster and a closed metal box; 4) Cole's personal diary, his police badge and his service pistol. You receive a Lighter.
Hand Truck Boxes
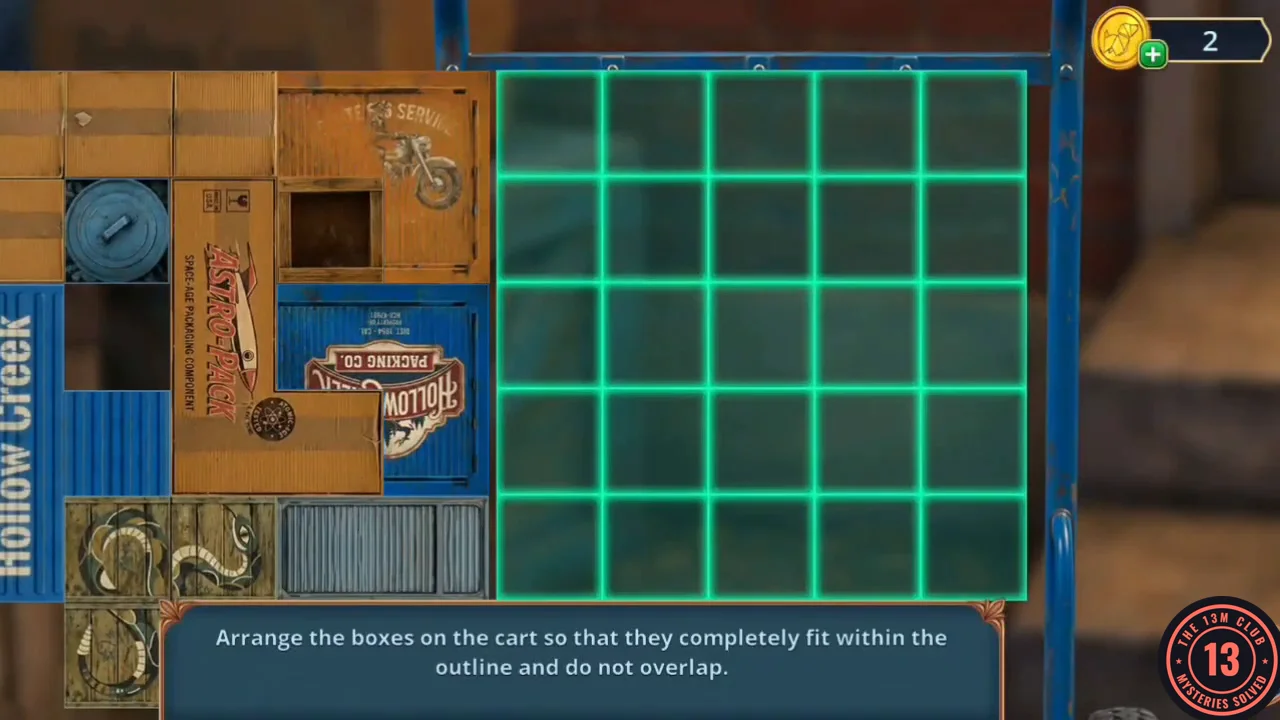
Arrange the boxes on the cart so they fit completely within the outline without overlapping.
- In the Backyard, zoom into the blue hand truck's loose wheel ("This wheel can still do some good. With the right tools"). Fit the Screw from the bridge into the axle. Then go to Sheriff Cole's Office and zoom into the desk corner with the candlestick. Melt the wax puddle with the Lighter and take the Gold Coin. Back at the hand truck, put the Gold Coin on the axle as a washer; Vivienne mounts the wheel.
- Drag the boxes onto the hand truck's grid and tap the rotate button to turn the selected box. One layout that fits has three plain cardboard boxes across the top left, with a fourth below the first; the motorbike box at the top right; the tall blue Hollow Creek crate in the second column; the open crate and the small round lid in the middle of the second row; the Astro-Pack box down the left; the Hollow Creek Packing Co. box on the right; the two snake crates in the lower middle; and the grey ribbed box at the bottom right. When everything fits, the crate on the hand truck opens; take the red Board.
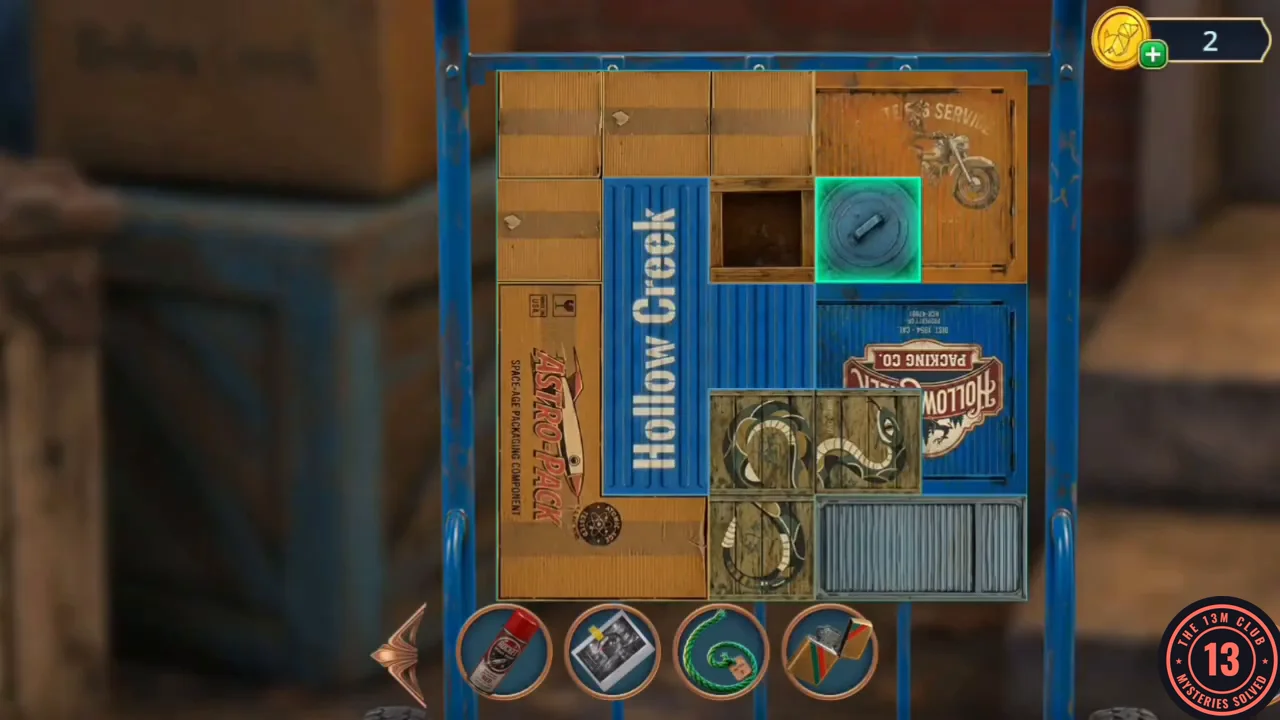
One box layout that fits the hand truck. - Tap Lucas in the Backyard and take the Ruler.
Old Case Files
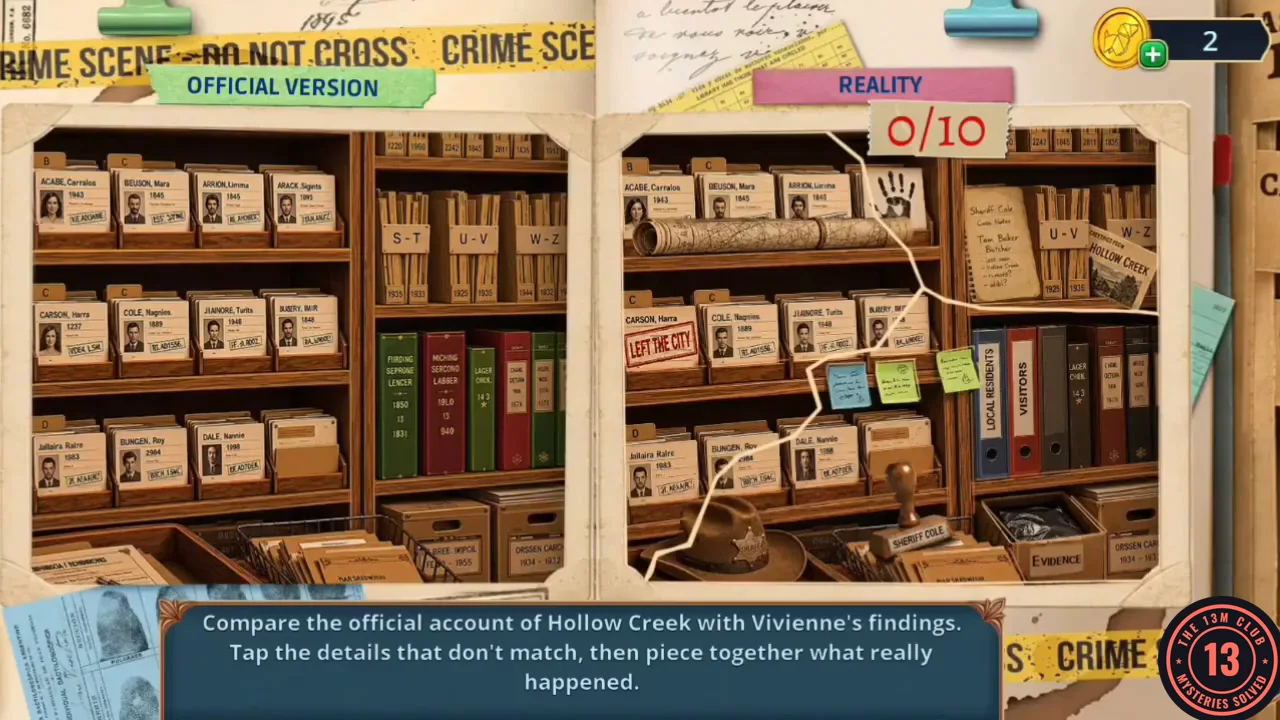
Find the 10 differences in the old missing-persons files.
- In the Darkroom, zoom into the glass cupboard. Slide the Ruler into the gap between the doors to lift the latch. Inside are bottles, a hex key set and a folder; tap the folder to start the comparison.
- Tap the 10 details in the Reality picture (right) that differ: the handprint and the rolled maps on the top shelf, Sheriff Cole's notebook, the stamped card at the top right, the "Left the city" stamp on the Carson card, the sticky notes, the LOCAL RESIDENTS binder, the hat on the bottom shelf, the SHERIFF COLE stamp and the EVIDENCE box. The result: the old missing-persons cases all ended the same way, in the same handwriting. Cole made sure people with no one to look for them could disappear.
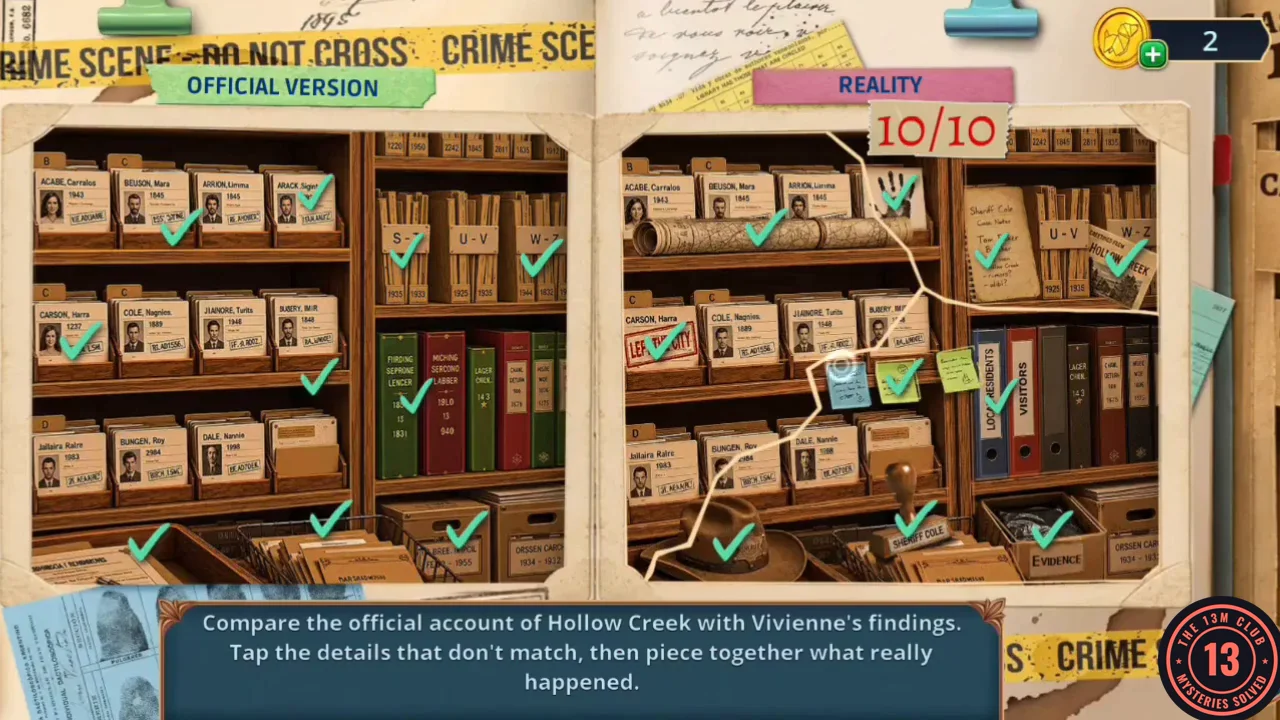
All 10 differences found on the case file shelves.
Projected Slides
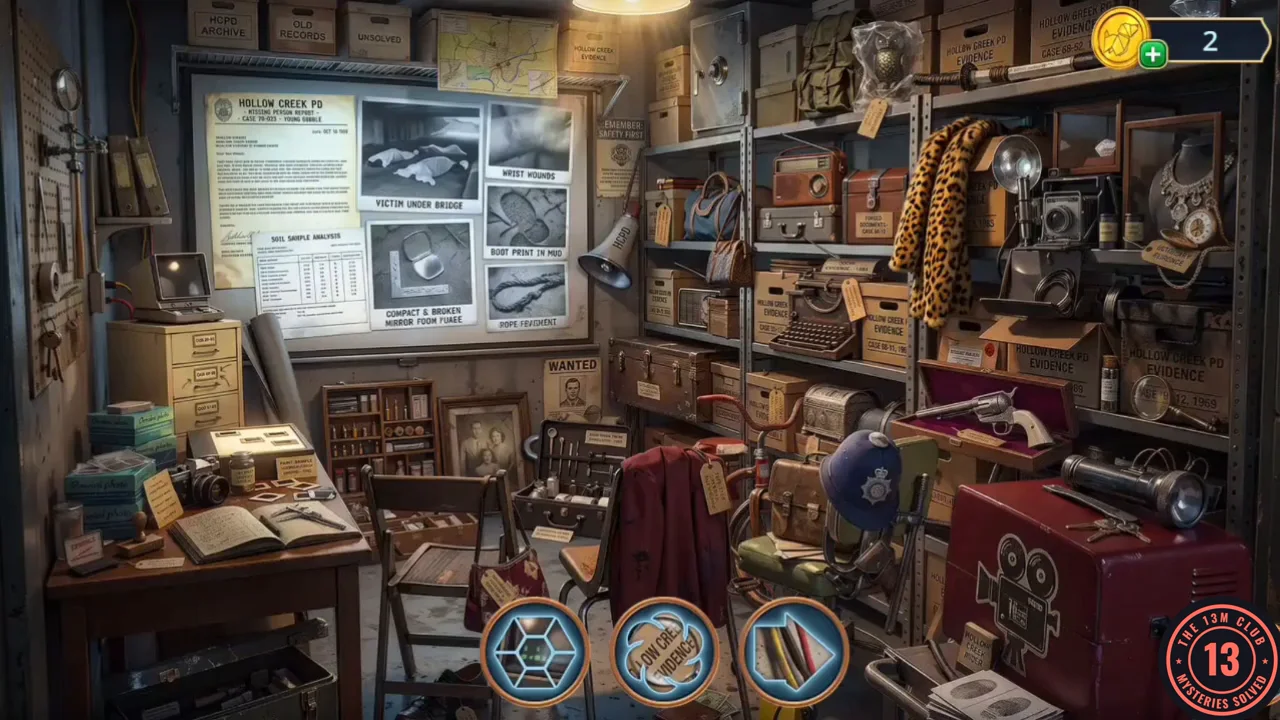
Find the objects shown by the icons in the projected slides.
- Take the Hex Key Set from the darkroom cupboard. Zoom into the vent shelf and unscrew the vent cover with the Hex Key Set. Take the MISSING PERSONS slide box: "slides from old case files. Someone must've hidden them here instead of putting them in the archive."
- In Evidence Storage, load the slides into the purple projector (still plugged in from earlier). The projected evidence scene opens. Three coloured object pictures at the bottom show what to find (examples seen: a hexagonal frame, a round "Hollow Creek Evidence" label, leopard-print fabric, a row of coloured books and a trophy); each found object is replaced by a new picture. When the list is empty you receive the Junction Box Key.
Slope Rocks
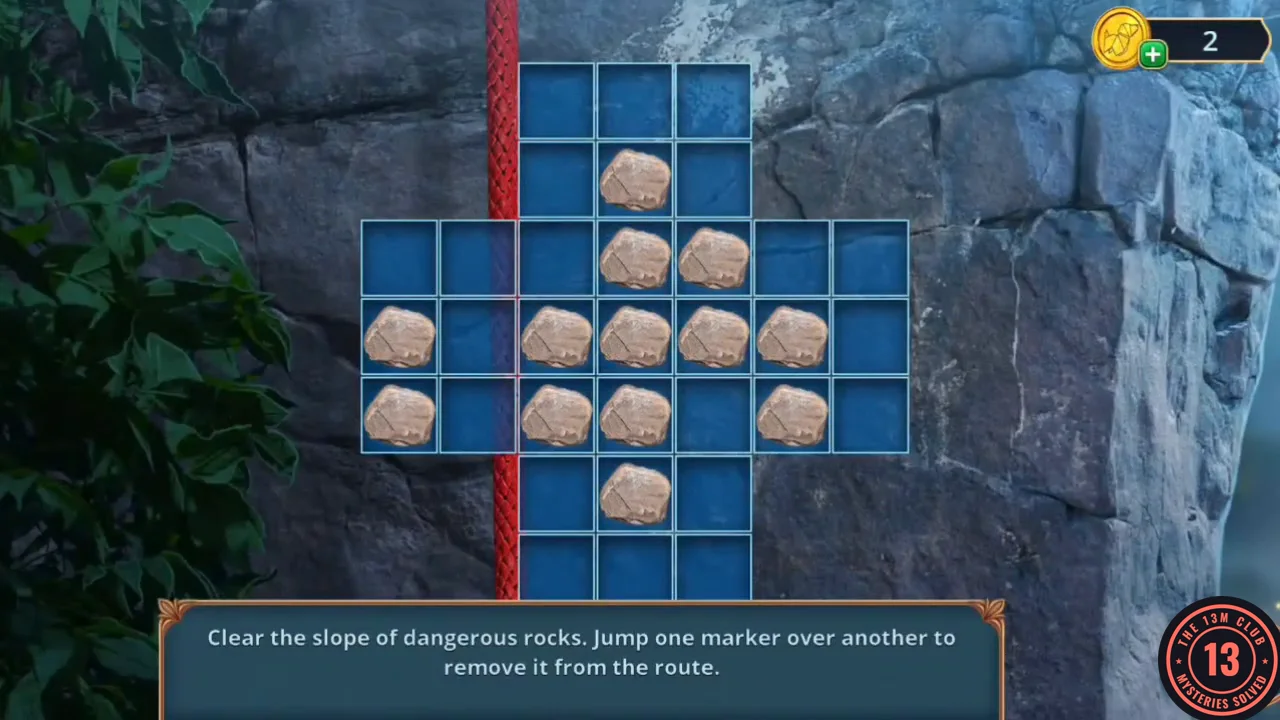
Clear the slope of dangerous rocks. Jump one marker over another to remove it.
- Go to Hollow Creek Bridge and zoom into the red junction box. Unlock it with the Junction Box Key and take the Cable (a red rope) and the Flute. In the inventory, open the Hook (a grappling hook from the Backyard hand truck) and tie the Cable to it. Zoom into the left guard rail and hook the Grappling Hook with Cable over it; the rope drops down the slope.
- This is the same cross-shaped board with the same 13 rocks as the fire-hydrant puzzle in Chapter 2, and the same solution works. Number rows and columns 1–7 across the whole cross: 1) row 3 col 4 up to row 1 col 4; 2) row 5 col 6 up to row 3 col 6; 3) row 5 col 1 up to row 3 col 1; 4) row 5 col 3 up to row 3 col 3; 5) row 4 col 5 left to row 4 col 3; 6) row 3 col 6 left to row 3 col 4; 7) row 6 col 4 up to row 4 col 4; 8) row 4 col 4 up to row 2 col 4; 9) row 1 col 4 down to row 3 col 4; 10) row 3 col 4 left to row 3 col 2; 11) row 3 col 1 right to row 3 col 3; 12) row 3 col 3 down to row 5 col 3. One rock remains, and Vivienne climbs down under the bridge.
Tangled Rope
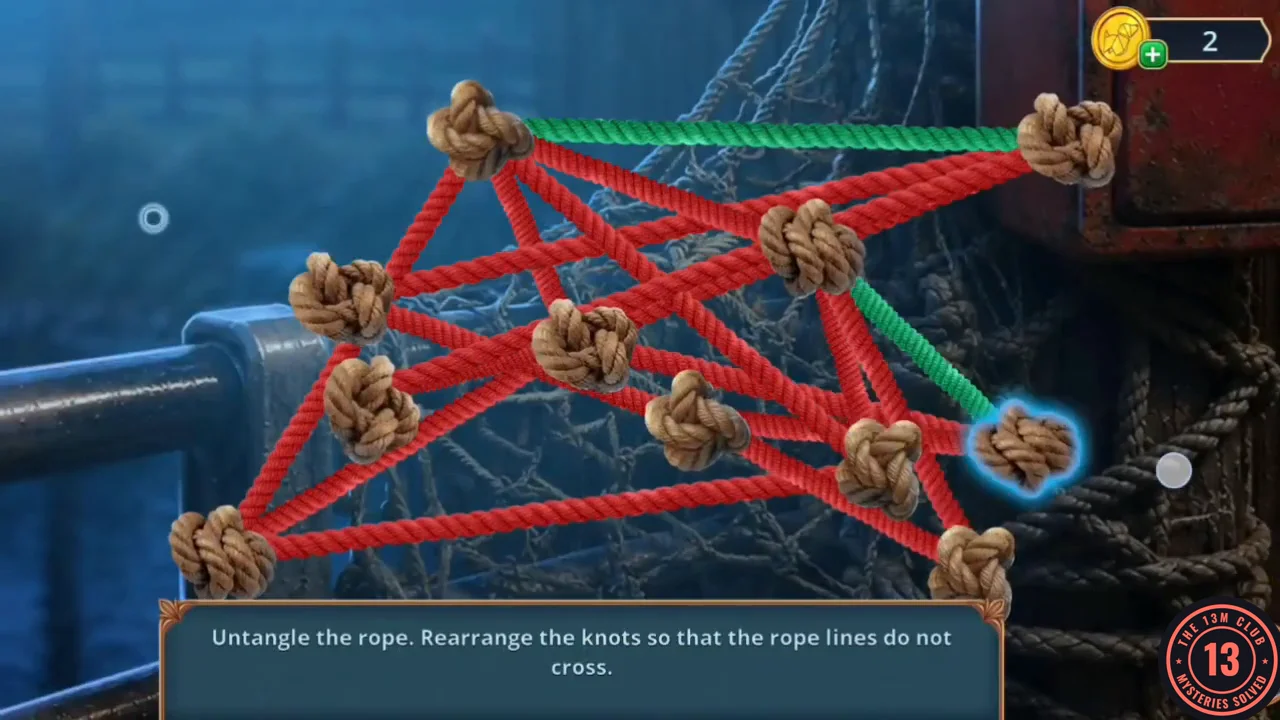
Rearrange the knots so the rope lines do not cross.
- Under the bridge, zoom into the old bicycle. Take Eleanor's Scarf from the handlebar and the Heeled Boot from the spokes; the bag has a bicycle-shaped lock ("There must be a key for this somewhere"). Close it and tap the Reporter's Token on the rocks to the right of the stream (104/140). Zoom into the snake coiled by the green board and play the Flute: the snake slithers away. Lift the board and take the Hand Drill and the Reporter's Token (106/140). Zoom into the rusty bucket by the post ("This ground's packed hard"). Dig with the Hand Drill and take the Walking Cane and the Metal Knot-Tying Sign. Take the Reporter's Token at the lower right of the bucket close-up (108/140).
- Back on Hollow Creek Bridge, zoom into the open junction box with the fishing net hanging beside it. Hang the Metal Knot-Tying Sign by the net to start the puzzle. Drag the knots until no two rope lines cross; each line turns green when it is clear. In one working solution the knots form an outer frame (top left, top right, bottom right, bottom middle, far left and upper left) with the remaining knots inside, so that every line runs without crossing.
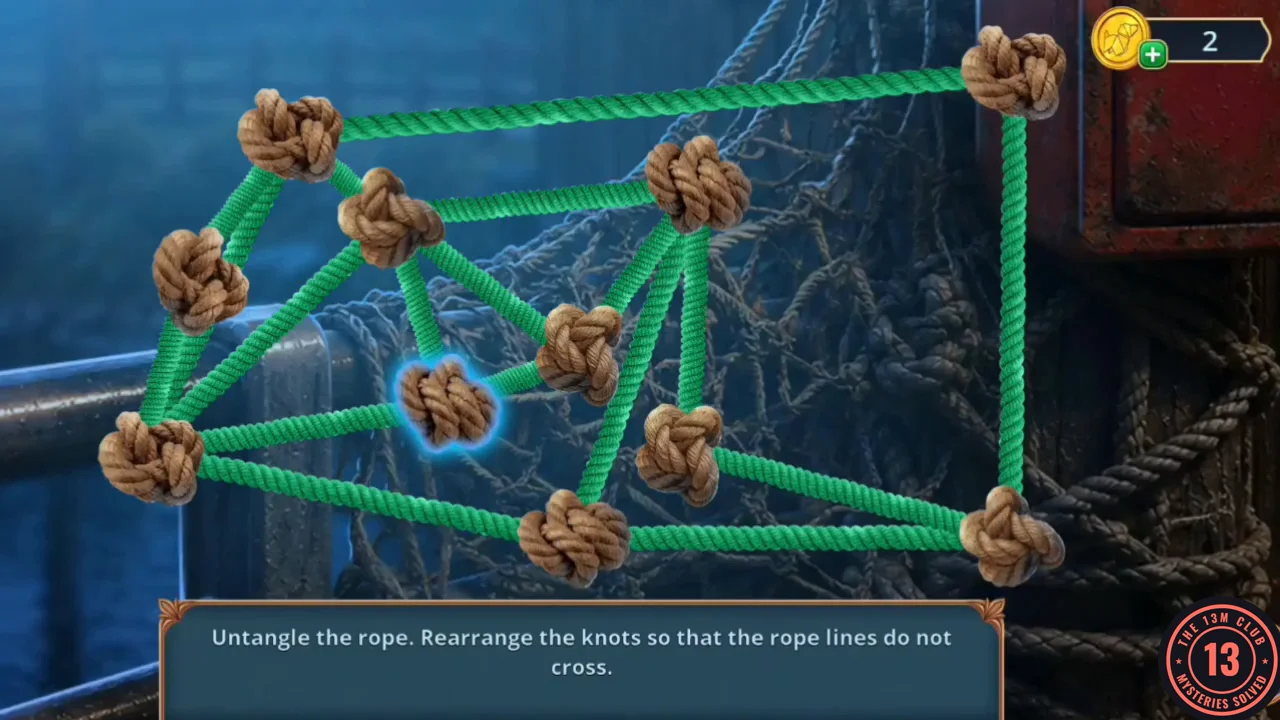
Example untangled rope. Any layout without crossings works. - Take the Knitting Needle from the untangled net. Zoom into the loose deck board ("The walking stick is too wide to get under the small board"). Pry it up with the Knitting Needle and take Sheriff Cole's Signet Ring from underneath.
Cole's Star Box
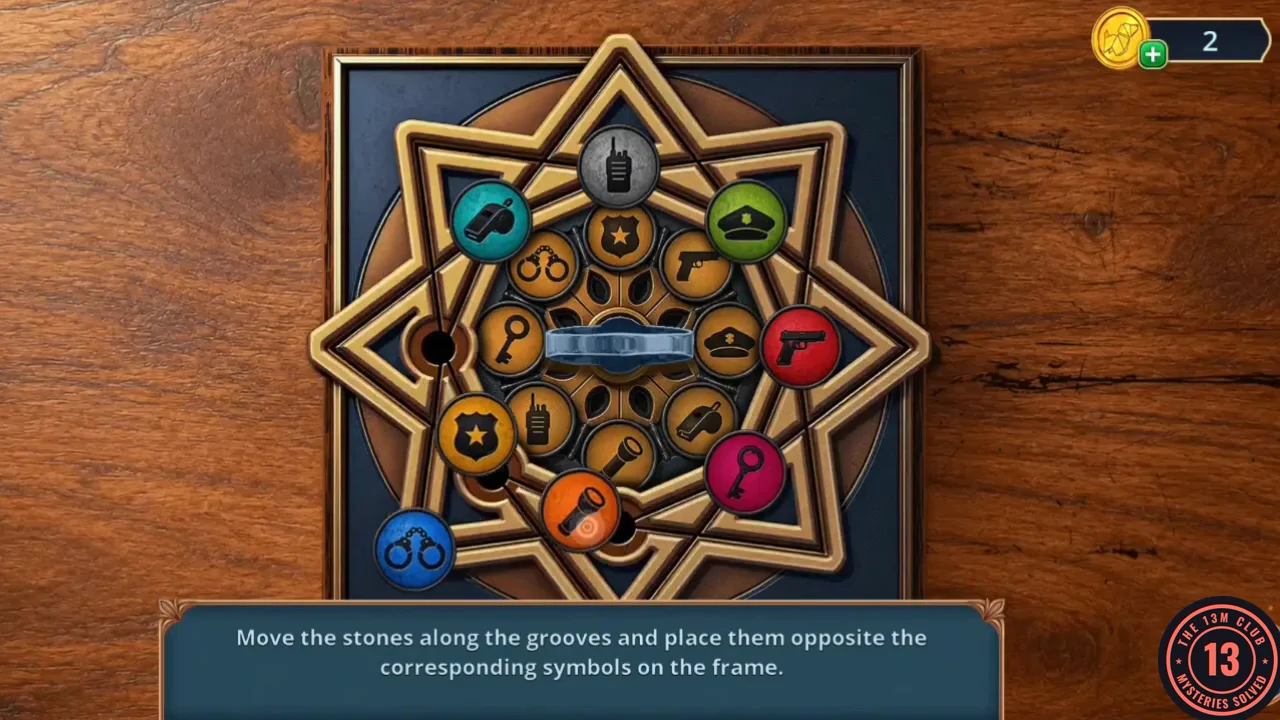
Move the stones along the grooves and place them opposite the matching symbols on the frame.
- In Sheriff Cole's Office, zoom into the star-patterned box beside the bust and press Sheriff Cole's Signet Ring into the round seal in its centre. Eight coloured stones sit in grooves around the star, and the inner frame shows eight symbols. Tap a stone to slide it along its groove until each stone sits opposite its matching symbol; a correct stone glows green. Solved arrangement, clockwise from the top: yellow badge, red pistol, green police cap, teal whistle, orange flashlight, grey walkie-talkie, pink key, blue handcuffs. The box opens; take the Shell with Gunpowder.
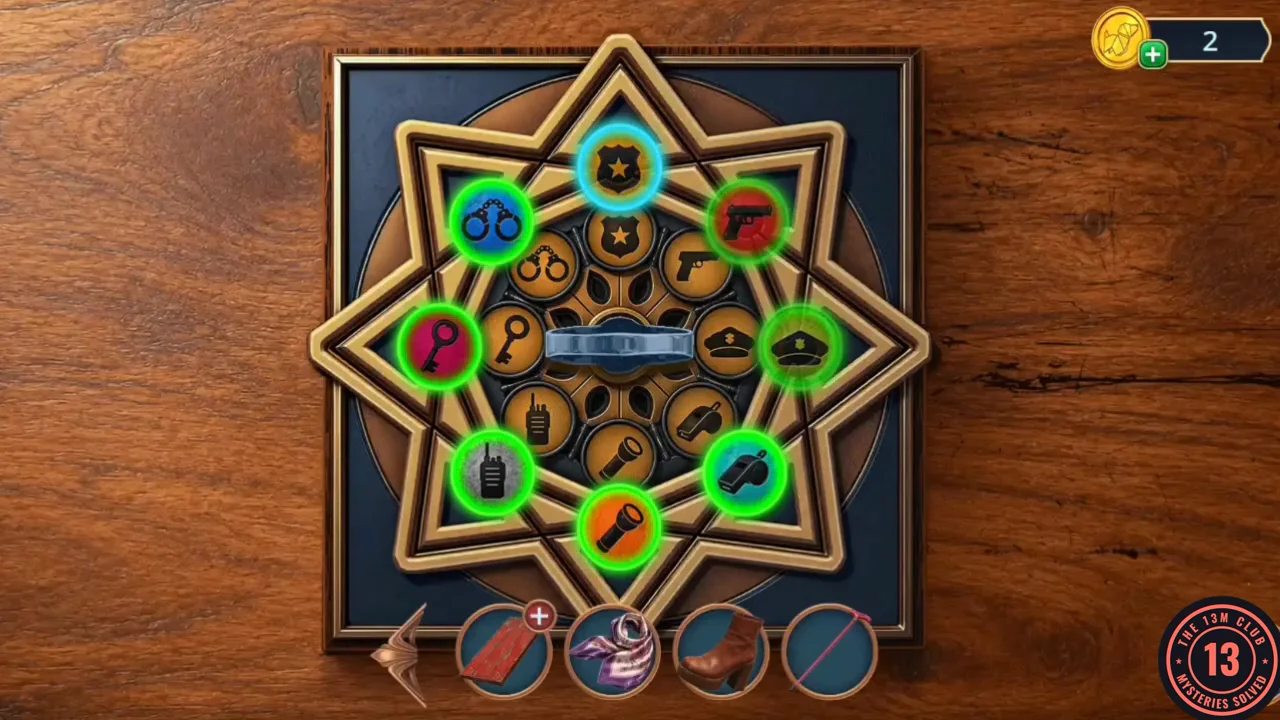
Solved star box: each stone sits opposite its matching symbol.