Trap the Faun
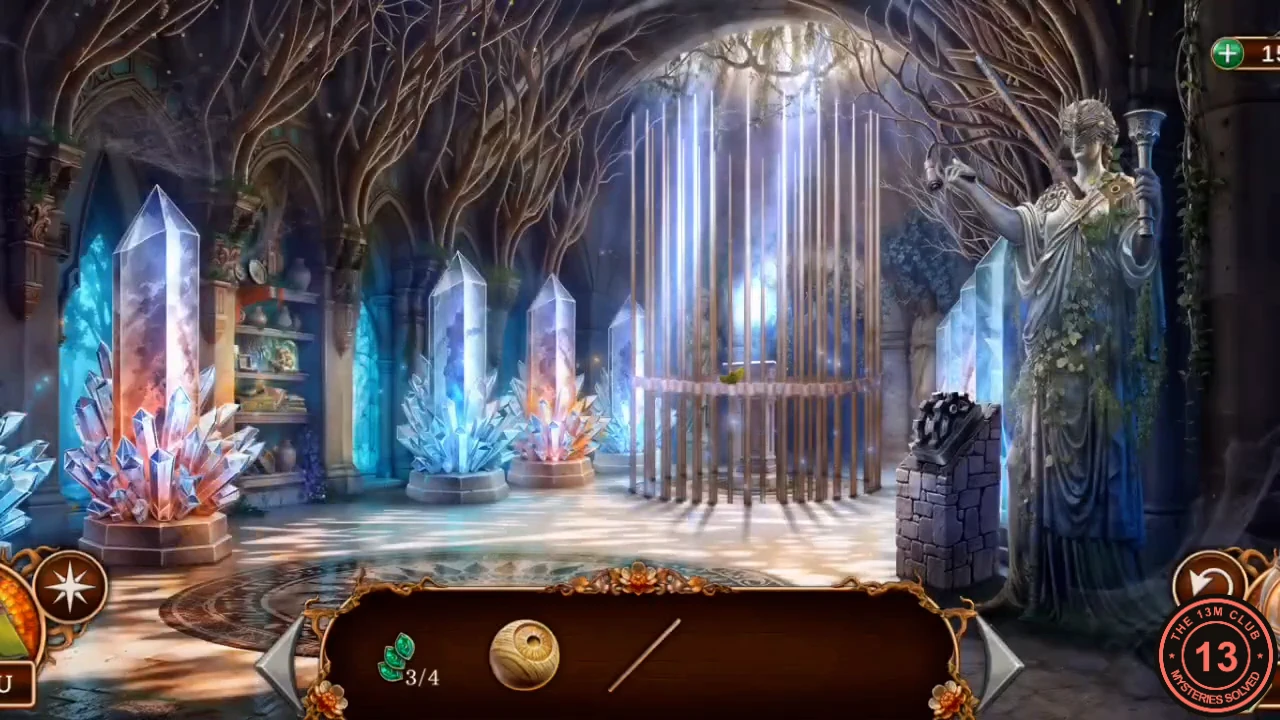
Your soul waits in a cage at the center of the labyrinth. To reach it you must first set the trap the Faun built for others.
- Go through the gate to the crystal room. Your soul burns behind bars, and the detective notes that you must find a way to it. Zoom into the shelf on the left. Collect the morphing object and take the blue crystal. The hunting horn here needs decorating later.
- Zoom into the cage and take the Winged amulet at its base. The trap is missing parts and the mechanism won't work without them.
- Zoom into the statue on the right. Read the note in her dress and take the Rune rod from her hand. She is missing parts too.
- Go back to the corridor mirror's table and zoom in. Use the Winged amulet and the blue crystal on the round niche. It opens: take the Amulet of sleep and the Golden circlet.
- In the crystal room, zoom into the shelf and use the Golden circlet on the red box. Take the Amulet of darkness.
- Zoom into the statue and use the Amulet of darkness and the Amulet of sleep on her. Take the Cage lever.
- Zoom into the cage and use both Rune rods on its bars. Back in the room, use the Cage lever on the black stone post on the right. The bars lift.
- Zoom into the pedestal and touch your soul. The Faun arrives. When he stands by the pedestal, press the lever on the stone post to drop the cage on him.
- Take Faun's grimoire from the floor and open it in the inventory. Take the Feather and the Skull emblem from its cover, read the pages and take the Portal key from inside.
Skull Panel: Light Them All
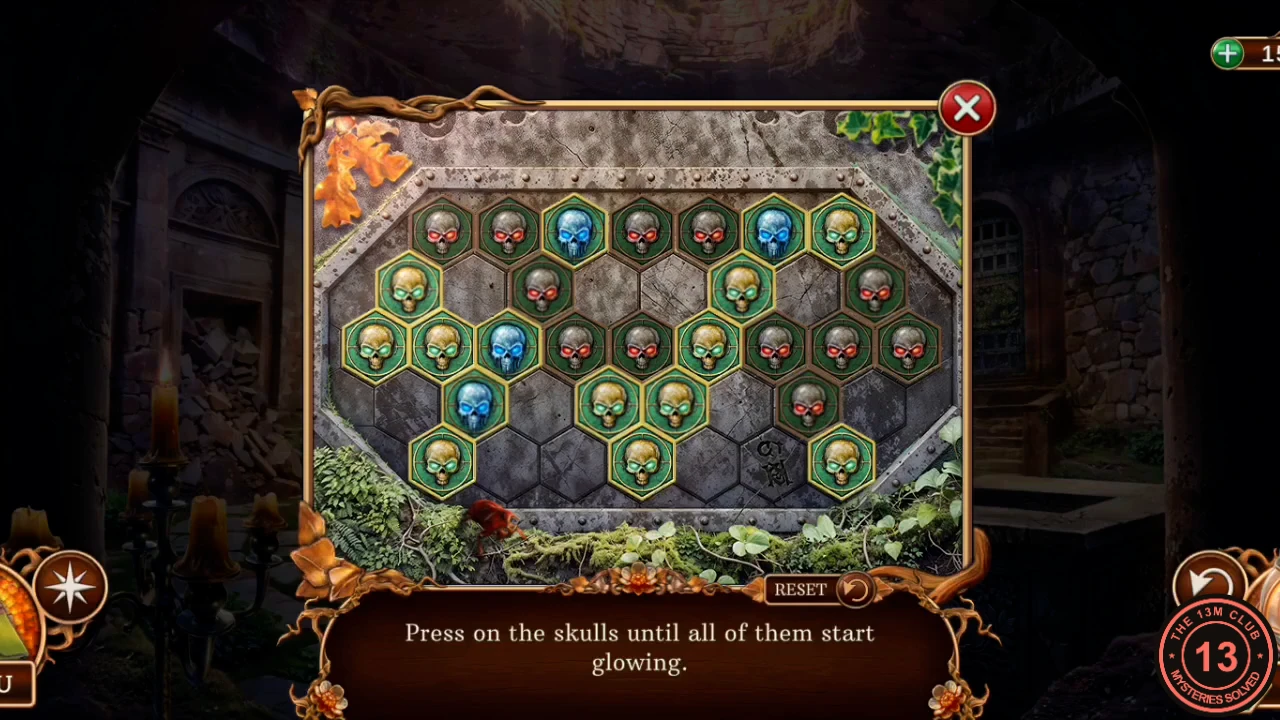
Press a skull to flip it and every skull touching it. Gray skulls with red eyes are off. Yellow and blue skulls are both on, because the color is fixed for each tile. Pressing a skull twice cancels it. If your panel looks different from the one pictured, work across from left to right, using each press to clear the row before it.
- In the courtyard, zoom into the hexagonal skull panel and use the Skull emblem on it. From the starting layout pictured under this section's title, press these five skulls: second in the top row; fourth in the top row; second from the left in the fourth row; middle of the bottom row; second from the right in the third row.CODETop row 2, top row 4, row 4 number 2, bottom row middle, row 3 second from right
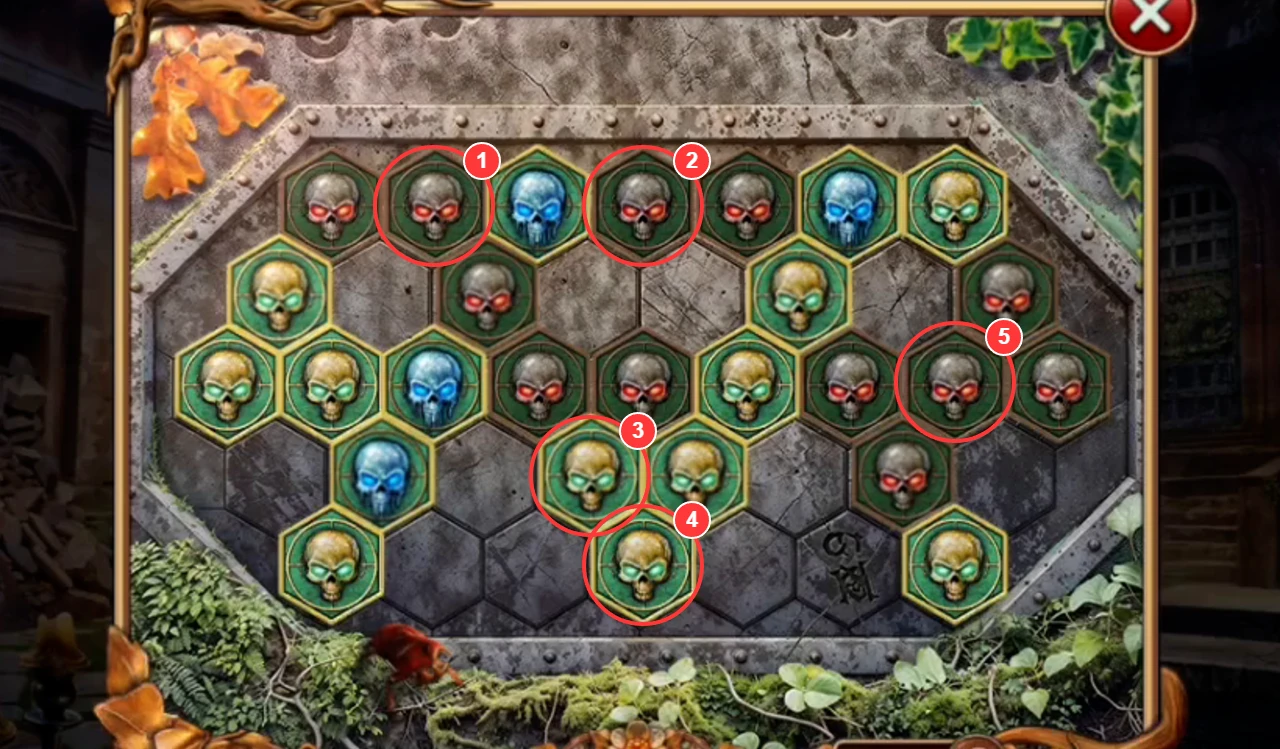
The five skulls to press on the starting layout, numbered in the order given in step 1.
The Keeper of Knowledge
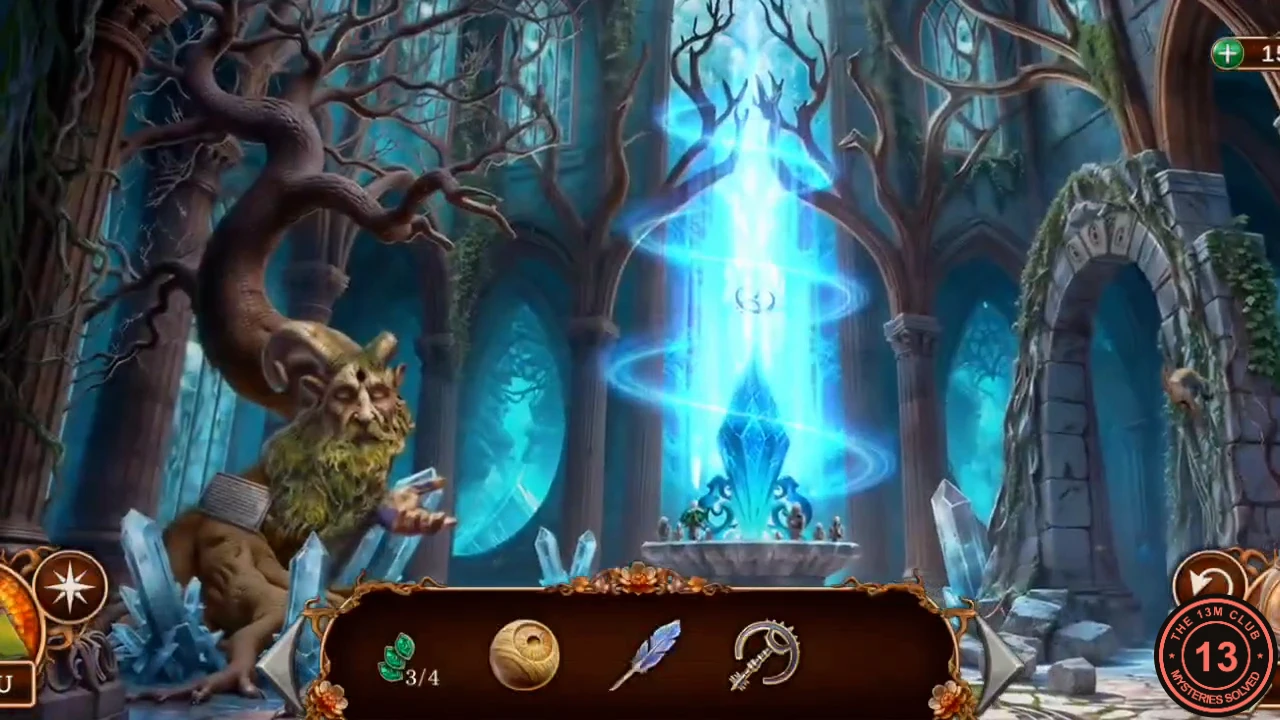
All the spirits that feed the Faun are held here. The chronicler Minastor stands broken at the side, and his missing parts are what you've been carrying.
- Enter the prison. You decide to free the spirits and buy time to work out how to activate the portal. Read Minastor's plaque: his third eye was torn out, his horn broken and his hands can never touch ink.
- Zoom into the font in the center. Take Glimmering emerald (4/4) from the basin rim. Three little creatures hold souls and one is missing. Use the Feather on the inkwell held by the figure on the right and take the Writing set.
- Zoom into the arch on the right. Collect the morphing flower and take the Wooden horn.
- Zoom into Minastor and give him the Wooden horn, the Writing set and the Third eye. His head opens: take the Marionette head.
- Go to the crystal room, zoom into the shelf and use the Marionette head on the creature figure. Take the Petrified spirit that comes loose.
- Return to the prison, zoom into the font and put the Petrified spirit into its empty central slot. The puzzle starts.
Soul Font: Rearrange the Figurines
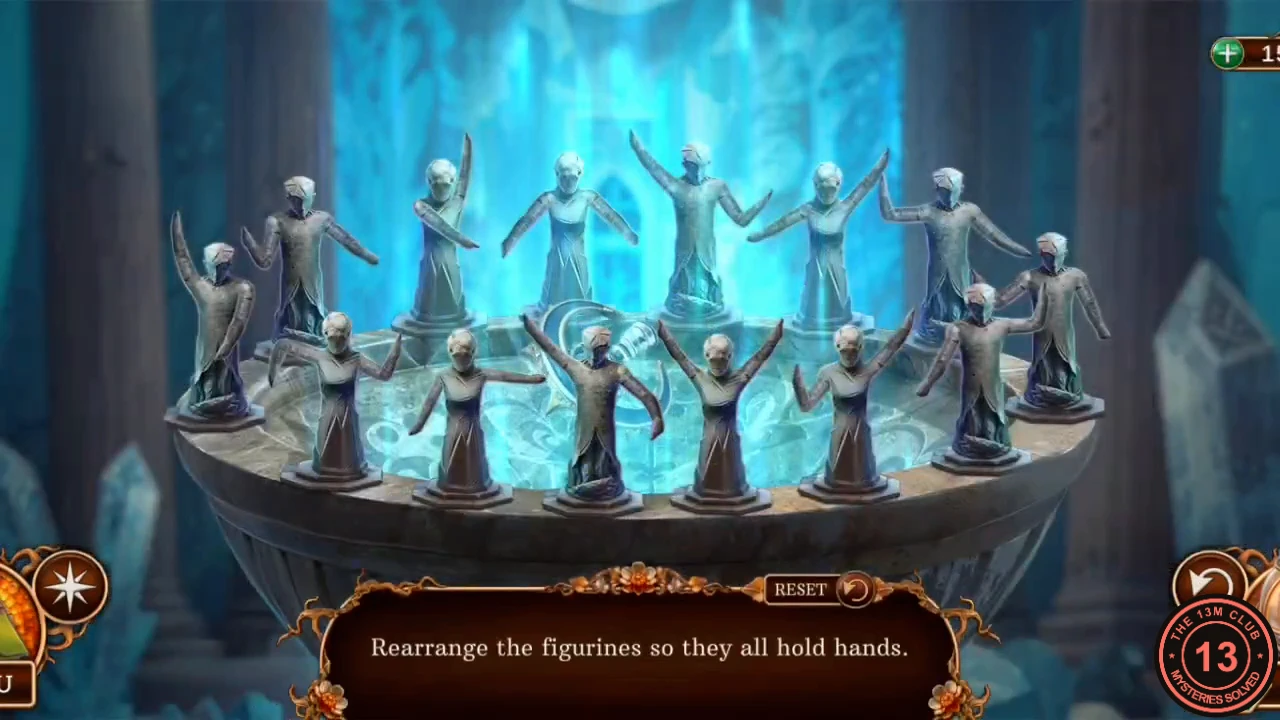
Fourteen figurines stand in a ring. Each has one hand raised and one low, both raised or both low. Pick a figurine up and drop it on another to swap them. Two neighbors link only when their facing hands are at the same height, and a linked pair glows. The start layout may not be fixed, so use the method below rather than a move list.
- Work round the ring from any pair that already glows. At each next place, look for a figurine whose near hand matches the height of the hand already waiting there, and check that its far hand can still match the next neighbor. Save the both-raised and both-low figurines for places where both neighbors match them. A swap changes the links on both sides of both figurines, so recheck them. Keep any pair already glowing unless a swap really needs it, and continue until the whole ring glows.
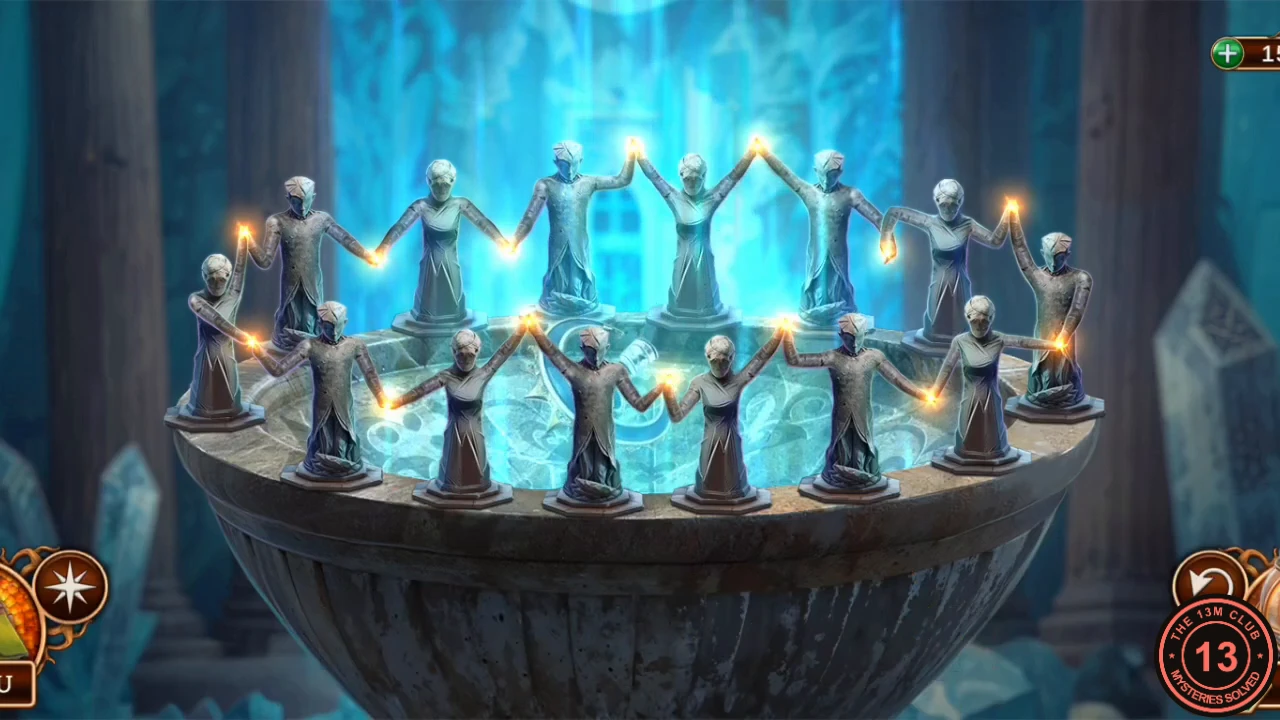
The finished ring: every hand is linked and the figurines glow.
Portal Keys: Open the Way Out
The souls are free. All that remains is to gather the other two keys and open the arch.
- Zoom into the font and take the Portal key. The detective notes that the Faun can no longer torment these souls and it is time to get out.
- Go to the corridor and zoom into the fairy statue. Put all four Glimmering emeralds in her eyes. The statue shatters: take the Portal key from the wreckage.
- Return to the prison, zoom into the arch on the right and use all three Portal keys on it. The portal opens.
- Watch the scene: you go through as the Faun bursts free, screaming that you will not leave and that your soul belongs to him.
- You pass through the portal and land beside a huge tree. The detective realizes this is still the Upside Down and that another portal is open ahead. New task: get to the portal.