Find the Three Missing Runes
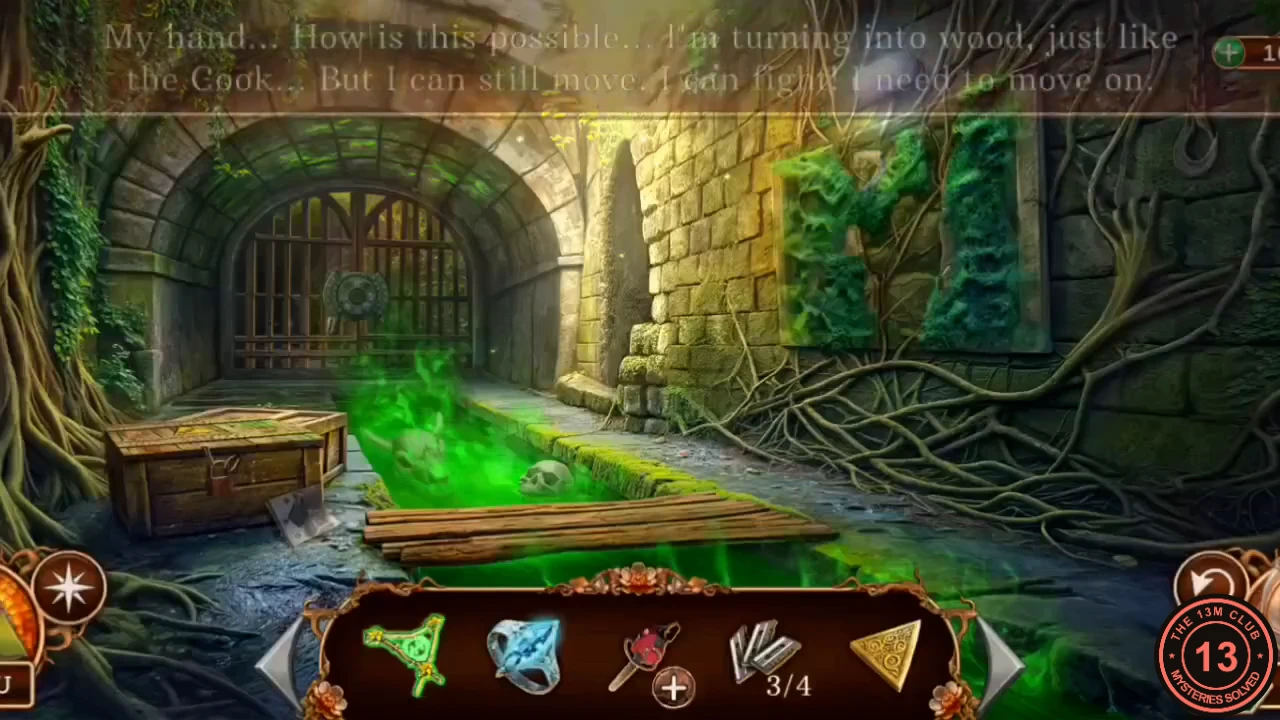
The Cook's sketch says a rune is guarded by a stone beast, another is among his awards and the last is in a vault that his tapes open.
- In the sewer channel, zoom into the chest on the left. Read the note: three runes are sketched alongside LYNX on the fridge, the gargoyle and the medal box. The lock looks flimsy, and something strong and heavy will break it later. Collect the morphing object in the corner of this view.
- Zoom into the round mechanism on the iron grate. Runes have been removed from it, so you need to find them. Take the Unplayed audiotape from the ledge.
- Zoom into the ivy on the wall just left of the iron grate. This view shows the round door at the end of a passage: pick up the Rust Remover lying at the bottom left. Then zoom into the moss on the wall on the right. Take the Dagger hilt from the roots and collect the morphing object in the corner. The wall behind needs cleaning.
- Teleport to the swamp and zoom into the sunken roof. Spray the Rust Remover on the rusty Harpoon, then take the Harpoon.
- In the diner, use the Harpoon on the gargoyle's chest slit. Take Missing runes (1/3) and the Golden beetle.
- On the street, use the Golden beetle on the medal box in the carriage. It opens: take Missing runes (2/3).
- Play the tape from the dungeon on the recorder. The Cook confirms where the runes are. Take Audiotape (4/4).
- In the kitchen, place the four Audiotapes on the stand inside the fridge. A letter lock appears. Enter LYNX.CODELYNX
- Take Missing runes (3/3) and the Unfinished antidote.
- Back in the dungeon, use the Missing runes on the grate mechanism.
Grate: Combine the Rune Tiles
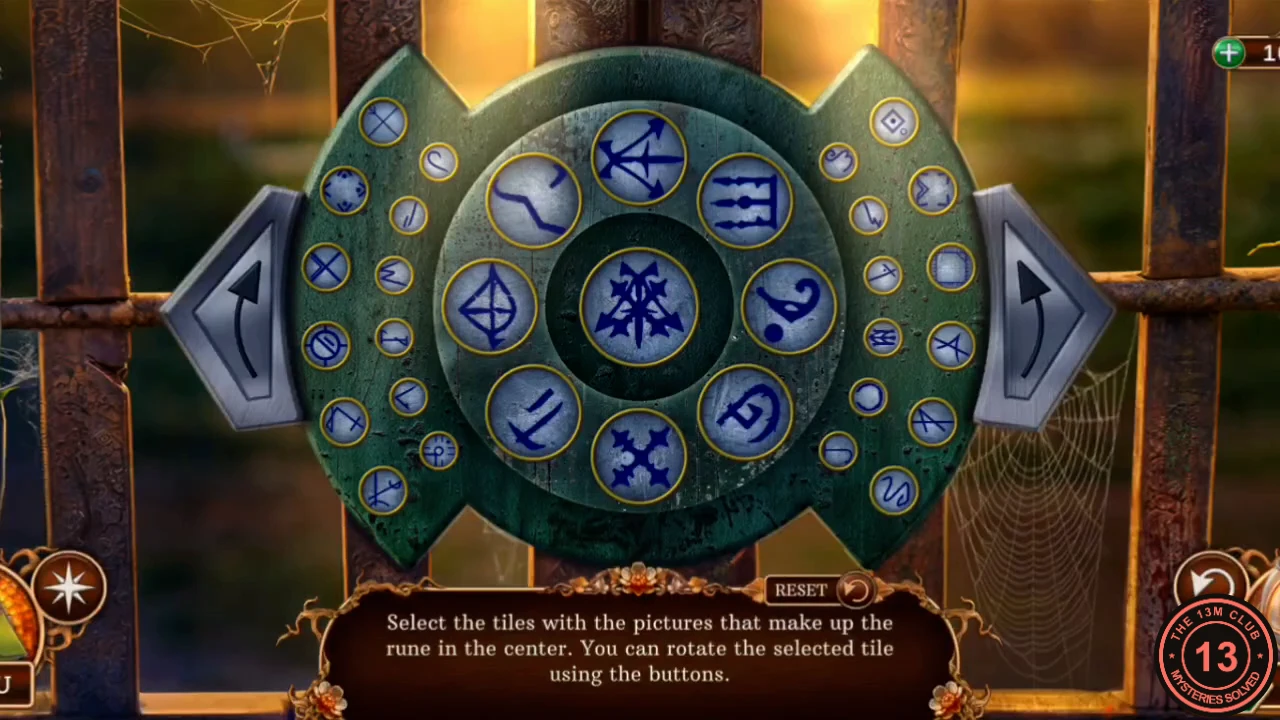
The rule: select tiles with pictures that make up the rune in the center, and rotate them with the buttons. Expect several minutes over roughly a dozen rounds, so this section gives the method rather than a move list.
- Look at the center rune, then pick two tiles in the ring whose lines together make that rune. Rotate each selected tile with the arrows until its lines fall in the right place. The pair locks in and a new center rune appears. Repeat until the ring is clear.
The Cook's Room
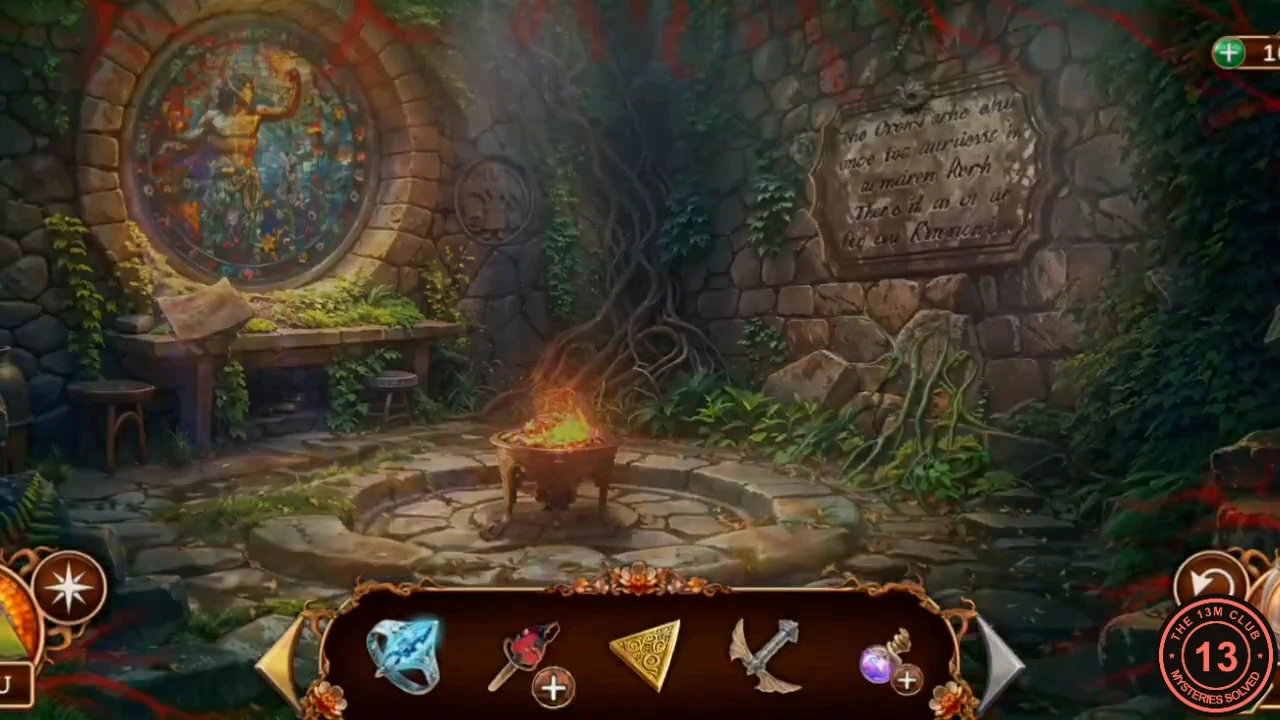
Behind the grate lies the walled room. Several objects here trade off against each other.
- Enter the room. Read the Cook's scroll showing a book with five slots. Use the King's ring on the brazier and take the Flame panel. Read the plaque about the Cook being walled up.
- Use the Charged Talisman of Wrongside on the roots on the wall and take the Spiral key.
- Use the Spiral key at the plaque. The brick wall is exposed, and you can take a Loose brick. The Cook's spirit calls from behind it and mentions dynamite nearby. New task: find a way to release the spirit.
- Use the Loose brick on the padlock of the chest in the sewer channel. Take the Dynamite and the Stiff brush.
- Use the Stiff brush on the moss wall to reveal a relief. Put the Flame panel in its slot.
- Take the Old scroll from the ledge of the round door. Use it on the stained glass to start the mosaic puzzle.
Stained Glass: Spot the Differences

The rule: select all the pieces of the mosaic that are different from the image on the scroll. Selected pieces get a white outline.
- Compare the window with the scroll and select the pieces that differ: the flame above the raised fist, the crown, the purple collar, the two small flowers and pale piece at the top right, the red flower with the lower arm at the left, the belt, the half-sun above the bee, the orange star flower, the rabbit, the flowering vine, the bee and the green leaf at the bottom right.
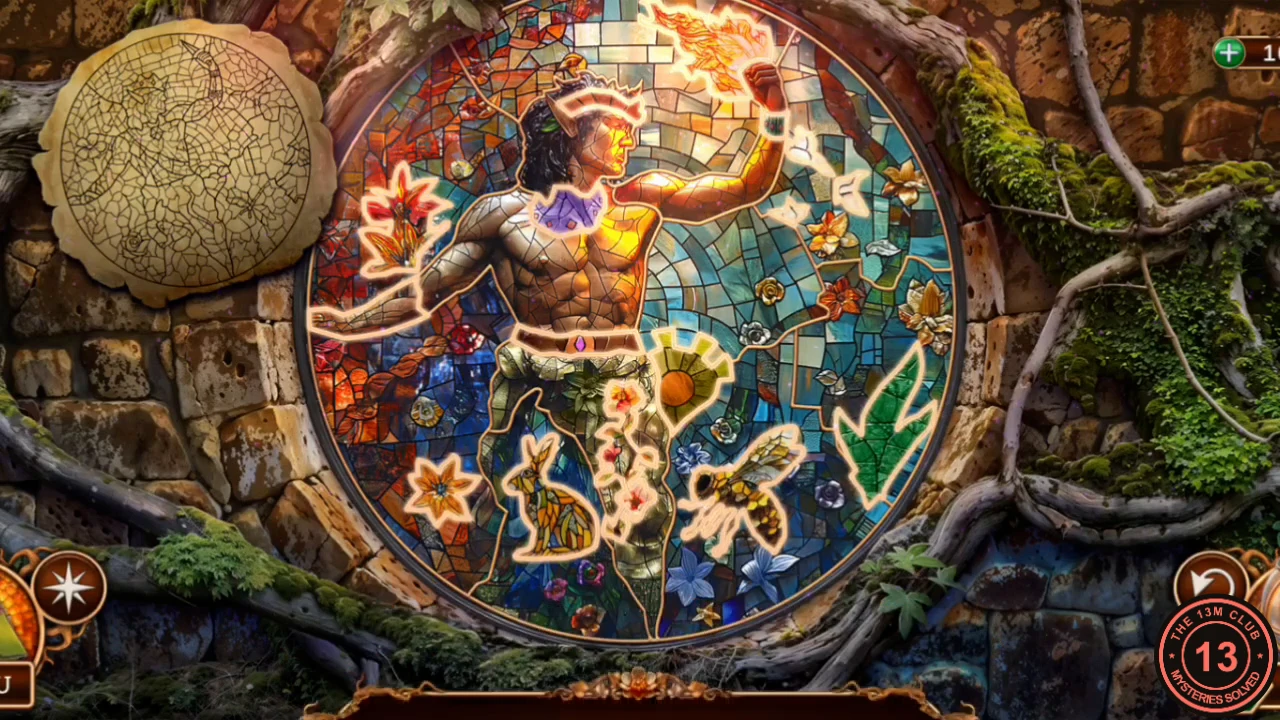
All the differing pieces selected, shown with white outlines. - Take the Beacon and read the note.
Free the Cook and Forge the Fey Dagger
With a lit beacon you can blow up the wall. The Cook's spirit will then show how to make the antidote's last ingredient reachable.
- In the kitchen, use the Beacon on the stove's burner to get a Lit beacon.
- Back at the brick wall, place the Dynamite and light it with the Lit beacon.
- Talk to the Cook's spirit. It can forge a fairy blade if you bring the shards and the hilt. New task: find the dagger fragments.
- Go to the shop in town. Take the Broken blade from the dagger cushion of the display case.
- Give the Dagger hilt and Broken blade to the Cook's spirit. It sacrifices itself to make the Fey dagger. New task: complete the antidote.
- On the diner street, use the Fey dagger on the face in the tree root and take the Black root.
- Open the Unfinished antidote in the inventory and add the Black root. Take the Antidote and drink it.
- The Faun returns. It tells a rhyme about two children lost in the forest, led into the Upside Down, and wants you to save them. New task: find the lost children.
Through the Round Door
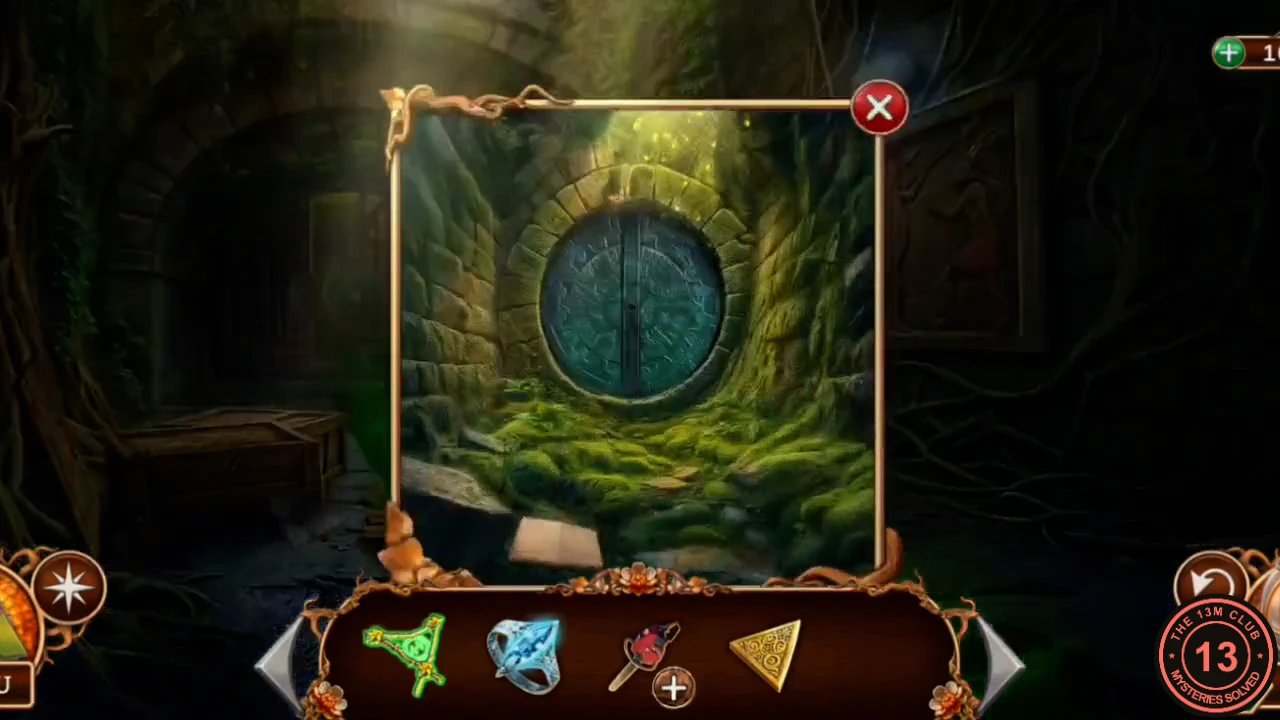
The explosion opened the way to a valve. Beyond the round door is a cave with a rift that leads up to the surface.
- In the dungeon, zoom into the round door: it needs a valve. Go through the blown-open wall, take the Valve from the rocks and look at the unusual chest beside them. It stays locked for now.
- Use the Valve on the round door and go through into the cave. The detective notes that the way out is up the slope and through the rift.
- Zoom into the disc in the cave wall and use the Triangular amulet on it. A compartment slides out: take the Lantern.
- Zoom into the iron grate in the cave and take the Safety rope from it. The grate itself is firmly locked, so you will need its key later.
- Zoom into the well on the right. Take the first Climbing wedge and the Rubber band, then collect the morphing object in the water. Note that this water is clean.
- Teleport to the swamp and zoom into the tree hollow. Read the note, then use the Lantern to light up the hollow and take the second Climbing wedge.
- Back in the cave, use the Climbing wedges and the Safety rope on the slope to start the climb.
Cave Slope: Climb to the Rift
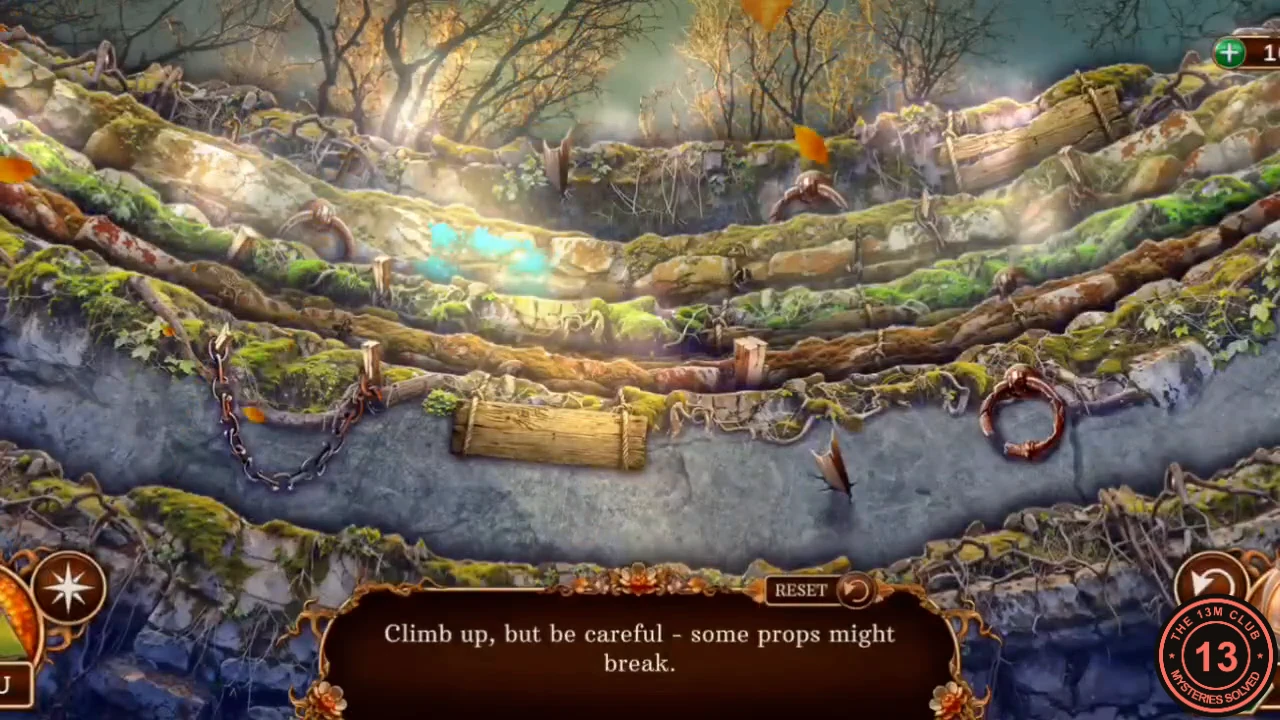
The rule: climb up, but be careful because some props might break. There are nine ledges and you tap one prop on each. The view moves up each time a prop holds. This order worked with no prop breaking in the gameplay checked for this guide.
- Tap these props in order, waiting for the view to settle after each one. 1. Bottom gray ledge: the plank in the middle. 2. Next gray ledge, with yellow paint on it: the stake to the right of the paint. 3. Red ledge: the ring, to the left of the yellow paint. 4. Red-brown ledge: the upright stake between the ring and the plank. 5. Gray-green ledge: the looped chain in the middle, to the left of the ring. 6. Mossy yellow ledge: the purple paint patch itself, to the right of the plank. 7. Lavender ledge: the chain at the far left. 8. Mossy ledge with turquoise paint: the ring on the left. 9. Top ledge: the chain at the upper left. You come out in the forest. If a prop gives way anyway, use Reset. The Skip button is also there if you get stuck.CODEPlank, stake, ring, stake, chain, purple patch, left chain, left ring, upper-left chain
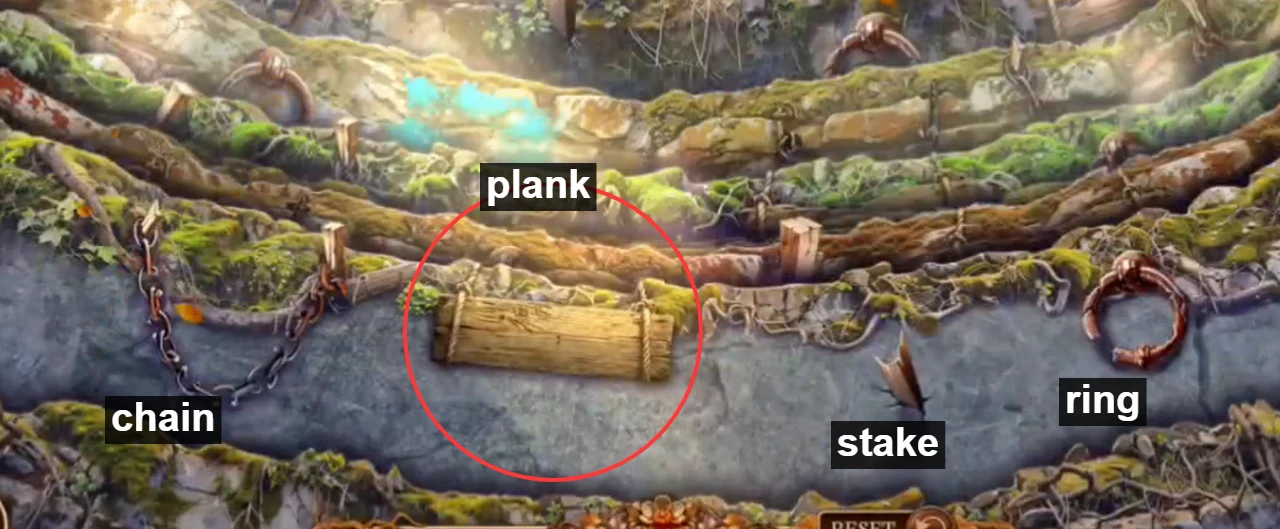
The bottom ledge, showing the four kinds of prop. Move 1 is the circled plank. 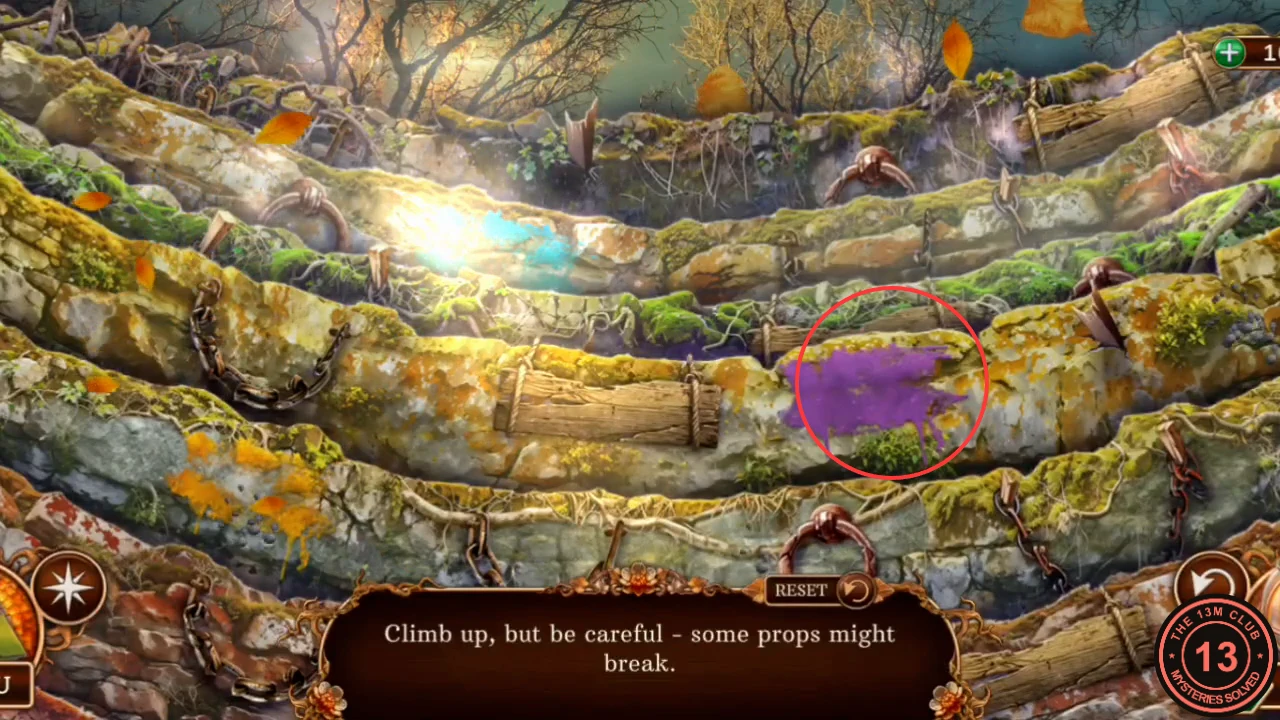
Move 6 is easy to miss: the prop is the purple paint patch itself, circled here at the moment it is tapped.