Entrance: Collect the Column Discs
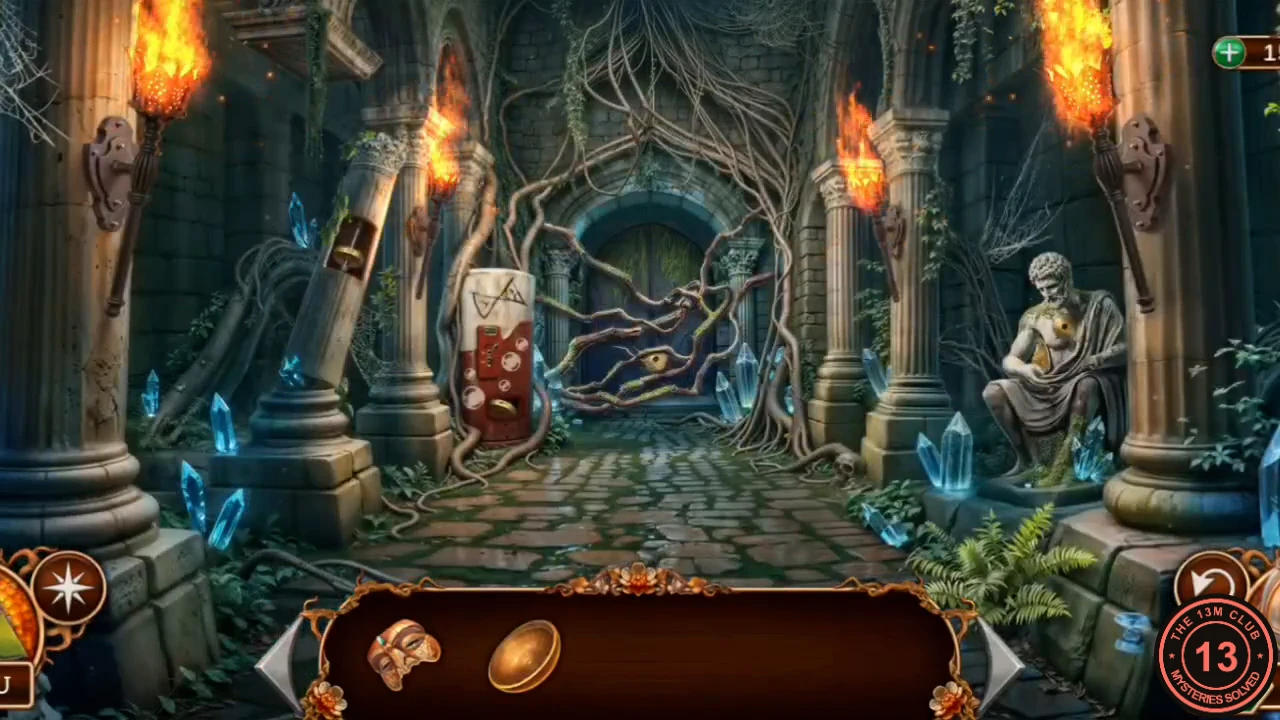
The labyrinth gate is sealed. A broken column beside it needs three discs, and the door behind the vines holds the clue you will need.
- Look at the broken column on the left: its mechanism is missing discs. Pick up the Torch and Column discs (1/3) from this scene.
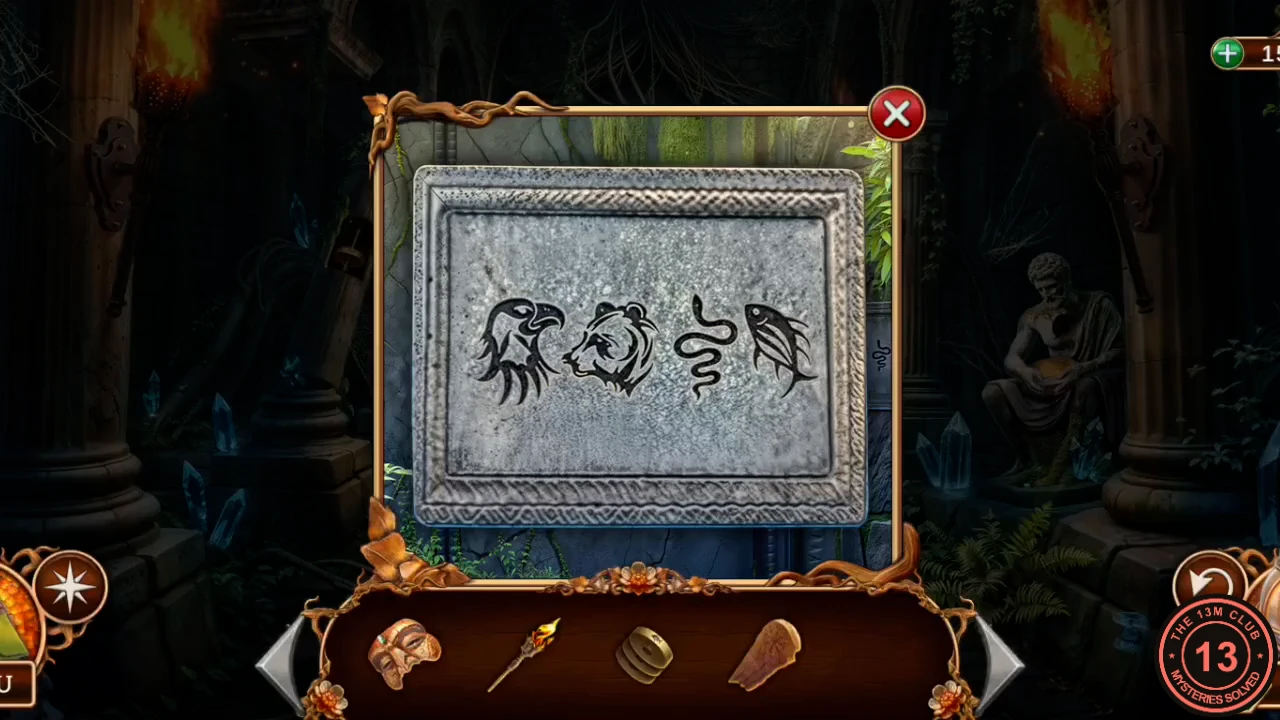
- Zoom into the vine-covered door. Take Column discs (2/3) from the lower left and read the small plate on the right. Its symbols run eagle, bear, snake, fish from left to right. The vines hide part of the statue here, and the detective notes that you need something to set them on fire.
- Light the Torch at the burning wall sconce on the right of the door, then use it on the vines. They burn away. The door behind them is heavy and needs a key. Take the Stone hand that falls clear.
- Zoom into the seated statue on the right. Take the Bronze wing. Use the Stone hand and then the Ritual bowl on it, which gives you Column discs (3/3). A morphing object appears in the foliage here.
Column: Set the Four Animals
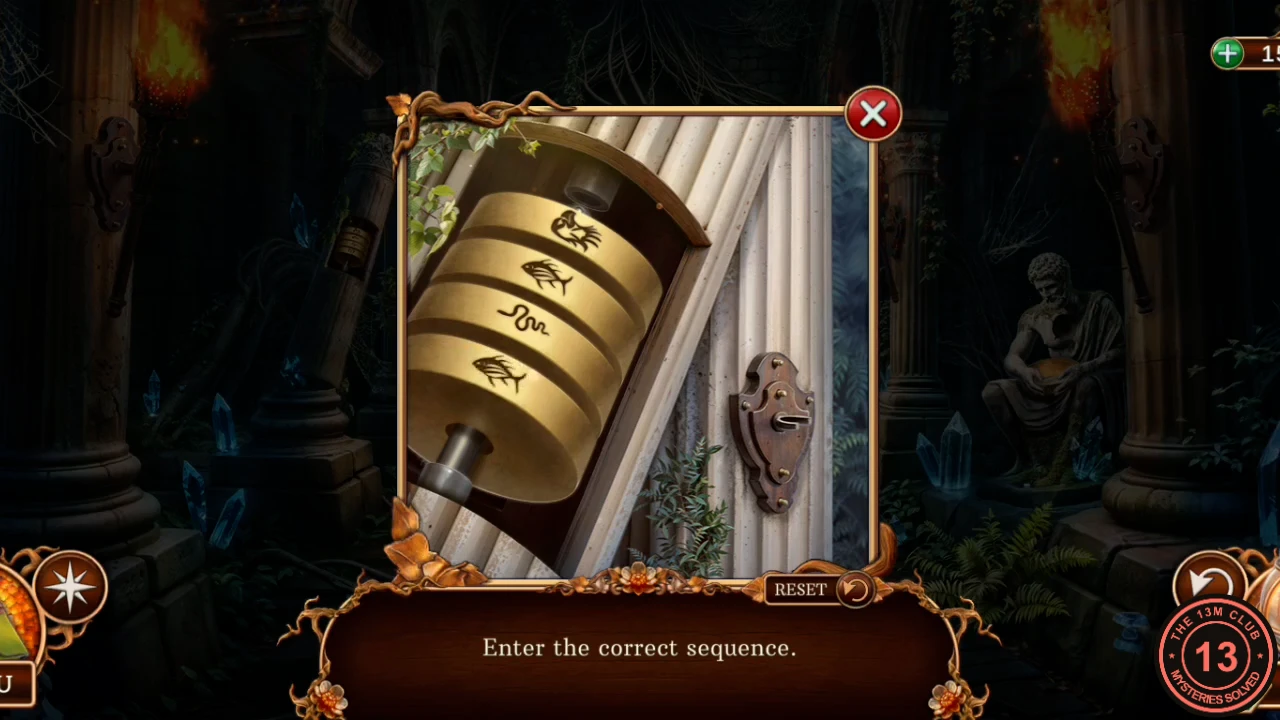
The door plate gives the order. The column reads from the bottom up, so the plate's first animal goes at the bottom.
- Use the Column discs on the broken column to start the puzzle. Turn the rings until they read, from top to bottom: fish, snake, bear, eagle.CODEFish, Snake, Bear, Eagle (top to bottom)
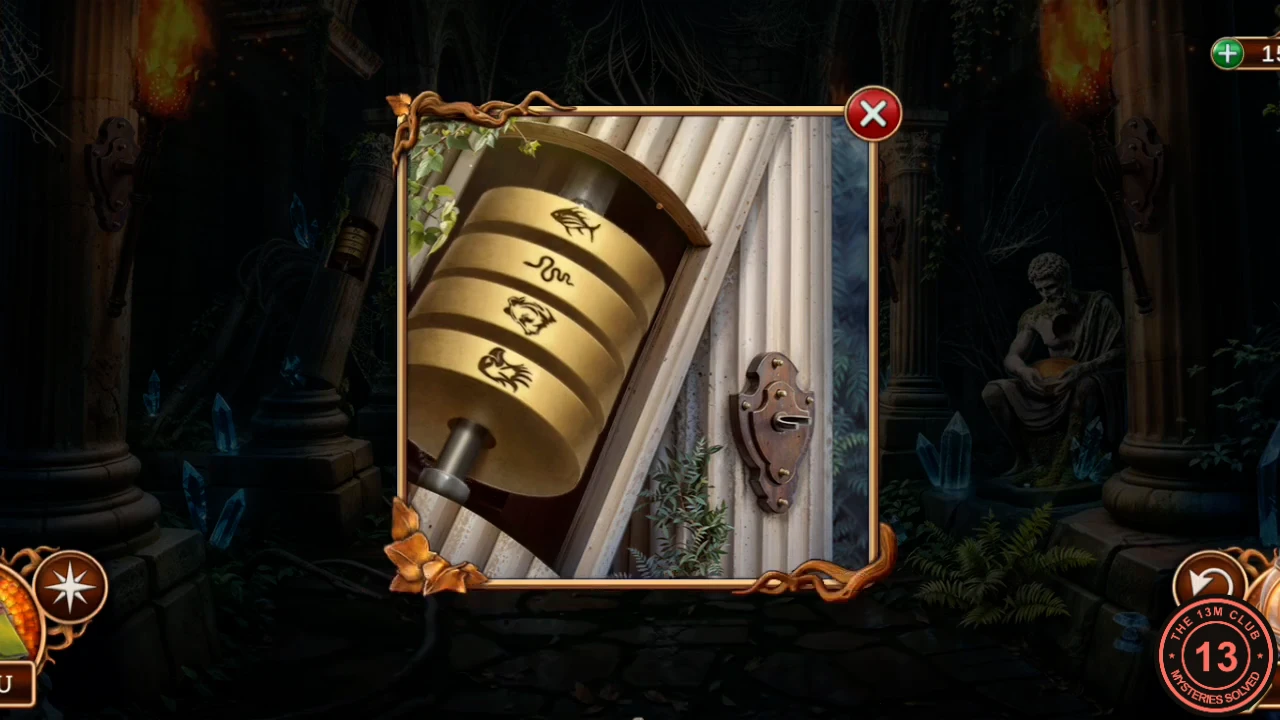
The solved column. From top to bottom: fish, snake, bear, eagle. - Take the Labyrinth key from the opened column.
Dark Maze: Fourteen Rooms
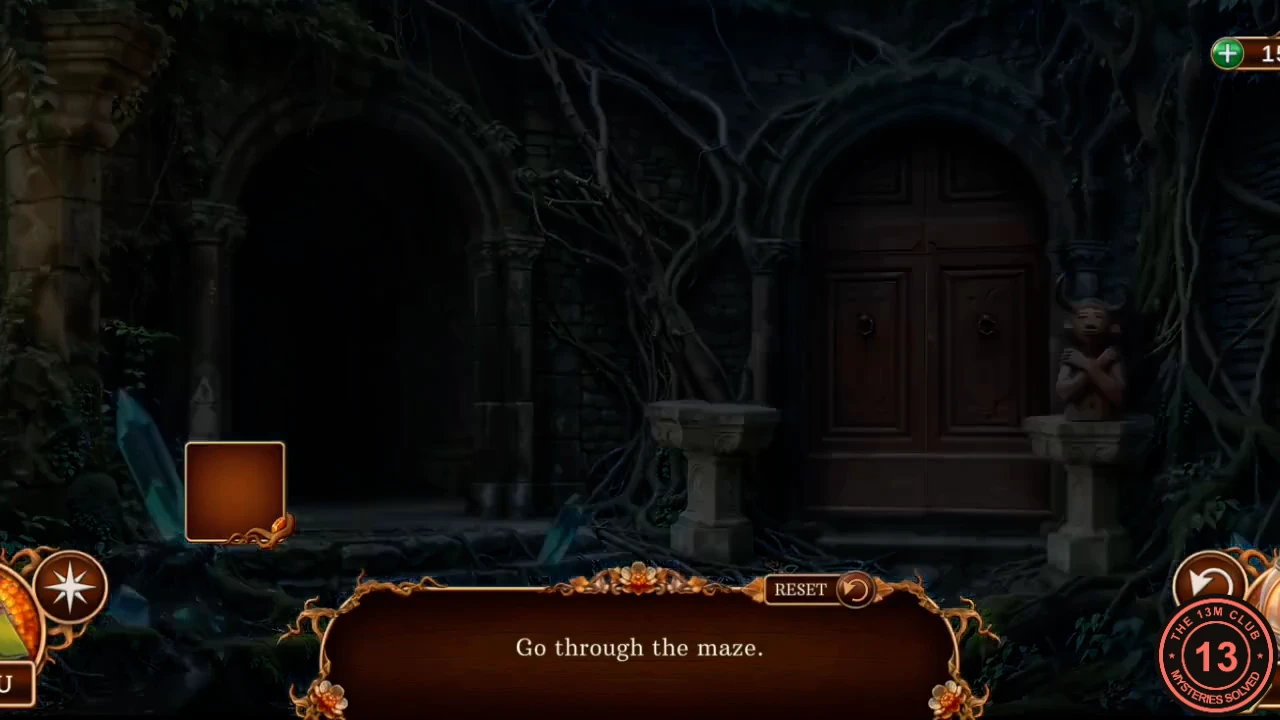
Use the Labyrinth key on the door, then the lit Torch on the darkness inside. You can carry only one maze object at a time. Reset returns everything to the start. The rooms are described by their contents because the arches can look alike.
- Use the Labyrinth key on the door, go in and use the Torch on the dark passage to start the maze.
- Take the left arch into the room with a sack on a crate and pick up the sack. Take that room's right arch to the fire room and drop the sack on the fire. Take the Horned figurine now uncovered.
- Go back twice to the first room and place the figurine on the empty left pedestal. The door on the right opens.
- Go through to the room with two root-covered arches and take the left arch to the statues. One statue raises its arm and the small door at the back opens. Go through to the crystal room and take the Knight helmet.
- Go back twice, to the statues and then to the two-arch room, and take the right arch to the knights. Put the helmet on the right knight. The door behind them opens.
- Go through. This room has a left door covered in paper seals and a right door in chains. Tap the seals to peel them away and the left door opens. Tap the right door: its chains fall and it opens too. Take the left door to the backpack, take the rolled bundle from it and go back once to the two-door room.
- Take the right door to the pit wall and use the bundle on the roots. A rope drops. Climb it to the tiger room.
- Take the left arch to the skeleton and take the white disc it holds. Go back and place the disc on the tiger's paw. The door on the right opens: go through to leave the maze.
The Shaman's Spirit and the Hydra Chest
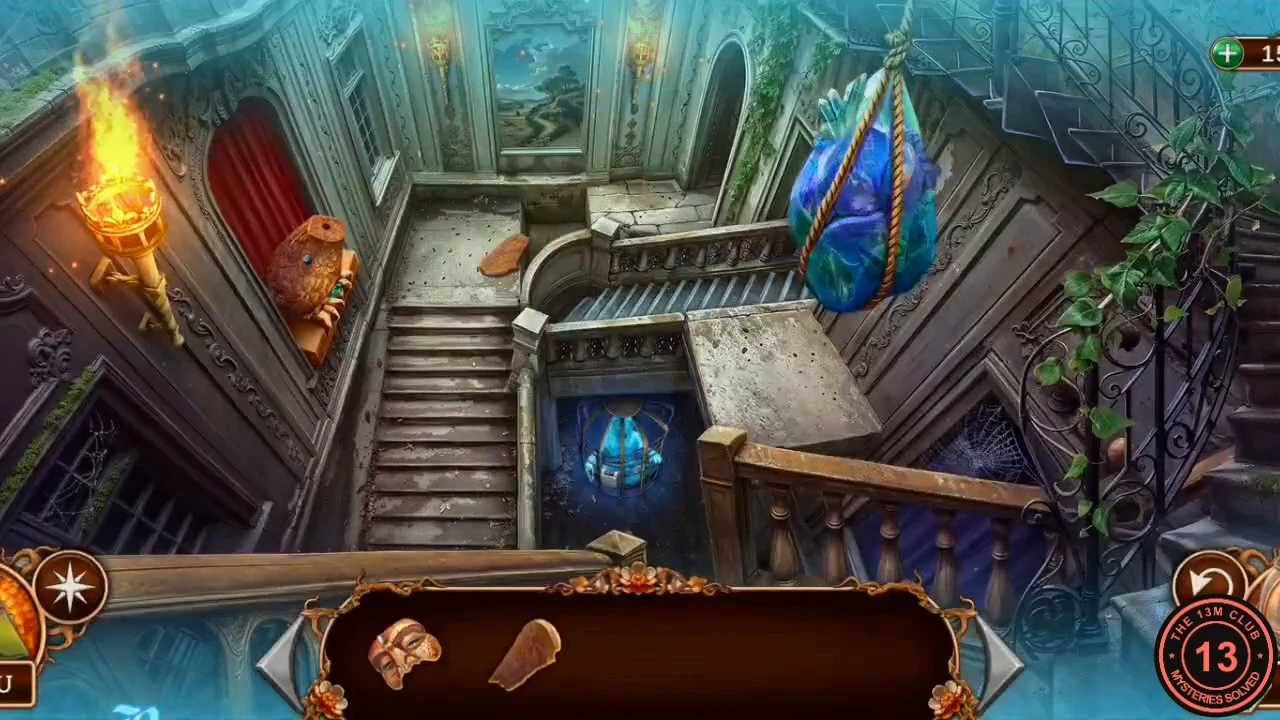
The hall is freezing and the only warmth comes from a spirit in a crystal cage. Your broken ladder, a shattered eagle figure and a sealed chest back in the cave all tie together here.
- Look around the hall. The detective says you are freezing and that the spirit's cage holds fire. The crystal hangs from a strong rope that you will have to cut.
- Zoom into the broken eagle figure on the left. Take Glimmering emerald (1/4) from its base and collect the morphing object here.
- Zoom into the steps at the back. Take the Eagle wing piece lying on the floor. The detective notes that you cannot use the ladder until you fix it.
- Zoom into the spirit's cage and use the Shaman mask, the mask from the altar bowl, on the spirit. He says his fire is part of your soul and gives you the Jagged stone, promising the rest in return for freedom.
- Use the Jagged stone on the rope of the hanging crystal. It crashes down on a red chest. Zoom in and take Adorned stones (1/2) and the Eagle head from the shards. The chest needs a flower with four petals.
- Zoom into the crystal cage and take the Hydra head at the lower right. The cage has a magic lock whose instructions must be somewhere in the labyrinth.
- Zoom into the eagle figure and use the Eagle head, the Eagle wing piece and the Bronze wing on it. The repaired figure gives you the second Hydra head. A strange symbol on its chest is too blurred to read for now.
- Open the map and travel back to the cave with the grate. Zoom into the hydra chest under the slab and use both Hydra heads on it. Take the Broken magnifier and Adorned stones (2/2).
Ladder Steps: Equal Widths
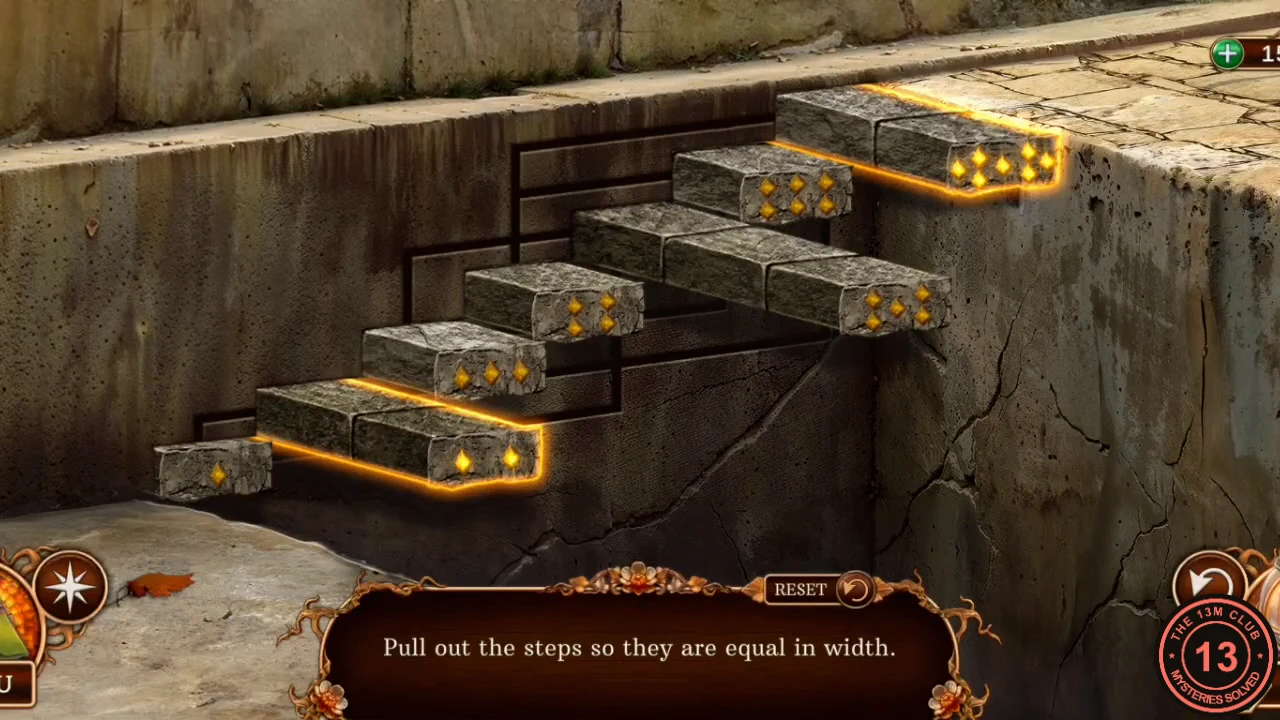
This ladder is a linked puzzle. Pulling one step also moves the steps tied to it, and the links flash in blue as you pull. Each step's dots count from one at the bottom to seven at the top, which helps you tell them apart. It takes a good deal of trial and error, so use the target and the links rather than a fixed move list.
- Back in the hall, use both Adorned stones on the ladder to start the puzzle. Pull the steps out so that all of them end up the same width. Start with the steps that stand out furthest from the others, watch which neighbors follow, and even out the remaining ones last.
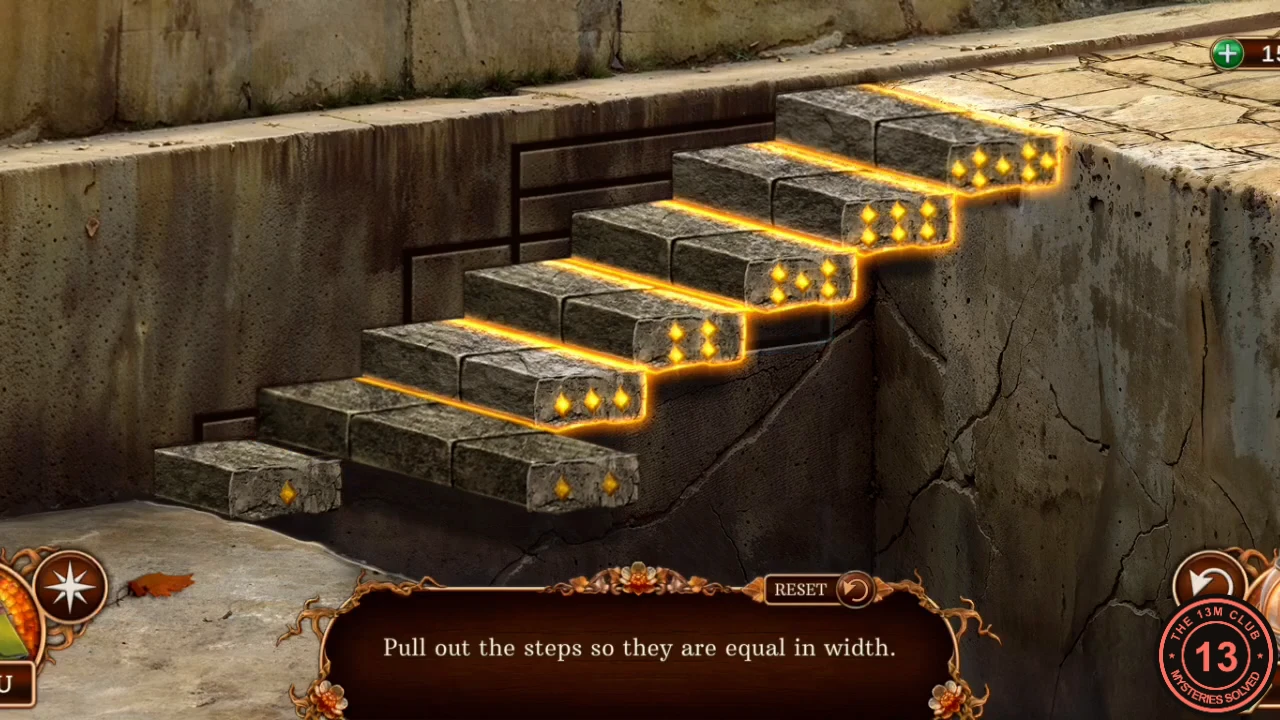
The target: every step pulled out to the same width. - Climb the repaired ladder to the next area, a round courtyard with a stone basin in the middle.
Crossroads: Tokens and Petals
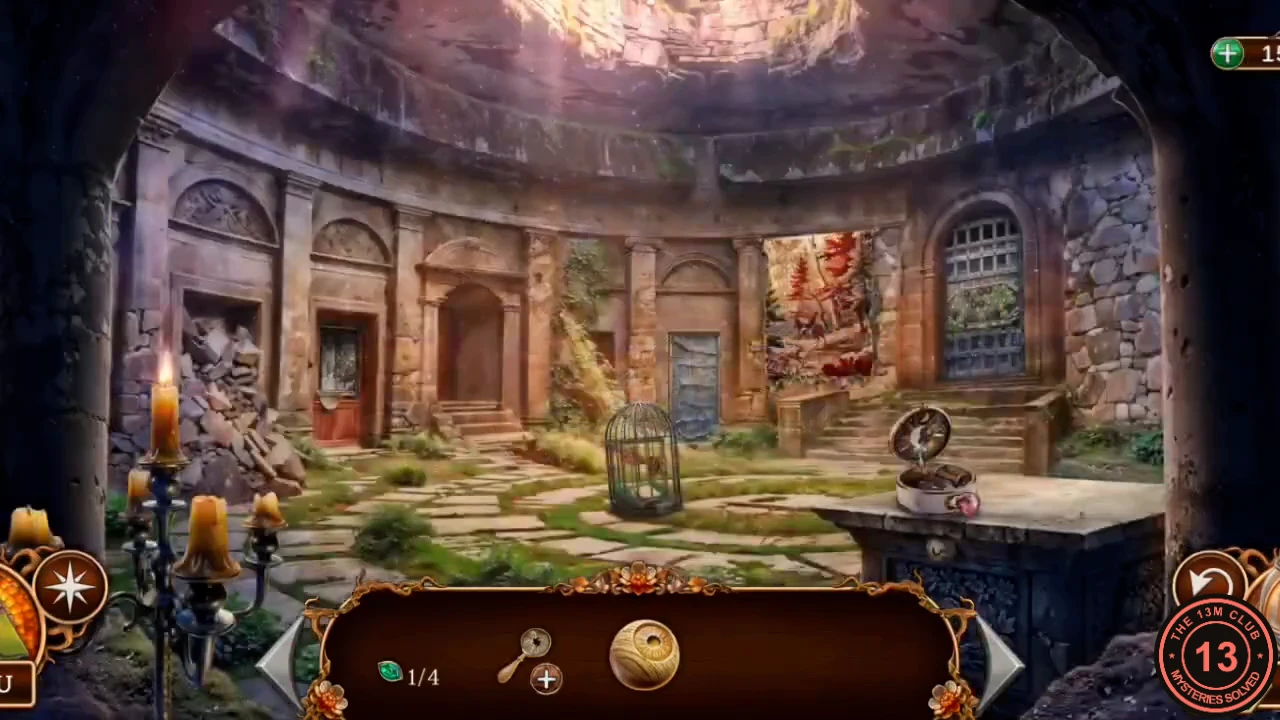
A locked room, a birdcage, a wall map and an altar drawer form a chain of hooked, arched and horned petals.
- Zoom into the handprint on the door's mirror. Amanda appears in it for a moment. The detective notes that she can help and you must find how to get into that room. Take the Third eye from the door and read the poem. It says where each mythical creature lives: the Kraken in the deep sea, the Cyclops on a mountain peak, the Hydra in the jungle, fairies in forests and the Djinn in the desert.
- Zoom into the birdcage on the green cloth. Collect the morphing object beside it. The cage needs a key of a certain shape.
- Zoom into the wall map disc on the right. A petal is stuck in the disc, and the detective notes that you can get it with the right hook. The map also lacks its tokens.
- Zoom into the hexagonal skull panel and take the Kraken token. A strange symbol here is too blurred to read.
- Zoom into the stone altar in the foreground and take the Music box. Its lock needs an arc. Open the Music box in the inventory and take the Hooked petal.
- Use the Hooked petal on the wall map disc to pull out the Arched petal. The map still needs its tokens.
- Use the Arched petal on the altar lock and take the Horned petal from the drawer.
- Use the Horned petal on the birdcage lock. Read the letter from the Faun inside, which shows the cage's rune pattern, and take it. The cloth underneath has one more blurred symbol.
Crystal Cage: Trace the Rune Pattern
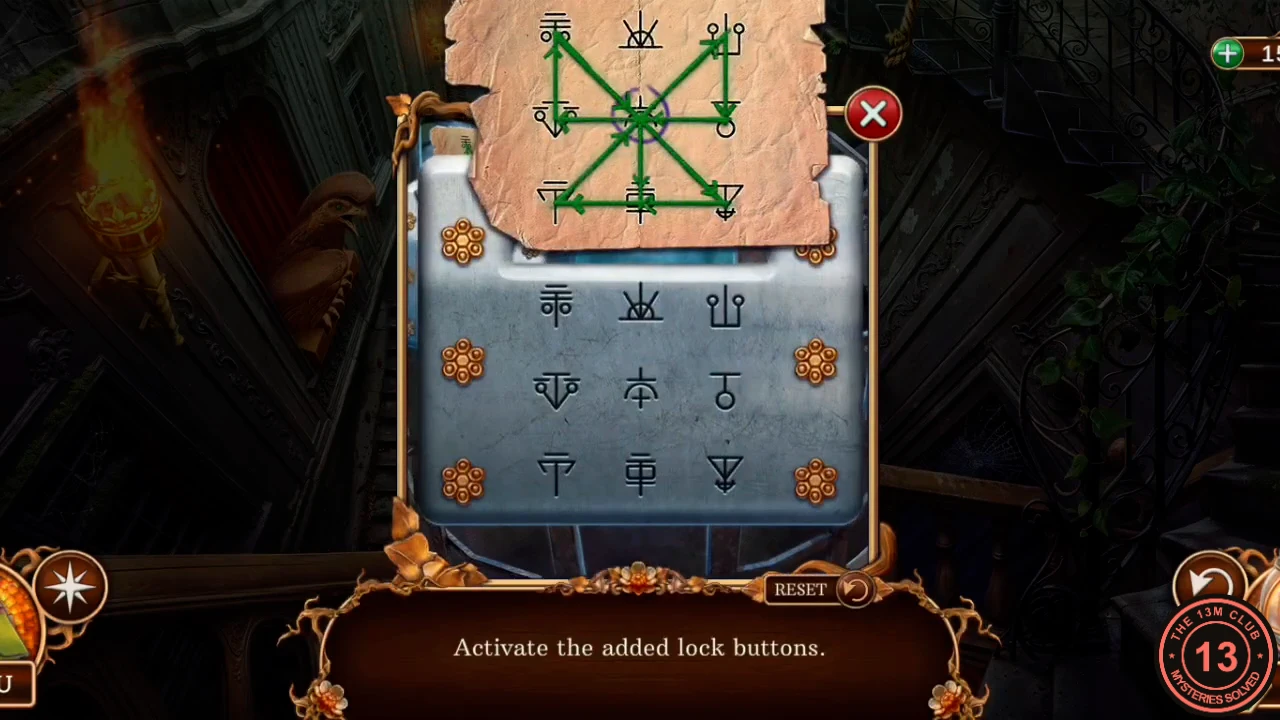
The Faun's letter is the answer. All the buttons must light in one unbroken line that matches the green drawing on the note. There are nine buttons in a three-by-three grid. Reset clears a wrong line.
- Return to the hall, zoom into the crystal cage and use the note on the lock. Press the buttons in this order: center, bottom middle, bottom left, center, top right, middle right, center, middle left, top left, center, bottom right, bottom middle.CODEC, BM, BL, C, TR, MR, C, ML, TL, C, BR, BM
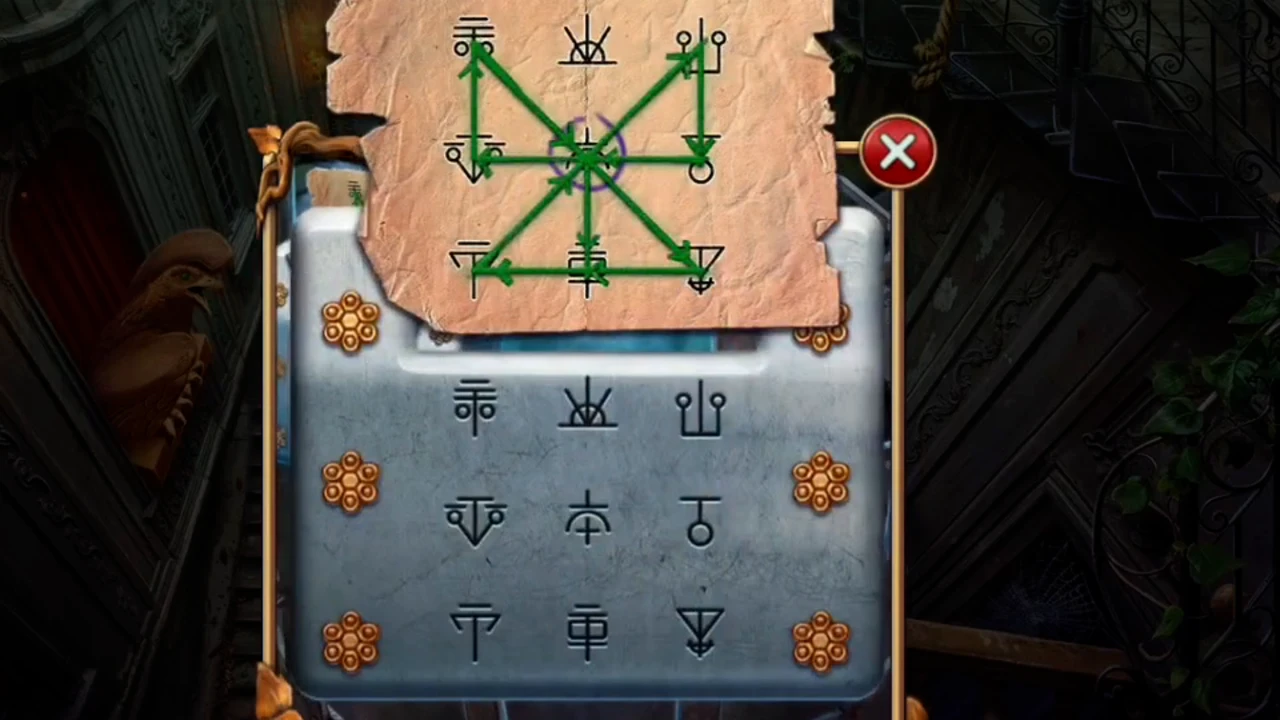
The Faun's note above the buttons. Its green drawing is the line that step 1 traces.
Free the Shaman and Assemble the Flower
Freeing the Shaman returns part of your soul and gives you the last piece of the four-petal flower.
- The Shaman thanks you. He says the other half of your soul is at the center of the labyrinth. Take the Iron flower he leaves behind. The spirit fades, and your soul partly returns.
- Open the Iron flower in the inventory and fit all three petals: Horned, Arched and Hooked. Take the Four-leaf flower.
- Zoom into the red chest and use the Four-leaf flower on its lid. The chest opens as a diorama puzzle.
Diorama: Mirror the Forest
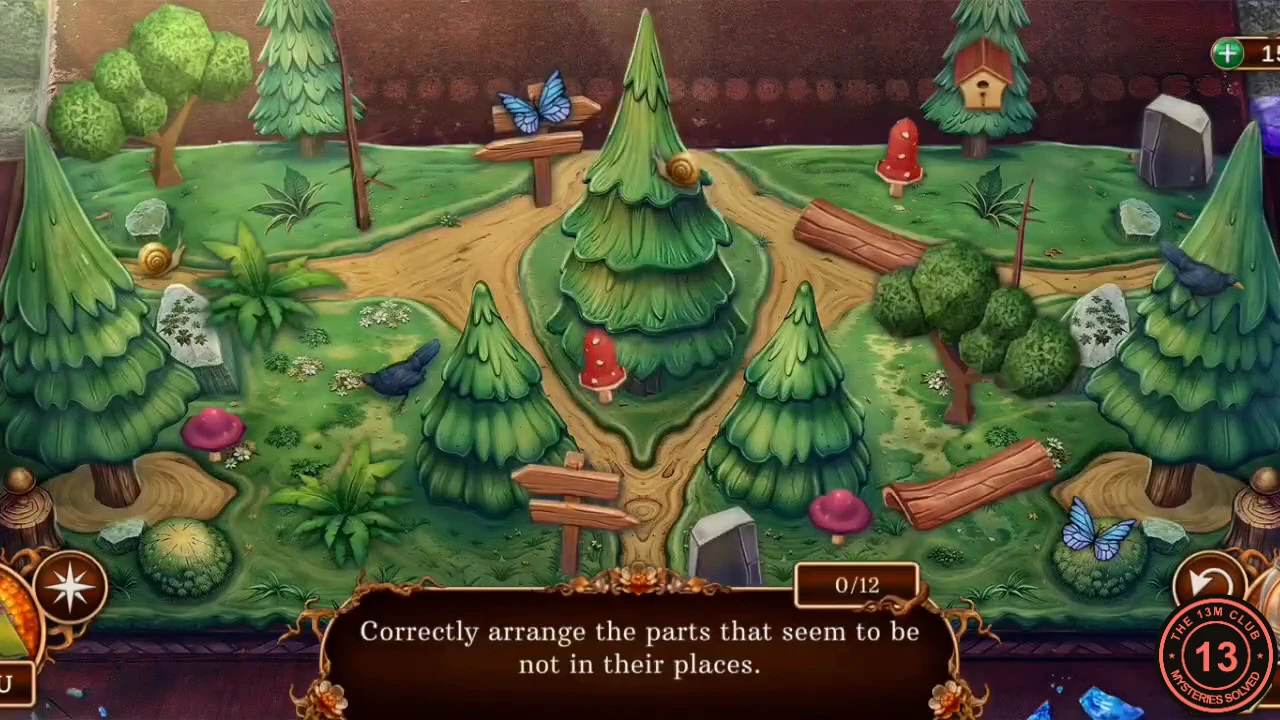
The two halves of the forest should mirror each other about the central path. Twelve parts on one side are wrong. A counter tracks how many you have fixed.
- Compare the left and right halves piece by piece. Move each object that doesn't mirror its partner until the counter reads 12/12: the mushrooms, logs, signs, stones, snails, butterflies, ravens and plants all count as objects to check. For example, the red mushroom on the left belongs on the grass to mirror the right-hand one.
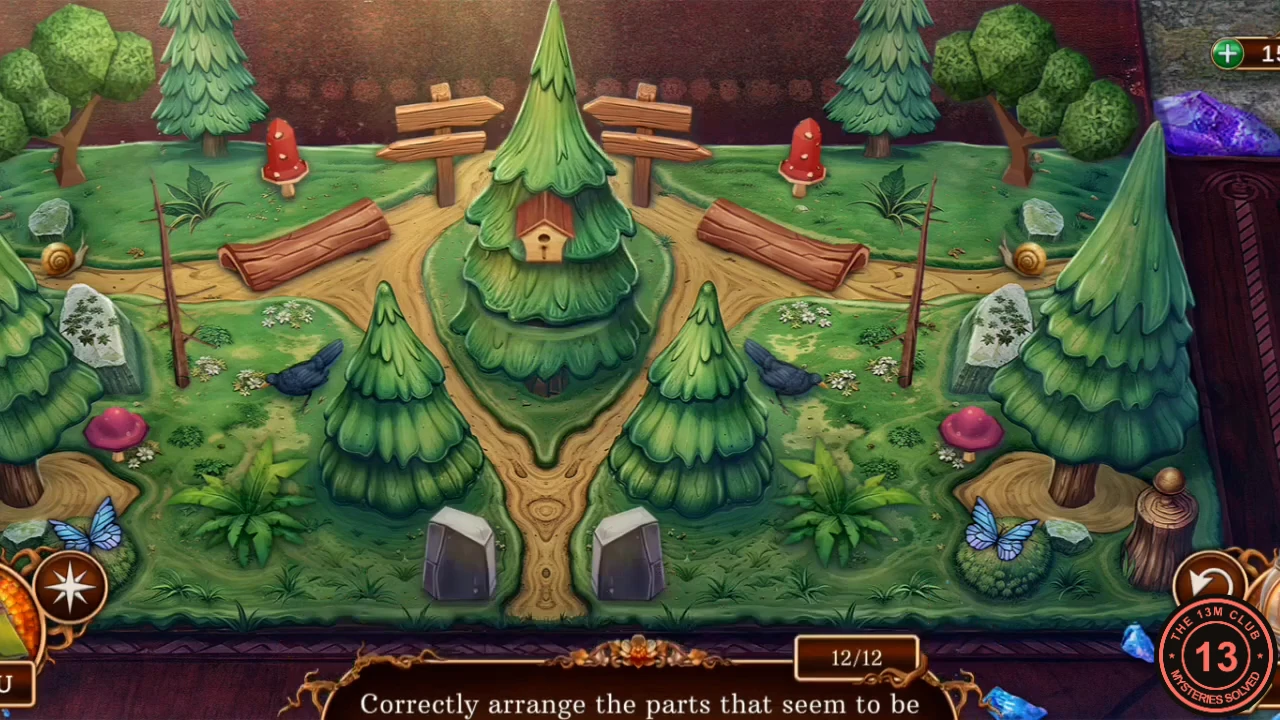
The finished diorama at 12/12, with both sides mirroring each other. - Take the Cyclops token from the opened chest.
Wall Map: Place the Tokens
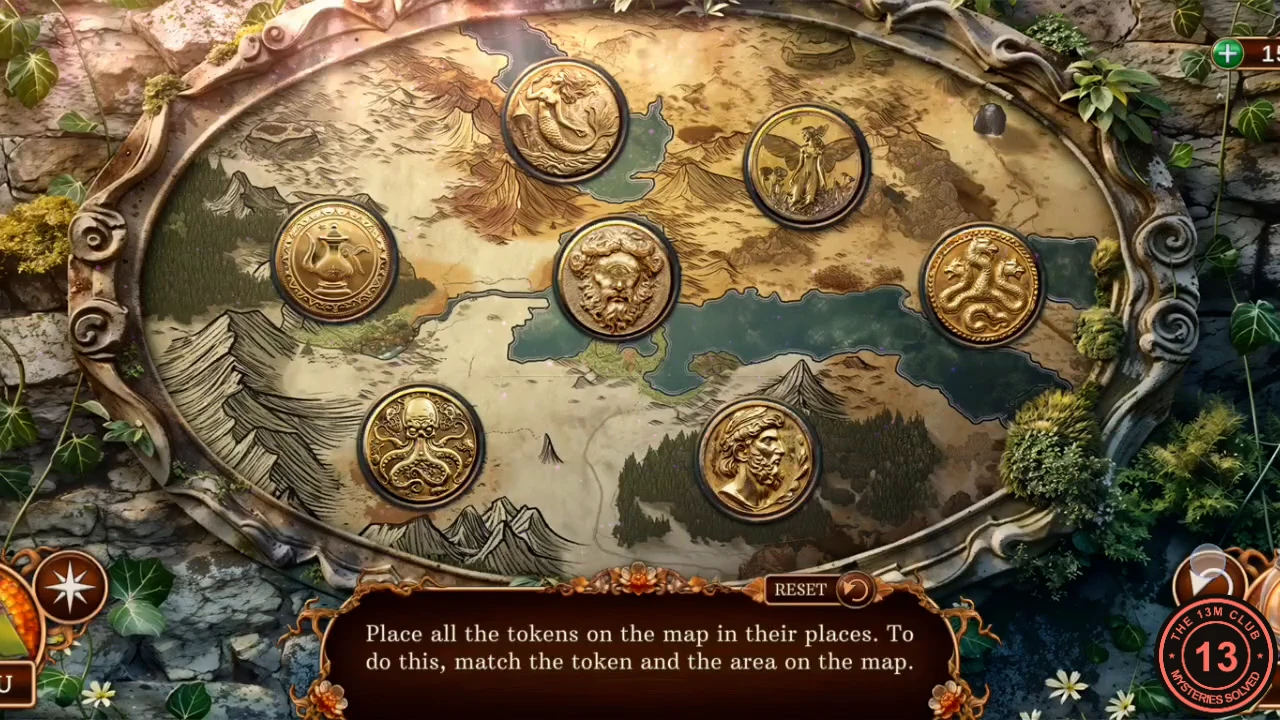
The poem from the door tells you where each creature lives. The map shows seas, mountains, forest, jungle and desert.
- At the courtyard, zoom into the wall map disc and use the Kraken and Cyclops tokens on it. The map opens with the full set of tokens.
- Move the tokens so that the Kraken is in the sea at top center, the Cyclops on the peak at upper right, the Hydra in the jungle on the left, the bearded man on the plains at the right, the Djinn lamp in the desert at lower left, the mermaid in the central sea and the fairy in the forest at the bottom right.
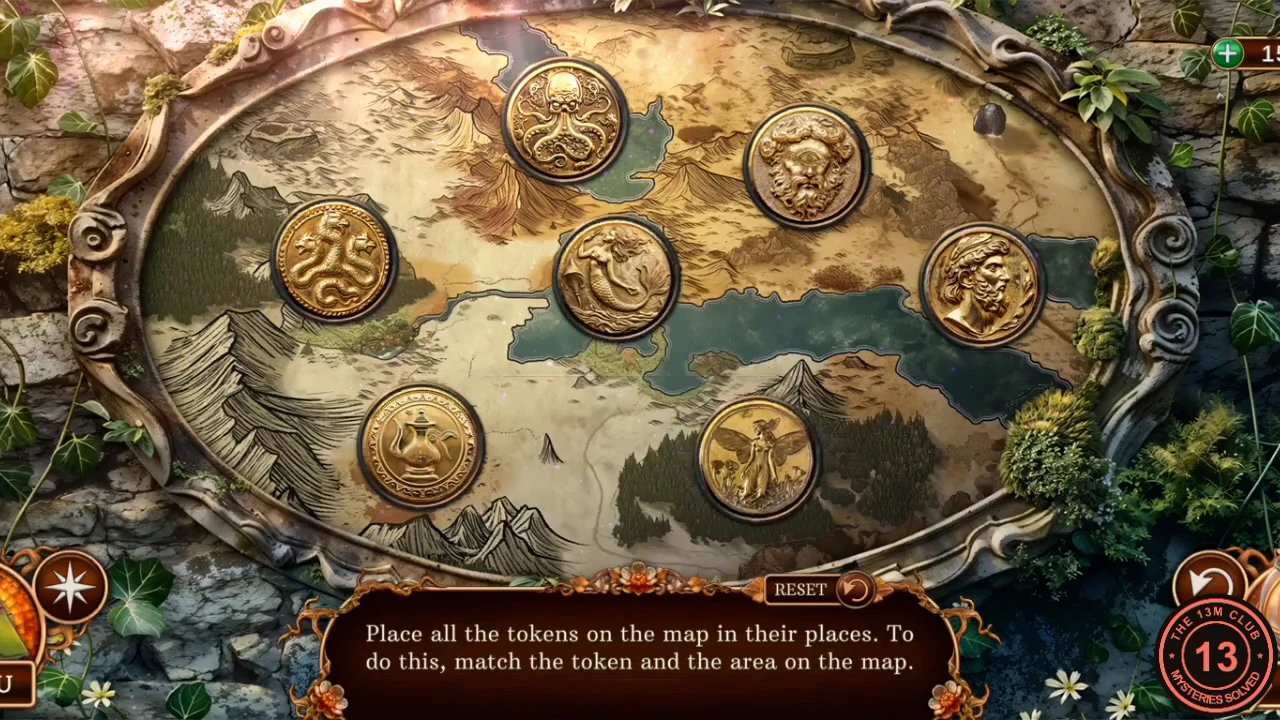
All seven tokens in place, just before the niche opens under the fairy. - Take the Diamond handle from the niche.
Speak to the Prophetess
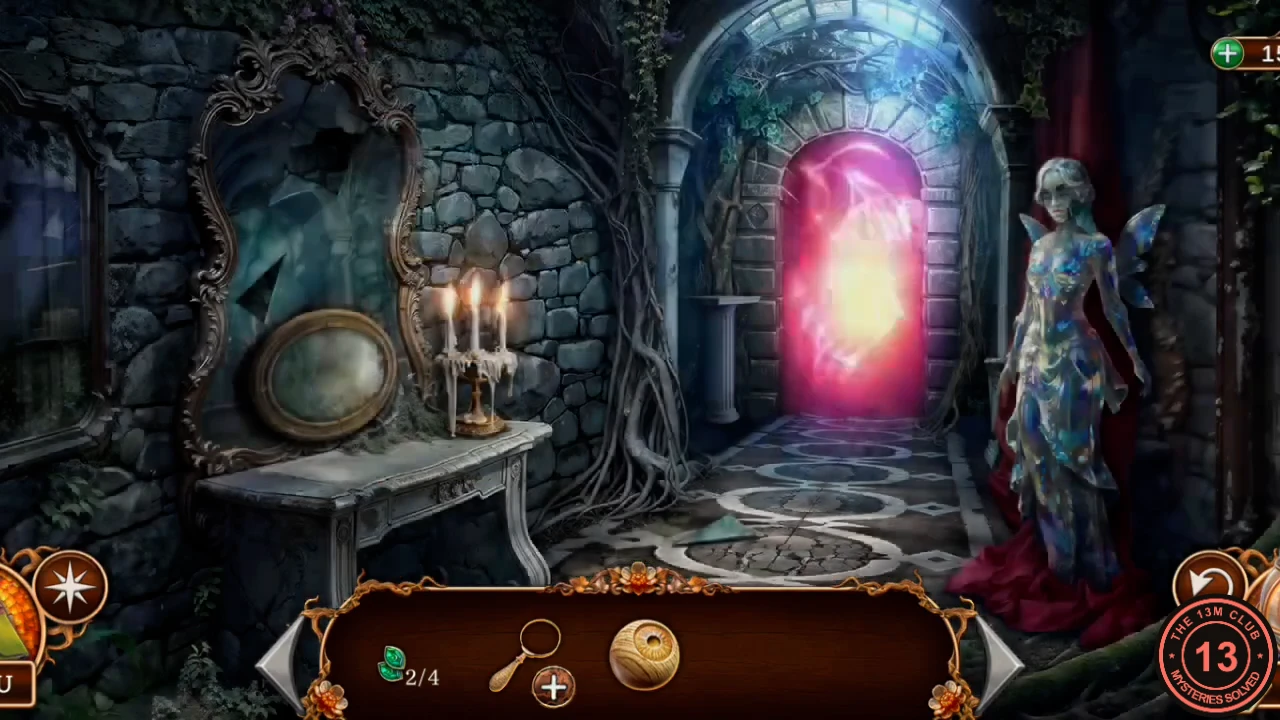
The locked room leads to a corridor with a cracked mirror. A vision here sends you back to Amanda's house for the tool that reveals hidden runes.
- Use the Diamond handle on the room's door and go through. A burning pink gate blocks the far end of the corridor.
- Zoom into the mirror table. Take Glimmering emerald (2/4). The detective decides to collect the pieces of the mirror to speak with the Prophetess.
- Pick up the Triangular shard from the corridor floor. Zoom into the stonework by the gate and take the Sturdy cane. Zoom into the fairy statue and take the Large shard. The detective notes that the statue's eyes are missing.
- Use both shards on the mirror. The Prophetess appears and gives you the Knitting needle. She tells you that a hut in the swamps holds what you need to collect the runes that open the way to your soul.
- Teleport to Amanda's house. Zoom into the pillow and use the Knitting needle to rip it open. Take the Seer's lens.
Enchanted Magnifier and the Five Runes
With the lens fixed, the blurred symbols you've seen around the labyrinth finally reveal the Faun's runes.
- Teleport to the forest camp and zoom into the stove. The bolt is broken and you need something strong. Use the Sturdy cane on it, then take Glimmering emerald (3/4) and a Rune rod from the firewood. A police notebook lies on the stove if you want to read it.
- Open the Broken magnifier in the inventory and use the Seer's lens on it. Take the Enchanted magnifier.
- Use the Enchanted magnifier on each blurred symbol to collect the Faun's runes: the labyrinth entrance door plate, the eagle's chest in the hall, the birdcage cloth, the stone altar and the hexagonal skull panel in the courtyard.
- Return to the corridor mirror and use the Faun's runes on Amanda. She says your salvation is in the hands of an ancient god and that the Faun's grimoire holds the key to the paths between worlds. Take the Rune stone.
Magic Gate: Reproduce the Pattern
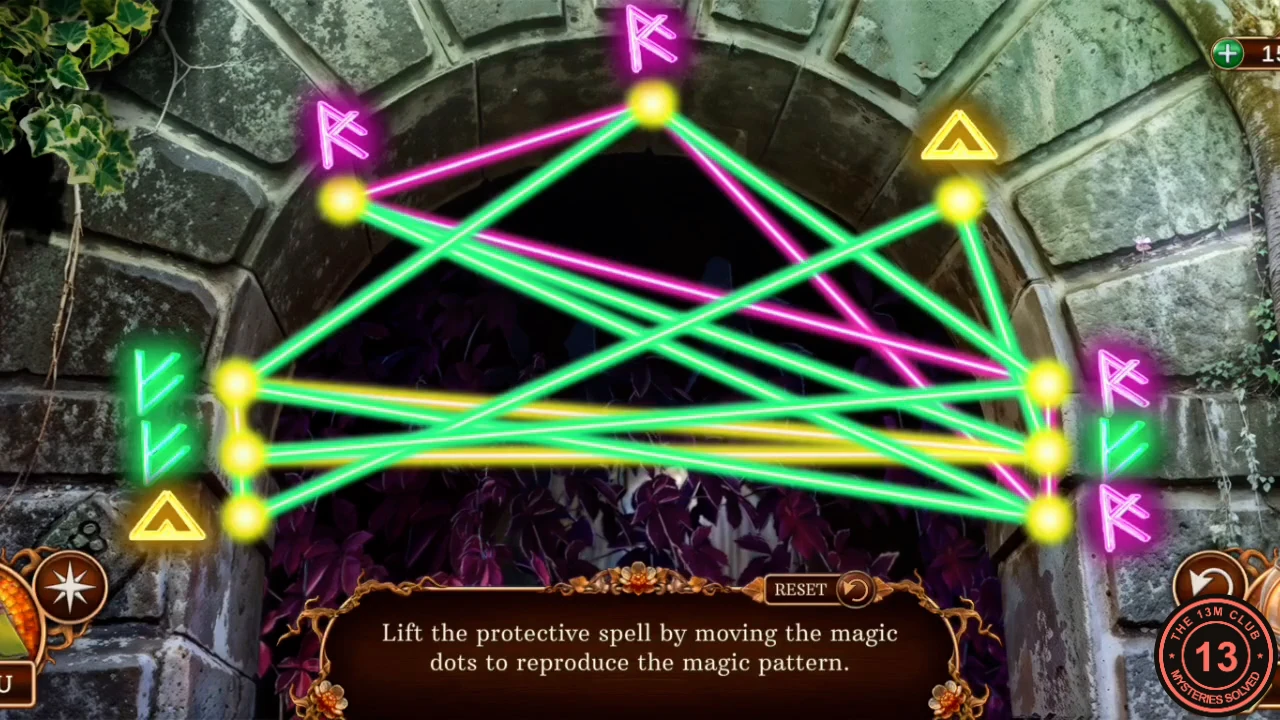
Each dot sits next to a symbol, and the symbols decide the line colors. Tap two dots to swap them. You are done when pink, green and yellow lines form the clean symmetrical pattern described in step 1. The dot layout at the start may vary, and solving it takes many swaps, so there is no fixed move list.
- Zoom into the socket beside the pink gate and use the Rune stone. Swap the dots, working one color at a time, until the symbols read: top center green; both upper corners pink; on each side from top to bottom pink, green, yellow. Then the lines form three shapes: a green outline with a bottom bar, a yellow triangle from the top dot to the middle side dots, and a pink bow tie between the upper corners and the side dots.CODETop: green. Upper corners: pink. Both sides, top to bottom: pink, green, yellow
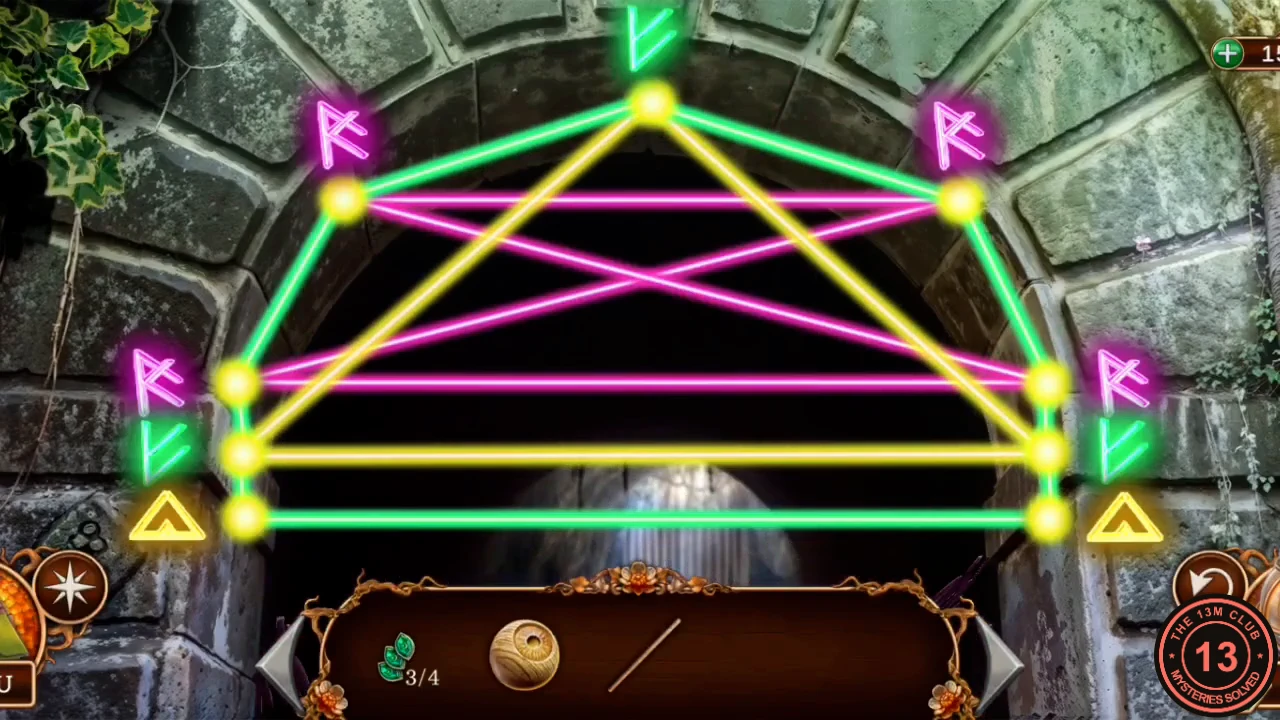
The finished pattern, with the green, yellow and pink shapes described in step 1.