Town Entrance: Lower the Bridge
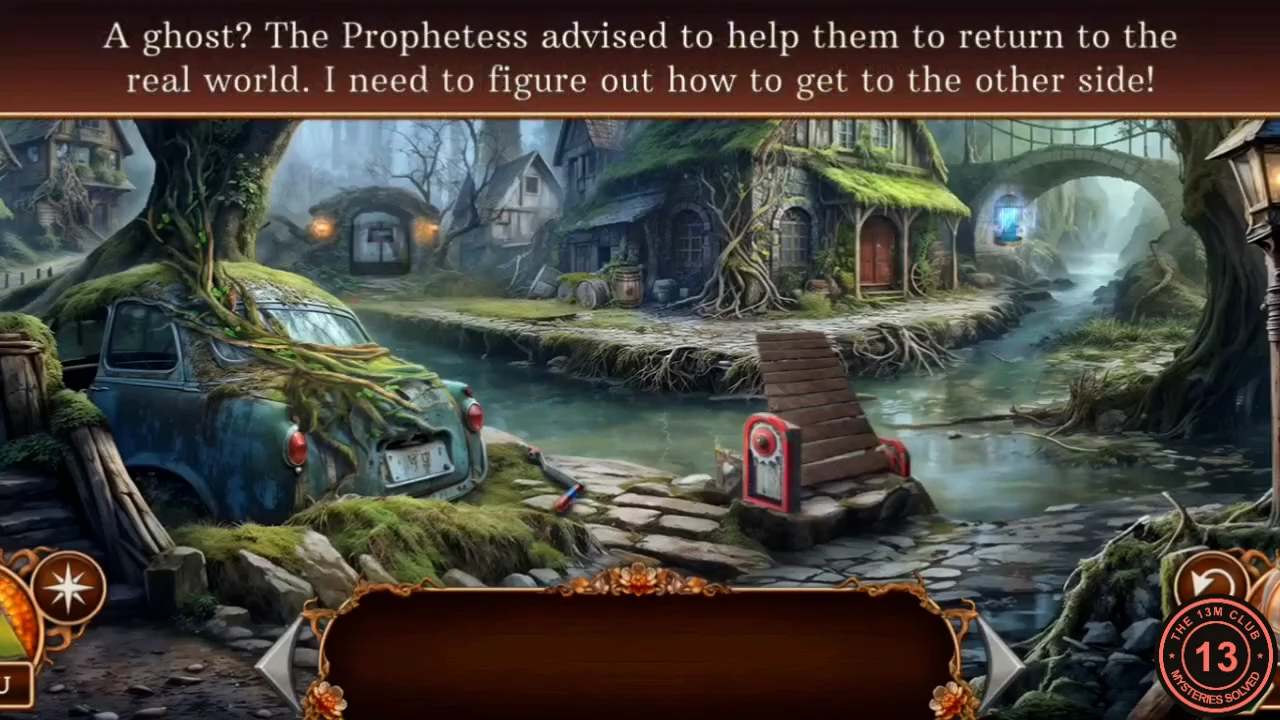
After Amanda's opening vision you arrive by a flooded road with a broken bridge. Tap sparkling areas to zoom in. Anything you pick up goes to the inventory bar at the bottom of the screen, and an item with a plus mark can be opened there to examine or combine it.
- Zoom into the overgrown car trunk on the left and take the Bridge lever lying in it.
- Zoom into the red bridge mechanism at the water's edge. Take the Heart locket from the frame, then use the Bridge lever on the mechanism and crank it.
- Tap the blue ghost trapped in the cage across the bridge and read its plea. It hands you the Astral beads and sets the task Contact the Prophetess.
- Zoom into the red tavern door and take the Pruner hanging on it. The door itself is locked.
- Zoom into the wooden barrel near the car. Use the Pruner on the thorny vines and take the Tavern key from the rim. Something else is sealed inside the barrel; it comes later.
- Use the Tavern key on the tavern door and go inside.
Tavern: Summon Amanda at the Mirror
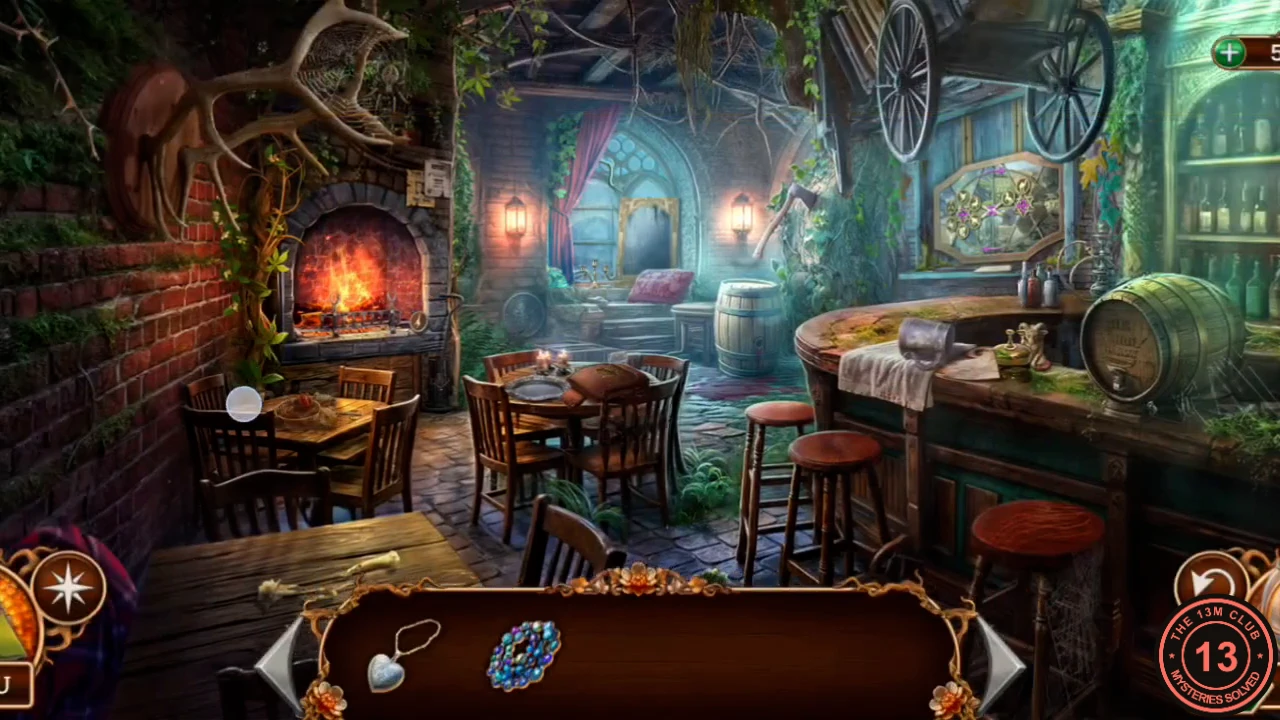
The window mirror on the back wall is the ritual spot. You need it clean, with the beads and three candles in place.
- Zoom into the fireplace and take Panel picture 1/4 from the grate.
- Zoom into the window mirror and tap it. Amanda flickers in the reflection, and the detective decides the glass must be wiped with a wet rag.
- Zoom into the counter and take the Beer mug. Then zoom into the wall panel with empty picture sockets and take the Rag.
- Return to the bridge scene and use the Beer mug on the canal to fill it.
- Back at the mirror, use the mug of water and then the Rag on the glass to clean it. Place the Astral beads on the candelabra stand.
- Zoom into the saddle-bag table and take all three candles standing there (Candles 1/3, 2/3, 3/3).
- Use the Candles on the candelabra at the mirror. Amanda appears, warns about the Three-Eyed Faun and shows you a rune.
- In the mirror view take the Mystical sign and the orange Gate slider that are now revealed. The Astral beads return to your inventory; keep them for later rituals.
- Return to the bridge and use the Mystical sign on the cage's lock. The freed ghost warns you about the Faun and hands you a second Gate slider (the long yellow bar).
Gate Puzzle: Two-Headed Ravens
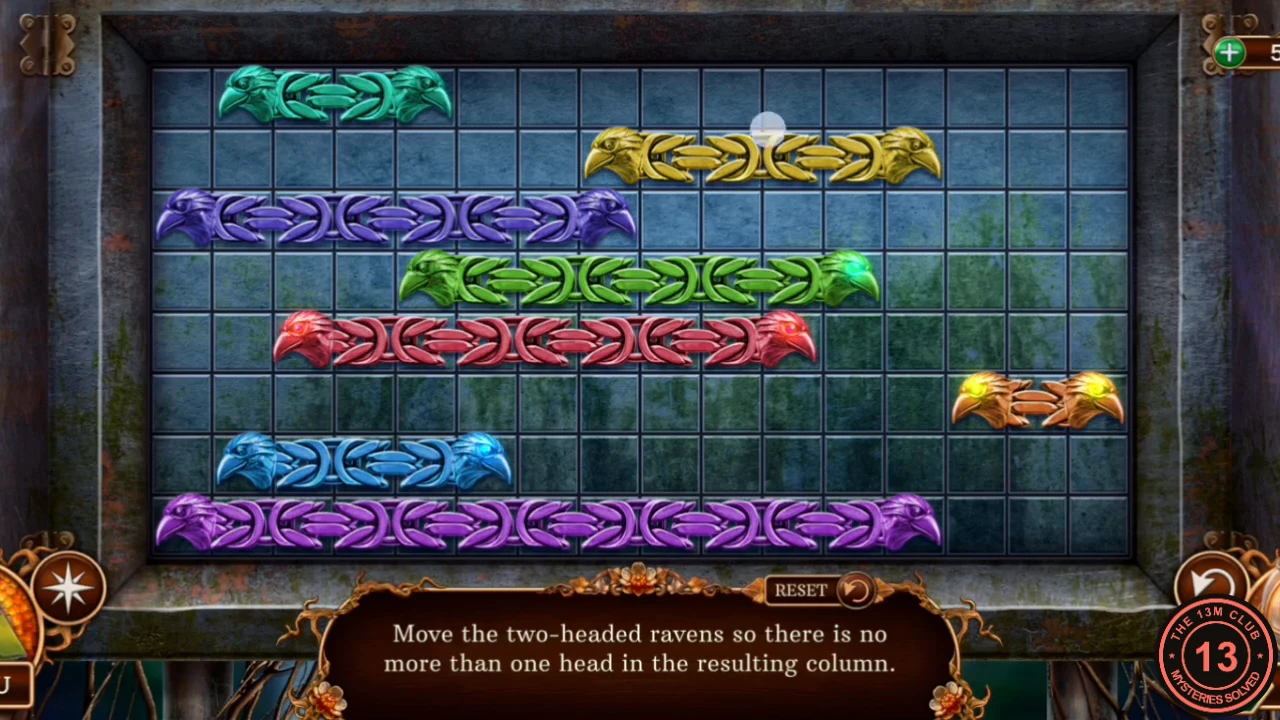
The gate at the top right of the Town Entrance is jammed until you fit the two Gate sliders. The rule: slide the eight two-headed ravens left or right so that no column of the grid holds more than one head.
- Zoom into the gate panel at the top right and place both Gate sliders (orange and yellow) in the empty rows to start the mini-game.
- Give every column exactly one head. The grid is 16 columns wide. This solved layout counts columns from the left: teal heads in columns 2 and 5, yellow 3 and 8, indigo 9 and 16, green 4 and 11, red 7 and 15, orange 12 and 14, blue 6 and 10, long purple 1 and 13. Raven lengths never change, so slide each bar until its heads sit in those columns.
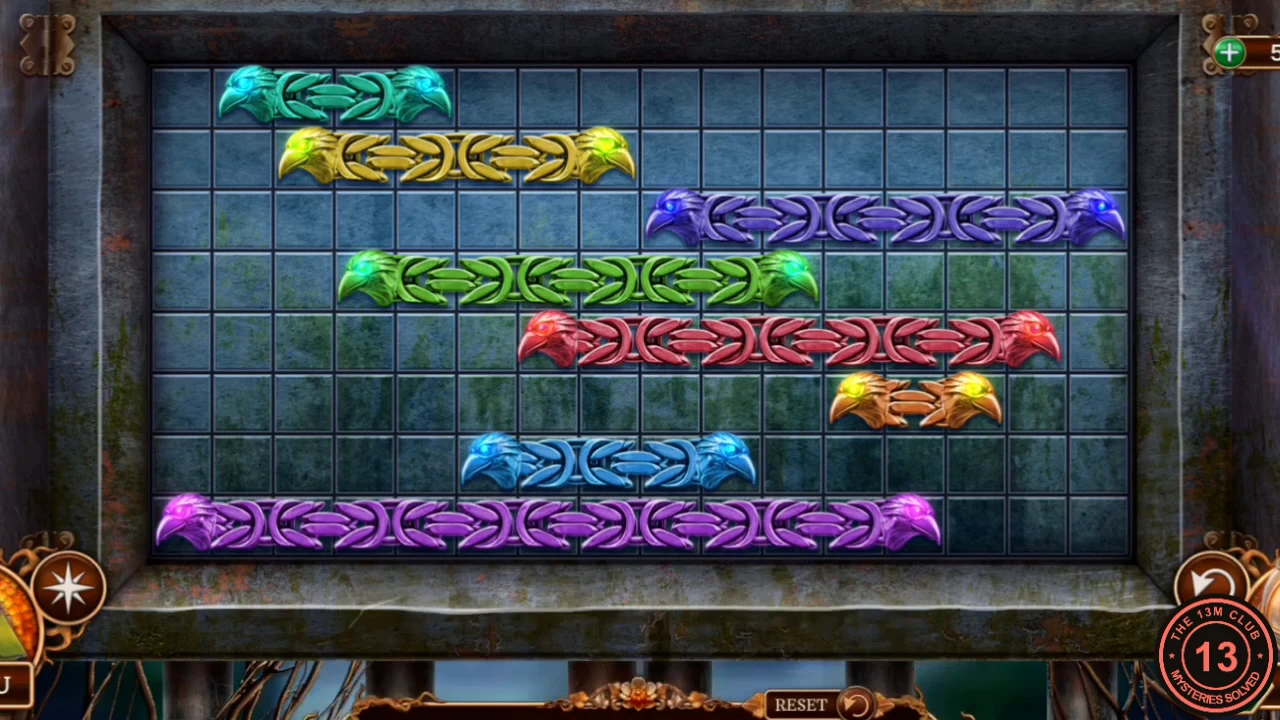
The solved gate: every column of the grid holds exactly one raven head.
Town Street: Sharpen, Cut and Saw
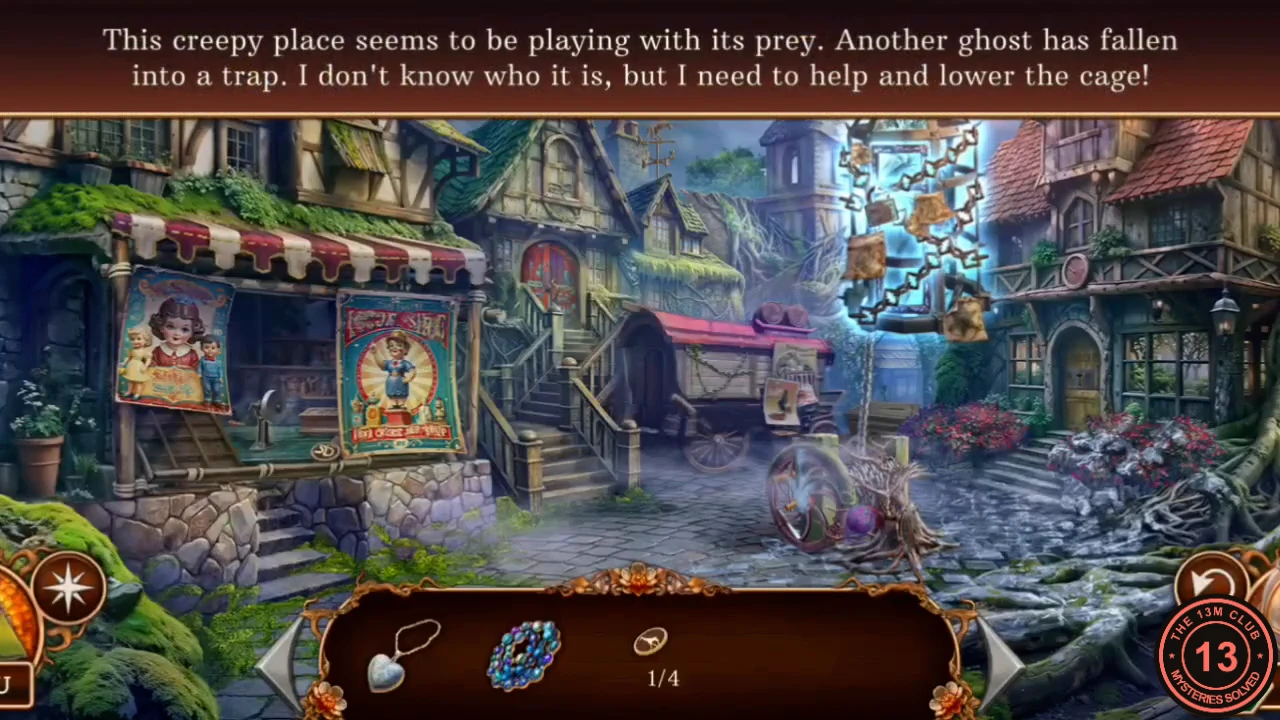
A second ghost hangs in a frozen cage above the street. The wheel that lowers it is iced over, so collect tools first.
- Enter the street. Zoom into the shelf with the grindstone and take Panel picture 2/4. Read the note and notice the empty figurine spots on the shelf.
- Zoom into the purple door and take the Wolf figurine resting on the handle. The door is locked for now.
- Zoom into the chained wagon on the street and take the Blunt machete. Use it on the grindstone to get the Machete.
- Zoom into the overgrown wheel. Take the Ball of yarn and the Narrow spatula, then use the Machete on the branch. The wheel is frozen and needs a reagent; come back later.
- Zoom into the panel with the goblet sign on the right and open its slot. Something sits out of reach inside, so leave it for now.
- Go back to the car at the Town Entrance and use the Machete on the vines in the trunk. Take the Amulet horse and Dry branches 1/2. Read Joseph Gray's note and look at the locked black box.
- In the tavern's saddle-bag table use the Amulet horse on the bag's slot. Take the File and Panel picture 3/4. Something is still stuck in the crack and needs something long.
- At the chained wagon in the street, use the File to saw through the chain. The lid needs propping up with branches.
- Zoom into the wheel again and pick up the branch you cut (Dry branches 2/2).
- Use the Dry branches on the wagon's lid to prop it open. The wagon starts sparkling.
Hidden Objects: The Store on Wheels
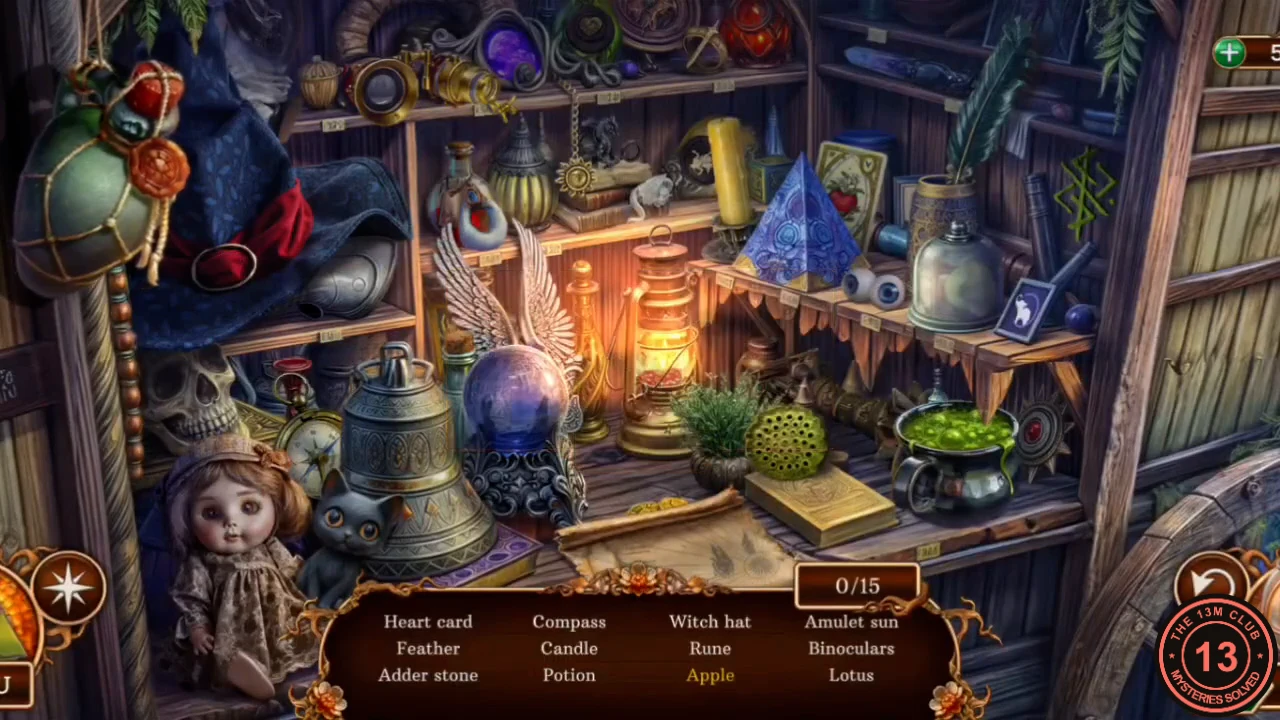
This is the first find-the-listed-objects scene. Fifteen named objects are involved, and the list at the bottom shows twelve at a time, refilling as you find them. A name in yellow needs an extra action before that object can be taken.
- Tap the sparkling wagon to open the scene, then tap these: the Compass, left of the bell beside the doll's head; the Rune, the green glyph on the right wall; the Potion, the bubbling green pot at lower right; the Candle, the fat yellow one on the middle shelf; the Witch hat at upper left; the Binoculars on the top shelf, left of center; the Adder stone, the white stone with a hole at the foot of the flask on the middle shelf; the Lotus, the green seed pod beside the potted plant; the Cat figurine at the foot of the bell; the Magic ball, the crystal ball under the silver wings; the Feather, the quill in the jar at upper right; and the Amulet sun, the gold pendant on a chain hanging from the top shelf. For the Apple, tap the Heart card behind the blue pyramid, which also counts, then tap the bitten apple it uncovers. For the Coins, tap the parchment scroll on the table so it rolls away, then tap the coins. The scene ends at 15/15.
- Use the Trade key on the purple door and enter the old shop.
Shop: Salt, the Winch and the King of Winter
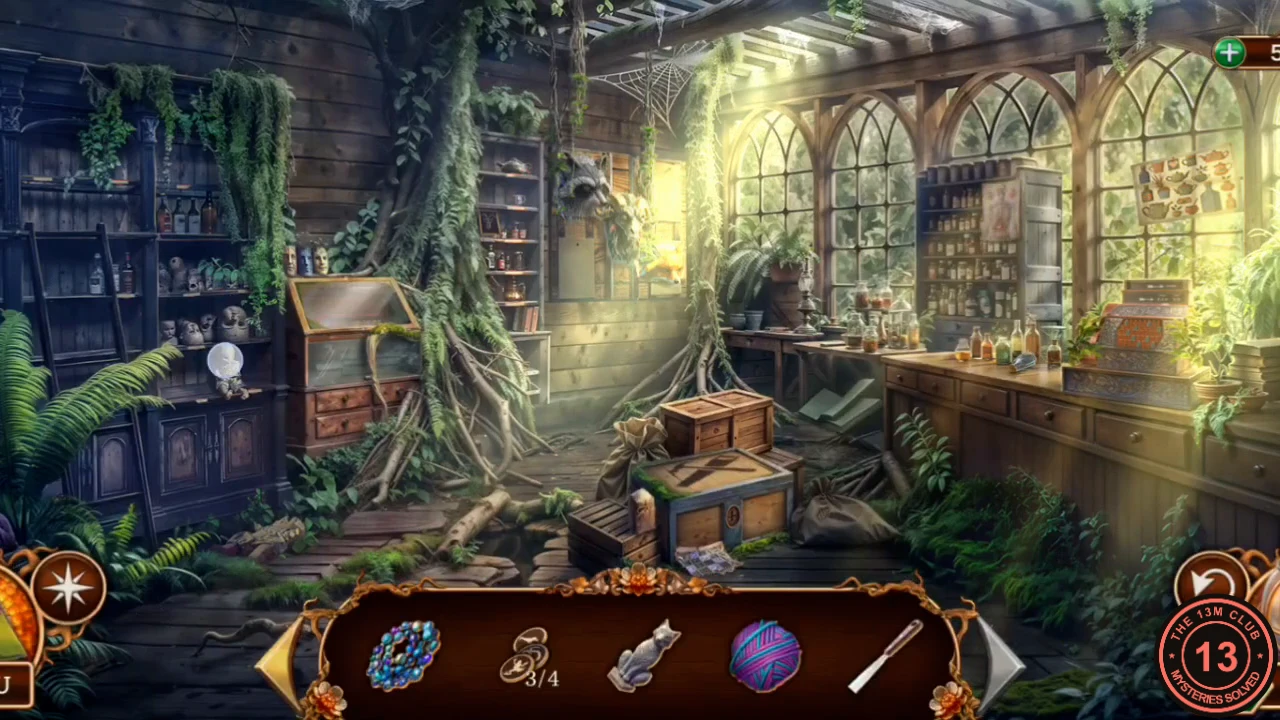
Inside the shop you find what thaws the wheel. Lowering the cage reveals a much more dangerous prisoner.
- Look at the scratched display case and the wall of animal masks. Take the Knob handle from the mask wall.
- Zoom into the supply crate in the middle of the floor. Take the Salt and read Fabian's note with the shaded grid; you will need that grid later.
- Go back to the wheel in the street. Use the Salt on the ice, then use the Knob handle on the wheel. The cage comes down.
- Talk to the imprisoned King of Winter. He demands you free him and hands you the King's chain. Task: open his cage.
- Open the King's chain in the inventory by tapping the plus-marked item. Take the Sharp icicle, then the King's ring.
- In the shop, use the Sharp icicle on the display case. Take Panel picture 4/4 and the Fox figurine from the case. The cushion shows a dagger is missing.
Tavern Panel: Animal Landscapes
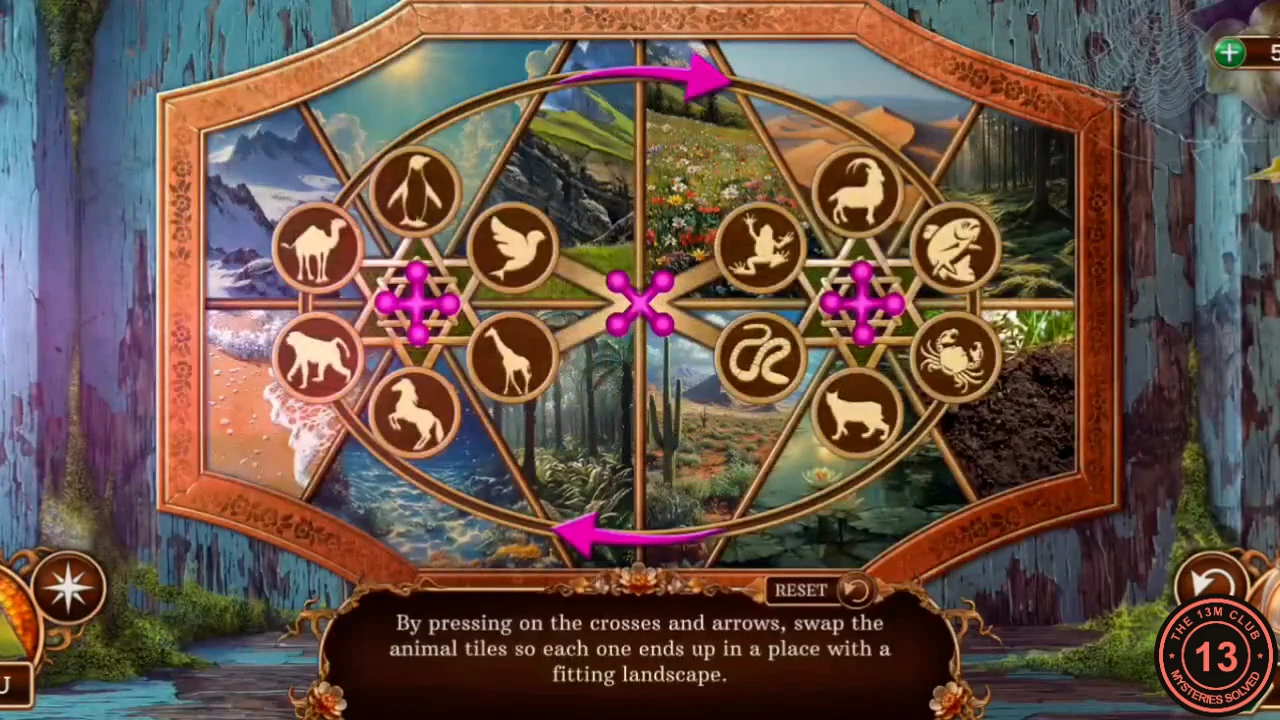
The four panel pictures complete a rotating wall mechanism. The rule: pressing the crosses rotates the group of tiles around that cross and the arrows swap the two sides; put each animal on the landscape where it belongs.
- Use the completed Panel picture on the tavern's wall panel to start the mini-game.
- Match every tile to its landscape. Solved layout: snow peaks = penguin; sunny sky = dove; rocky mountain = goat; beach = crab; open sea = fish; jungle = monkey; flower meadow = horse; dunes = camel; forest = lynx; cactus desert = giraffe; pond = frog; bare soil = snake. Tiles glow when correctly placed.
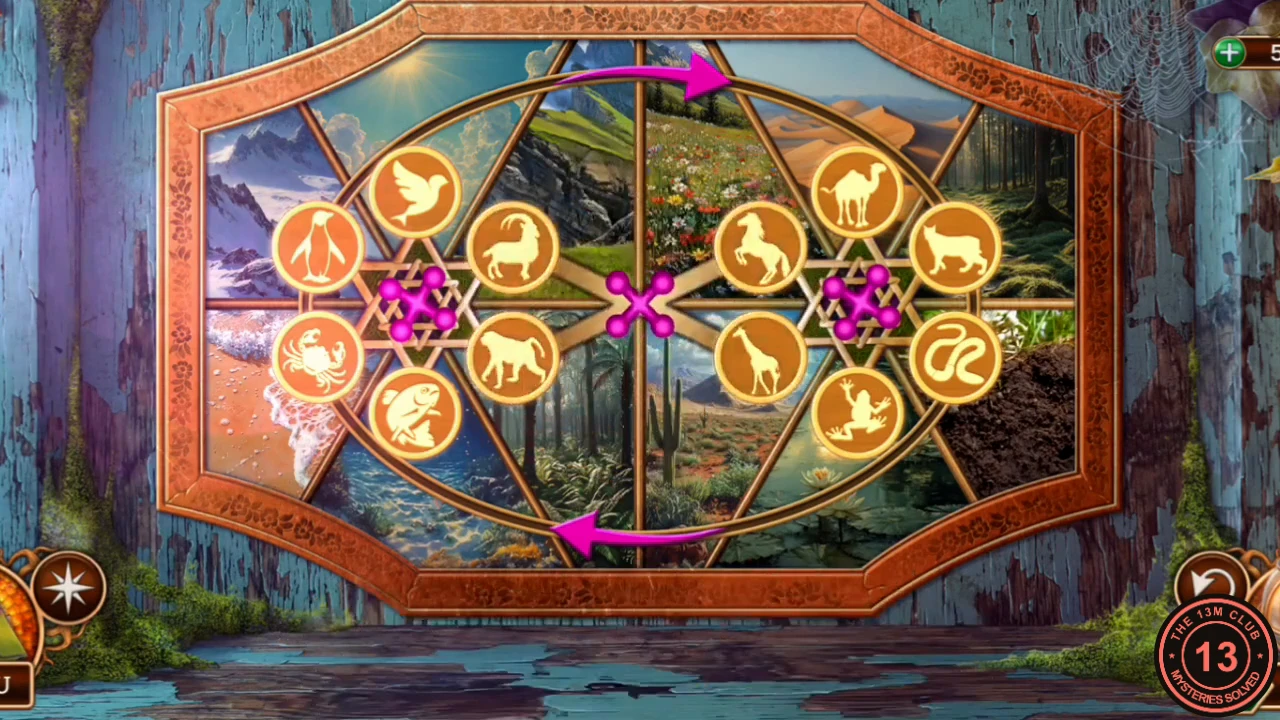
The finished panel, with every animal on its own landscape. - Take the Hare figurine and Lock parts 1/5 from the opened compartment.
Figurines, Black Box and Barrel
Now the earlier locked spots open in a chain.
- In the street, place the Wolf, Fox and Hare figurines on the grindstone shelf. All three figurines' eyes glow and a drawer opens. Take the Amulet car, Lock parts 2/5 and a Cash register key.
- At the Town Entrance car, use the Amulet car on the black box. Take the Corkscrew, the Magnet and the Monkey mask.
- Use the Corkscrew on the bung of the barrel. When the water drains, look inside and take the Bear mask and a second Cash register key.
- Select the Magnet in the inventory (it has a plus mark) and put the Ball of yarn on it to make the Magnet on rope.
- Use the Magnet on rope on the goblet slot in the street. Take the third Cash register key and Lock parts 3/5.
Cash Register Board
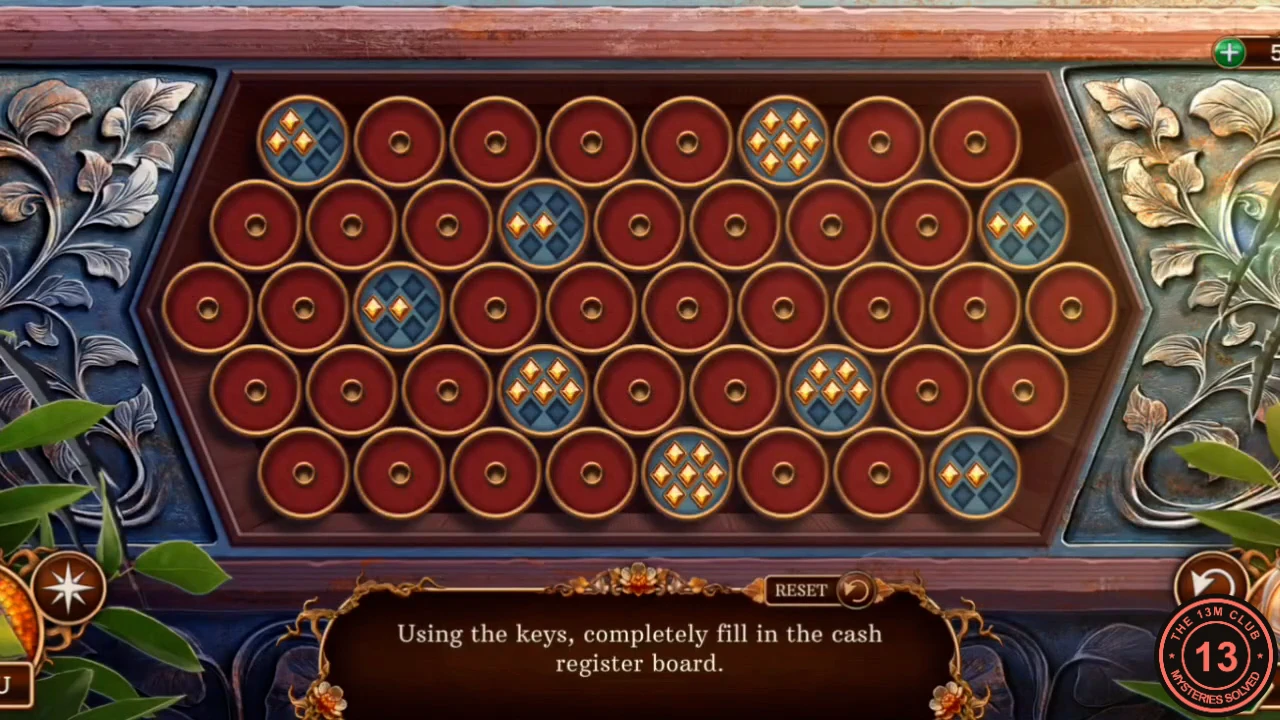
The shop's cash register takes three keys. The rule: fill every red disc. Each blue key shows diamonds; its number of diamonds is exactly how many discs it can light, in straight lines from that key.
- In the shop, place all three Cash register keys on the register on the right-hand counter.
- Draw lines from the blue keys. This solution numbers rows from the top and counts keys from the left. Row 1 first key (3): right 1, down-left 1, down-right 1. Row 1 second key (7): left 3, right 1, down-left 2, down-right 1. Row 2 first key (2): left 1, down-left 1. Row 2 second key (2): up-left 1, down-left 1. Row 3 key (2): left 2. Row 4 first key (5): left 3, up-right 2. Row 4 second key (5): left 1, right 1, up-left 1, up-right 2. Row 5 first key (7): left 4, right 2, up-left 1. Row 5 second key (2): up-right 2. If your board looks different, use the rule: each key must light exactly as many discs as it has diamonds.
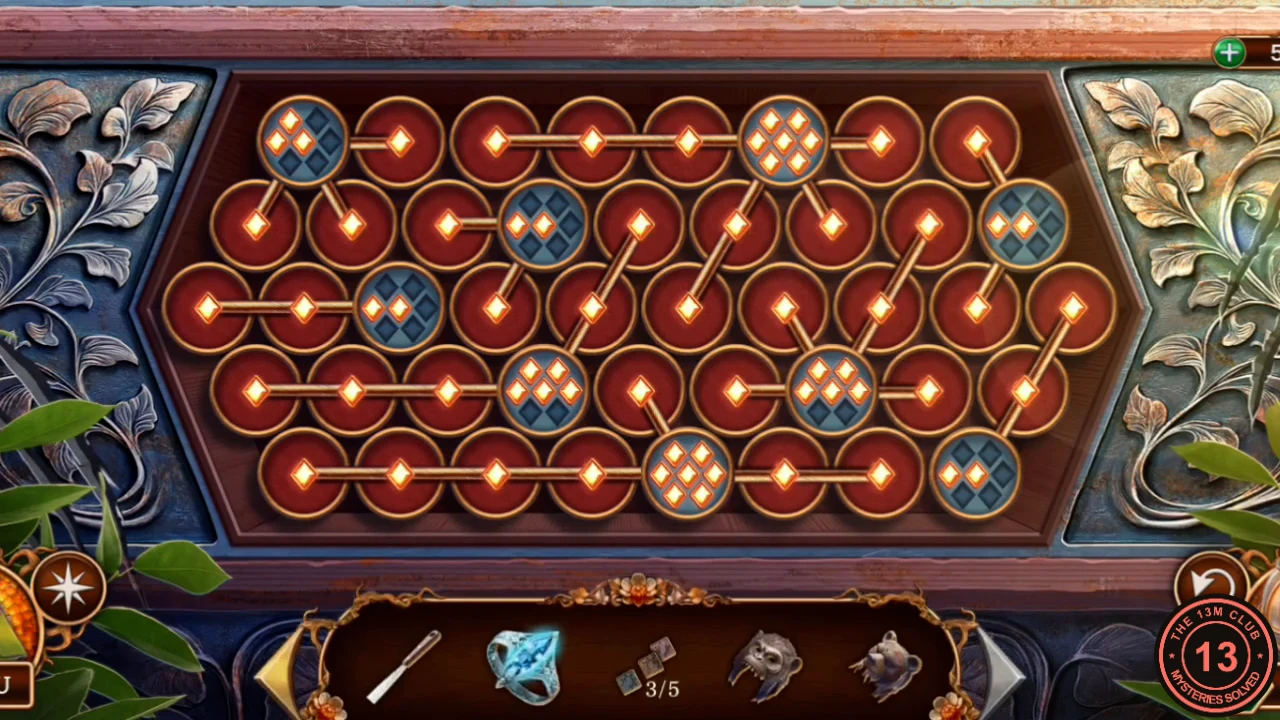
The solved board with every red disc lit, matching the lines listed in step 2. - Take Long nail, Golden coin and Lock parts 4/5 from the drawer.
The King's Cage Lock
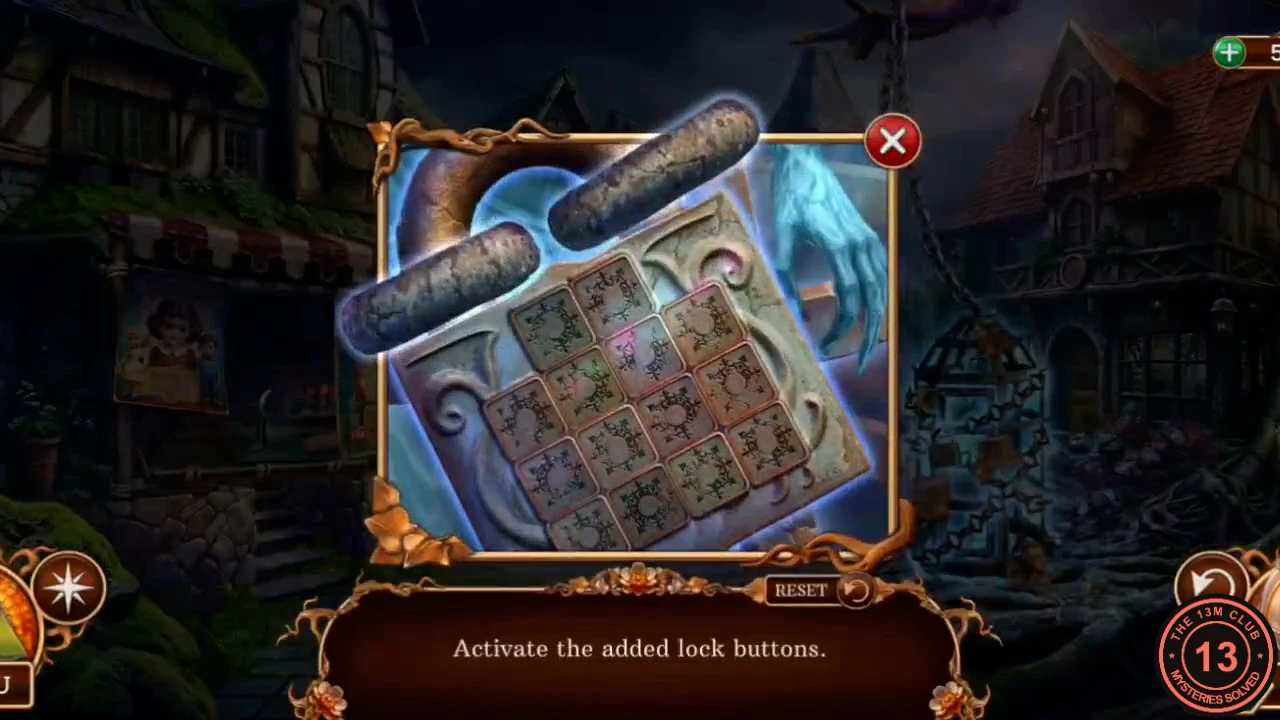
The King's cage needs all five Lock parts and the pattern from Fabian's note in the supply crate.
- On the shop's mask wall, use the Monkey mask on the upper-right empty spot. The lower-left spot has no hook yet.
- At the tavern saddle bag, use the Long nail on the crack to pull out Lock parts 5/5. The nail stays in your inventory.
- Use the Lock parts on the King's cage lock in the street. The tiles appear and the prompt reads Activate the added lock buttons.
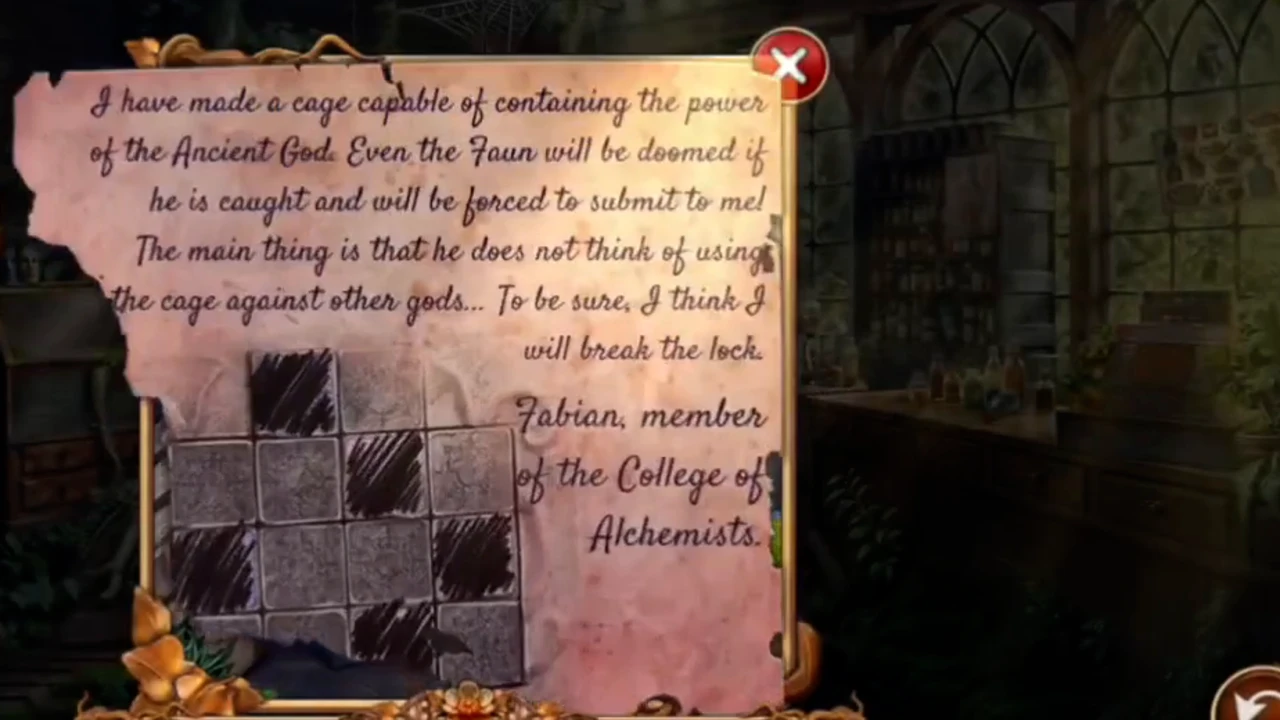
Fabian's note from the supply crate. The shaded squares are the five tiles to press. - Press the five tiles that match the shaded squares in Fabian's note. With the lock held so its top edge is level, the rows are: top row, left of the two tiles; second row, third tile; third row, first and fourth tiles; bottom row, third tile.
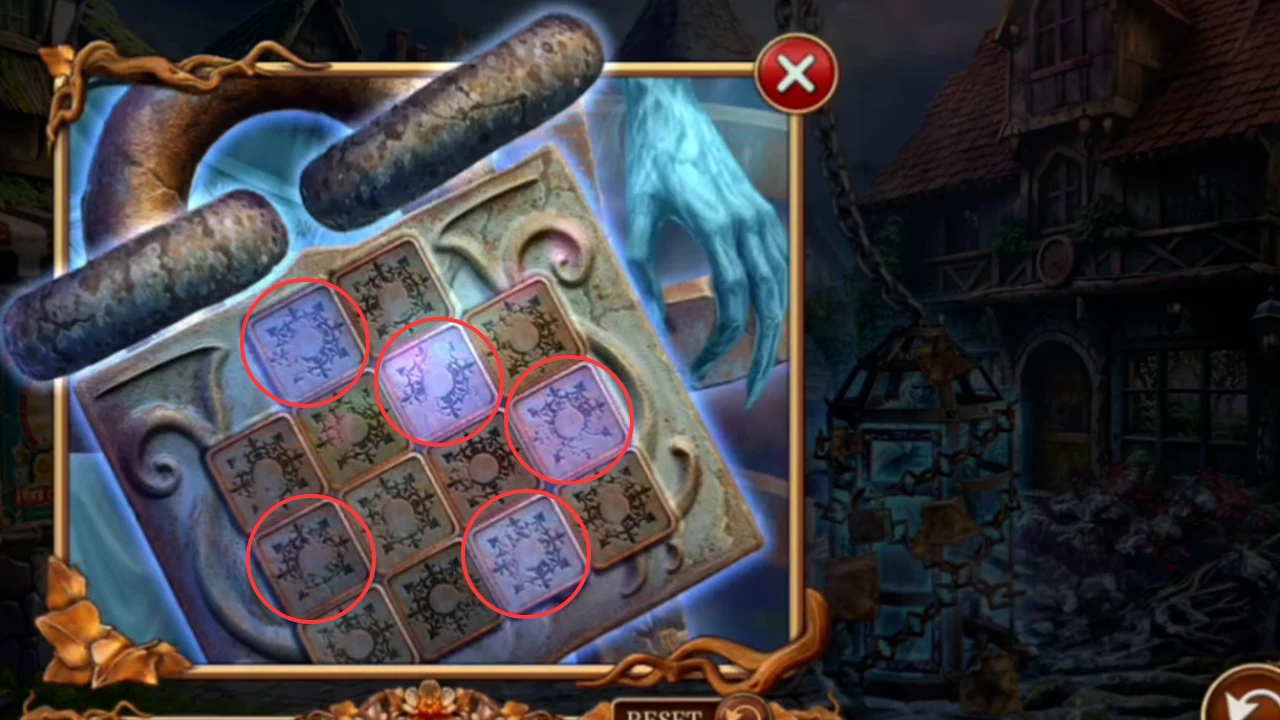
The five tiles to press are circled. This frame was taken just before the last one, so four are already lit and the lower-left one is not. - The King of Winter hands you the Broken blade and asks for paper and a pencil so he can write a spell.
- In the shop, put the Broken blade in the display case's dagger cushion. The lower drawer opens. Take the Amulet bowl and the Hammer.
- On the mask wall, use the Long nail on the empty lower-left spot and then the Hammer to drive it in. Hang the Bear mask there.
- The central mask comes alive and its compartment opens. Take the Amulet snake and the Black candle.
Goblet Door: Gear Lock
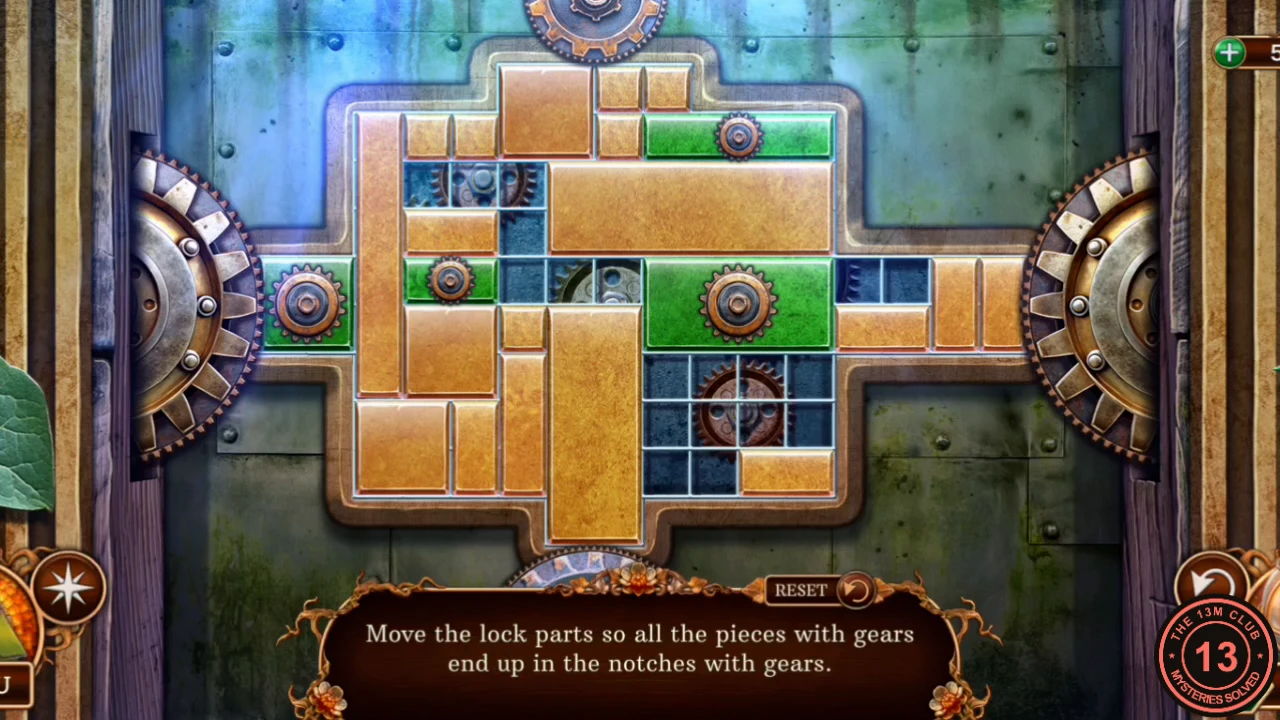
The door with the goblet sign in the street needs the Amulet snake and the Amulet bowl, and then opens a long sliding-block lock. The rule: slide the blocks until every green gear piece sits in its matching notch (top, left, right and bottom). This is a long rearrangement that can take a few minutes, so this section gives the end state and an approach rather than a full move list.
- Use the Amulet snake and then the Amulet bowl on the door plaque with the goblet sign. Once both are fitted, the sliding-block lock opens.
- Move blocks so that one green gear block fills the top notch, one the left notch, the long one the right notch and the small one the bottom notch. Practical approach: clear the empty blue area first, park the long tan blocks against the left, and bring each green block in turn along the open row before sliding it into its notch. Use Reset if you box yourself in.
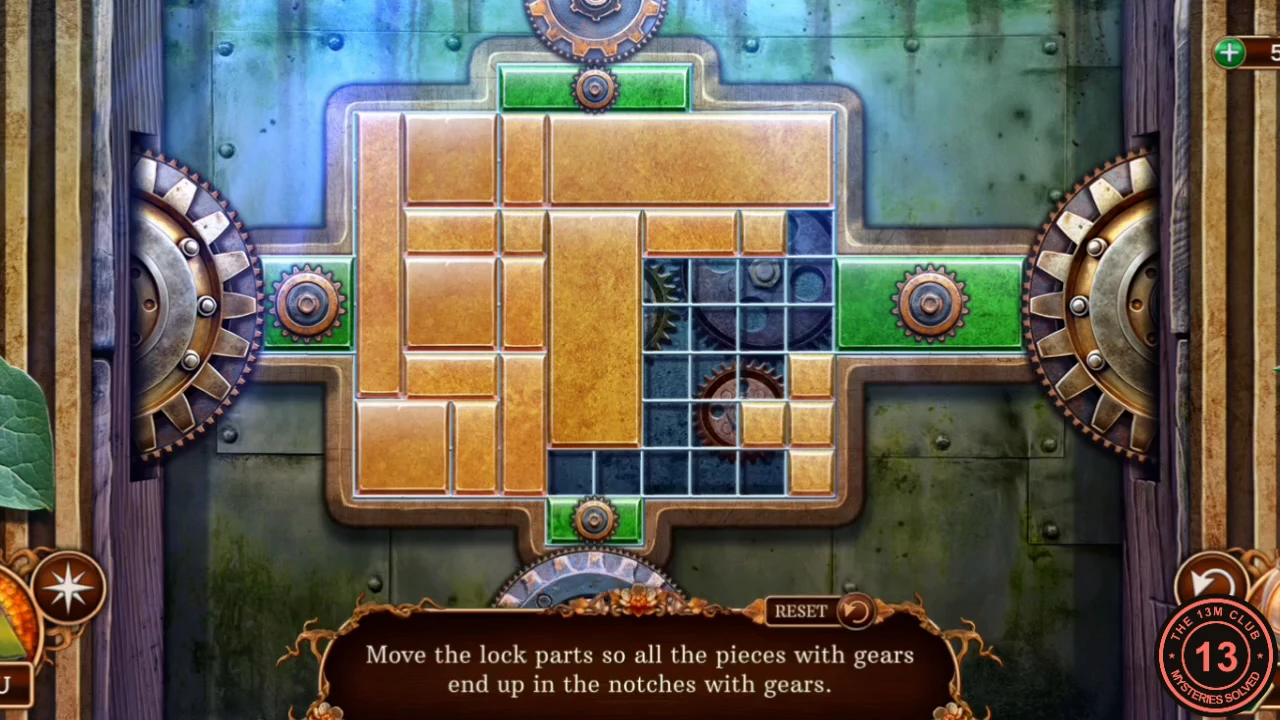
The end state: all four green gear pieces sit in their notches.
Candles for a Second Ritual
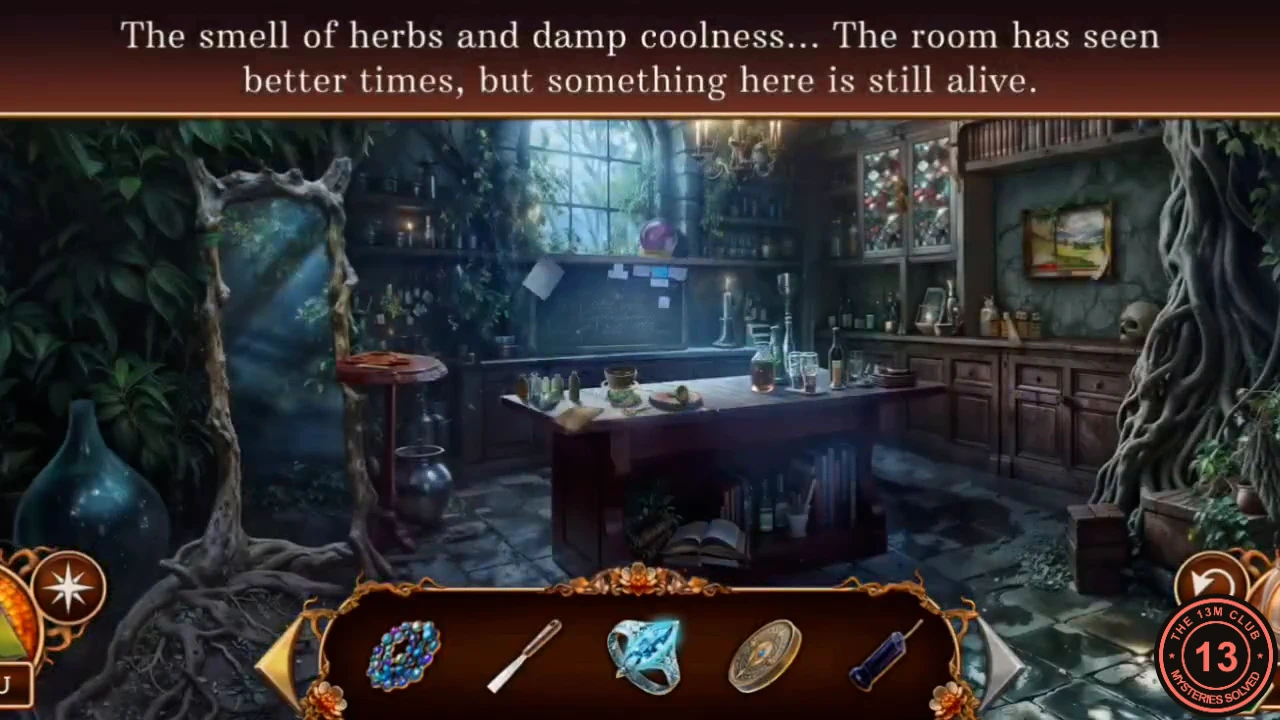
The mirror here shines too, but you need candles. The room has a workbench for making them; the wax is back at the tavern.
- Enter the alchemist's room through the goblet door. Zoom into the mirror altar on the left and take the Pencil. The mirror needs candles and Astral beads.
- Zoom into the workbench and read Fabian's second note. The bench can be used to make new candles.
- Zoom into the stained-glass cabinet on the wall and take the Wick cord.
- Go to the tavern mirror and use the Narrow spatula on the old candle paraffin to get the Paraffin wax. On the tavern counter take the Paper.
- In the street, give the Paper and the Pencil to the King of Winter. He writes a spell and hands you the Paper with symbols and a Suitcase wheel. Task: find a way to contact Amanda.
- At the car trunk, use the Suitcase wheel on the suitcase. Take the Candle mold and the Box of matches, and read the note.
- At the alchemist's workbench, use the Paraffin wax on the burner bowl, add the Wick cord and light the burner with the Box of matches. Set the Candle mold on the left of the bench, then tap the hot bowl so the wax pours into the mold. Take Candles 1/2 and 2/2. Take the Tree token lying on the wood block in the same bench view.
The King's Magic Lock: Colored Lights
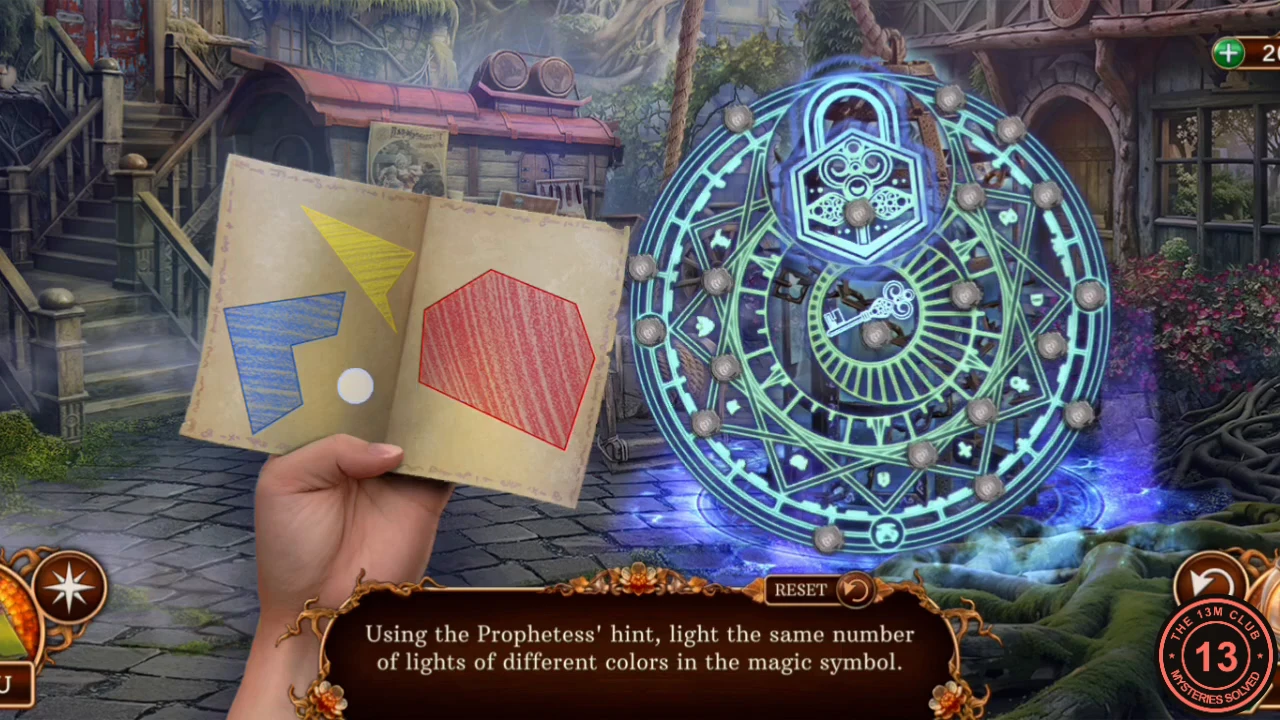
Amanda rewrites the King's spell into an antispell that frees him. The rule on the lock: light the same number of lights of each color as the hint on the paper shows. Count the corners of each shape on Amanda's paper: yellow 4, blue 6, red 6. Tapping a light cycles its color.
- At the alchemist's mirror altar, place the two new Candles and the Black candle, then the Astral beads, and light them with the Box of matches. Amanda appears.
- When the tutorial prompts you, drag the Paper with symbols from the inventory onto Amanda. She corrects the spell and gives you the Paper from Amanda.
- Use the Paper from Amanda on the King's cage in the street. The magic-circle lock opens.
- Tap lights to change their color until you have 4 yellow, 6 blue and 6 red; the remaining 4 stay unlit. Match the positions in the solved image below this step.
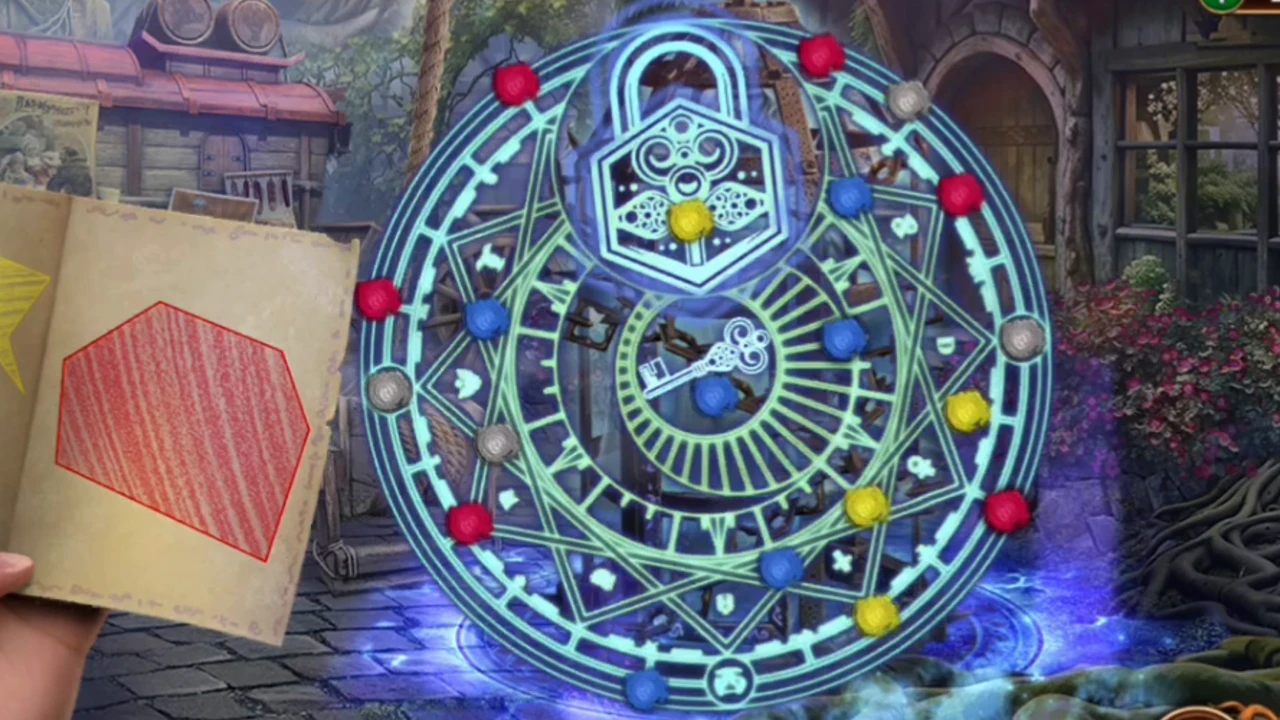
The finished lock with 4 yellow, 6 blue and 6 red lights, and 4 left unlit. - Watch the cutscene: the King is struck down and the Three-Eyed Faun takes over. New task: follow the trail of the Three-Eyed Faun.