The Garden, the Monster and the Statue
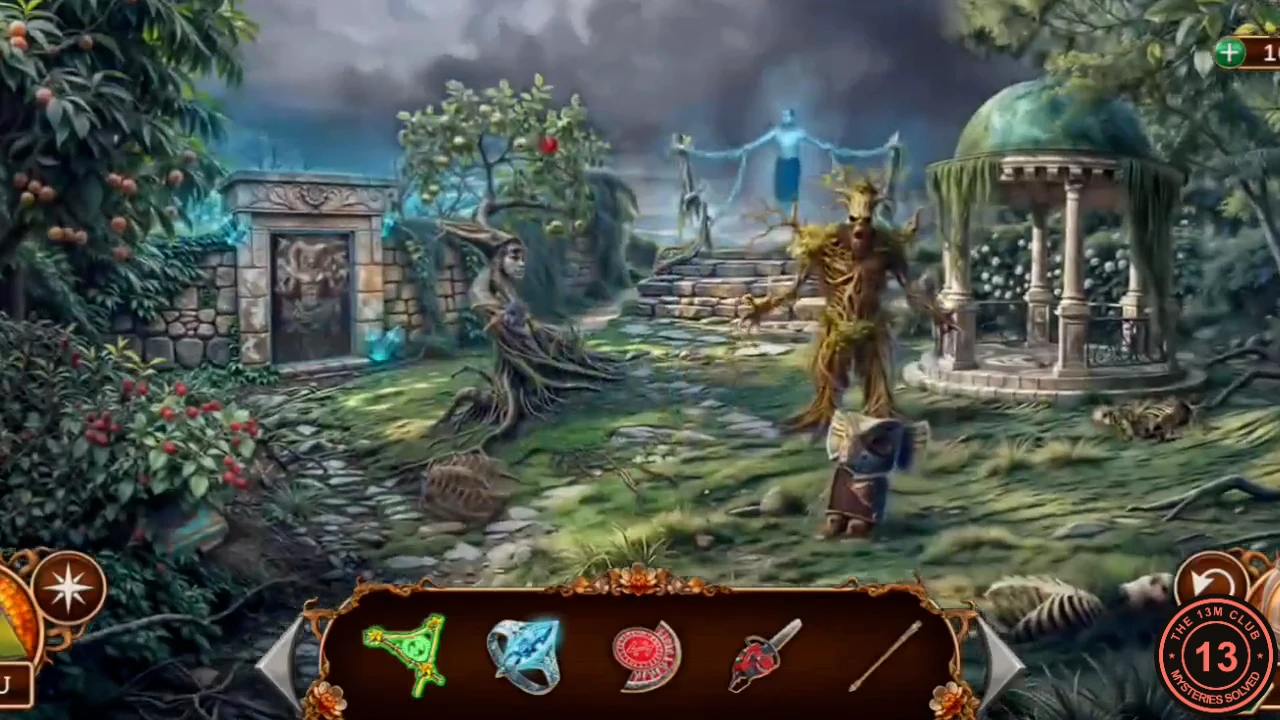
A wooden monster guards this garden, and a chained spirit hovers at the top of the steps.
- Enter the garden. Zoom into the blue chest under the apple tree. Collect the morphing object in the foliage and read Jessica's note.
- Zoom into the statue of the woman. The ropes on her have an unusual lock that needs a key. Collect the morphing object in the branches. An apple is stuck in the tree above.
- Use the Chainsaw on the wooden monster. Both the monster and the saw are destroyed. Take the Monster's paw.
- Zoom into the totem by the gate and take the Onyx key. The detective notes that one face is broken and missing an eye.
- Zoom into the statue again and use the Monster's paw to knock down the Apple. Open the Apple in the inventory: take the Ripe apple and the Floral emblem from inside.
- Use the Onyx key on the statue's rope lock and take Totem fragments (1/2).
- At the top of the steps, talk to the chained spirit, Jessica. She investigated the disappearances and was captured. New task: free the shackled spirit.
- Zoom into the mosaic floor of the gazebo and take Totem fragments (2/2). The detective notes that the mosaic can be fixed if you find all the parts.
- Use the Floral emblem on the blue chest. It opens: take the Key with a tag.
Three Mosaic Pieces
The gazebo mosaic is missing three pieces, spread across the street, the lodge and the garden wall.
- Teleport to the diner street. Zoom into the carriage and use the Key with a tag on the purple lantern. Take the first Mosaic piece.
- Back at the gazebo, use the Mosaic piece on the floor mosaic.
- Zoom into the totem and use the Totem fragments on its broken face. It splits open: take the Golden revolver.
- In the lodge, zoom into the wall shelf and use the Golden revolver on the statue in the wall. The base slides out: take the second Mosaic piece.
- Zoom into the Faun relief in the garden wall and take the third Mosaic piece.
- Use both remaining Mosaic pieces on the gazebo floor to start the crystal puzzle.
Gazebo Mosaic: Thirteen Crystals
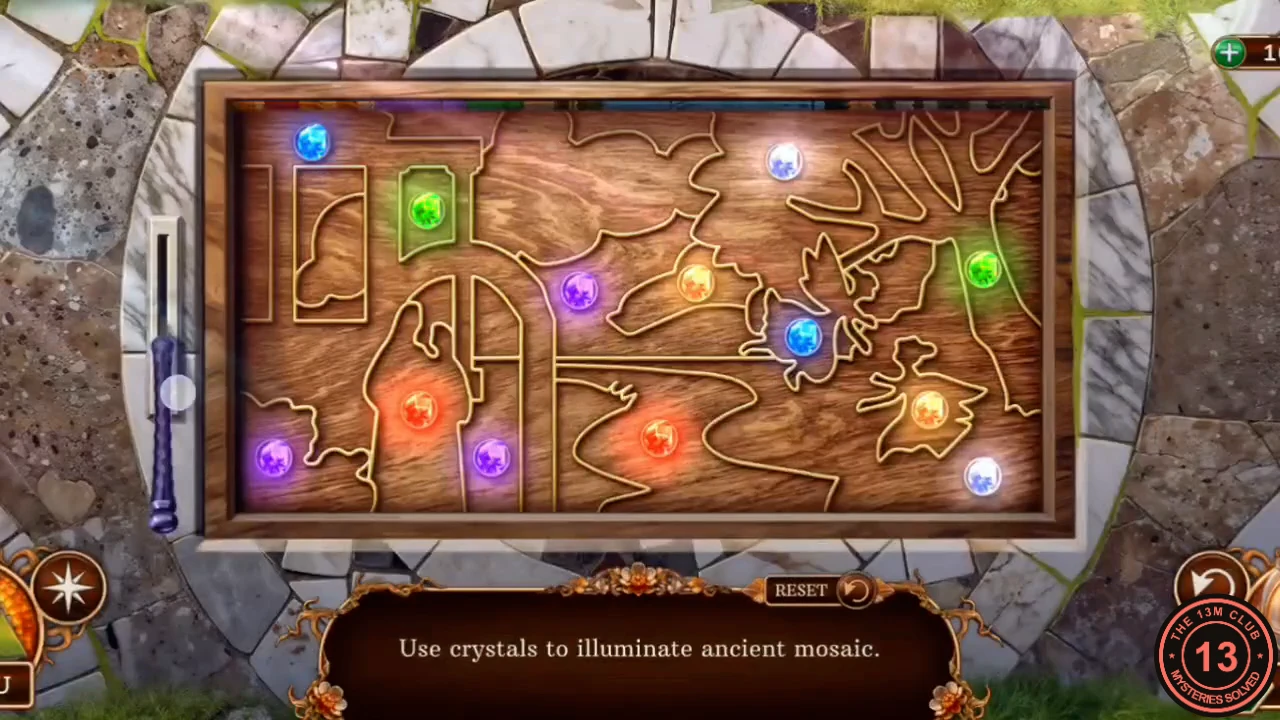
The rule: use crystals to illuminate the ancient mosaic. Swap crystals so each one lies in the right area of the picture, then pull the lever. Pulling the lever also shows you the target picture over the board. The starting colors may differ, so match the finished colors in step 1.
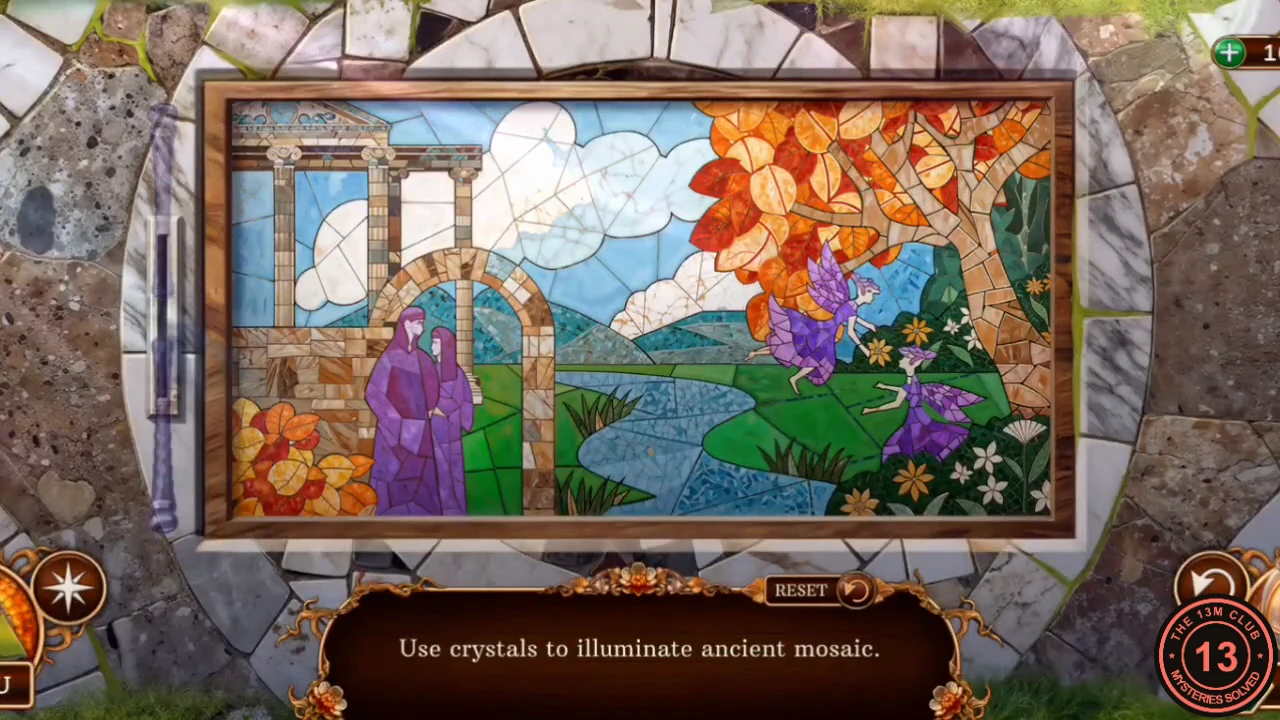
- Tap two crystals to swap them. Finished colors: top left white, the small window at the top orange, the center-left spot blue, the hill white, top right red, the tree on the right orange, the upper fairy on the right purple, the lower fairy on the right purple, the bottom-right corner green, the river in the middle blue, the doorway green, the robed figures on the left purple and the bottom-left corner red. Pull the lever on the left.
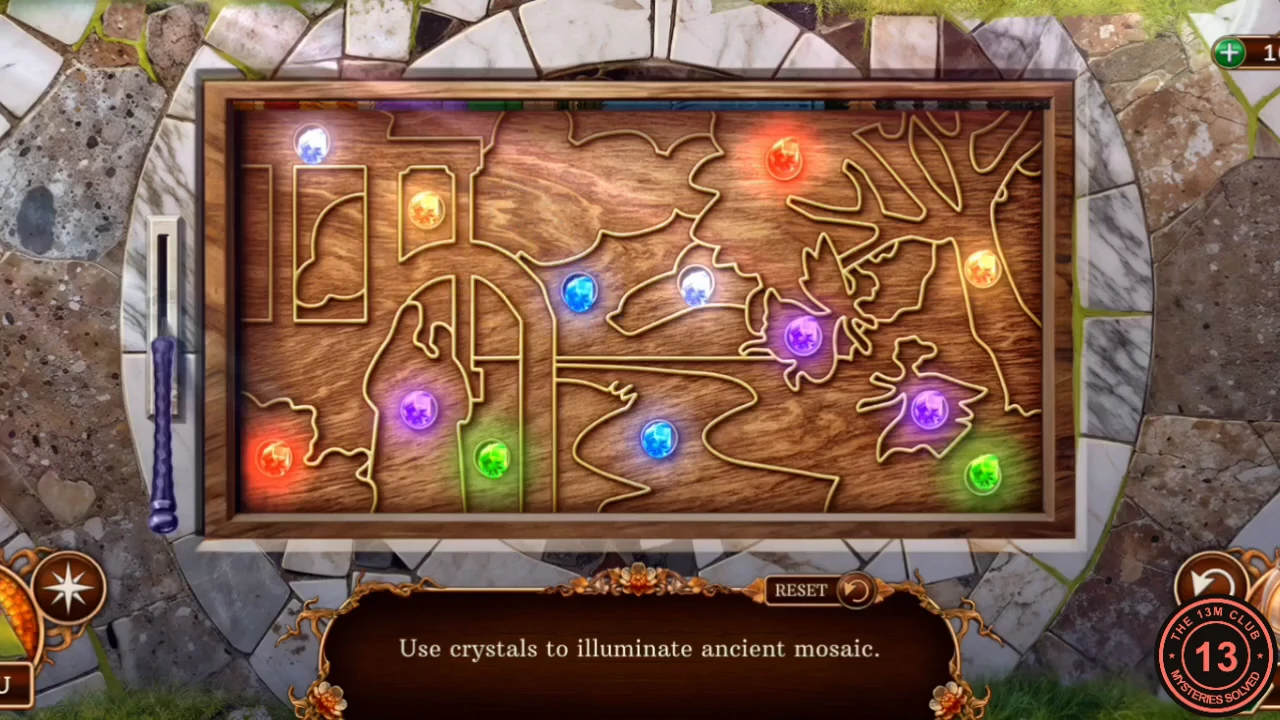
The finished board. Use it to check each crystal color from step 1. - Take the Shackles talisman.
Free the Spirit and Defend the Lodge
Jessica joins you, but the Faun's servants come for the children. You have to barricade the lodge and make a weapon.
- Use the Shackles talisman on the chained spirit at the top of the steps. Jessica is freed and wants to go back to her children. Take the Cold chains. New task: protect the children.
- Go to the lodge. The Faun's servants are approaching: barricade the door and window, hide the children and find a weapon.
- Take the Nail-planked boards beside the window. Use the Cold chains on the door and the Nail-planked boards on the window.
- Take the Broken spear from the floor in front of the dresser. Open it in the inventory, add the Decorated shaft, then use the King's ring on it to make an Ice spear. The ring is used up.
- Open the wardrobe so Jessica and the children hide inside.
- The servants break in. Use the Ice spear on them to freeze and shatter them.
- Take the white stone fragment from among the wreckage. Jessica says the charm can open secret paths, so restore it. New task: find the second part of the amulet.
Faun Relief: Press the Right Parts
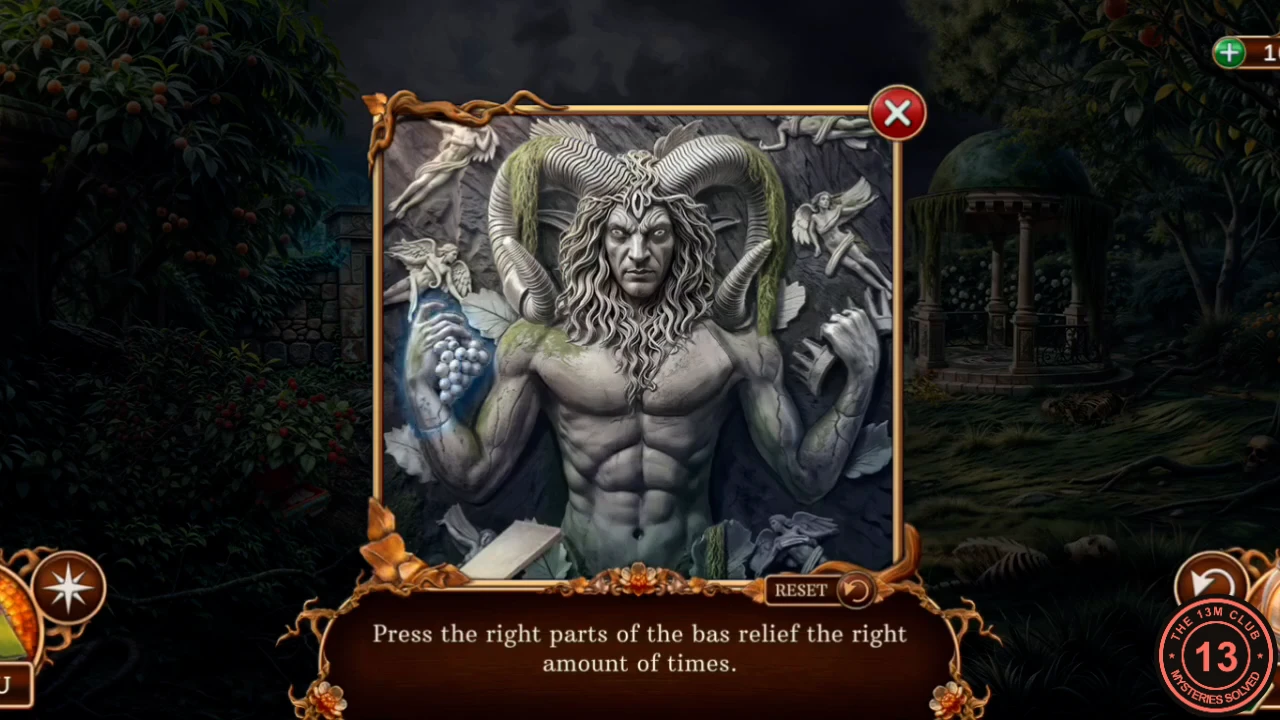
The rule: press the right parts of the bas relief the right number of times. The clue is the sketch that appears when you add the stone fragment.
- Zoom into the Faun relief in the garden wall and use the stone fragment on it. Read the sketch: 3 on the hand holding the grapes, 2 on the head and 3 on the other hand.
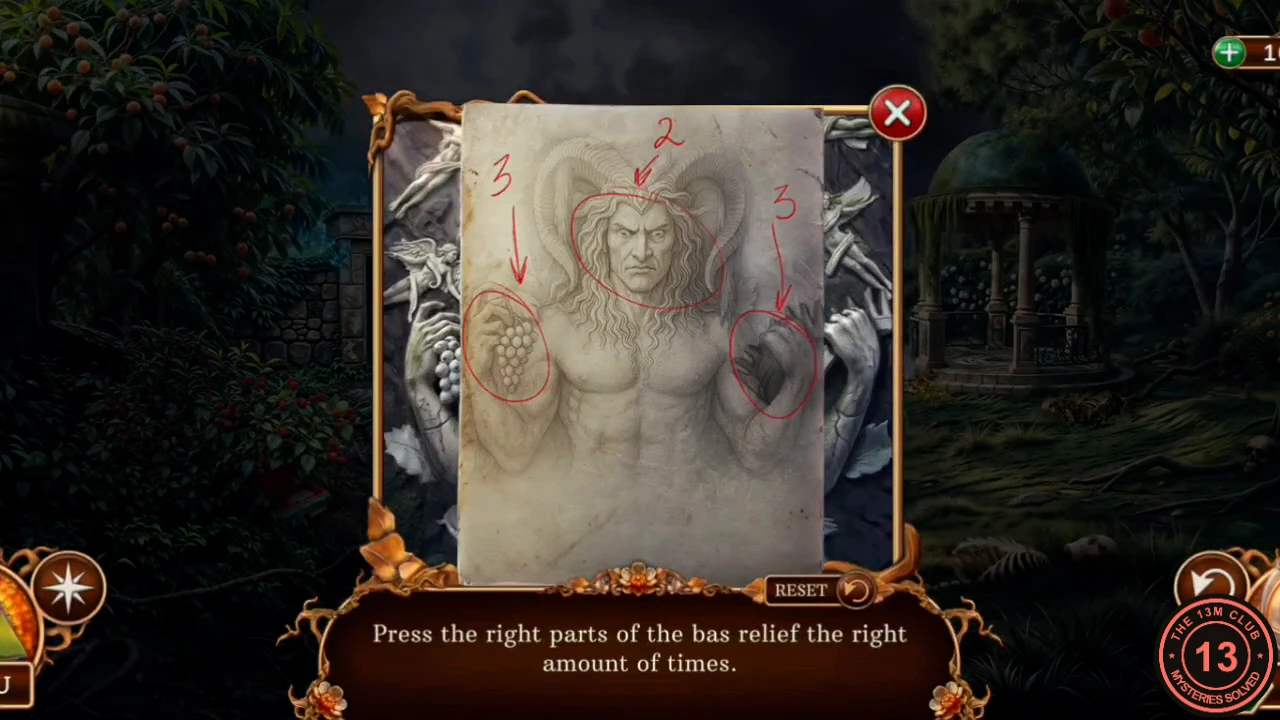
The sketch on the relief: three presses on the grape hand, two on the head and three on the other hand. - Press the grape hand 3 times, the head 2 times and the other hand 3 times.CODE3 / 2 / 3
The Faun's Altar
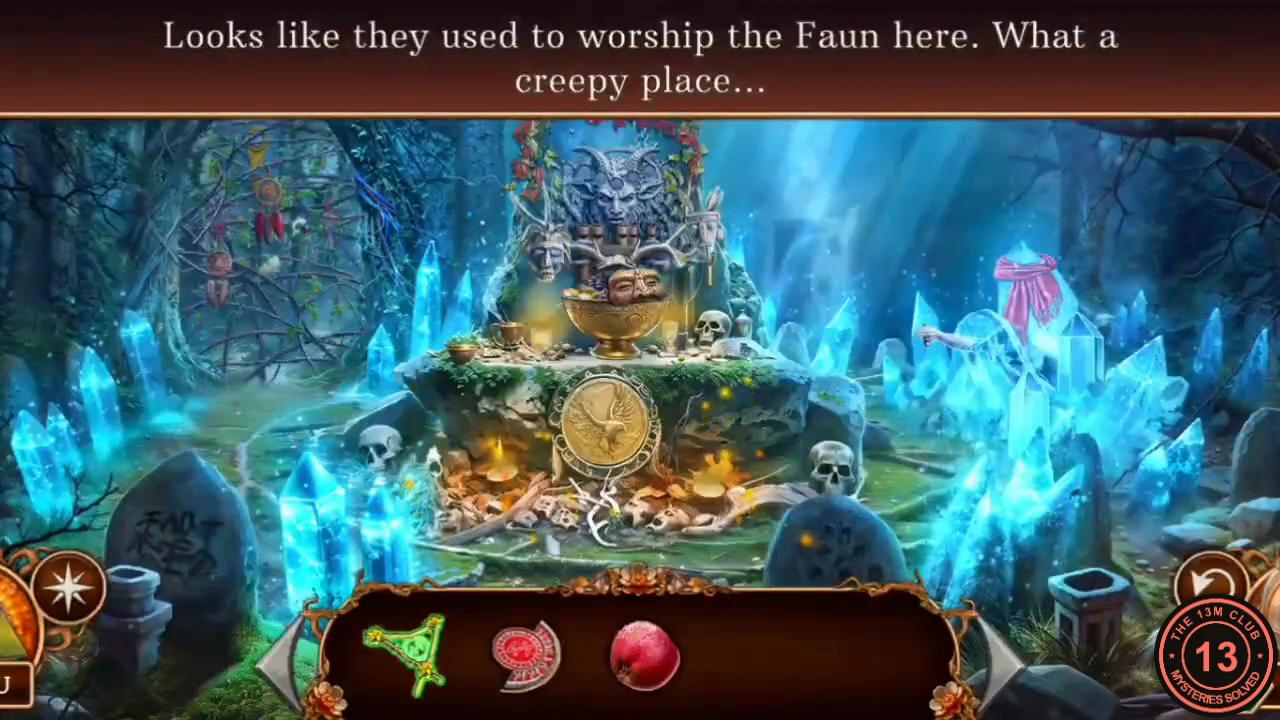
The altar's broken flute must be repaired. Its offering bowl and a frozen hand hide what you need.
- Enter the altar. Zoom into the branches on the left and take the Silver comb. An amulet has been ripped off here, and the detective notes that getting it back will open the passage.
- Zoom into the altar's offering bowl. Take the mask lying on the fruit. The detective notes that the apple has rotted and must be replaced.
- Use the Ripe apple on the bowl. The fruit melts away: take the Lost ring and the Ritual bowl.
- Zoom into the frozen hand in the crystals on the right and use the Lost ring on it. Take Pan flute pipe (1/2). Collect the morphing objects that show up around the altar. The flute itself needs its missing pipes.
- Zoom into the branches on the left and take the Dolphin talisman.
- Teleport to the forest tent. Use the Dolphin talisman on the backpack's clasp and take Pan flute pipe (2/2).
- Back at the altar, use both Pan flute pipes on the flute to start the puzzle.
Altar Flute: Light the Seven Lamps
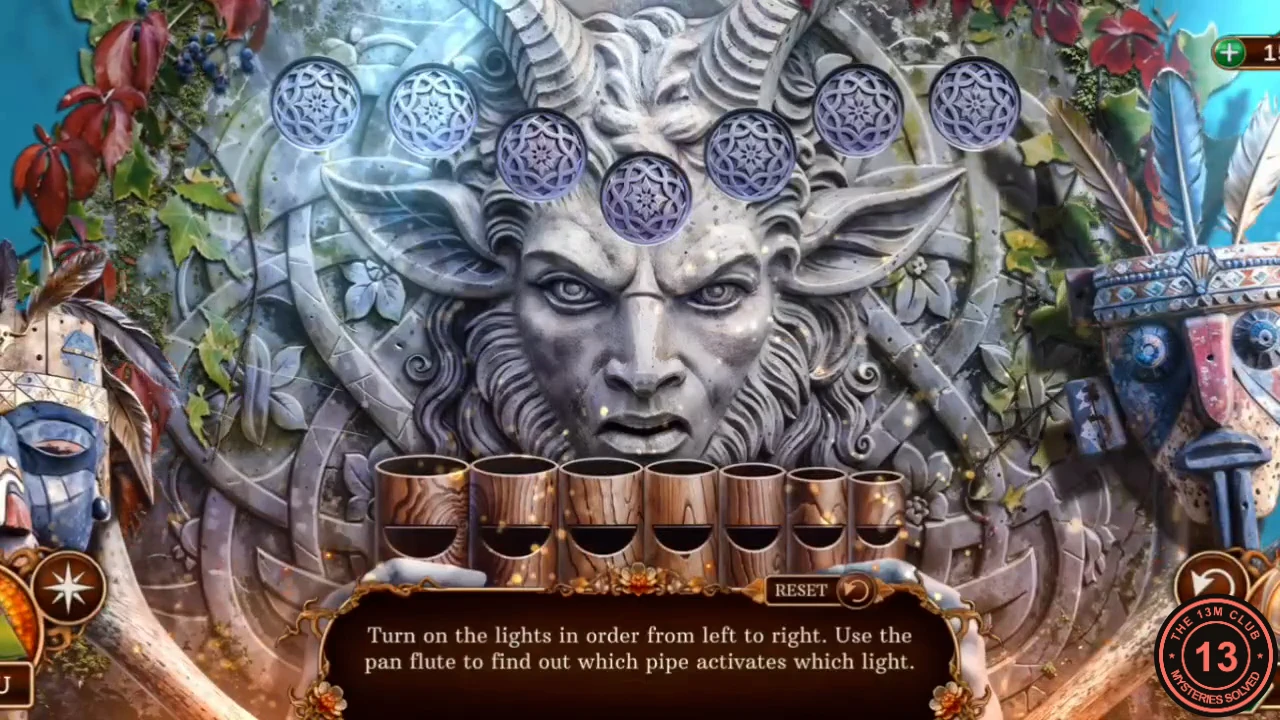
The rule: turn on the lights in order from left to right, using the flute to find out which pipe activates which light. Pipes are counted from the left, tallest to shortest. There is a Reset button.
- Press the pipes in this order: 5, 7, 2, 3, 6, 4, 1. If your flute behaves differently, play each pipe to learn which light it controls and use Reset.CODE5 7 2 3 6 4 1
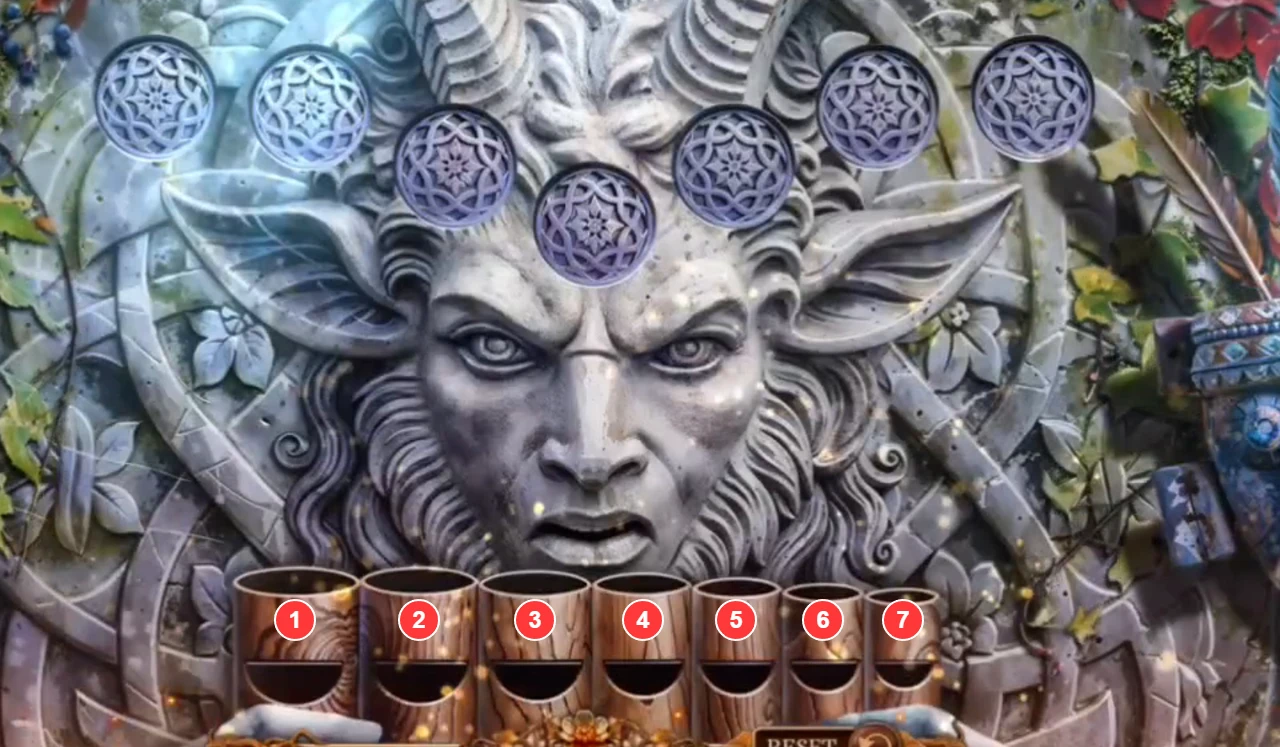
The pipes numbered as the press order uses them, from the left, tallest first.
Send the Family Home
The Faun offers a cruel bargain. You choose to give up your amulet so the family can leave, and it costs you your soul.
- Watch the Faun appear. He gives you the Amulet half, warning that you will doom yourself to torment. New task: help the children leave.
- Go to the lodge. Use the Amulet half on Summer. Jessica repairs the charm: take the Repaired amulet. It still needs power.
- Open the Repaired amulet in the inventory and use the Charged Talisman of Wrongside on it. The talisman crumbles and a portal opens. Jessica and the children step through.
- The Faun appears, drains your soul and leaves. The detective notes that you must get into the labyrinth to get it back.
- Pick up the Creepy doll from the lodge floor, open it in the inventory and use the Silver comb on it. Take the blue Glass eye it holds.
- In the garden, zoom into the split totem and put the Glass eye in its empty socket. It opens: take the Hanging amulet and collect the morphing object here.
- At the altar, zoom into the branches on the left and use the Hanging amulet on the empty cord. The vines clear and the passage opens. Go through into the labyrinth.