Charge the Talisman and Meet the Faun
The talisman needs charging at the swamp altar. Showing it to Yon sets off the Faun's first trial.
- In the swamp, zoom into the altar and put the Talisman of Wrongside in the triangular groove. Take the Charged Talisman of Wrongside. New task: move on to the next part of the Upside Down.
- Go to the Old Square. Yon is waiting and wants to see the amulet. Use the Charged Talisman of Wrongside on Yon. Yon vanishes and the Faun appears.
- Talk to the Faun. He makes you drink a potion, shows you his memories, then reveals that it was poison. You have a little over an hour, he says, and he mentions a note at the Vulture Dinner. New task: find a diner.
- Zoom into the thorny gate on the street to the right of the statue. Use the Charged Talisman of Wrongside to burn away the thorns. A round lock with an Owl key is revealed. Take the Owl key.
- In the swamp, zoom into the sunken roof again and use the Owl key on the blue boat drawer's second keyhole. Take the Full Moon Medallion.
Street Gate: Shape and Picture Lock
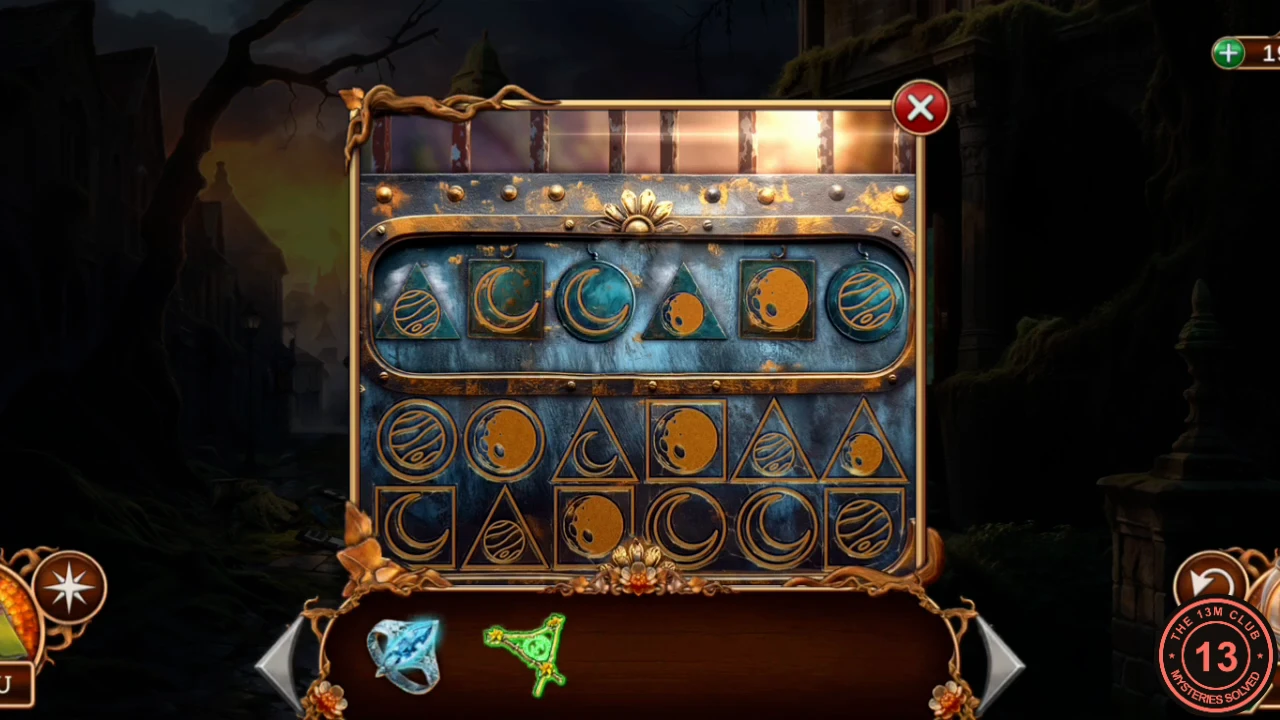
The rule: fill the top row so that it uses each pictured combination from the rows below only once. There are three shapes (triangle, square, circle) and three pictures (full moon, crescent, planet). You have to complete the set with two medallions, then swap tiles.
- Zoom into the gate lock. Place the Crescent locket and the Full Moon Medallion in the two empty slots of the top row.
- Tap two tiles in the top row to swap them. Match each top tile to the two tiles below it: each column must show one triangle, one square and one circle, and one of each picture. A top row that works, left to right: triangle full moon, square crescent, circle planet, triangle planet, square full moon, circle crescent.
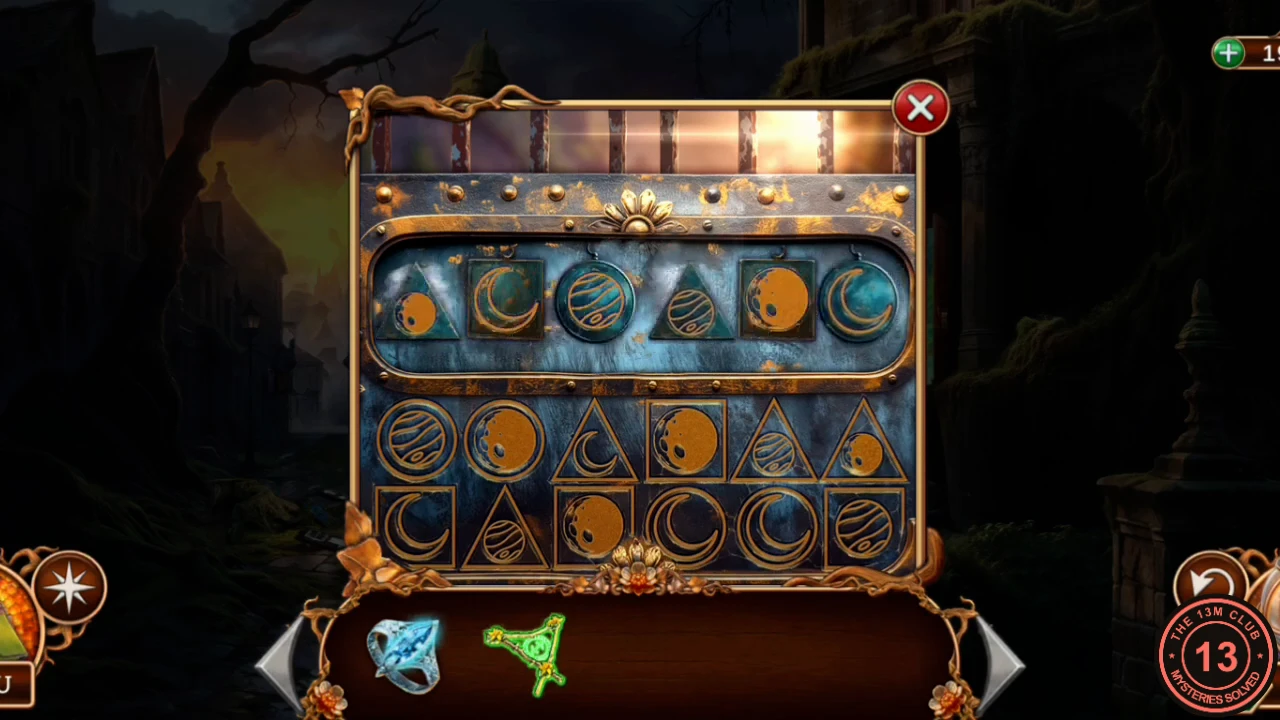
The working top row, matching the list in step 2.
The Diner Street
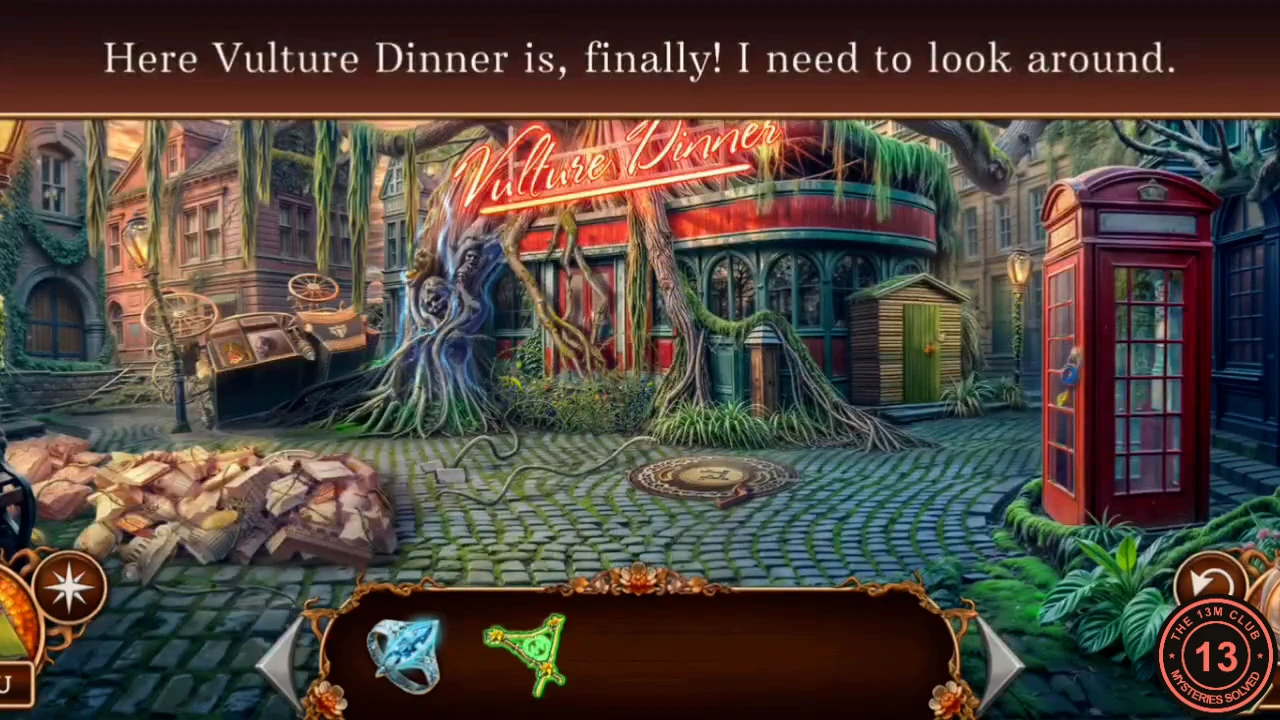
The street is tangled with enchanted roots, and you need several tools to reach the diner.
- Enter the street, see the Vulture Dinner sign and notice someone in the window. Zoom into the phone booth and take the first Colored shard (yellow). The booth's lock has a key stuck in it.
- Zoom into the carriage on the left, with its tulip window and a lantern that needs a key. Then zoom into the manhole on the ground and take the Copper handle.
- Zoom into the green shed door. Take the Work gloves (1/2) and read the note: a hint about a safe connected with award medals. Look at the debris pile in front of the shed: you need the second glove to search it.
- Use the yellow Colored shard on the tulip window of the carriage.
- Zoom into the diner door and use the Charged Talisman of Wrongside on the thin thorns. Take the second Colored shard (red). The thick roots still need a serious tool.
- Use the red Colored shard on the tulip window. Take Work gloves 2/2. Look at the box inside: its lock needs a bug-shaped part. Take the Thin pin from the seat next to it.
- Use the Thin pin on the booth's lock. It only partly helps: the lock is damaged, and you will need to break it open.
Debris Pile: Remove Pairs
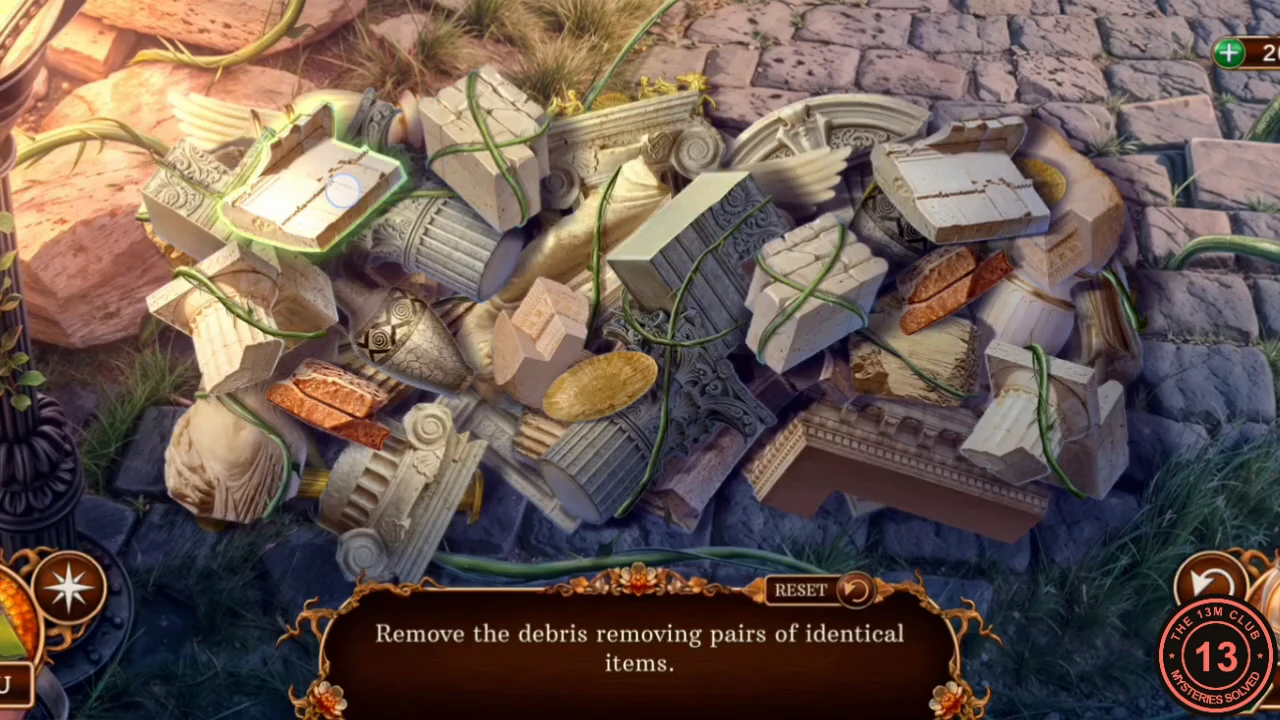
The rule: remove the debris by tapping pairs of identical pieces. Only pieces with nothing resting on them can be picked up. If you get stuck, use Reset.
- Zoom into the debris pile near the shed and use the Work gloves on it to start the mini-game.
- Clear pairs from the top down. The vine-wrapped stone blocks and the ornate capitals come in matching pairs. Toward the end you should be left with pairs such as the gold-framed trims, the brass hoses, the angel wings and the white window frames.
- Take the Broken chainsaw and the Lockpick beside it.
Open the Booth and the Safe
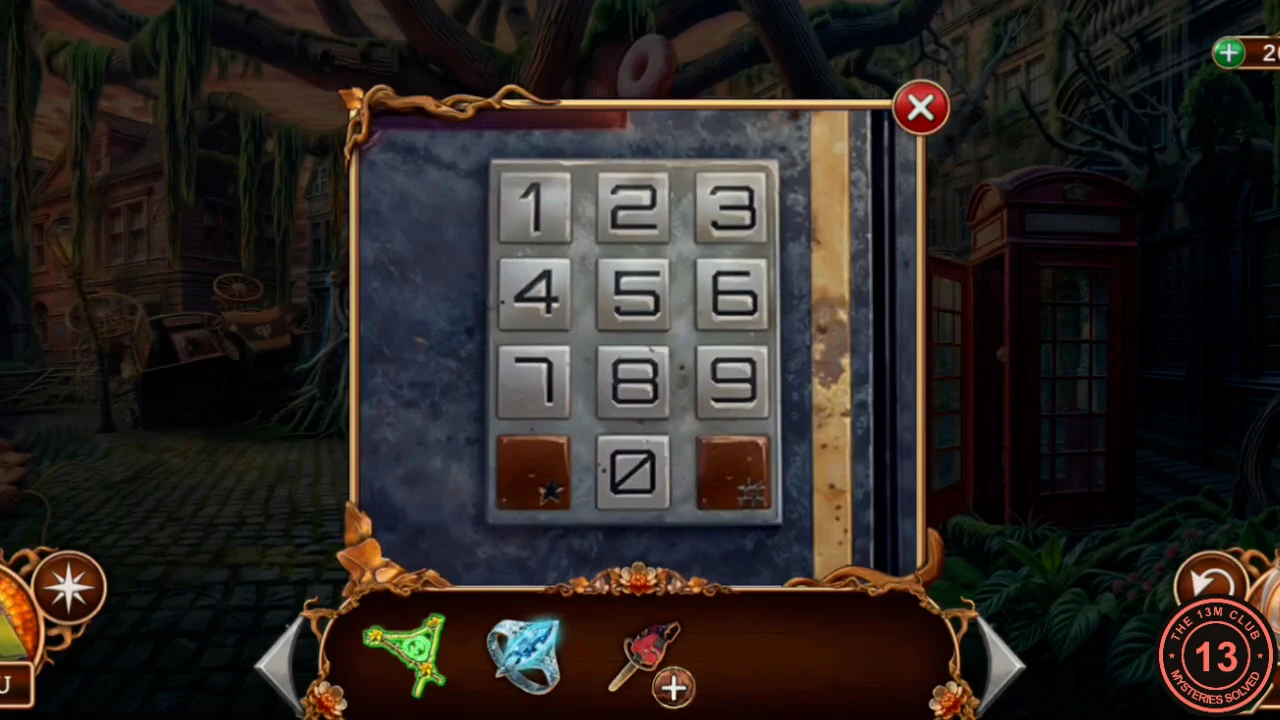
A working chainsaw is the way through the roots. Its starter and chain are hidden in the booth and the safe.
- Use the Lockpick on the phone booth's lock and go inside. Take the Ruler and the Chainsaw starter.
- Open the Broken chainsaw in the inventory and add the Chainsaw starter. It still needs a chain.
- At the shed door use the Ruler on the boards to pry them off. Behind them is a safe. Use the Copper handle on its door.
- Enter the safe code 2465 on the keypad and turn the handle.CODE2465
- Take the Chainsaw chain and the note. The blue case above it is jammed and needs its hinges lubricated.
- Open the Broken chainsaw in the inventory and add the Chainsaw chain, which makes it a Chainsaw. Use it on the thick roots at the diner door, then on the planks across the door.
- Go into the Vulture Dinner. New task: examine the building.
Inside the Diner: First Recording and the Fan
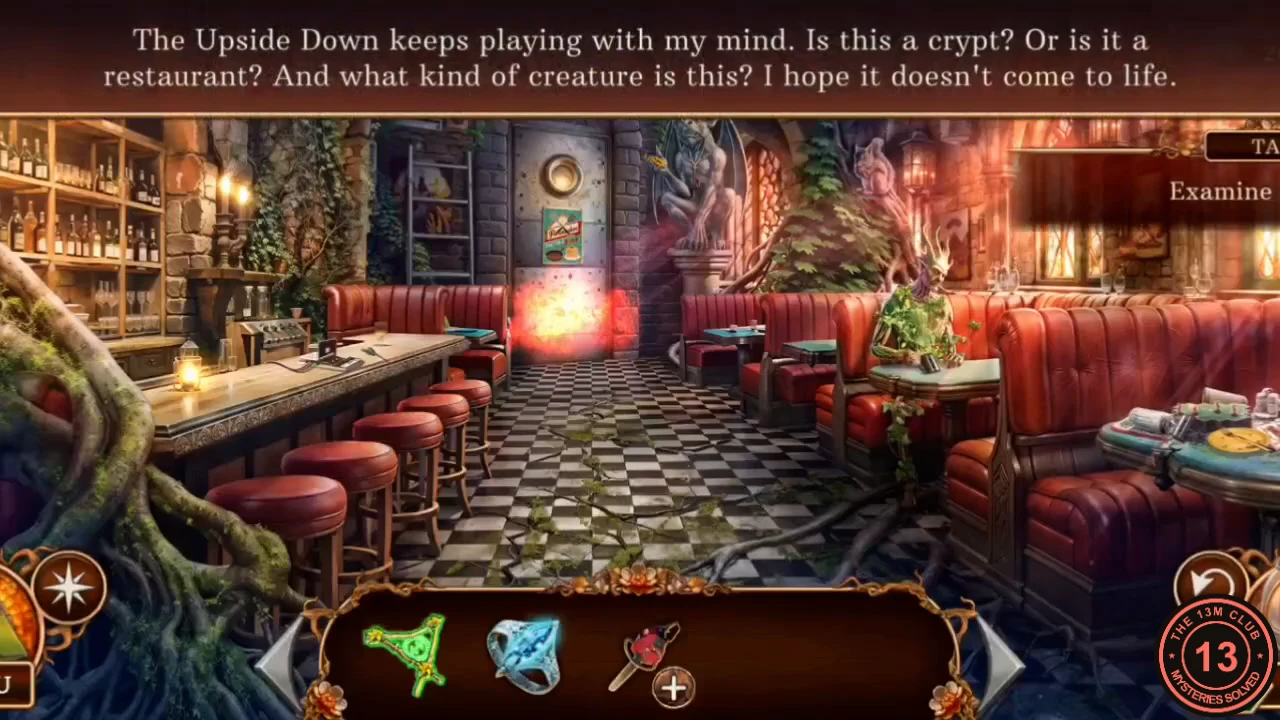
The diner's owner left audio tapes behind. Play them on the recorder at the counter.
- Zoom into the recorder on the counter and take the Oiler. The detective mentions that you need to find audio cassettes for it.
- Zoom into the ventilation grill by the door. You cannot undo its screws by hand. Also look at the gargoyle by the door: the slit in its chest needs a pointed weapon.
- Zoom into the table with the wooden hands and take the Unplayed audiotape.
- Zoom into the board game on the booth table. Take the Damaged audiotape, read the note and see that the game needs more figures. This board comes later.
- Put the Unplayed audiotape into the recorder and listen. The owner, who was turned to wood by the Faun, says he hid a recipe in the kitchen. A drawer opens below the recorder. New task: go to the kitchen.
- Take Audiotape (counter 1/4) and the Hand sign from the drawer. Use the Hand sign on the wooden hands at the table. They open: take the first Fairy figurine.
- Back at the safe, use the Oiler on the blue case's hinges and open it. Take the Screwdriver.
- Use the Screwdriver on the ventilation grill's screws. Take the Sun Medallion and the second Fairy figurine from behind the grill. Press the machine's button and read that its regulator is broken.
- Open the Map (the book at the bottom-left of the HUD) and teleport to the library. Zoom into the raven and use the Sun Medallion on its pedestal to get the third Fairy figurine.
- Teleport back to the diner. Place all three Fairy figurines on the board game to start the puzzle. The yellow fairy is already there.
Board Game: Lead the Fairies
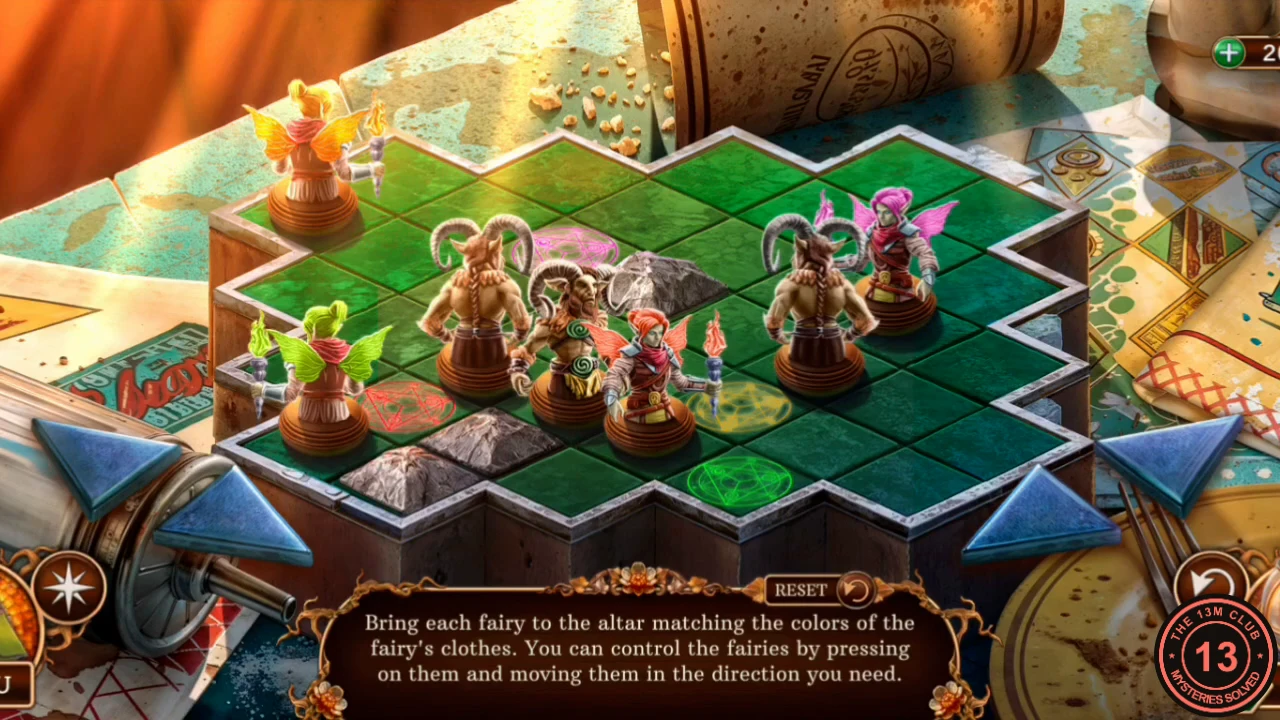
The rule: bring each fairy to the altar matching the colors of its clothes. Press a fairy or a faun and swipe to slide it along the rows until it reaches an obstacle. This is a long rearrangement, so this section gives the goal and a method rather than a full move list.
- Use the fauns as stoppers. Each fairy slides until it hits a rock, a board edge or another figure, so push a faun into place first and then slide a fairy against it. Altars: the pink one behind the rock at the back, the red one at the front left, the yellow one in the center right and the green one at the front right. Use Reset if the fauns get stuck in a corner.
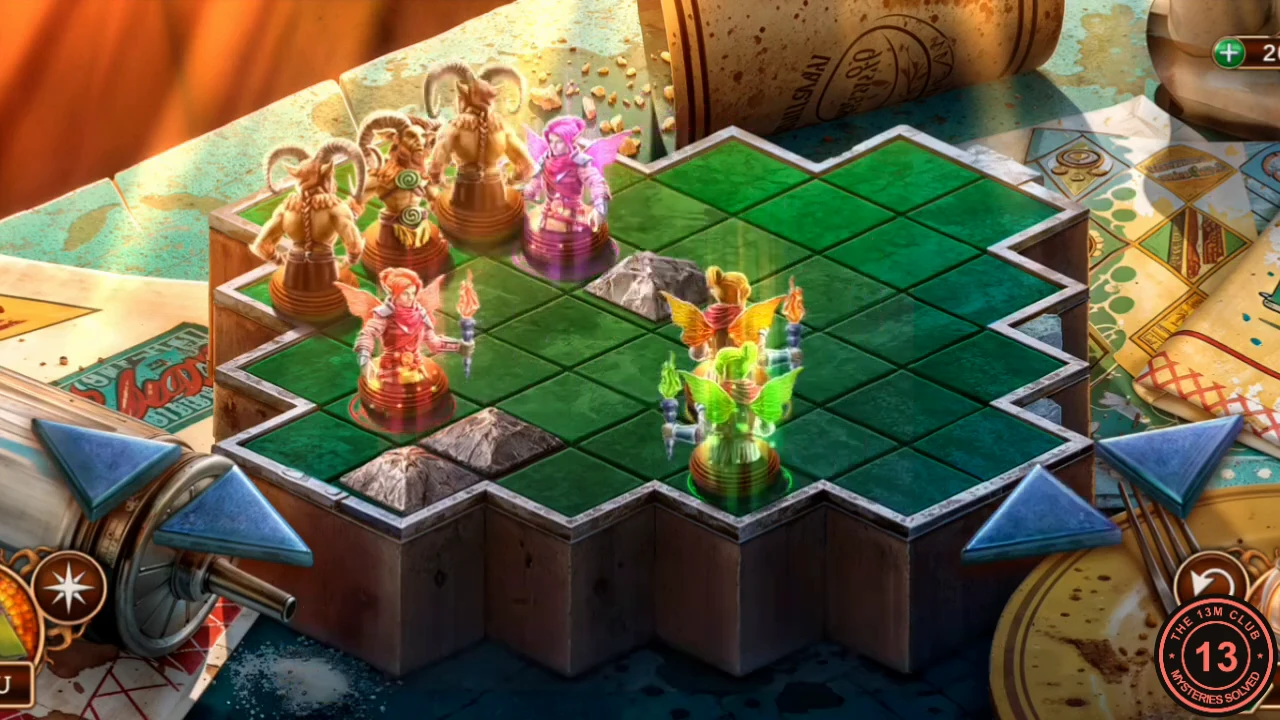
The finished board, with each fairy on the altar that matches her clothes. - Take the Regulator wheel from the opened compartment.
Run the Fan and Enter the Kitchen
The fire at the back of the diner bars the kitchen until the fan clears it.
- At the machine by the grill, use the Regulator wheel and press the button. The fan runs and the fire at the back goes out.
- Go through to the kitchen. New task: learn where the antidote is hidden.
Kitchen: First Tour
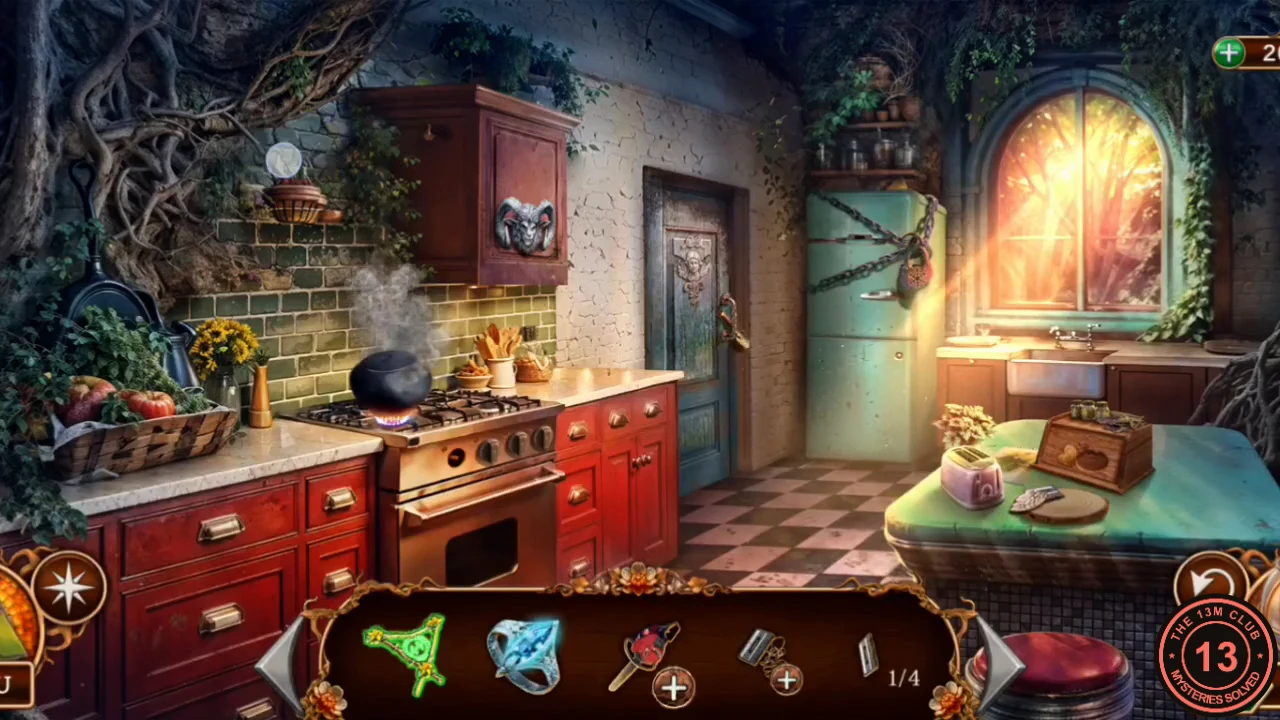
The cook hid his recipe here, but almost everything is locked. This tour gathers the clues and two early items.
- In the kitchen, zoom into the stove. The pot is about to explode, so the gas must be turned off, but the knob needs a handle. Zoom into the cabinet on the wall: the Faun-head lock needs its eyes back.
- Zoom into the pantry door. Take the Garden trowel by the handle. The door's cherub is missing its wings. Zoom into the fridge and take the Triangular amulet from the chains. The chain lock still needs the right piece.
- Zoom into the kitchen table. Take the Unplayed audiotape and the first Decorative wing. The toaster needs a lever and the bread bin needs a handle. Read the note.
- Teleport to Amanda's house. Use the Garden trowel on the flowerpot and take the Mechanical pointer. A morphing object appears in this view, so collect it too.
- Back in the diner, play the new tape on the recorder. Take Audiotape (2/4) and the second Decorative wing from the drawer.
- Use the Decorative wings on the cherub on the pantry door. The pantry search scene opens.
Pantry: Find 16 Items
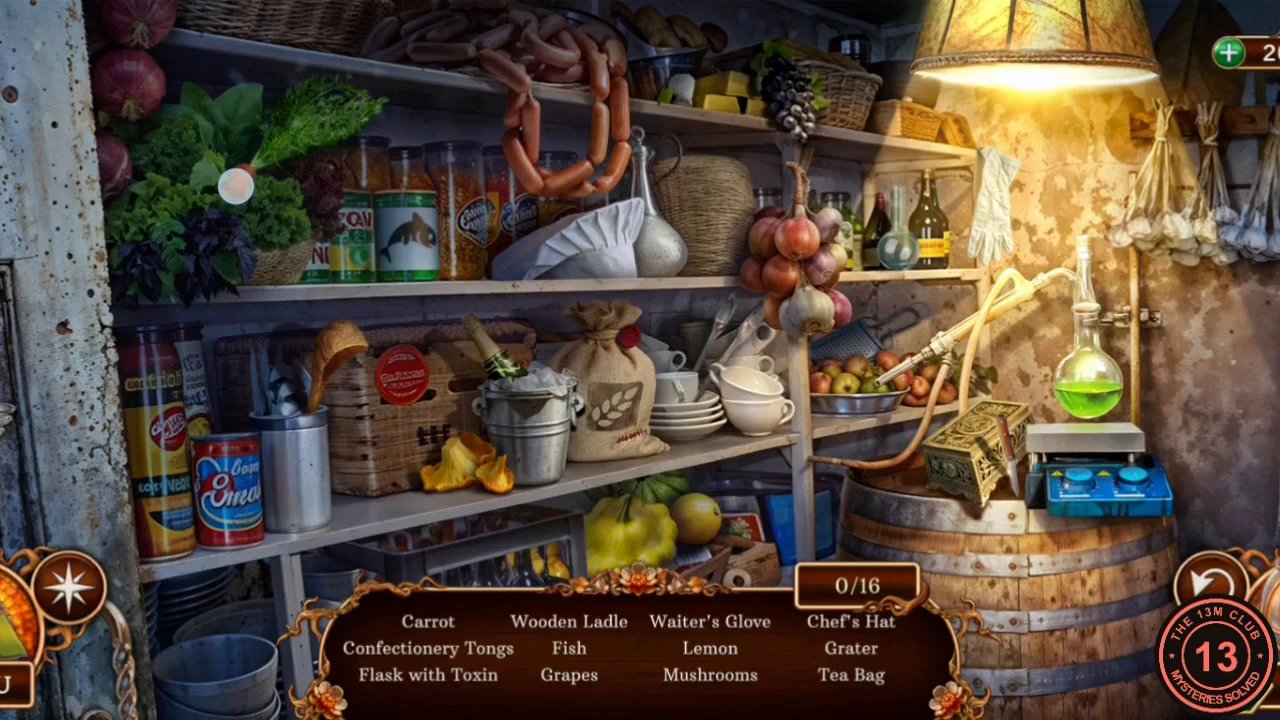
This is a hidden-object scene. The word list shows up to twelve items at once and refills as you find them. The counter runs to 16.
- Tap these on the shelves: the Carrot in the greens at upper left, the Chef's Hat on the upper shelf, the Fish (the orca picture on the tin beside the hat), the Grapes and the Tea Bag on the top shelf (the Tea Bag is the small white pouch in the metal bowl beside the yellow cheese), the Wooden Ladle in the metal tin at left, the Mushrooms on the middle shelf, the Confectionery Tongs among the white cups, the Grater behind the fruit bowl, the Lemon on the bottom shelf and the Waiter's Glove hanging at the right. Zoom into the grain sack and tap the red wax seal: the Elephant is stamped in it. Zoom into the golden box on the barrel, tap the knife leaning on it to pick it up, tap the lid to open it, then take the Signet Ring from the jewels and the Heart, the green inset on the front of the box. Tap the empty flask on the upper right shelf so it moves down beside the still, tap the flask and then tap the green liquid in the still to get the Flask with Toxin. Tapping the still with no flask only gives a remark. Finally, zoom into the sack again and tap its stitched seam: the knife cuts it open, so you can tap the Amber inside.
- Take Amber (1/3) when the scene closes.
Three Ambers and the Antidote Trail
The ambers are the Faun cabinet's eyes. They give you the handles you need for the stove and bread bin.
- On the diner street, use the Mechanical pointer on the manhole. It fills one of the two pointer slots. The manhole also has a round socket for a ball.
- Zoom into the face in the tree root on the diner street. Take Amber (2/3). The detective notes that the root itself will need a special weapon.
- In the diner, zoom into the gargoyle by the door. Take Amber (3/3) from its chest area.
- In the kitchen, use the Ambers on the Faun-head lock. The cabinet opens: take the Stove handle and the Silver shell.
- Use the Silver shell on the bread bin on the table to open it. Take the Ladle.
- Use the Stove handle on the stove and turn off the gas. The pot is still too hot to touch, so use the King's ring on it to cool it. Then use the Ladle in the pot and take the Snowflake amulet.
- Use the Snowflake amulet on the fridge's chain lock. The chains fall away. Take the Pencil and the second Mechanical pointer. Inside the fridge is a stand with four cassette slots.
- Open the Damaged audiotape in the inventory and use the Pencil on it to wind the tape back. It becomes an Unplayed audiotape.
- Play it on the recorder. The Cook says the antidote is hidden in the fridge, without its last ingredient, and that he hid things in a dungeon below the diner. New task: find the Cook's dungeon under the diner. Take Audiotape (3/4) and the Steel ball from the drawer.
- On the street, use the second Mechanical pointer and the Steel ball on the manhole to start its puzzle.
Manhole: Rotating Maze
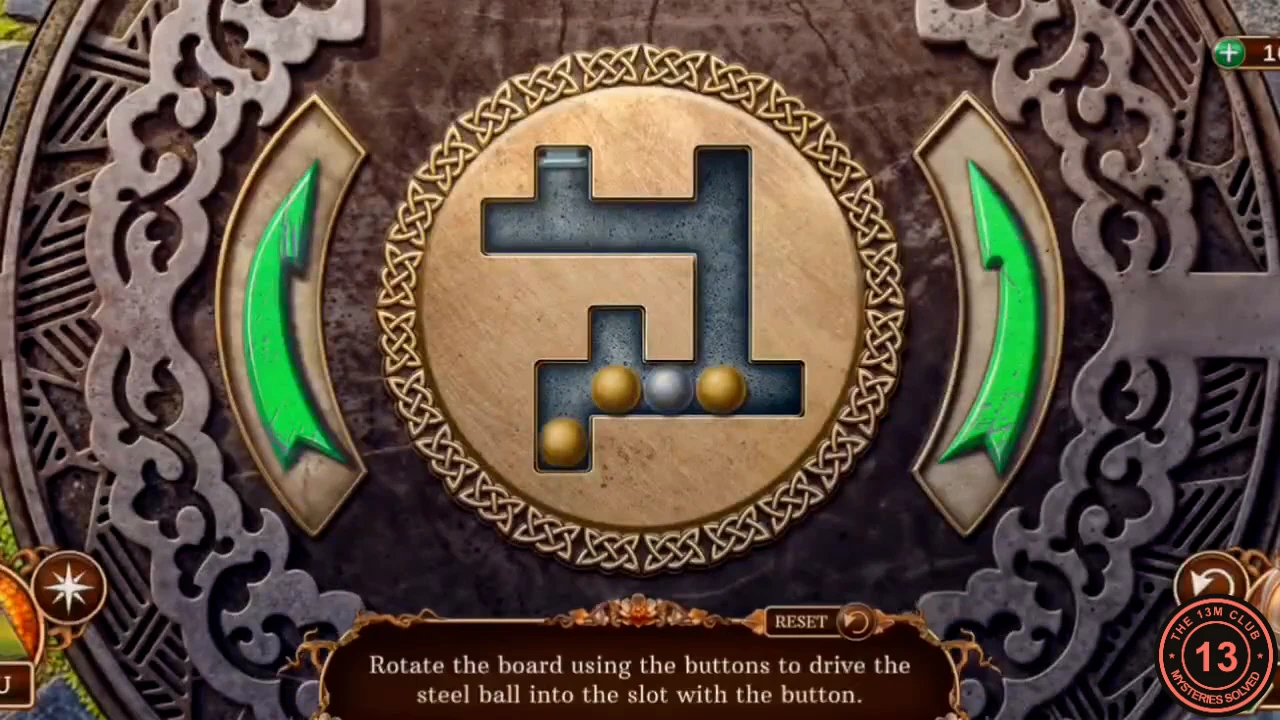
The rule: rotate the board with the two green buttons so gravity rolls the steel balls. Drive the steel ball into the slot with the button. The right button turns the board counterclockwise and the left button turns it clockwise.
- From the starting position, press: Right, Right, Right, Left, Right, Left, Right, Right, Left, Left, Right, Left, Left, Right, Left, Right. If your board does not start in the same position, use Reset first.CODER R R L R L R R L L R L L R L R