City Ruins Cleft: Rake Everything into the Pit
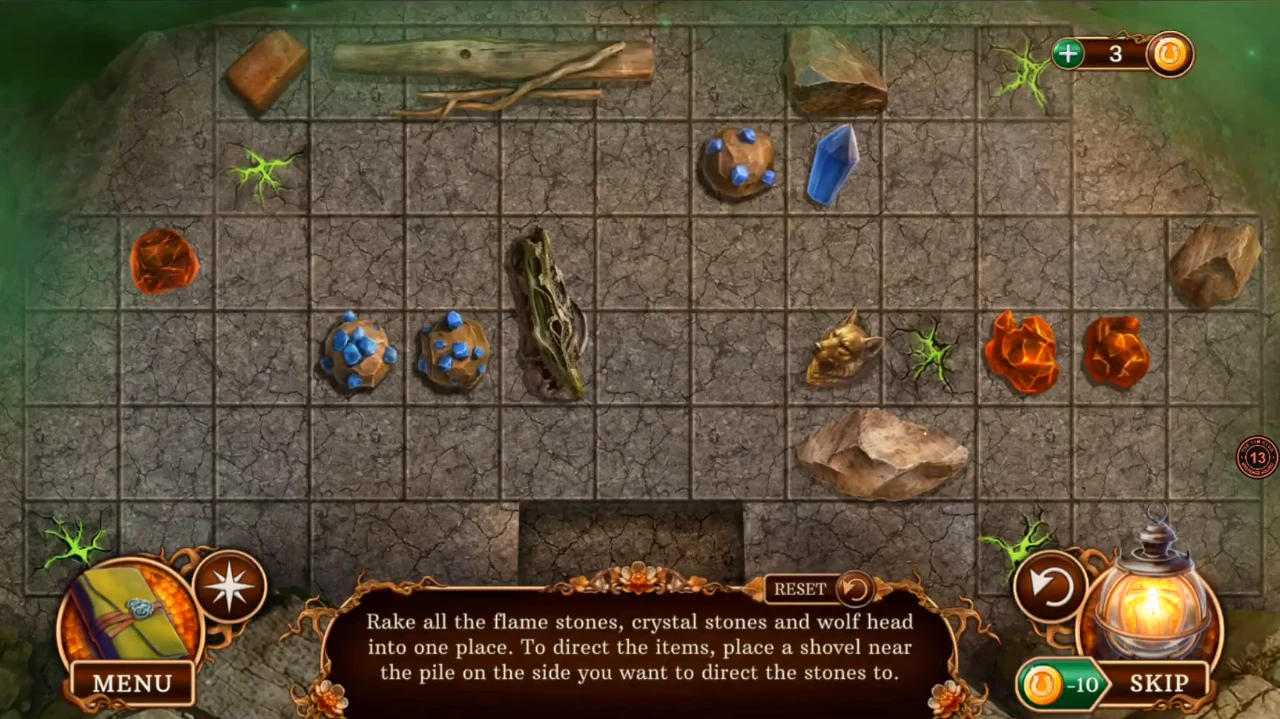
Prompt: Rake all the flame stones, crystal stones and wolf head into one place. To direct the items, place a shovel near the pile on the side you want to direct the stones to. The one place is the two-cell pit at the bottom center. Eight items must go in: one blue crystal, three blue-studded crystal stones, the wolf head and three flame stones. The layout appears to be fixed. If yours differs, use the same method.
- In the City Ruins, zoom into the green-lit cleft in the road and use the Shovel on it. The raking board opens.
- How it moves: tap the ground right next to an item. The shovel appears there and pushes the item one cell directly away from it, so tap on the opposite side from where you want the item to go. This differs from what the prompt seems to say. The log, boulder, tufts and edge rocks do not move. Use RESET if you get stuck.
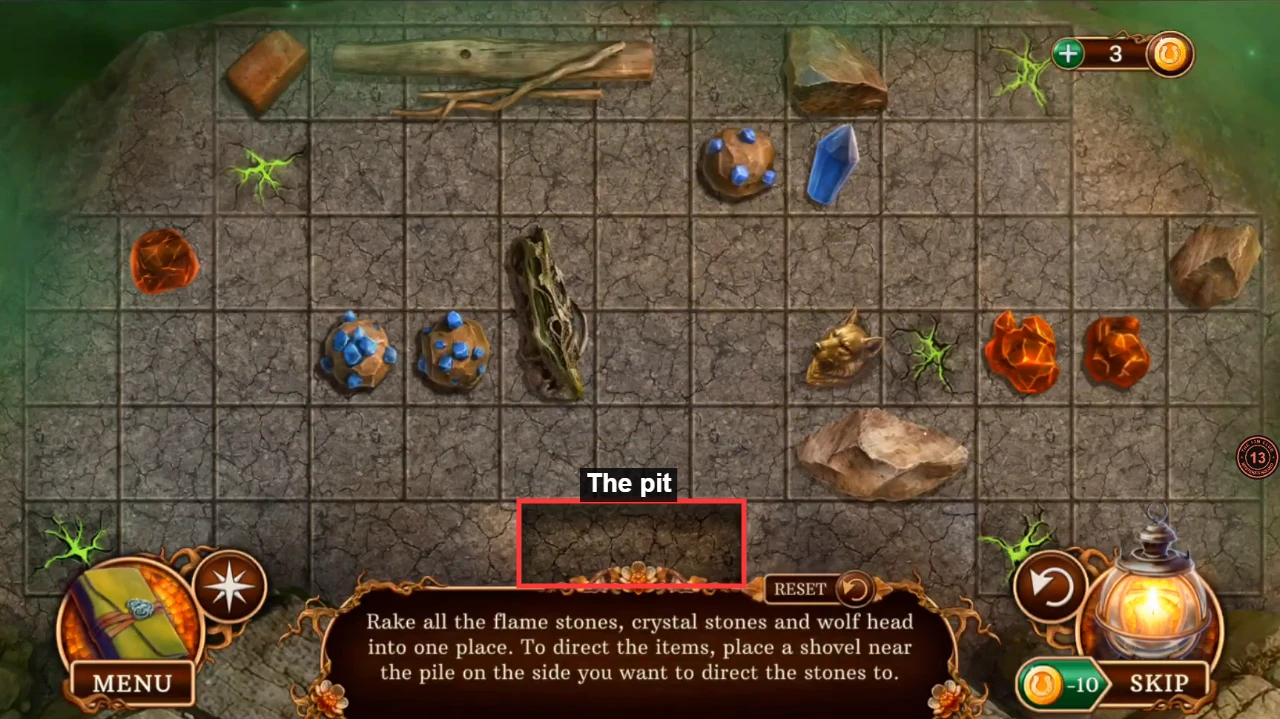
The starting board. Everything has to end up in the pit marked at the bottom center. - Clear the center first. Push the blue crystal and the crystal stone at the top down past the right of the log and into the pit.
- Move the two right-hand flame stones up over the wolf head, then left along the top of it and down the right side of the log. Push the wolf head down beside the boulder and in, then finish those two flame stones.
- Lower the two crystal stones on the left by one row, push them right along the row above the pit and drop each one in.
- Finally bring the last flame stone from the far left down and right into the pit. The board closes and you receive the Blue Crystal, Wolf Head and Heated Stone.
Crystals, Gunpowder and the Totem
With all four crystals you can open the crypt floor, and the doll supplies what the spirits lacked.
- Zoom into the crypt floor and set each crystal on the mark of its own color: Blue, Red, Yellow and Green. The floor opens: take the Doll's Heart.
- Put the Doll's Heart in the doll's chest in the City Ruins and take the Bag of Gunpowder she gives you.
- In the crypt, zoom into the totem on the right. Put the Heated Stone in its open mouth, then add the Bag of Gunpowder. The totem blows open. It reveals a falcon banner marked IV and a fire you can use.
- Take the Monkey Head from the hole in the totem.
The Second Fruit and the Falcon Head
The knockers go back on the door as you find them. The fire you lit melts the cage lock.
- Zoom into the round door. Fit the Monkey Head, Wolf Head and Bull Head to their knockers.
- Hold the Plain Key in the totem fire to get a hot, glowing key.
- Open the Frozen Cage in the inventory and use the hot key on its lock. The door opens and the Cool Fruit is yours. In the cutscene the Faun bursts in through a portal and carries off the spirits. The task becomes Save the spirits.
- In Tree Roots, zoom into the red roots and use the Cool Fruit on them. The root turns green.
- Talk to the Mistress. She gives you the Queen's Amulet, and you also get the Falcon Head. You note that she has told you where the Faun may be hiding the last fruit, but you must defeat him first.
Crypt Door: Knock in the Right Order
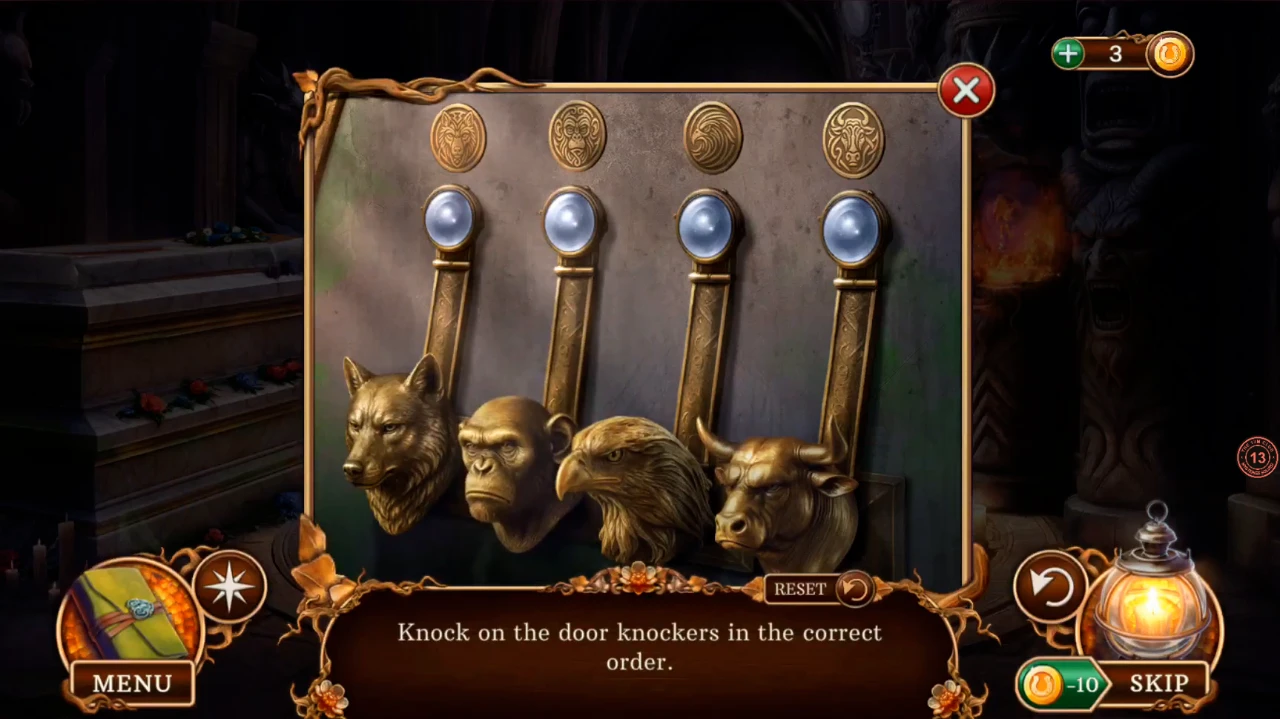
Prompt: Knock on the door knockers in the correct order. The four colored banners you have seen carry Roman numerals and animal emblems, and those numerals give the order.
- Zoom into the round door and fit the Falcon Head to the last empty knocker. The puzzle starts.
- Knock in this order: Monkey (second from left), Wolf (far left), Bull (far right), Falcon (third from left). This matches the banners: monkey I at the car root, wolf II in the rocks, bull III in Tree Roots and falcon IV in the totem.CODEMonkey, Wolf, Bull, Falcon
- The door opens as a purple portal. Go through it to the Faun's prison.
Defeat Faun: Gather the Weapons
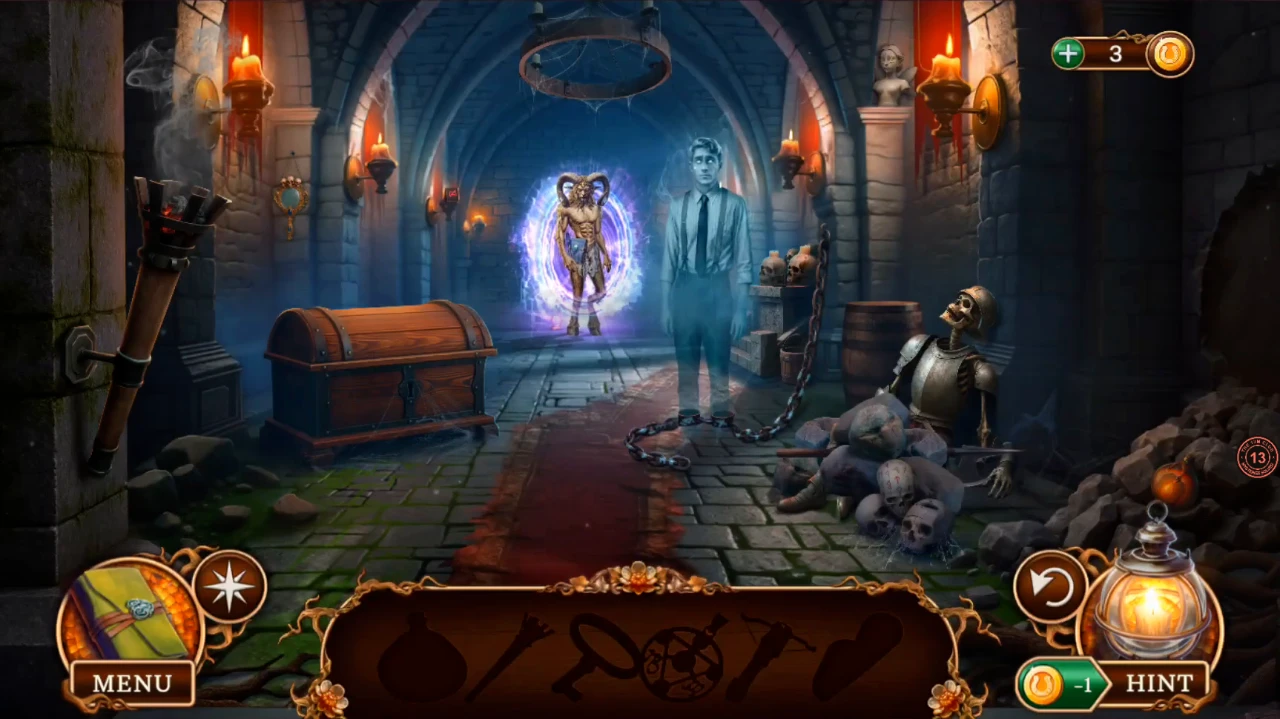
The Faun stands in a portal at the end of a dungeon hall, and the inventory bar now shows silhouettes of what you need. Some finds unlock others.
- Take the orange flask from the rock pile at the lower right.
- Zoom into the unlit torch on the left wall and pour the flask on it. Light it from the flame and take the Torch.
- Zoom into the dark hole in the right wall and use the Torch on it. In the light, take the key and the round amulet with a red gem.
- Zoom into the chest on the left and use the key on it. Take the Crossbow.
- Zoom into the pile by the skeleton. Move the skulls and rocks: take the skull with red runes, then take the halberd from under the skeleton's hand.
- Take the hand mirror from the left wall.
- Tap the small cherub bust on top of the right pillar. The bust is taken and a square tile silhouette appears at the end of the bar. The game does not say what the bust is for.
- Zoom into the glowing chain on the floor and use the halberd on it. Take the Chains.
- Take the dark tile with a red rune from the far sconce on the left wall.
- Zoom into the altar with the two candle skulls at the right of the hall. Put the rune skull in the empty center place and the rune tile in the left slot, then take the triangular pendant from the floor panel.
- Put the round amulet in the circle on the floor panel. A drawer opens: take the dagger.
Defeat Faun: Use the Weapons
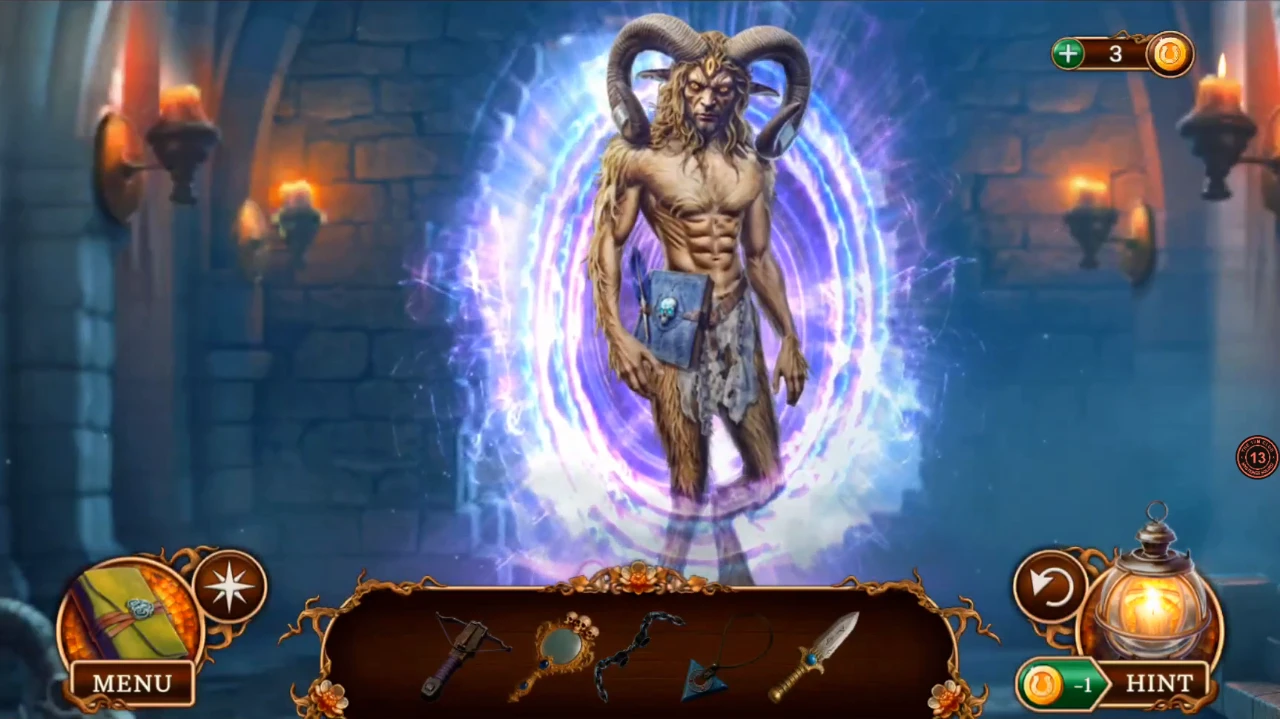
With five weapons in the bar, zoom in on the Faun and use them one after another.
- Use the Crossbow on the Faun. He throws green magic at you.
- Use the Hand Mirror to throw his magic back.
- Use the triangular pendant on him. The portal around him collapses.
- Use the Chains on him. They lock around his wrists.
- Use the dagger on him. A green sphere bursts out of him and he is gone.
- Take the Map Piece. It joins the Queen's Amulet in your bar, and the Faun's Horn is added too. You then move on into the Secret Garden.
Secret Garden: Scissors from the Statue
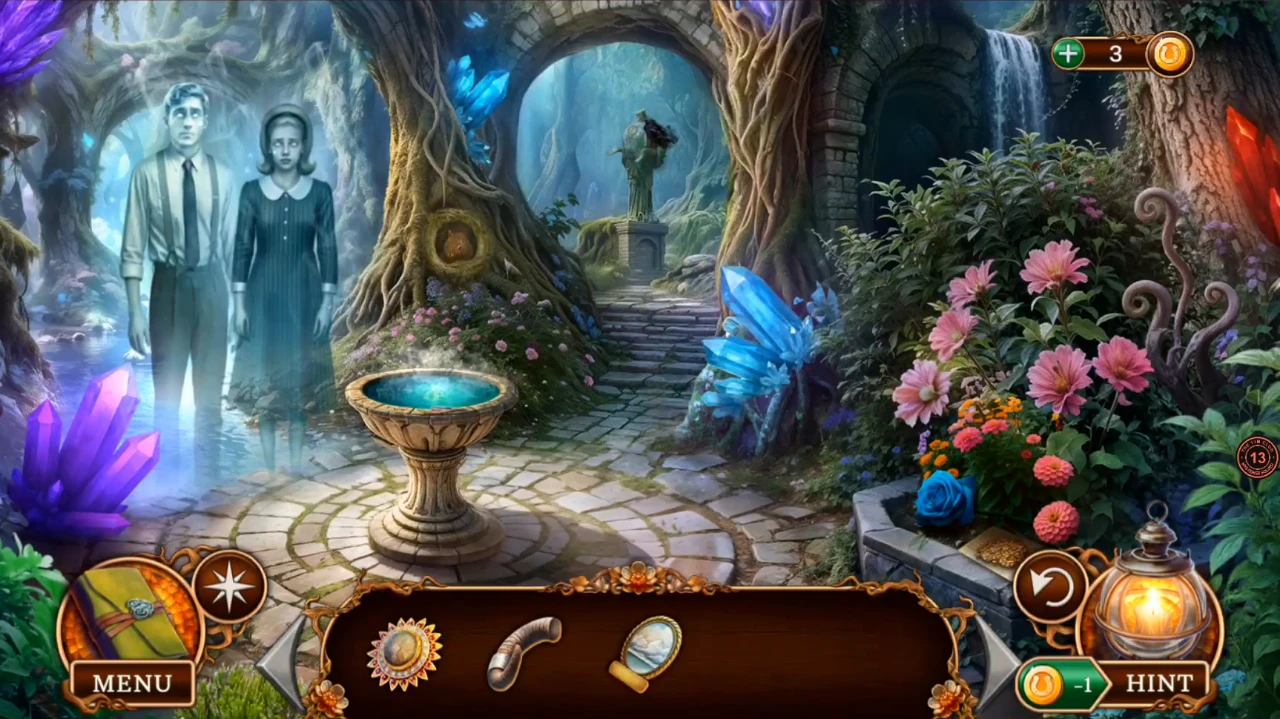
The two spirits are safe here, and the last fruit lies in a fountain you cannot reach into. Everything you need starts with the flowers by the fountain.
- Talk to the spirits. They ask you to prove they are safe, so give them the Faun's Horn. They hand you the Broken Tongs. The task becomes Find the last fruit of the Tree.
- Zoom into the flowerbed at the lower right. Take the Seeds and read the note from the Mistress: the Faun stole the magic scissors, the only thing that can cut the enchanted blue roses.
- Zoom into the fountain. The last sacred fruit is in the strange water, and you cannot take it by hand. The Broken Tongs do not work yet.
- Zoom into the headless statue at the back. A raven blocks the Queen's Amulet, so put the Seeds in the statue's outstretched hand to draw the raven off.
- Put the Queen's Amulet on the statue's chest. A niche opens: take the Flower Scissors and a Map Piece.
Blue Roses, Tongs and the Healing Fruit
The scissors cut all four blue roses. The roses open the sarcophagus, and the tongs reach the fruit once repaired.
- Put your two Map Pieces on the wall panel in Tree Roots. One oval is still empty.
- Use the Flower Scissors on the first rose, in the doll's hair in the City Ruins.
- Cut the second rose, above the opened gap in the bridge at the Great Tree.
- Cut the third rose, on the healed root in Tree Roots.
- Cut the fourth rose, in the flowerbed in the Secret Garden. Take the Screw underneath it.
- Open the Broken Tongs in the inventory and add the Screw.
- In the crypt, zoom into the sarcophagus and lay the four Blue Roses in the wreath. It slides open: take the Half of Tongs. You note that you still need the parts to repair them.
- Back at the fountain, zoom in and take the Razor from its rim.
- In the City Ruins, zoom into the rock box and use the Razor on the purple bag. Take the Map Piece.
- Put the last Map Piece on the wall panel in Tree Roots. A round brass disc comes free: take it.
- Open the tongs in the inventory and fit the brass disc on the hinge to finish them.
- Use the Tongs on the fountain to lift out the Healing Fruit.
- In Tree Roots, zoom into the green roots and use the Healing Fruit on them.
Chronicle of Worlds: Open the Portal Home
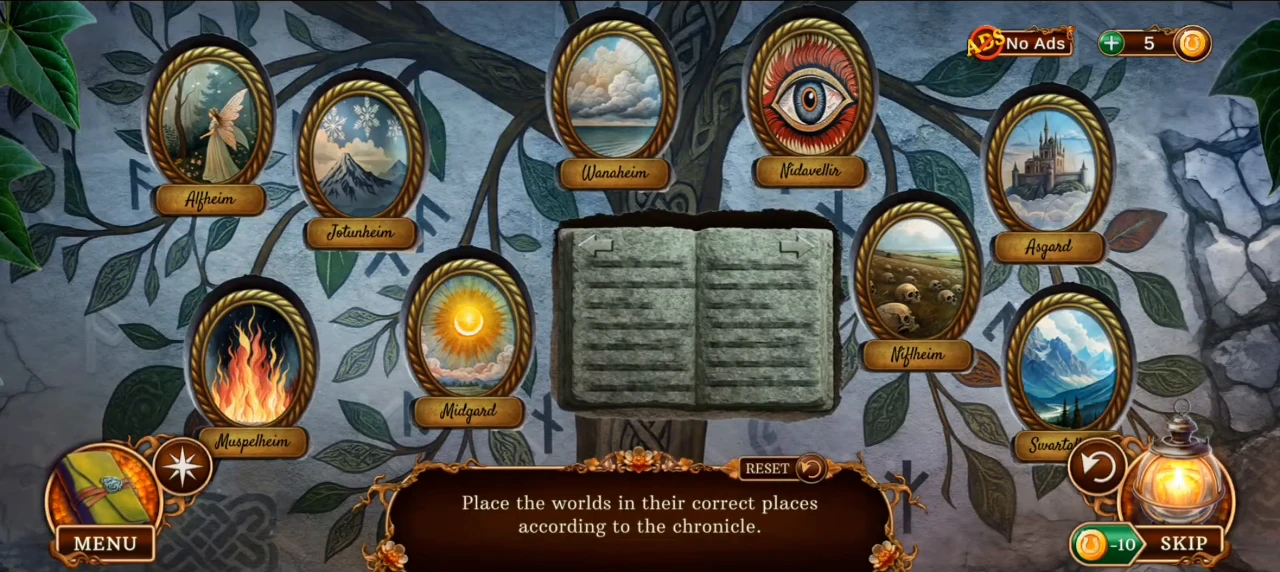
Prompt: Place the worlds in their correct places according to the chronicle. The three healed roots bring the Great Tree back to life. Nine picture frames sit around a stone book on the tree on the wall. Tap the arrows on the book to turn its two pages, and tap one frame and then another to swap them.
- Talk to the Mistress. Life has returned to the Upside Down: she gives you the Chronicle of Worlds, and the task becomes Open the portal home.
- Zoom into the wall panel and place the Chronicle of Worlds on it. The world map opens.
- Read the book. Asgard and Vanaheim came first and rule above. Midgard grew beside the land of the fae, its reflection Alfheim, which became the Reverse Side. Fiery Muspelheim and icy Jotunheim clashed and made a realm of stony balance, Nidavellir. Niflheim, the dead, lies beneath the humans. Svartalfheim watches from afar.
- Swap the frames into this layout. Top row, left to right: Muspelheim, Svartalfheim, Asgard, Vanaheim, Midgard. Lower row, left to right: Nidavellir, Jotunheim, then the book, Alfheim, Niflheim. The labels name each world, so ignore the starting positions.CODETop: Muspelheim, Svartalfheim, Asgard, Vanaheim, Midgard. Lower: Nidavellir, Jotunheim, (book), Alfheim, Niflheim.
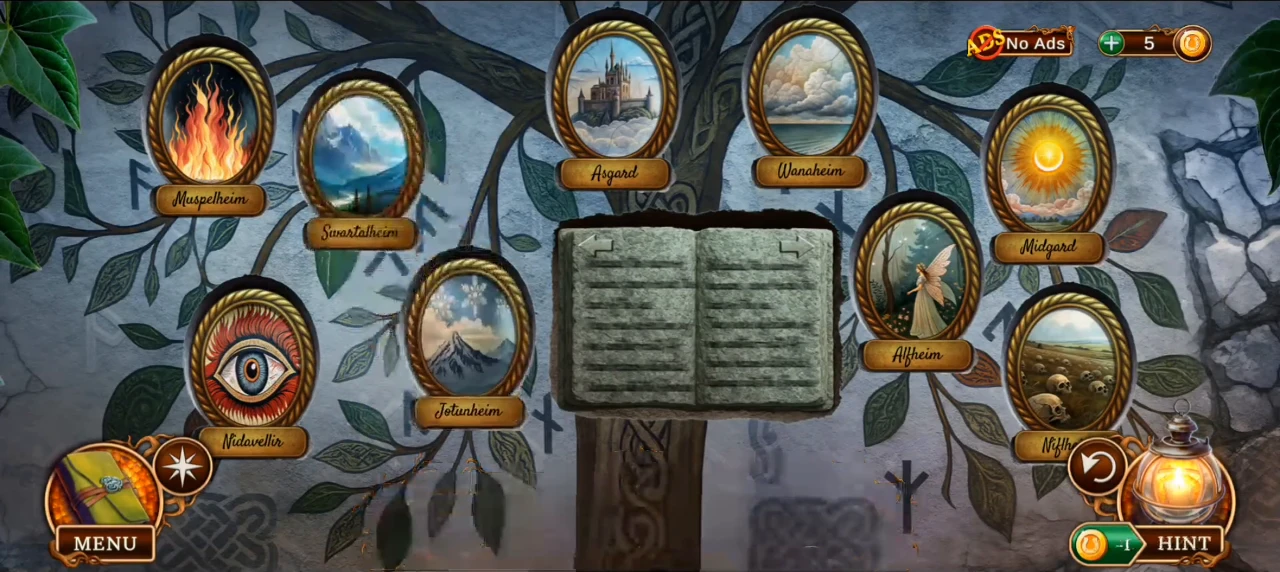
The finished layout of the nine worlds around the book. - Watch the ending. The green portal over the sphere stabilizes and shows your own town, and you step through. The game then shows the Thank you for playing the game screen.