CHAPTER 2
Library drawer and safe
The drawer yields the Access Card.
- In the City Library, use the Drawer Handle on the drawer. Take Frame Fragments 1/2 and the Access Card.
- Deluxe only: use the Dirty Amber on the grindstone in the drawer to get the Amber.
- Use the Access Card on the safe. Read the note and take the Mannequin Hand.
CHAPTER 2 DELUXE
Deluxe: Restricted Section, bust and drawer
Continues the branch after you have the Amber.
- In the Restricted Section, use the Amber on the bust. Take the Keys.
- Use the Keys on drawer 6 of the card cabinet and take the Cuckoo.
CHAPTER 2 PUZZLE
City Park water column
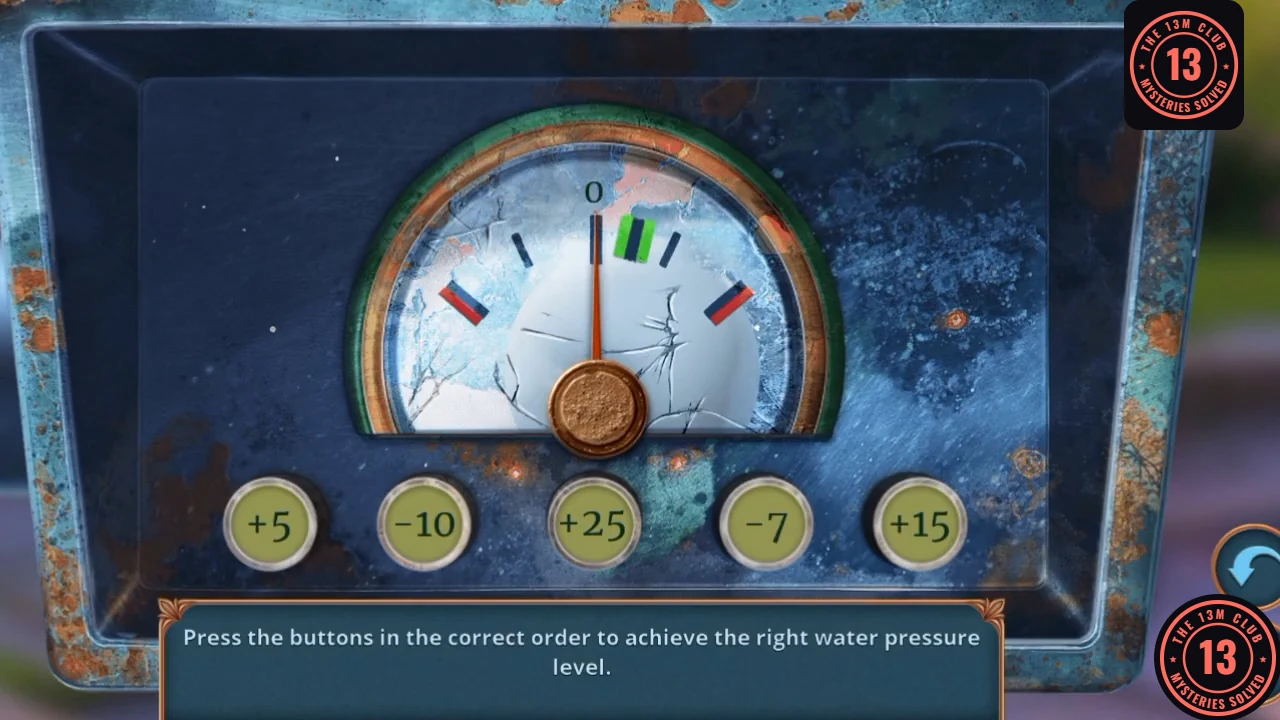
Bring the gauge into the green band using the buttons.
- In City Park, use the Mannequin Hand on the water column.
- Each button changes the reading and flips sign once pressed. Press -10, -7, +5, then +25 to reach 13 in the green band. Leave the +15 button alone. Take the Hex Key.CODE-10, -7, +5, +25 = 13
CHAPTER 2
Grate and hose
The Hex Key frees the hose for the Backyard pump.
- Use the Hex Key on the grate in City Park. Take the Hose.
- In the Backyard, use the Pump and Hose on the tube.
CHAPTER 2 PUZZLE
Coloured hoses
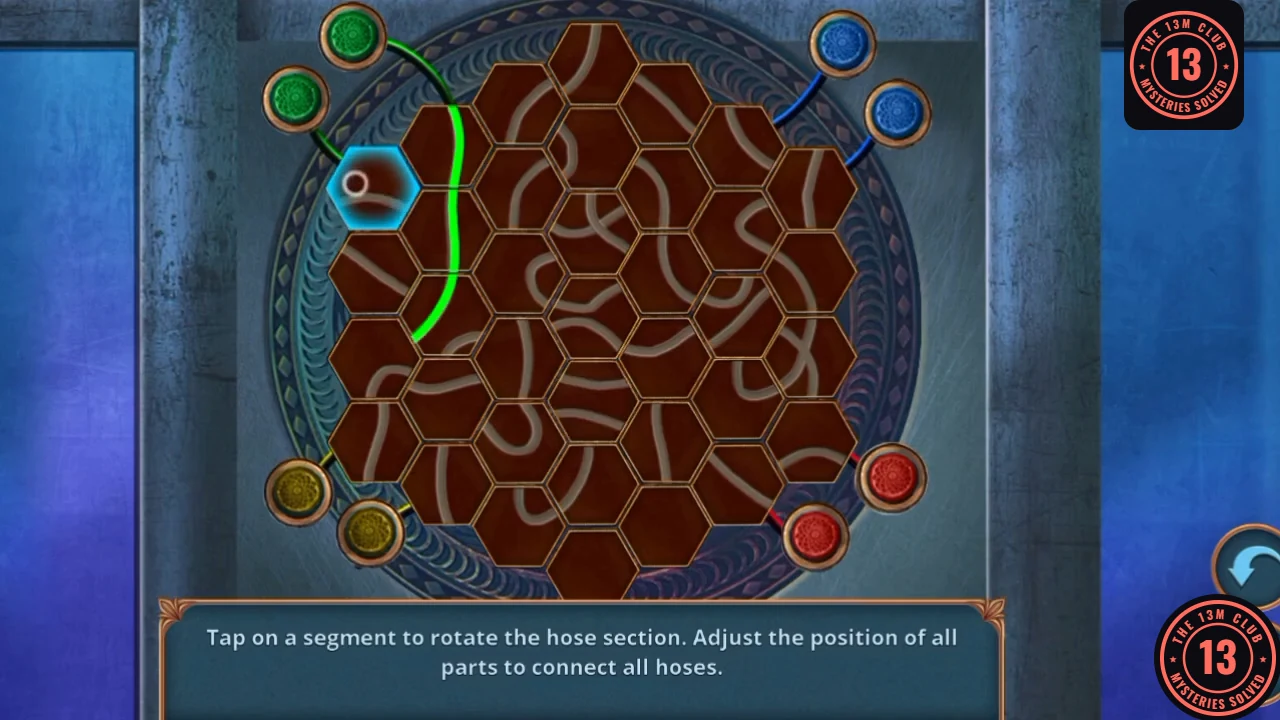
Tap a segment to rotate that hose section until all the hoses connect.
- Each colour joins its own pair of valves: green at the top left, blue at the top right, yellow at the bottom left and red at the bottom right. This takes a while, so finish one colour before starting the next and keep each hose in its own part of the board. The reward is the Crowbar.
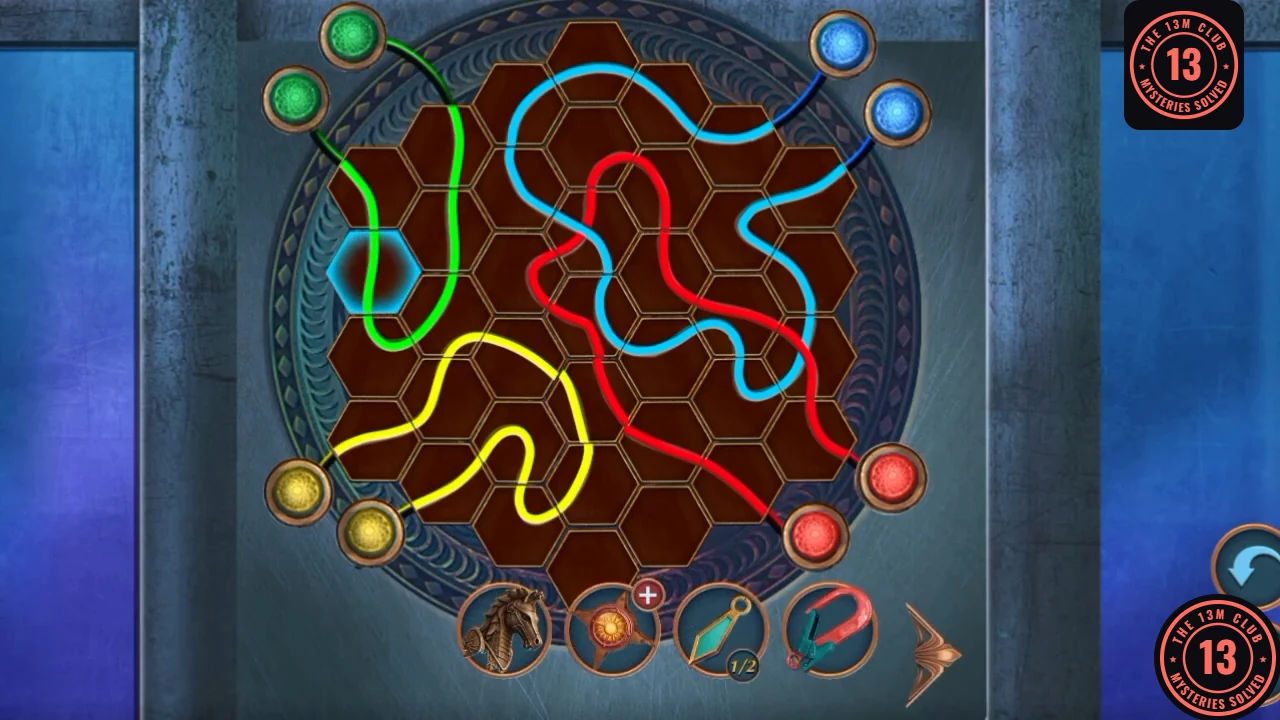
Solved: each colour joins its own pair of valves.
CHAPTER 2
Glue and the data board
Repair the figurine and open the data board.
- Use the Crowbar on the lid in the Backyard shed. Take the Glue.
- In the City Library, go back to the broken figure by the chest. Use the Glue on it, then fit the Figurine Head. The figure is repaired and the chest opens. Take the Glue back along with the Stained Glass Pieces and Data Flash Drive. Use the Puzzle Hint on the cache.
- Use the Data Flash Drive on the data board.
CHAPTER 2 PUZZLE
Data board
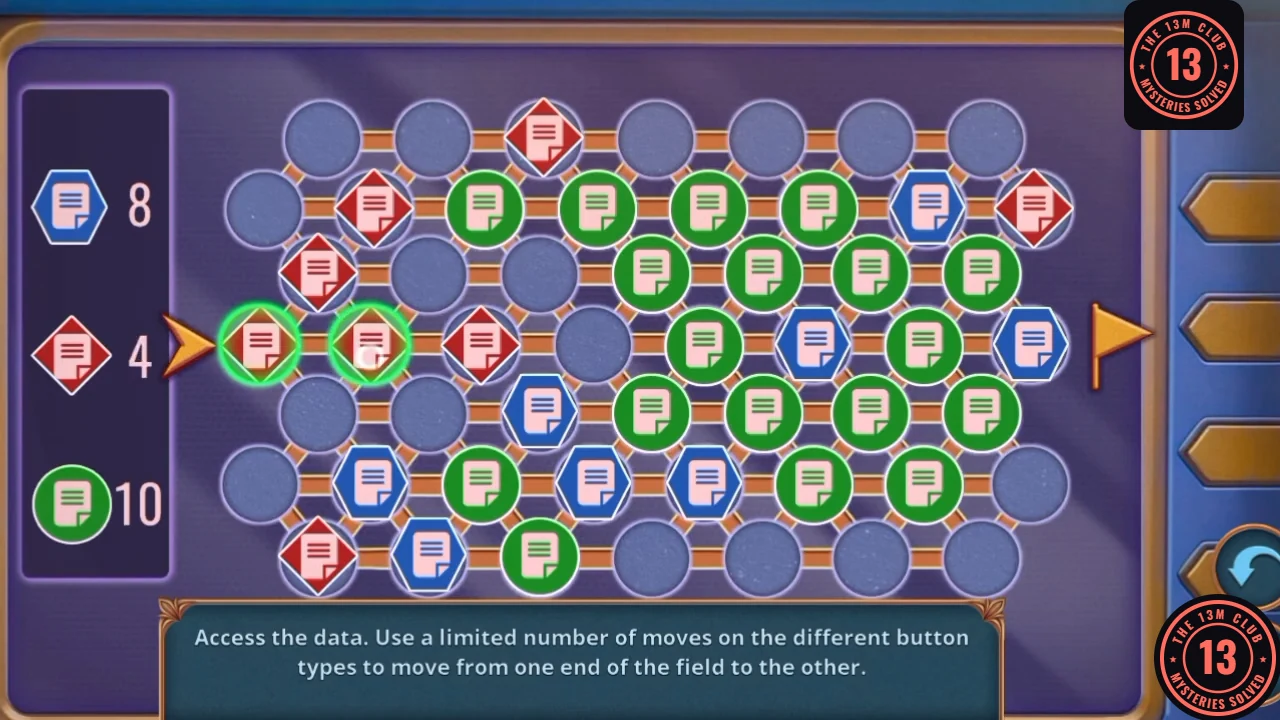
Access the data. Use a limited number of moves on each button type to get from one end of the field to the other.
- The counters start at 8 blue, 5 red and 10 green. Each press lights a new node, and the lit network grows from any node already lit. Start at the left arrow and aim for the flag on the right. The recording finished with all three counters at 0, so plan to use every move. Read the note on the chapel theory.
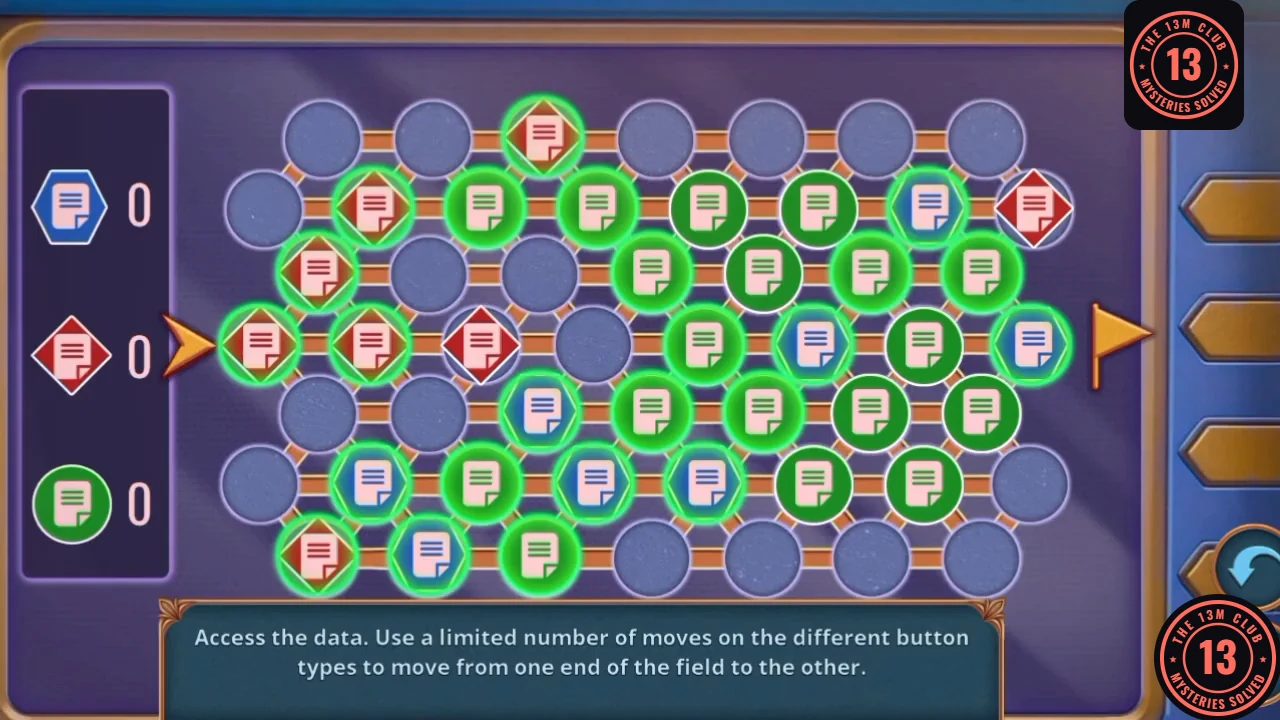
The finished board from the recording, with all three counters at 0. Your route may differ. - Tomas asks what to do with the records: "Destroy all records" (0), "Hide everything" (+2) or "Restore justice" (+4). Pick "Restore justice". You receive the Paper Clip.
CHAPTER 2
Sun Amulet
The Paper Clip yields the parts for the amulet.
- In City Park, use the Paper Clip on the door. Take the Colored Glass, Microchip and Sun Rays.
- In the inventory, use the Sun Rays on the Damaged Sun Amulet to make the Sun Amulet, and use the Glue and Colored Glass on the Stained Glass Pieces.
- In City Park, use the Sun Amulet on the ornate arched door.
CHAPTER 2 PUZZLE
Sun amulet colours
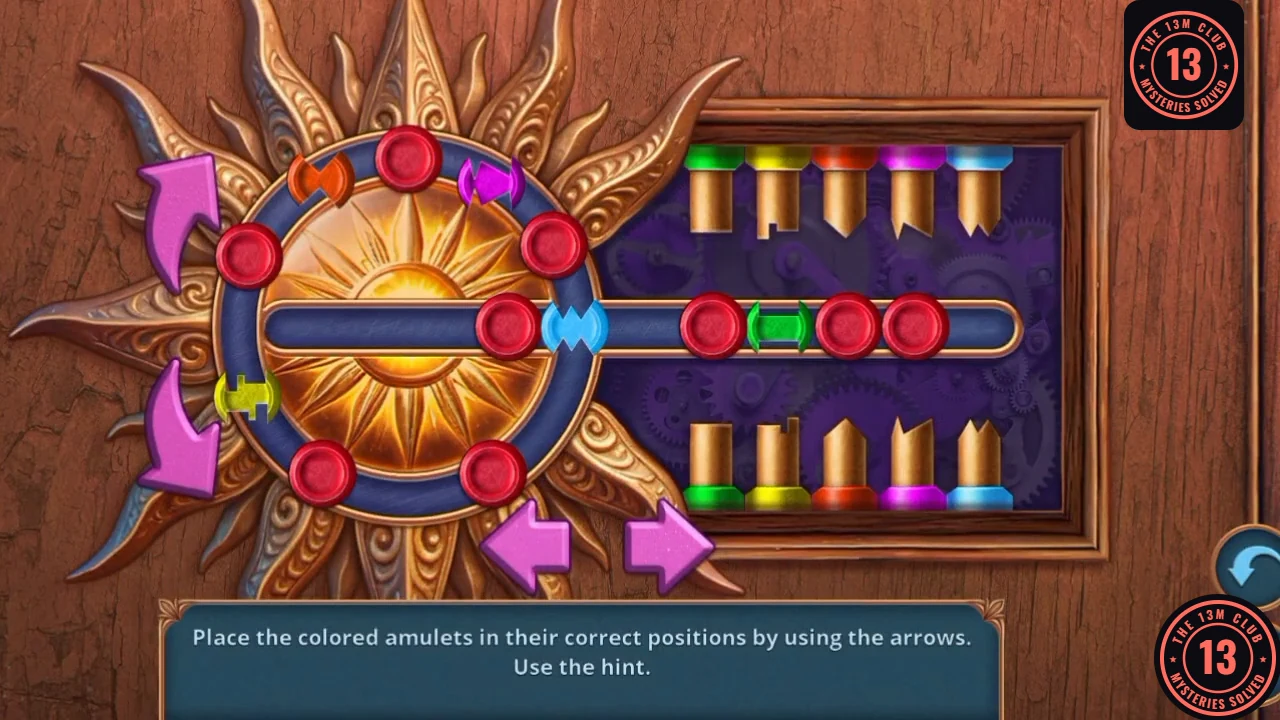
Place the coloured amulets in their correct positions using the arrows. Use the hint.
- The hint tubes give the target for the rail, left to right: green, yellow, orange, magenta, blue. The curved arrows rotate the ring and the straight arrows slide the rail. Use them together until the rail reads in that order. The door opens.
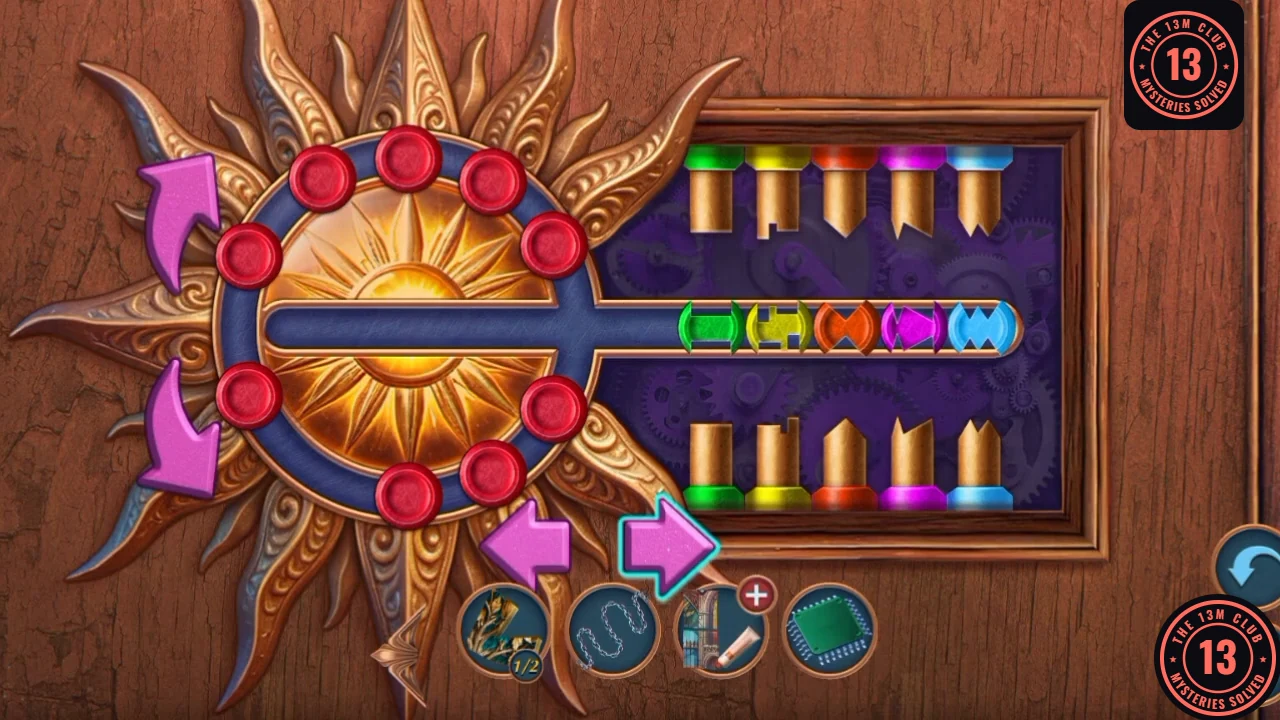
Solved: the rail matches the hint tubes.
CHAPTER 2 DELUXE
Deluxe: Old Chapel clock and the Decoder
Uses the Cuckoo from the Restricted Section.
- In the Old Chapel, use the Cuckoo on the top of the clock case. Take the Alkali.
- In the Restricted Section, use the Alkali on the poster wall to soften the posters, then use the Scraper on them. The posters fall and a brick niche opens: take the Decoder.
- Use the Decoder on the book.
CHAPTER 2 DELUXE
Deluxe puzzle: decoder
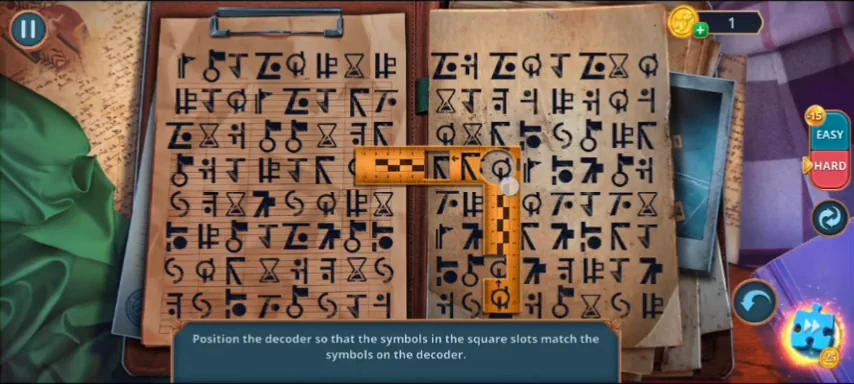
Position the decoder so the symbols in the square slots match the symbols on the decoder.
- Hard board: drag the L-shaped decoder onto the left page, with the horizontal arm along the top row covering columns 1 to 6 and the vertical arm running down column 6 to row 5. It locks orange. The right page is not the answer.
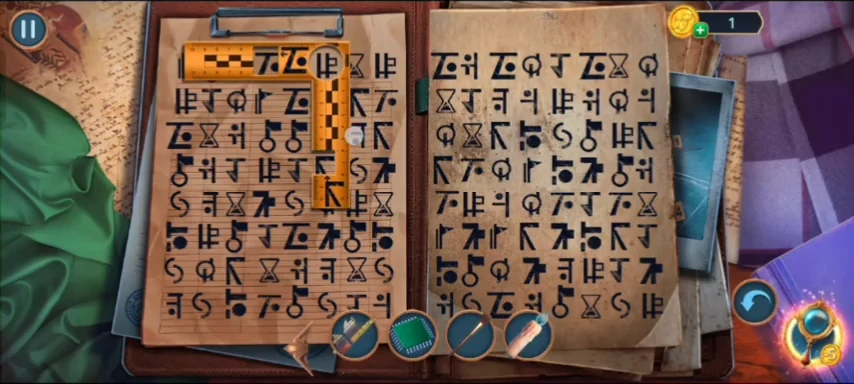
Solved on Hard: the decoder locked orange on the left page, top row and down the sixth column.