CHAPTER 1
Cellar: the pipes
Collect the Corkscrew and repair the pipes for the safe handle.
- Take the Corkscrew in the Cellar and use it on the cork. Take the Mosaic Fragment and Copper Pipe.
- Take the Mannequin Joint from the wine rack.
- Use the Cold Welding and Copper Pipe on the pipes.
CHAPTER 1 PUZZLE
Cellar pipes
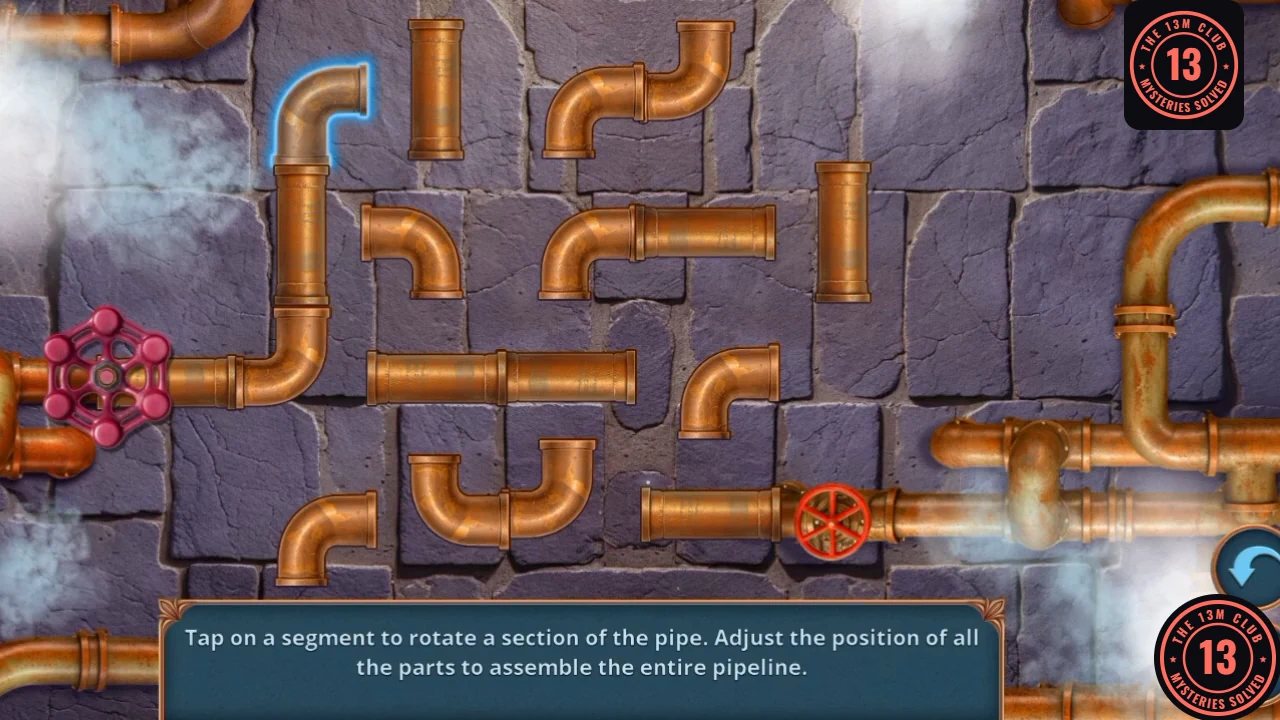
Tap a segment to rotate that section of pipe until the whole pipeline is assembled.
- The line starts at the large magenta valve on the left. Turn the sections so that it runs right, then down, along the bottom, up and over the arch, and down to the bend that joins the straight pipe at the small red valve. The reward is the Valve Handle.
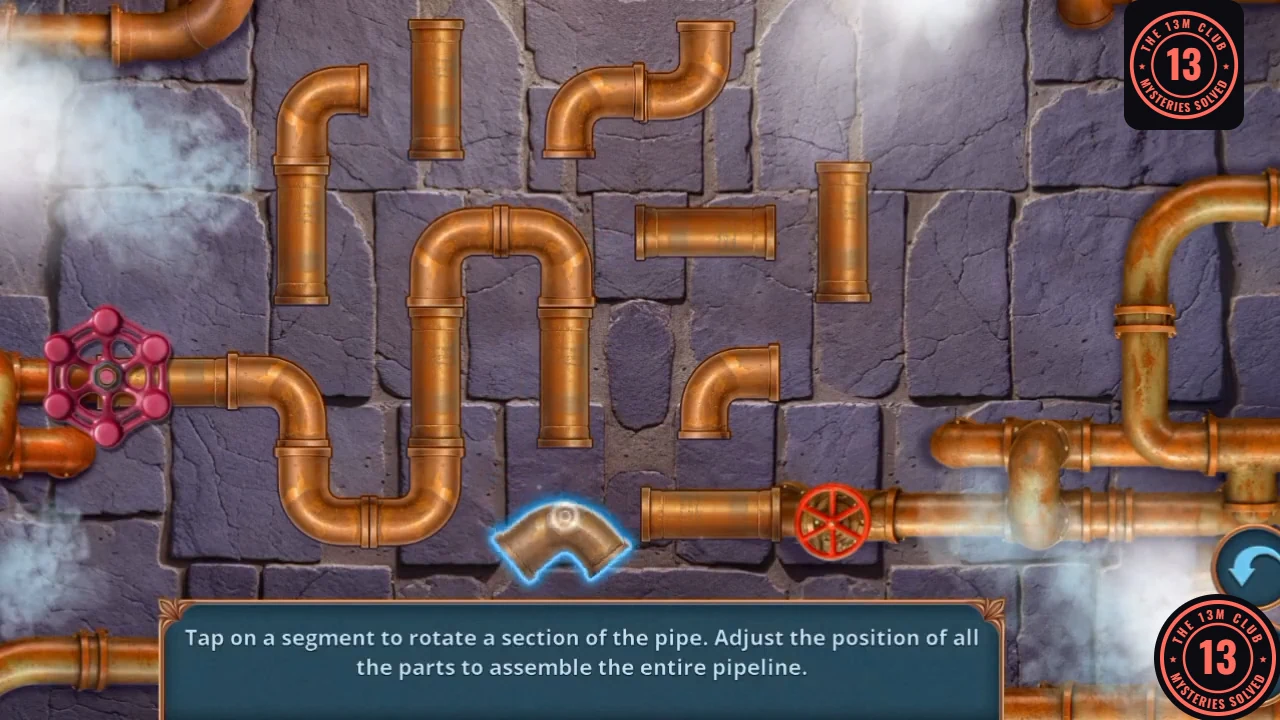
One turn from finished: the highlighted bend is the last piece.
CHAPTER 1 DELUXE
Deluxe: Mansion Garden, shed and bowl
Continue the garden branch after the Colander. These items are only used in this branch.
- In the Cellar, use the Colander on the green liquid in the barrel. Take the Magnet.
- In the Mansion Garden, use the Magnet on the blue shed door. Take the Cleaner and Gardening Trowel.
- Use the Gardening Trowel on the flower mound. Take the Brush.
- On the front yard, tap the car. The brass bowl lies on the seat in front of the closed black case, which stays locked for now. Use the Cleaner and then the Brush on the bowl. Take the Singing Bowl.
- In the Mansion Garden, use the Singing Bowl on the statue's hand. Take the Whistle, then use it on the crow.
CHAPTER 1 DELUXE
Deluxe puzzle: crow notes
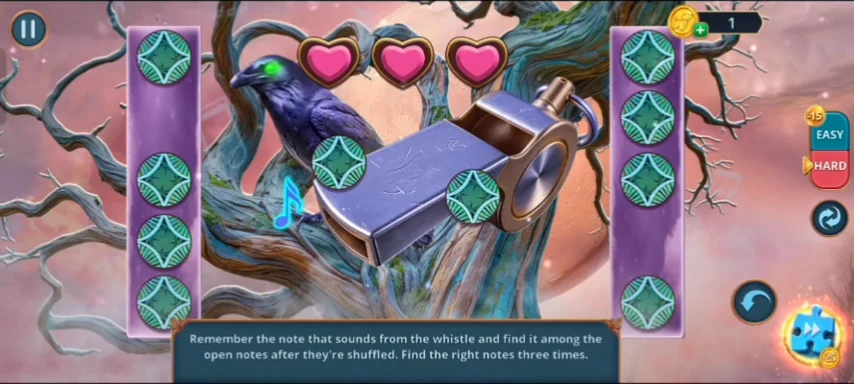
The notes are shown, then flip over and shuffle. Find the blue note that floats by the whistle. Do this three times. You have three hearts.
- Watch the note tiles while they are open and follow the tile with the note shown by the whistle as they flip and shuffle. Tap it when they stop. A wrong tap costs a heart. Find the right note three times. On a copy with the EASY/HARD toggle you can change the board at the right edge.
CHAPTER 1
Second Floor: safe and musket
The Vintage Photo reveals a safe; its contents load the musket.
- On the Second Floor, use the Vintage Photo on the curtain, then the Valve Handle on the safe. Take the Match, Candles 1/2 and the Ball.
- In the inventory, use the Gunpowder and Ball on the Antique Musket to make the Loaded Musket.
- Use the Loaded Musket on the lock above the stairs by the piano.
CHAPTER 1 PUZZLE
Door symbol lock
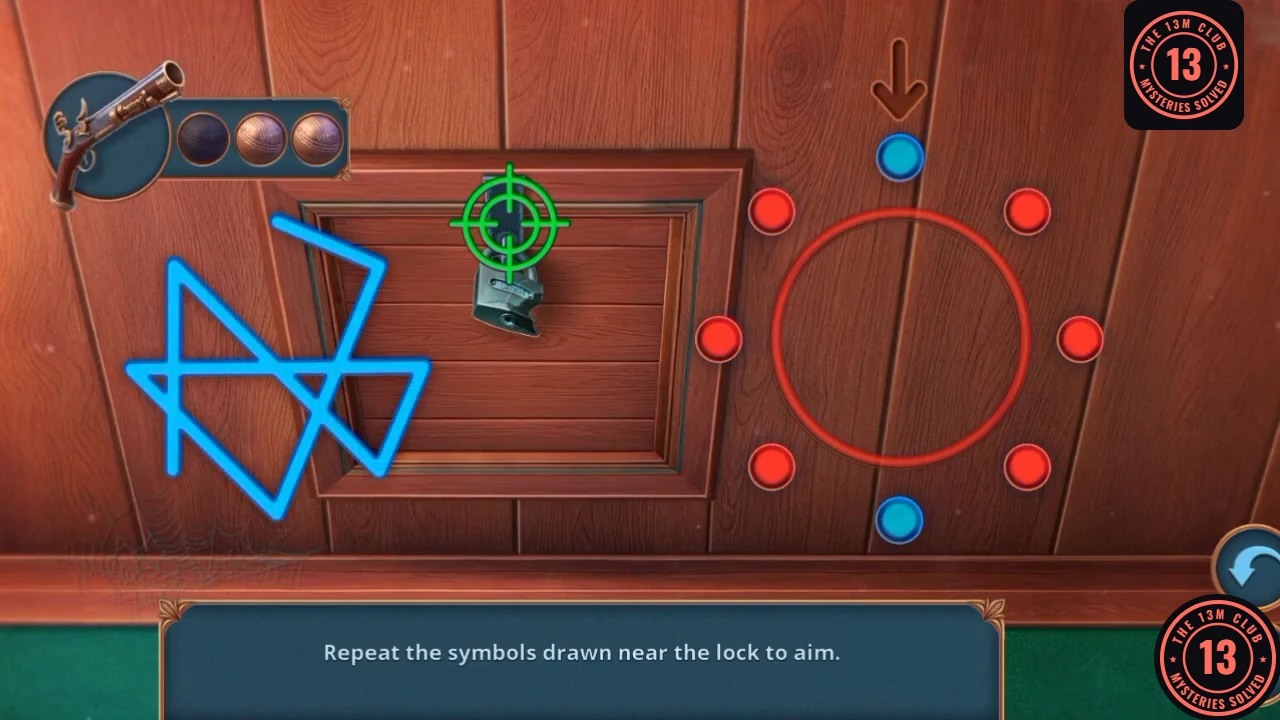
Repeat the symbols drawn near the lock to aim. There are three shapes.
- Eight dots form a circle, and a brown arrow marks the dot to start from: the top dot for the first two shapes and the left dot for the third. Tap the dots in the order that draws the cyan shape, one line at a time, then do the same for the next shape. The lock opens after the third.
CHAPTER 1
Attic: mannequin and candles
Assemble the mannequin and light the candles to reach Agnes's notes.
- In the Attic, take the Antivirus Flash Drive and Cake Spatula.
- Use the Cake Spatula on the cabinet door. Take the Box Panel and Mannequin Arm.
- Use the Mannequin Joint and Arm on the mannequin. Take the Awl and Candles 2/2.
- Use Candles 2/2 and the Match on the candle holder.
CHAPTER 1 PUZZLE
Hidden objects: Attic riddles
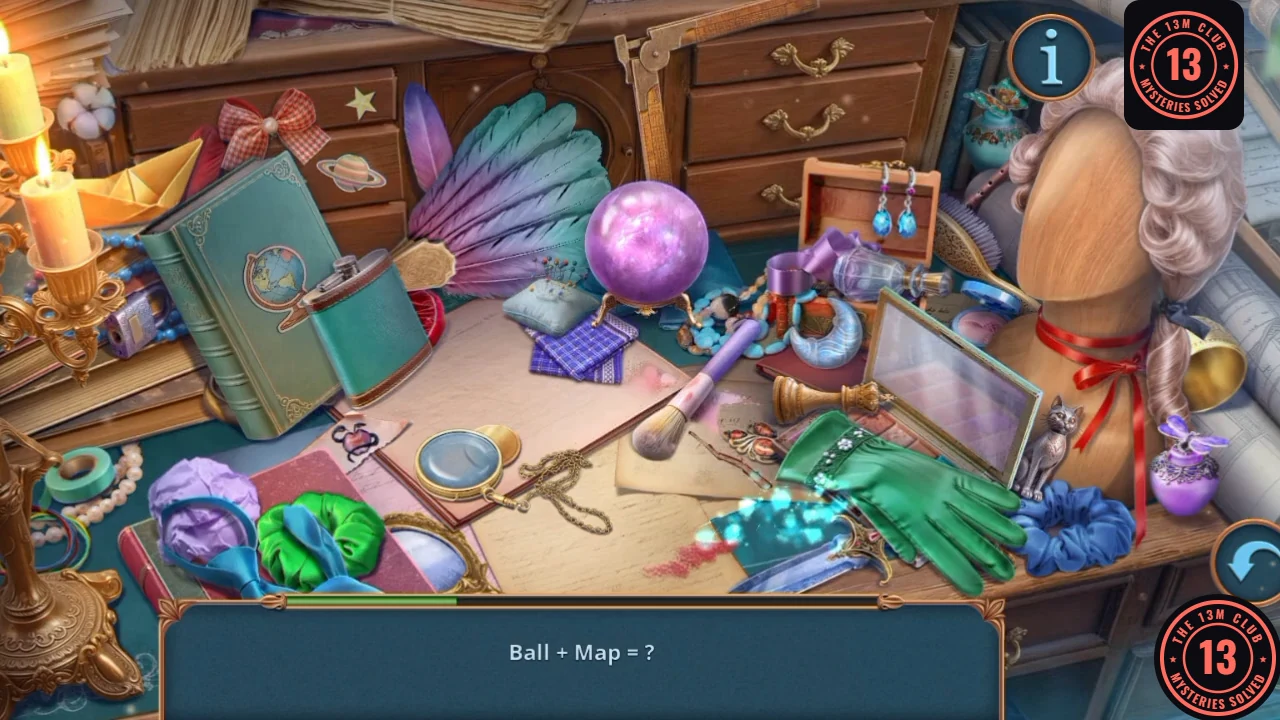
Each entry is a riddle instead of an item name.
- Each entry names two clues, such as "Ball + Map = ?". Tap the one object they describe. First four: Ear + Hooks = the blue earrings in the small red box at the upper right (they stay drawn after the tap, and the entry still counts). Music + Ballerina = the small music box with a bow, lower left. Time + Pocket = the pocket watch beside the red box. Color + Lips = the lipstick, lower centre.
- Next four: Ball + Map = the globe emblem on the green book cover. Hat + Curls = the wig on the mannequin. Glasses + Close Look = the magnifier with a chain, lower centre. Whiskers + Paw Prints = the cat figurine right of the mirror case.
- Last four: Feathers + Wind = the feather fan, upper centre. Sailing + Paper = the paper boat, upper left. Hair + Brushing = the gold-backed hairbrush right of the earring box. Chessboard + Game Piece = the wooden chess piece on the papers above the green glove. A drawer opens at the upper right. The reward is the Architect's Journal, and the task "Find Aunt Agnes's notes" completes.
CHAPTER 1
Showing Agnes the journal
Agnes's answer gives you the crest.
- On the Terrace, use the Architect's Journal on Agnes. When she mentions historian Tomas Kraus, pick "Find out why she didn't mention him before." for +1 (not "Remain silent and indifferent."). Take the Coat of Arms.
- Use the Coat of Arms on the crest door on the Terrace. Take the Small Key and Brush.
- On the front yard, use the Small Key on the car case. Take the Depleted Laptop.
- Tap the sparkle on the yard to open the tools scene.
CHAPTER 1 PUZZLE
Hidden objects: construction tools
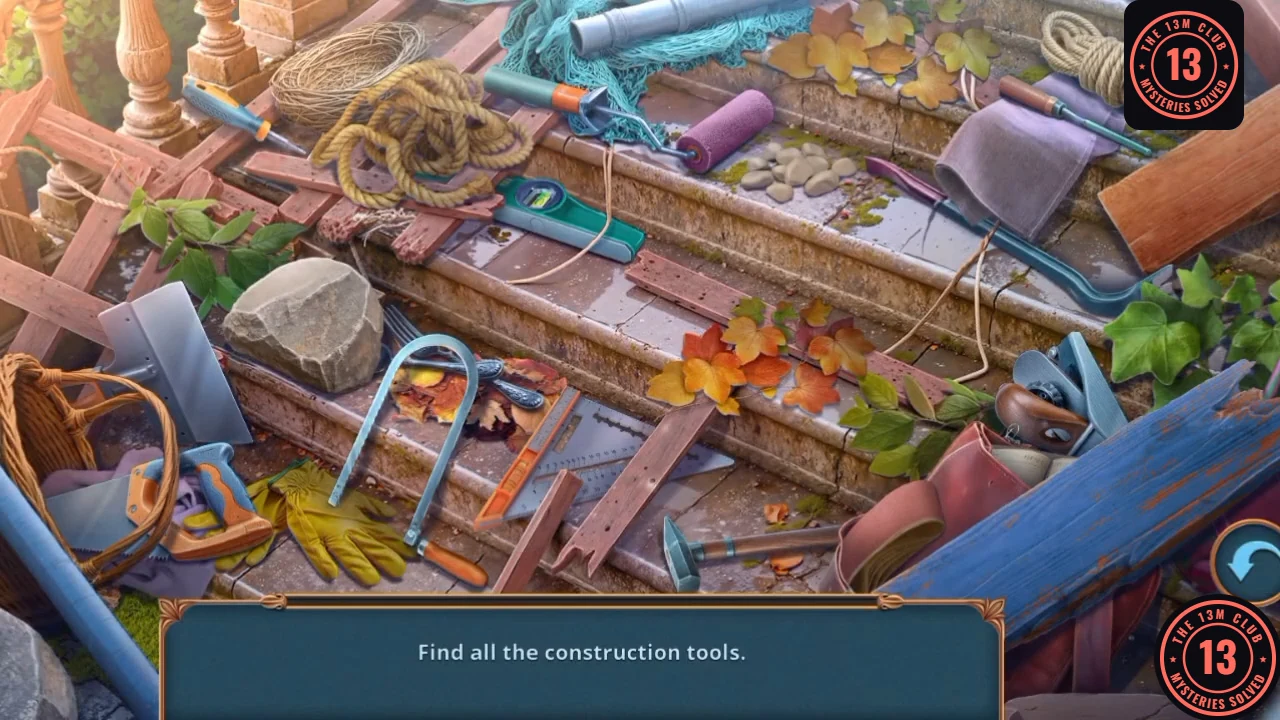
Find all the construction tools.
- Tap every construction tool in the scene. The reward is the Telephone Book.
CHAPTER 1
Calling Tomas
Use the phone to get a photo of the mosaic.
- Use the Telephone Book on Agnes's Phone. Tomas warns you the house is doomed: pick "Explain that you've had experience with curses" for +1 (not "Get straight to the point."). You receive the Photo of Mosaic.
- In the Kitchen, use the Mosaic Fragment and Photo of Mosaic on the mosaic in the window sill.