CHAPTER 3 PUZZLE
Skeleton guitar chords
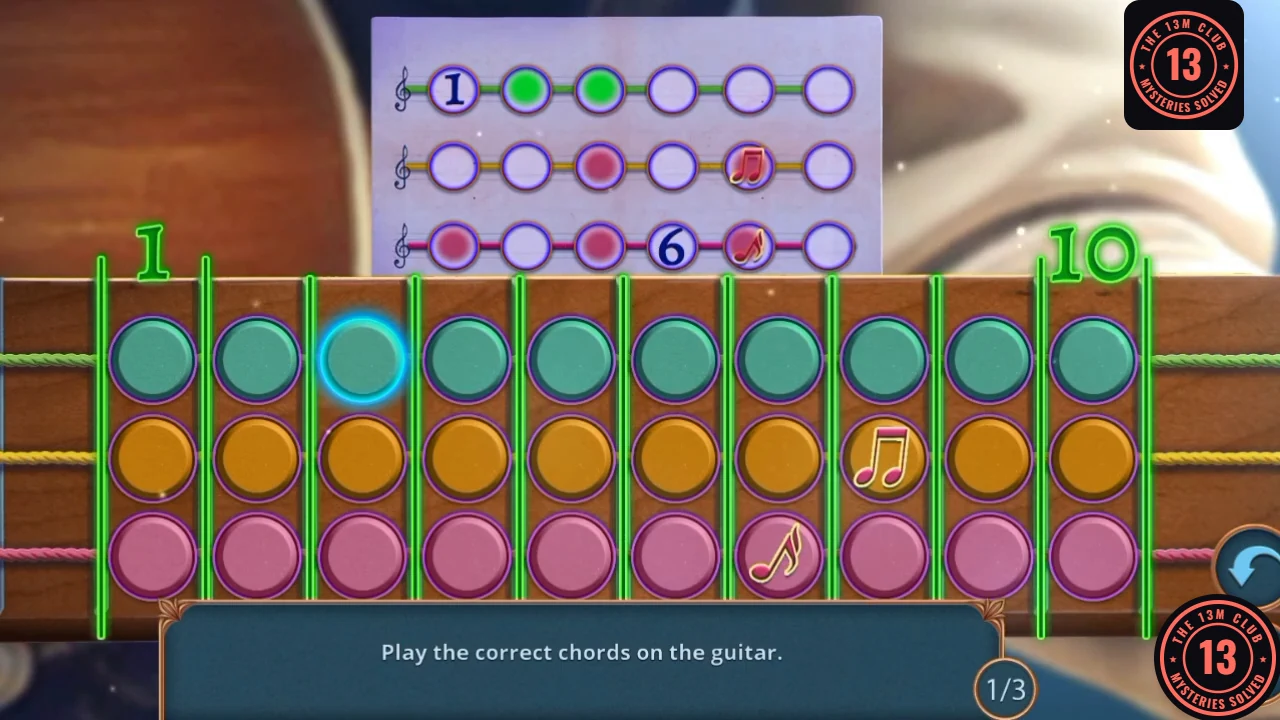
Play the correct chords on the guitar. Three rounds.
- In the Antique Shop, use the New String and Music Hint on the skeleton.
- The hint has one row for each string (top teal, middle orange, bottom pink), and the board has frets 1 to 10. A number or note icon in a hint row fixes the scale for that row, and the circles either side are the neighbouring frets. The note icons on the board mark middle fret 8 and bottom fret 7. Tap the frets with a coloured dot; played dots turn green on the hint. Round 1: top 2, 3; middle 6, 8; bottom 3, 5, 7. Round 2: top 4, 5, 7; middle 6, 8, 10; bottom 8, 9, 10. Round 3: top 5, 7, 9; middle 3, 4; bottom 3, 6. The reward is the Moon Signet Ring.
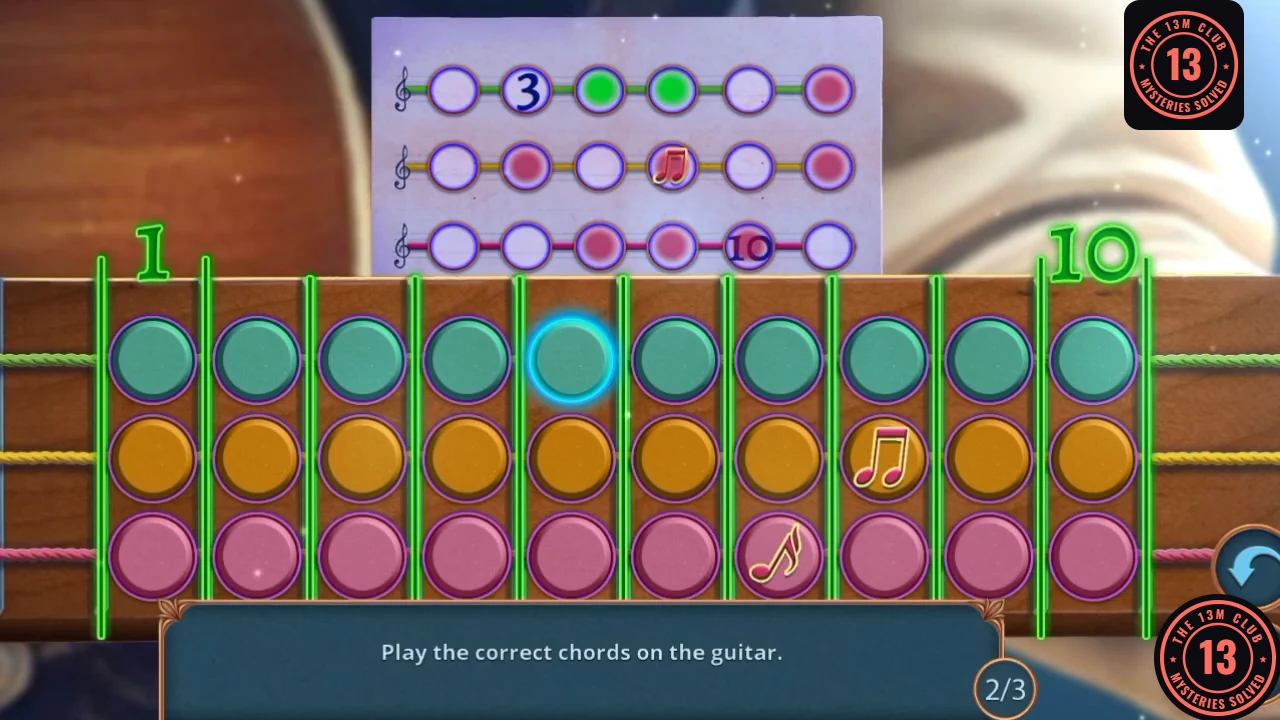
Round 2 of 3, with some of its dots already played and turned green on the hint.
CHAPTER 3
Sophia's box and the journal
The ring opens Sophia's box.
- In Sophia's House, use the Moon Signet Ring on the box. Take Flags 1/2 and the Pendant.
- Use the Pendant and Cryptex on Heinrich's Journal.
CHAPTER 3 PUZZLE
Journal path
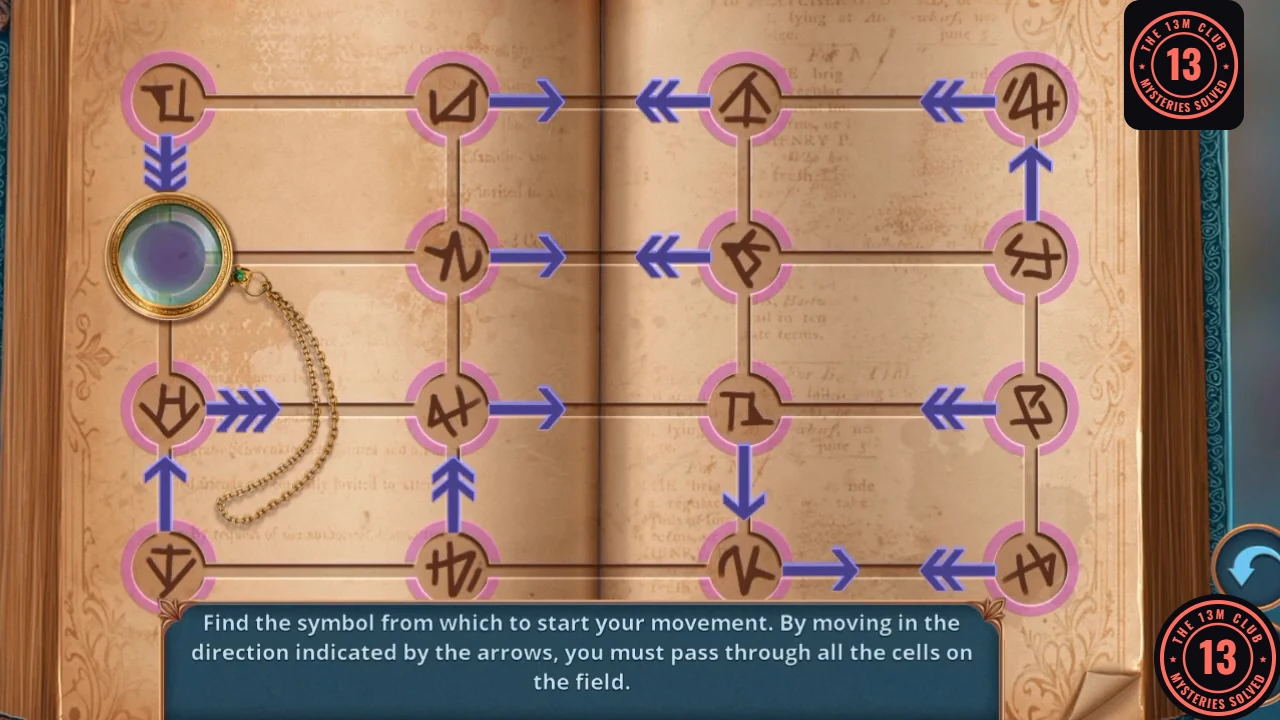
Find the symbol from which to start, then follow the arrows through all cells.
- Place the magnifier token on the second row, rightmost symbol. It then runs on its own through every cell and ends on the purple cell, all green. Take and read the note.
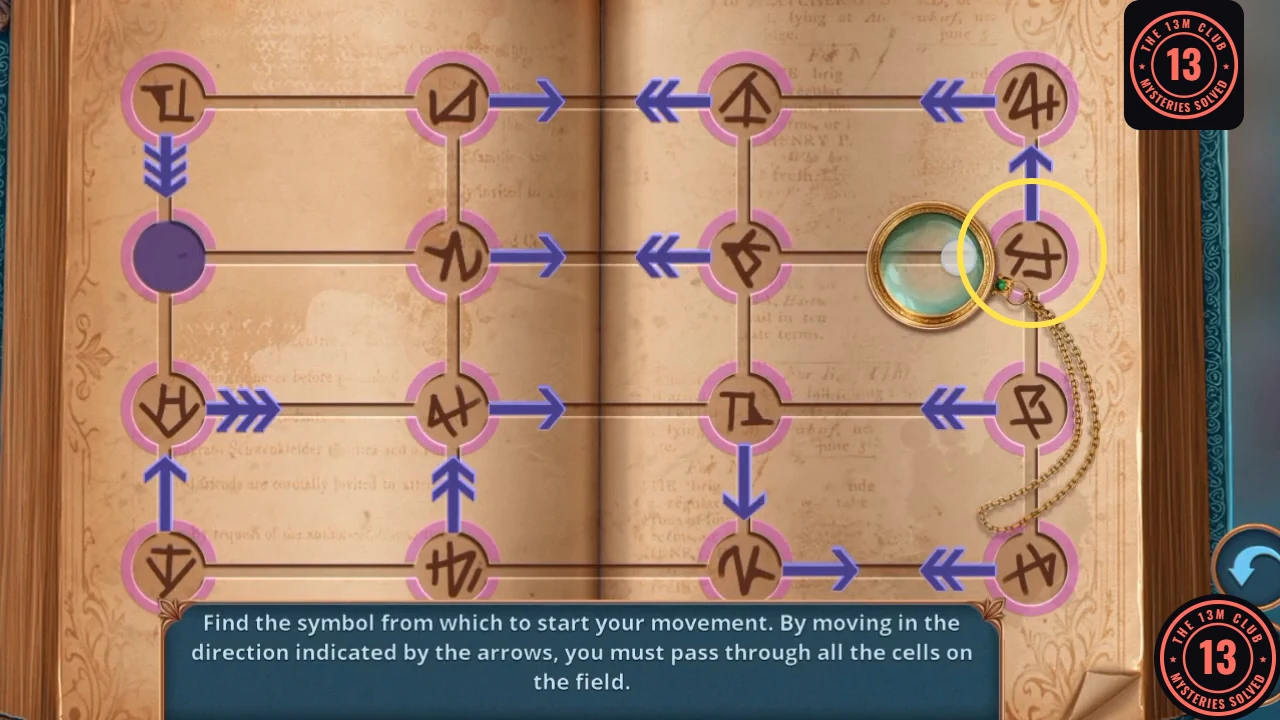
Start here: the rightmost symbol in the second row. - Asked whether to tell Sophia, pick "I think she would want to know the truth" for +1 (not "I think it's better to hide this after all"). You receive the Coin.
CHAPTER 3
Town Square kiosk
The Coin pays for the climbing gear.
- In the Town Square, use the Coin on the kiosk slot. Take the Granite Award and Grappling Hook, then take Hooks 1/2 from the ledge.
- Use the Grappling Hook on the upper window.
CHAPTER 3 PUZZLE
Wall climb
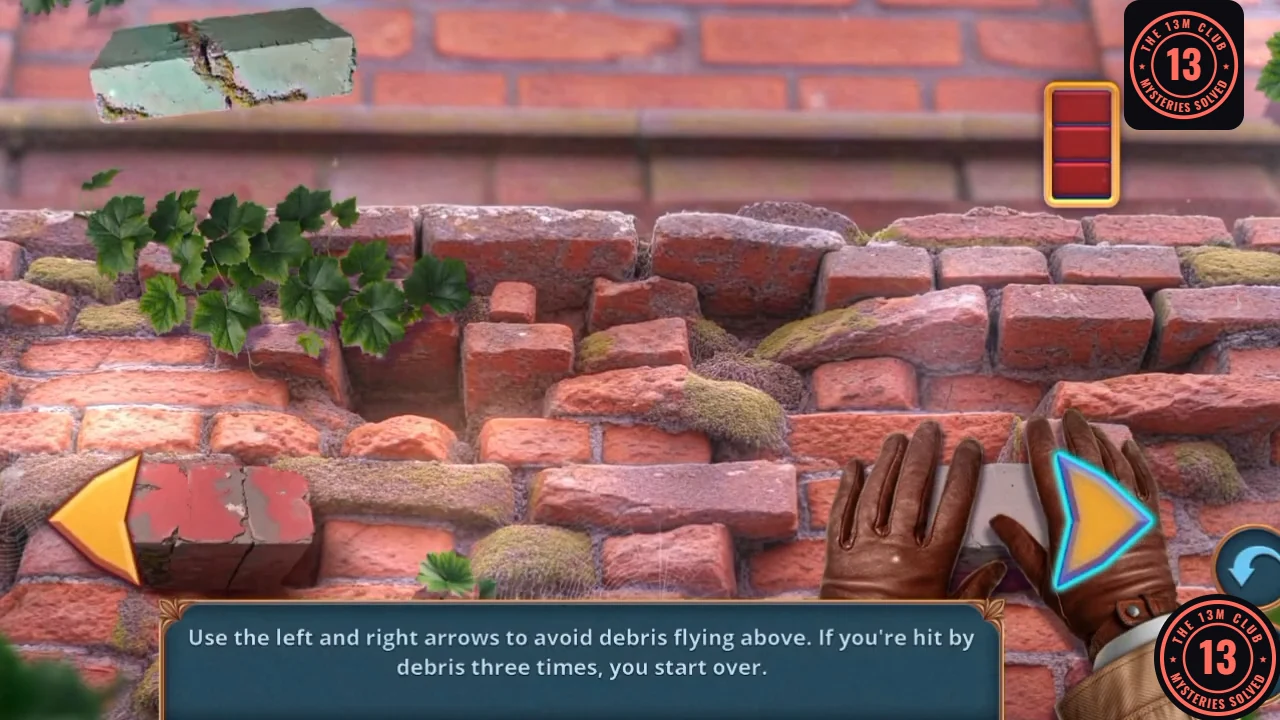
Climb the wall by tapping the right bricks, then dodge the debris. A wrong brick starts the climb again, and so do three hits.
- Tap one brick on each of the three walls: first the wide two-tone block right of centre, then the small orange block at the upper left, then the wide orange-and-grey block at the middle right. On the third wall, the red outline at the upper left is left over from the second wall, so ignore it. Tap START, then use the left and right arrows to avoid the debris flying above until the marker at the top right fills. You enter the Architects' Building.
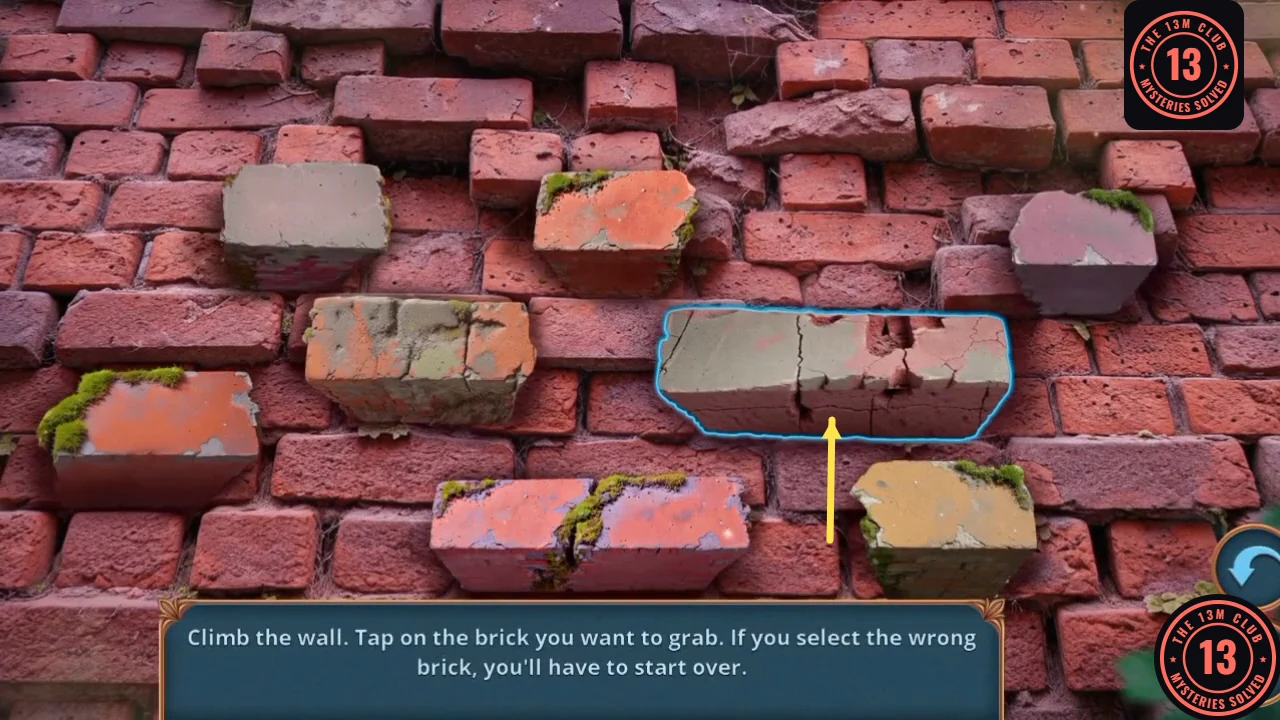
Wall 1: the wide two-tone block right of centre. The game outlines the brick you tapped. 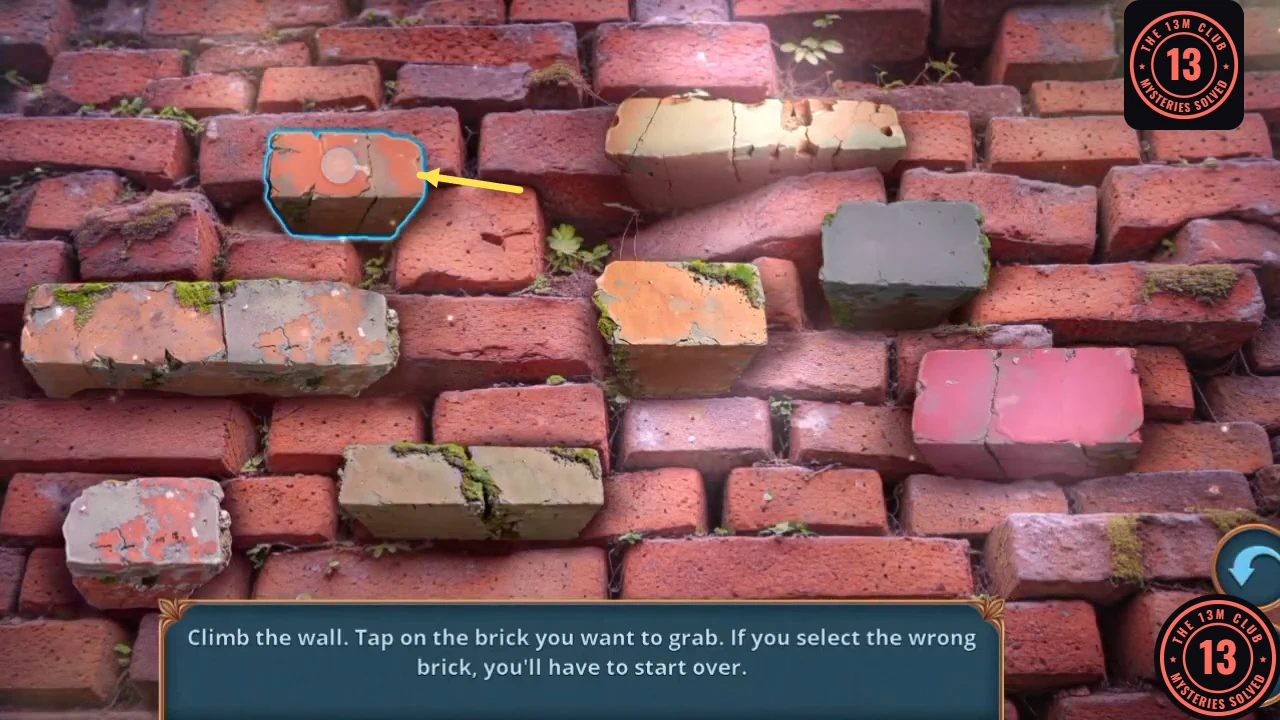
Wall 2: the small orange block at the upper left. 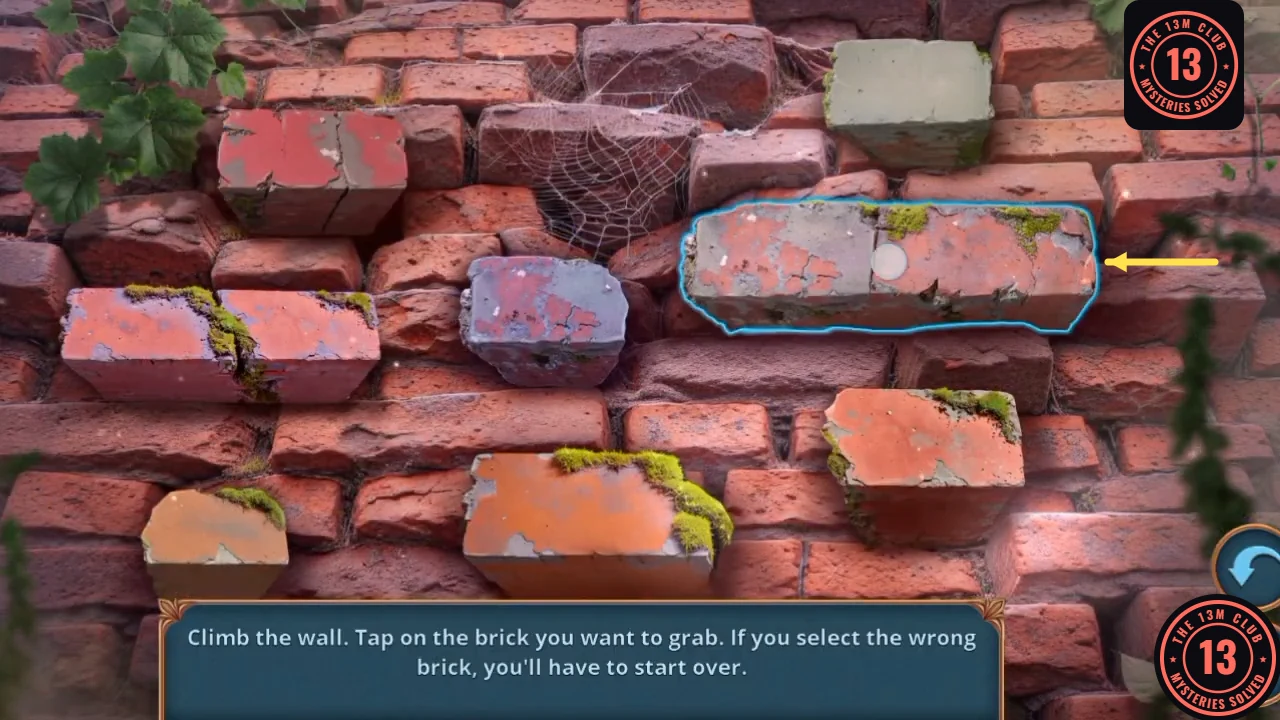
Wall 3: the wide orange-and-grey block at the middle right.
CHAPTER 3
Architects' Building
The city model and safe give you what you need for the cat.
- Take the Tower Model from the statue base and the Endoscope with Camera from the door close-up.
- Use the Tower Model on the city model. Take the Business Card and Powder (achievement Perfect City).
- Use the Business Card and Tape on the safe to lift the fingerprint. Take the Treat.
- In Sophia's House, use the Treat on the cat.
CHAPTER 3 PUZZLE
Hidden objects: the cat's stash
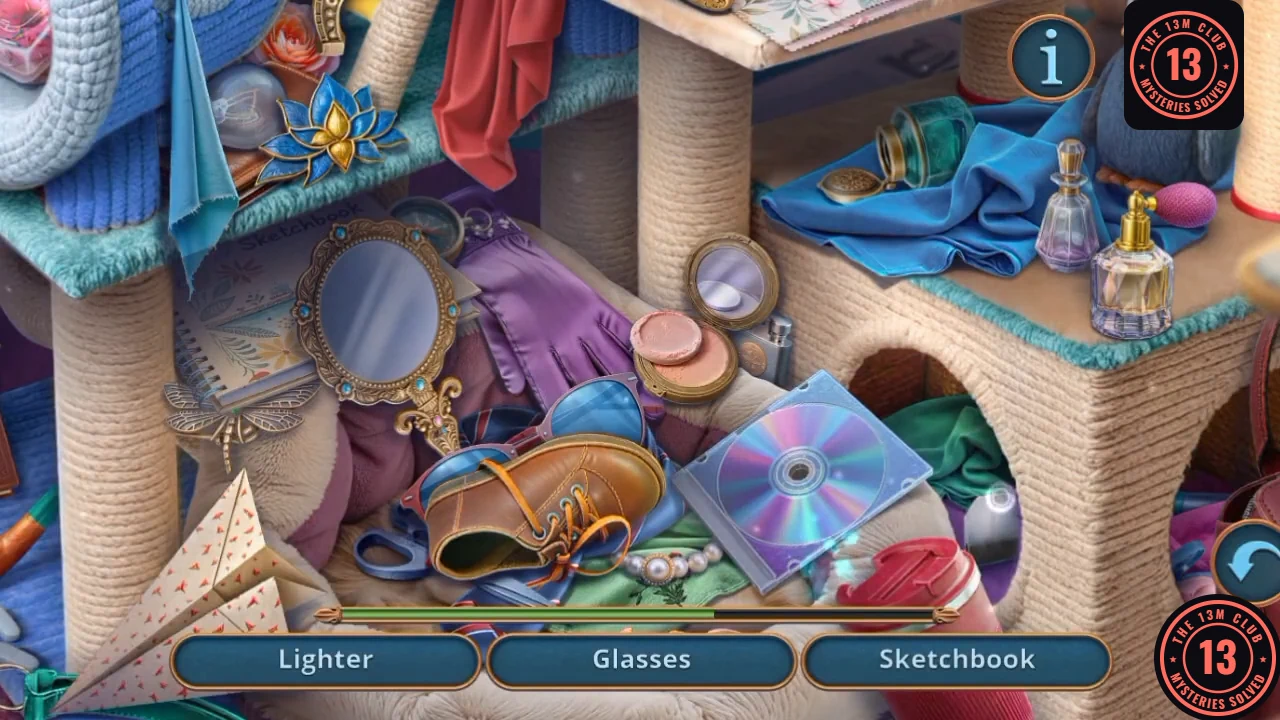
Find the listed objects.
- Find every listed item (Lighter, Camel, Watch, Battery, Thimble, Glasses, Clothespin, Button, Ring, Sketchbook and others). The reward is the Roller.
CHAPTER 3
Collar for the skulls
Clean the collar and bring it to the shop.
- Use the Roller on the Furry Collar to make the Collar.
- In the Antique Shop, use the Collar on the skulls.
CHAPTER 3 PUZZLE
Skull silhouettes
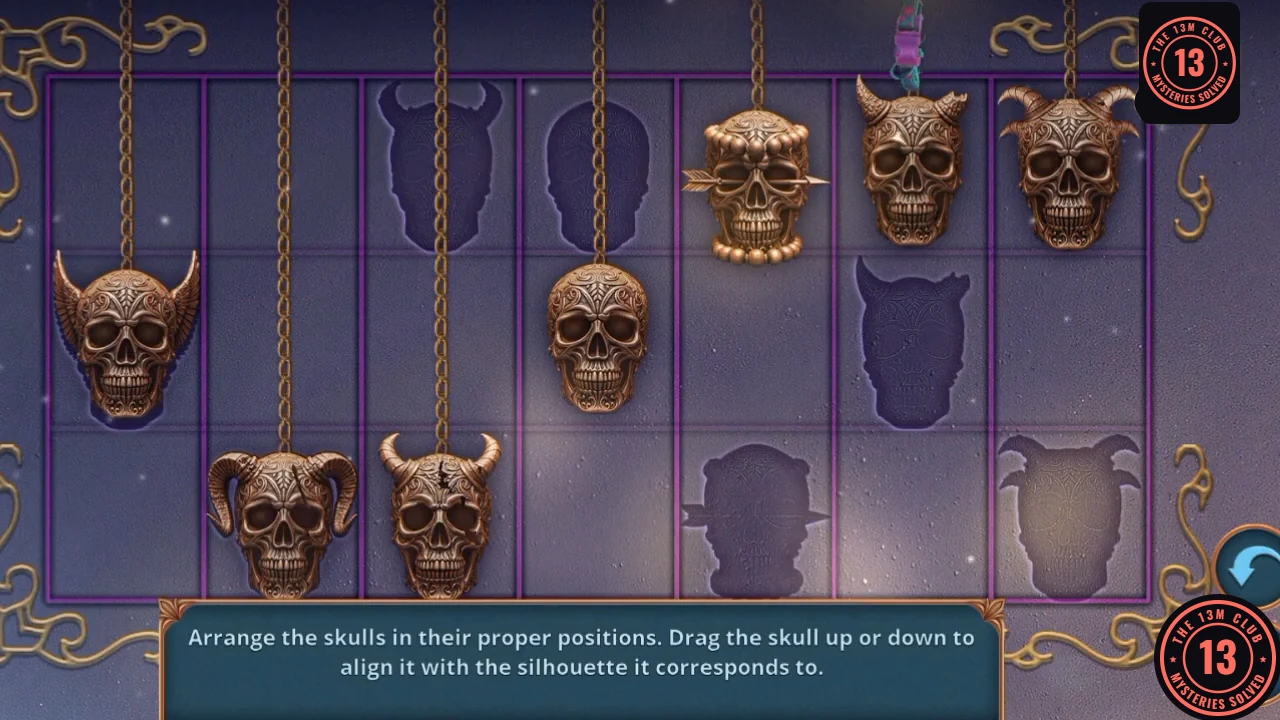
Arrange the skulls in their proper positions. Drag a skull up or down to align it with its silhouette.
- Drag each skull until it lines up with the silhouette that matches its shape. The reward is the Old City Map.
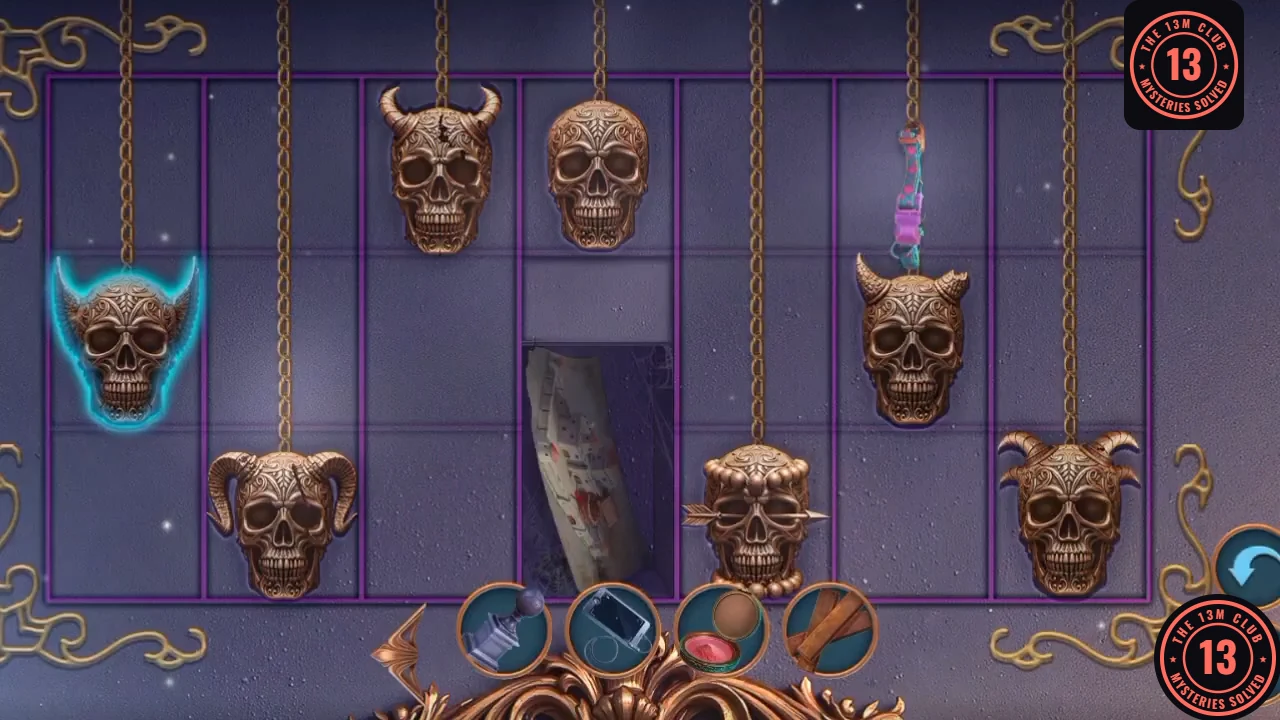
The finished skull positions.
CHAPTER 3
City model and the archive door
The map finishes the model.
- At the Architects' Building, use the Old City Map and Well Model on the model. Take the Cartridge and Hooks 2/2.
- Use Hooks 2/2 on the door lock.
CHAPTER 3 PUZZLE
Door chain path
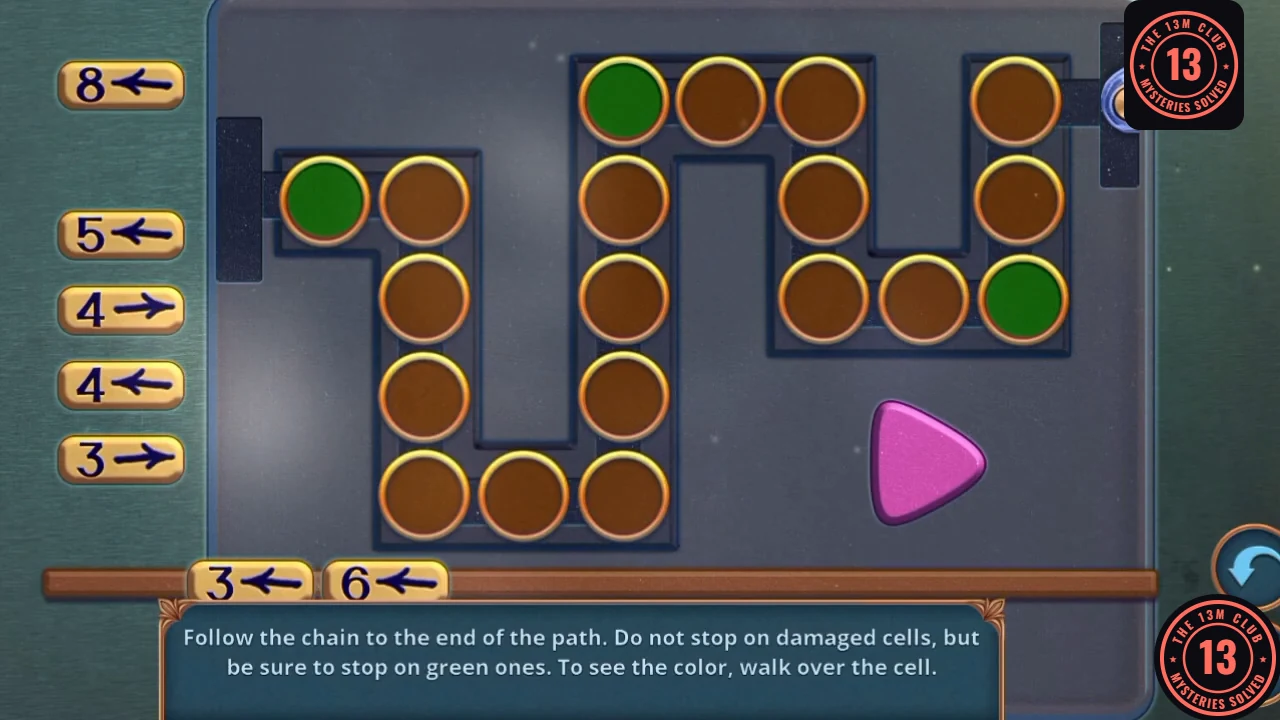
Place the arrow tiles so the runner stops only on safe cells, then press Play.
- The tile rack holds 8 left, 6 left, 5 left, 4 right, 4 left, 3 right and 3 left. Place them in this order: 3 left, 6 left, 8 left, 4 right, 5 left, 3 right, 4 left. Press Play. The runner must not stop on damaged cells and must stop on the green ones.CODE3L, 6L, 8L, 4R, 5L, 3R, 4L, Play