CHAPTER 2
Reaching City Park
Open the hole and the door to reach the park.
- In Tomas's House, use the Wooden Pole on the hole in the wall dial.
- In the Backyard, use the Metronome and Cue on the red gate, then go through to City Park.
- In City Park, open the grate close-up and tap the blue wallet. Take Coins 2/2.
- Use the coins on the newspaper vendor. Take the Newspaper (achievement What's New?).
- Open the scanner close-up at the Library door. Read the note ("Library closed after 4 p.m.") and take Slides 1/2.
- Use the Newspaper on the smoke.
CHAPTER 2 PUZZLE
Hidden objects: the smoke
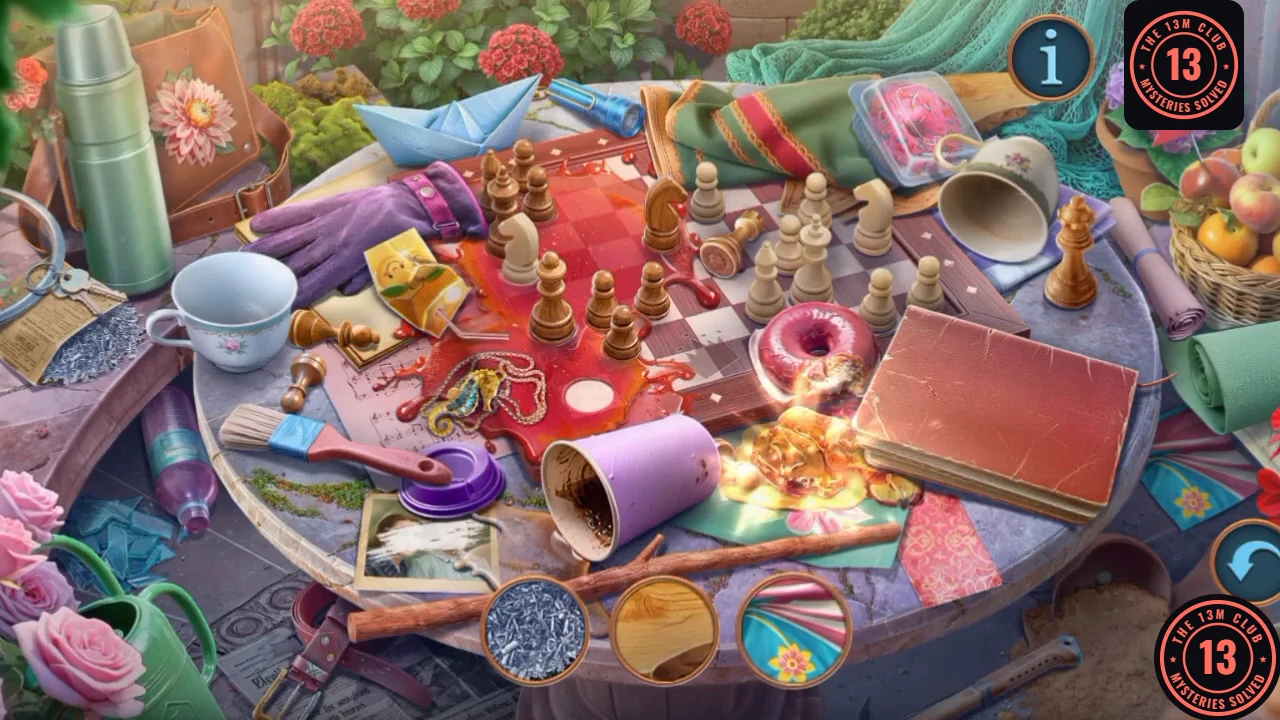
Fan the smoke away and search.
- Find every object shown in the circles along the bottom. The reward is the Cane.
CHAPTER 2
Sugar for the ants
The Cane reaches two useful items.
- Use the Cane on the items by the door. Take the Pump and Sugar.
- In the City Suburbs, use the Sugar on the ants.
CHAPTER 2 PUZZLE
Ants checkers
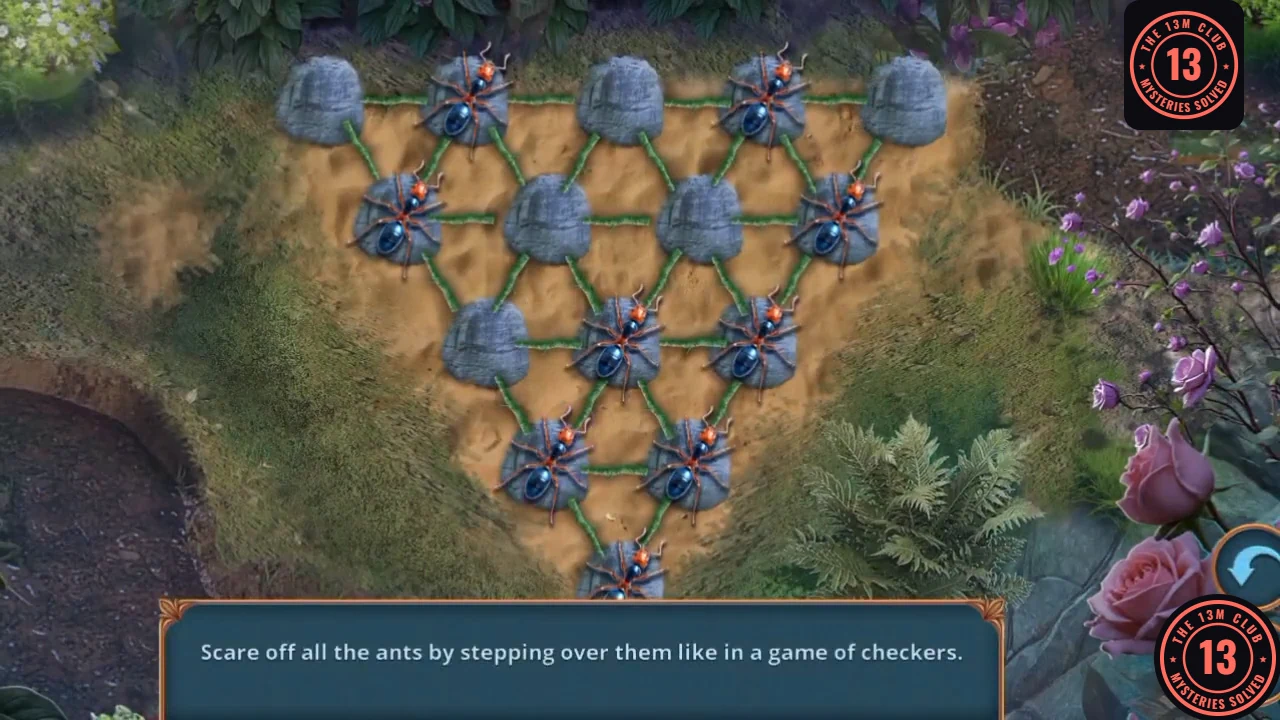
Scare off all the ants by stepping over them as in checkers. One ant left ends the puzzle.
- Rows from top to bottom hold 5, 4, 3, 2 and 1 stones; count stones from the left in each row. The ants start on row 1 stones 2 and 4, row 2 stones 1 and 4, row 3 stones 2 and 3, row 4 stones 1 and 2, and row 5 stone 1. Make these jumps, each one removing the ant jumped over: row 5 stone 1 to row 3 stone 1; row 4 stone 2 to row 2 stone 2; row 2 stone 1 to row 2 stone 3; row 3 stone 3 to row 1 stone 5; row 1 stone 5 to row 1 stone 3; row 1 stone 2 to row 1 stone 4; row 1 stone 4 to row 3 stone 2; row 3 stone 1 to row 3 stone 3. Rewards: Figurine Head, Damaged Sun Amulet and Chess Piece Part.
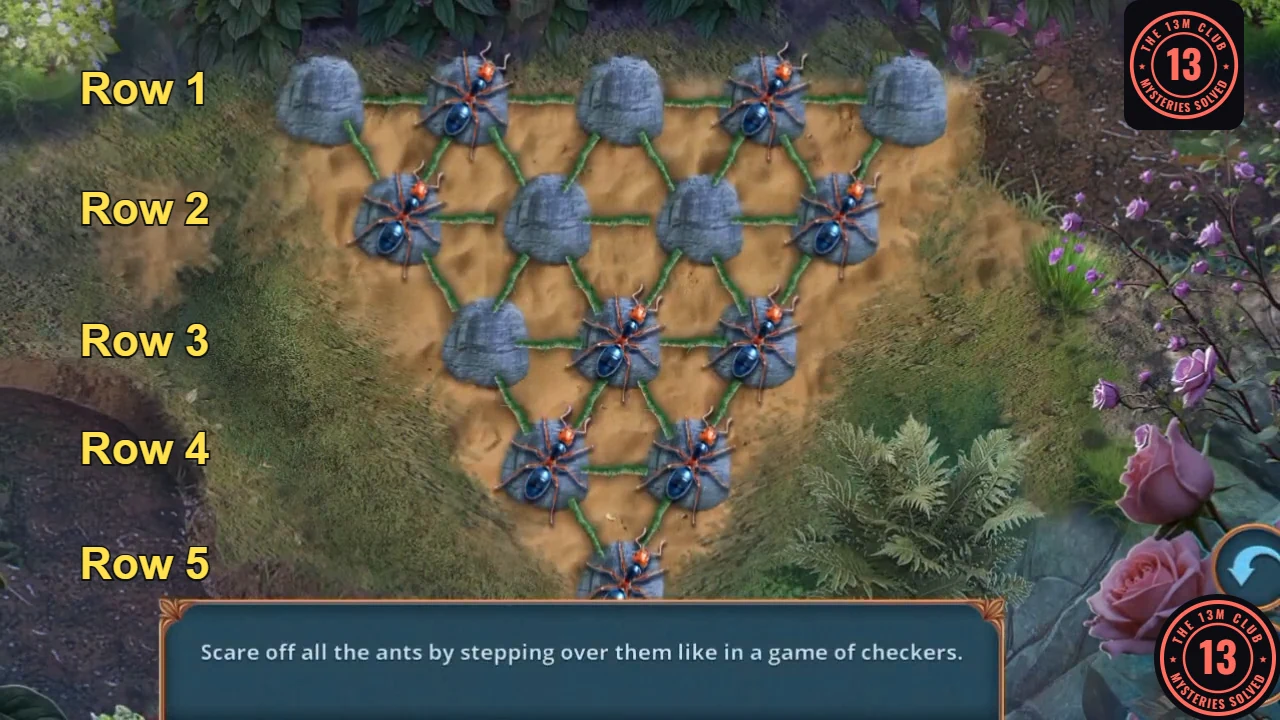
Row numbers for the jumps in this section. Count stones from the left in each row. - In the inventory, combine the Chess Piece Part with the Chess Piece Base to make the Chess Piece.
CHAPTER 2
City Park chess table
Bring the missing piece to the board.
- In City Park, use the Chess Piece on the chessboard. The game asks "Shall we play?"
CHAPTER 2 PUZZLE
Hidden objects: chess table
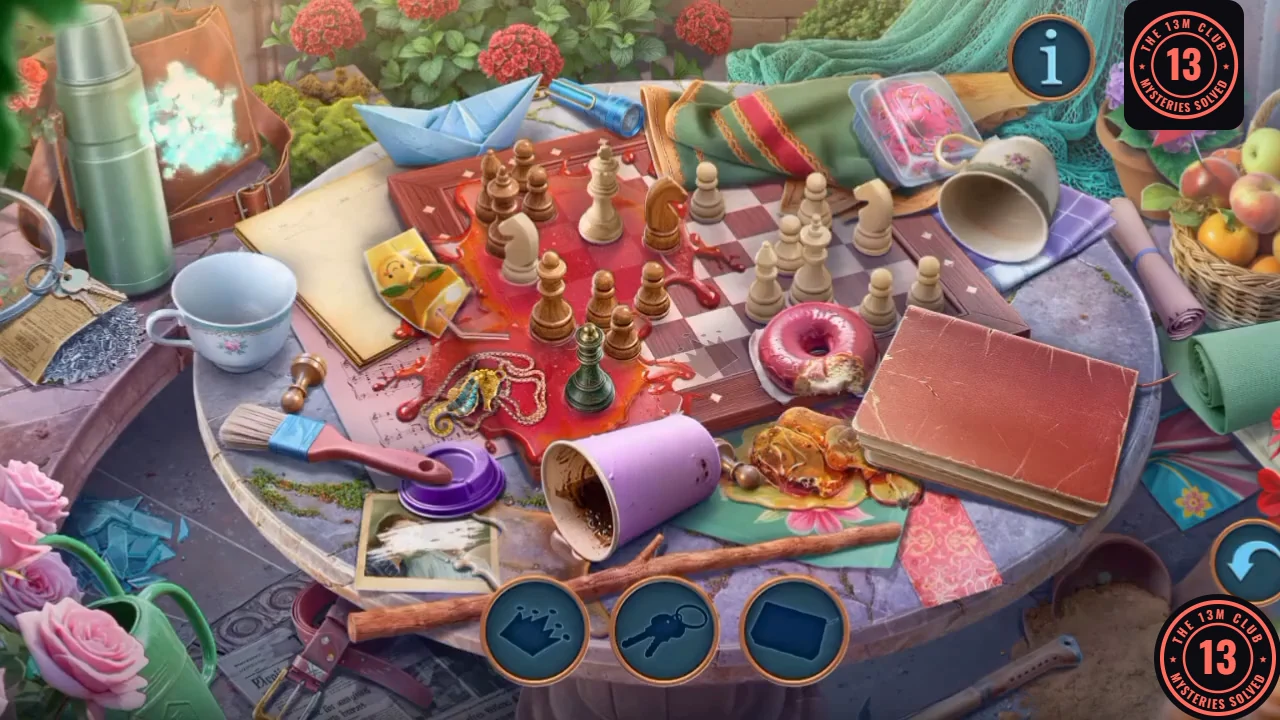
Find the objects shown around the board.
- Find every object. The reward is the Library Pass.
CHAPTER 2
City Library
Open the drawer and connect the flash drive.
- Use the Library Pass on the scanner and enter the City Library.
- In the Library, open the close-up of the chest and its broken figure. Take the loose Crescent Moon Charm beside it. The game says "This poor thing has lost its head. I need to fix it properly." The figure stays broken for now, so keep the Figurine Head.
- Use the Crescent Moon Charm on the drawer lid. Take Clock Hands 1/2 and the Empty Flash Drive.
- Use the Empty Flash Drive on the laptop.
CHAPTER 2 PUZZLE
Coats of arms
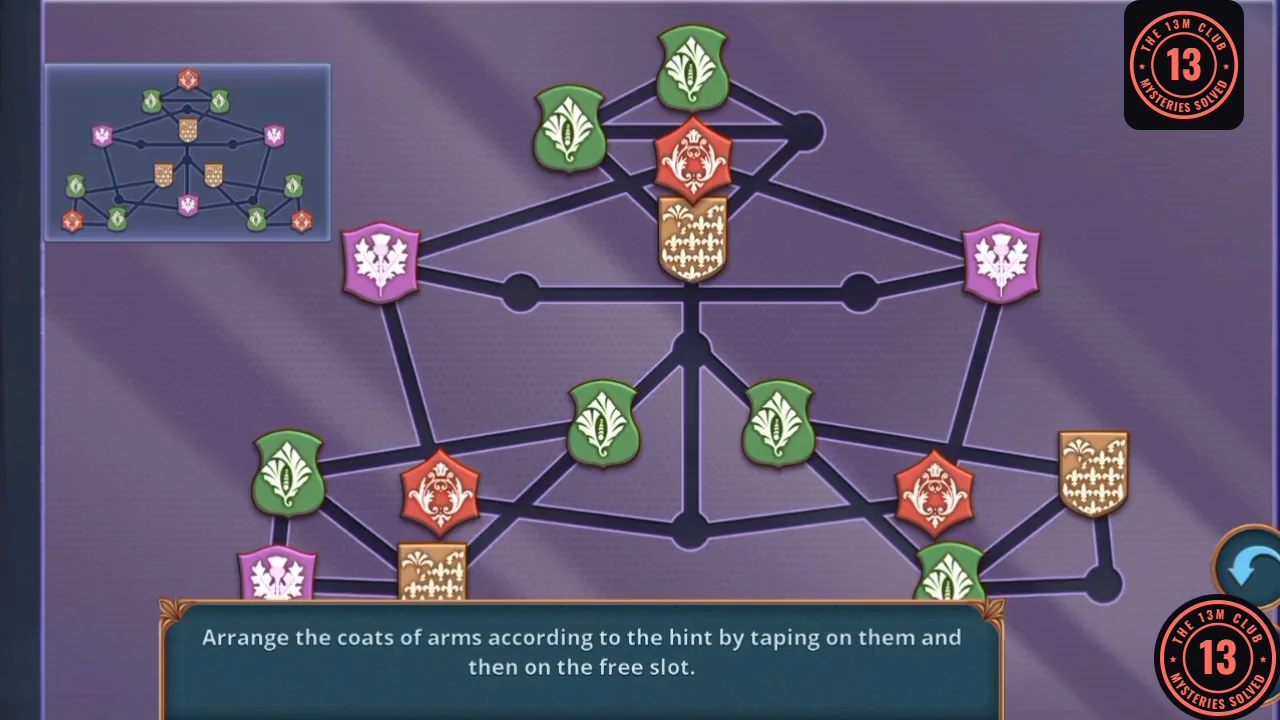
Arrange the coats of arms according to the hint by tapping a shield and then the free slot.
- This is a long rearrangement (about 3 to 4 minutes in the checked footage), so here is the approach rather than every move. Tap a shield, then the free slot, to move it. The hint panel at the top left shows the target. Bring each shield to its place in turn, using the free slot to make room.
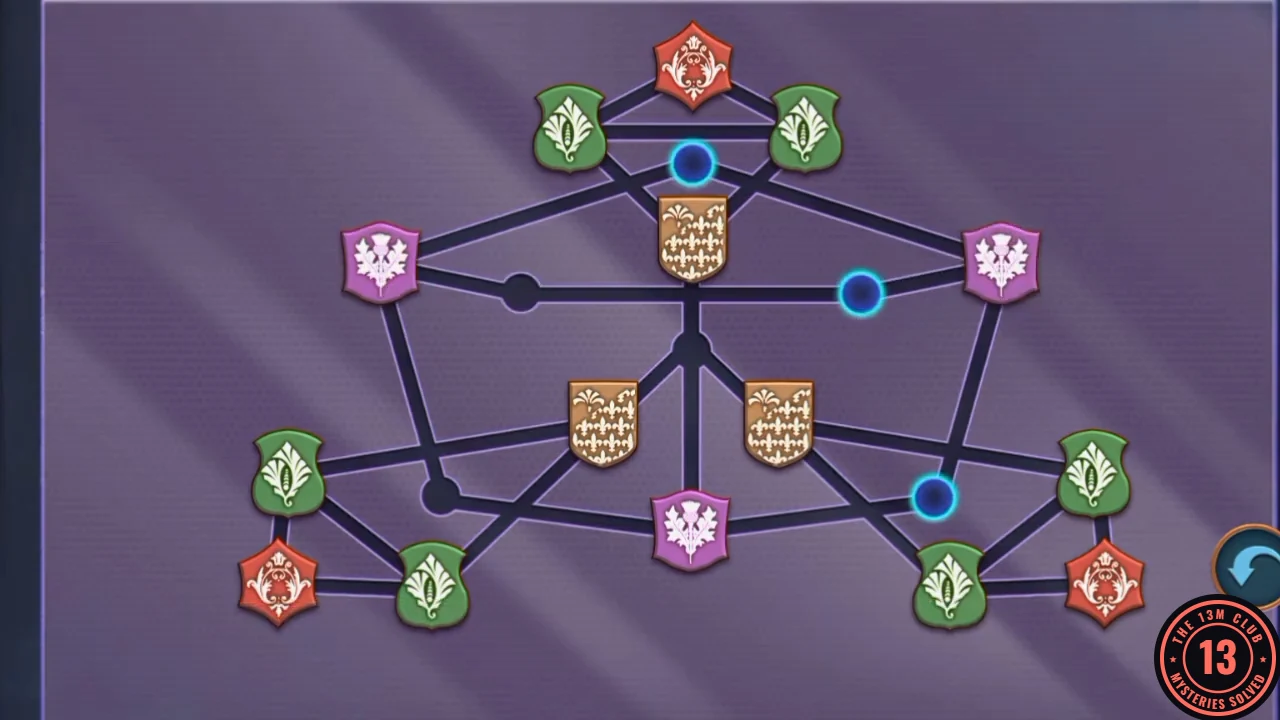
The finished arrangement of the coats of arms. - Tomas mentions the Library restricted section. "Yes, it wouldn't hurt" (+6, Deluxe) opens it; "No time to waste. Heinrich is more important now" skips it. Either way you receive the Wave Pendant.
CHAPTER 2 DELUXE
Deluxe: Library Restricted Section
Optional bonus location. On the checked run that plays it, Tomas opens the section after the coats-of-arms puzzle.
- Pick "Yes, it wouldn't hurt". The section opens beside the Library. Task: Search for information about Agnes's family.
- Take the Photograph from the code book on the desk, and the Scraper at the base of the bust.
- Use the Photograph on the numbered card cabinet. Drawer 11 opens: take the Wheel.
- Use the Wheel on the poster wall stand and take the Dirty Amber. Use the Scraper on the posters.
CHAPTER 2
Library chain and the ship's wheel
The Wave Pendant opens a chest at Tomas's.
- Take the Chain in the Library.
- In Tomas's House, use the Wave Pendant on the chest. Take the Steering Wheel.
- Use the Steering Wheel on the hole.
CHAPTER 2 PUZZLE
Ship's wheel
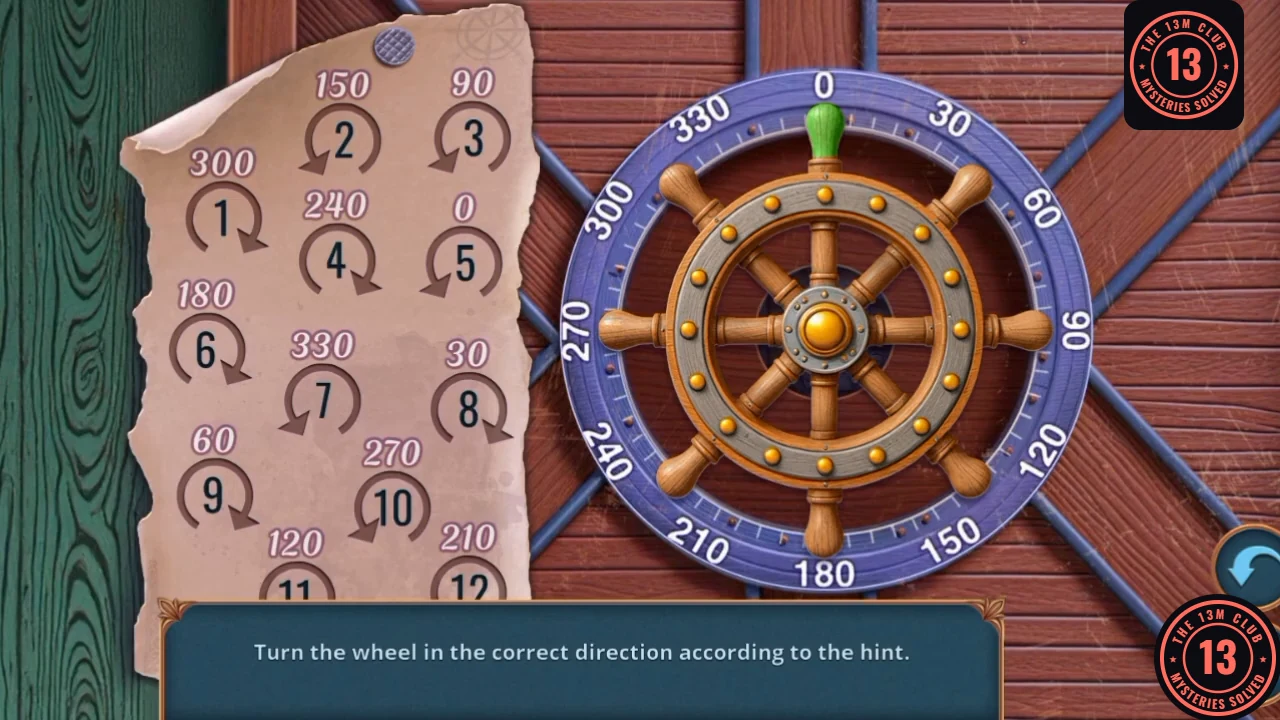
Turn the wheel in the correct direction according to the hint.
- The paper hint lists twelve turns. Drag the wheel at its rim to each position in order: 1 to 300 clockwise, 2 to 150 counter-clockwise, 3 to 90 counter-clockwise, 4 to 240 clockwise, 5 to 0 counter-clockwise, 6 to 180 clockwise, 7 to 330 counter-clockwise, 8 to 30 clockwise, 9 to 60 clockwise, 10 to 270 counter-clockwise, 11 to 120 clockwise, 12 to 210 counter-clockwise. The text box covers the arrows for 11 and 12, so those two directions come from watching the wheel turn.CODE300 CW, 150 CCW, 90 CCW, 240 CW, 0 CCW, 180 CW, 330 CCW, 30 CW, 60 CW, 270 CCW, 120 CW, 210 CCW
CHAPTER 2
Tomas's Study
Search the room and set up the projector.
- Take the Carbine and Puzzle Hint under the cloth.
- Take the Dog Figurine from the portrait close-up and use it on the shelf slot. Take the Grabber Hand and Slides 2/2.
- Use Slides 2/2 on the projector.
CHAPTER 2 PUZZLE
Hidden objects: slide projector
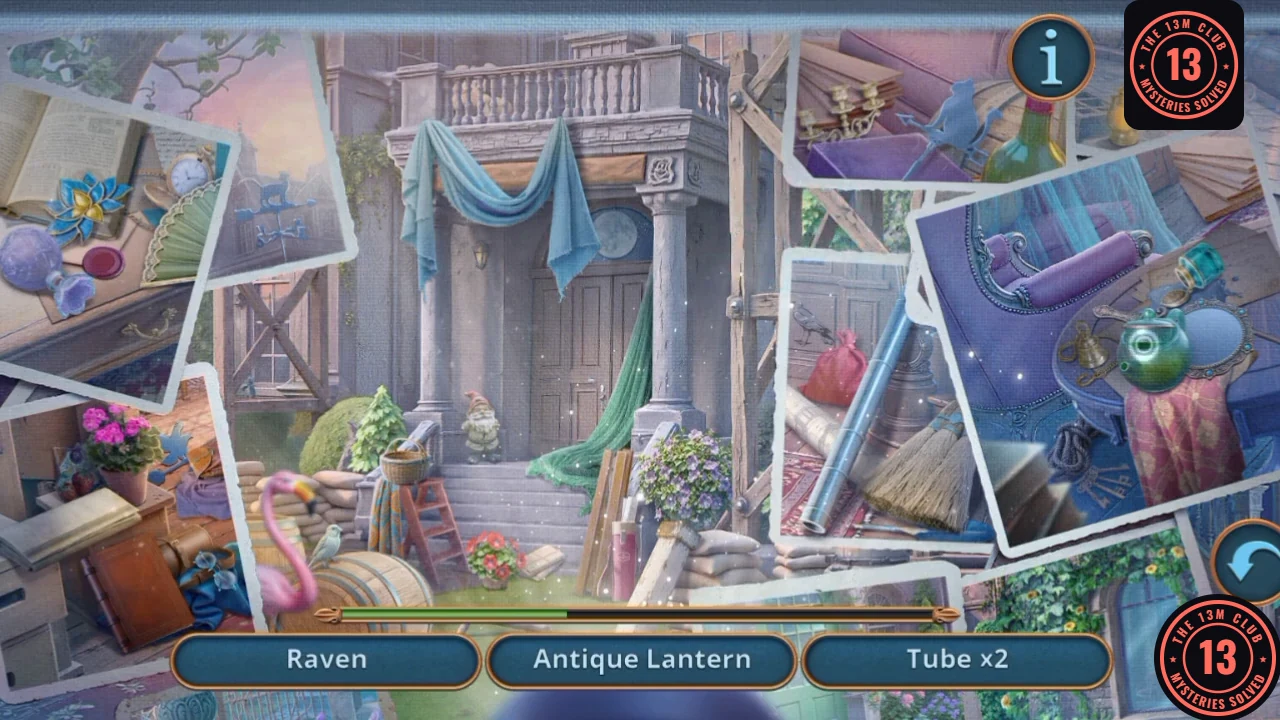
The list counts how many of each object to find in the projected photos.
- Find the counted objects (Raven x3, Antique Lantern x3, Tube x3, Weathervane x3 and others). The reward is the Drawer Handle.
- Tomas offers more background: pick "Learn more." for +1 (not "Ignore Thomas.").