CHAPTER 1 PUZZLE
Kitchen mosaic
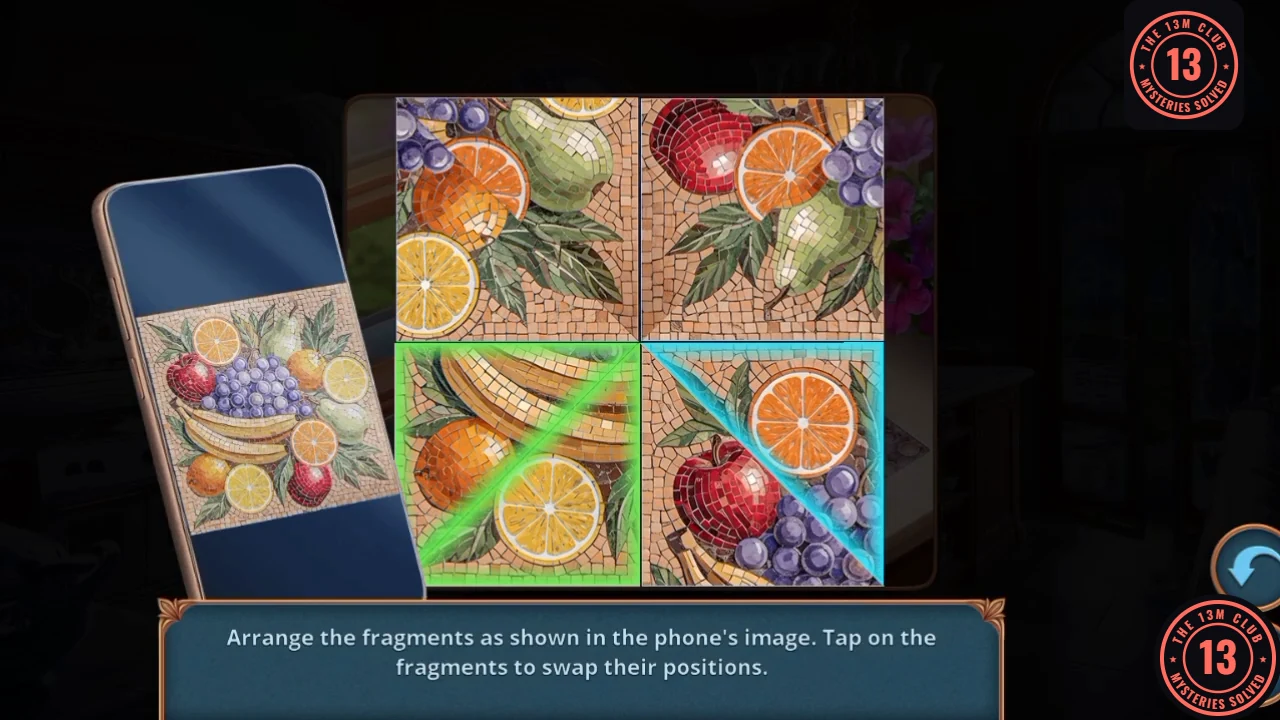
Arrange the fragments as in the phone's photo by tapping two fragments to swap them.
- Compare with the phone photo at the side. The fragments are diagonal halves: tap two to swap them until each square shows its part of the picture. A green outline marks a fragment in place. Then read the note lying on the sword hilt, and take the Antique Sword Handle and Wind-up Mouse.
- Use the Wind-up Mouse on the hole in the Kitchen wall.
CHAPTER 1 PUZZLE
Mouse maze
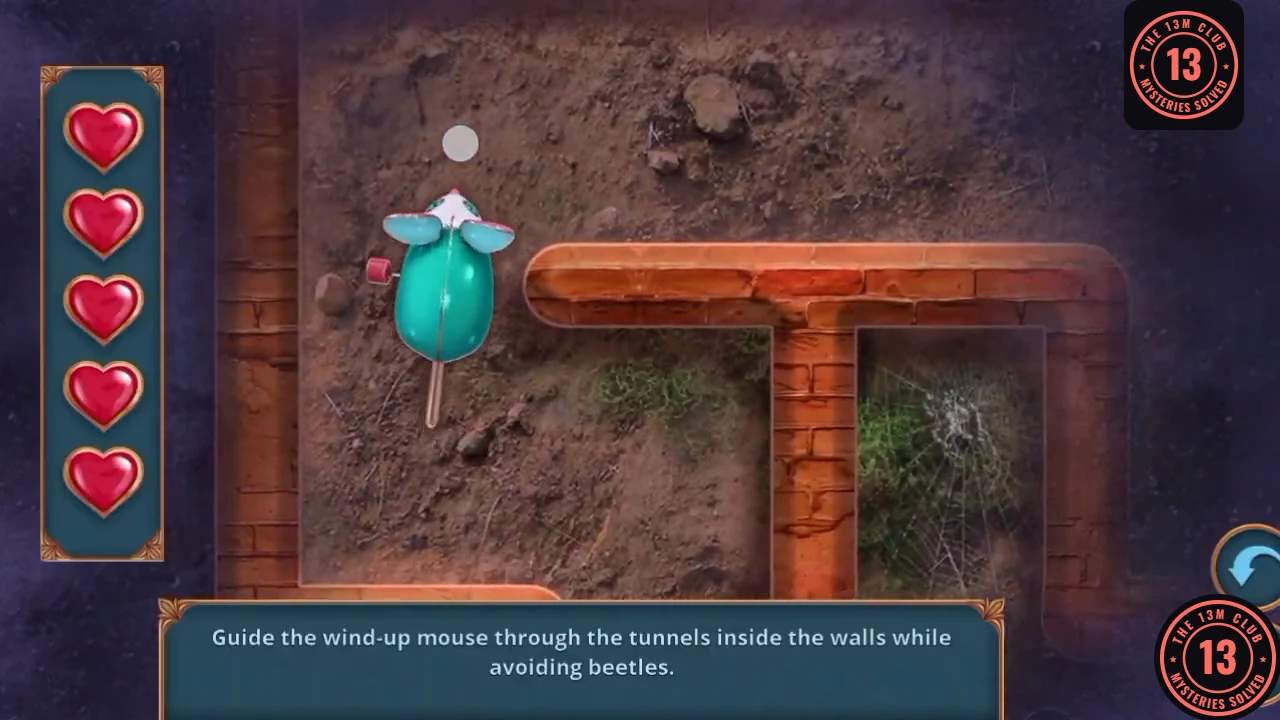
Guide the wind-up mouse through the tunnels inside the walls while avoiding beetles. You have five hearts.
- The tunnels scroll as the mouse moves. Wait for each beetle to pass before you cross its path, because a hit costs a heart. The reward is the Glass with Holes.
CHAPTER 1
Attic trunk and laptop
The trunk gives the last laptop part.
- In the Attic, use the Box Panel on the trunk lid and the Glass with Holes on the mirror. Take the Door Bell and Wireless Internet Modem.
- In the inventory, use the Modem and Antivirus Flash Drive on the Depleted Laptop.
CHAPTER 1 PUZZLE
Laptop password
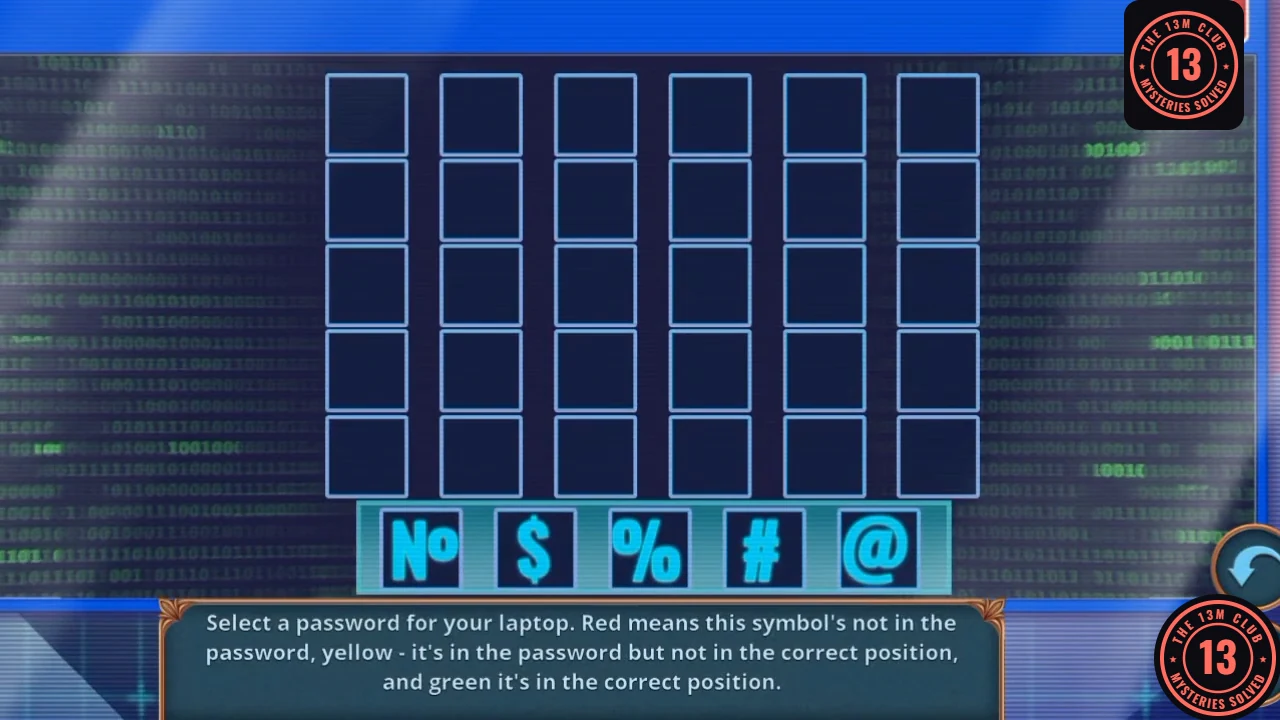
Enter five symbols. Colour feedback shows which guesses are right.
- Enter the symbols in this order: % No # @ $ ("No" is the number sign). Two checked recordings used the same answer. Red and yellow feedback mark wrong symbols or positions; green is right. Read the note and receive Heinrich Braun's Music.CODE% No # @ $
CHAPTER 1
Piano and the storeroom photo
The music triggers a ghost and three pickups.
- On the Second Floor, use Heinrich Braun's Music on the piano and watch the ghost event. Take the Sword Pommel, Sticky Dart and Heinrich's Photograph.
- Use Heinrich's Photograph on the storeroom.
CHAPTER 1 PUZZLE
Hidden objects: photo and reality
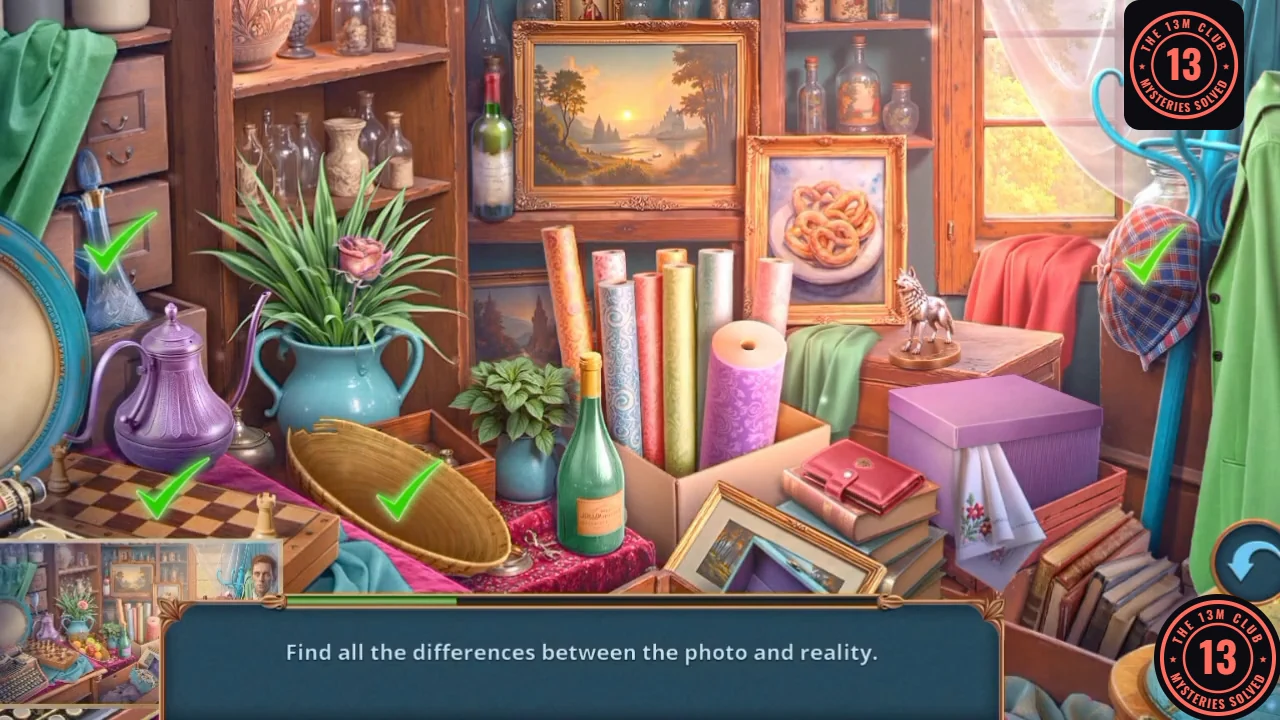
Find all the differences between the photo and the room.
- There are 12 differences, and each tap adds a green tick. Listed in the recording's order: the tartan hat on the coat stand at the right; the blue glass atomizer at the far left, above the purple pot; the chessboard at the lower left; the oval wicker tray; the pink flower in the potted plant; and the upper wine bottle on the shelf, left of the landscape painting.
- Then: the lower green bottle; the pink-and-purple roll in the carton; the pretzel picture; the small figurine on the chest; the red wallet on the books; and the handkerchief hanging from the purple box. The reward is the Wine Bottle.
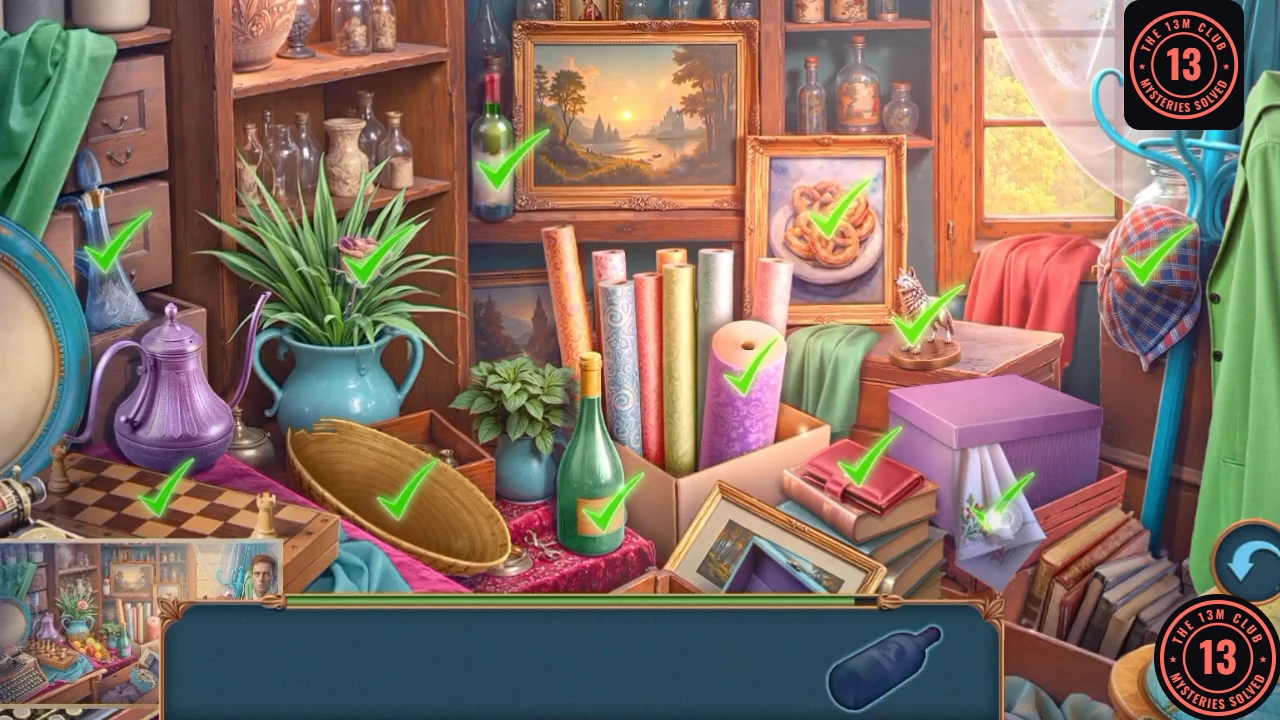
All 12 differences ticked.
CHAPTER 1
Cellar door and the records
The wine rack gives what you need for the teal door.
- In the Cellar, use the Wine Bottle on the empty rack slot. Take the Winemaker Award.
- Use the Awl and Winemaker Award on the teal door. Take the Encrypted Box and Ink Developer.
- In the Attic, use the Brush and Ink Developer on the records on the table.
CHAPTER 1 PUZZLE
Hidden objects: Attic records
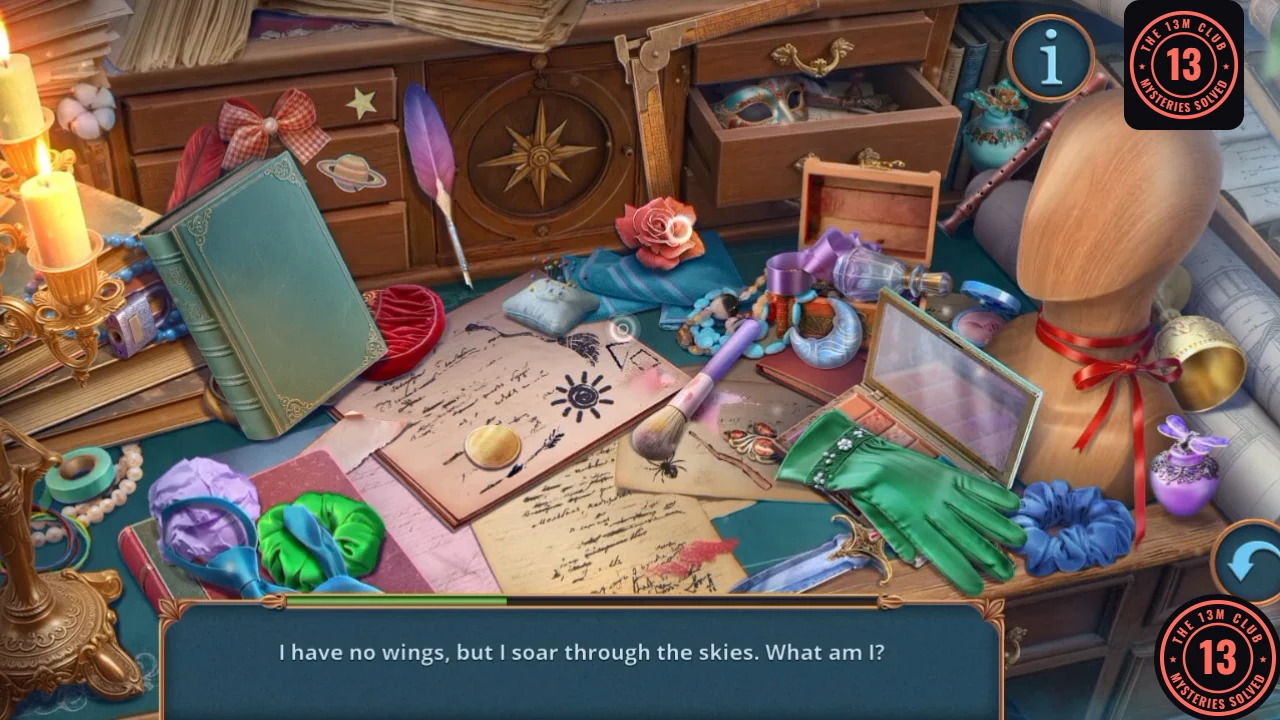
A longer riddle-style search on the records.
- Each entry is a one-line riddle. "I can save you from thirst, or I can be full of poison." = the teal flask leaning on the green book. "I measure the sands of time, and I'm made of glass." = the hourglass sketch on the pink paper, lower left of centre. "I'm a crystal ball without the magic." = the purple ball on its stand. "I'm a red fruit so fair, but filled with woe." = the fruit-and-snake drawing on the torn scrap left of the notebook.
- "I'm a cauldron of bubbling brew, but not for cooking." = the cauldron sketch on the pink paper beside the green cloth. "I have no wings, but I soar through the skies." = the broom sketch at the top of the open notebook. "I have fingers, but I'm not alive." = the green glove. "I have many faces, but show no emotion." = the carnival mask in the open drawer, upper right.
- "I'm made of wood, but I'm not a tree." = the thin wooden stick between the makeup brush and the palette. "I'm a thread of fate, but I don't belong to a loom." = the red ribbon on the mannequin's neck. "I won't let anyone in, but I'm not a guard." = the lilac padlock behind the candlestick, against the book. "I shimmer with an otherworldly moon glow, a guardian of dreams." = the blue crescent ornament beside the makeup brush. The book then lifts: take the Wheel from under it.
CHAPTER 1
Forging the sword
Last chance to explore before the chapter ends.
- In the Cellar, use the Wheel on the barrel. Take the Silver Tray and Blade.
- Use the Sword Pommel and Blade on the Antique Sword Handle to make the Knight Sword (achievement You're Knighted!).
- Before you use the sword, search this chapter's rooms for any Antique Busts you still want. The list is under Antique Busts and the Movie Theater.
- Use the Knight Sword on the ghost hands holding Agnes. A warning says that if you complete this task, you won't be able to go back to previous locations and find the remaining items. Tap NO to go back and search, or YES to continue.
CHAPTER 1 PUZZLE
Breaking Agnes's chains
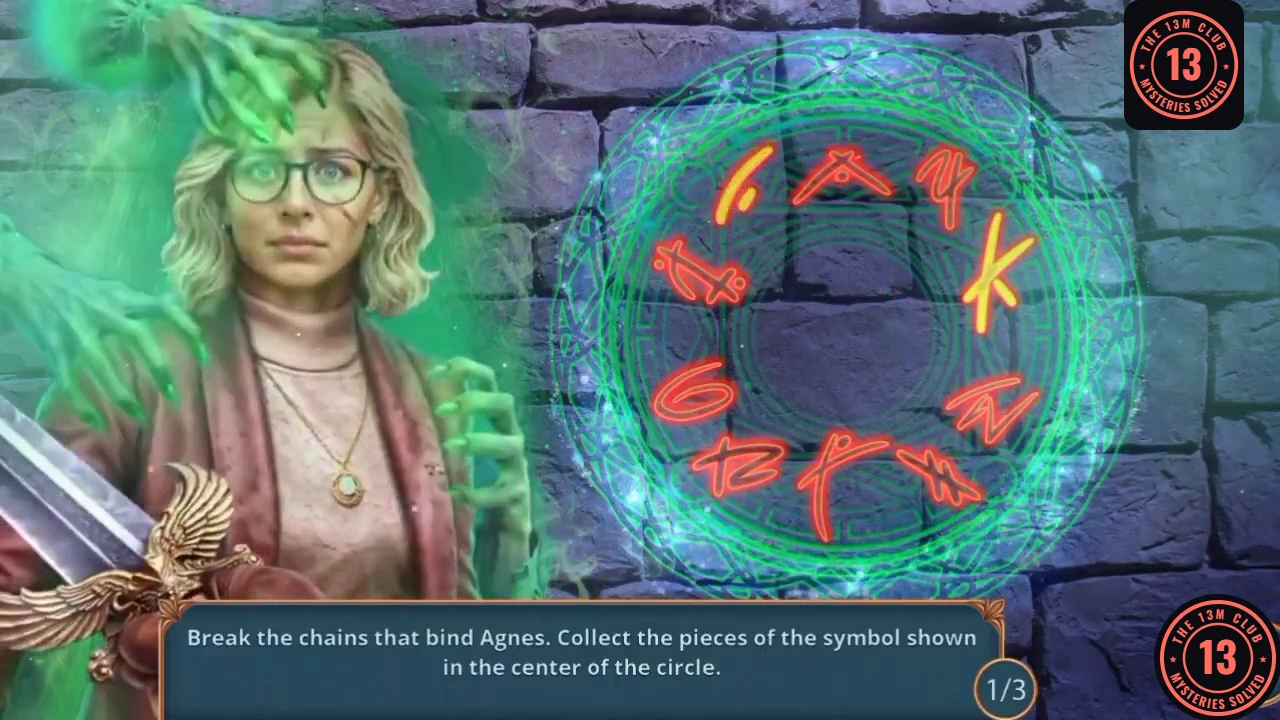
Collect the pieces of the symbol shown in the centre of the circle. Three rounds.
- A symbol appears in the centre. Tap the pieces around the ring that belong to it, and leave the others. Repeat for rounds 1/3, 2/3 and 3/3.
- The chapter ends with your Decision Points tally (max 13). See Decision Points for what each choice is worth.