Servants' Entrance
Chapter 3 begins at the servants' entrance after Jarrett threatens you. A hatch above the ladder leads on, but the ladder is broken.
- Answer Jarrett. "Appeal to the humanity in Jarrett" earns 2 decision points; staying silent earns none. Both answers are free.
- Take the pendant lace and the tape at the bottom of the ladder. Use the forceps from the castle gate on the grill and take the iron cone.
- At the wall beside the door, take the flint and steel, put the iron cone in its place and use the spur to remove the loose brick. Take the wheel and the pliers.
Ironing Board
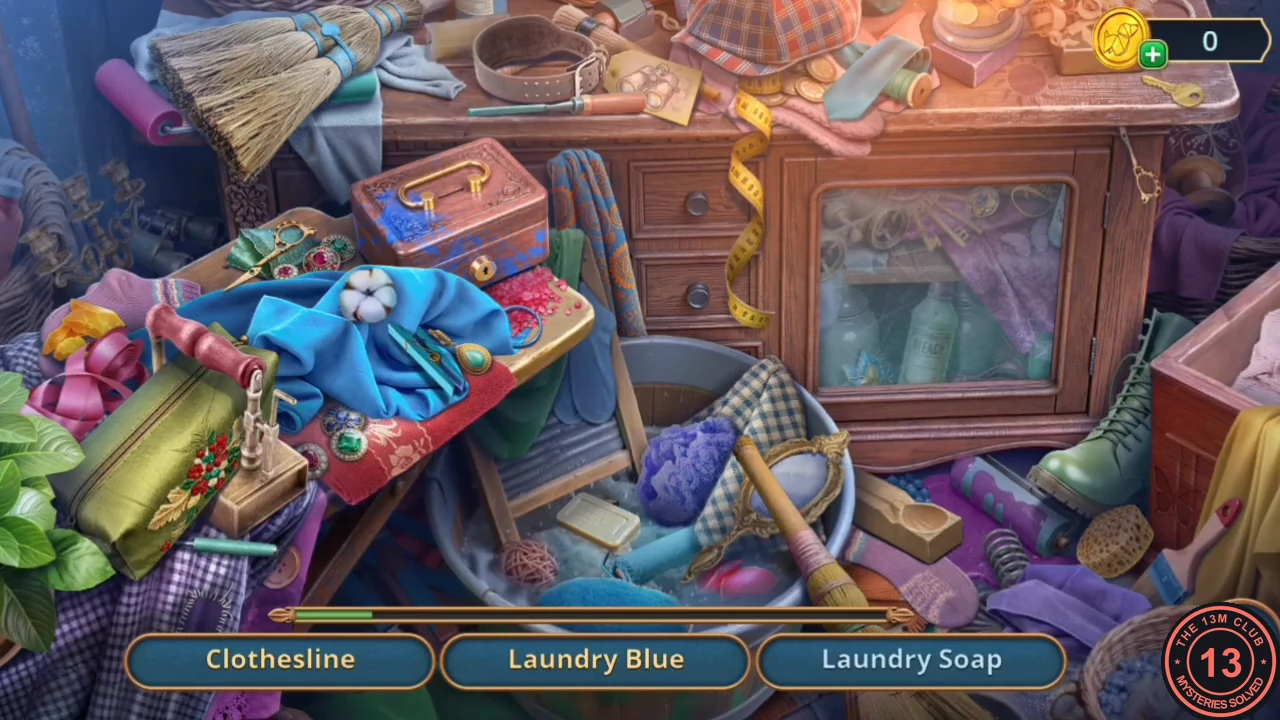
A list hidden-object scene at the ironing board. The reward is a spinning top.
- Pull the nail out of the ironing board with the pliers. Find the listed laundry items (such as a clothesline, laundry blue, laundry soap, a thimble and a clothes brush) and take the spinning top.
Ladder Under the Hatch
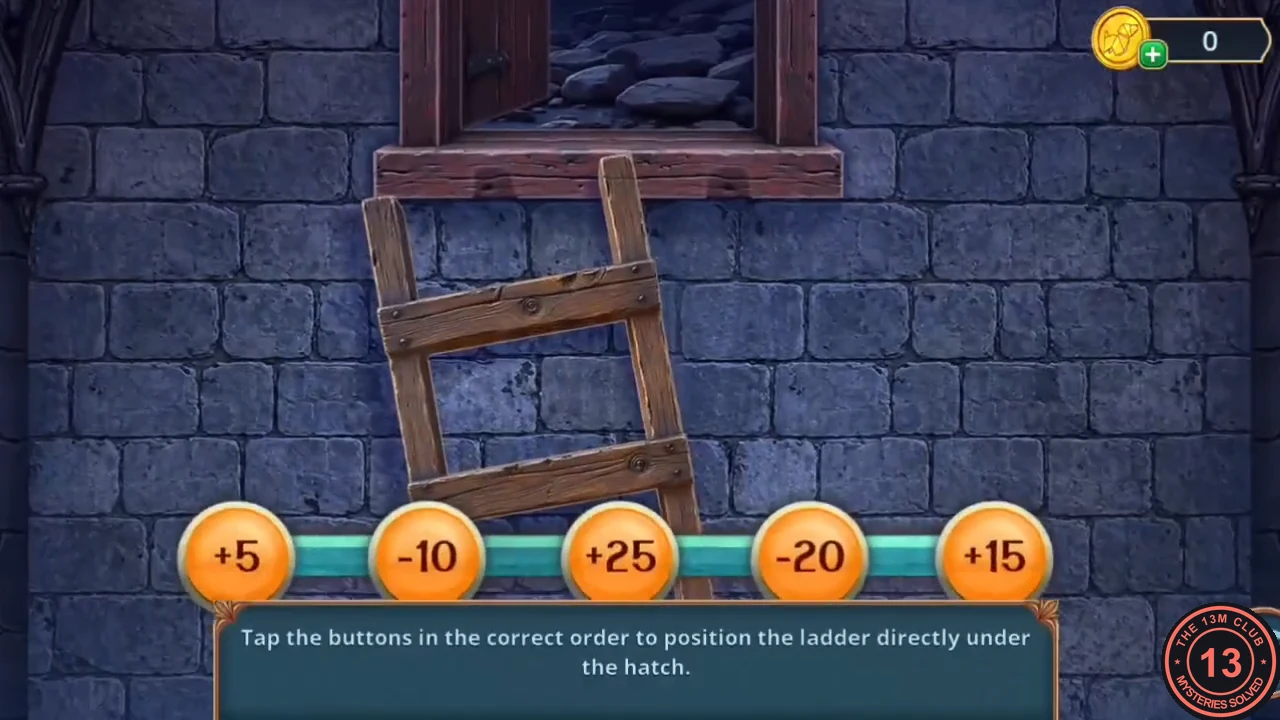
The game's instruction: "Tap the buttons in the correct order to position the ladder directly under the hatch." Each button moves the ladder by its value. After a press the button's sign flips, so pressing it again undoes the move.
- Repair the ladder with the wheel and the spinning top.
- Press +15, then -10, then +5. The ladder stops under the hatch.CODE+15,-10,+5
Secret Passages
Behind the hatch lie the Secret Passages, blocked by rubble. You blast a way through with home-made dynamite.
- Take the cricket bat from the rubble, then the curtain holder and the golden pattern (1/3). Collect the scroll bundle leaning against the clay jugs at the front right of the room.
- Move a rock with the cricket bat and take the barrel tap. Fit the tap on the barrel, press the button and take the saltpeter.
- In the inventory, combine the cigar case, the saltpeter and the pendant lace to make dynamite. Place it on the rubble and light it with the flint and steel. The passage to the Count's Study clears.
- At the bedroom door, Samantha suggests a look inside. "Explore the bedroom." is the Deluxe answer that opens the Count's Old Bedroom bonus location (see Deluxe Bonus Locations). "Don't go there." continues the free route.
Count's Study Table
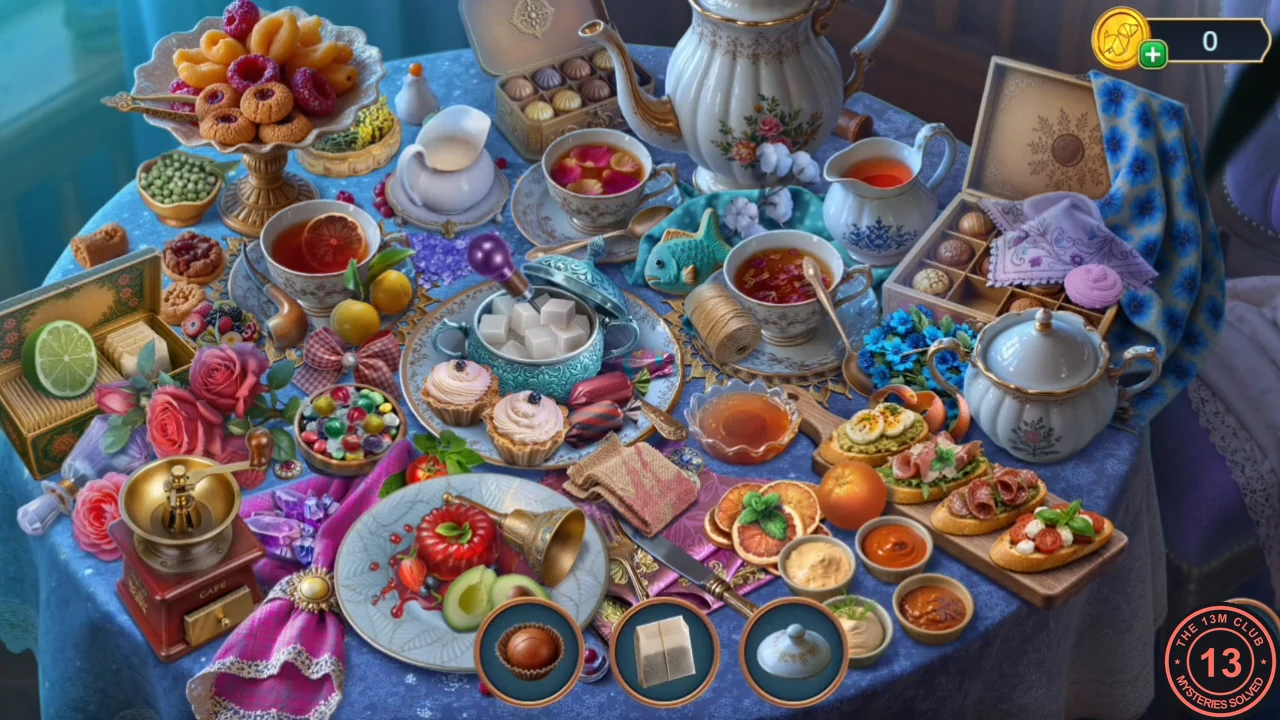
The Count's Study has a broken desk lamp, a window with an old recipe and a table scene where objects go back on their outlines.
- At the desk lamp take the tie and a wine tag. At the window, read the old recipe: "the acid from the yellow fruit, the salt of the sea, and the white gold of cows" (lemon, sea salt and milk). Its three ingredient slots stay open for later. Take the scissors and the hairbrush, then use the curtain holder at the window.
- In the table scene, put each object onto its matching outline. Take the lamp button.
- Fit the lamp button on the lamp cable. The lamp stays dark until you wrap the damaged cable with the tape. With the lamp lit, take the small key, unlock the vise on the desk and take the rattle.
- In the Secret Passages, stop the steam from the pipe with the tie and the rattle. Take the anti-rust foam, a wine tag and the golden pattern (2/3). Open the tomb with the foam and take the third wine tag.
Wine Barrel Labels
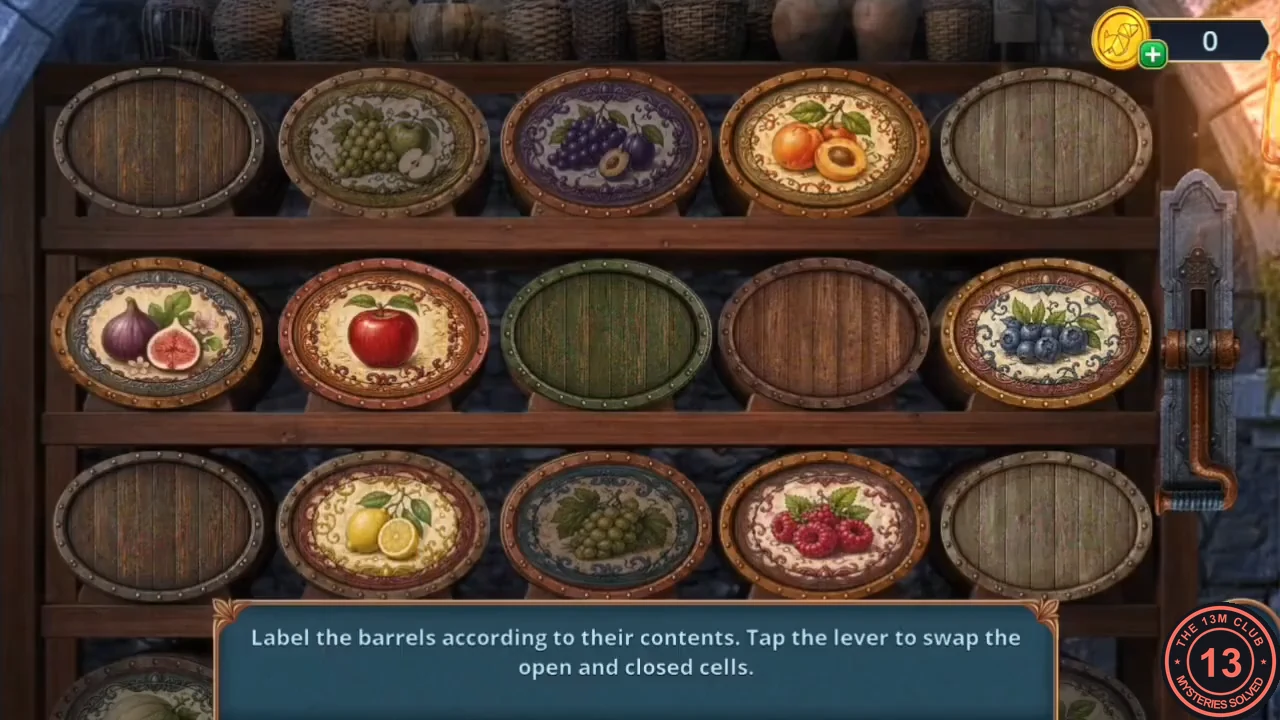
The game's instruction: "Label the barrels according to their contents. Tap the lever to swap the open and closed cells." Three rows of five barrels are in play. Below them a fourth row sits almost entirely behind the instruction panel (a melon label shows at its left end); in both recordings its visible labels never changed, before or after the solution, and nothing there needs to be moved. Only some cells are open at a time, and the lever switches to the other set; the green-grapes-with-apple and purple-grapes-with-plum barrels in the top row and the green grapes in the middle of the bottom row show in both sets.
- Place the three wine tags on the barrel rack in the Secret Passages.
- Tap two open labels to swap them; pull the lever to reach the other set of cells. Arrange the three rows like this. Top row, left to right: red grapes, green grapes with apple, purple grapes with plum, lemon, strawberries. Middle row: blueberries, apricots, pomegranate, blackberries, raspberries. Bottom row: cherries, apple, green grapes, fig, kiwi. One lever position holds the lemon, blueberries, apricots, raspberries, apple and fig; the other holds the red grapes, strawberries, pomegranate, blackberries, cherries and kiwi. The secret door opens as soon as the last label is right.
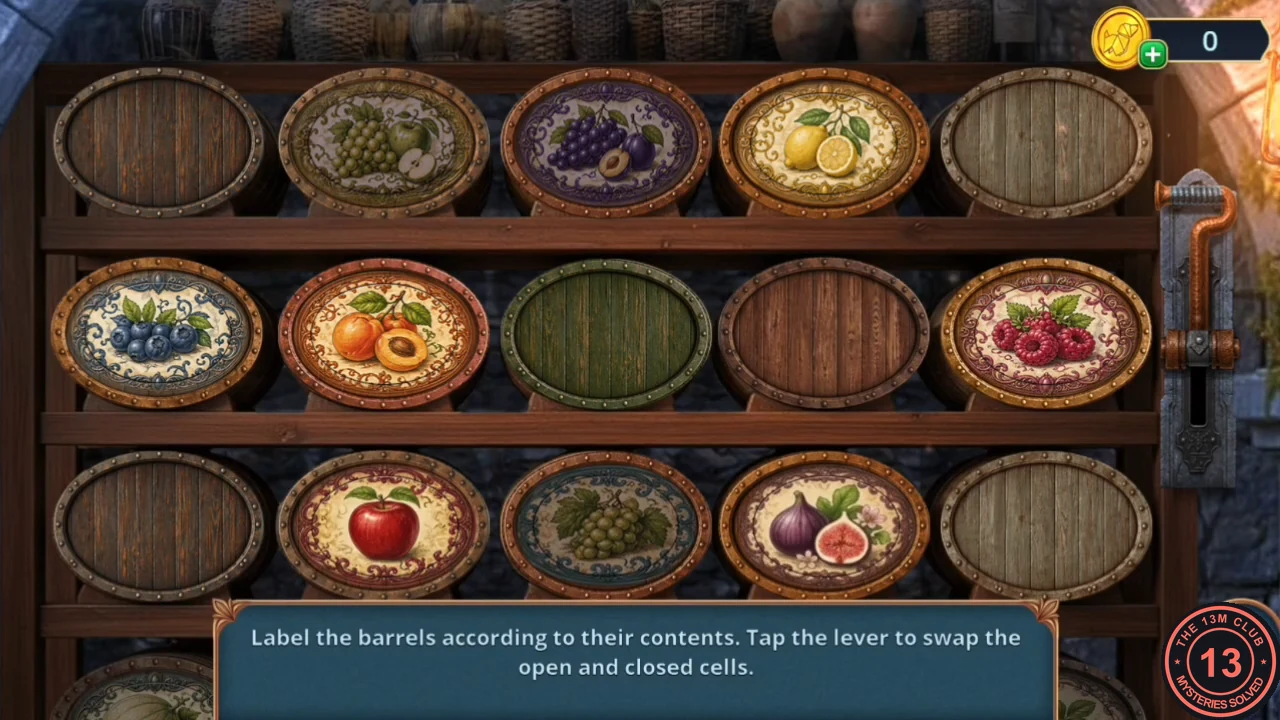
First lever position, finished: lemon, blueberries, apricots, raspberries, apple and fig in place. Blank barrels are the closed cells. 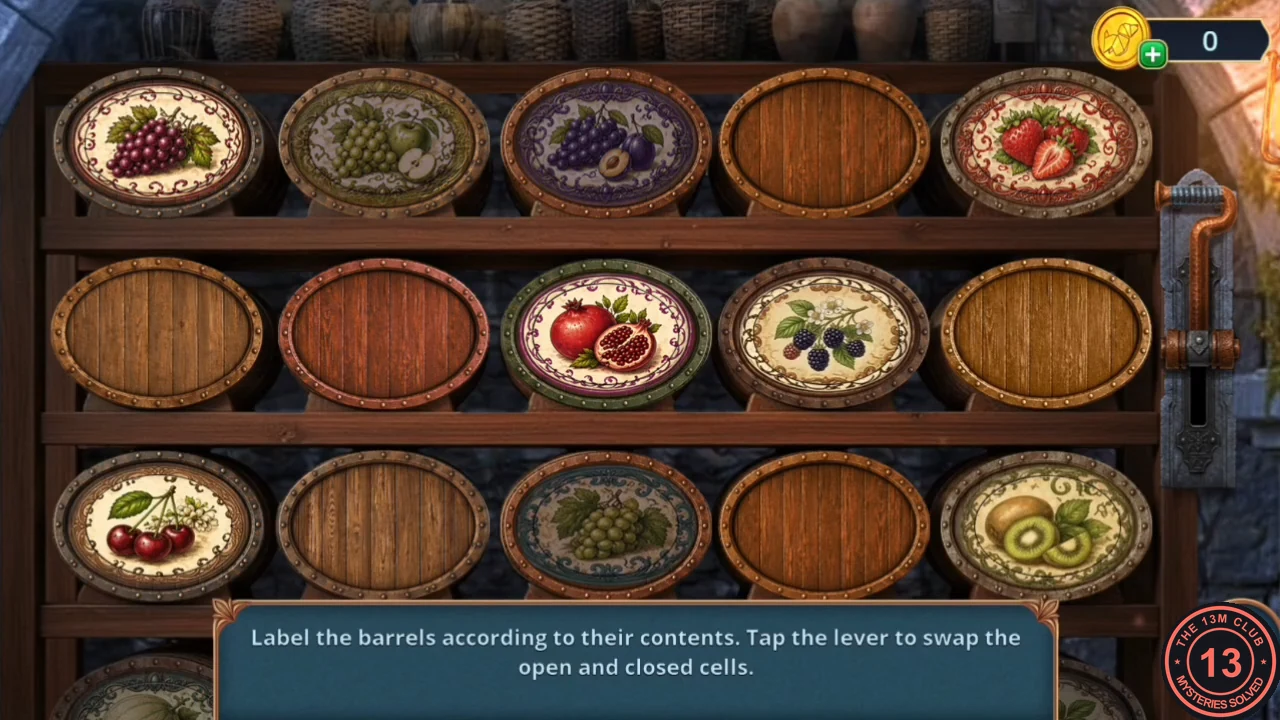
Second lever position, the last moment before the secret door opens: red grapes, strawberries, pomegranate, blackberries, cherries and kiwi in place.
Old Library Film Differences
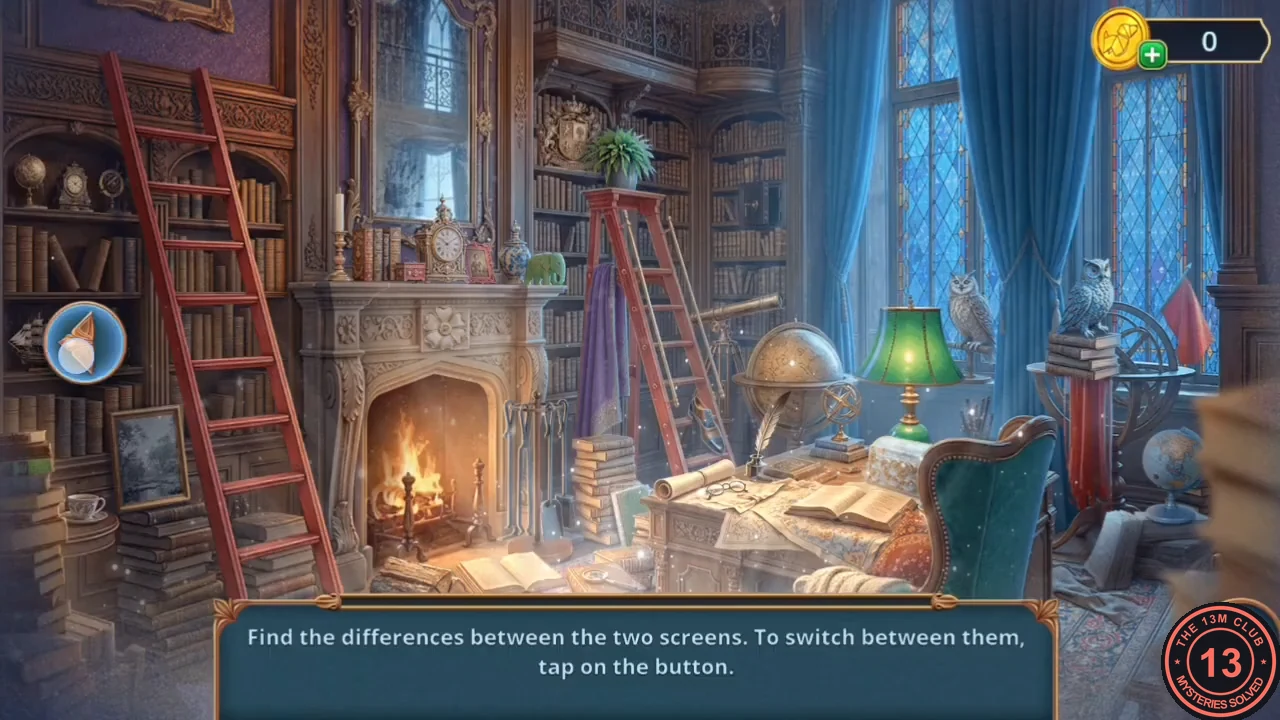
The Old Library has a stained-glass window, a projector and a wasp nest guarding a morbid coin.
- At the stained-glass window take the pipette and the hanger. Combine the hanger with the cricket bat to make a long hook, and use it to take the film slides from the top shelf.
- Put the film slides in the projector and find the differences between the two screens (tap the button to switch). Take the box of chocolates.
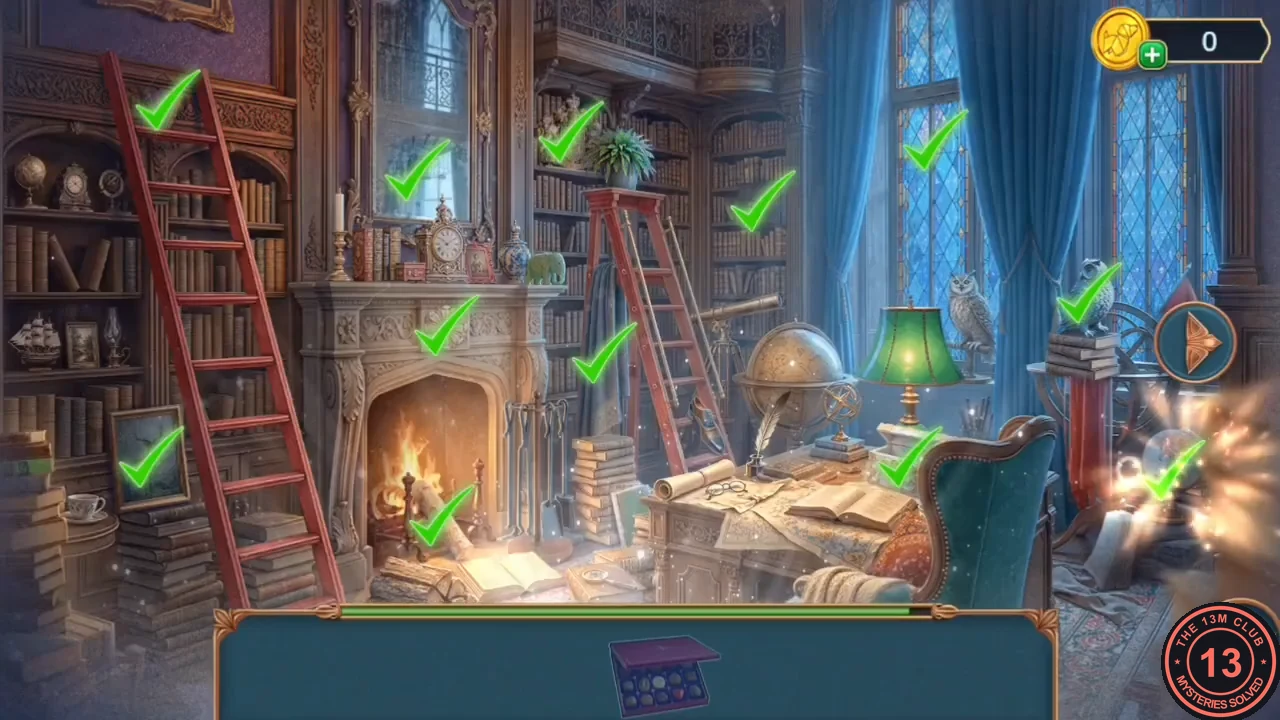
All differences found in the projected film; the last one sparkles on the right. - Give the chocolates to the wasps. Take morbid coin (1/2) and the deep shell.
- In the window close-up at the Servants' Entrance (with the cat and the flower box), collect the scroll on the sill and dig in the pot with the deep shell. Take the golden pattern (3/3). Put the three patterns on the ornate door to enter the Butler's Room.
Supply Record Boxes
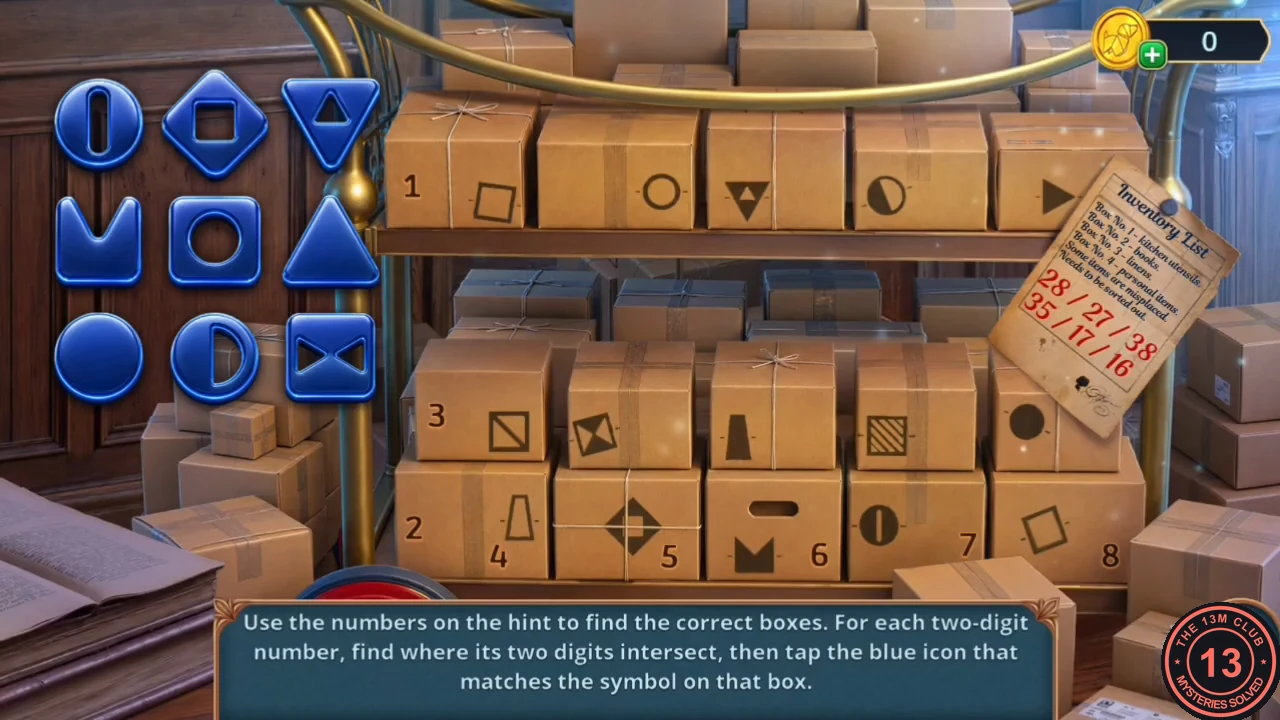
The supply records list six two-digit numbers: 28, 27, 38, 35, 17 and 16. On the boxes, each number is a row digit followed by a column digit. Find the box where that row and column meet and tap the blue icon in the 3 x 3 panel that matches the symbol on that box.
- At the boxes take the aquarium filter. Cut the rope with the scissors and take the old glasses from the opened box. At the cupboard take the oil lamp, then fit the old glasses on the door to open it. Read the inventory list, take the supply records and collect the scroll inside the glass cabinet.
- The rows are numbered 1 (top shelf), 3 (middle) and 2 (bottom); the columns 4 to 8 run along the bottom. Tap these icons in order: 28 = rotated square (top middle), 27 = circle with a vertical bar (top left), 38 = filled circle (bottom left), 35 = bow-tie shape (bottom right), 17 = half-filled circle (bottom middle), 16 = triangle inside a triangle (top right).