Fountain Pendant Circle
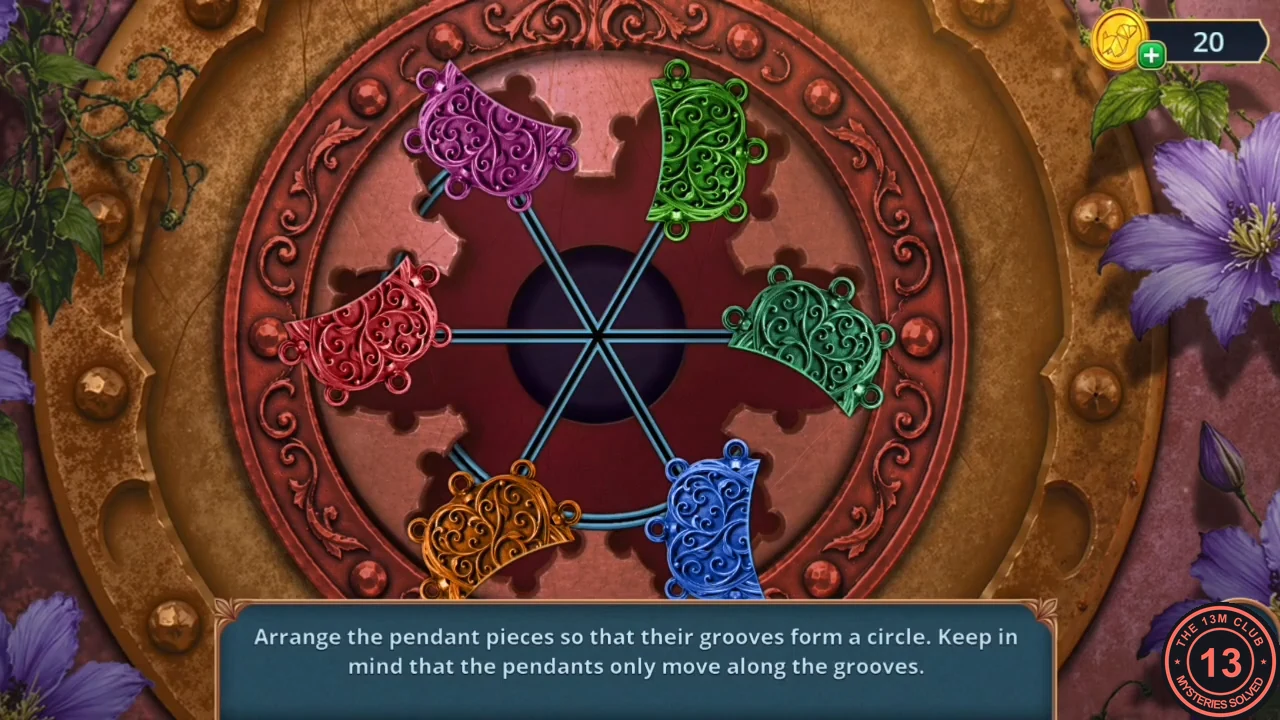
The game's instruction: "Arrange the pendant pieces so that their grooves form a circle. Keep in mind that the pendants only move along the grooves." The coloured pieces sit on six grooves that meet in the middle. Tap a piece to slide it along its groove into a free spot.
- Zoom into the top of the castle gate and use the lasso on the tools caught up there. Two items fall: a scoop with an orange handle and the forceps. Take both and keep the forceps for later. In the pavilion, dig in the dirt pile with the scoop and take the button. In the inventory, fit the button to the broken folding knife to get the folding pocket knife.
- Cut the weeds on the fence with the knife and take the coin. Put the coin on the fountain nub; the fountain starts running. Take the door handle and the pendant.
- Put the pendant on the statue's necklace. Move the pieces one at a time through the free spots until the grooves on neighbouring pieces join into one unbroken ring. Use the middle as a passing place when two pieces need to swap sides. Take the pump handle.
Falcon Colour Wheel
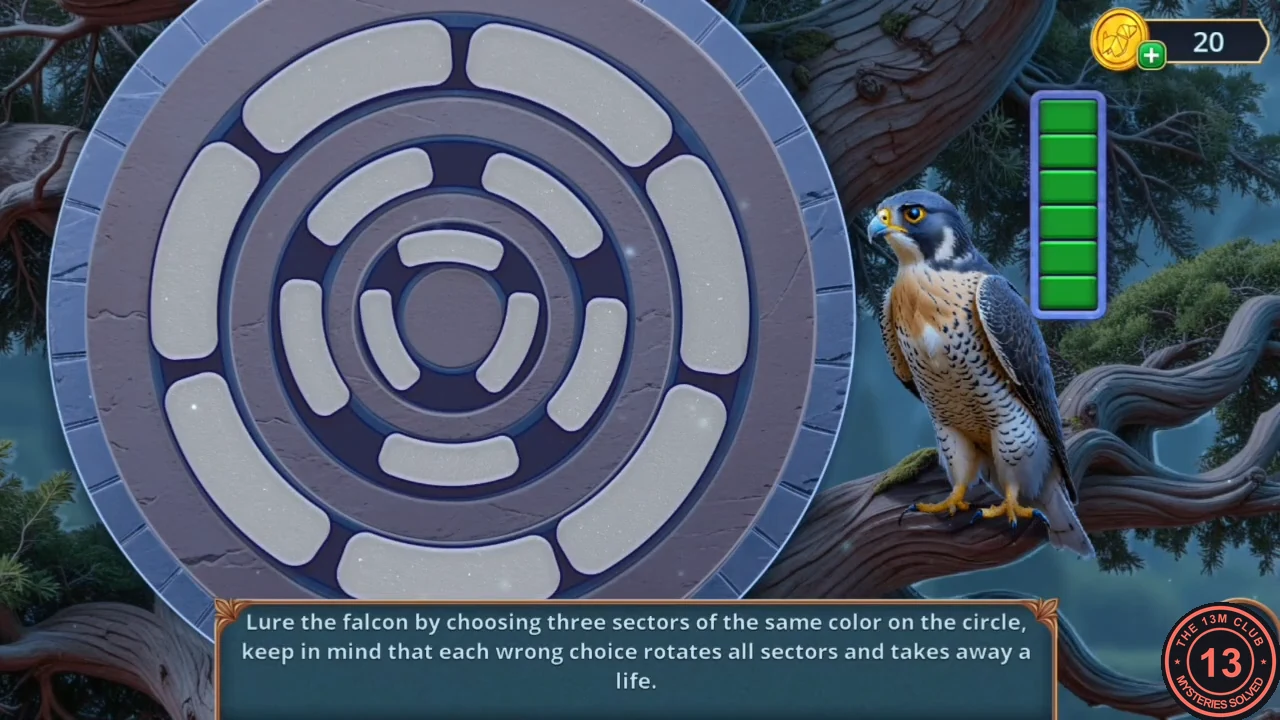
The game's instruction: "Lure the falcon by choosing three sectors of the same color on the circle; keep in mind that each wrong choice rotates all sectors and takes away a life." The green bar on the right shows your remaining lives.
- Put the handle on the terrace water pump and take the glove.
- Use the glove on the falcon. Pick three sectors of the same colour on the rings. If a pick is wrong, the sectors rotate, so look at the whole wheel again before the next pick. Take the sugar tongs.
- In the Old Healer's Hideout, use the sugar tongs on the fireplace to get the metal smoker. Put it on the bookshelf and take the threads.
Attic Search and Root Potion
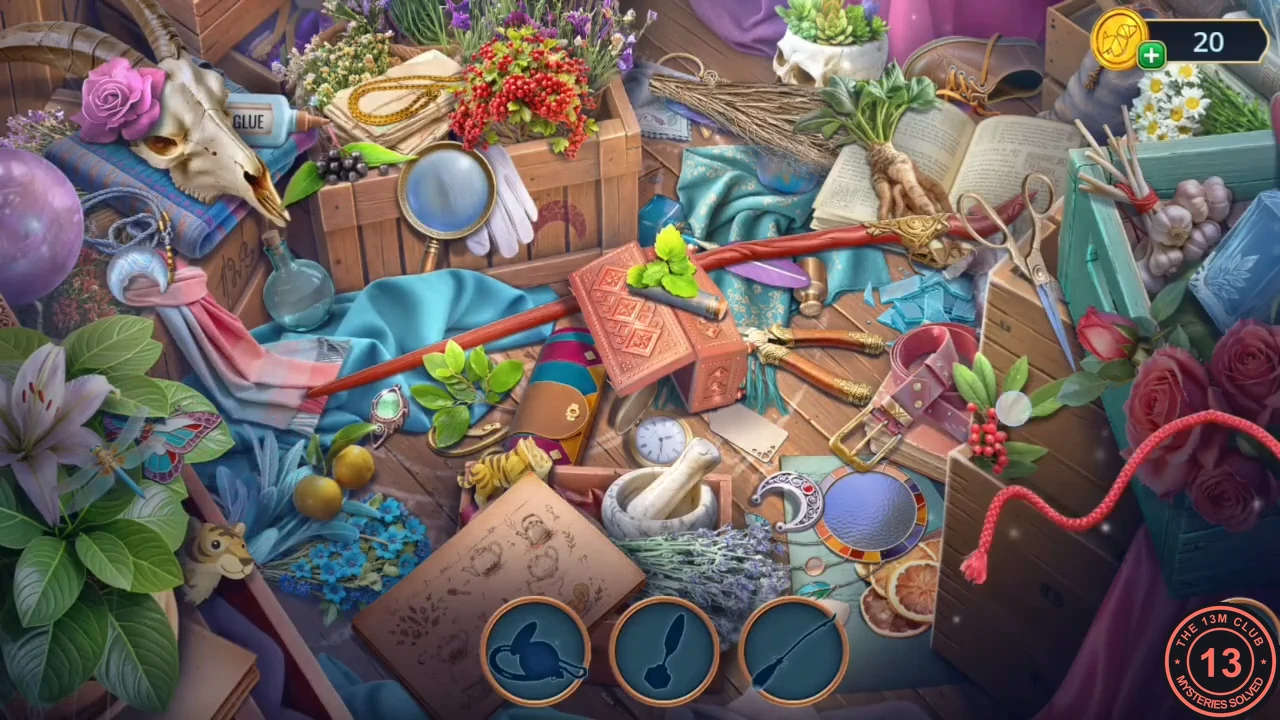
A second attic search gives the last ingredient for the potion that weakens the roots holding Samantha.
- Search the Healer's attic again. This time find every object shown as a silhouette in the bottom bar. Take the bay leaves.
- At the Healer's fireplace, put the bay leaves and the threads into two of the three potion slots; the middle slot stays empty for now. Collect the scroll on the big table next to the stack of books.
- At the Old Dead Tree, collect the scroll on the roof of the shed at the right. Zoom in on Samantha and take Samantha's hair.
- Back at the fireplace, put Samantha's hair in the middle slot and take the potion.
- Give the potion to Samantha at the Old Dead Tree.
Magic Field Symbol Count
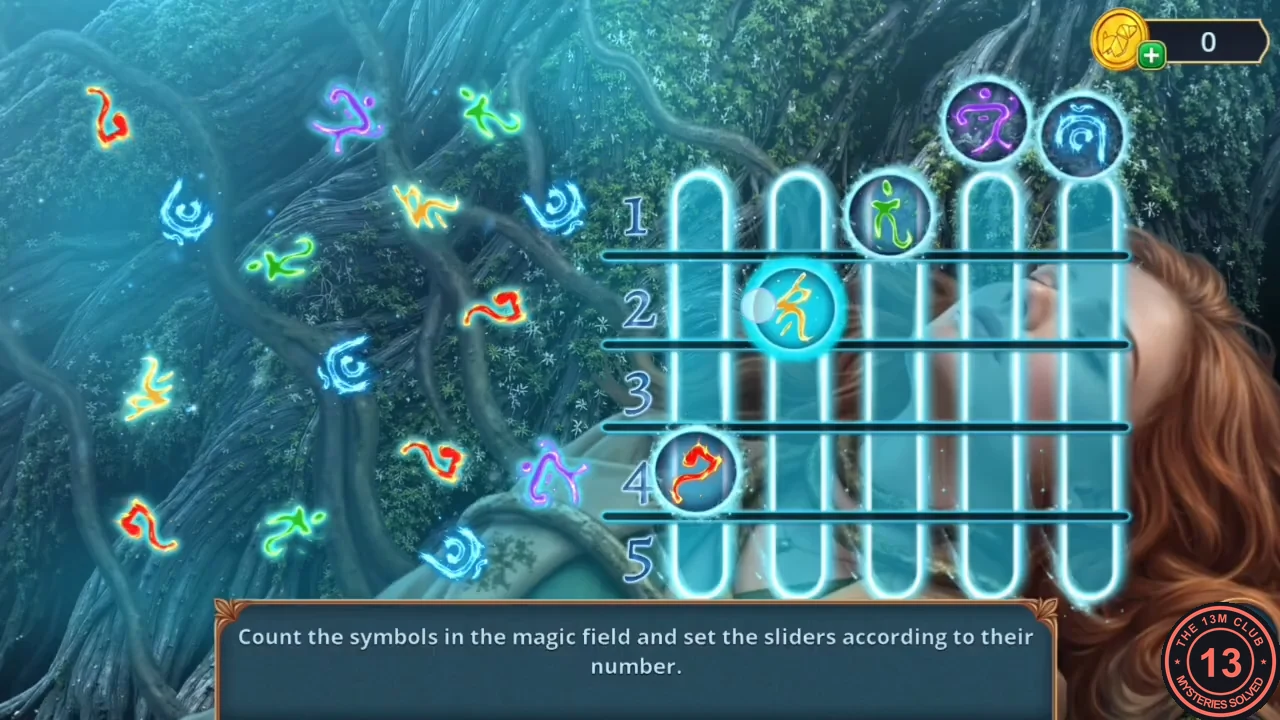
The game's instruction: "Count the symbols in the magic field and set the sliders according to their number." There is one slider per colour.
- Set the sliders to red 4, yellow 2, green 3, purple 2, blue 4. If your field looks different, count each colour's symbols yourself and use those numbers.CODE42324
- Samantha is freed. After talking to her you receive the broken crystal ball. Take the stick from the roots, pry open the hut window with it. Inside is a box whose lid holds a channel board ("There is space in this lid for some kind of object, apparently"); take the broken toy ship and the shards from it.
Crypt Grave Differences
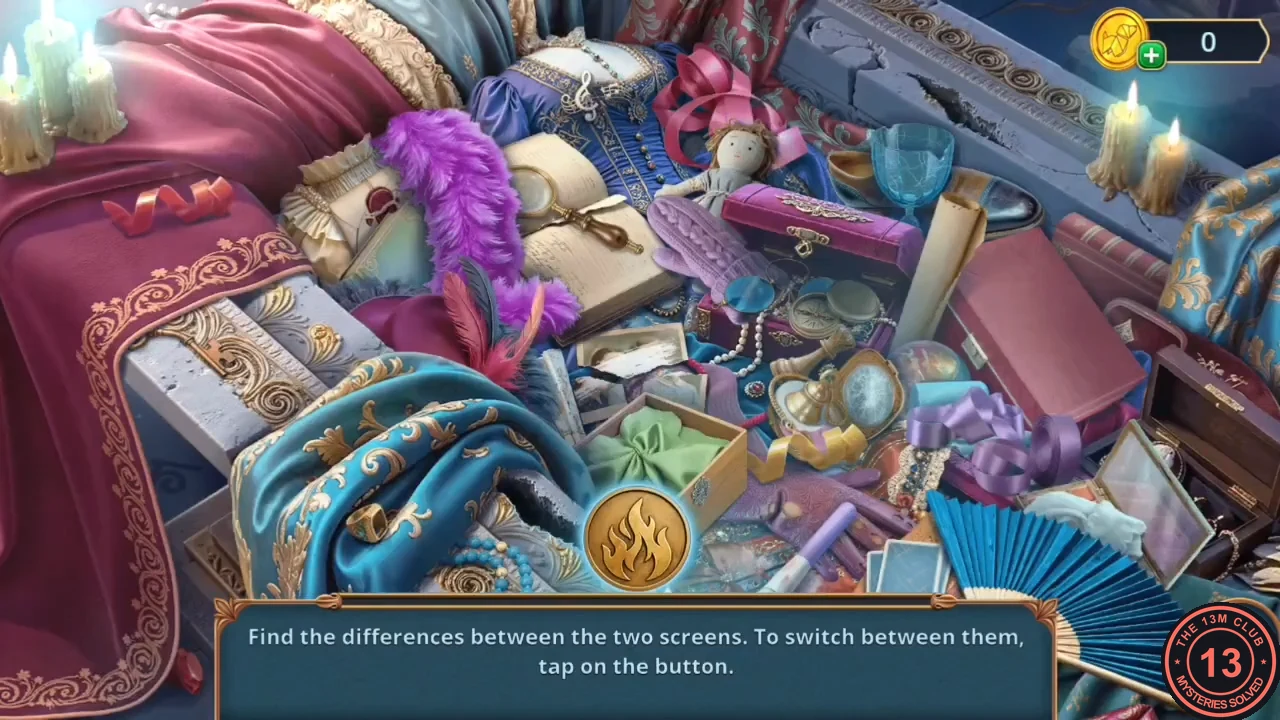
A spot-the-difference scene at a grave in the crypt. The reward is an old heart lock.
- At the Old von Graven Crypt, tap the sparkling grave. Find the differences between the two screens (tap the button to switch between them) and take the old heart lock.
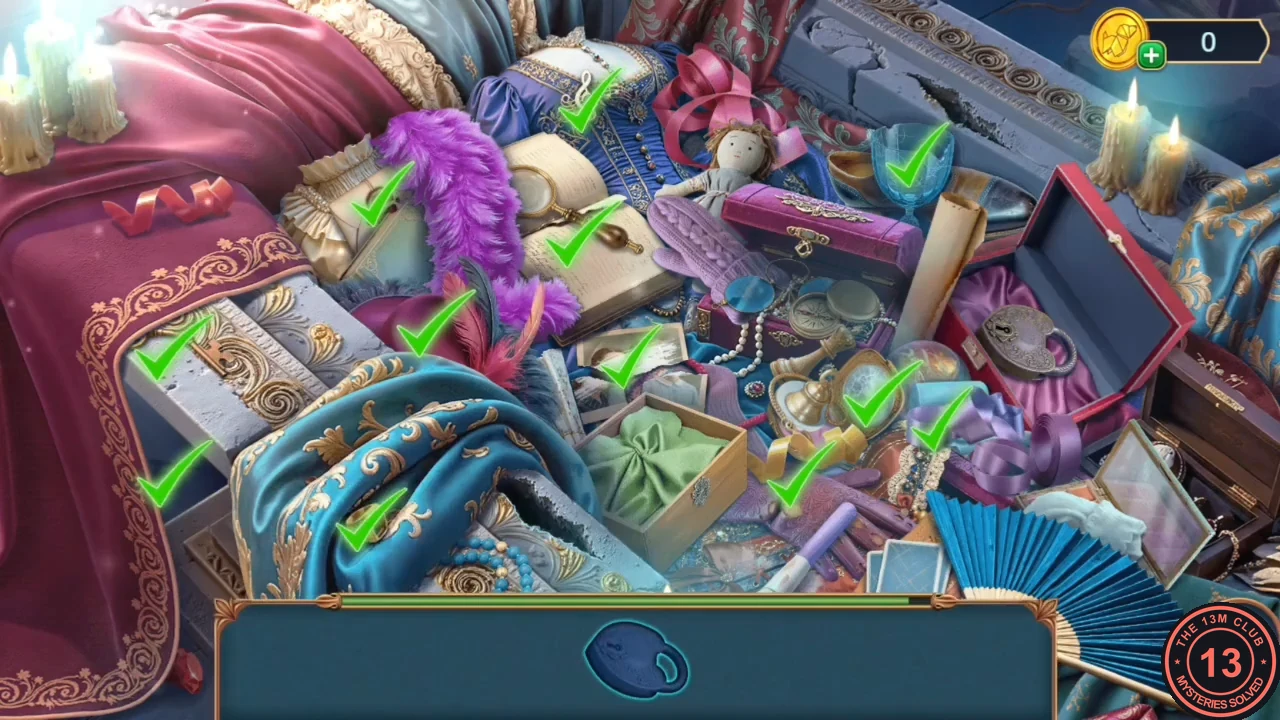
All differences found: each one is marked with a green tick. - Use the lock on the terrace swing and take the mushroom treat.
- Give the mushroom to the mouse in the crypt. Take skull (1/3) and the vase hint.
Crypt Vase
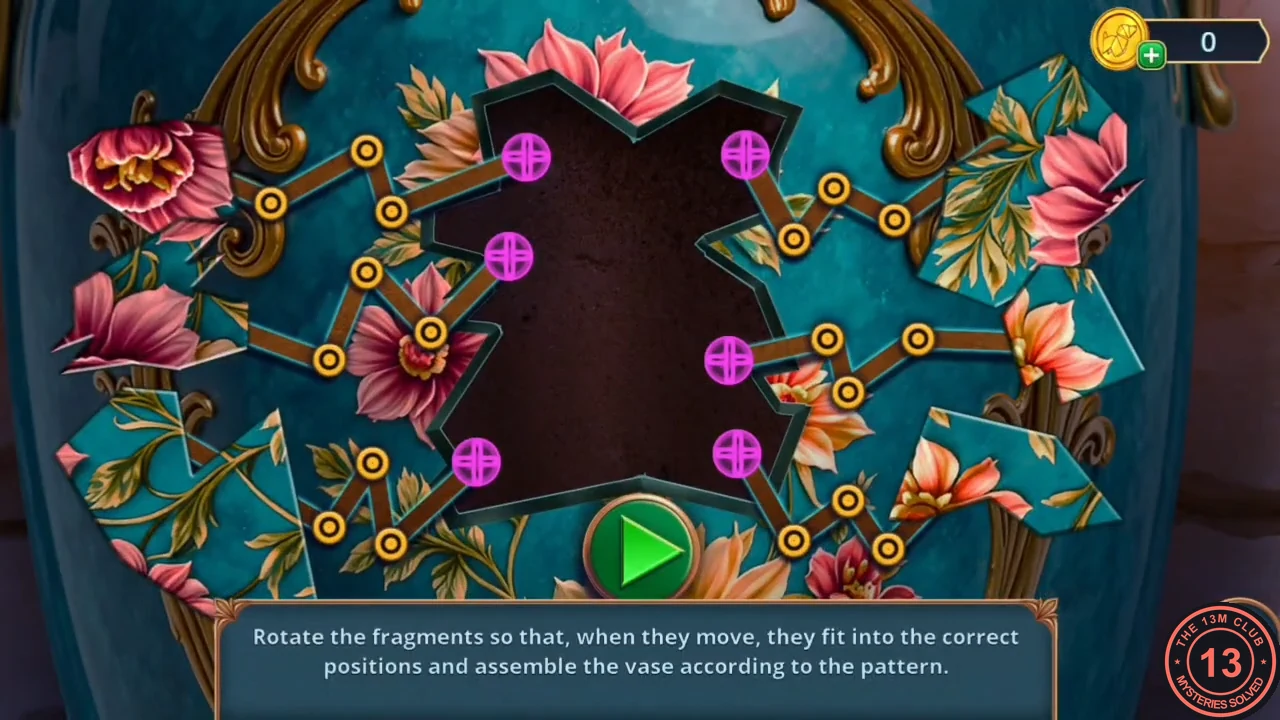
The game's instruction: "Rotate the fragments so that, when they move, they fit into the correct positions and assemble the vase according to the pattern." Each teal fragment sits at the start of a dotted path that leads into the dark gap of the vase. Tap a fragment to rotate it, then tap the green Play button to send all fragments along their paths.
- In the crypt, zoom into the broken vase on its pedestal at the left and place the vase hint beside it. The fragment puzzle opens.
- Follow each fragment's path to the part of the gap where it ends and turn the fragment so that, after the trip, its shape fits that part of the outline. Tap Play to test. If some fragments do not fit, they return; correct those and try again. Take the fur rug.
- Lay the fur rug over the spiked fence at the Old Fountain Walkway and take the glue. Mend the crystal ball with the glue and the shards.
- Talk to Margaret through the repaired ball in the Healer's Hideout. She says, "Until Herman von Graven lets go of the past, the house will never let go of anyone." Mark notes the code she gave him for the barrel: 1854.CODE1854
Barrel Token Path
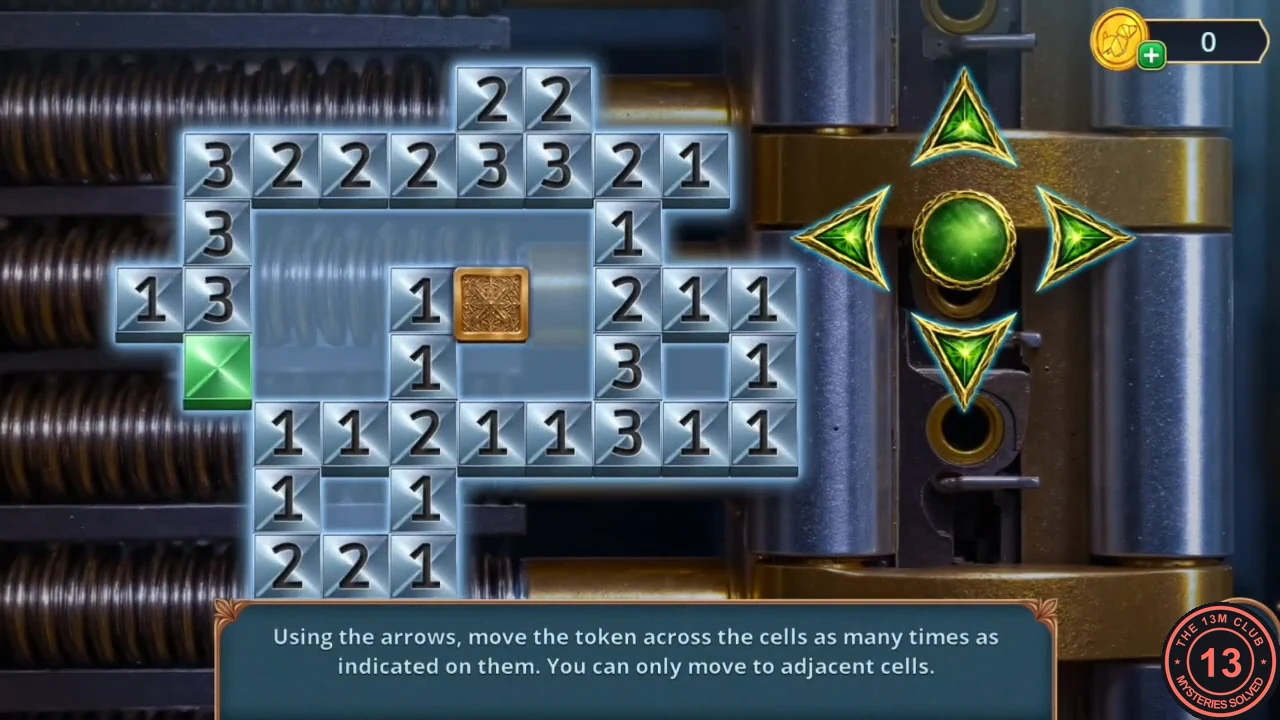
The game's instruction: "Using the arrows, move the token across the cells as many times as indicated on them. You can only move to adjacent cells." Every numbered cell must be entered exactly that many times, and the route ends on the green cell. This is a long puzzle. A tested route for the grid shown in the overview follows; other valid routes exist.
- Enter 1854 on the barrel lock. If your grid matches the overview, move: Left 1, Down 4, Left 2, Right 1, Left 1, Up 2, Right 5, Up 2, Down 2, Up 1, Down 1, Right 2, Up 2, Left 2, Up 2, Right 1, Left 2, Up 1, Down 1, Up 1, Down 1, Left 1, Up 1, Down 1, Up 1, Down 1, Left 2, Right 1, Left 3, Down 1, Up 1, Right 1, Left 1, Down 2, Up 1, Down 1, Left 1, Right 1, Down 1. If your numbers differ, plan your own route: cells with high numbers are where you go back and forth, and the route must finish on the green cell.
- Take the spur, the screw (2/2) and the scroll from the barrel compartment. Repair the iron with the screws and the handle and fill it with coals from the fireplace.
- Melt the amber in the terrace birdhouse with the hot iron and take the mechanical heart. Give it to the robot together with the oil and take the mast; fit the mast to the broken toy ship to repair it.
Ship Checkpoints
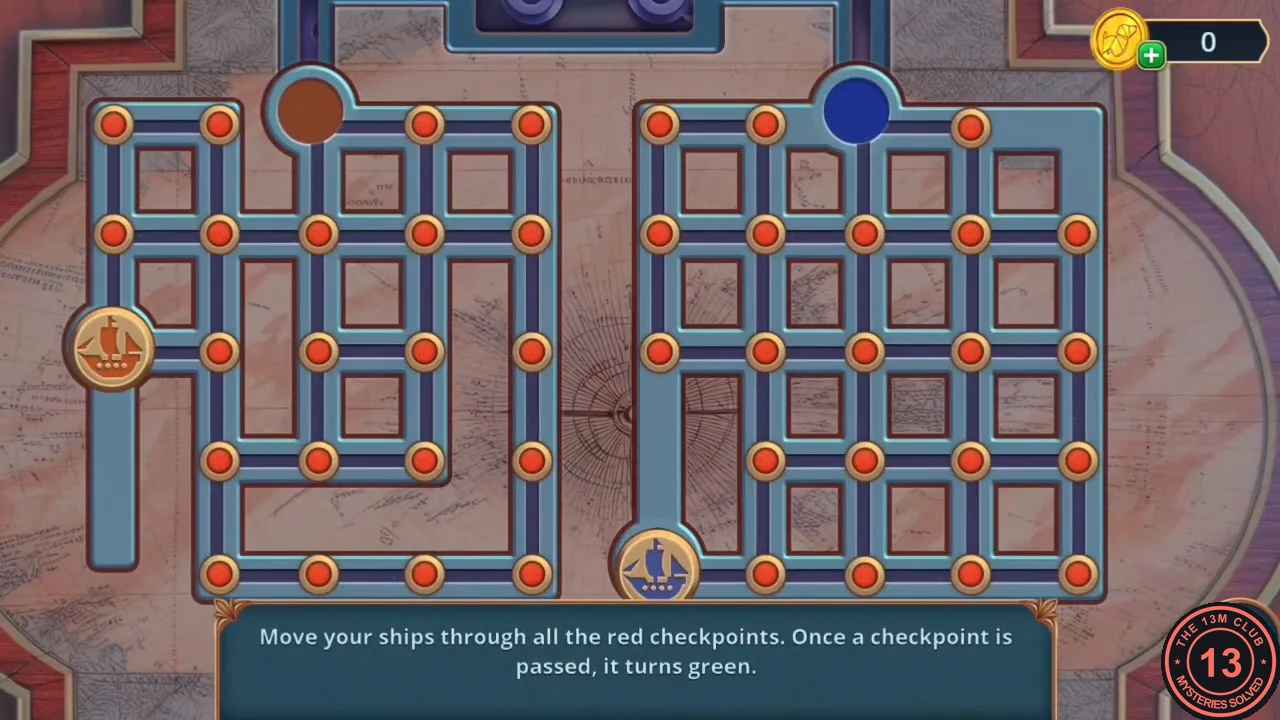
The game's instruction: "Move your ships through all the red checkpoints. Once a checkpoint is passed, it turns green." There are two ships and a network of channels; each ship must end in a harbour circle at the top. The puzzle has Easy and Hard versions, and you can switch to Easy for coins. Your board depends on the version, so the guide gives the method rather than a move list.
- Place the ship on the board in the hut at the Old Dead Tree.
- Controls: the board has two separate channel grids. The orange ship sails the left grid and finishes in the brown harbour at the top of that grid; the blue ship sails the right grid and finishes in the blue harbour at the top of it. Yellow arrows appear next to the ship you are moving, showing the directions it can sail from its current checkpoint; tap an arrow to move one checkpoint that way. Red checkpoints turn green as a ship passes them, and a ship may sail back over green ones. Method: with one ship at a time, steer through every red checkpoint of its grid and only then enter its harbour; then do the same with the other ship. In the recording the Hard board showed "You lose. Please try again." at the moment the orange ship entered its harbour with its whole grid green (the player called Hard mode bugged) and the player switched to Easy using coins earned by watching ads. On the Easy board the same method worked: orange ship first, then blue ship, both ending in their harbours.
- Take the cigar case and the soldering iron (a brass blowtorch) from the box. At the castle gate, use the soldering iron on the welded seam where the two door leaves meet; the door opens. Collect the scroll behind the opened door and take the rake. Clear the weeds among the roots with the rake and take skull (2/3).
Tree Riddles
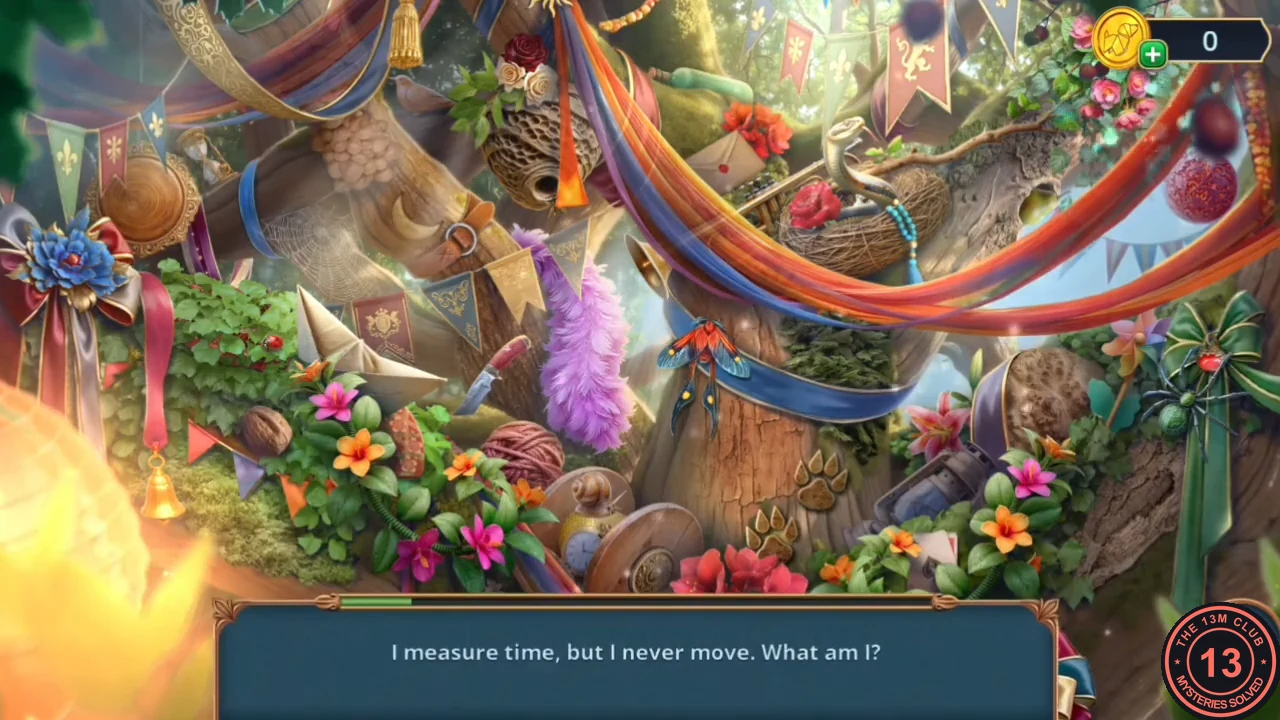
The big tree in the Old Maze Garden holds a riddle search. Riddles appear one at a time at the bottom of the screen, and you tap the object that answers each one.
- Answer the riddles in order: "I write without a voice, yet stories I tell" (feather quill); "I hang on a branch and fall when I'm ripe" (apple); "I measure time, but I never move" (hourglass); "No beginning, no end, yet I am complete" (ring); "I make sound without a voice when air passes through me" (trumpet); "I hold what flows, yet I do not drink" (bottle); "I tick away your moments but never rest" (clock); "I burn without flame when filled and lit" (lamp); "I grow on a tree, sweet and green, shaped like a drop" (pear); "I hide a secret inside a hard shell" (walnut); "I ring without a tongue when the wind moves me" (bell); "I sit on branches but never fly" (bird figure). Take the crab-shaped valve.
- Put the valve on the barrel in the Healer's Hideout and take skull (3/3).
Secret Skull Paths
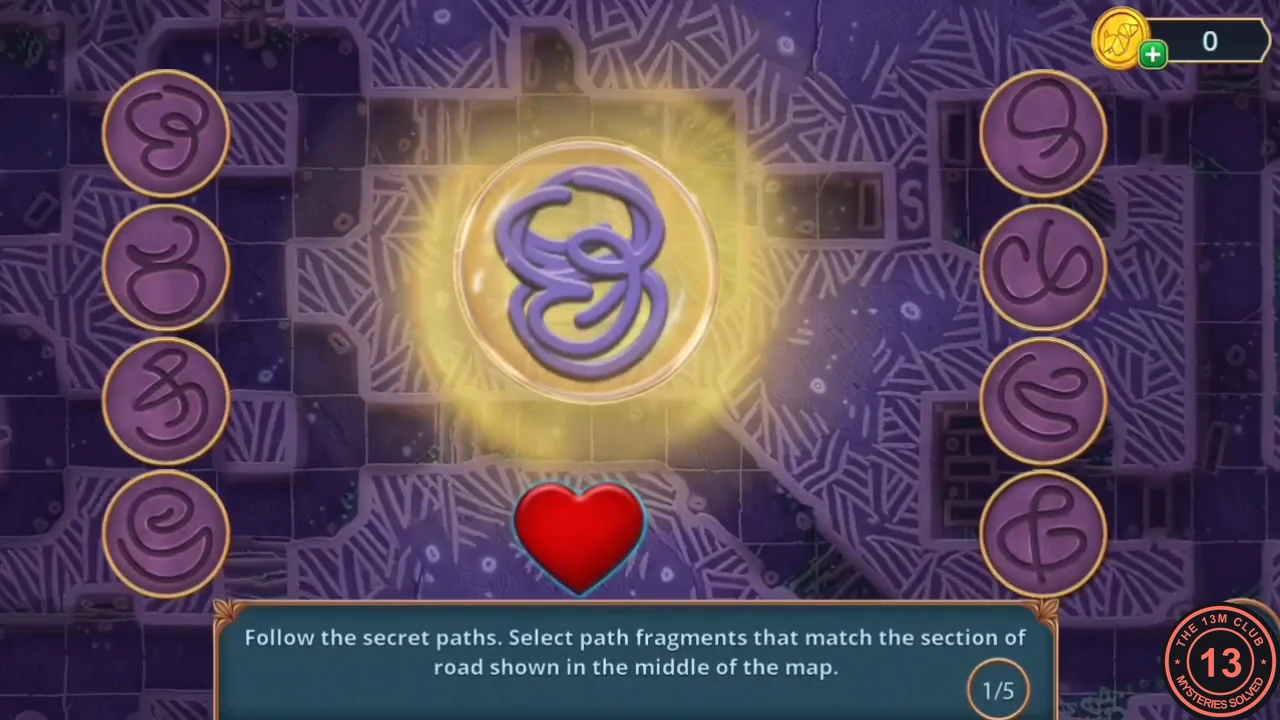
The game's instruction: "Follow the secret paths. Select path fragments that match the section of road shown in the middle of the map." There are five rounds. In each round, eight fragments sit in two columns of four, and you pick the three that complete the road section in the middle.
- Hang the three skulls on the hooks of the crypt wall. A warning says you cannot return to earlier locations to find remaining items after this task. Collect any missing Chapter 2 scrolls first, then tap Yes.
- In each round, select the three fragments that complete the middle section; tap a selected fragment again to deselect it. Counting the four fragments in each column from the top, these picks were accepted: round 1 left 1, left 2, right 1; round 2 left 3, right 2, right 3; round 3 left 2, left 3, right 1; round 4 left 3, right 2, right 4; round 5 left 1, left 4, right 3. If your fragments look different, compare their road lines with the gaps in the middle picture.
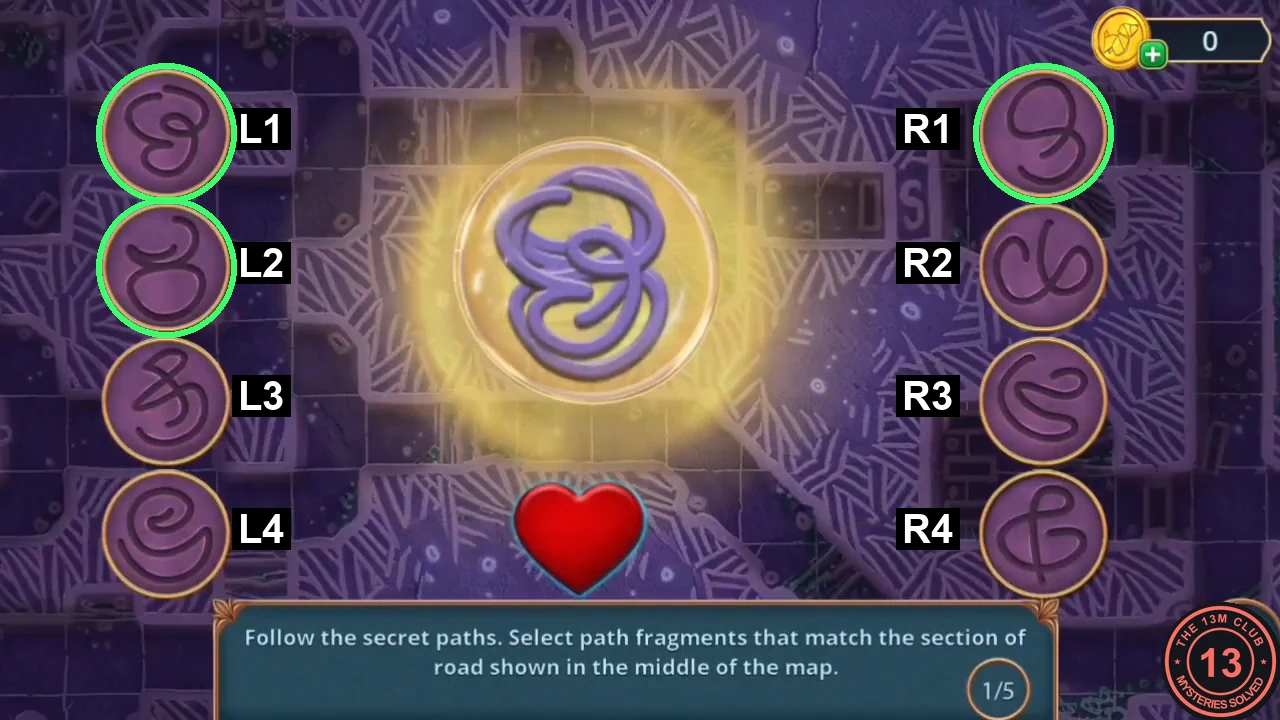
How the fragments are counted, using round 1: the circled picks L1, L2 and R1 complete the middle road. - The Chapter 2 Decision Points panel appears (see Decision Points), and the chapter ends.