Count's Study (Deluxe)
Optional Chapter 1 location. It opens only if you pick the Deluxe dialogue answer when Jarrett mentions your burnt documents in the hallway. The free route never needs it; the reward is a decision point, the "Bloodright" achievement and story about the von Graven inheritance. How Deluxe access works: each chapter has one dialogue answer marked with a DELUXE tag and a +1 star, and choosing it opens that chapter's bonus location (a yellow "Bonus Location" node on the chapter map). In both recordings the DELUXE answer looks the same, with no lock or price on it. In the second recording, tapping it simply continued the dialogue and awarded the star, with no purchase or unlock screen. Neither recording, the store listing nor the walkthroughs checked say whether an earlier purchase (the store lists in-app purchases) is required, so the guide can't confirm that every free-to-play player can select it. If the Deluxe answer can't be selected, choose the other answer; the main story continues normally without the bonus location.
- When Jarrett says a copy of your documents should be in the Count's study, choose "Thank you, it wouldn't hurt to put the documents in order." (Deluxe, +1 decision point). The Count's Study opens upstairs and the task "Find the originals of the burnt documents" starts.
- At the house model on the left, take the tie (purple cloth) and the silver frame part (1/2).
- Clean the dog's tray with the tie and take the golden feathers.
- Put the golden feathers on the peacock on the desk and take the comb.
- Go out to the Mansion Gate. Optional: read the old letters on the mailbox. Use the comb on the wooden crate next to the mailbox and take the screwdriver.
- Back in the study, use the screwdriver on the clock of the house model and take the bone-shaped cookie.
- Give the cookie to the dog and take the second silver frame part (2/2).
- Put both frame parts on the frame of the painting above the fireplace and take the typewriter platen.
- In the living room, put the platen on the typewriter and take the miniature tree.
- Put the miniature tree in front of the house model to start the mansion puzzle.
Count's Study: Mansion Rooms
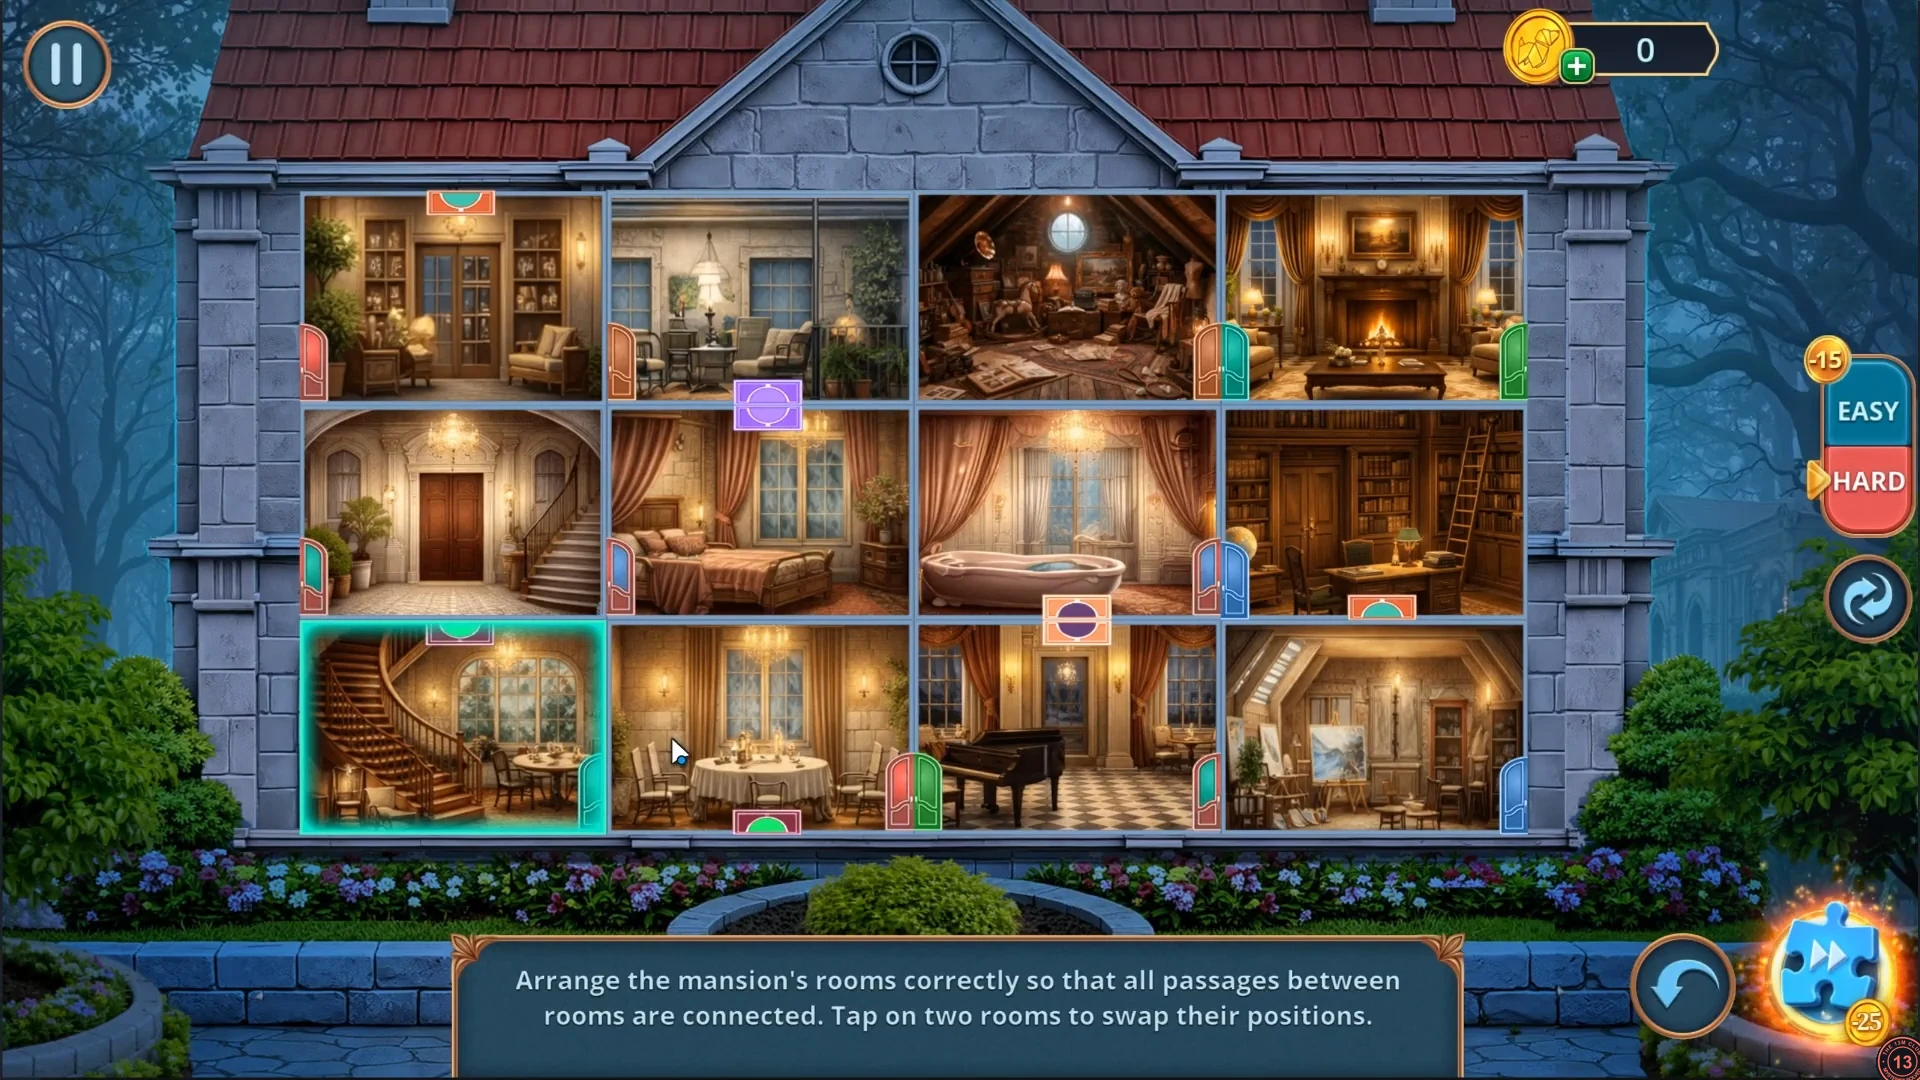
"Arrange the mansion's rooms correctly so that all passages between rooms are connected. Tap on two rooms to swap their positions." Every room has coloured door or hatch halves on its edges; neighbouring rooms must show the same colour on the shared wall or floor.
- Swap pairs of rooms until every coloured passage meets a matching passage in the neighbouring room. The staircase room goes bottom-left and the entrance hall with the front door bottom-right.
- Take the book nook from the model.
- Put the book nook on the bookshelf beside the fireplace and take the key.
- Open the desk drawer with the key and read the inheritance document with the von Graven seal. The task completes and the "Bloodright" achievement appears.
Old Festival Row (Deluxe)
Optional Chapter 2 location. It opens only if you pick the Deluxe dialogue answer when Margaret mentions the Festival Row in the Old von Graven Crypt. Its steps interleave with the main Chapter 2 route, as noted below.
- In the crypt, when Margaret mentions the Festival Row, choose "Great, I'll go there." (Deluxe, +1 decision point). The entrance to the Row appears.
- Enter the Old Festival Row. Talk to the old man ("I would like some instructions") and take the training sword.
- At the target stand, use the training sword to knock down the bag hanging by the curtain; take the crystal ball from it.
- Give the crystal ball to the fortune teller; take the carving instructions.
- Give the carving instructions to the old man; take the chess piece.
- Place the chess piece on the chess board and take the salt crystal.
- Once the fountain at the Old Fountain Walkway is running (main route: coin on the nub), drop the salt crystal into the fountain basin and take the throwing knife that appears. The recording did this later, on its way back to the Row after brewing the root potion.
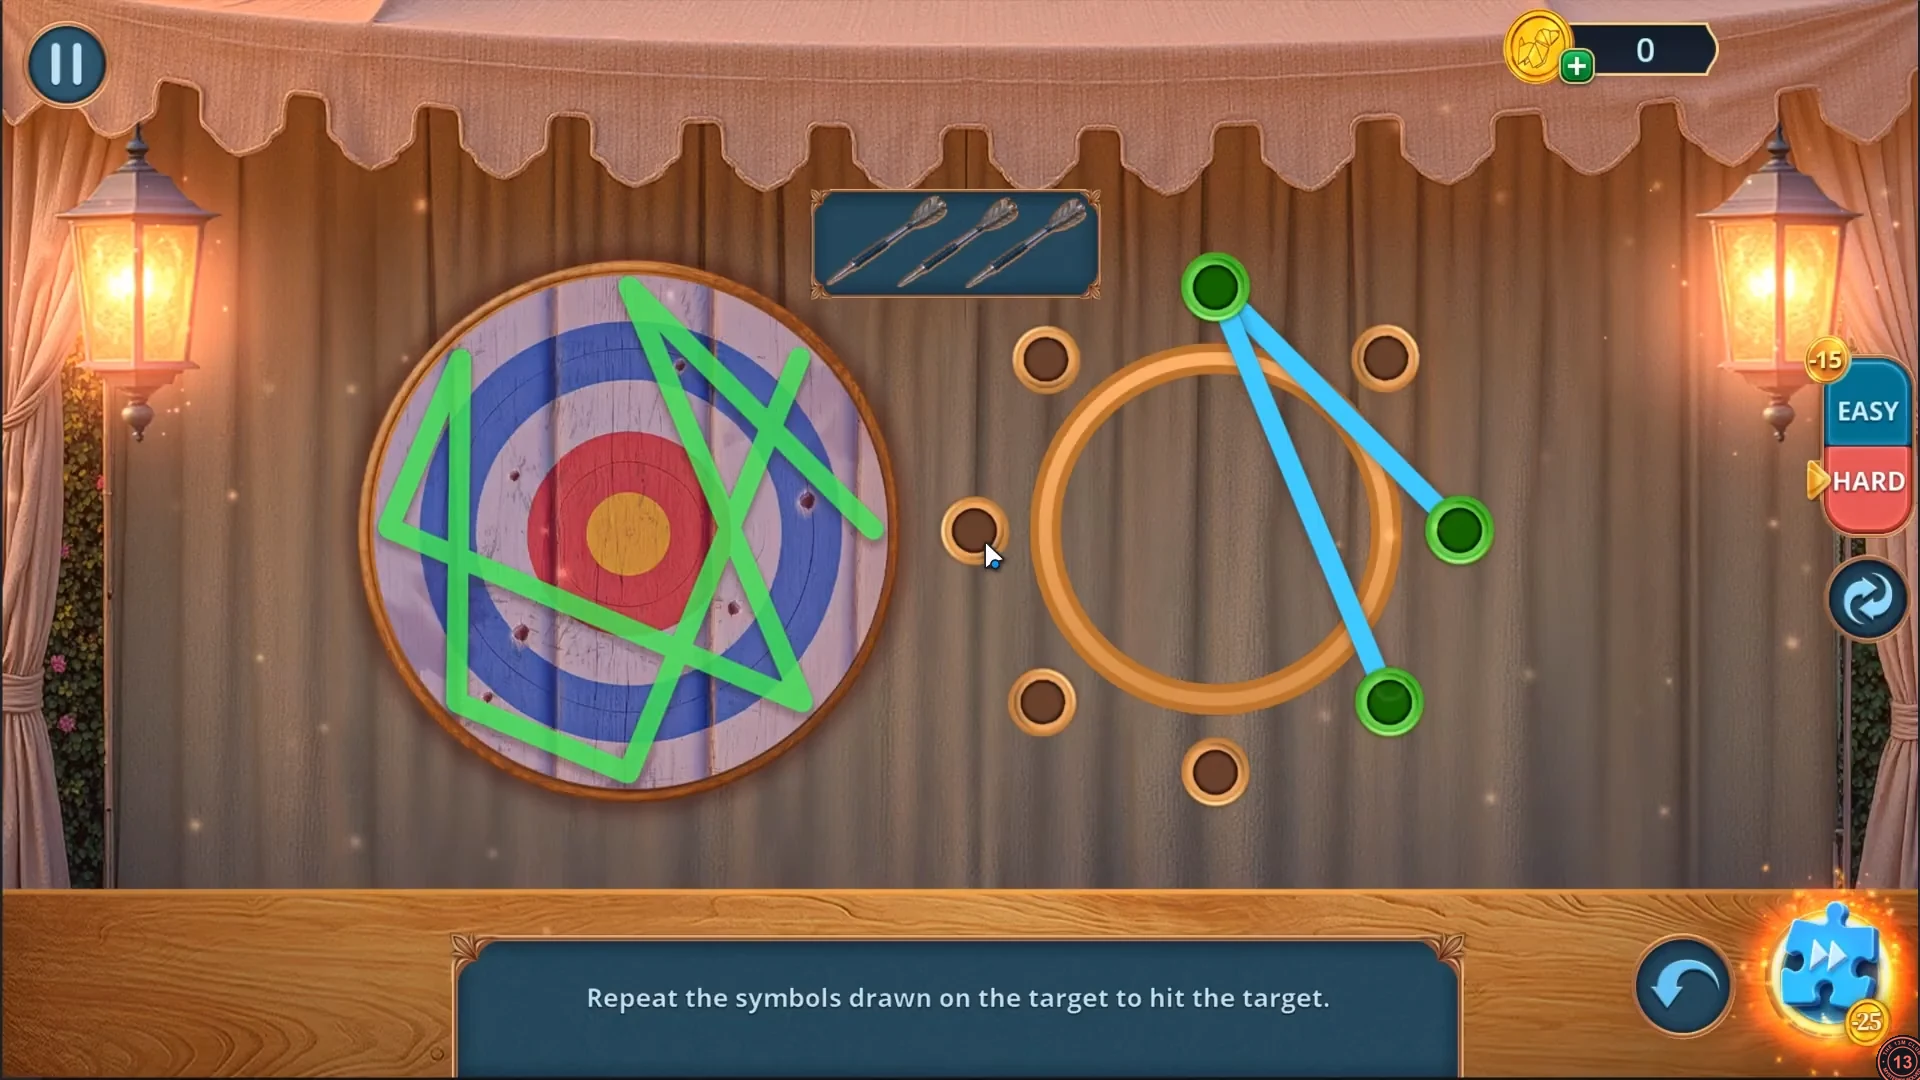
- Use the throwing knife on the Festival Row target. Copy the green figure drawn on the target by connecting the points on the ring; repeat for each round.
- Open the chest beside the target, take the street organ and give it to the old man; take his hat.
- After Samantha is freed, put the hat over the pit under the pavilion at the Old Dead Tree and take the spreader.
- At the fortune teller's table, use the spreader on the compressed spring of the carousel horse; the horse lifts and you can take the magic butterfly from the stand.
- Put the magic butterfly on the rose lock on the chess table and read Lydia's letter.
Count's Old Bedroom (Deluxe)
Optional Chapter 3 location. It opens only if you pick the Deluxe answer at the bedroom door next to the Count's Study ("Explore the bedroom."). The steps interleave with the main Chapter 3 route; the reward is a decision point, a scene with Lydia's ghost and the "Forever Love" achievement.
- At the Count's bedroom door, choose "Explore the bedroom." (Deluxe, +1 decision point). The Count's Old Bedroom opens and the task "Fix Lydia's wreath" starts.
- Take the tatting thread from the wreath above the bed.
- At the armchair with the snake carving, take the tatting shuttle (1/2) from the album and pick up the clock weights.
- Hang the weights on the wall clock between the windows; take the tatting shuttle (2/2) and the eucalyptus leaves.
- Put both tatting shuttles and the tatting thread at the broken dressing-table mirror and take the lace glove.
- After lighting the oil lamp in the Servants' Old Room (main route), reach into the hole in the wall with the lace glove and take the mirror shard.
- Put the mirror shard into the broken mirror; after the vision of Lydia and Herman, take the rattlesnake tail.
- Attach the tail to the snake on the armchair and take Lydia's pocket watch.
- Put the pocket watch on the wall clock and take the glue.
- At the sewing machine in the Servants' Old Room, glue the red gems together to repair the heart amulet.
- Put the heart on the album on the armchair, read the page and take Lydia's photo.
- Put Lydia's photo, the berries (from the Servants' Old Room wall hole) and the eucalyptus leaves on the wreath above the bed.
Count's Old Bedroom: Wreath Pieces
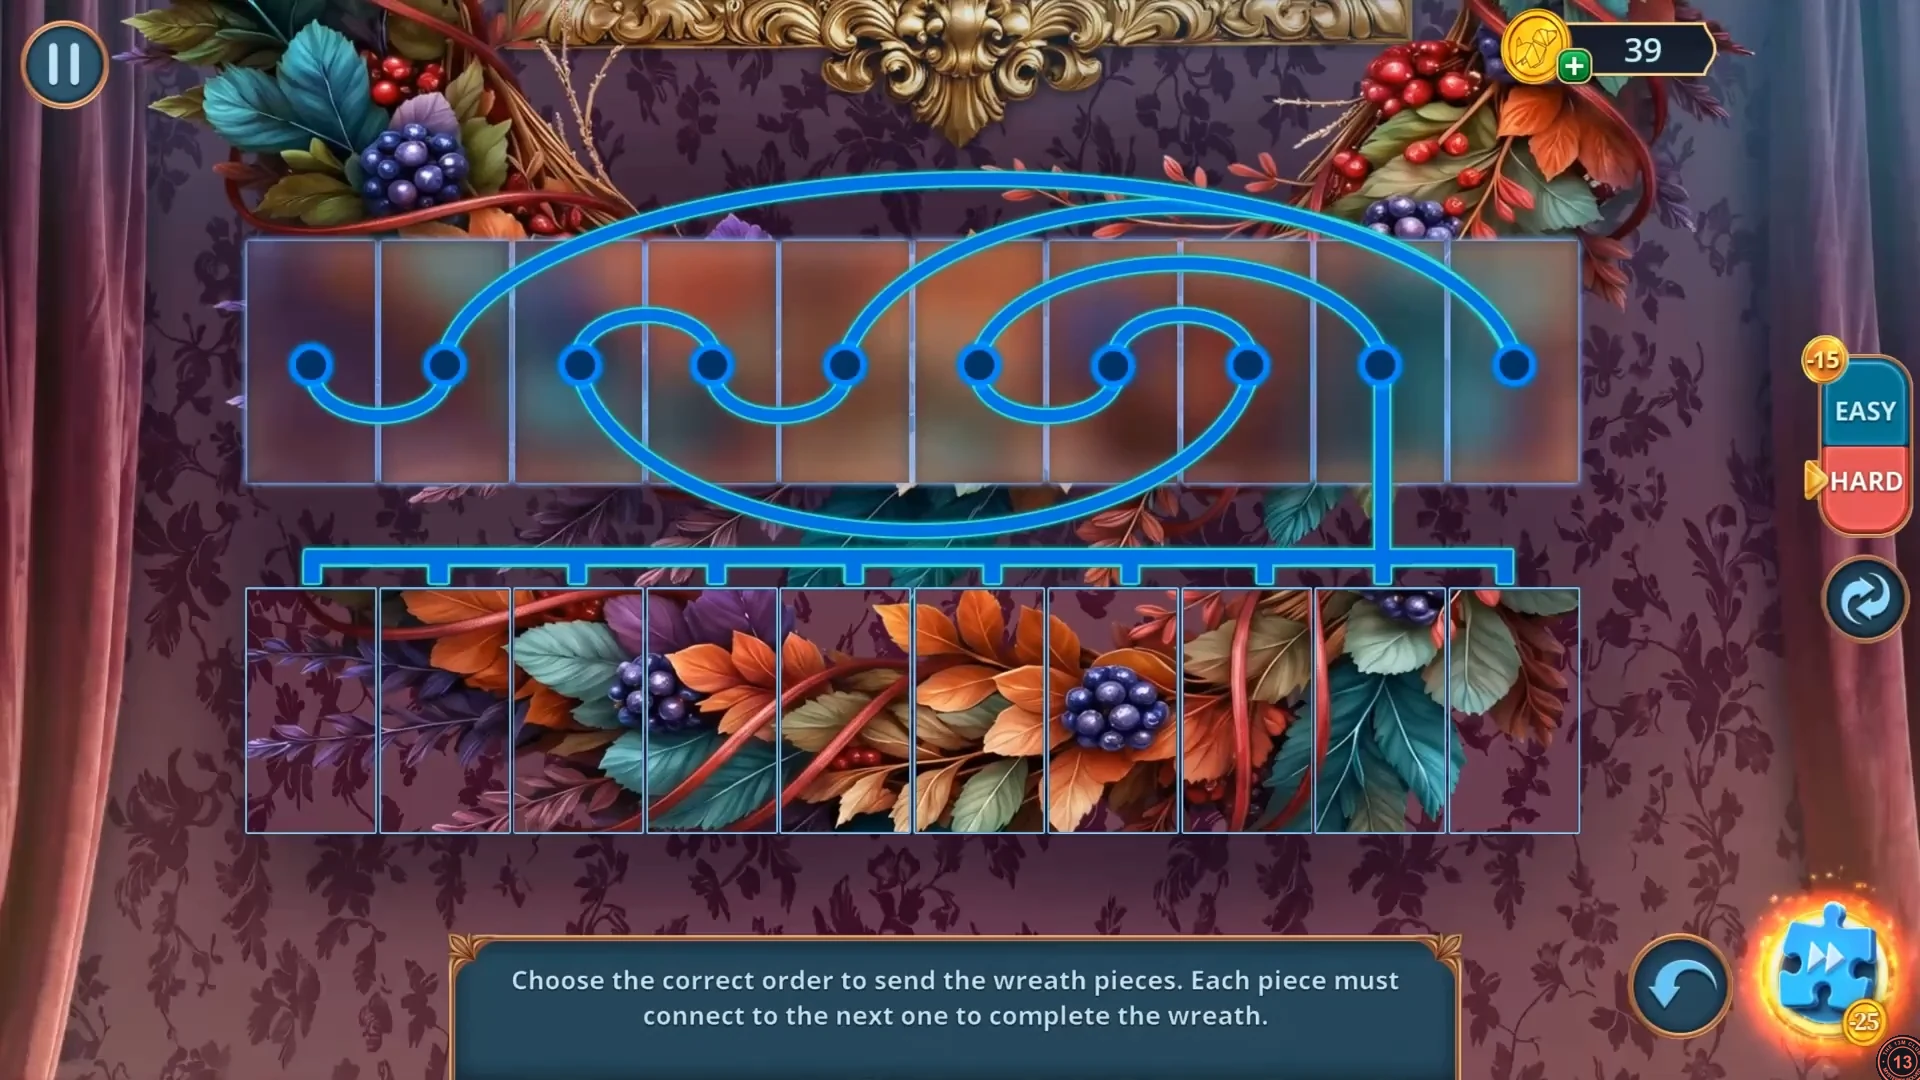
"Choose the correct order to send the wreath pieces. Each piece must connect to the next one to complete the wreath." Tap the ten pieces in the bottom row in sending order; the blue line above shows how the slots connect.
- In the recording, the pieces were tapped in this order, counting bottom-row positions from the left: 1st, 2nd, 10th, 5th, 4th, 3rd, 8th, 7th, 6th, 9th. The wreath completed on the first attempt. If your layout looks different, follow the blue line from the left end instead.
- Watch Lydia's ghost and Herman dance, then talk to Lydia. The task "Fix Lydia's wreath" completes and the "Forever Love" achievement appears.
Wine Cellar (Deluxe)
Optional Chapter 4 location. It opens only if you pick the Deluxe answer when Samantha finds the wine cellar key in the Mansion Basement. The steps interleave with the main Chapter 4 route; the reward is a decision point, the "Hearty Meal" achievement and Jarrett's diary.
- In the Mansion Basement, when Samantha says she found the key to the wine cellar and fresh footprints, choose "Follow the tracks into the cellar." (Deluxe, +1 decision point). The trapdoor in the floor opens.
- Once the Sanctuary is open (main route), go down the trapdoor into the Wine Cellar; the task "Find out what Jarrett was doing in the cellar" starts.
- At the skeleton's dinner table, take the grapes from the basket and the Parmesan knife from the plate.
- At the shelves in the back, cut a piece of the spoiled Parmesan with the knife and take the spice pouch.
- Feed the cheese to the hungry plant on the right and take the press handle.
- Fit the handle on the wine press on the left and take the spice scoop.
- In the Mansion Sanctuary, use the spice scoop and spice pouch at the window on the left to collect the bone dust.
- Put the grapes and the bone dust into the wine press to start the recipe game.
Wine Cellar: Wine Press Recipe
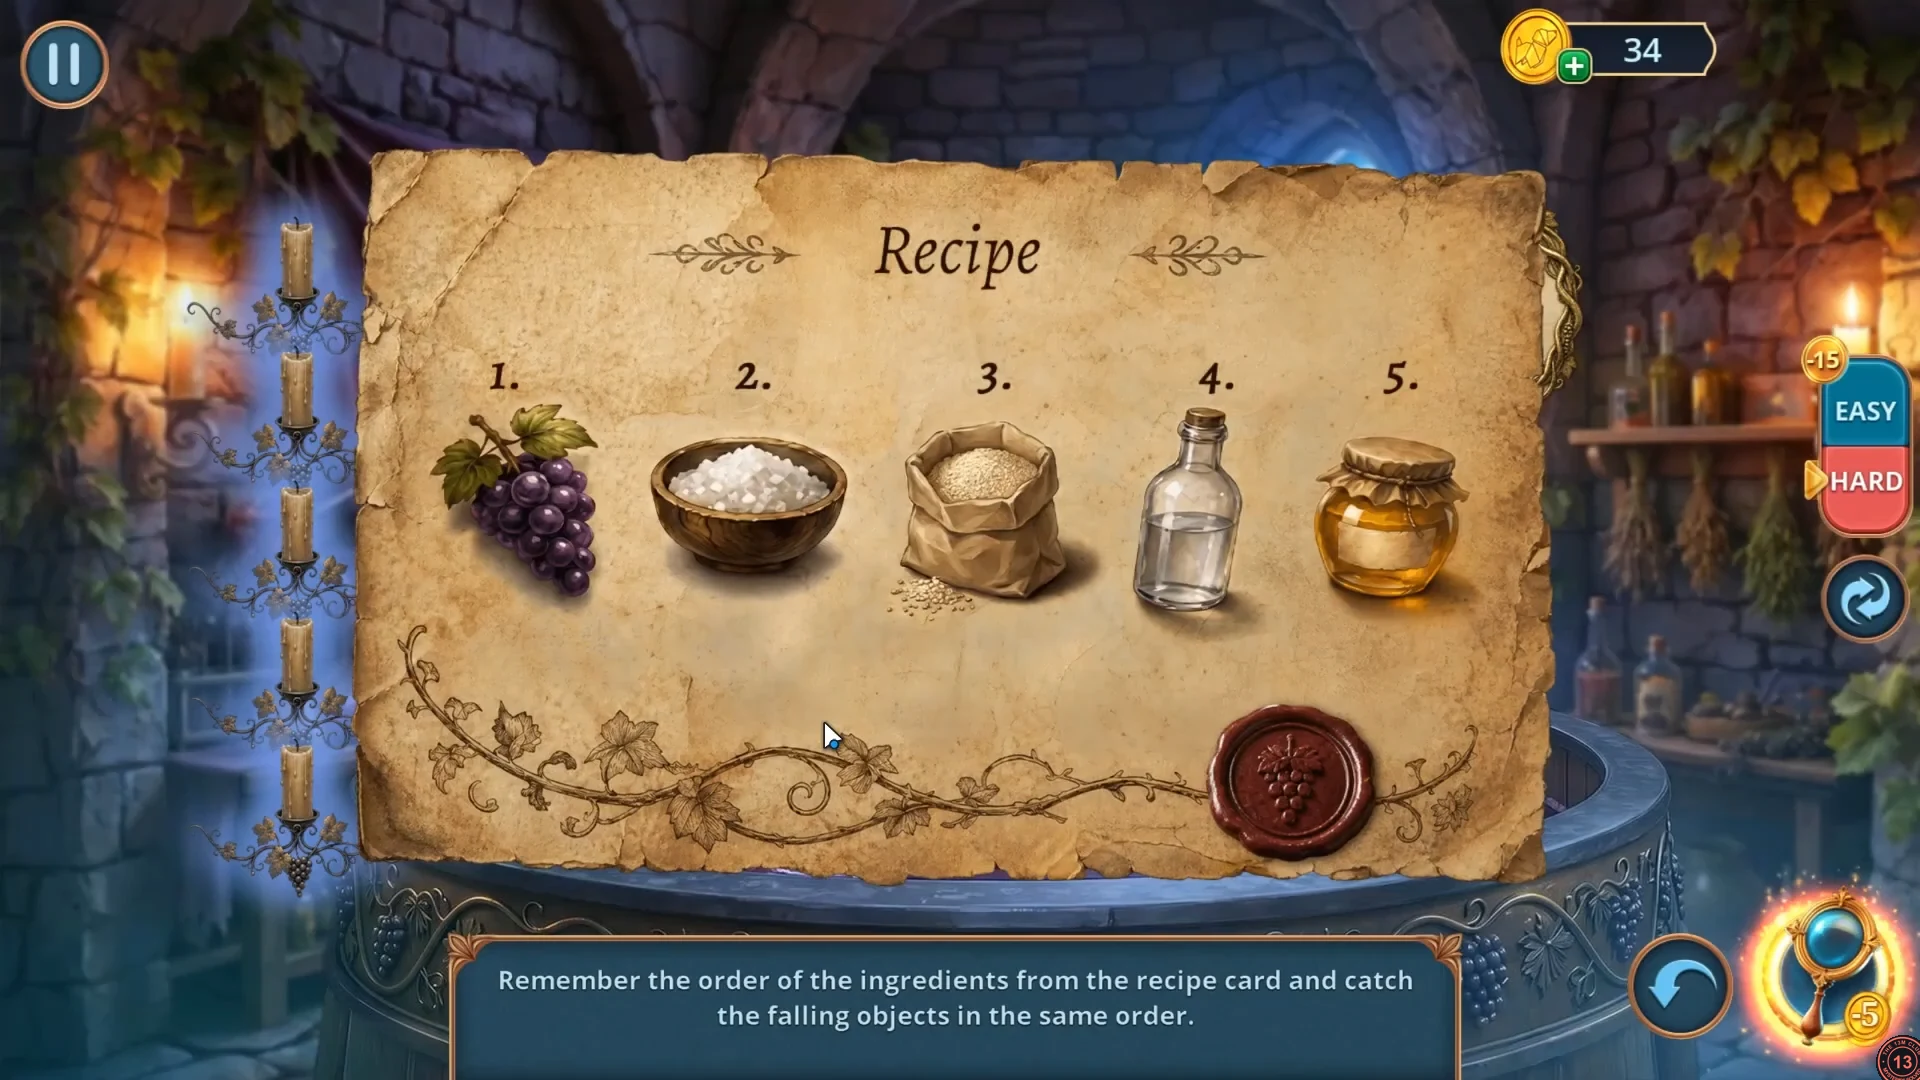
"Remember the order of the ingredients from the recipe card and catch the falling objects in the same order." The recipe changes between attempts, so there is no fixed answer.
- Memorise the numbered ingredients on the recipe card, then catch the falling objects in exactly that order. In the recording the hard-mode attempt failed ("You lose. Please try again."); the creator's on-screen note advises Easy mode, and the Easy attempt with a four-ingredient recipe succeeded.
- Take the wine from the press and give it to the skeleton at the table ("Hearty Meal" achievement). Open his basket and take the lady figurine.
- Later, after you place the floral pattern on the Sanctuary altar (main route, which gives the cap), put the lady figurine next to her partner in the altar compartment and take the diamond.
- Back in the Wine Cellar, cut the glass dome next to the hungry plant with the diamond and take the carrot amulet.
- Put the carrot amulet on the rabbit basket beside the skeleton and take the freezing spray.
- Spray the fire under the cheese shelf to calm the salamanders, then take and read Jarrett's diary. The task completes.