Trapped in the mine
Maaron and Folnur are locked in the mine after the gate slams shut. Folnur is weak and the tunnel is blocked by rubble. The Sickle from Chapter 2 is still in the inventory.
- From the episode list start Chapter 3, First brotherhood, and watch the storybook.
- Collect the Morphing object in the upper-right corner (31/45) and the knight-figurine collection item by the posts on the left (knight set 1/8).
- Zoom into the table on the right (task Another way starts) and take the Mug from the bottom shelf and the Keg of gunpowder. Pick up Folnur's hammer from the tracks.
- Fill the Mug at the underground pool at the lower left and give the water to Folnur.
- Take the Cord from the crate by the rubble. Put the Keg of gunpowder on the rubble and attach the Cord as a fuse.
Puzzle: conjuring fire
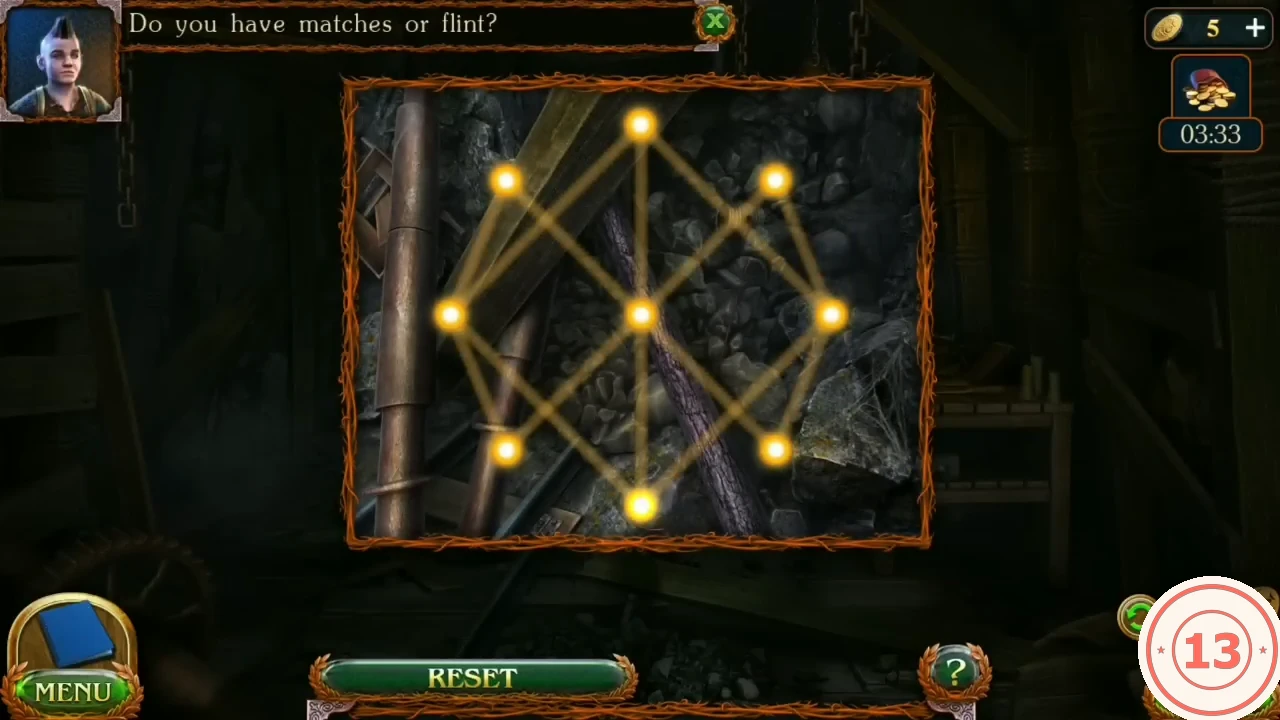
To light the fuse Maaron conjures fire: a figure of faint lines between nine glowing points appears and must be traced completely.
- Maaron conjures fire: trace every faint line of the figure between the nine glowing points until the whole figure glows.
- Zoom into the damaged rails in the tunnel on the left and repair them with Folnur's hammer.
Mini-game: mine cart run
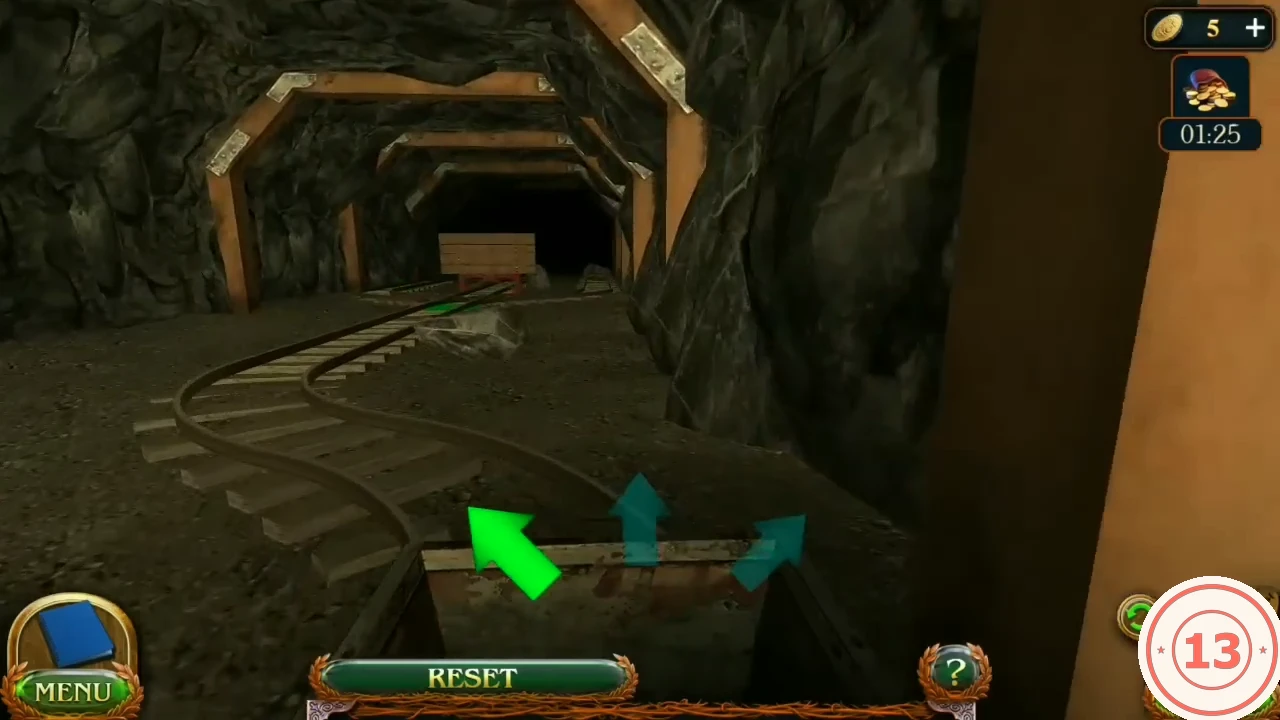
Rule: avoid obstacles using the arrows to get to the exit from the mine. The lit arrow under the cart is the turn taken at the next fork. Obstacles include rocks, a barrel and a boarded barrier.
- Before each fork, look down both branches and set the arrow to the one without an obstacle. A working route is: straight, right, straight, left, straight, left, straight, right, straight, left, right, holding the last choice to the end. If the obstacles in your run are placed differently, keep reading each fork instead of following this list.CODES, R, S, L, S, L, S, R, S, L, R
Castle ruin camp and the shepherd's note
The rails end near an old castle with a wooden hoist ramp. A shepherd's camp is nearby but the shepherd is gone.
- After the storybook, collect the Morphing medallion on the left tree (32/45) and the 7-item set's first collection item at the lower right (set 1/7).
- Zoom into the campsite by the firepit: read the shepherd's note (8 sheep, a red flag, a dog; task Portal tower) and take the Broken flag and the Sausage.
- Zoom into the wooden platform at the right: only five sheep are here. Take the Piece of the puzzle. Task Lost sheep starts.
- Return to the campsite zoom and take the Shepherd's staff leaning on the stump and the Castle gate detail beside the firepit.
Clover field and the standing stones
The path continues to a clover field and a circle of standing stones with a tree altar.
- In the clover field collect the Morphing object right of the sheep (33/45) and the set item at the lower right (set 2/7).
- Zoom into the strawberry patch among the clover (ripe berries need a container) and take the second Piece of the puzzle at the lower right.
- Zoom into the hole: the dog has fallen in and is hanging on.
- At the standing stones take the Castle gate detail by the sheep stone.
- Zoom into the tree altar on the rock and take Historical Manuscript 7/8 (Bryn pass) from the panel among the roots. Back at the standing stones, tap the face of the altar rock just right of the tree roots, upper right of the scene (knight set 2/8), then the small tree stump in the grass at the lower right, right of the path and left of the animal skull (Morphing 34/45).
Rescuing the dog
The shepherd's dog is stuck in a hole in the clover field and carries a castle gate detail on its strap.
- Use the Shepherd's staff on the hole in the clover field; the dog climbs out but won't move.
- Give the dog the Sausage and take the Castle gate detail from its chest strap.
Puzzle: tree altar rosettes
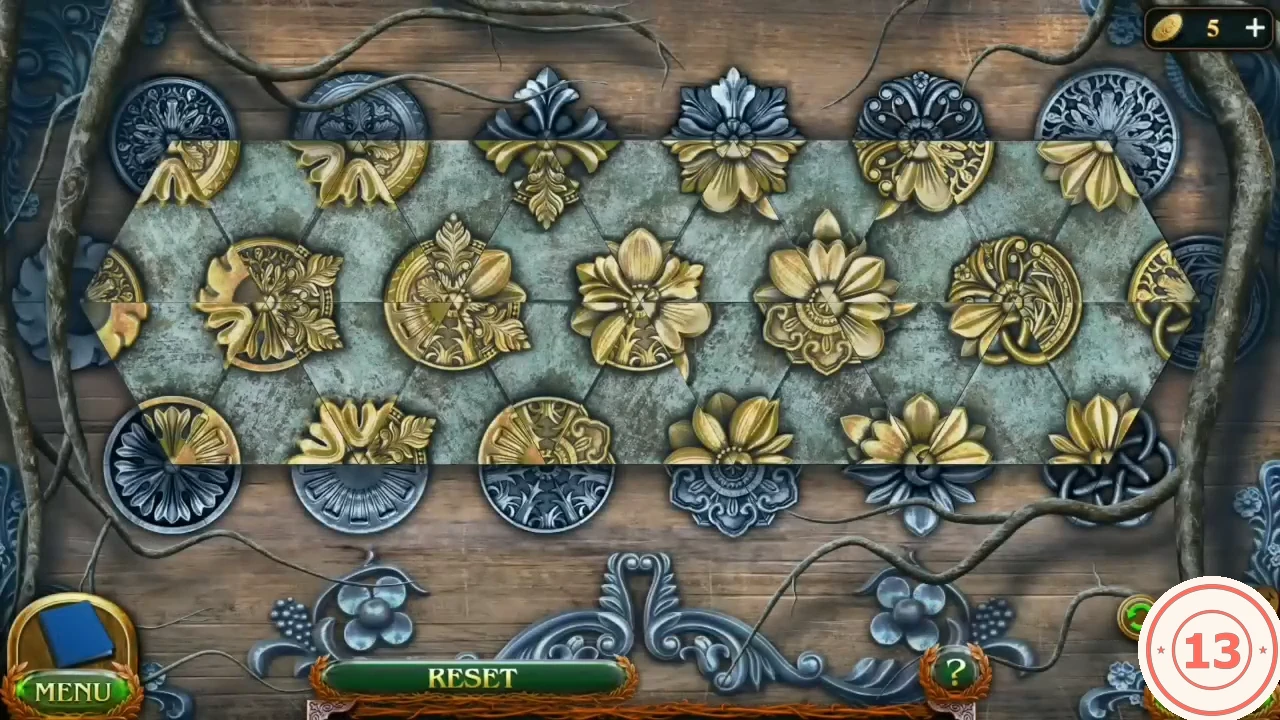
The tree altar on the rock has a hexagonal rosette panel with two empty slots. Clusters of hex tiles rotate when tapped; the goal is whole gold rosettes everywhere.
- Put both Pieces of the puzzle into the tree altar panel.
- Tap to rotate clusters of hex tiles until every gold rosette is whole and the half-rosettes on the frame are completed. Complete the rosettes along the frame first, because their half-pieces fix where the outer tiles must sit, then work towards the centre. The completed-state image shows the finished panel.
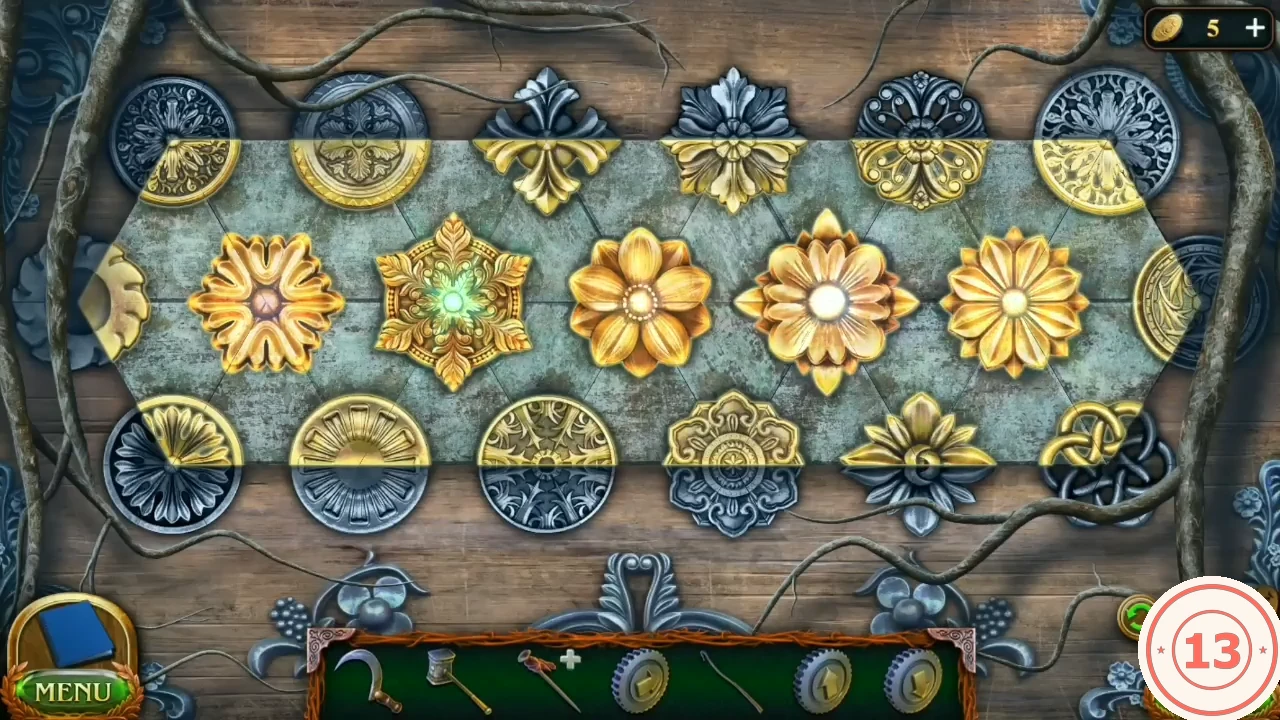
Completed: every rosette is whole, including the halves along the frame. - Zoom into the dead tree with the white cloths and cut one with the Sickle.
The red flag and the lost sheep
Sheep are trained to run to a red flag. Make one and bring the flock back to the platform.
- Take the Basket from the campsite and pick the strawberry clusters in the clover field.
- Open the Broken flag in the inventory: remove the torn fabric, add the Piece of cloth and dye it with the Ripe strawberries.
- Show the Red flag to the sheep at the standing stones and in the clover field.
- Fix the Red flag to the right railing post of the hoist platform and drive it in with Folnur's hammer. Use the Shepherd's staff on the flock so the sheep walk onto the platform; use it again on the one sheep left by the tomb.
- A little more weight is needed: tap the small yellow butterfly near the lower-right edge of the deck. The platform lowers and opens the knight's tomb.
- Take the last Castle gate detail from the skeleton in the tomb.
Puzzle: castle gate blocks
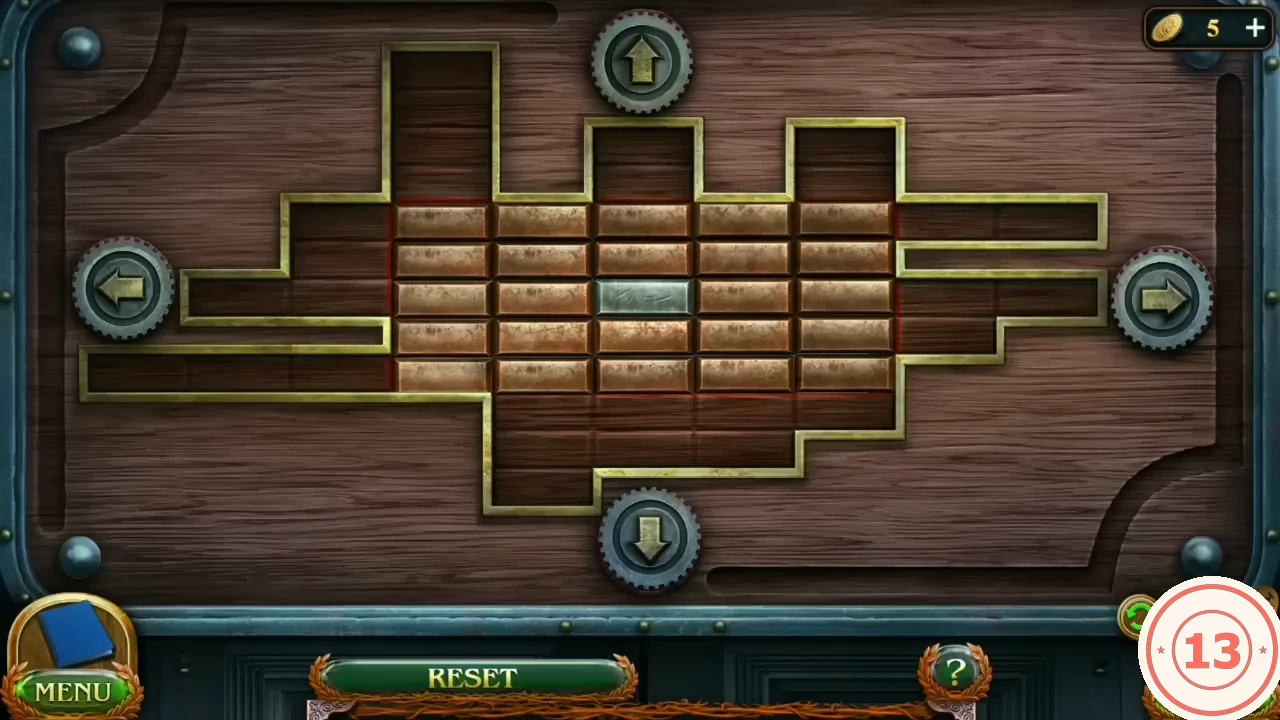
No rule text is shown. Each arrow moves the silver block one cell and pushes the bricks ahead of it; bricks pushed off the central 5x5 square drop into the outer channels, and cells the silver block leaves stay empty. It is a lengthy pushing puzzle, so the guide gives the goal and method rather than every press; the completed-state image shows the cleared board.
- Zoom into the gate under the archway and insert the four Castle gate details into the round sockets.
- Push all bricks out of the central 5x5 square into the outer arms. Clear one row or column at a time, pushing towards the nearest arm, and avoid leaving a single brick stranded in a line the silver block can no longer reach from behind. One successful solve starts with a press to the right and finishes with the silver block in the upper-right arm and the whole centre empty. Finishing in under 90 seconds earns the achievement Handyman.
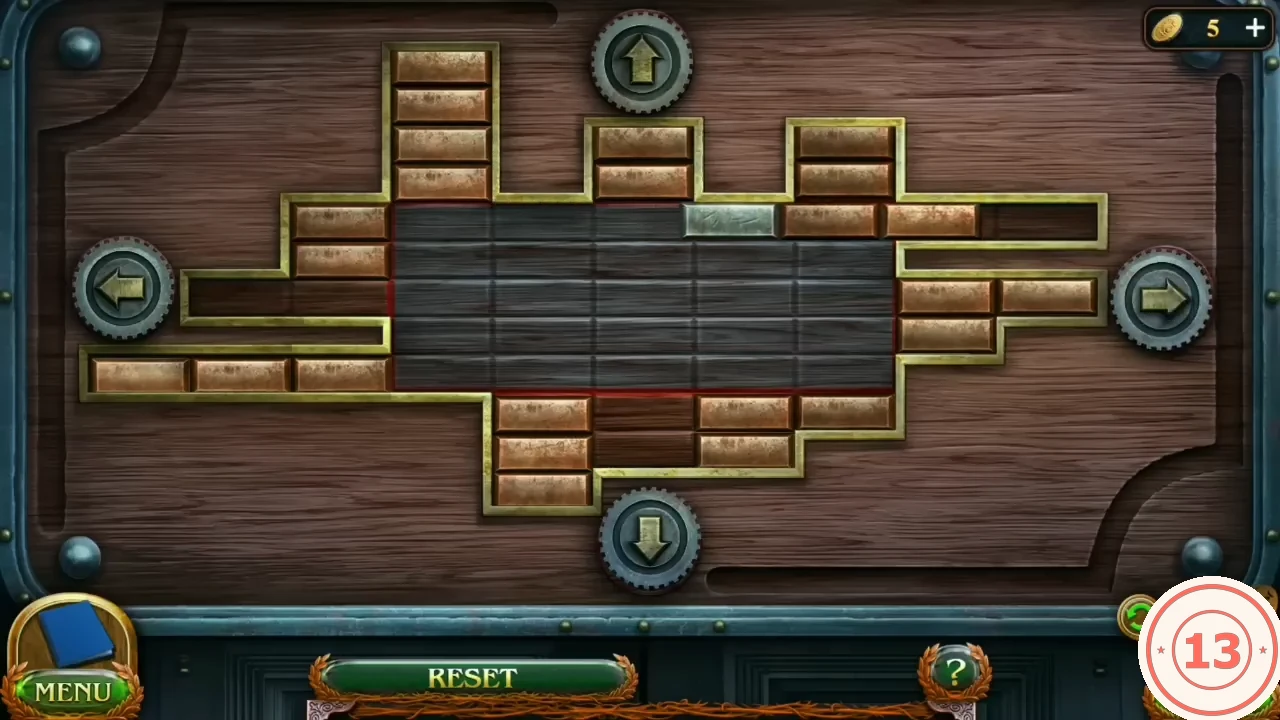
Solved: the central square is empty.
Puzzle: castle courtyard embroidery door
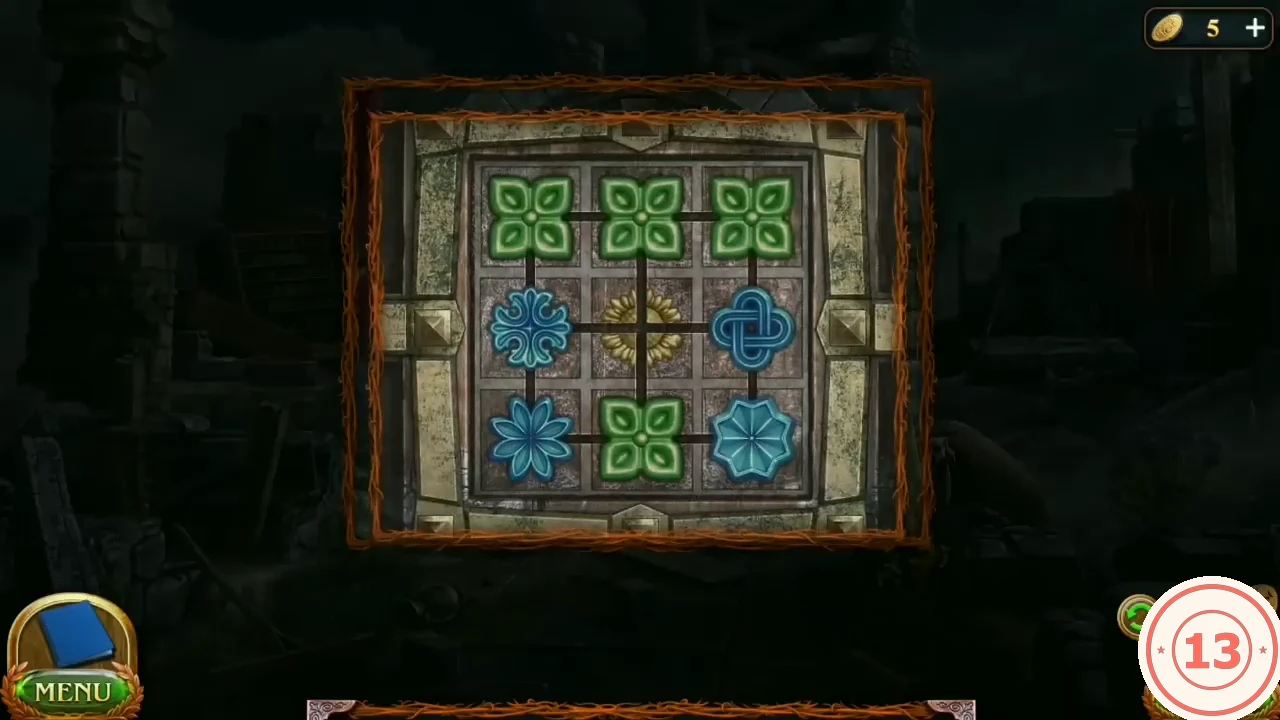
The portal is at the top of the spiral tower; its door shows the castle's coat of arms.
- Enter the courtyard. Collect the knight item on the rubble left of the central path (knight set 3/8) and the Morphing disc on the footboard of the ruined bed at the right (35/45).
- Zoom into the bed and take the Embroidery hoop. At the collapsed bookcase on the left read the two diaries (crows dying at the tower top; the fauna of Bryn pass) and take the purple Glass prism.
- Place the Embroidery hoop on the tower door as the reference. Slide the tiles along the grooves until they match the embroidery: blue tiles in the corners (curled cross upper-left, many-petalled flower upper-right, knot lower-left, pointed star lower-right), green four-leaf tiles in the middle of each edge and the golden sun in the centre.
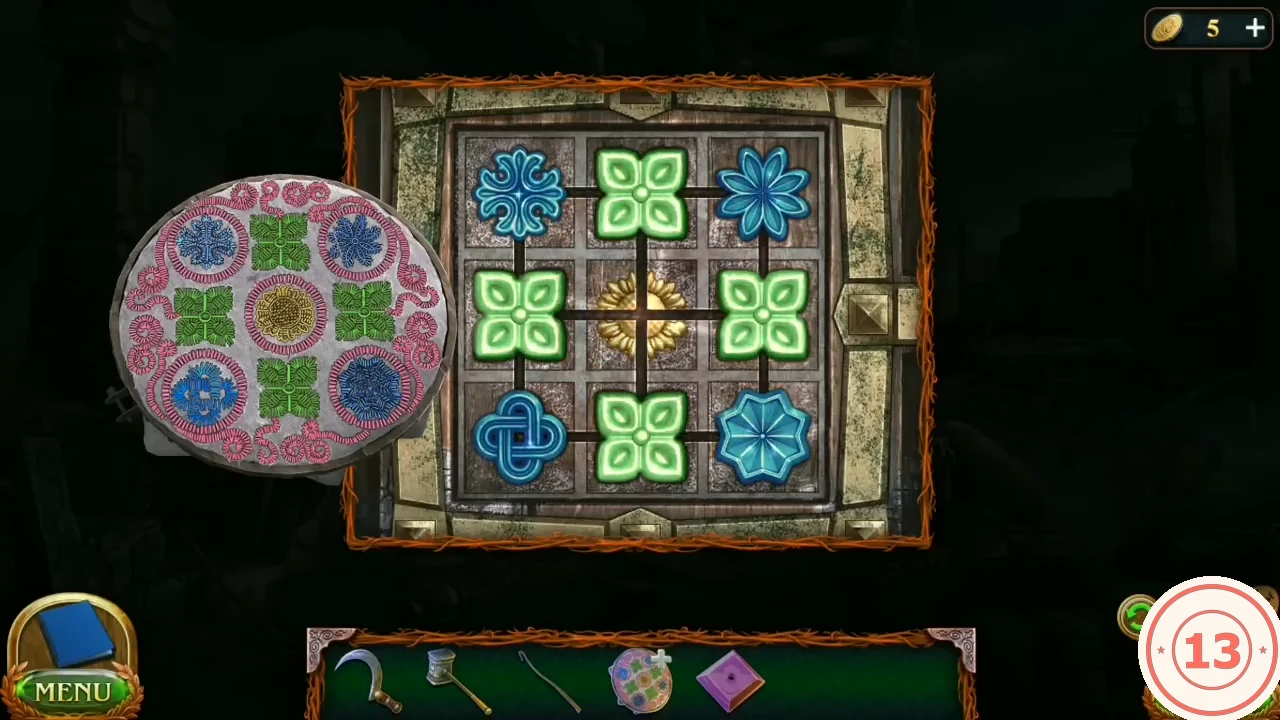
Solved: the tiles match the embroidery on the hoop.