Puzzle: figurines holding hands
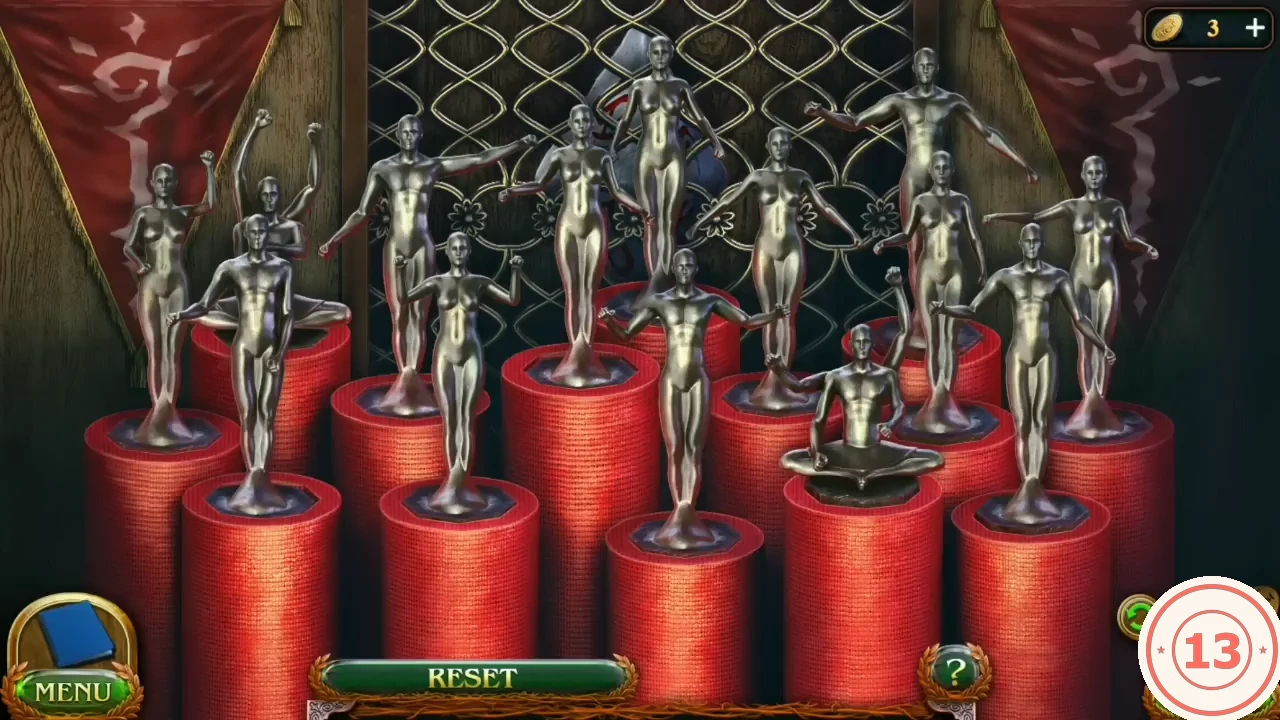
Rule: rearrange the figures so that they all would be holding hands. Tap a figurine, then another position to move or swap it; joined hands glow blue.
- Rearrange the silver figurines on the red pedestals until every pair of neighbouring hands glows. Look at which way each figure's hands reach and place figures whose hands meet side by side; the one empty pedestal gives you room to move figures around. The completed-state image shows the finished cabinet.
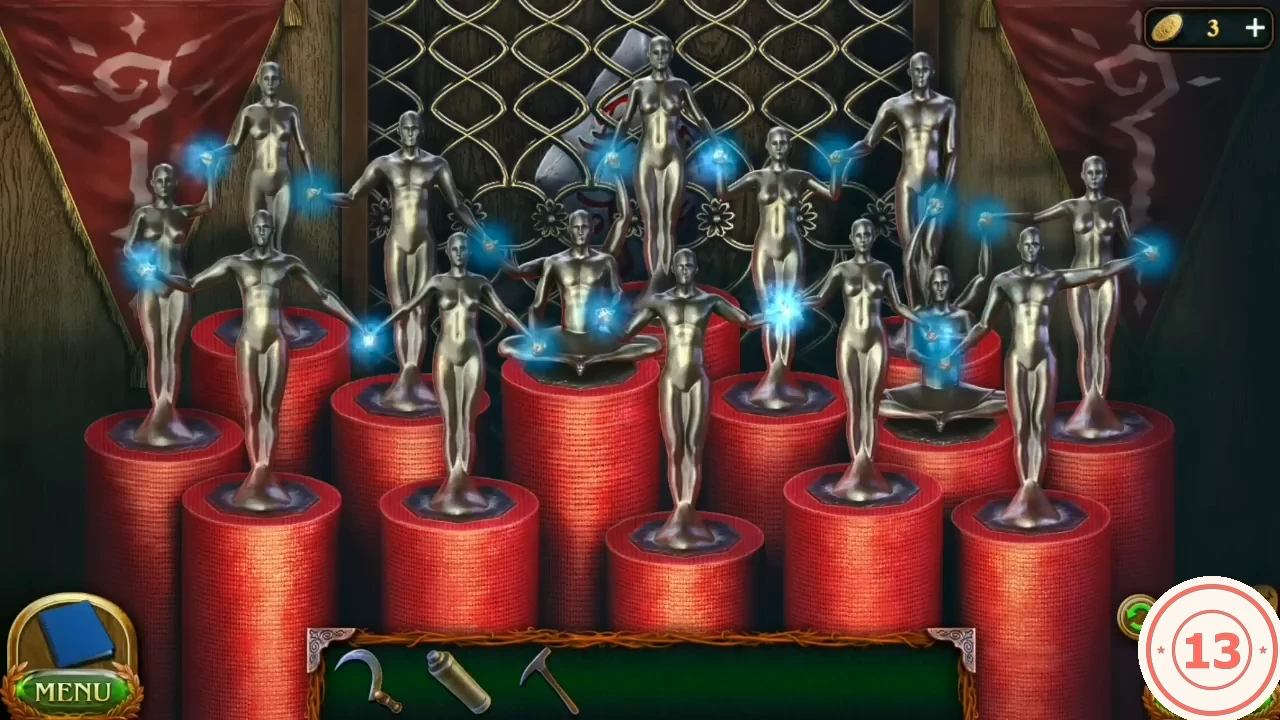
Completed state: every pair of neighbouring hands glows.
Puzzle: rune hyperstone
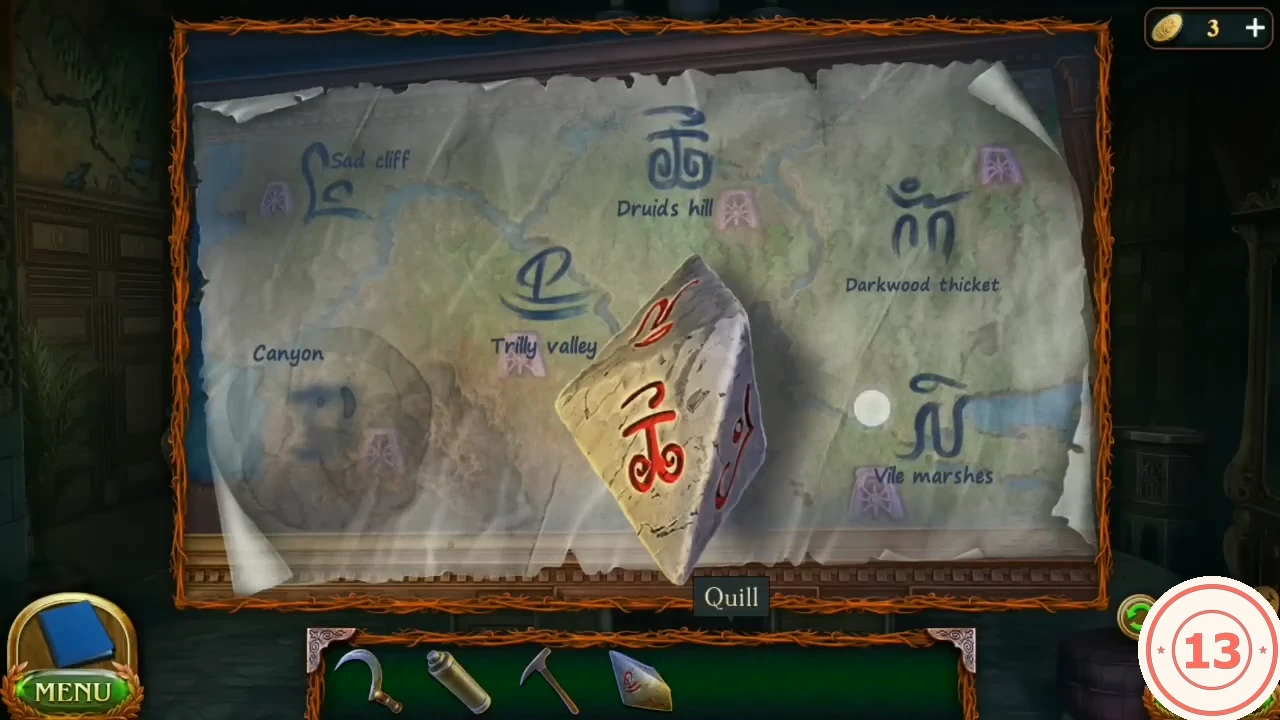
The Rune hyperstone from the figurine cabinet is a turning stone with a symbol on each face; it is checked against the dolmen map.
- Take the Rune hyperstone and place it on the dolmen map. Take the Quill from the octagonal side table.
- Turn the stone through its faces and circle each face symbol that matches a dolmen on the map (Sea cliff, Trilly valley, Druid's hill, Darkwood thicket, Vile marshes). The face without a match is the canyon symbol; the quill draws it (a hook-shaped rune) at the Canyon.
Puzzle: backyard pedestal pattern
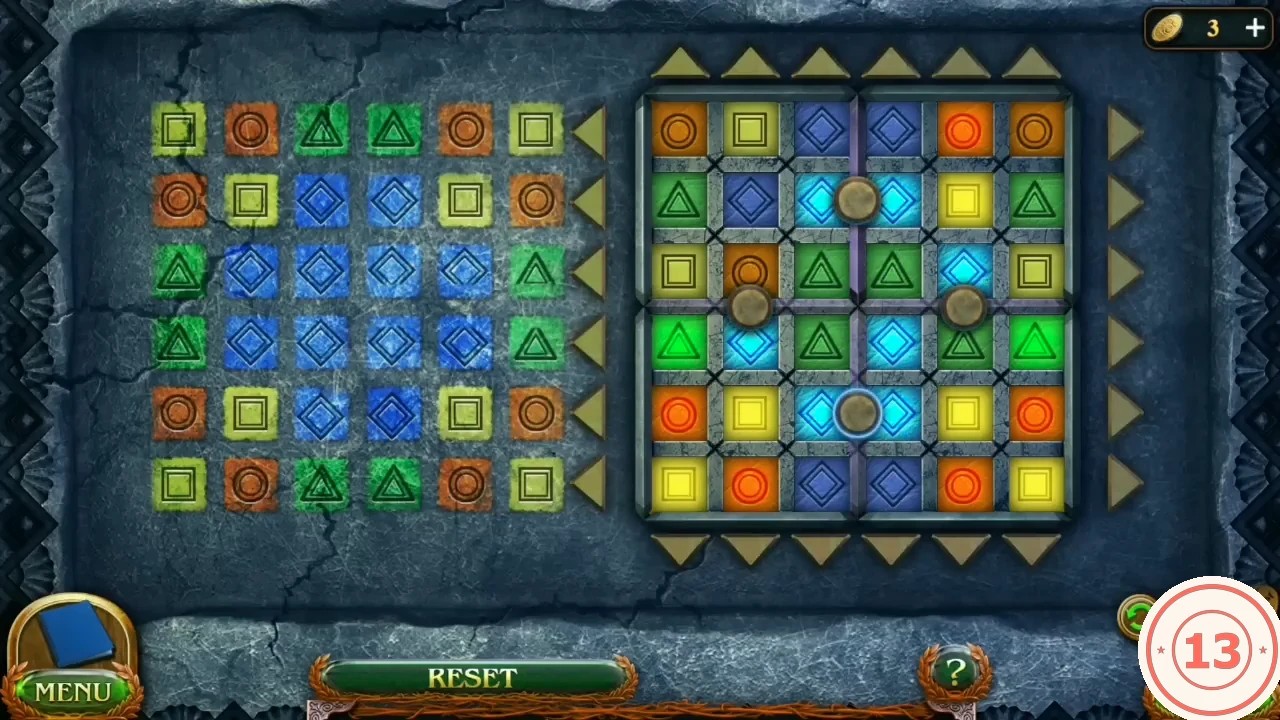
Rule: use the buttons to move the pieces to repeat the pattern on the left. The board has six rows and six columns; each arrow button around its edges shifts a whole row or column one place, and the tile pushed off one end comes back in at the other. Two seams cross the middle of the board, each with round bolts on it. A seam section that glows purple is a divider: while it is lit, the arrows only turn the three tiles on their side of it. Tapping the bolt on a lit seam section switches that divider off, so the arrows move whole rows and columns again. The starting layout is shuffled differently from game to game. This is a long shifting puzzle, so the guide gives the method rather than every press; the target pattern stays visible on the left throughout. The method is reliable but uses many moves, so it does not earn the Skillful achievement, which needs a much shorter solution (see Achievements). The target, row by row from the top (Y = yellow square, O = orange circle, G = green triangle, B = blue diamond): Y O G G O Y; O Y B B Y O; G B B B B G; G B B B B G; O Y B B Y O; Y O G G O Y.
- Through the backyard, library and archive, open the wall cupboard with the bottles on the left and take the Runestone.
- Put the Runestone on the stone pedestal with the canyon rune in the right foreground of the backyard, just left of the right-hand portal arch.
- If part of a seam glows purple (at the start of this solve it was the upper half of the vertical seam), tap the bolt on it so that every arrow moves a whole row or column. Then shift the rows and columns until the board repeats the target pattern on the left. Build the pattern one row at a time from the top: bring the right pieces into a column by shifting it, then shift the row sideways to line them up. Once a row is finished, avoid column shifts that pass through it, or restore it straight after with the opposite arrow.
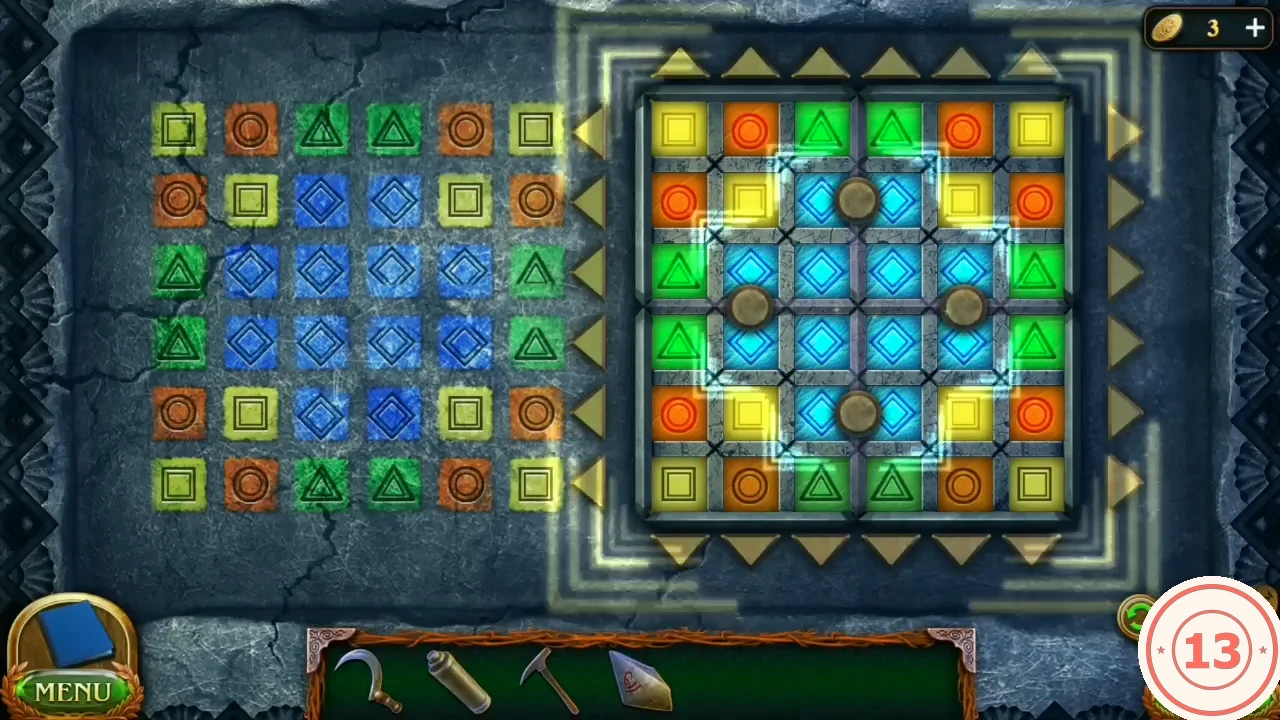
Solved: the right board repeats the target pattern. - The dolmen has run out of energy: put the Rune hyperstone into the front compartment of the pedestal. Enter the portal in the backyard arch.
Observation tower cliff
A destroyed observation tower stands by a stone ring that hides a descent. Task What happened in Khaen-Tum? starts here.
- Collect the Morphing object at the far left edge by the tower (42/45) and the knight item on the right by the cliff (knight set 5/8).
- Zoom into the crack behind the blue berries at the lower left and break it open with the Mini pickaxe, then take the Projection crystal from the opened crack.
- Clear the rocks from the stone ring in the centre (one rune tile is missing) and take the Well tile at the foot of the tower's right post.
- A vulture guards the nest on the right crag. Travel to the castle tower top and pick up the Dead crow from the floor in front of the grate, then return.
- Put the Dead crow on the nest; the vulture takes it and leaves. Take the second Well tile.
Puzzle: spotting scope symbols
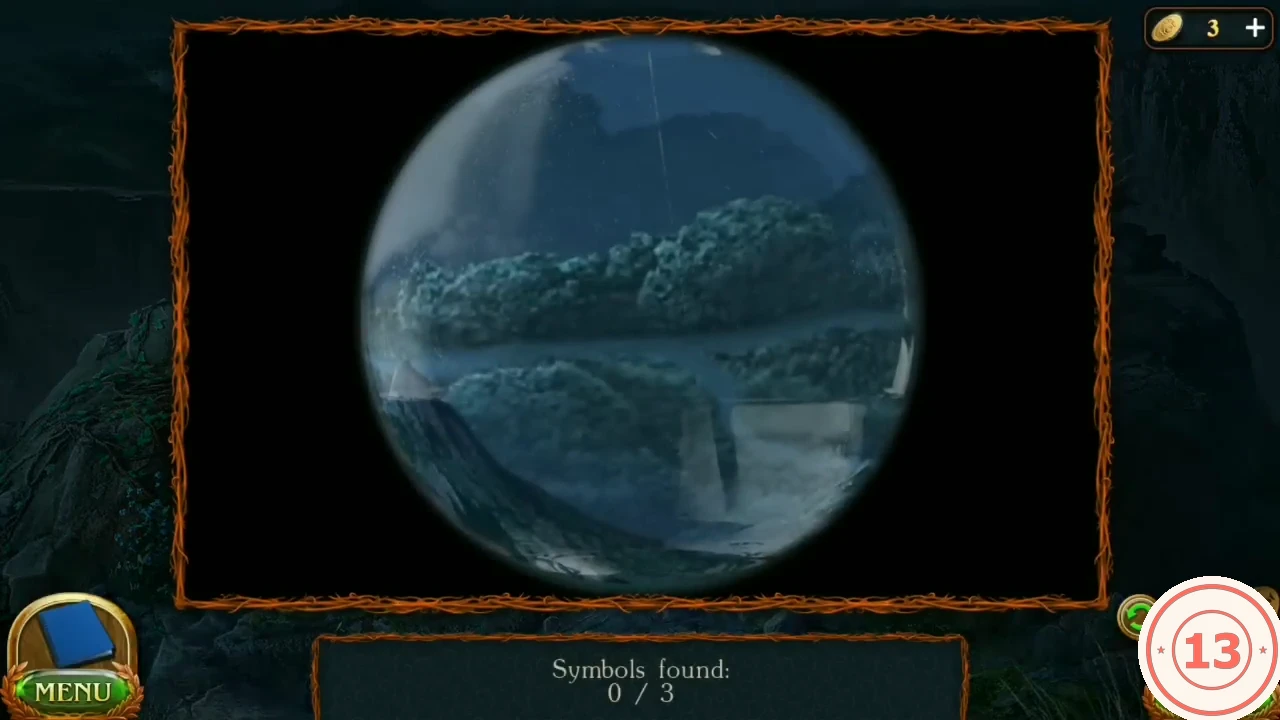
The spotting scope reveals three symbols in the landscape that open the descent.
- Use the Spotting scope at the lower-left cliff edge and pan the view to find three blue symbols (0/3): a serpent-like glyph on the cliff face below the grassy ledge, a bird-like glyph on the far hillside and an N-shaped glyph with a hook on the tall rock spire.
Puzzle: well stone ring
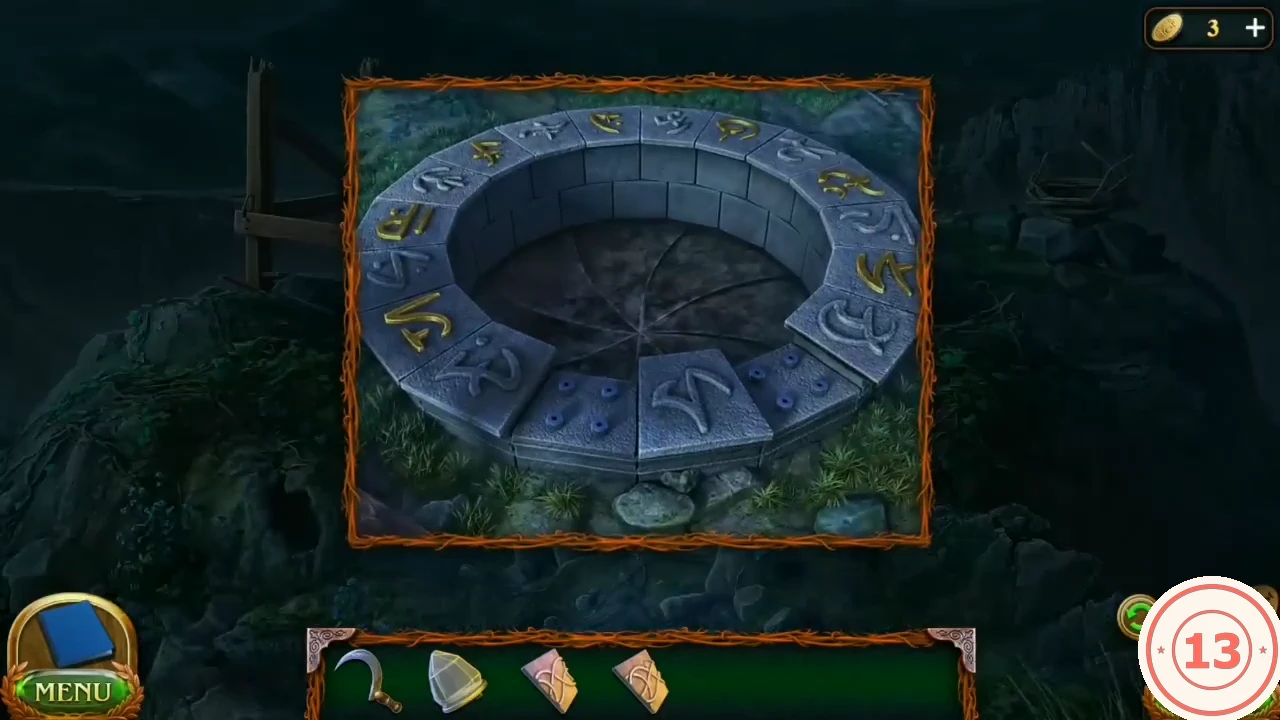
The stone ring by the well has tiles carved with glyphs. The three symbols found with the spotting scope are the answer.
- Place both Well tiles in the gaps of the stone ring.
- Tap the three tiles matching the scope symbols: the bird glyph at about 2 o'clock, the spire glyph at about 4 o'clock and the serpent glyph at about 8 o'clock.CODEBird (2 o'clock), spire glyph (4 o'clock), serpent (8 o'clock)
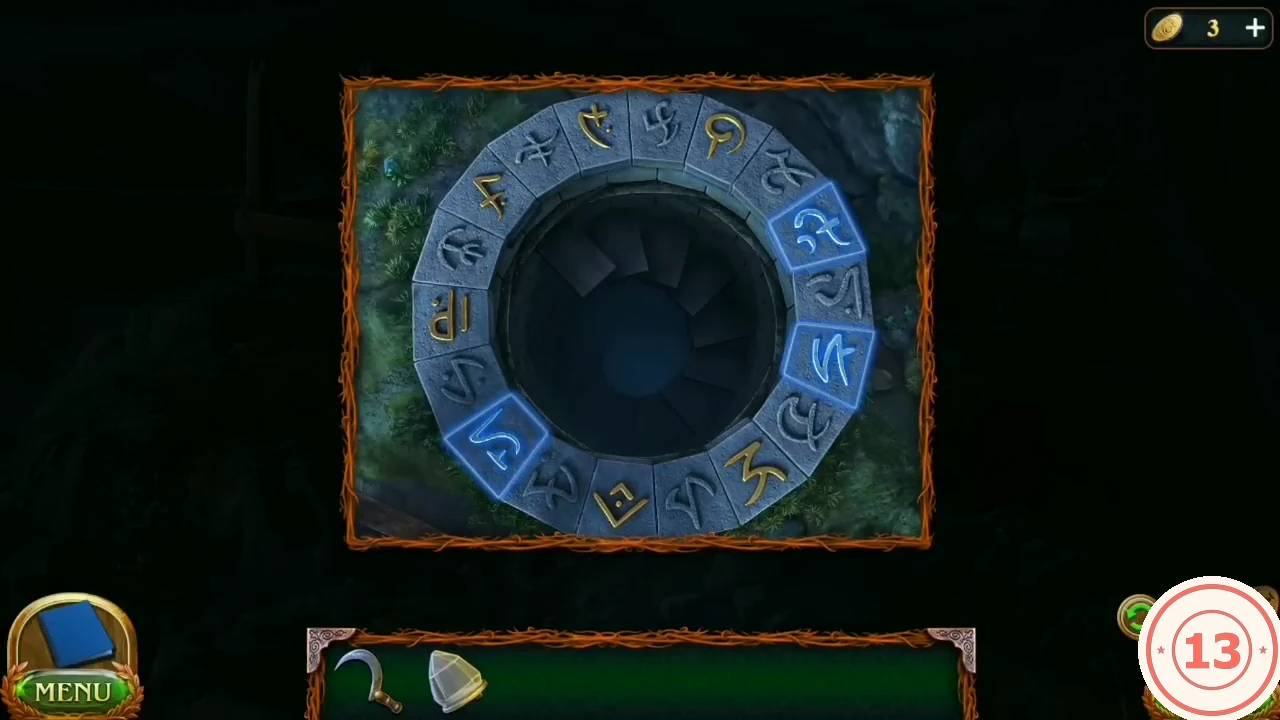
The three tiles matching the scope symbols, lit at about 2, 4 and 8 o'clock. - Descend to the ice city. Tap the lower door area of the left building for the knight item (6/8) and the right tower doorway for the Morphing object (43/45).
Puzzle: ice city tower stairs
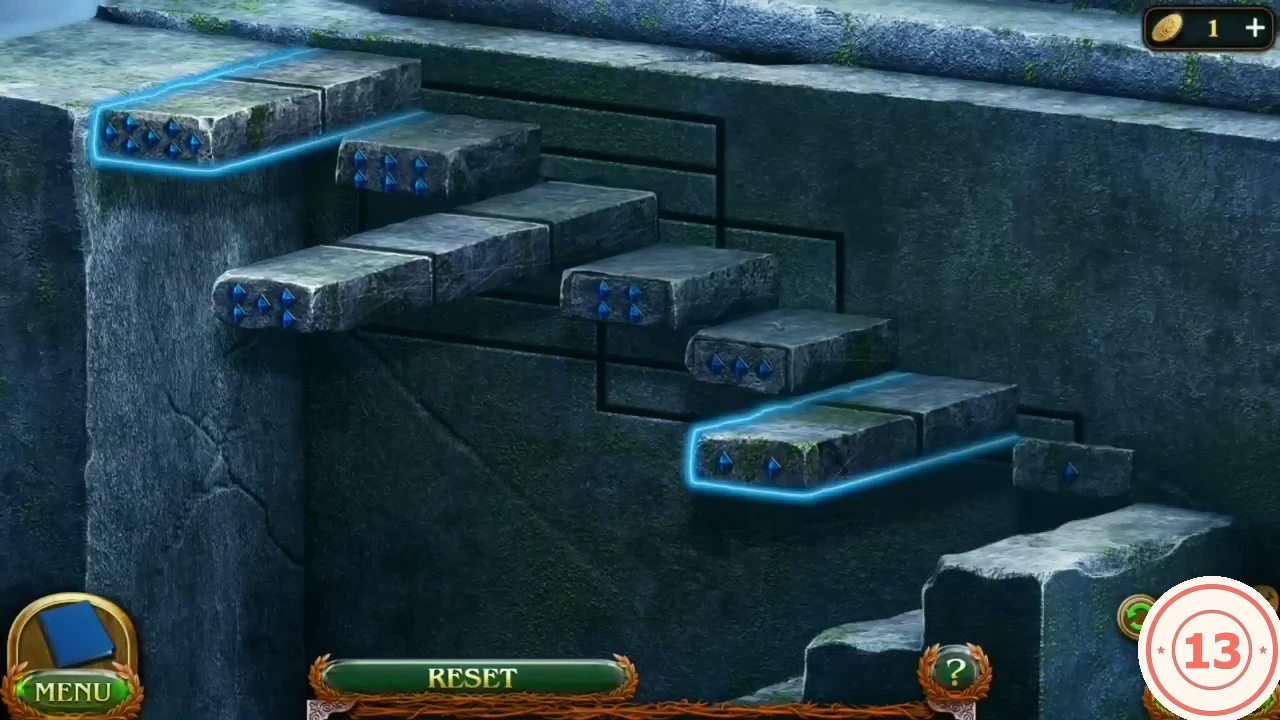
Rule: extend the steps so that they would be equal in width. One flight of the right tower's stairs is missing and an object hangs in a net out of reach. The starting layout of the stair puzzle can differ between games, so the guide gives the method rather than a fixed sequence.
- Enter the temple (left building). Tap the floor centre-left for the knight item (7/8) and the upper-left arched doorway for the Morphing object (44/45). Take the Pattern block from the skeleton in the open sarcophagus.
- Put the Pattern block into an empty slot of the right tower stairs.
- At the observation tower zoom into the wooden frame. The rope on it is tied too tightly to take, so use the Sickle to cut it free and take the Piece of rope, then take the Long pole leaning against the frame. Combine the Long pole with the Sickle and the rope.
- Cut down the hanging net in the ice city with it and take the second Pattern block from the fallen bundle on the rubble.
- Put the second block into the stairs and extend the steps until they are all equal in width. Selecting a step outlines it in blue, together with any steps linked to it. Start with the narrowest steps and check after each move which other steps changed; when every step reaches the same width, the stairs glow and are complete.
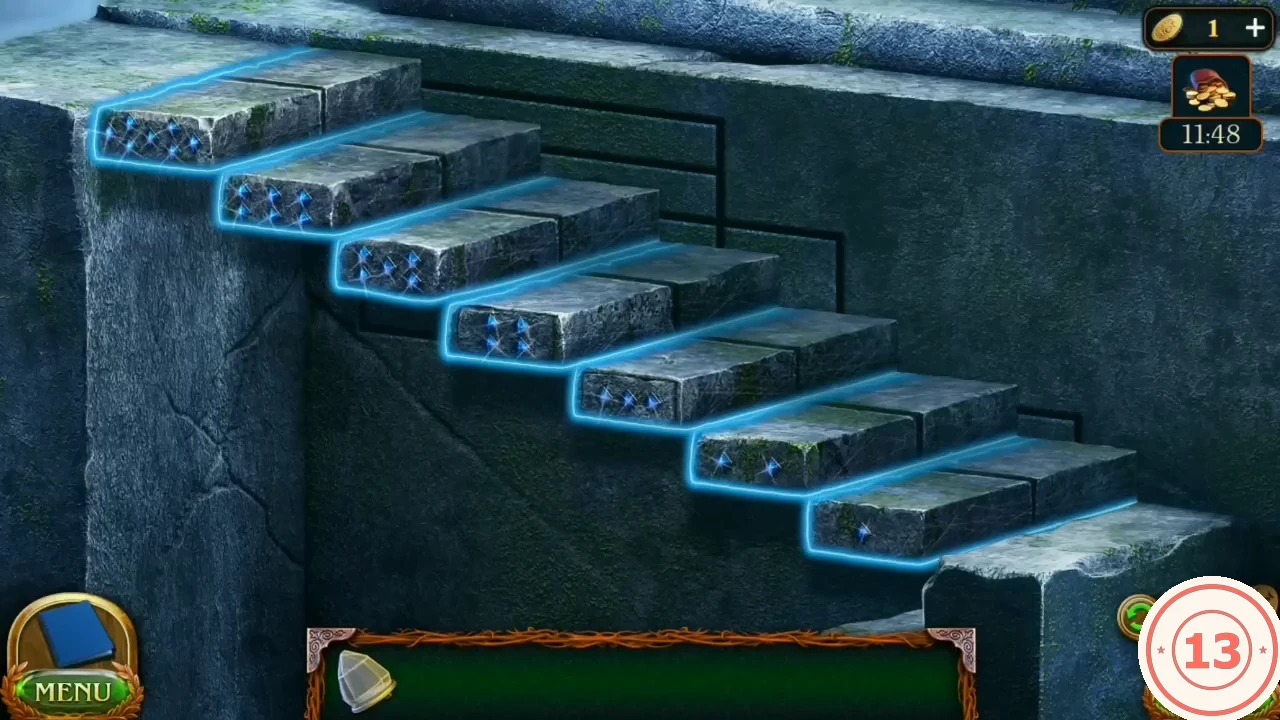
Solved: every step has the same width.
Puzzle: tower-top rings and the last manuscript
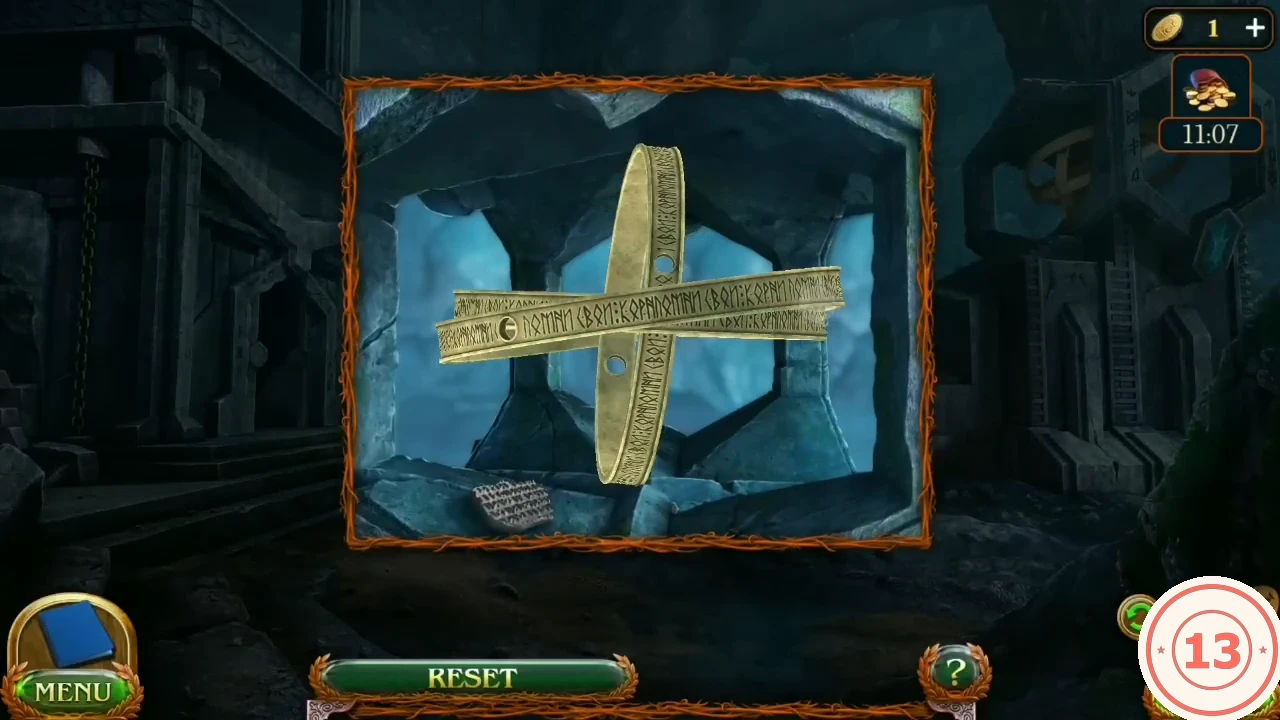
The rings on top of the tower must be stopped to open the temple door.
- Climb the tower and take the paper at the base of the rings: Historical Manuscript 8/8 (Sacred peak). All manuscripts unlock a puzzle in the BONUS menu; achievement Historian.
- Folnur knows how to stop the rings. Rotate the three gold rings until all three are seen edge-on, crossing at the centre like a six-pointed star (see the completed-state image). Line up one ring at a time and leave it in place while you turn the others.
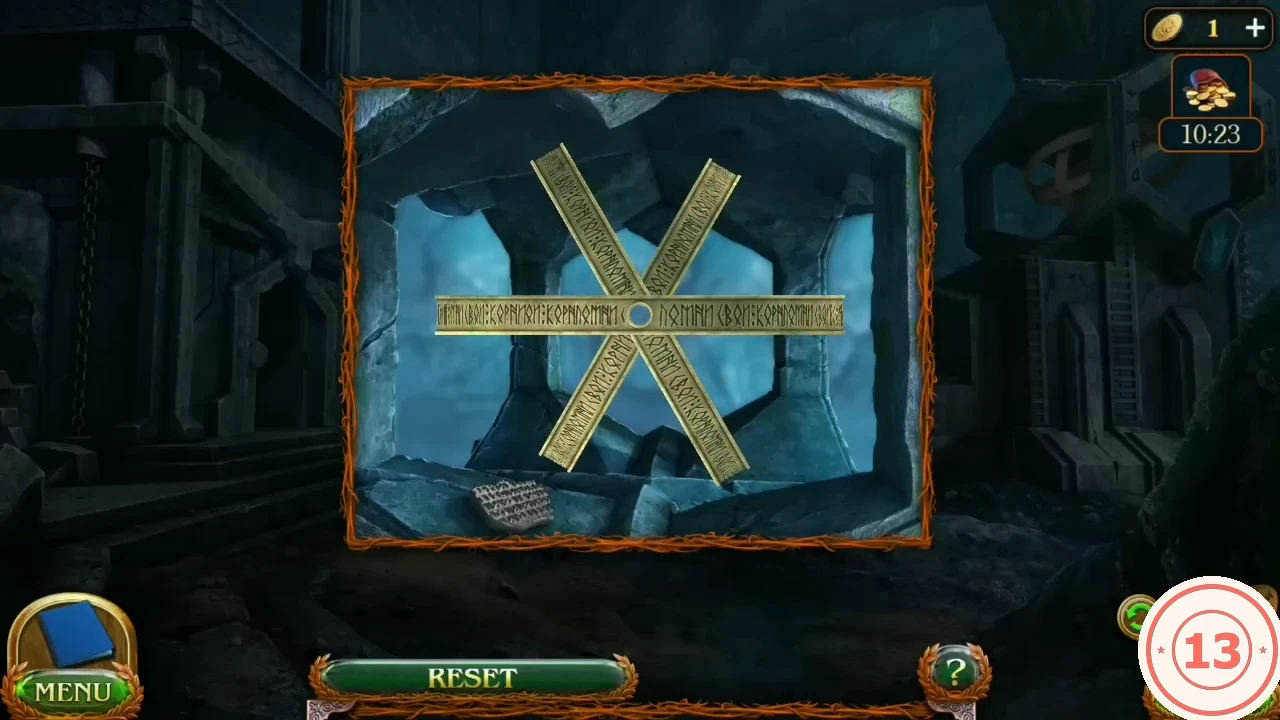
Completed state: all three rings edge-on, forming a six-pointed star. - Enter the museum. Tap high centre-right for the last Morphing object (45/45, achievement Master of Details; the 20 Bonus Game levels open in Extras) and the right side for the last knight item (8/8; the Extras collection puzzle opens).