Museum statue runes
The statue at the back of the museum bears the same medallion as the body in the temple.
- Put the Projection crystal into the socket of the museum's central altar.
- Zoom into the statue base and note its six runes, left to right: diamond, hooked stave, B, double hook, N, lightning.
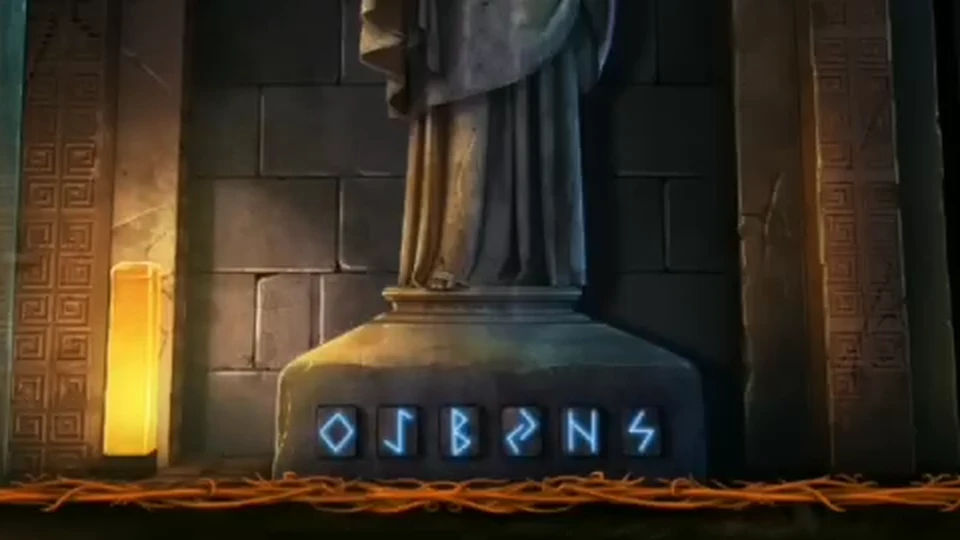
The six runes on the statue base, left to right.
Puzzle: temple rune tablet
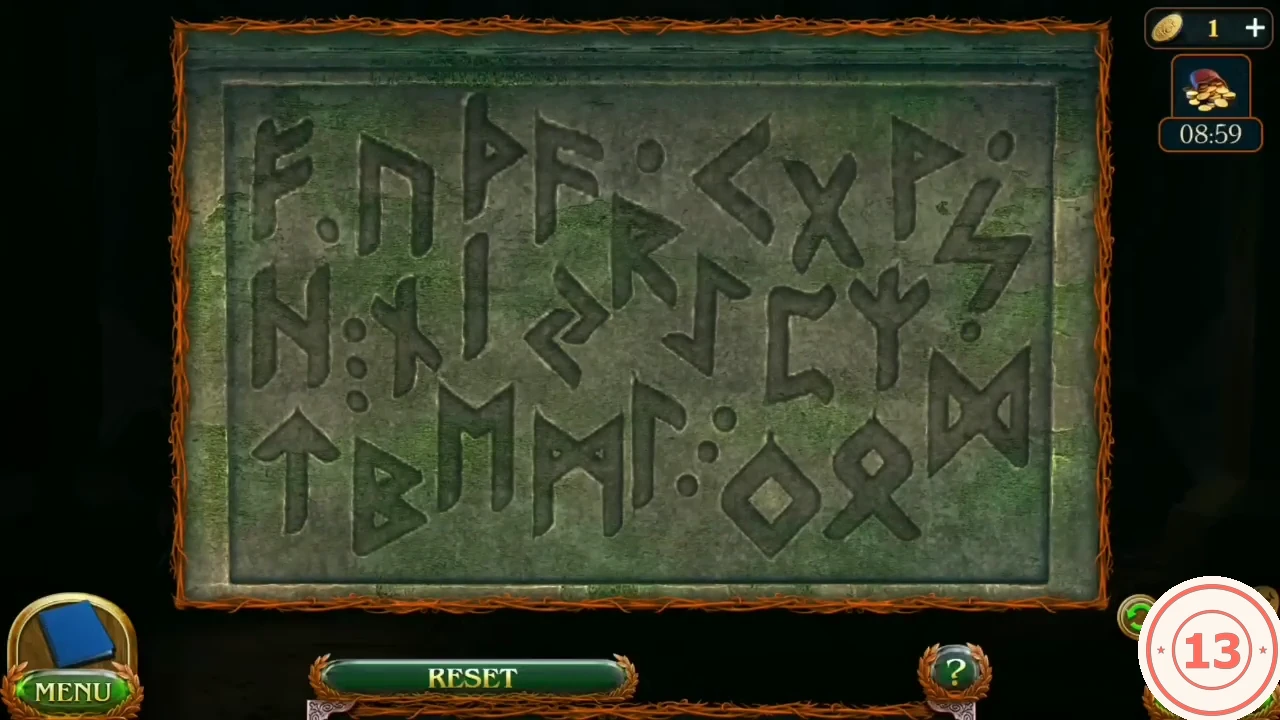
The tablet on the temple lectern takes six runes. The order is the one carved on the museum statue base.
- At the temple lectern tap the six runes on the tablet in the statue's order.CODEdiamond, hooked stave, B, double hook, N, lightning
Puzzle: generator and the museum crystal rays
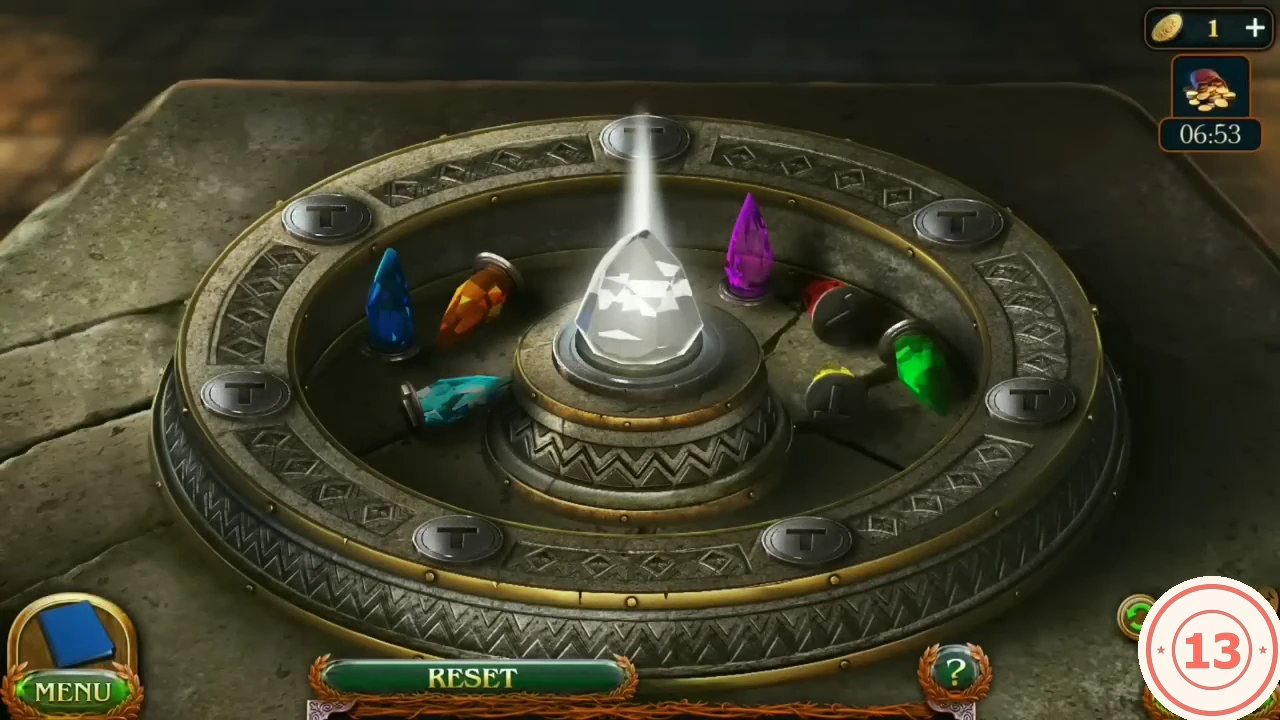
Rule: arrange the crystals so that their rays would be directed at other crystals.
- From the rubble pile in the ice city take the Part of the stone floor and a Shard of text. Take Oigela's medallion from the open sarcophagus.
- Fit the Part of the stone floor at the temple generator; mana is generated.
- Take the second Shard of text at the stopped tower-top rings and the third from the museum's left rubble. Fit all three into the broken plaque at the museum altar.
- Tap the seven loose crystals into the sockets, then swap them until all rays connect. Clockwise from the top socket: yellow, blue, red, cyan, orange, green, purple.CODETop yellow, upper-right blue, right red, lower-right cyan, lower-left orange, left green, upper-left purple
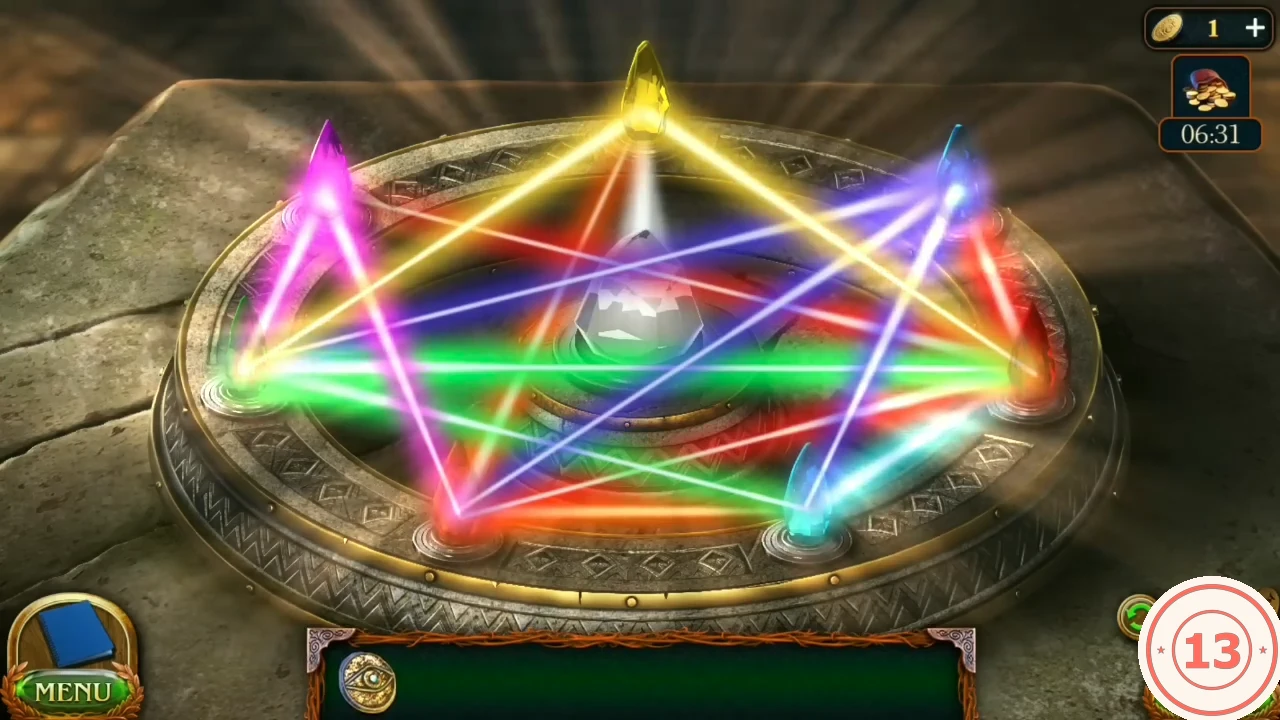
Solved: all rays connect.
Museum guide and the Soul catcher book
The guide tells of Oigela's spirit. Maaron must build a Soul catcher while Folnur leaves for a while.
- Watch the guide's story; then take the Book about the Soul catcher from the left rubble. It lists 15 parts and shows four glyphs at the lower left of the left page. Task Soul catcher starts.
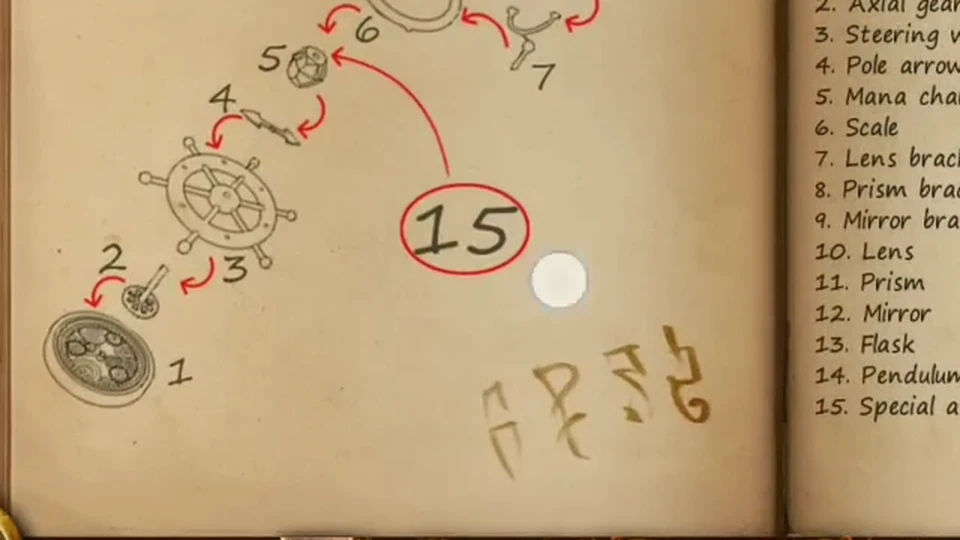
The four glyphs at the lower left of the book page are the door code.
Puzzle: museum door code lock
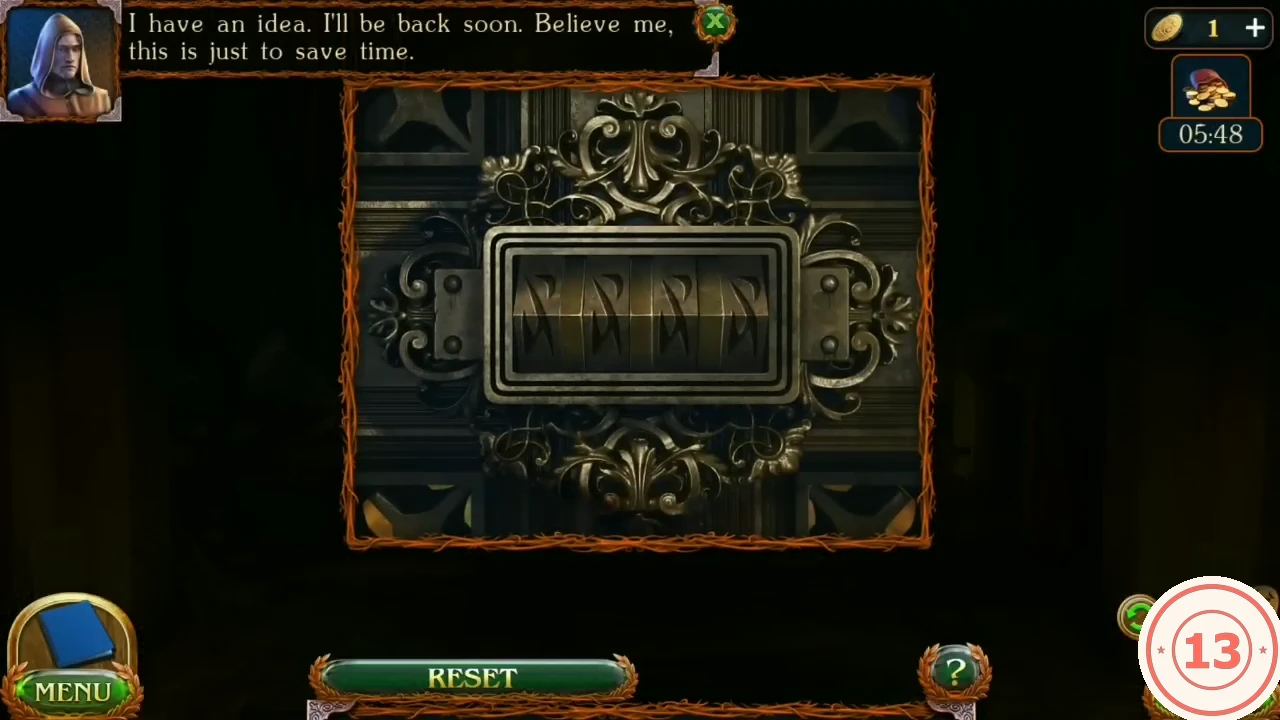
The museum's right door has a code lock with four symbol reels. The answer is the four glyphs in the Book about the Soul catcher.
- Set the four reels of the code lock on the museum's right door to the four glyphs from the book, left to right.
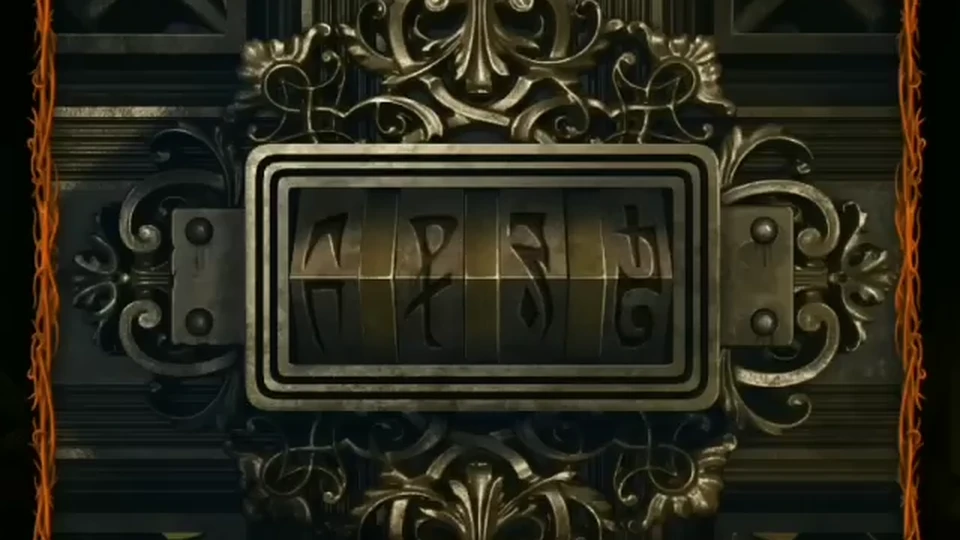
The code lock set to the book's four glyphs, left to right.
Search: Soul catcher parts room
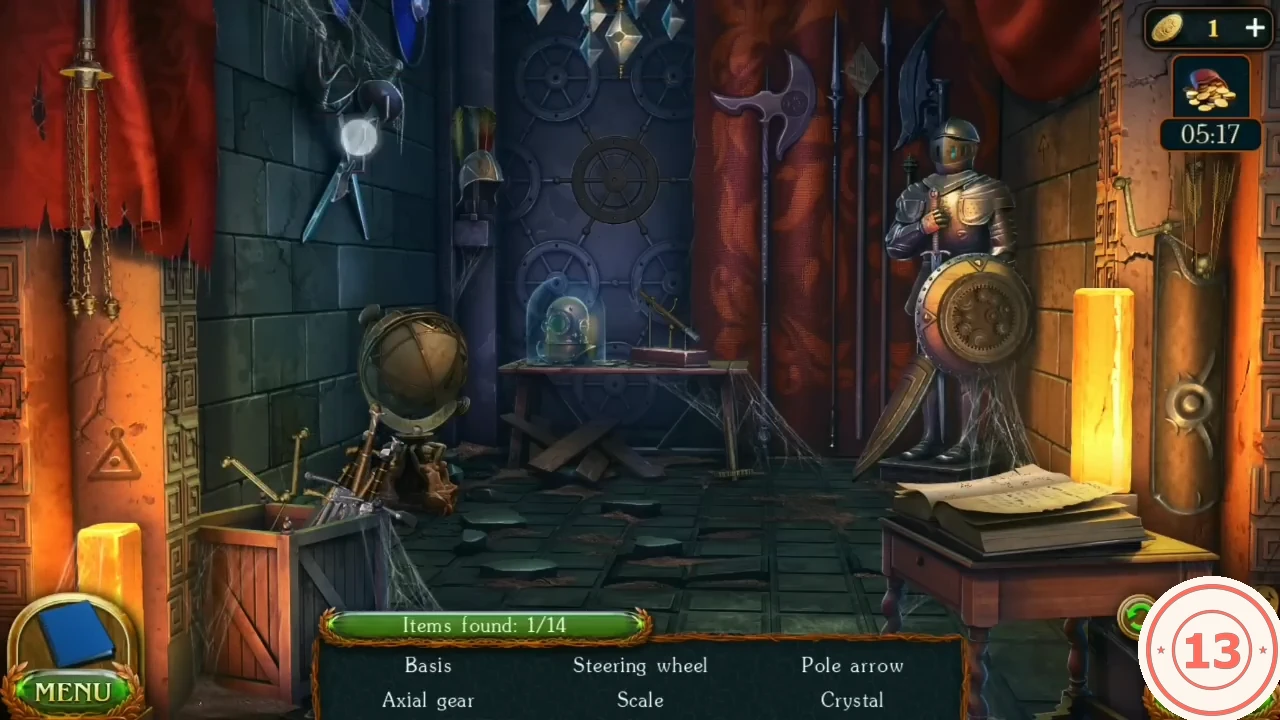
Items found 0/14: the list is parts 1-14 from the book. Some parts are inside the globe, the chandelier, the knight armour and the diving helmet.
- Take the Pole arrow from the crossed weapons hanging on the upper-left wall.
- Zoom into the globe and tap it so its halves open; take the Scale (the ring inside). Leave the close-up and take the Prism bracket from the open crate in the lower-left corner.
- Take the Axial gear from the floor under the right end of the central table, then the Steering wheel from the upper-left wall.
- Tap the crystal chandelier at the top so it lowers, then take the Prism from it.
- Zoom into the knight armour for the Crystal (visor) and the Basis (lower right). Find the Mirror bracket on the right side of the room and the Flask (glass dome over the diving helmet).
Puzzle: diving helmet symbol lock
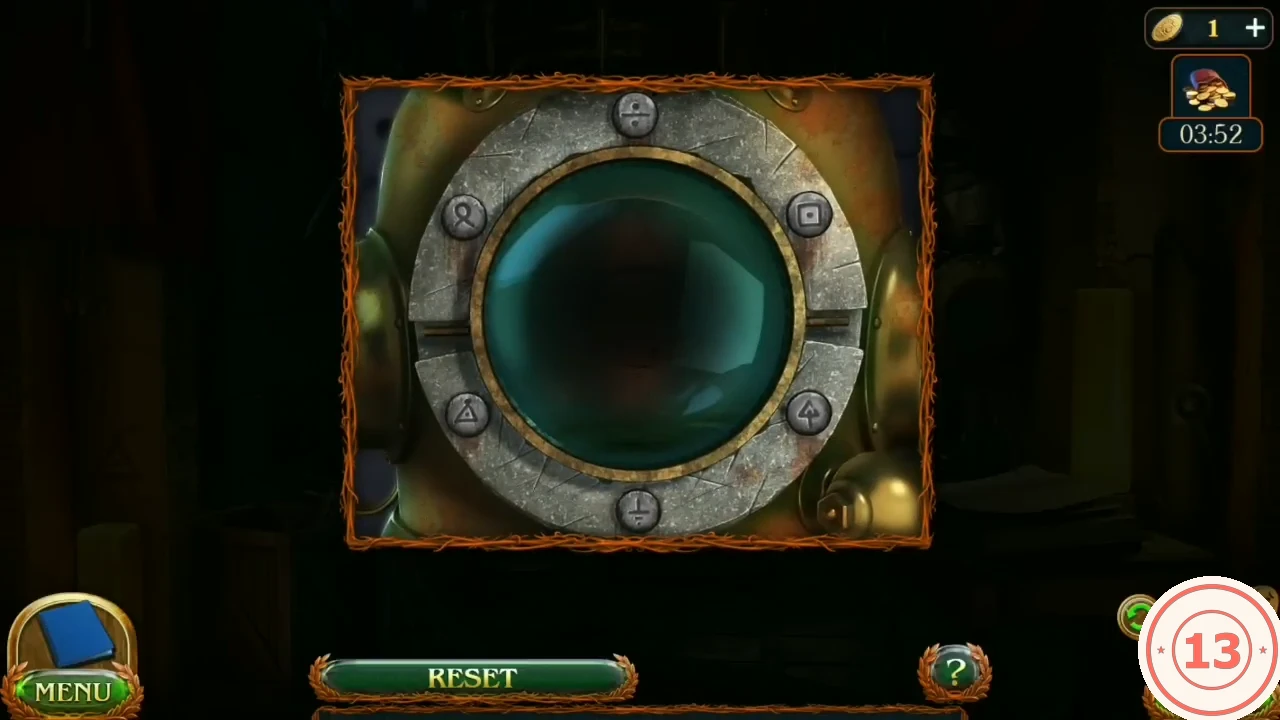
The faceplate of the diving helmet on the table is locked by three symbols hidden around the parts room.
- Take the Pendulum at the helmet table. Open the helmet faceplate: tap the three symbols found in the room (triangle with a dot on the left pillar, dotted square on the wall by the globe, branched arrow beside the knight).
Completing and charging the Soul catcher
The last parts come from the helmet and the wall; then the Soul catcher is assembled and charged.
- Take the Lens from the faceplate, then the Lens bracket at the helmet table. Back in the room, the last part, the Mirror, is the small diamond-shaped plate on top of one of the tall poles in the weapon rack, high up just above and left of the knight armour; tap it (14/14).
- Back in the museum Folnur returns with the Talking mask. Assemble the Soul catcher in the book's numbered order (Basis, Axial gear, Steering wheel, Pole arrow, crystal, Scale, brackets, Lens, Prism, Mirror, Flask, Pendulum).
- At the temple generator, open the beam close-up and place the Soul catcher on the floor left of the beam's stone base. Tap the glass dome to lift it off, then tap the crystal so it floats onto the top of the stone base inside the blue beam. When it glows brightly, tap it to return it to the catcher's stand, tap the dome to put it back over the device, and take the charged Soul catcher.
Sacred peak: catching Oigela's soul and the totem skulls
Travel to the Sacred peak at Bryn pass. Oigela asks for the skulls of the four totem animals on the four obelisks.
- Open the centre of the stone spiral and place the Soul catcher there. Tap the glass dome to lift it aside, then put Oigela's medallion into the cup on top of the crystal (the parts did not move when tapped before the medallion was in place). Tap the movable parts so each swings into its working position; tap the square mirror at the left (it rises above the cup), the round lens at the right (it swings over to the left), the small prism beside the cup (it turns to the right) and the arm at the upper left. When the rays form a glowing triangle above the cup, tap the dome to put it back. After the burst of light Maaron says he cannot talk to the spirit without a mask: drag the Talking mask onto the dark spirit rising above the catcher.
- The skull lying lower right at the Sacred peak is a snake skull and is not needed. Collect: Ram skull at the castle camp campfire, Horse skull on the rock lower right in the castle courtyard, Eagle skull in the bird nest at the observation tower, Wolf skull on the right wall shelf in Maaron's hideout.
- Place the skulls on the obelisks, left to right: Eagle, Wolf, Ram, Horse.CODEEagle, Wolf, Ram, Horse
Puzzle: ritual of liberation
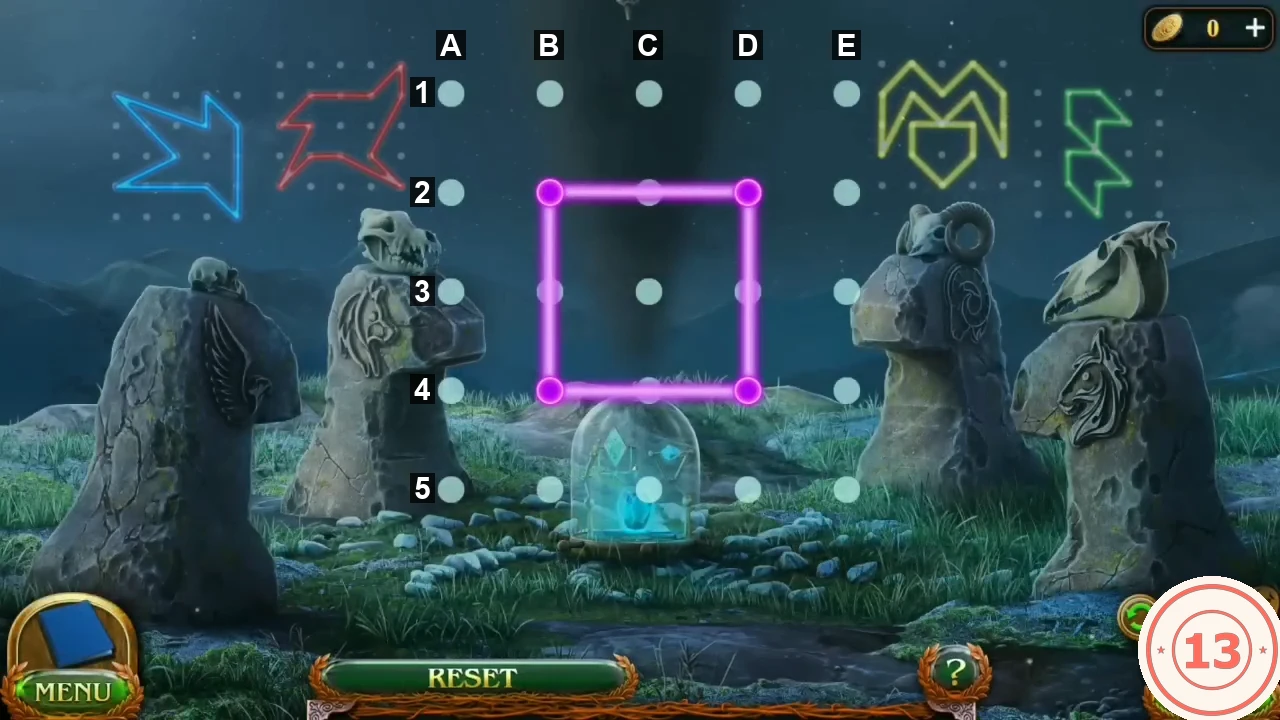
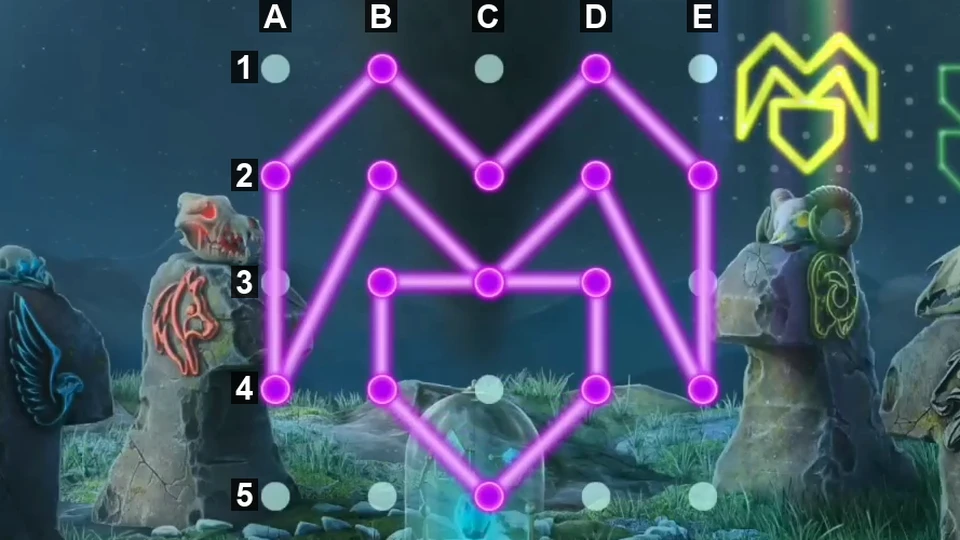
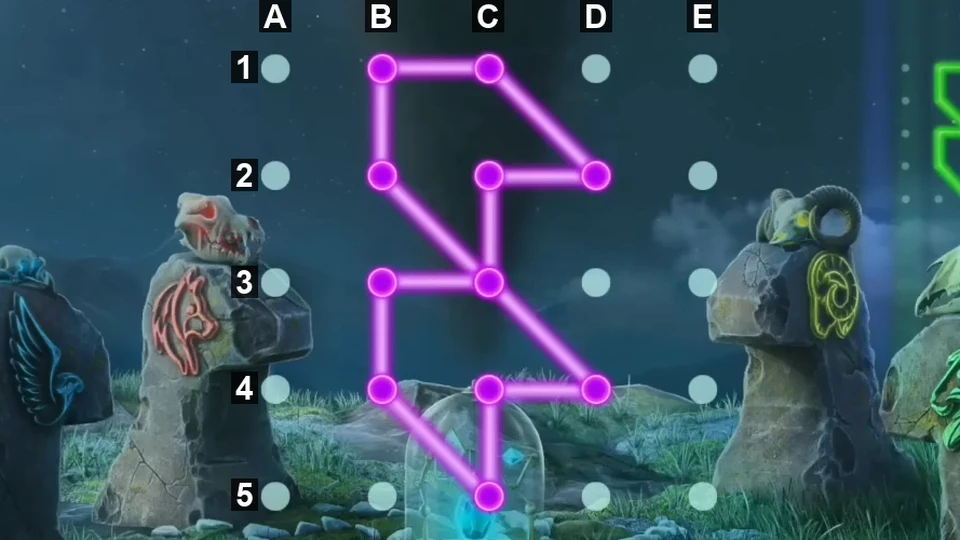
Rule: move the lines to create the right patterns. On a 5x5 dot grid (columns A-E left to right, rows 1-5 top to bottom) the outline starts as a square (B2-D2-D4-B4). Grab any straight line of the outline and drag it onto another dot: the line bends at that dot, so the dot becomes a new corner while the line's two ends stay where they were. For example, dragging the top line of the starting square onto A1 gives the outline B2-A1-D2-D4-B4. Keep bending lines until the outline matches the target; the codes below list the finished outlines corner by corner, not a fixed drag order. Four target glyphs are shown at the top; after each match the outline resets to the square.
- Blue glyph: A1-D2-D1-E2-E5-D4-B4-A4-C3-B2-back to A1.CODEA1-D2-D1-E2-E5-D4-B4-A4-C3-B2-A1
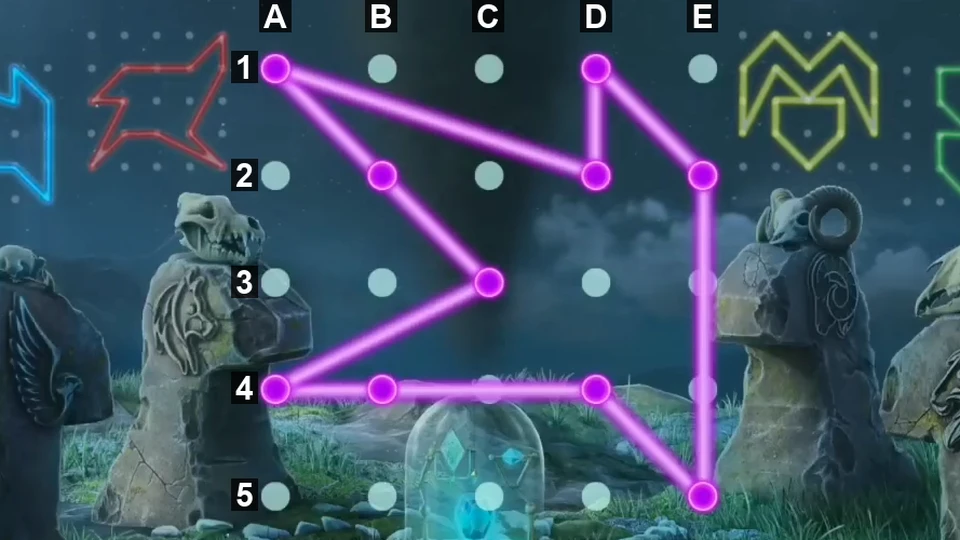
Blue glyph completed (labels added). - Red glyph: E1-D2-B2-A3-B3-A5-B4-C4-E5-D4-E2-back to E1.CODEE1-D2-B2-A3-B3-A5-B4-C4-E5-D4-E2-E1
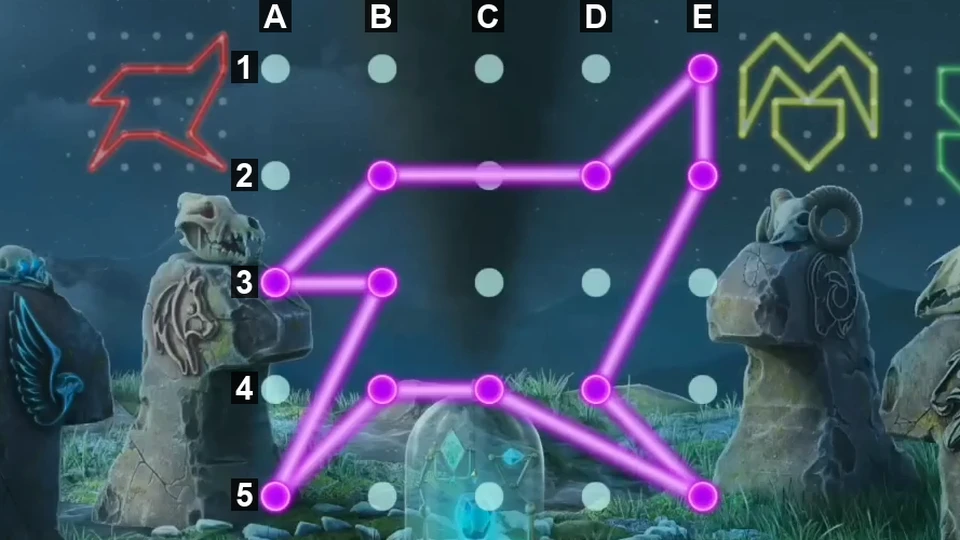
Red glyph completed (labels added). - Yellow glyph: A2-B1-C2-D1-E2-E4-D2-C3-D3-D4-C5-B4-B3-C3-B2-A4-back to A2.CODEA2-B1-C2-D1-E2-E4-D2-C3-D3-D4-C5-B4-B3-C3-B2-A4-A2
Yellow glyph completed (labels added). - Green glyph: B1-C1-D2-C2-C3-D4-C4-C5-B4-B3-C3-B2-back to B1.CODEB1-C1-D2-C2-C3-D4-C4-C5-B4-B3-C3-B2-B1
Green glyph completed (labels added). - Watch the ending: the ritual frees Oigela and the story closes with The end.