Crossroads and the canyon edge
Chapter 1 opens at the crossroads outside Folnur's village. Collect the first tools, chase the boar away and uncover the buried chest at the canyon edge.
- From the main menu choose the episode list and start Chapter 1, Unchildlike mischief. The tutorial offer can be accepted or skipped; it does not change the route. If you want every achievement, read the Achievements section first: three of them require playing all chapters without skipping mini-games, without hints and without skipping dialogues or videos.
- Zoom into the water trough in the right foreground, below the shrine, and take the leaf-patterned Iron flower.
- Open the satchel at the small camp to collect Historical Manuscript 1 of 8.
- Zoom into the signpost. Take the Screwdriver shaft, then the Stick.
- Use the Stick on the beehive hanging in the tree at the upper right. The bees chase the boar off the right-hand road.
- Collectibles here: the first book collection item is at the signpost (book set 1/7) and the first Morphing object is in the bush at the top centre (Morphing 1/45).
- Take the right road to the Canyon edge. Collect the book item among the rocks at the lower left (book set 2/7) and the Morphing object on the right cliff (Morphing 2/45).
- Zoom into the pile of stones and move them aside. A buried chest appears; its lock needs three missing honeycomb pieces.
- Collect the three Wooden honeycombs: from the red mineral vein on the left cliff, from the base of the stone pillar, and the third from the twisted tree with the hanging ropes on the right: zoom into the tree and tap the grass at the foot of the rope on the lower right of the close-up. (The rocky close-up in the middle of the scene holds nothing to take at this point.)
- Place the three Wooden honeycombs on the chest lock to start the puzzle.
Puzzle: honeycomb rope chest
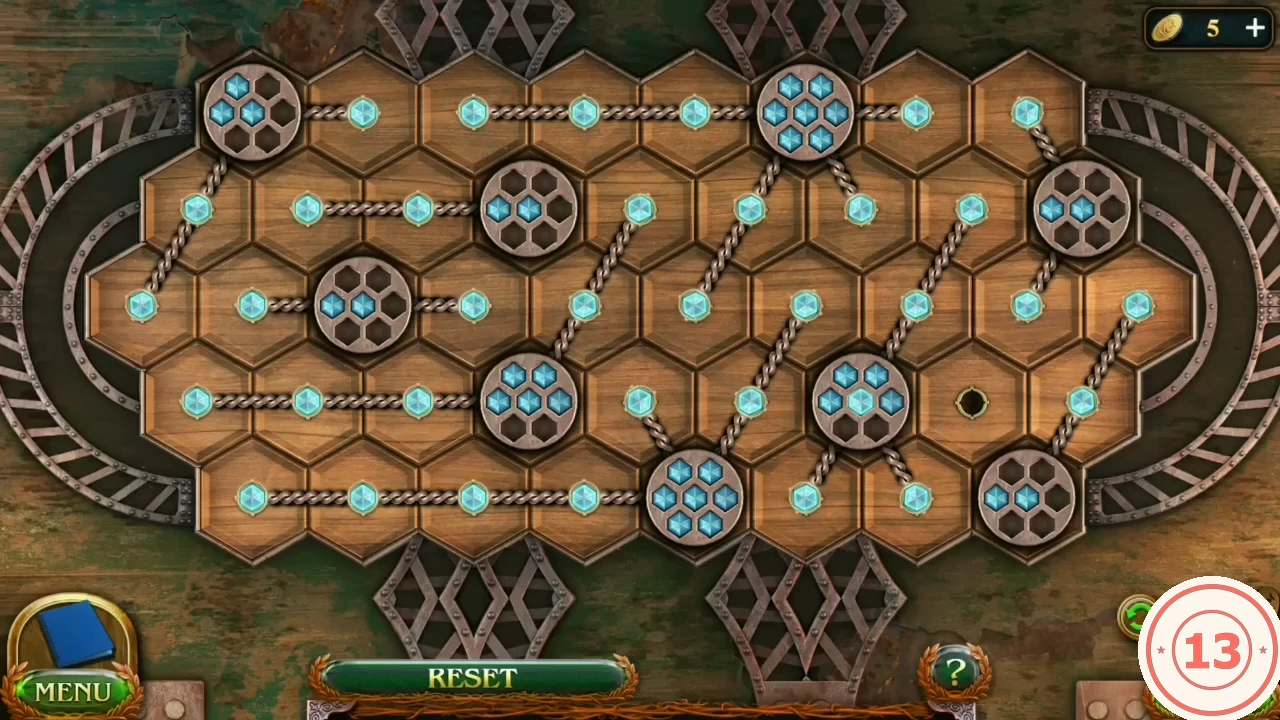
Round dials sit among the holes of the honeycomb lid. Each dial shows a number of lit crystals, and that number is how many holes its ropes must cover. Ropes run in straight lines from a dial, sideways or diagonally along the honeycomb. Reset restarts the board. The image under the title shows the completed board.
- Count the lit crystals on each dial. Drag from a dial outwards along a straight line of holes to lay a rope over them; one dial can send ropes in several directions, and their holes together must equal its crystal count (for example, a 2-crystal dial can cover two holes on one side or one hole on each side). Each hole takes only one rope, so start with the dials that have the fewest free lines, such as the 7-crystal dial at the top. A few holes stay empty at the end. When every dial has exactly its count, the lock opens.
- Open the chest and take the Roll of rope and the fan-shaped Shelter key.
Descending to the ruins
Rig the rope at the canyon edge and climb down to the ruins below.
- Use the Roll of rope on the tree at the canyon edge to tie it off.
- Folnur needs belaying gear. Pick up the Ascender: it lies in the grass at the far right of the foreground, just right of the tall spiky plant and below the twisted tree with the ropes.
- Use the Ascender on the cliff edge to descend to the ruins.
- Zoom into the fallen traveller and take the Traveler's key from his hand. (The flask beside him is needed later.)
- Tap the stone head's mouth to start the slider puzzle.
Puzzle: stone head serpent slider
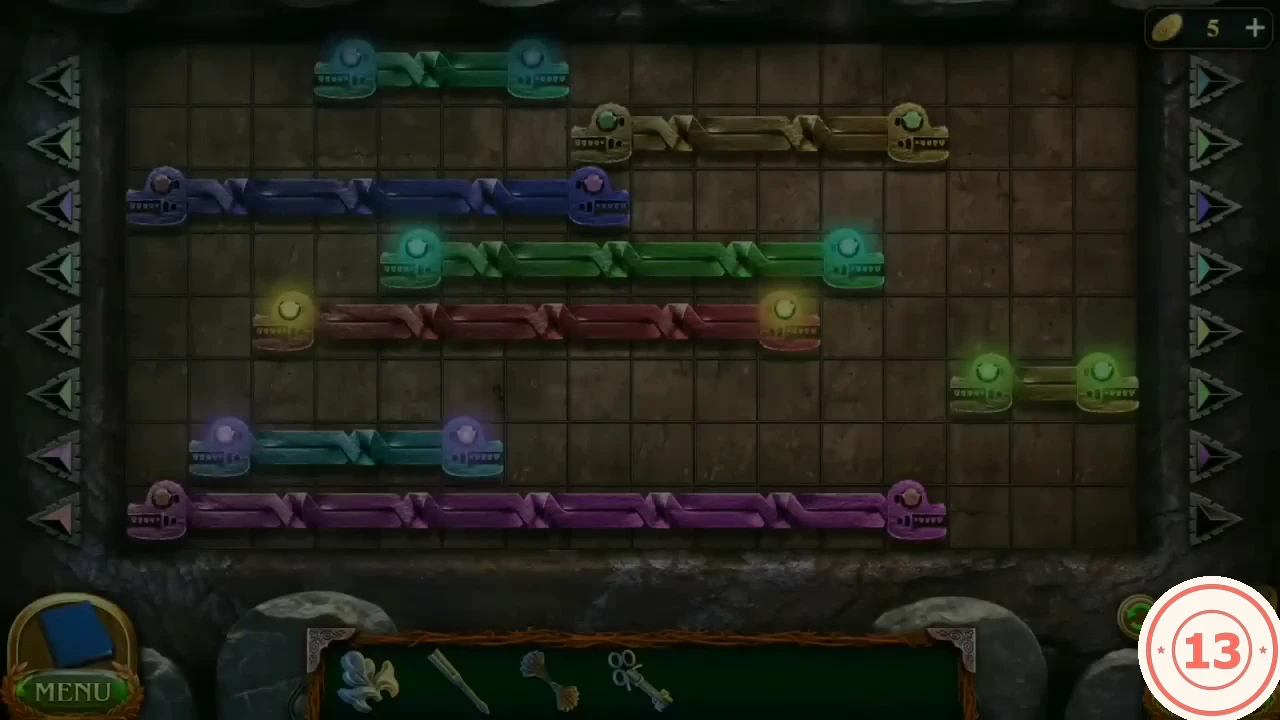
Eight two-headed stone serpents lie in eight rows of a 16-column grid. Each serpent slides only left or right within its own row. A head's gem glows only while no other head stands in the same column, so the goal is exactly one head in every column.
- Drag the serpents so that their left heads stand in these columns, counting columns 1-16 from the left edge of the grid: row 1 (short green, top) column 12; row 2 (gold) column 2; row 3 (blue) column 3; row 4 (green) column 1; row 5 (red) column 6; row 6 (short olive) column 11; row 7 (teal) column 5; row 8 (long purple, bottom) column 4. The order of moves does not matter, because the serpents never block each other. When all 16 gems glow, the mouth opens. Dragging each serpent straight to its column finishes the board in well under a minute, which earns the achievement Lightning as the mouth opens.
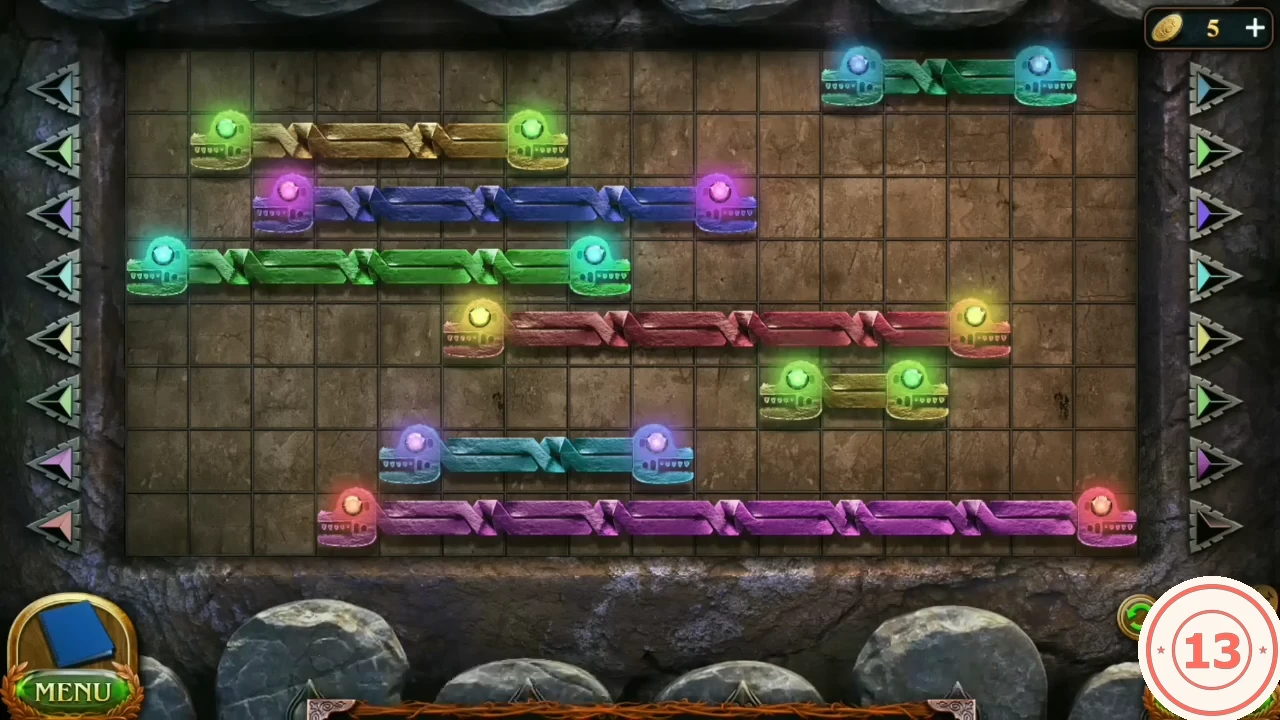
Solved: one head in every column and all 16 gems glow (top serpent left head in column 12). - Take the note from the mouth cavity (it says to look in the schoolyard) and the Screwdriver handle. Combine the handle with the Screwdriver shaft to make the Screwdriver.
Schoolyard and the lion fountain
The ruins have a shelter door with a two-key lock and a boarded niche; both come later. Go to the schoolyard first.
- Note the shelter door (two key slots) and the boarded niche, then climb back up and take the left path from the crossroads to the Schoolyard.
- Collectibles: book item near the door on the right of centre (book set 3/7) and the Morphing object on the upper-left facade above the fountain (Morphing 3/45).
- Zoom into the fountain drain grate and take the winged Iron flower.
- Zoom into the house door and unscrew the bent lion mask with the Screwdriver.
- Place the Lion mask in the centre of the fountain between the lions. After the scene with the teacher, Mr Dornord, take the Barn key.
- Use the Barn key on the barn door on the right to enter the barn.
Puzzle: barn pipeline details
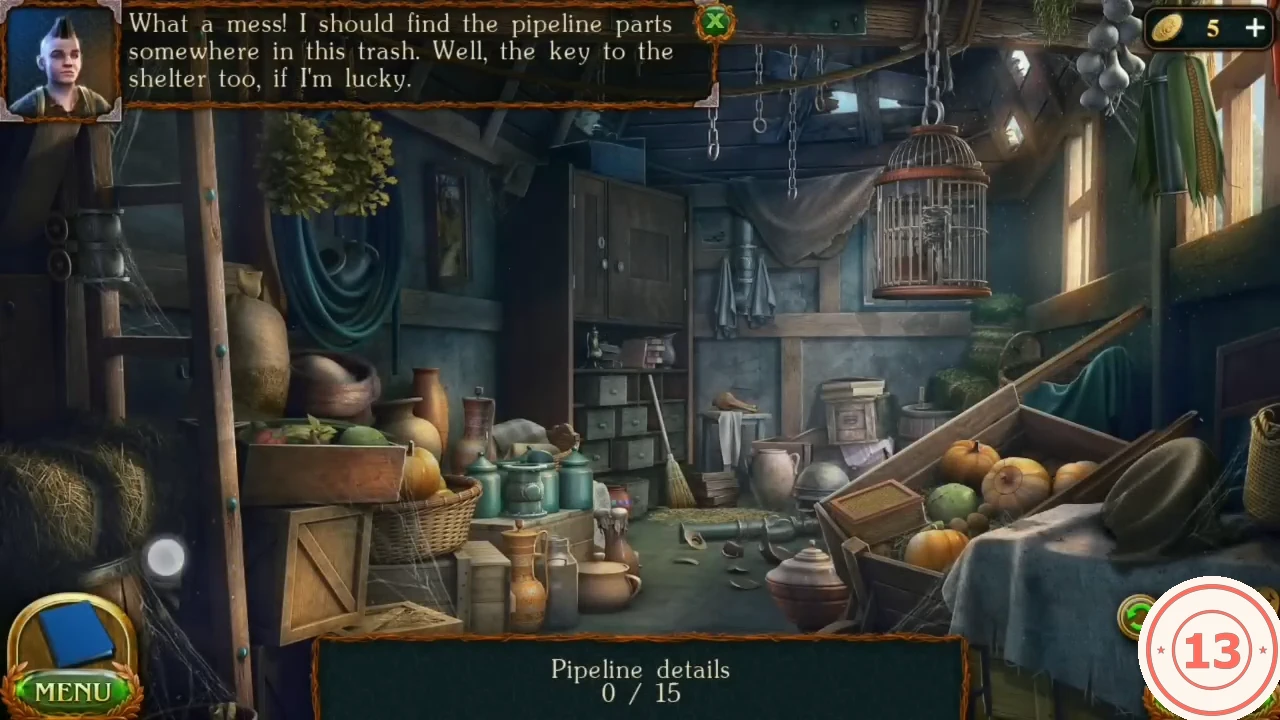
An interactive hidden-object scene: find the 15 pipeline details. Several are inside containers that must be opened first (vegetable crate, cupboard and small safe, bird cage, pumpkin crate).
- Main barn view: tap the pipe fitting hanging on the left wall beside the ladder, the curved pipe inside the coiled blue hose on the left wall, and the grey pipe lying on the floor in the centre (3/15).
- Tap the vegetable crate on the left. In the close-up take the pipe elbow to the right of the crate, then tap the vegetables aside and take the long pipe underneath (5/15).
- Tap the cupboard on the back wall. Take the pipe elbow on the upper-right shelf, open the left cupboard door, take the wheel from inside and put it on the safe to open it, then take the parts from the safe and the small box on the lower-left shelf (8/15).
- Back in the main view, take the pipe hanging from the chains above the back wall, left of the bird cage (9/15).
- Tap the bird cage. Free the chain on the cage door and take the two parts: one beside the cage at lower right and one inside the cage (11/15).
- Tap the pumpkin cart on the right. Open the small lidded box and move the pumpkins to take two more parts (13/15).
- Take the part on the right side of the barn next to the window (14/15), then the part among the teal canisters in the centre (15/15). You receive the Plumbing parts.
Puzzle: fountain pipes
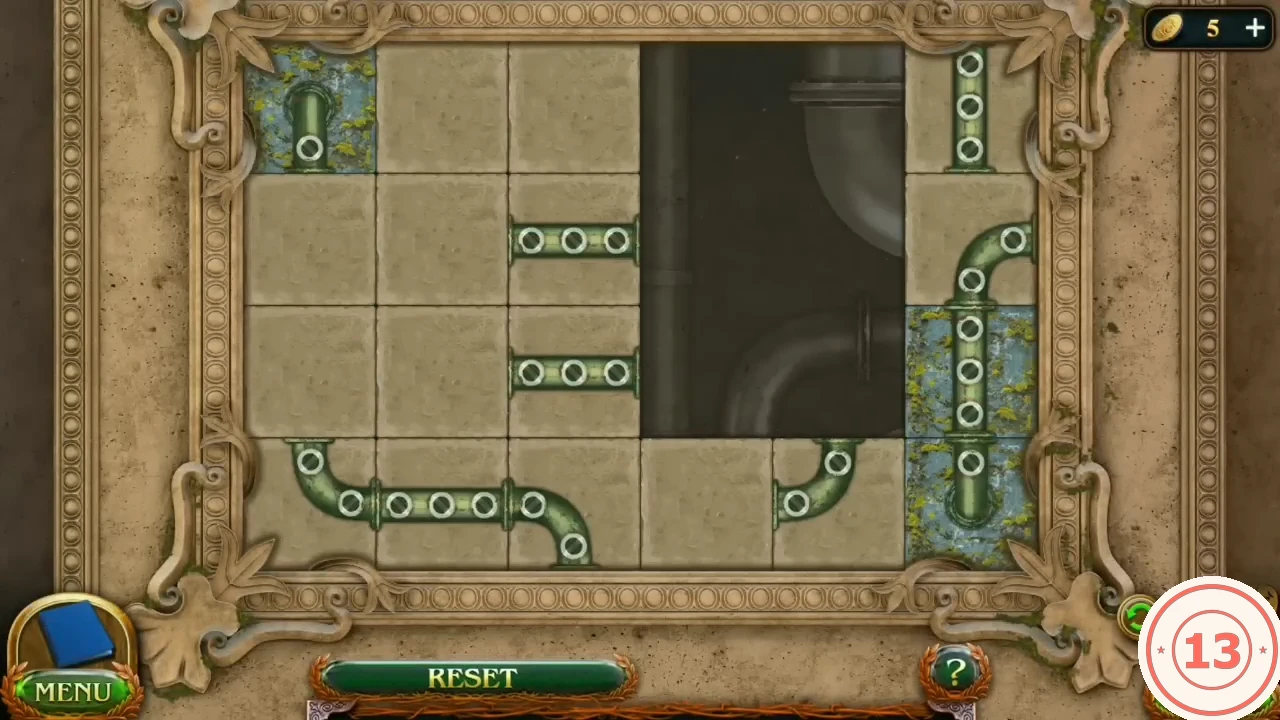
Repair the fountain to reach the key hidden in its drain. The pipe puzzle has three stages of increasing size. Each board is a grid of stone tiles with several empty spaces; the mossy tiles holding the source and the outlet stay fixed. Because tiles can be slid in many orders, the guide gives the goal and a method rather than every slide; the step images show each completed stage.
- Use the Plumbing parts on the fountain and look up at the column to open the pipe puzzle.
- In each stage, slide single tiles into the dark empty spaces next to them until one continuous green pipe runs from the mossy source tile to the mossy outlet tile. Build the pipe outwards from the source, push plain tiles without pipe into corners where they are out of the way, and use the empty spaces to bring the next piece you need into position. When a stage is complete the next board appears; after the third, the fountain flows.
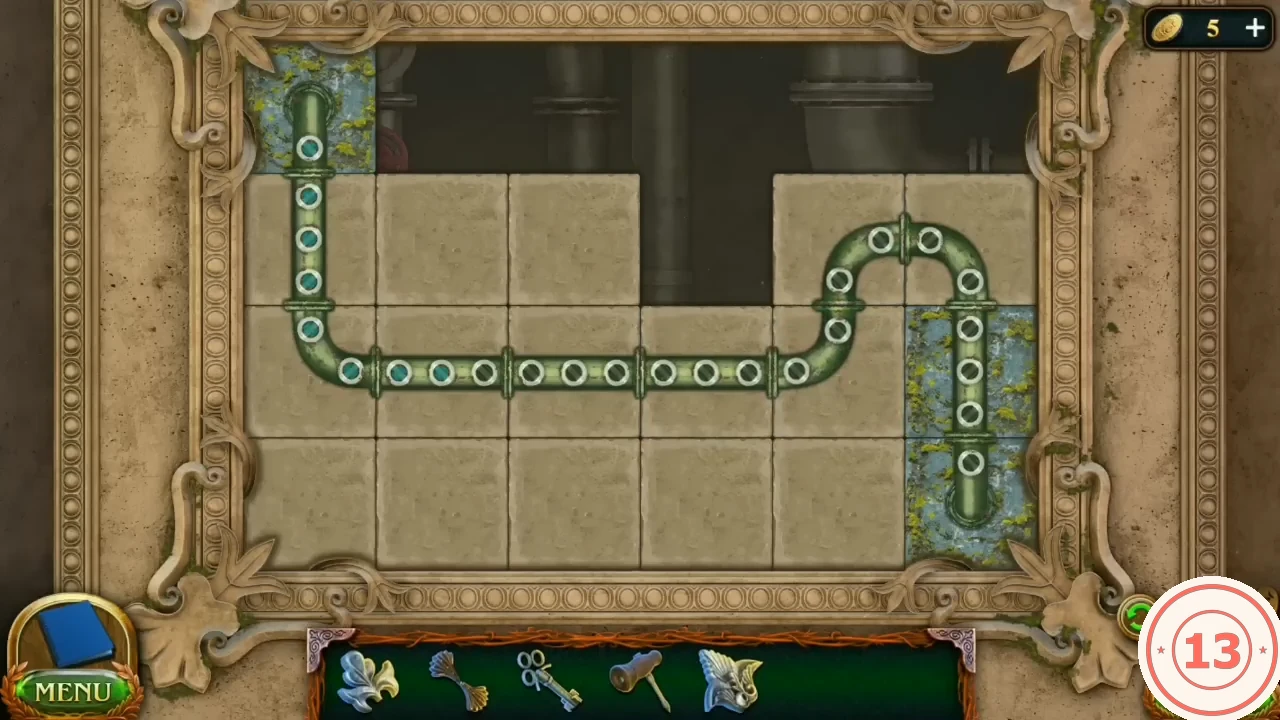
Stage 1 completed: one continuous pipe. 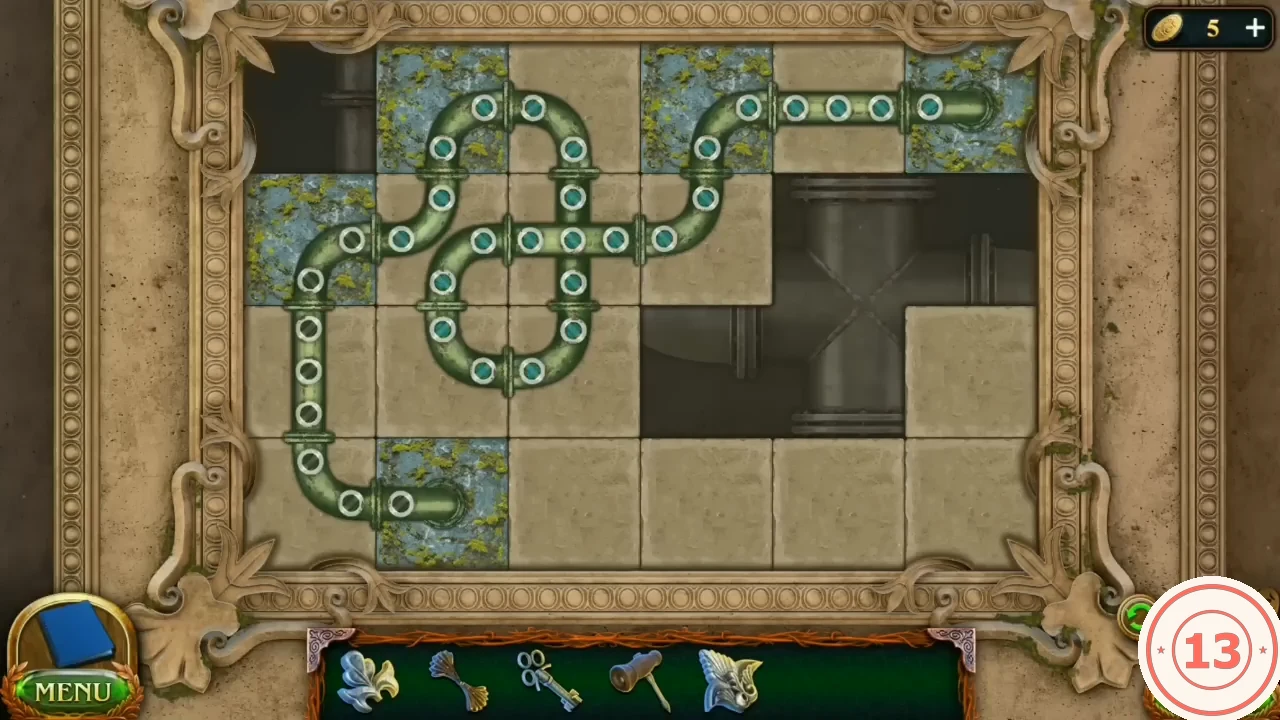
Stage 2 completed. 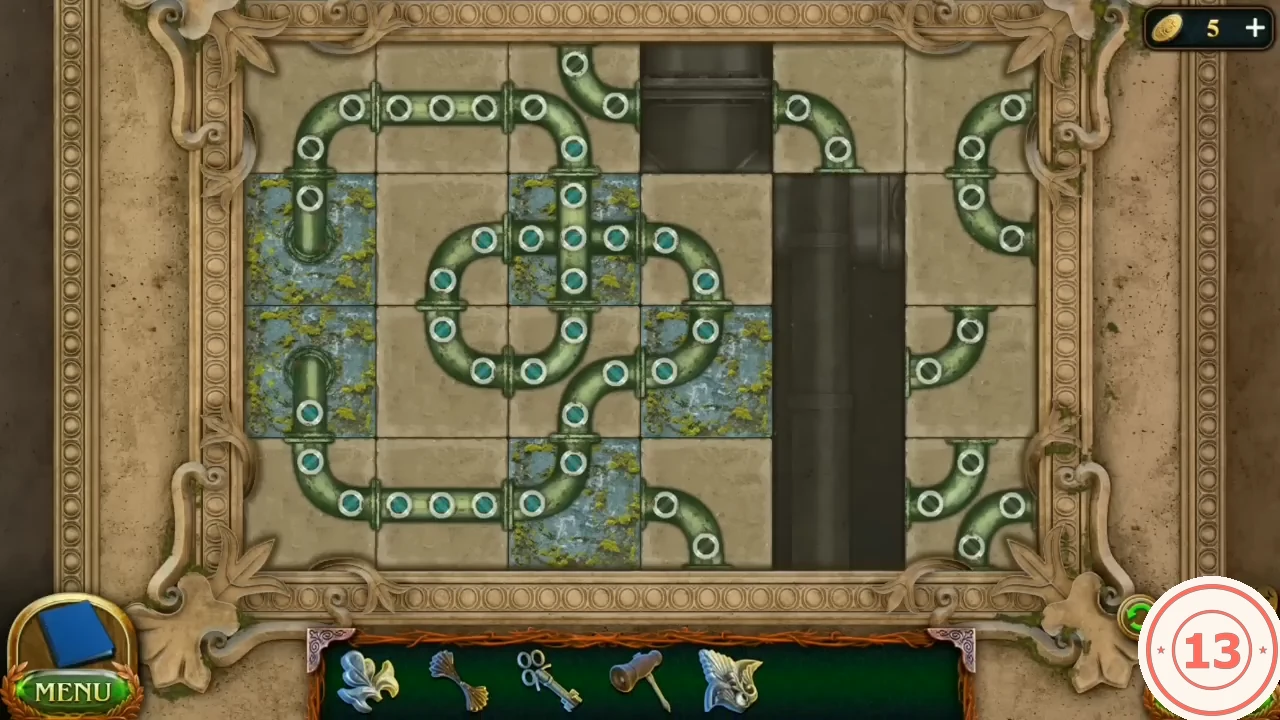
Stage 3 completed; the fountain starts to flow. - Use the Screwdriver on the drain grate and take the bone-shaped Shelter key. Task Re-hidden key completes.
Opening the shelter
Both Shelter keys are now in hand. Open the camp box on the way and unlock Folnur's shelter in the ruins.
- Return to the ruins. Collect the first ring collection item at the upper centre (ring set 1/8) and the Morphing object near the shelter door emblem (Morphing 4/45).
- At the crossroads camp, open the box with the Traveler's key and take the Flint.
- At the shelter door, insert the bone-shaped key first and then the fan-shaped key (the opposite order gives "Not in that order").
- Inside the shelter collect the ring item in the rubble right of the stone workbench, at the foot of the mossy right wall (ring set 2/8), and the Morphing object on the upright wooden beam at the upper left, above the wooden sawhorse (Morphing 5/45). Task Experiment starts.
- Zoom into the contraption, move the book aside and take the lily-shaped Iron flower and the Toolset key.
- Open the tool chest with the Toolset key. Take Manuscript 2 of 8, the Gear transmitter and the Hammer.
- Zoom into the grindstone mechanism and place the Gear transmitter to start the block puzzle.
Puzzle: grindstone gear blocks
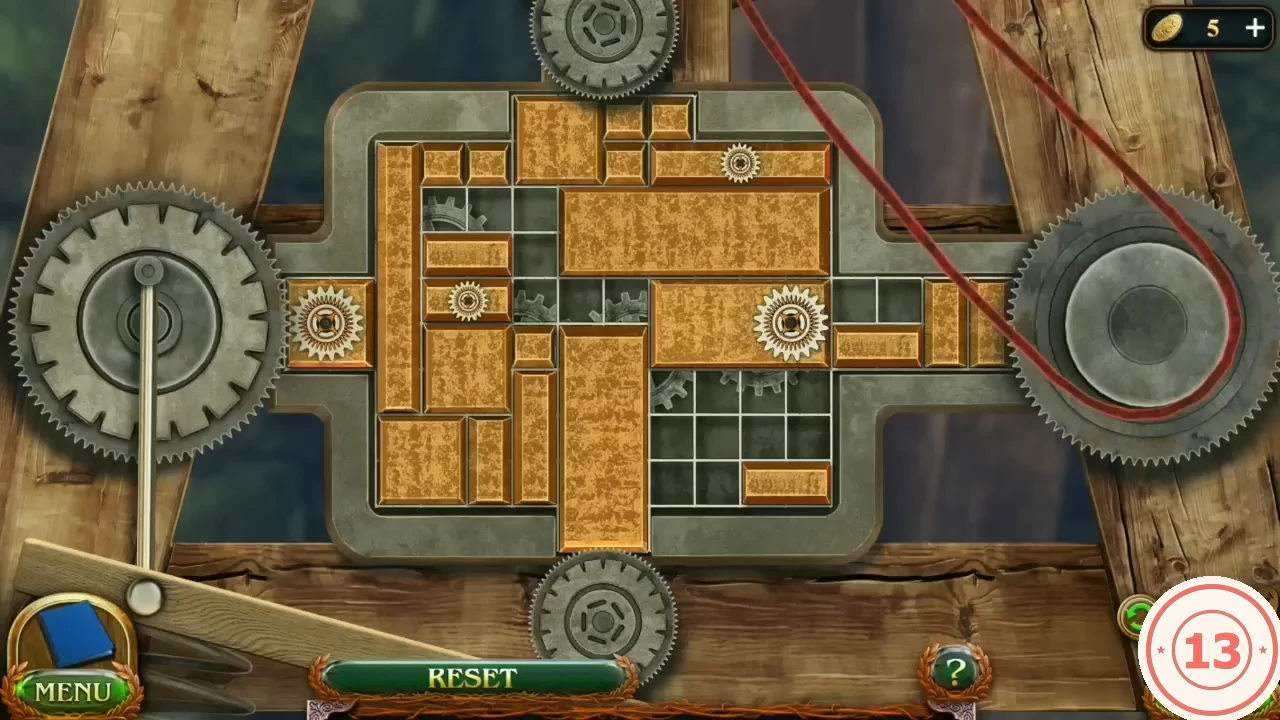
The tray is cross-shaped, with a channel on each side leading to an outer wheel: the big wheel on the left, the belt wheel on the right and the small gears above and below. Four wooden blocks carry a gear. The goal is a gear block in every channel so each one meshes with its outer wheel. It is a sliding-block puzzle, so the guide gives the target and a method rather than each move.
- The gear block in the left channel already sits in place. Drag the other blocks into the empty spaces to clear paths, then move the large gear block into the right channel against the belt wheel, the long four-cell block with a small gear into the top channel under the top gear, and the small two-cell gear block down into the bottom channel above the bottom gear. When all four channels hold their gear block, the grindstone turns. If this is your third mini-game in a row without Skip, the achievement Clever appears as the grindstone starts turning.
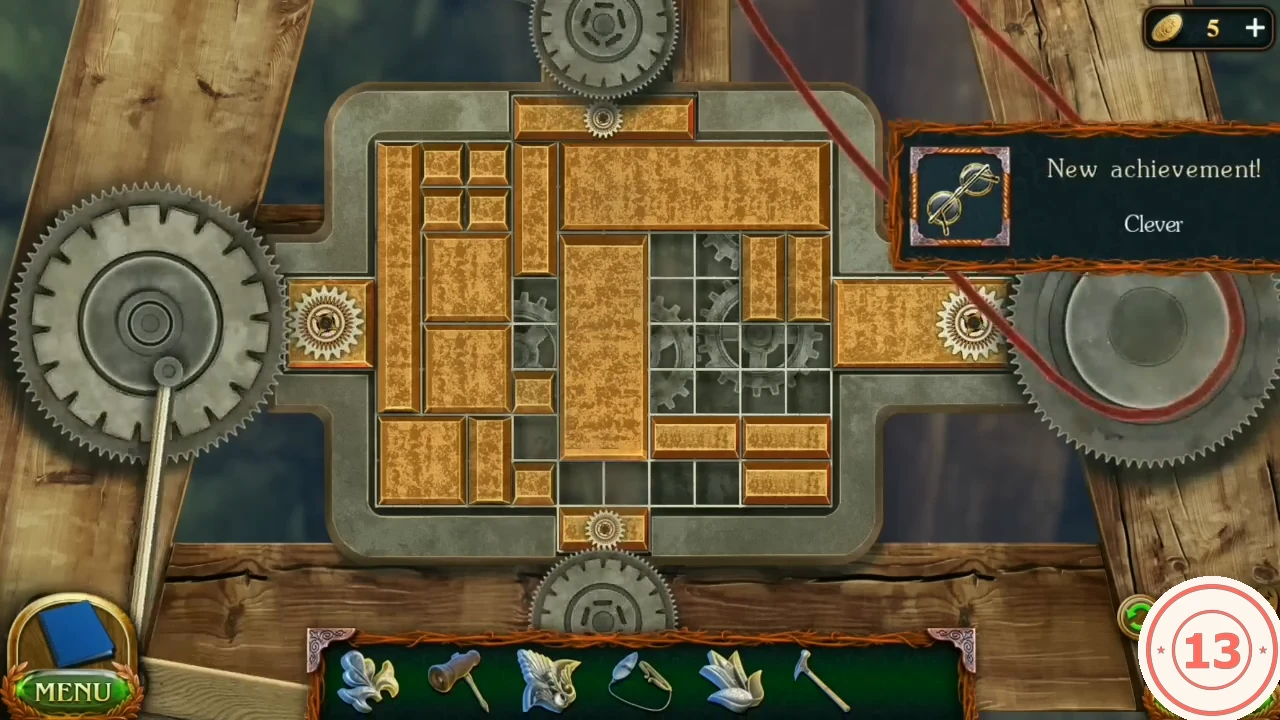
Solved arrangement; the Clever achievement appears as the grindstone starts turning. - Folnur notes the grindstone overheats and needs something greasy.
Fat, nuggets and crystals
Light a campfire to render fat, open the shrine with the three Iron flowers and chip mineral nuggets for the experiment.
- At the canyon edge take the dry bush: Brushwood.
- At the crossroads camp zoom into the fireplace and drag the raw meat from the checked cloth beside the camp box into the pot hanging on the tripod.
- Place the Brushwood in the camp fireplace at the crossroads.
- In the ruins, take the Flask with alcohol from beside the fallen traveller.
- Back at the camp, pour the Flask with alcohol on the brushwood and light it with the Flint.
- In the camp close-up, drag the empty cup from beside the camp box to the front of the fire. The cooked pot then tips its fat into the cup and drops the grilled meat back onto the cloth. Take the cup: Fat. Leave the meat on the cloth for now; you will need it later.
- At the crossroads shrine, place the three Iron flowers. The shrine opens; take the yellow Nuggets.
- Chip three more Nuggets with the Hammer: the red vein on the canyon's left cliff near the pillar, the blue vein left of the stone head in the ruins, and the cyan vein on the back wall of the shelter.
- At the grindstone place the Nuggets and put the Fat on the oil cup, then drag each nugget onto the spinning wheel to get the Crystals.
- Place the Crystals in the contraption's claws. The experiment explodes and cracks the wall; task The secret in the wall starts.
Puzzle: the secret in the wall
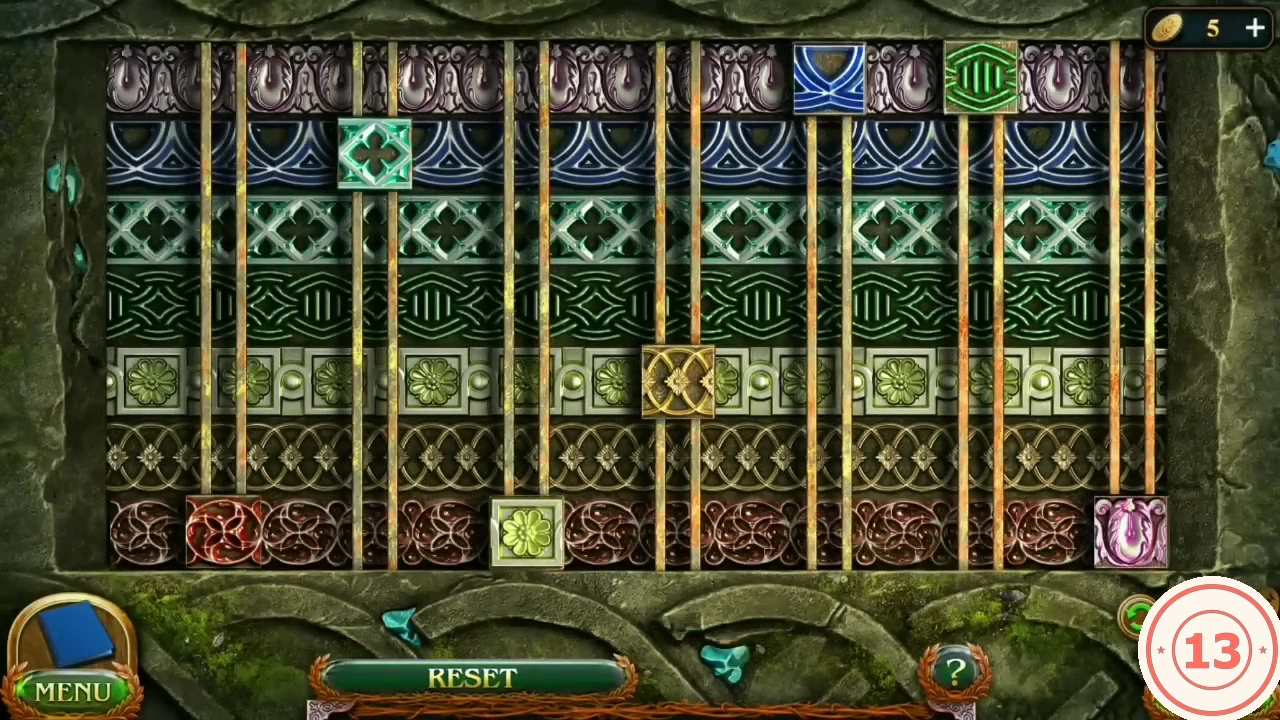
Break the cracked wall and solve the pattern-row lock behind its grate. The seven tokens are linked: moving one token also moves others, so plan each move.
- Use the Hammer on the cracked wall, then tap the grate behind it to open the lock.
- Move the tokens until each one sits in its own pattern band. Final layout, columns left to right: column 1 red scroll (bottom band), column 2 teal lattice (band 3), column 3 cream flower (band 5), column 4 gold rings (band 6), column 5 blue arch (band 2), column 6 dark-green weave (band 4), column 7 pink tulip (top band).
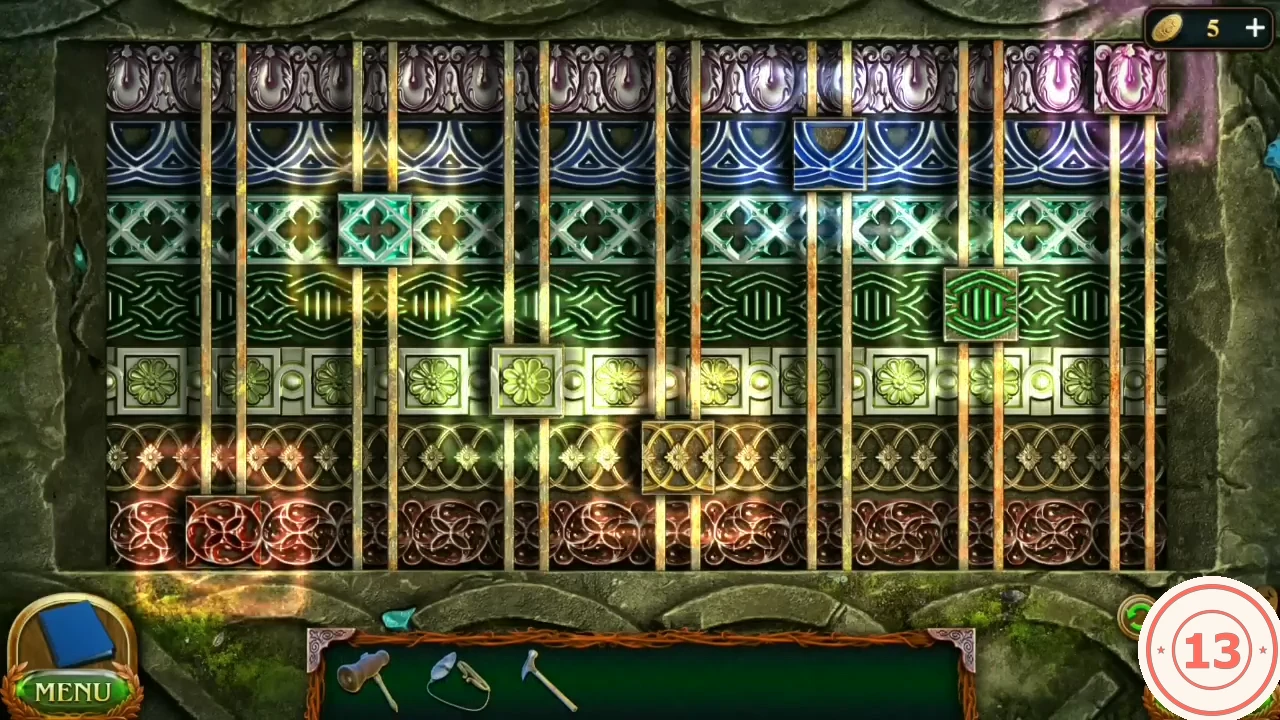
Solved: each token sits in the band with its own pattern (red at the bottom, pink at the top). - Go through the opening into the dungeon.
Dungeon gate
The note on the skeleton points to a sarcophagus behind the gate. Collect the first Crystal candles, build a bridge and light the two statue bowls.
- Search the skeleton: take the Crystal candle, the Pry bar and the treasure hunter's note (task Sarcophagus with treasures).
- Go left to the gate. Take the Crystal candle from the left statue's bowl. Collectibles: Morphing object on the left statue's head (6/45), ring item at the lower right of the gate (3/8); back in the dungeon, Morphing object on the stone block in the left background, left of the tall central rock pillar (7/45), and ring item on the rocks just left of the seated skeleton on the right (4/8).
- In the ruins use the Pry bar on the boarded niche to take a Board.
- In the dungeon use the Board on the tall pillar to knock down the Ancient seal, then pick the Board up again.
- The Board is too short for the gap at the gate. Take the Nails and Boards from the ruins niche, then combine Board, Boards, Nails and Hammer in the inventory to make a long board.
- Lay the long board across the gap in front of the gate.
- Take the Cauldron from the camp tripod, fill it at the water trough and pour the water into the left statue's bowl.
- Fill the Cauldron from the dark puddle near the chasm rock in the dungeon, pour the black oil into the right statue's bowl and light it with the Flint.
- Place the Ancient seal in the centre of the gate to open the rune lock.
Puzzle: gate rune diamond
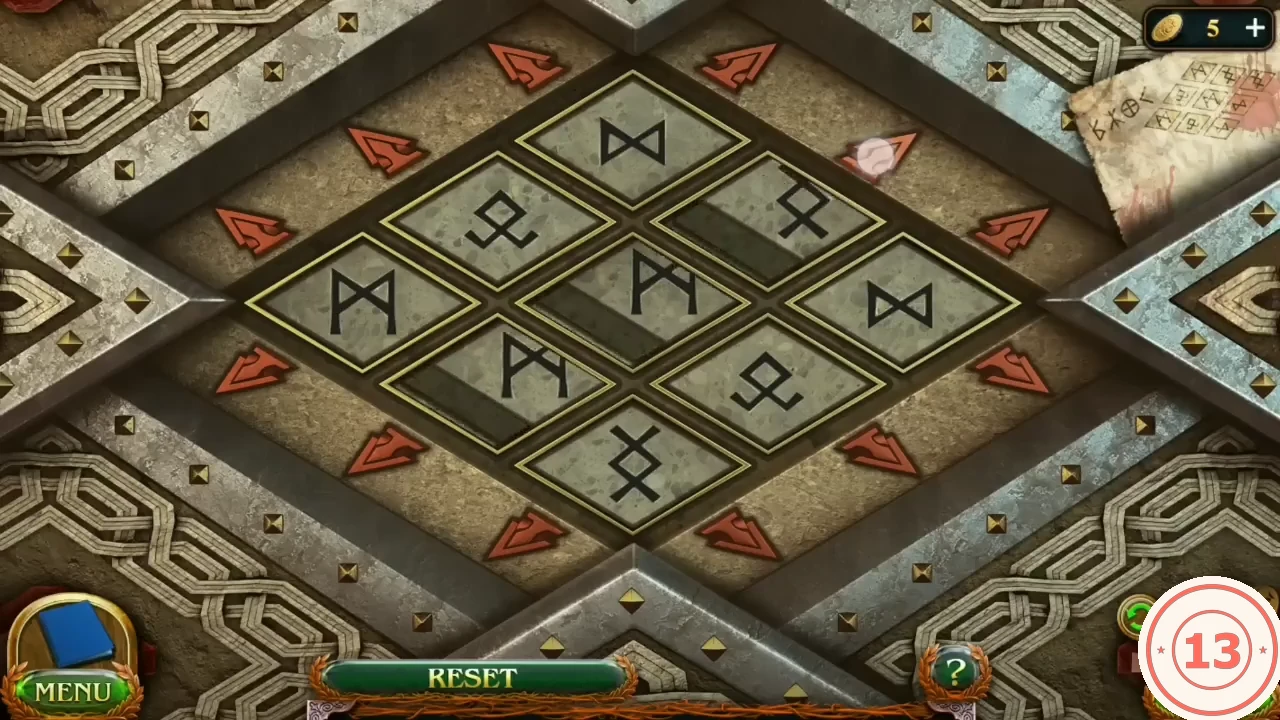
Nine runes sit in a diamond. Each red arrow on the rim slides one diagonal line of three runes around cyclically. The treasure hunter's note shows the target, though it is smeared; use the arrangement below.
- Slide the diagonal lines until the diamond reads: top M-rune; upper left loop rune; upper right crossed X; left M; centre M; right bow-tie; lower left loop; lower right bow-tie; bottom crossed X.
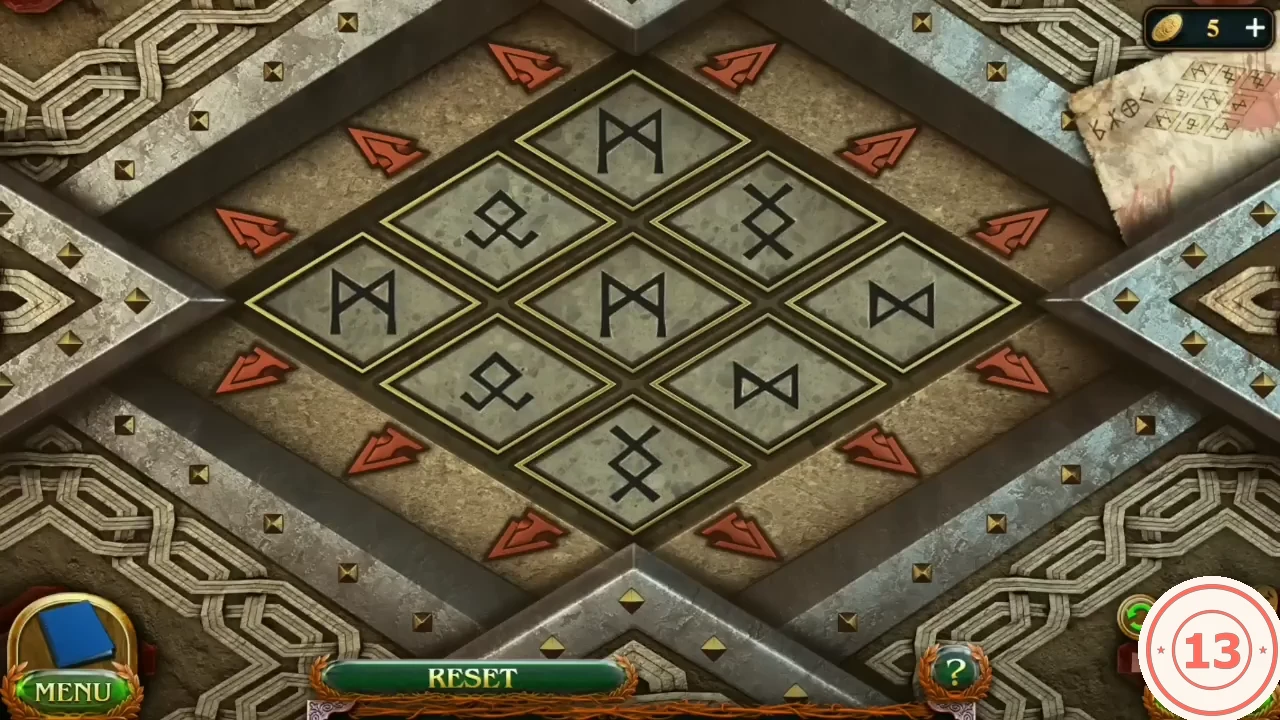
Solved arrangement of the nine runes. - Walk through to the dwarf city.