The dwarf city
Folly, Folnur's sister, joins after a short scene. The bell mechanism is broken and must be repaired.
- Watch the scene with Folly, then collect the ring item on the left of the city (ring set 5/8).
- In the wide city view, tap the ornament on the roof of the stone temple at the far right (Morphing 8/45). Then zoom into that temple's triangular stone door and take the Shaft lock lying at the lower left of the door frame.
- Zoom into the big gear in the archway under the elevated pavilion, left of the central tower ("The blocker is broken"), and insert the Shaft lock.
- Zoom into the bell hanging in the elevated stone pavilion left of the central tower and take the Broken connector. A new part has to be cast.
Forge: preparing the mould
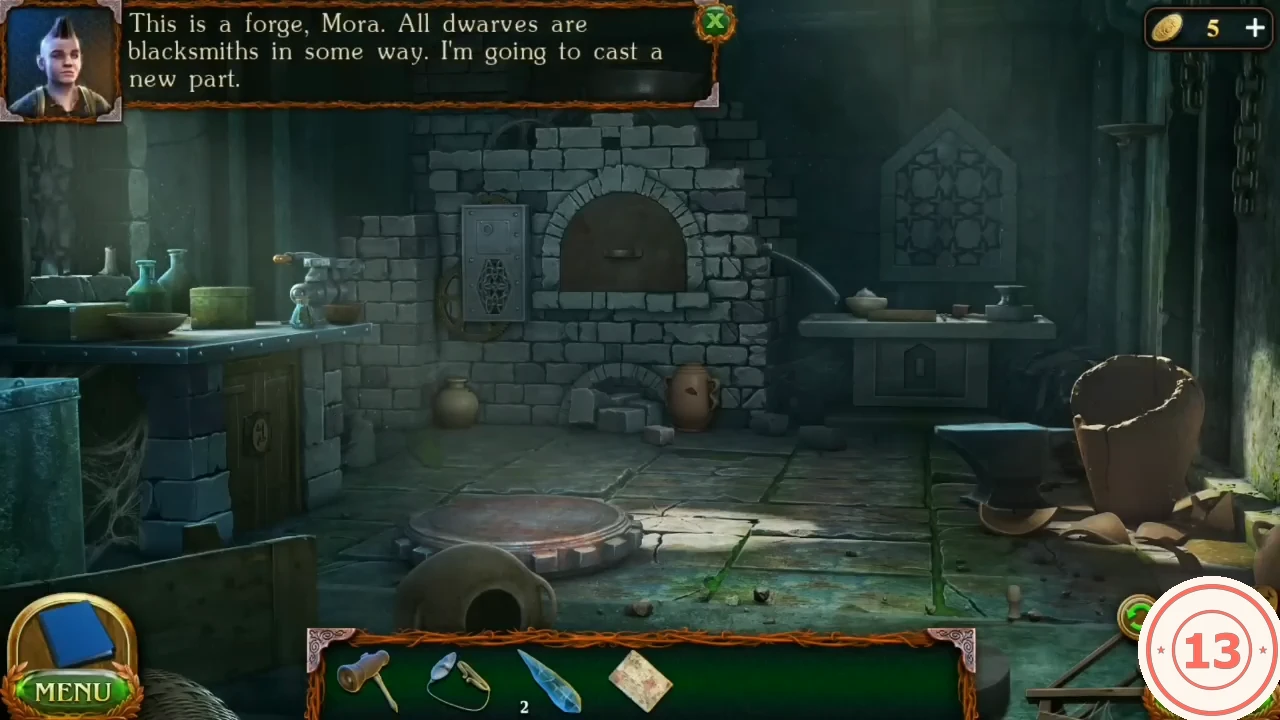
The forge is behind the open doorway of the carved building on the left of the city. It is an interactive scene with its own tool bar at the bottom (mould halves, tongs, jug, bellows, hammer, levers, bucket of coals, lighter fluid); items found here go into that tool bar. A rotating ball-maze lock on the cupboard and the furnace firing follow in the next two sections.
- Back in the city, tap the open doorway of the carved building on the left to enter the forge, then use the Broken connector in the forge. Folly asks what Folnur is going to do, the connector halves are laid on the work table and the forge tool bar replaces the inventory.
- At the table, dig out the old plaster from the tray and pour in the fresh plaster from the bowl.
- Fill the jug from the urn by the anvil and take the first mould half from the anvil base.
- Zoom into the vise bench. Take the wooden bucket of coals from the floor under the vise. Open the carved box on the bench and read the Liquid fire note inside (glycerin plus manganese salt start a fire instantly). Pour the powder from the bowl into the small stoppered flask at the left end of the bench, then take the finished flask, Lighter fluid. The vise itself is clamped shut around a hooked part and cannot be opened by hand yet.
- Zoom into the base of the furnace. Tap the loose stone block on the floor: it slides into the opening and the clay urn beside it breaks. Take the second mould half from the shards, tap the stone blocks in the arched air channel to clear them and take the Hammer lying behind them. Then zoom into the furnace itself, take the long iron rod (Lever) lying across its mouth and pour the coals from the bucket into it.
- At the table, pour the water into the plaster, stir it and press both mould halves in to make the mould.
Puzzle: cupboard ball maze
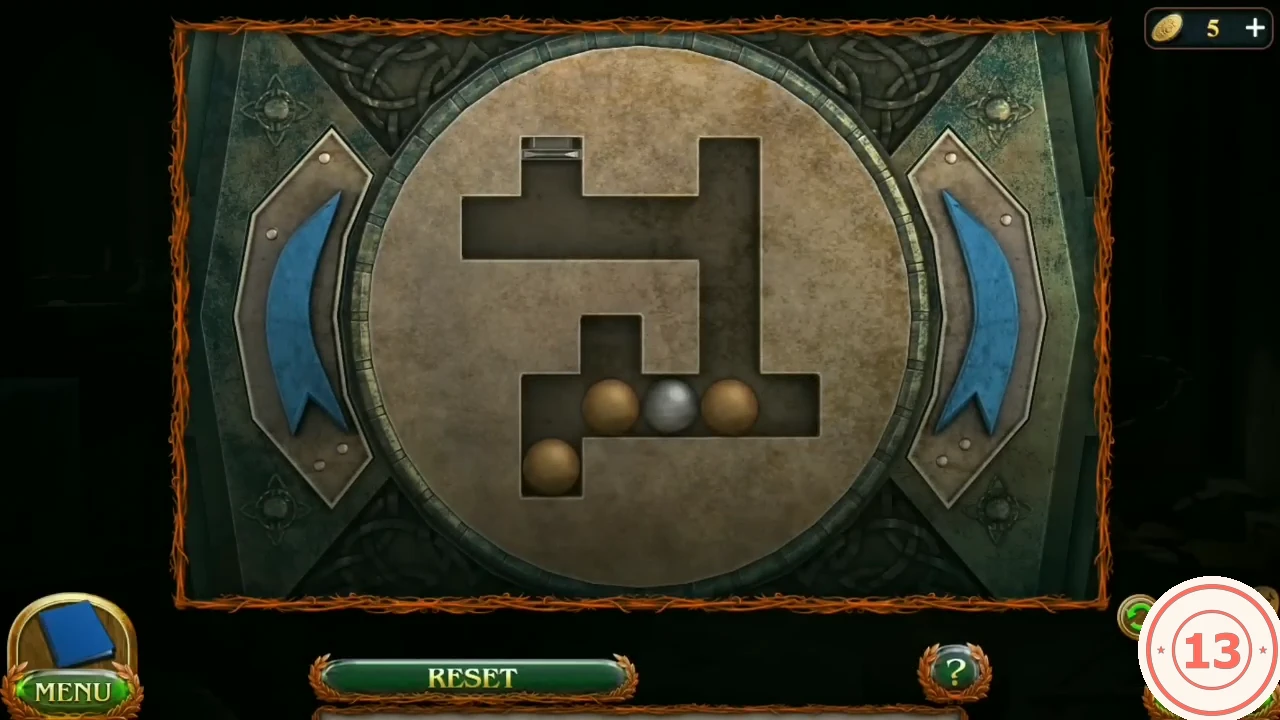
A round ball-maze lock on the forge cupboard. Two blue arrows turn the whole disc; after each turn the balls roll downwards along the channels. Only the silver ball matters: it has to drop into the metal-lined goal slot. Reset and ? buttons are available.
- Tap the button on the cupboard to open the ball maze. The blue arrows turn the disc a quarter turn left or right, and the balls then roll downwards. The goal is to drop the silver ball into the metal-lined slot at the end of one arm; the three bronze balls only block the way. Turn the disc until the bronze balls collect in side arms and the silver ball has a clear run, then turn the slot to the bottom so the silver ball falls into it. Take the Bellows from the open cupboard.
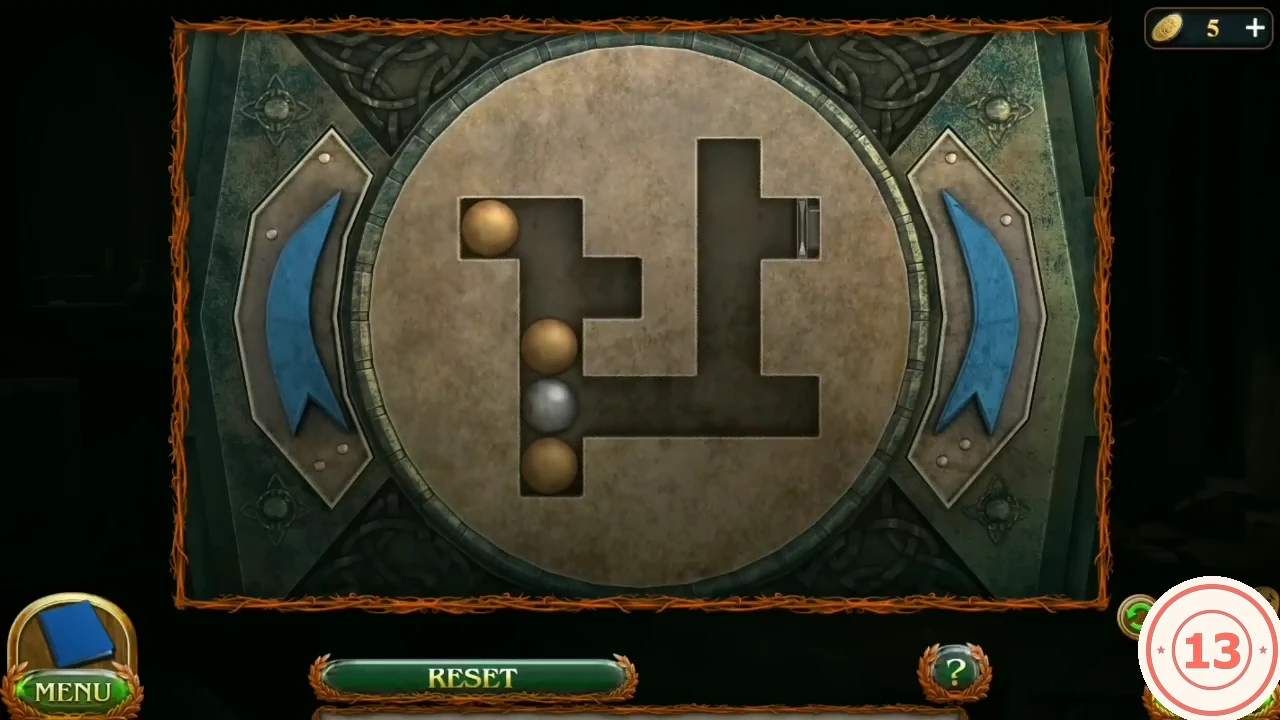
The cupboard ball maze part-way through, with the metal goal slot turned to the right: rotate the disc with the blue arrows.
Forge: firing the furnace and casting the connector
With the ball maze open, free the hooked lever, light the furnace and cast the new Connector.
- At the vise bench, fit the Lever (iron rod) into the vise handle and turn it to open the jaws; take the hooked lever that was clamped inside. At the furnace, insert the hooked lever into the slot of the iron panel on the left of the opening. Place the Bellows in the air channel at the furnace base, pour the Lighter fluid on the coals so they catch fire, and pump the bellows until the fire roars.
- Pour the molten metal into the mould, lift the casting with the tongs, quench it in the urn and hammer it on the anvil to get the Connector.
Ringing the bell
Repair the bell, ring it with the big gear and use what falls out to open the central portcullis.
- Attach the Connector to the bell in the elevated pavilion left of the central tower.
- Tap the big gear in the archway under the pavilion to ring the bell. Take the Hourglass figurine and the Crystal candle that drop into the bell close-up.
- Place the Hourglass figurine at the central portcullis. The grate rises and reveals the hex gear puzzle.
Puzzle: hex gear pieces
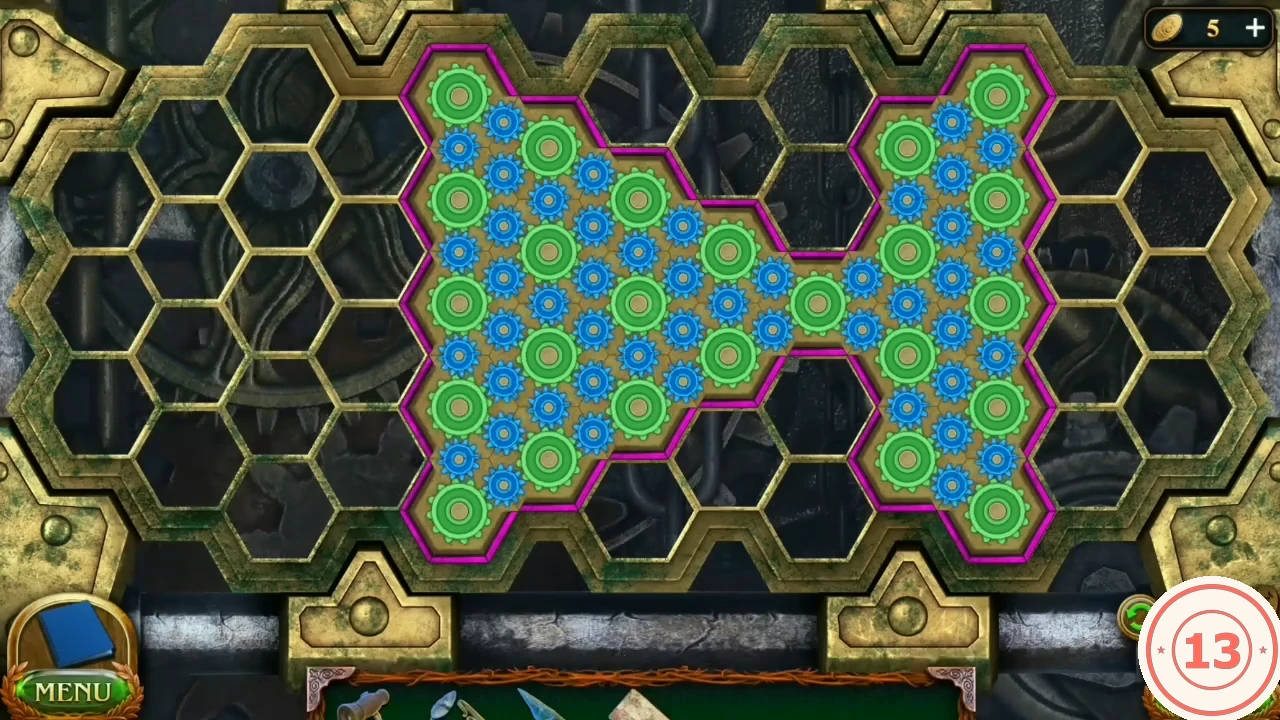
The hex board holds several gear pieces, each made of several hex cells and outlined in magenta. Drag a piece to move it; when pieces touch, their outlines merge. The puzzle is solved when every piece is joined into one solid figure with no holes. Reset and ? buttons are available. The starting board can differ between games; the goal is always the same single hole-free figure, and the shape below is the one this board completes.
- Assemble the figure that completes this board: a large triangular block on the left, a narrow bridge in the middle and a tall block on the right, joined in a single bow-tie shape (see the completed board under the title). Build the two big blocks first, then the bridge, and fit the last small pieces into the remaining holes. When the last gap is filled, the mechanism starts in the city.
Puzzle: stone door rune lock
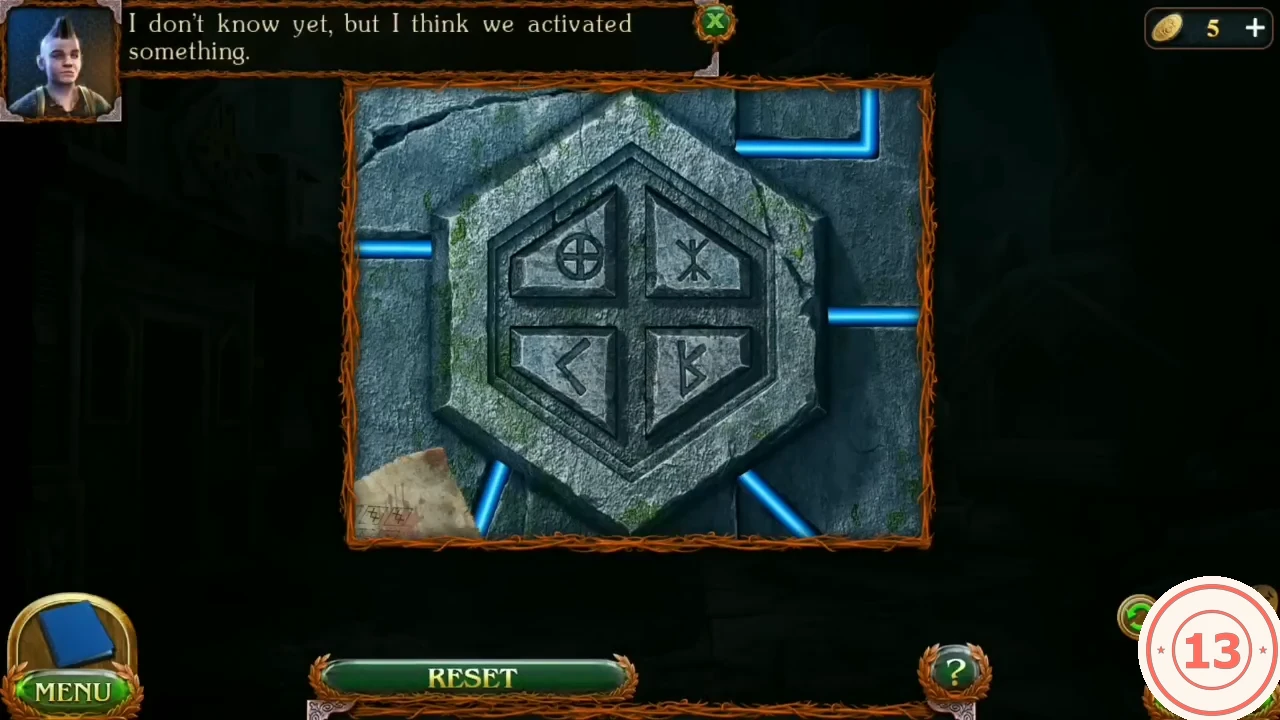
The triangular stone door of the temple at the far right of the city has four rune buttons. The treasure hunter's note shows the order.
- Press the runes in this order: lower right (Б-shaped), upper right (X), upper left (circled cross), lower left (<). A wrong press means using Reset and starting again.
Temple: the seven Crystal candles
Collect the remaining Crystal candles and the rune clue for the organ.
- Collectibles: ring item on the floor at the lower right (ring set 6/8) and the Morphing object in the floor crack right of centre (Morphing 9/45).
- Zoom into the sarcophagus: take the Crystal candle and Manuscript 3 of 8 (last one in this chapter). The lid will not move yet.
- Zoom into the altar organ: take the Crystal candle on the ledge below the book and read the book.
- Take the Crystal candle in the debris at the lower left of the temple.
- Return to the city and take the last Crystal candle from the big-gear close-up.
- Go to the ruins and look at the mural in the opened niche: a sarcophagus and seven runes arching left to right (F, B, Þ, S-zigzag, diamond, <, Y).
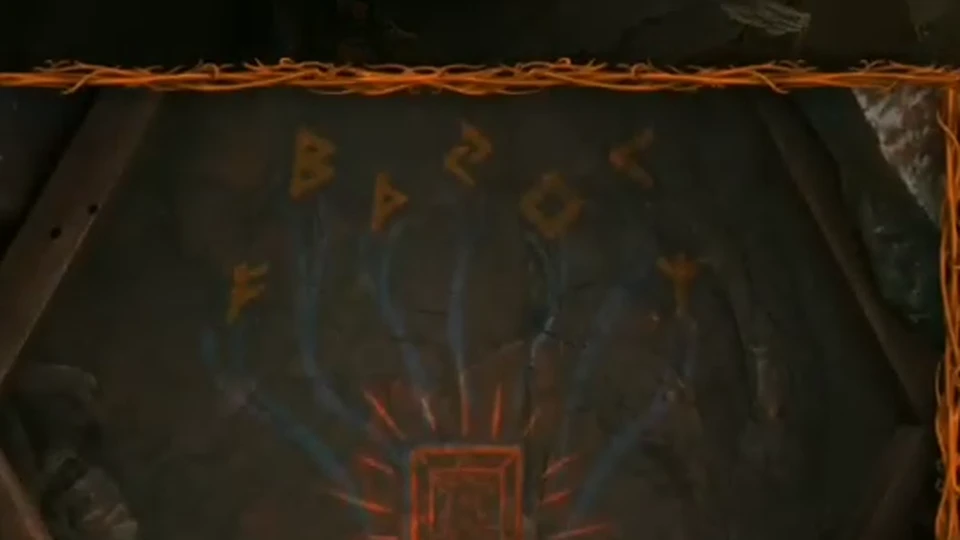
The mural clue: read the runes along the arch from left to right. - At the temple organ place all seven Crystal candles; the organ lights up and the rune tablet opens.
Puzzle: organ rune tablet
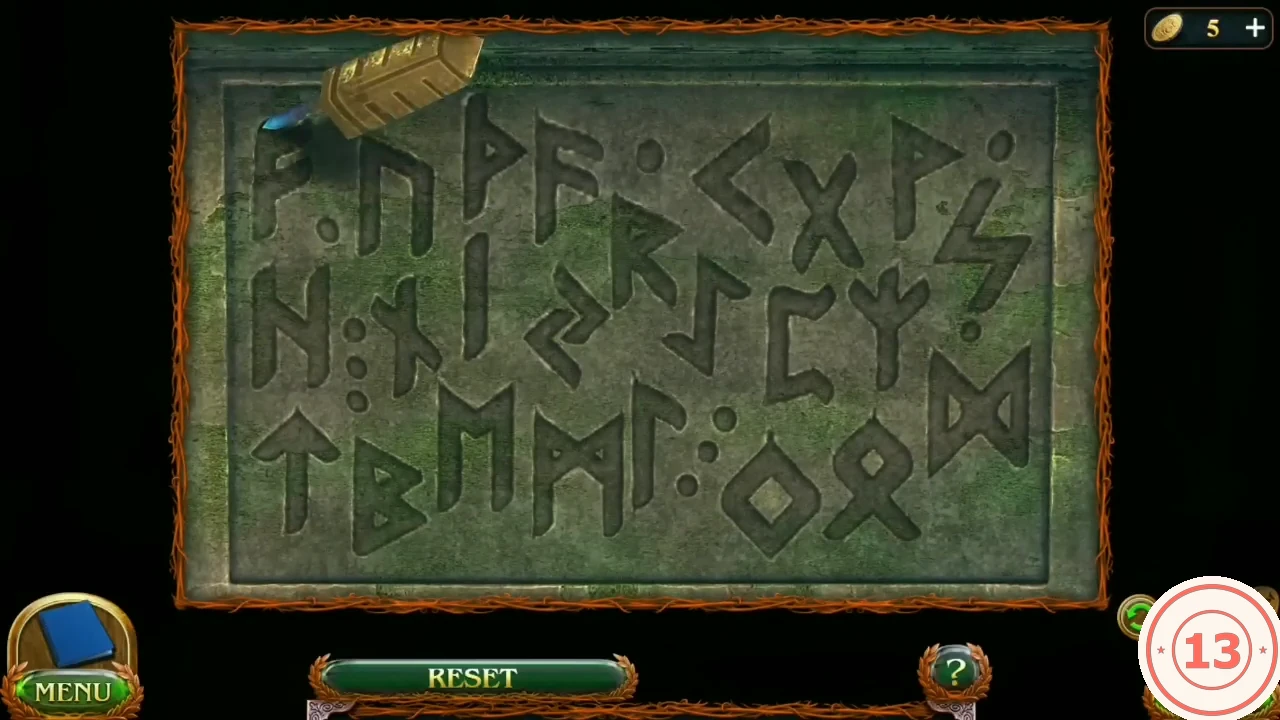
Trace the seven runes from the ruins mural on the tablet with the golden stylus.
- Trace the runes in this order: F, B, Þ, S-zigzag, diamond, <, Y. Energy flows to the sarcophagus.
Puzzle: sarcophagus energy tiles
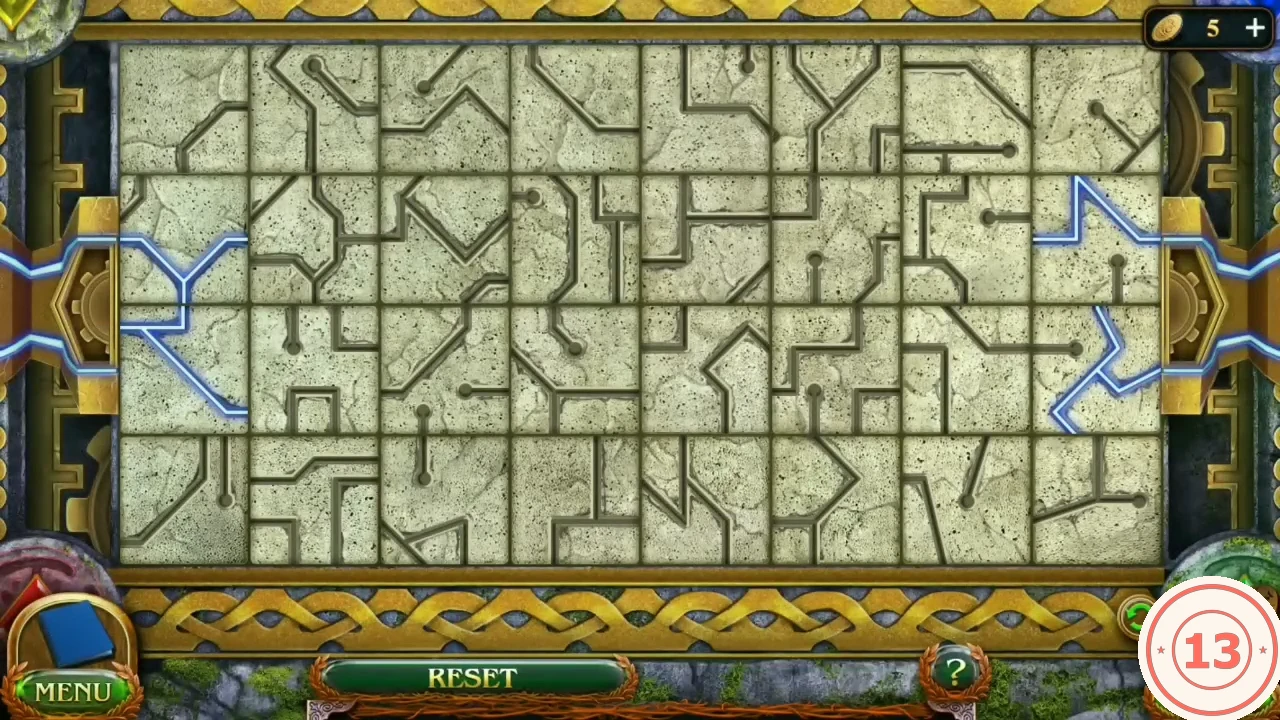
Blue energy enters from sockets on the left and right. Tap a tile to rotate it. The guide explains the goal and method rather than every tap; the completed-state image shows the lit board.
- Zoom into the side of the sarcophagus. Energy enters from the sockets at the middle of the left and right edges. Tap a square tile to turn it, and turn each tile so its line continues the glowing blue path. Work inwards from both sockets, row by row, until every line on the board glows blue; the lid is then pushed back.
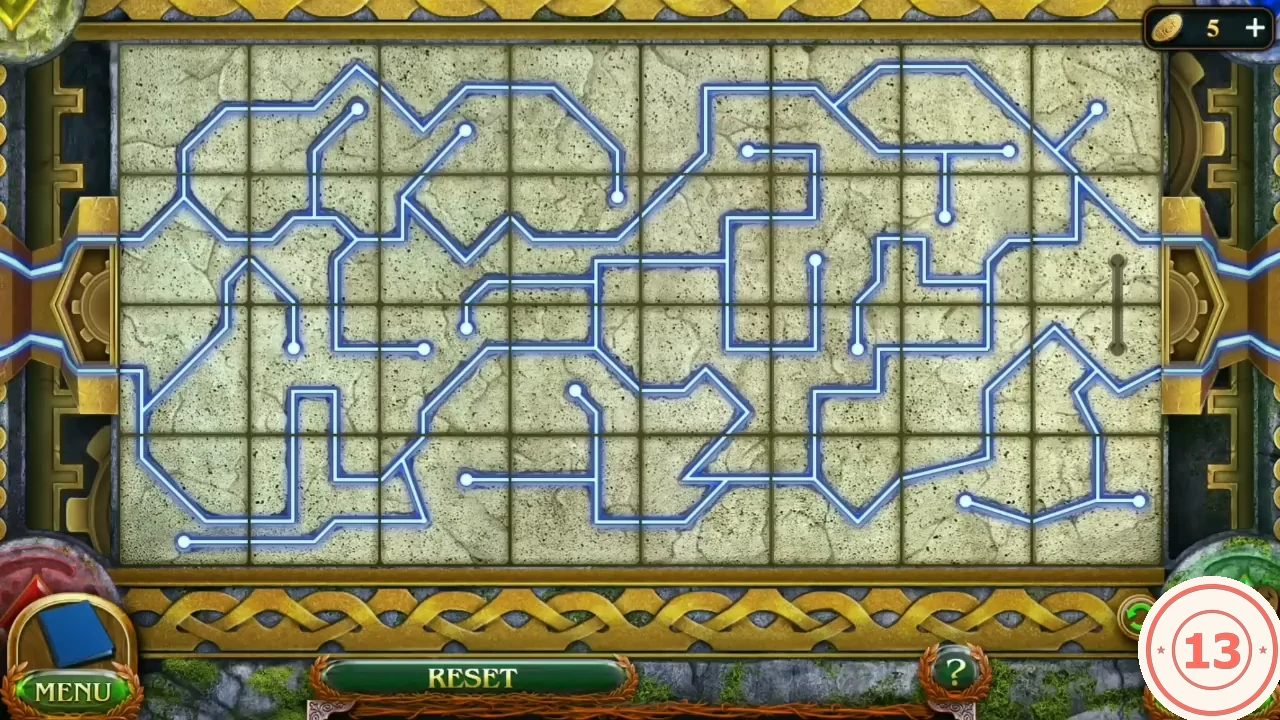
Completed state: every line on the board glows. - After the story scene take the Dagger. (Dismiss the rating popup if it appears.)
Village homestead
Folnur's home is barred and his dog Sirko is hiding. A countdown icon may appear at the top right; it is an offer timer, not part of the quest.
- Go to the village yard. The house door is barred by a diagonal beam and the dog hides in the hollow log.
- Zoom into the well winch, take the screwdriver stuck in the right post and insert it into the axle as a crank. Turning it jams the rope.
- Look into the well shaft and cut the snagged rope with the Dagger to take the End of the rope.
- Collectibles: book item at the base of the winch (book set 4/7) and the Morphing medallion on the right of the cottage facade (Morphing 10/45).
- Tie the End of the rope to the beam on the house door. The winch alone cannot pull it.
- Go to the barn yard behind the house. Collect the book item on the left (book set 5/7) and the Morphing object at the lower right (Morphing 11/45). Note the crate hanging from the loft crane.
- Zoom into the broken ladder to start the rung puzzle.
Puzzle: broken ladder
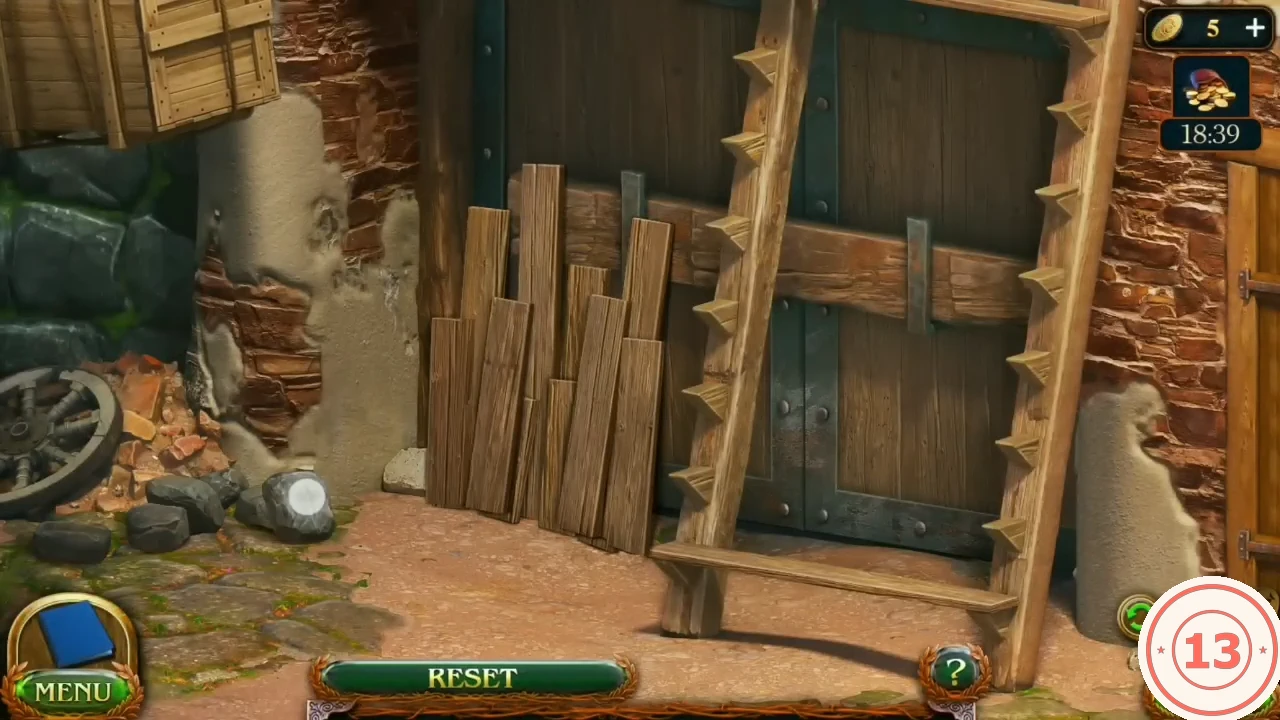
Loose planks of different lengths must be fitted as rungs into the ladder's notches. Reset is available. The completed-state image shows the repaired ladder.
- Drag the loose planks from the pile on the left onto the ladder and drop each one between a free pair of notches on the rails, until every rung from the bottom to the top is filled and no planks are left. The planks differ in length; if a plank does not sit across both rails in one gap, move it to another gap. Reset returns all planks to the pile.
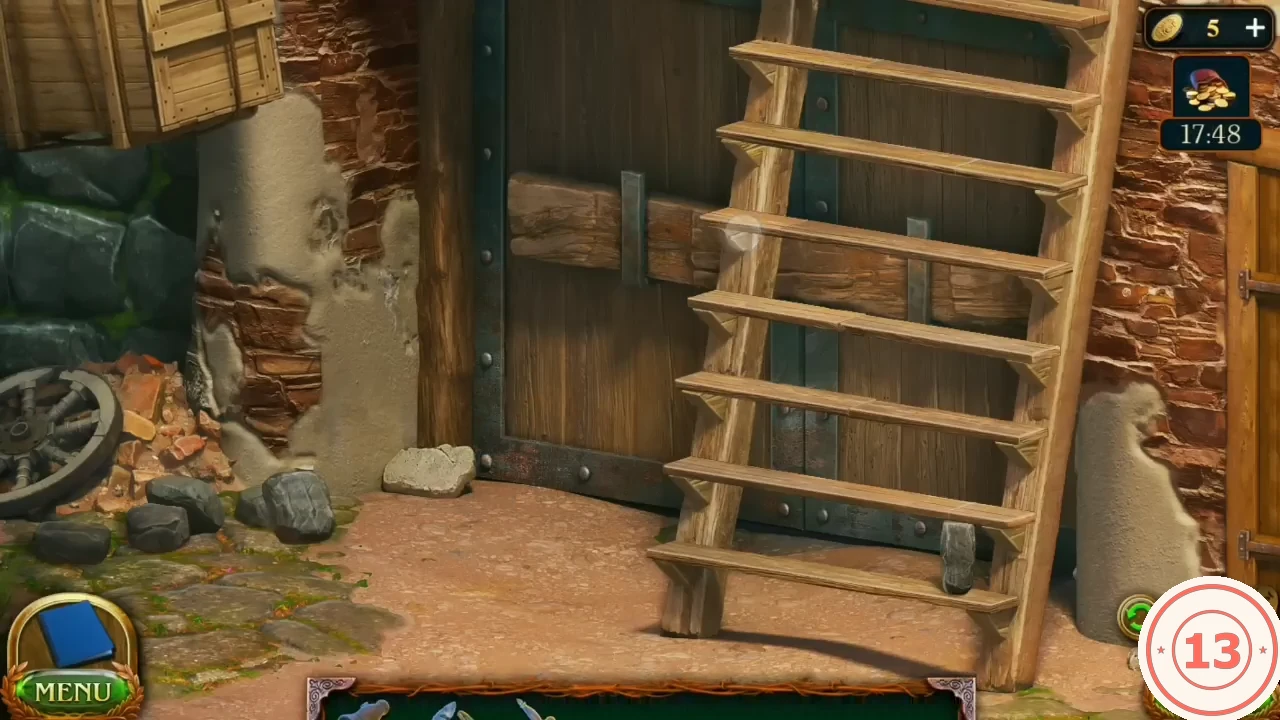
Completed ladder with every plank in place.
Power multipull and the house key
Lower the crate from the loft to get the Power multipull, then win over Sirko for the house key.
- Climb to the loft winch (the cable is clamped). Take the Wire cutters from the shed on the right of the village yard.
- Cut the loft cable with the Wire cutters; the crate falls. Move the planks in the wreckage and take the Power multipull.
- At the house door, loosen the rope binding on the beam with the Dagger, then attach the Power multipull. The winch hauls the beam away; the door is still locked.
- Take the Grilled meat from the blanket at the crossroads camp.
- Offer the Grilled meat at the hollow log. Sirko comes out; take his Collar.
- Open the Collar in the inventory and use the Screwdriver on the clasp that holds the round medallion. The medallion comes free and turns out to be the head of the House key.
- Unlock the house door. After the scene with Folnur's sick mother you receive the Medicine recipe and the task Medicine for mom.