Puzzle: medicine ingredients in the pantry
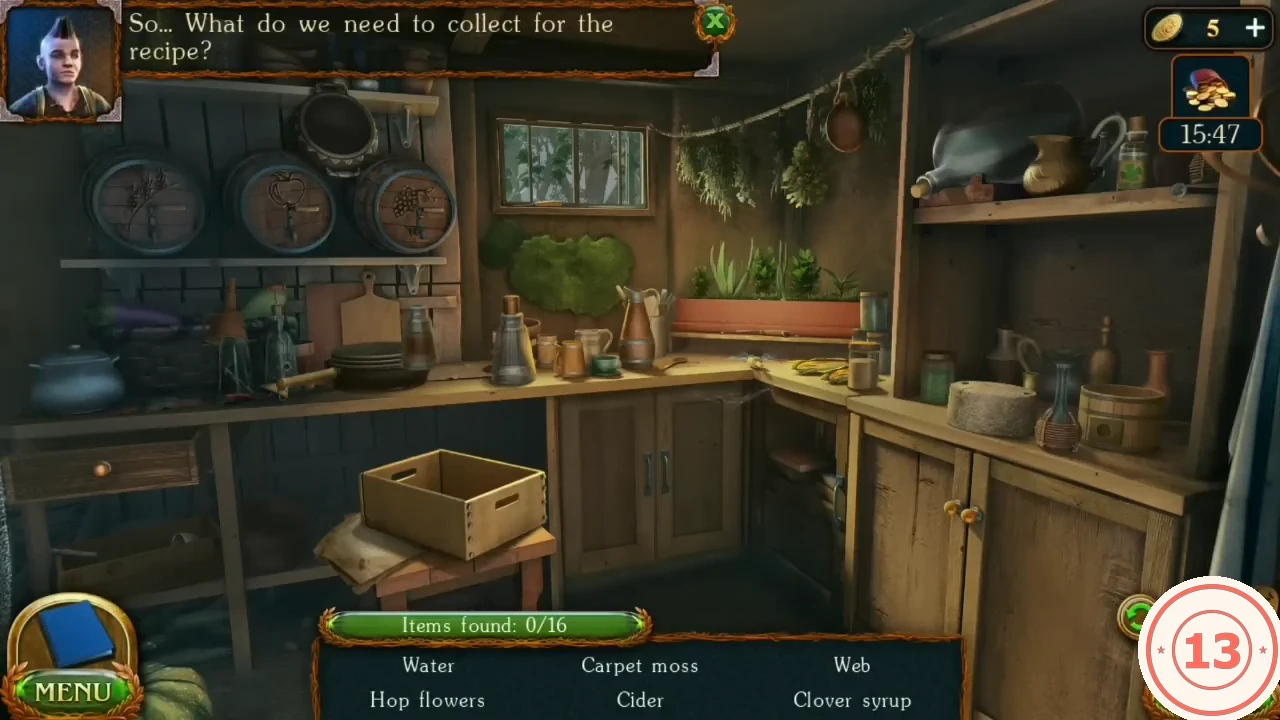
The pantry is a list scene: find 16 items for the medicine box. Six names are shown at a time (two rows of three) and new names replace found ones. Some items need a small action first.
- Take the Cider bottle on the shelf and the Water.
- Zoom into the window: scrape the Carpet moss off the sill with the scraper, then open the window and take the Hop flowers outside.
- Collect the Web, the Cauldron on the left shelf and the Pan on the left rack.
- Zoom into the planter box: cut an Aloe leaf with the knife lying there and pull the Onion from the soil.
- Open the drawer under the counter for the Grater and the Scoop; take the Clover syrup (bottle with a green clover label) from the upper-right shelf beside the jug, the copper Funnel standing on the back-left counter below the barrel shelf, and the round copper Flask hanging from the herb line, just left of the tall right shelving.
- Zoom into the lower-right cupboard and assemble the juicer: barrel on the base, then the arched frame over the barrel, then the threaded rod through the frame, the crossbar handle on top of the rod and the pressing plate.
- Check the recipe page, then take the Gauze from under the planter box to finish the list.
Firewood and the last book items
Set up the stove counter and chop firewood in the garden. Two book items and a Morphing object are collected on the way.
- Place the Set of ingredients on the stove counter. Folnur needs firewood.
- Take the Ax from the shed in the village yard.
- Inside Folnur's house, zoom into the cracked rear window and use the Ax on it to knock out the broken glass. Go through the open window into the garden.
- In the garden, zoom into the dead tree left of centre and use the Ax to fell it. Its trunk falls across the big stump on the right.
- Zoom into the stump and use the Ax on the fallen trunk to chop Firewood.
- Collectibles: book item on the right of the garden (book set 6/7); in the house, the Morphing plaque above the wardrobe (Morphing 12/45) and the last book item on the top-left shelf (book set 7/7, achievement Librarian).
Puzzle: cooking the medicine
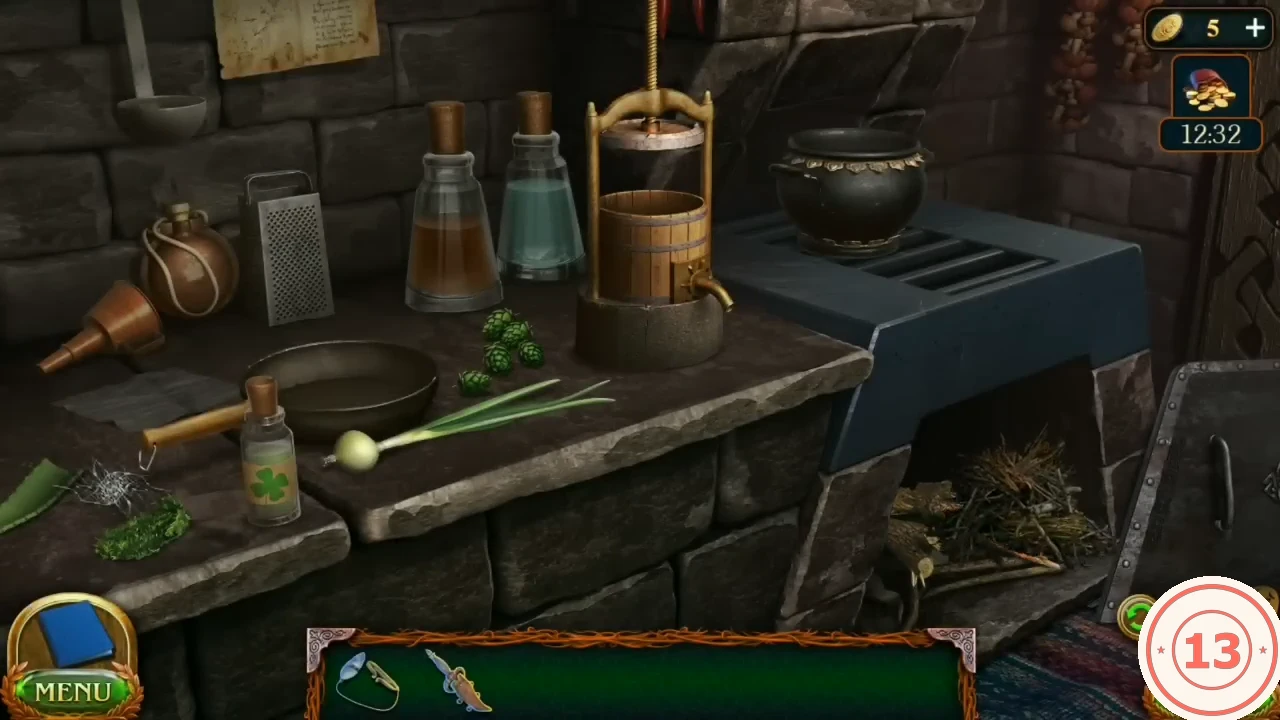
Follow the recipe pinned above the counter. Wrong steps give messages such as "I need to follow the recipe" or "I need to boil the water".
- Put the Firewood into the open firebox under the stove, then use the Flint on the wood to light it.
- Rub the Onion on the grater into the frying pan, then add the Carpet moss to the pan.
- Pour the Water into the pot on the stove and let it boil. Then drag the spider Web from the front left corner of the counter into the pot, followed by the Hop flowers.
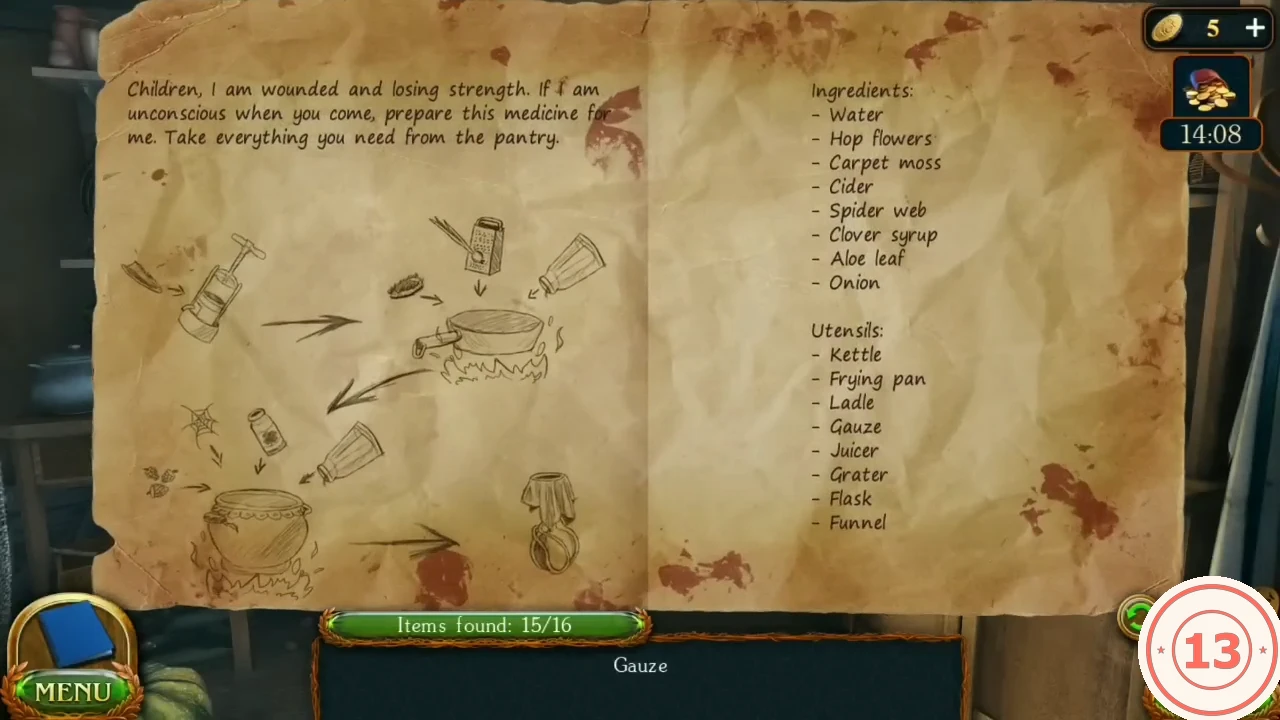
The recipe page: the drawings show which ingredients go into the pan and which into the pot. - Pour the Cider into the pan. Press the Aloe leaf in the juicer with the pan under the spout, then put the pan on the stove to fry.
- Add the Clover syrup to the pot, then pour the pan's contents into the pot.
- Set the Flask on the counter, put the Funnel in it and the Gauze on the funnel, then ladle the pot into the flask.
- Give the Medicine to Folnur's mother. After the scene take the Cabinet key; task Family weapon starts.
Puzzle: cabinet chest cords
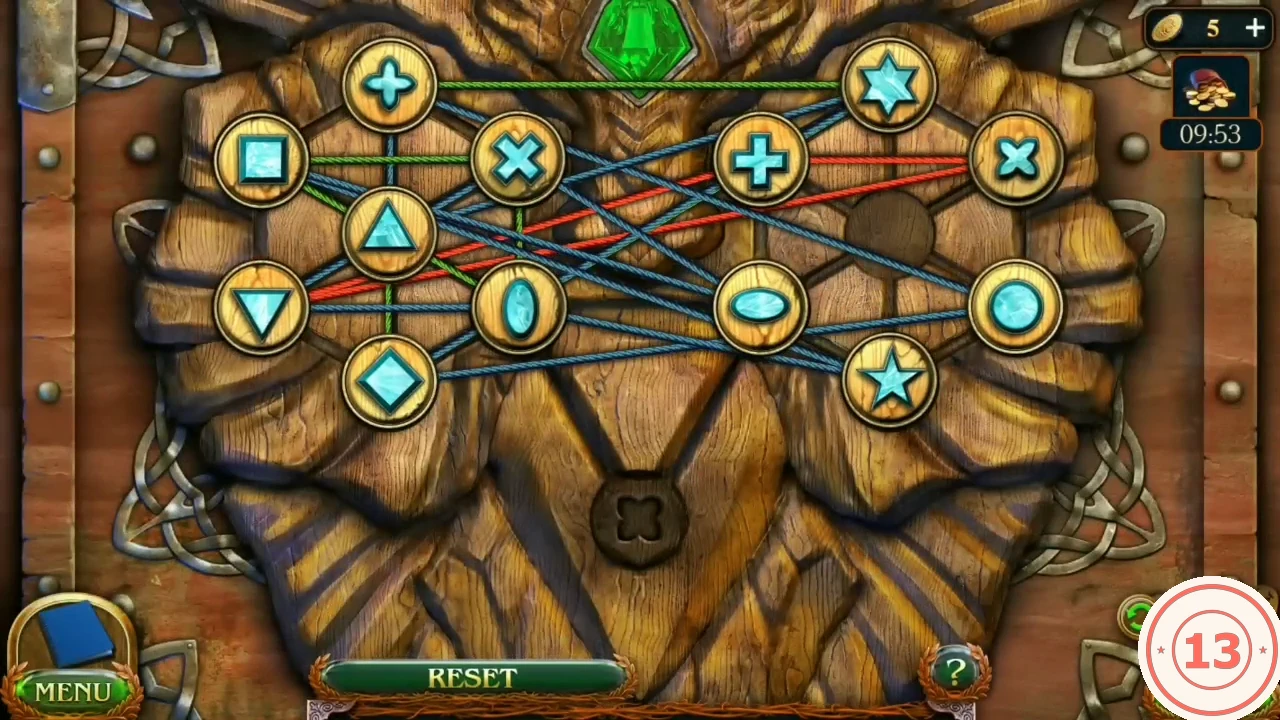
Thirteen symbol tokens sit on fifteen engraved sockets and are joined by fixed coloured cords; two sockets stay free. Tap a token: the free sockets it can move to are ringed in green; tap one and the token slides there. The goal is a layout in which no cords cross; the gem at the top then lights. The board is two rings (left and right), each with six sockets around it and one in its centre, plus one socket at the bottom centre.
- Open the cabinet on the right wall with the Cabinet key and zoom into the ornate chest.
- Move the tokens into this finished layout. Left ring: circle at the top, plus at upper left, diamond at upper right, triangle at lower left, plus at lower right, six-pointed star at the bottom, centre socket empty. Right ring: flat oval at the top, X at upper left, square at upper right, downward triangle at lower left, five-pointed star at lower right, upright oval at the bottom, centre socket empty. Bottom-centre socket: the second X. Most tokens end on the socket engraved with their own symbol, which you can see on free sockets. If two identical tokens leave a crossing, swap them. When no cords cross, the gem lights.
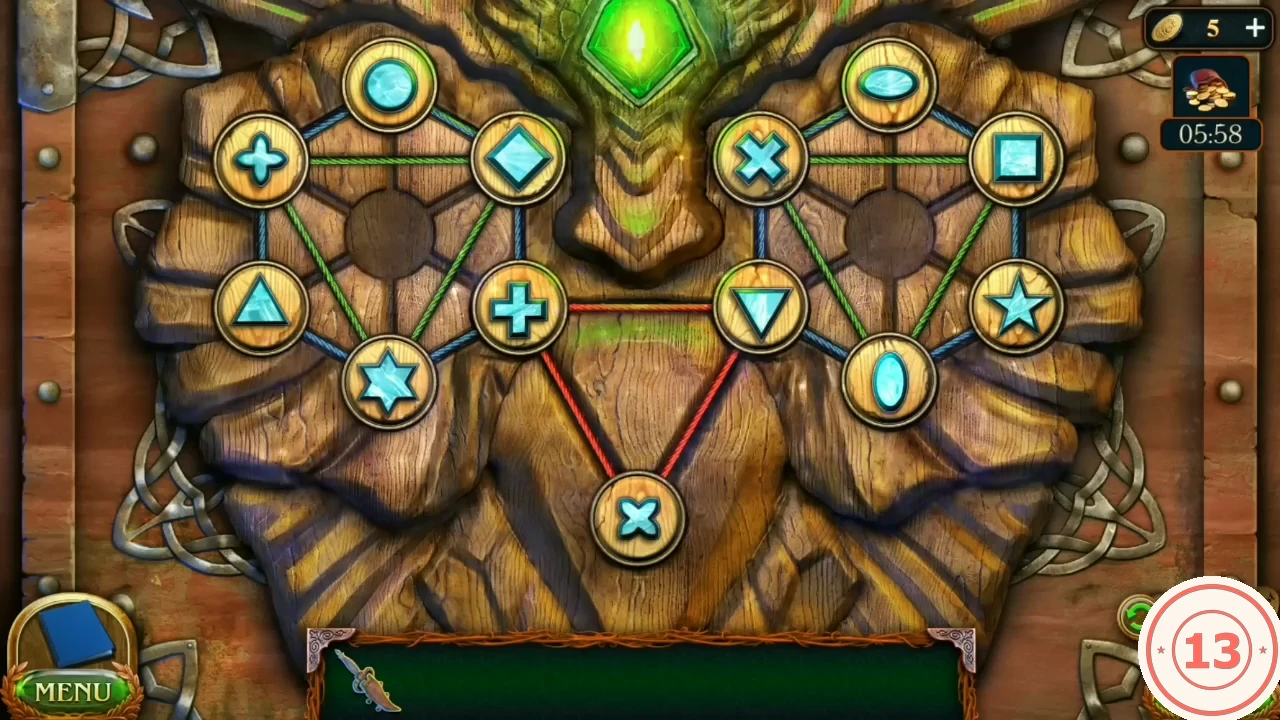
Solved state: no cords cross. - Take the Family seal and the Gate key from the compartment.
Mountain path and the stuck chest
The Gate key opens the barn's back doorway to the mountain path.
- Unlock the wooden back door of the barn with the Gate key and go up the Mountain path.
- Search the satchel in the wrecked wagon: read the diary page and take the Patterned chip.
- Take the Shovel from the village shed and the Leash from the hollow log.
- Collectibles: ring item on the wagon's left wheel hub (ring set 7/8) and the Morphing disc on the rock face (Morphing 13/45).
- At the ledge by the abyss, tie the Leash to the chest ring, dig with the Shovel and haul the chest up.
- Place the Patterned chip in the chest lock to start the rune dial.
Puzzle: rune dial lock
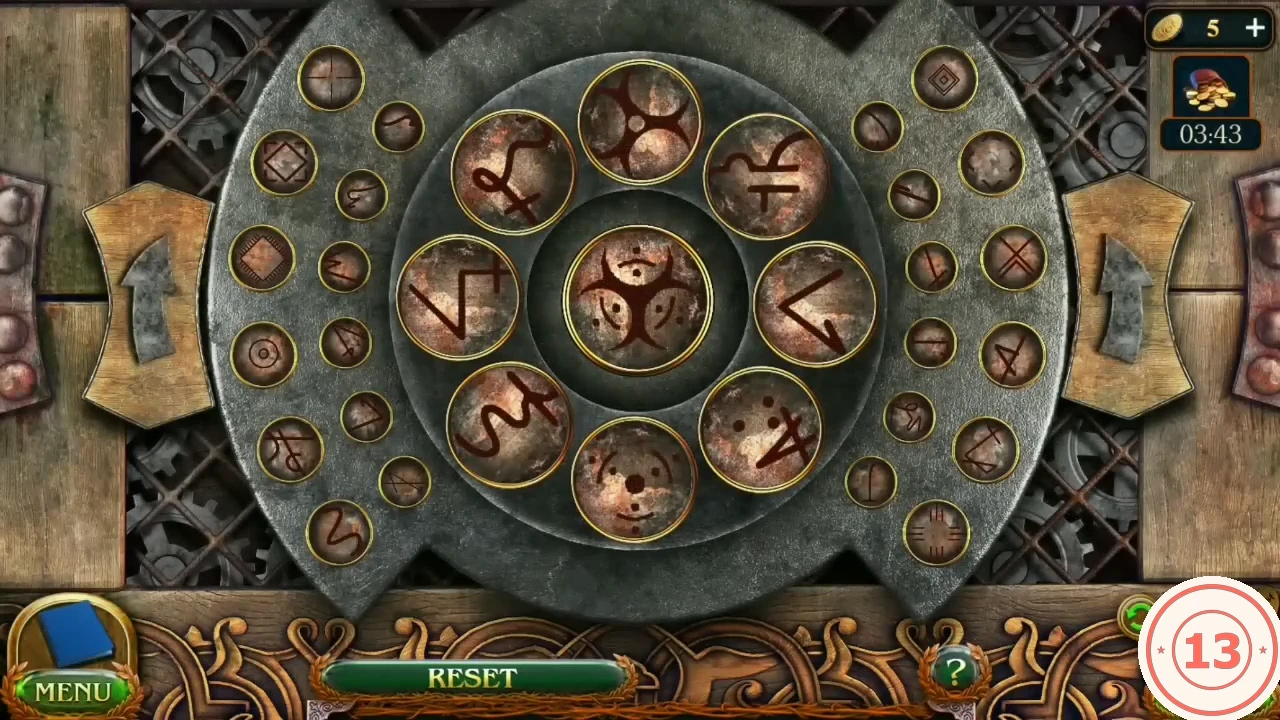
The centre disc shows a composite sign and eight large runes sit on the ring around it; small spare runes wait in the two side columns. Each round, find the two ring runes whose strokes, laid over each other, make exactly the centre sign. A ring rune may be turned at the wrong angle: tap it (it turns cyan), then press the arrow plate on the left or right side of the dial; each press turns the selected rune one step to a new orientation. Tapping a selected rune again deselects it and it keeps its new angle. Once both runes of a pair are turned to match their parts of the centre sign, select one of them and then tap the other: they fly into the centre, flash white and disappear, spare runes refill the gaps and a new centre sign appears. Once the spares run out, the ring empties round by round.
- Pair runes round by round until the dial flares. Check each candidate pair by laying the two runes over each other in your mind, allowing for rotation: together they must reproduce every stroke and dot of the centre sign. For each rune of the pair, tap it and press a side arrow plate until it sits at the angle of its part of the centre sign. Then, with one rune of the pair selected, tap the other to merge them. Example from a later round: tap the top-right rune, press the left plate twice until it shows its matching shape and tap it again to deselect it; tap the rune on the left of the ring, press the right plate until it lines up, then tap the top-right rune; both runes merge into the centre. First round: the centre is a three-armed sign with dots, made from the plain three-armed rune at the top of the ring plus the dotted rune at the bottom. Last round: the knot-like lattice in the centre is made from the X rune plus the diamond rune with arrow points.
- Take the Fast time potion from the chest.
Puzzle: flowers for the graves
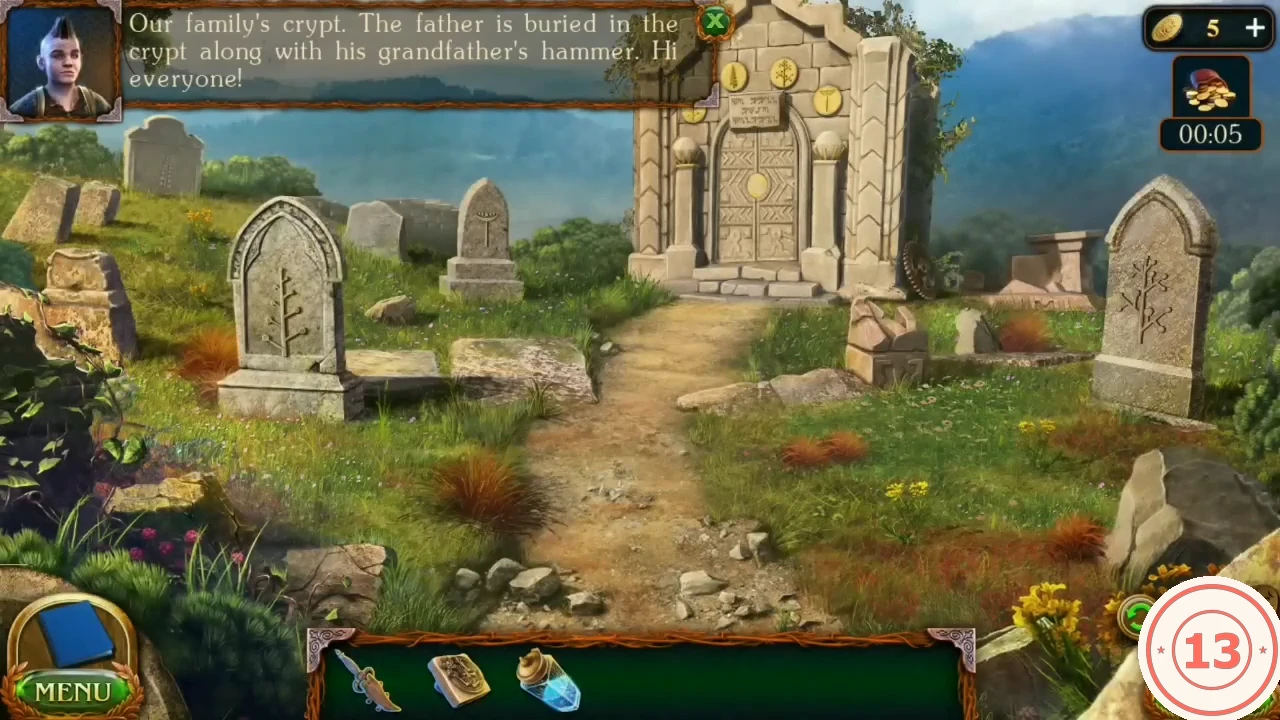
Each grave at the family cemetery is carved with a plant. Grow flowers instantly and lay the matching bouquet on each grave.
- Travel to the cemetery and greet the graves; task Memory of ancestors starts. The crypt door has four flower plaques and a round seal recess.
- Take the Hoe from the village shed.
- In the barn yard zoom into the pallet of seed bags and pick the four bags marked with coloured flower dye to get the Flower seeds.
- In the garden, till the flowerbed by the fence with the Hoe and sow the Flower seeds. Back in the garden view, tap the small squirrel sitting on the tree branch in the top-left corner; it changes into an owl (Morphing 14/45).
- Take the Pitcher from the schoolyard fountain basin, pour the Fast time potion into it and water the flowerbed.
- Cut four bouquets with the Dagger: dandelions, lilies of the valley, hydrangeas and gladioli.
- At the cemetery both remaining collectibles are in the left corner of the scene: tap the right one of the two small leaning stones at the back left, then the low carved stone in the left foreground (tapping the tall grey gravestone behind them in between opens a close-up; check it as well if a pop-up is missing). These taps give the last Morphing object (15/45) and the last ring item (ring set 8/8, achievement Collector); the pop-ups appear together after the second tap.
- Lay the bouquets: hydrangeas on the front-left grave (stem with paired round buds), gladioli on the small back-left grave (stacked spike), dandelions on the centre grave (stem with a cup on top), lilies of the valley on the right grave (branching tree).
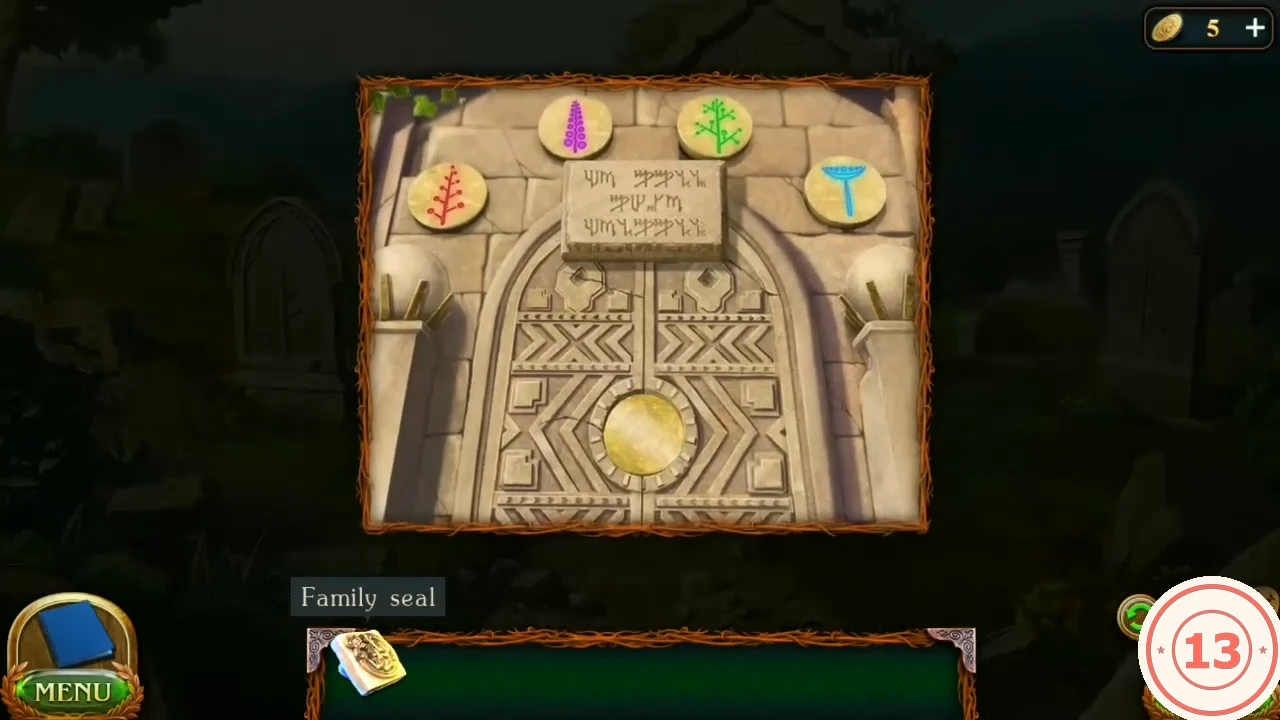
The crypt door with all four flower plaques coloured after the bouquets are laid; the round recess takes the Family seal. - Place the Family seal in the crypt door's round recess. Task Memory of ancestors completes and the crypt opens.
Puzzle: crypt gem board
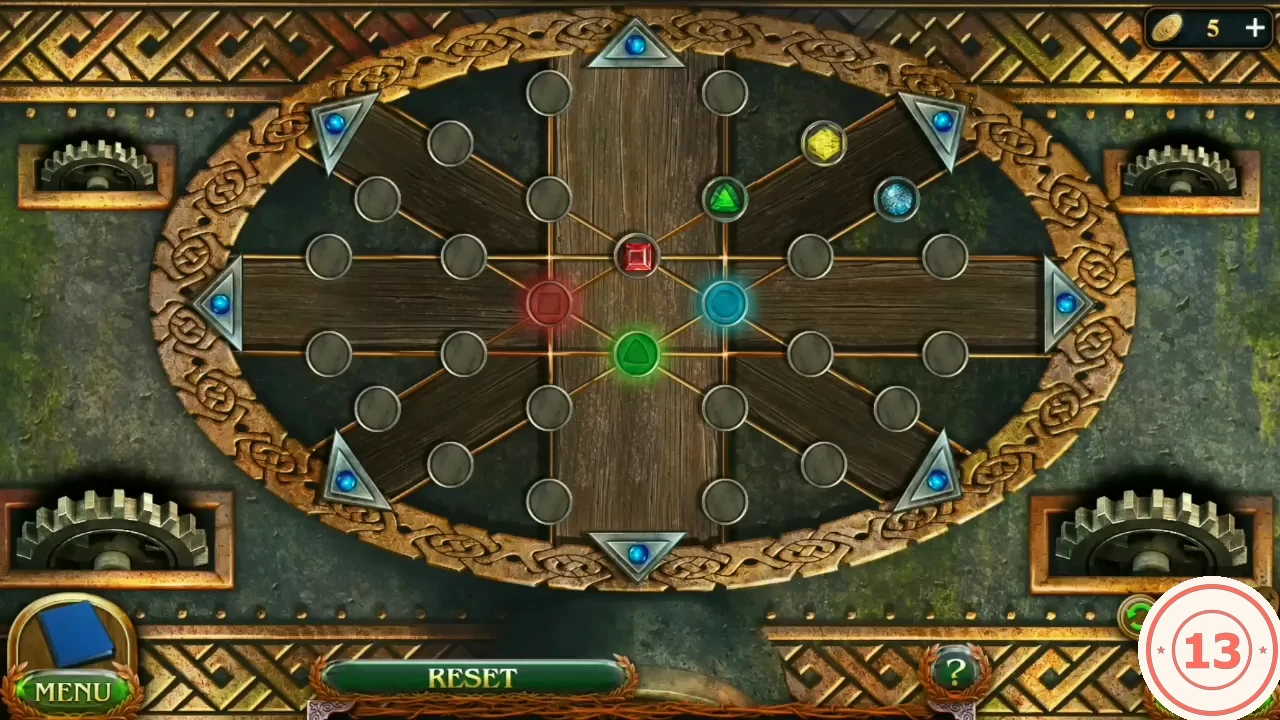
An oval board of crossing lines has four coloured rings in the centre (yellow top, red left, blue right, green bottom) and four loose gems of the same colours. Eight triangle buttons sit on the rim: top, bottom, left, right and the four diagonals. Pressing a button moves every gem that lies on a line running in that direction one node towards the pressed button; gems on other lines stay put. Reset and ? buttons are available, and the board can also appear in a different starting layout. This board on the father's sarcophagus is the one meant by the achievement Specialist (the sarcophagus in Bogro Cemetery in fewer than 35 moves); each button press counts as a move, and the sequences below need only 7 or 9 presses.
- Zoom into the round board on the father's tomb and bring each gem onto the centre ring of its own colour. Usual start: yellow gem at the left end of the upper horizontal line, red gem on the upper-left diagonal next to the top-left button, blue gem on the upper-right diagonal next to the top-right button, green gem at the top of the right vertical line. From this layout press, in order: bottom, lower-right, lower-left, lower-left, right, lower-left, right (7 presses). If your board starts with yellow at the top of the left vertical line, green at the left end of the upper horizontal line, blue on the upper horizontal line just right of the centre and red on the left vertical line just below the centre, press: right, lower-right, left, left, upper-right, bottom, lower-left, lower-right, top (9 presses). For any other layout, before each press check which gems lie on a line in that button's direction, because all of them step together; gather the gems one node outside their own rings along a shared direction, then step them in together. When all four rings hold their gems, the board flares.
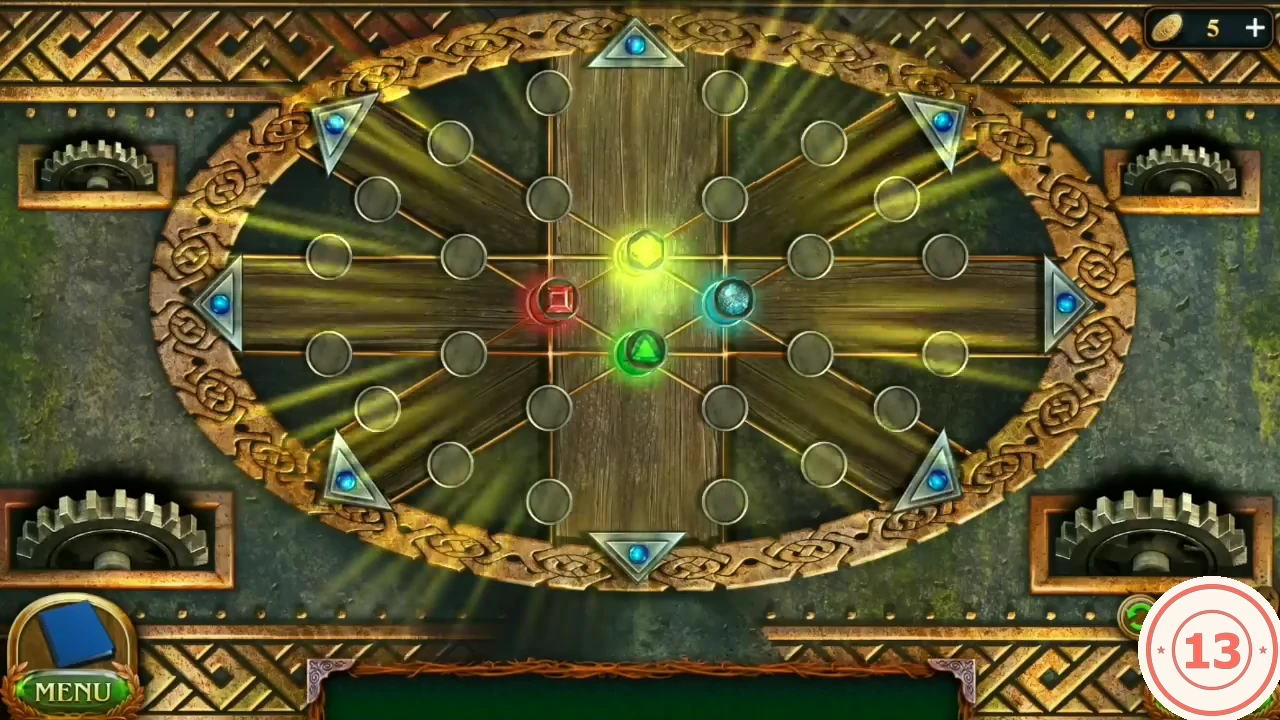
Solved: every gem sits on the ring of its own colour. - Take Father's hammer. Task Family weapon completes; watch the closing story and Chapter 1 ends.