Puzzle: infirmary chest animal paths
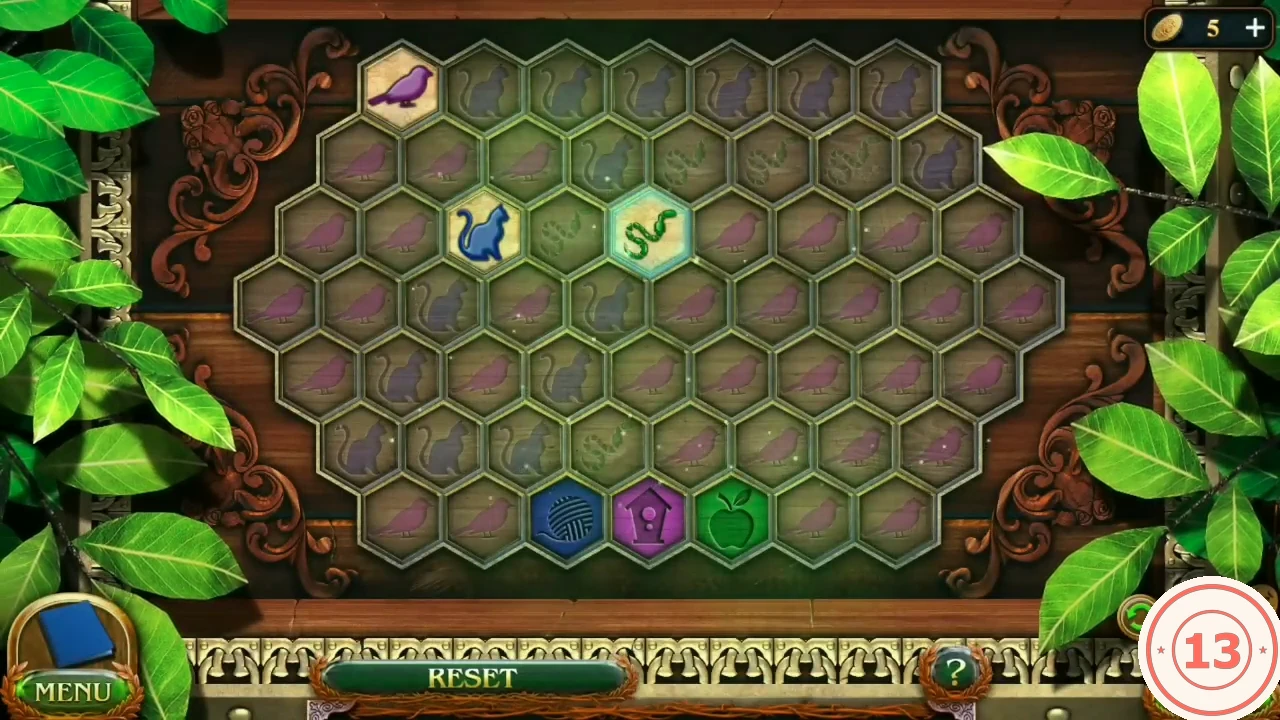
The wounded dwarf lies in the infirmary. A hex-board chest on the left holds the key to the cauldron chain.
- Take the Ointment recipe and, from the scales table, the Piece of the puzzle (hex tile near the mortar).
- Collect the Morphing object on the beam above the dwarf (23/45) and the rune-stone item on the floor runner at the bottom left (set 4/8).
- Put the Piece of the puzzle into the upper-right socket of the chest board.
- How the board works: tap a token to select it and the cells it may use light up; then tap a lit cell next to it to move it one cell. Repeat cell by cell. Each animal must reach the slot of its colour in the bottom row: purple bird to the purple birdhouse, blue cat to the blue ball of yarn, green snake to the green apple. Below, rows are counted from the top (7, 8, 9, 10, 9, 8 and 7 cells) and cells from the left of each row, so the bird starts at row 1 cell 1, the cat at row 3 cell 3, the snake at row 3 cell 5, and the slots are row 7 cells 3 (yarn), 4 (birdhouse) and 5 (apple). First move the bird: row 2 cell 2, then row 2 cell 3.
- Move the cat up and around: row 2 cell 2, row 1 cell 1, row 1 cell 2, row 1 cell 3, then row 2 cell 4.
- Move the snake two cells left: row 3 cell 4, then row 3 cell 3.
- Take the bird home: row 3 cell 4, row 3 cell 5, row 3 cell 6, row 3 cell 7, row 4 cell 7, row 4 cell 6, row 5 cell 5, row 5 cell 6, row 6 cell 5, then the purple birdhouse (row 7 cell 4).
- Take the cat home: row 2 cell 3, row 3 cell 4, row 3 cell 5, row 4 cell 5, row 4 cell 6, row 5 cell 6, row 6 cell 5, row 5 cell 5, row 5 cell 4, row 6 cell 3, then the blue yarn (row 7 cell 3).
- Take the snake home: row 3 cell 4, row 4 cell 5, row 5 cell 5, row 6 cell 5, then the green apple (row 7 cell 5).
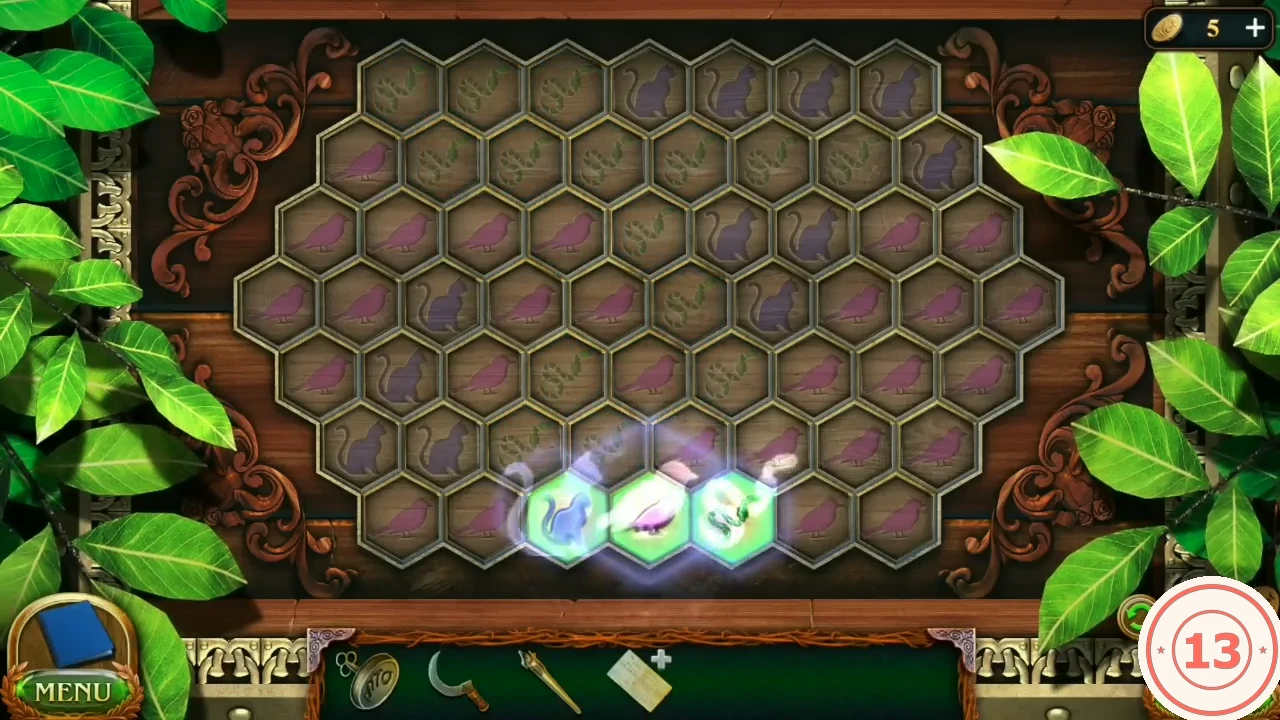
Solved: each animal has reached the slot of its colour. - Take everything from the opened chest: the Chain Key, the Bandage and Historical Manuscript 5/8.
Kraunyyr's tent: herb chest tangram
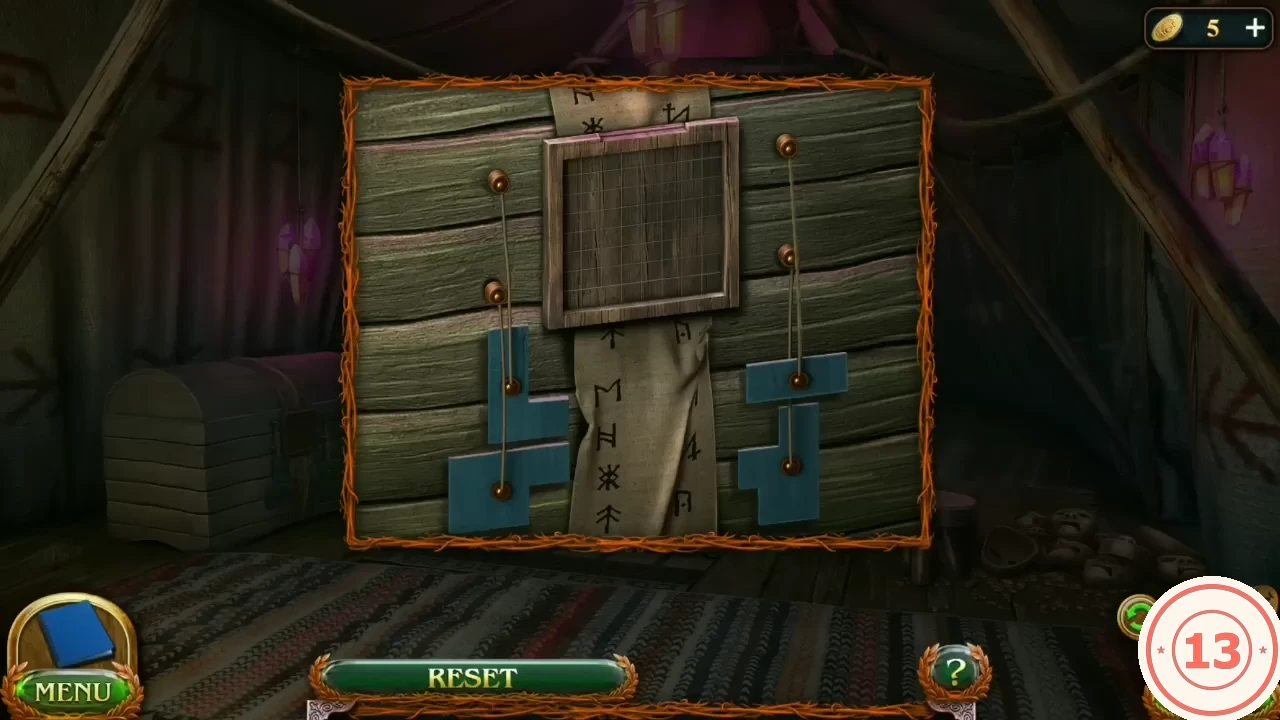
Kraunyyr keeps ritual herbs in a chest in his tent. It can be opened now, but the herbs are only usable later.
- In Kraunyyr's tent collect the dreamcatcher hanging on the right fabric wall, up and to the right of the four-armed idol and just left of the slanted tent pole and the bright pink lantern (dreamcatcher set 5/7), then tap the pale top of the staff Kraunyyr is holding, just right of his head (Morphing 24/45).
- Zoom into the chest on the left and drag the blue tile pieces into the square frame until it is completely filled. Place the largest pieces in the corners first, then fit the small pieces into the gaps that remain.
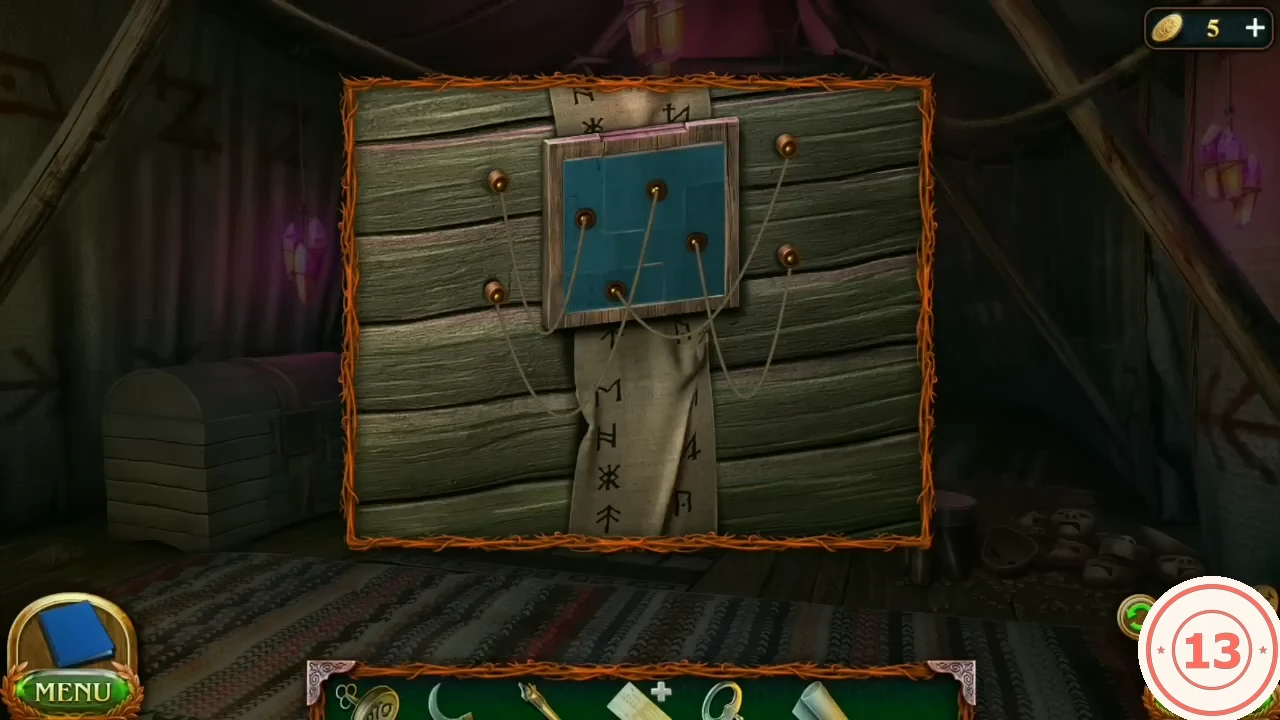
Completed: the frame is filled.
Collecting the ointment ingredients
The recipe needs River silt, Tears of the idol, Pollen of the forest fairy, Firefly ivy flowers, Beetle milk juice, Blood of the victim and 15 leaves of healer's tongue for the wounds.
- Open the chain padlock on the tree by the cauldron with the Chain Key; the cauldron drops. Healer's tongue leaves are counted in one inventory item (x/15). Pick the leaves now exposed among the roots at the lower right of the tree base (3/15). Zoom into the cauldron and take the leaves growing behind its rim at the upper left, beside the wooden scoop handle (5/15), then take the Bowl from the cauldron area.
- In the infirmary use the Sickle on the dried blood on the dwarf's hand to get the Blood of the victim.
- On the castle road take the Firefly ivy flowers from the pink ivy in the arch. Then zoom into the foot of the big tree carrying the totem pole on the right, among the red poppies, and pick the healer's tongue plant there (8/15).
- Take the empty Flask from the cauldron and hold it to the eye of the totem idol on the castle road to collect the Tears of the idol.
- In the waterfall glade zoom into the Sycophant bush on the tree roots and pick the small healer's tongue leaf on the root left of the bush (9/15). Use the Shaft on the branch above the bush so it releases more pollen, then take the Pollen of the forest fairy.
- Zoom into the waterfall pool, pick the healer's tongue leaf on the mossy left bank (10/15) and fill the Bowl with silt from the pool.
- At the herb patch take the Stem of beetle milk and pick the healer's tongue in the bushes right of the blue flowers (13/15). Back in the waterfall glade, pick the last small healer's tongue plant on the bare ground in the middle of the glade, below the waterfall and left of the mossy yellow log (15/15). Place every ingredient on the Ointment recipe in the inventory.
Puzzle: balancing the silt on the scales
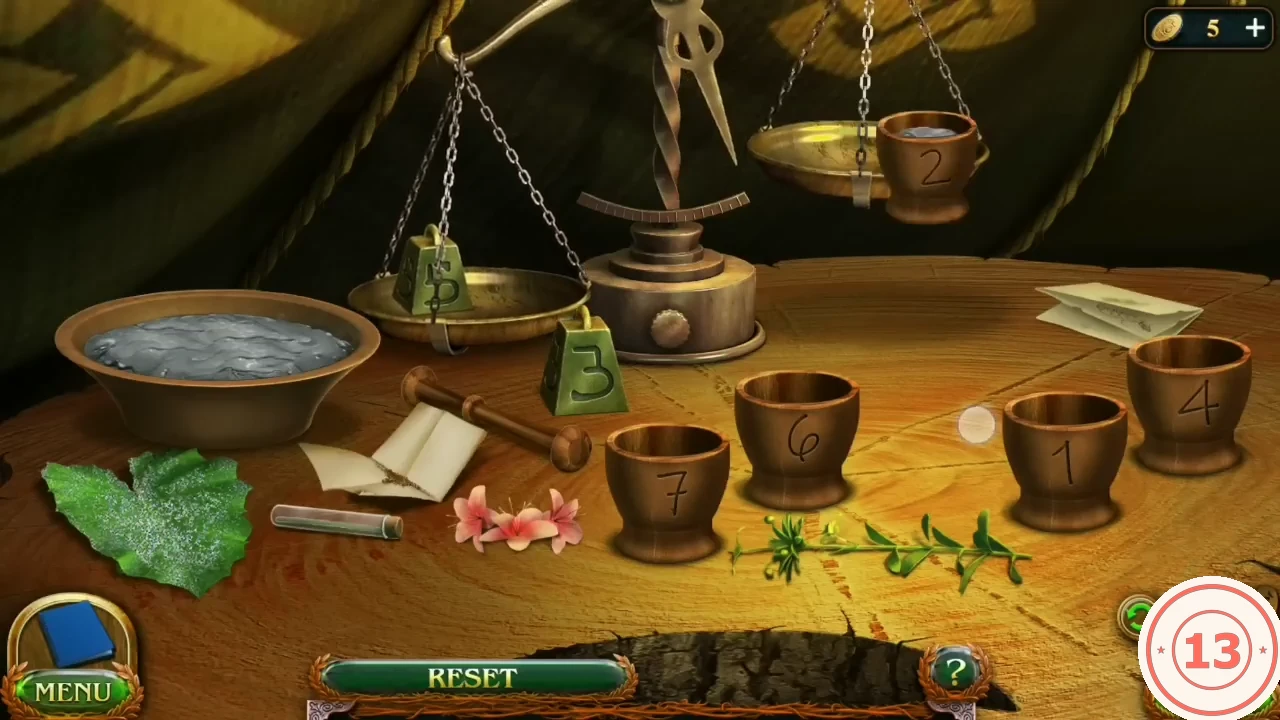
Rule: prepare the cup with the number required by the recipe by balancing it on the scales. The silt must be split into cups of 2, 7, 4, 6 and 1 using the weights 5 and 3. Tap the silt bowl to fill the empty cup on a pan until the pans balance.
- Put the Set of ingredients on the infirmary scales table.
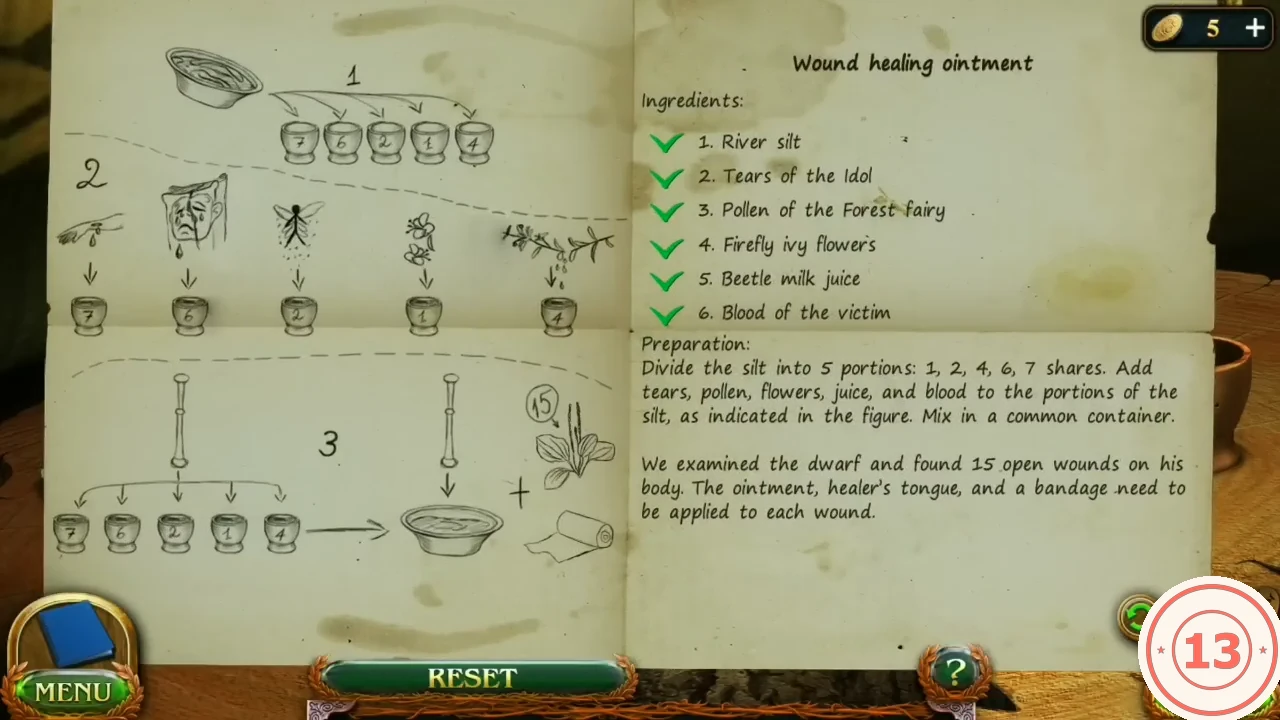
The ointment recipe: the silt must be divided into 1, 2, 4, 6 and 7 shares. - Left pan: weight 5. Right pan: weight 3 and the empty cup 2. Pour silt until balanced.
- Left pan: weight 5 and the filled cup 2. Right pan: empty cup 7. Pour.
- Left pan: weight 5 and empty cup 4. Right pan: filled cups 7 and 2. Pour.
- Left pan: weight 5 and filled cup 4. Right pan: weight 3 and empty cup 6. Pour.
- Left pan: weight 5 and empty cup 1. Right pan: filled cup 6. Pour.
Mixing the ointment and treating the wounds
Follow the recipe figure for which ingredient goes into which cup.
- Drag the ingredients into the cups: Firefly ivy flowers to cup 1, pollen to cup 2, beetle milk stem to cup 4, Tears of the idol to cup 6, Blood of the victim to cup 7.
- Grind each cup with the pestle, pour all cups into the common bowl and stir it with the pestle.
- Treat the 15 wounds on the dwarf: tap each white circle to apply ointment and a leaf; he turns over halfway; finish with the Bandage.
- The dwarf cannot speak. Task Telepathy starts.
Academy library: the Talking mask book
A book in the academy library explains the Talking mask ritual and gives the laboratory code.
- Travel to the academy library. Use the spells directory scroll on the left pillar, go to shelf 4 and read the book Talking mask: four runes, a magic star sign and the herbs chamomile, rose and mint. Task Talking mask starts.
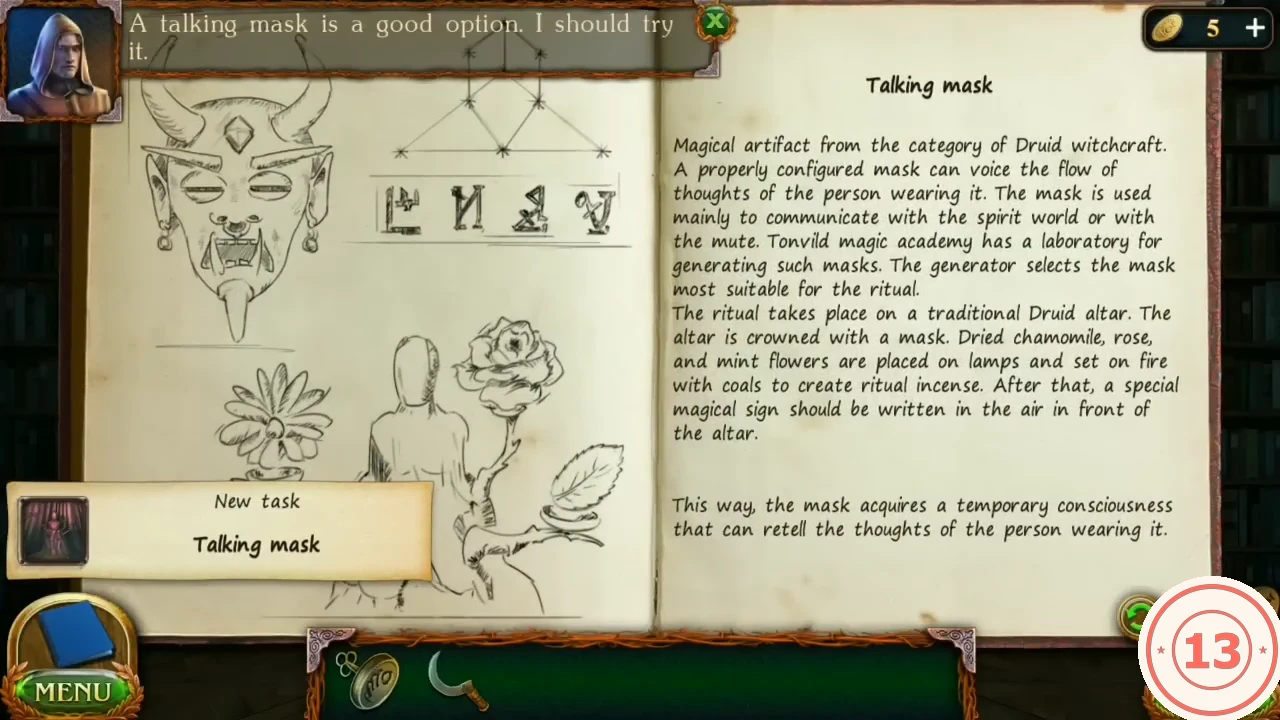
The Talking mask book: the four runes at the top are the laboratory door code; the star sign above them is drawn at the altar later.
Puzzle: laboratory door rune reels
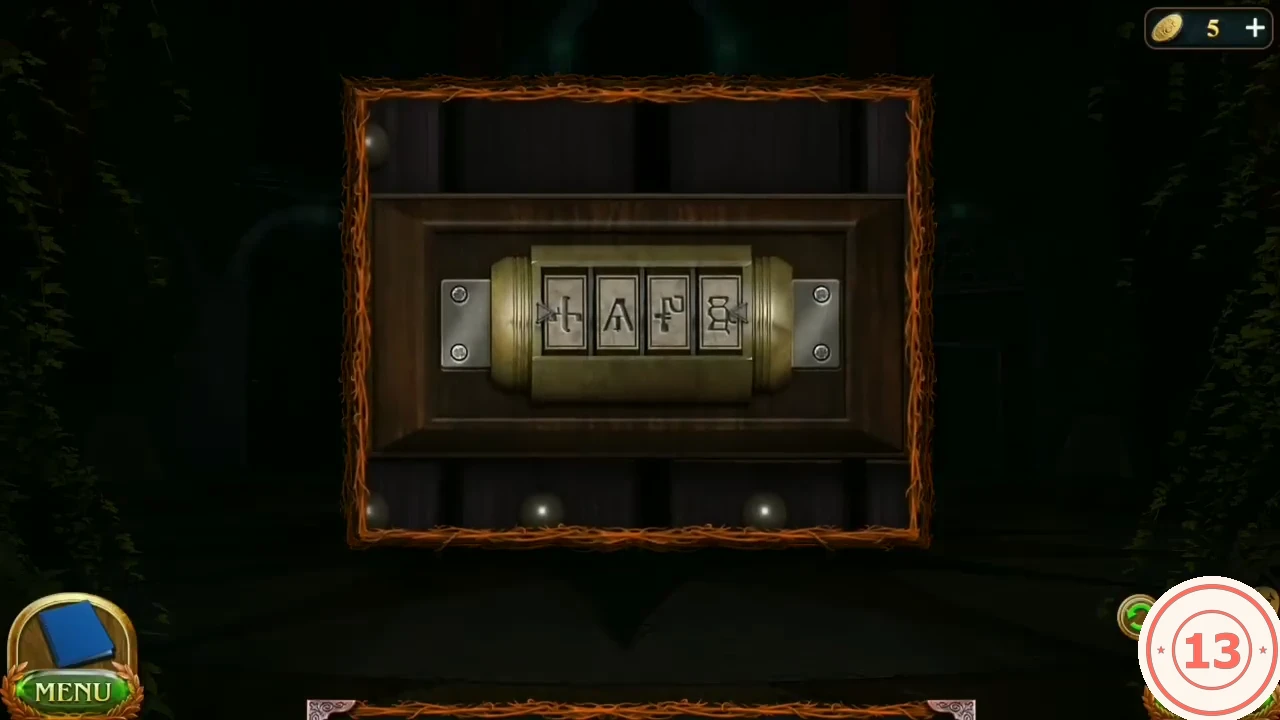
The laboratory door in the academy hall has four rune reels. The code is the four runes from the Talking mask book.
- Zoom into the laboratory door in the hall and set its four rune reels to the four runes from the Talking mask book, in the book's order.
- In the laboratory take the Dry rose from the picture frames (second row, second frame). Collect the rune-stone item at the cushions lower-left (set 5/8) and the Morphing object on the shelf right of the generator (25/45).
Puzzle: Bottomless bag dot grid
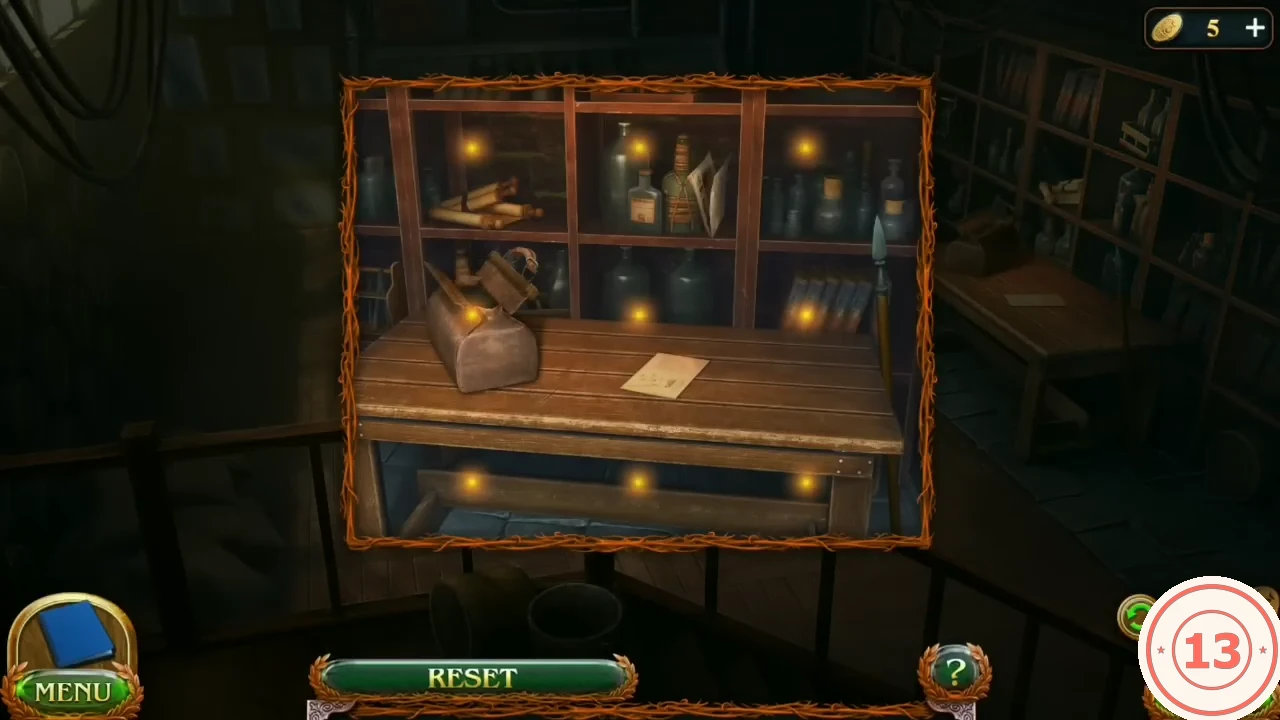
In the laboratory a 3x3 dot grid guards the Bottomless bag. The note on the shelving desk, Bottomless bag, experiment #815, shows which sign to trace.
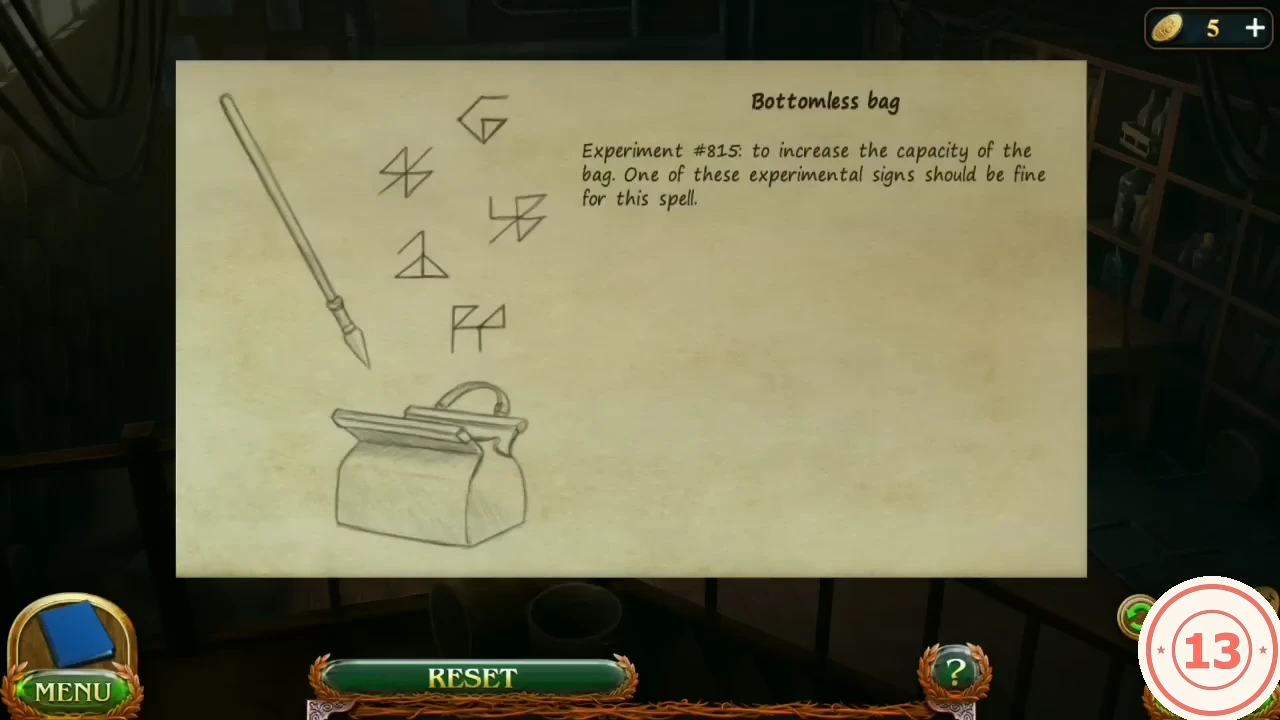
- At the shelving desk read the note Bottomless bag, experiment #815. On the 3x3 dot grid trace the flag sign (the bottom of the five signs): top-left down to bottom-left; top-left to top-centre; top-centre to middle-left; middle-left to centre; centre to top-right; top-right to middle-right; middle-right to centre.
- Take the Bottomless bag and Historical Manuscript 6/8.
Puzzle: mask generator
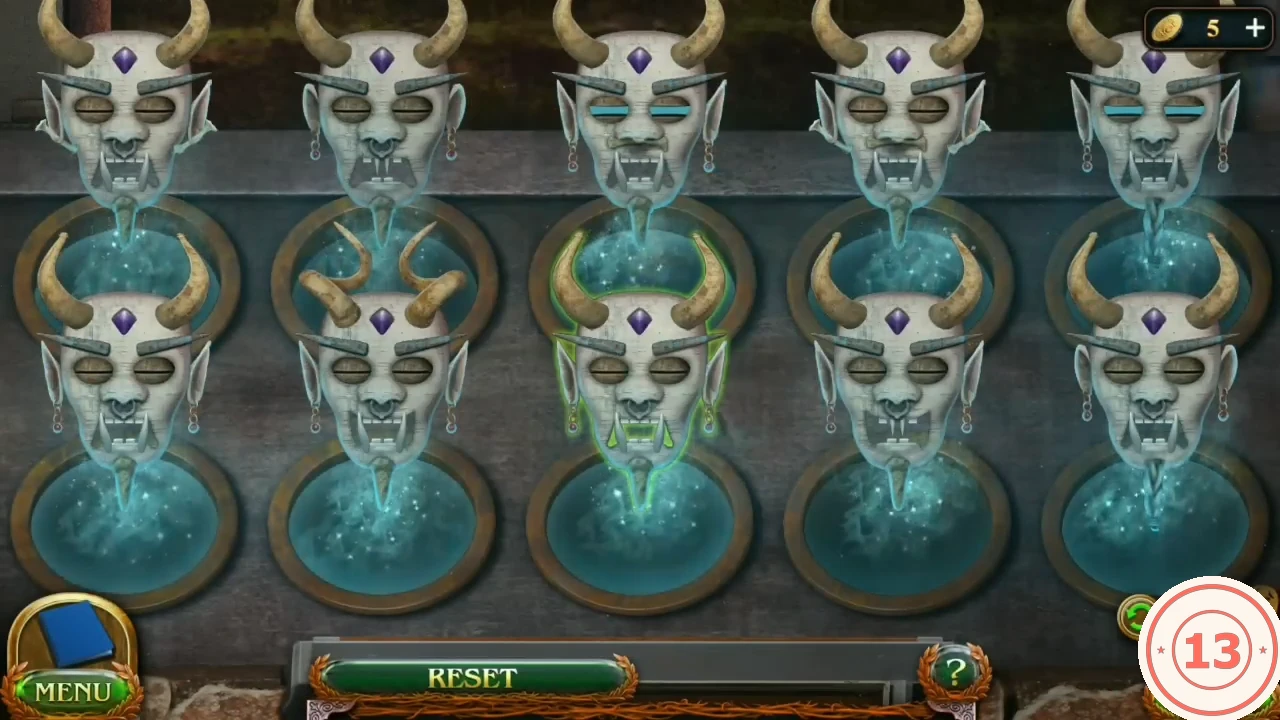
Rule: consistently remove masks with unique elements until the desired mask remains. The side list shows the order: Horn, Smile, Teeth, Ears, Beard, Eyes, Nose ring, Earring.
- In Kraunyyr's tent use the Bottomless bag on the pile of nine pale masks to get the Blank masks.
- Put the Blank masks into the lower hatch of the laboratory generator.
- Work down the list: look at the element named next on all remaining masks, find the one mask whose version of that element differs from the others and tap it to remove it. For example, every mask starts with horns, but one has a differently shaped pair: remove that one first. Repeat for each element until two identical masks remain. Example order from one game, counting masks from the left in the top (T) and bottom (B) rows: B2 (different horns), B4, T2, B5, T5, T3 (different eyes), T4, T1. If your masks are arranged differently, use the element list instead of these positions. Finishing in under 90 seconds earns the achievement Brilliant.CODEB2, B4, T2, B5, T5, T3, T4, T1
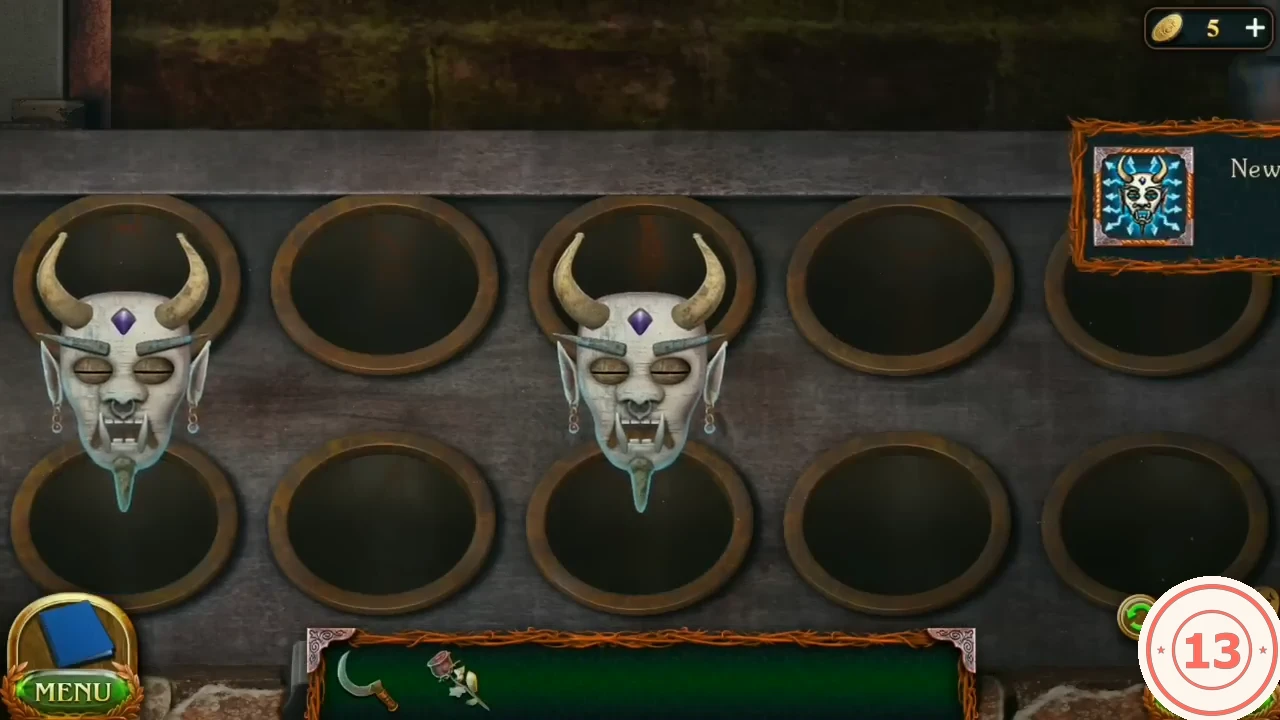
Two identical masks remain: the puzzle is complete. - Take the Ritual mask.
Puzzle: druid altar Talking mask
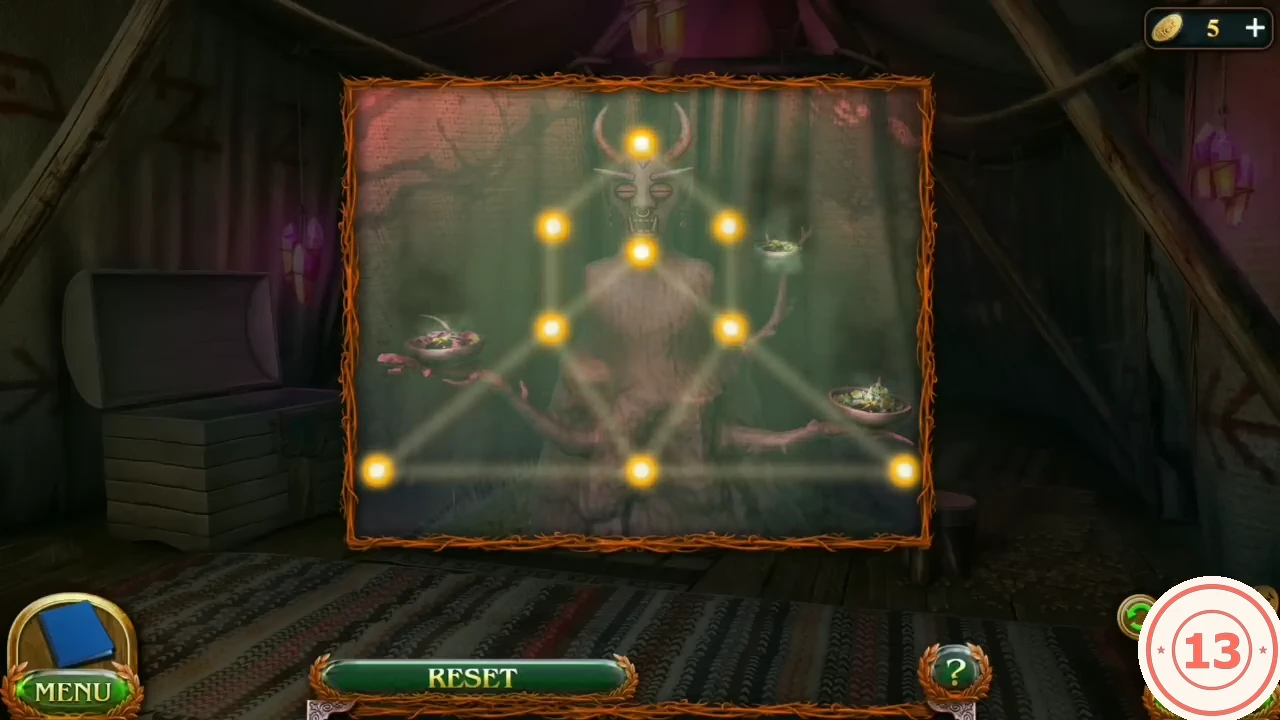
The four-armed idol at the back of Kraunyyr's tent needs the mask, three herbs and fire.
- Put the Ritual mask on the idol's head and the Dry rose into the left bowl. Take the Dry mint from Kraunyyr's chest (now takeable) and add it.
- In the settlement, zoom into the fire under the hanging cauldron and tap the small scoop lying at the lower left of the fire: it fills with embers and becomes Hot coals. Then go to the academy library (the hall with long tables, the upper gallery and the glowing green pillar) and zoom into the near table with the golden vase, the same table that carries the scratched symbol; take the Dry chamomile from the vase.
- Put the chamomile in the lower-right bowl and the Hot coals on the bowls. A 9-dot board appears over the idol.
- Draw the star sign in one stroke: top, upper-left, middle-left, bottom-centre, middle-right, upper-right, top, centre, middle-left, bottom-left, bottom-centre, bottom-right, middle-right, centre.
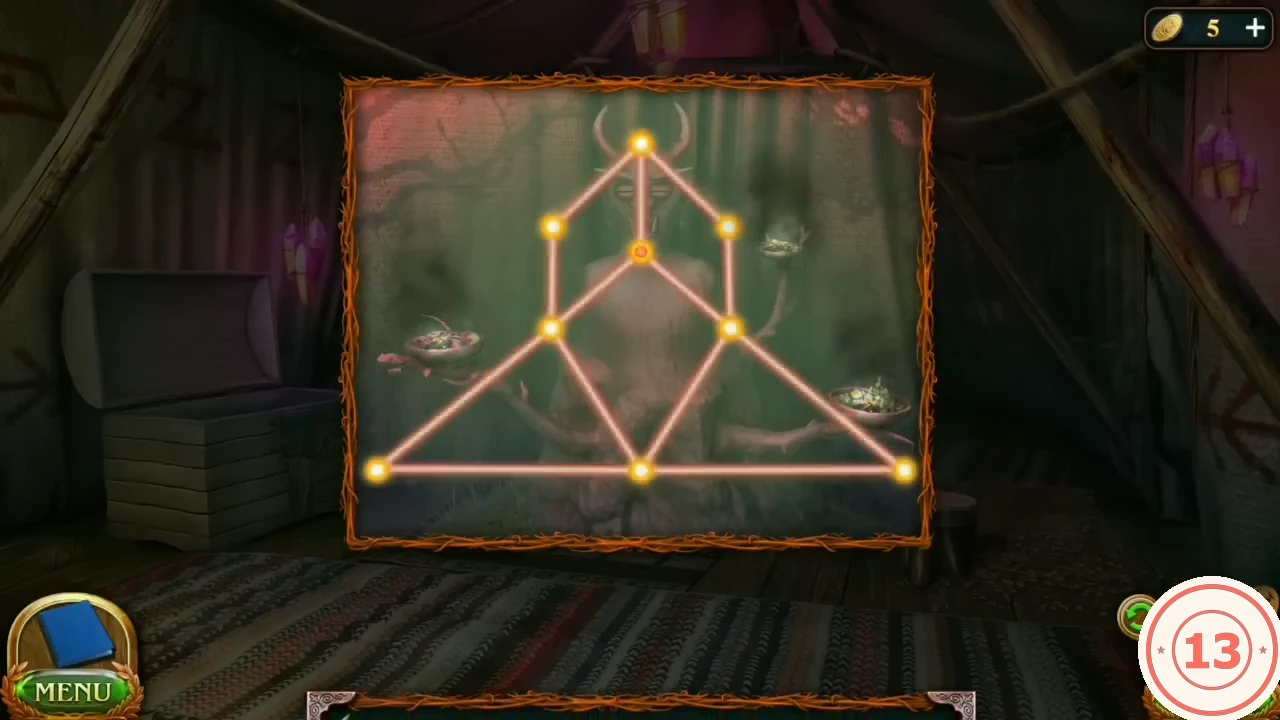
The finished star sign. - Put the Talking mask on the dwarf in the infirmary. Dornord tells of the attack at the dwarven school in Trilly valley; take the School key. Task Scene of the incident starts.