Puzzle: Trilly valley runestone chips
The rector's map shows the Trilly valley dolmen symbol (a boat on a wave). Its runestone is in the archive cabinet.
- In the rector's office look at the dolmen map: the Trilly valley symbol is a boat on a wave.
- In the archive runestone cabinet take the Trilly valley Runestone (top row, third stand).
- Put the Runestone on the lower-left pedestal of the courtyard dolmen.
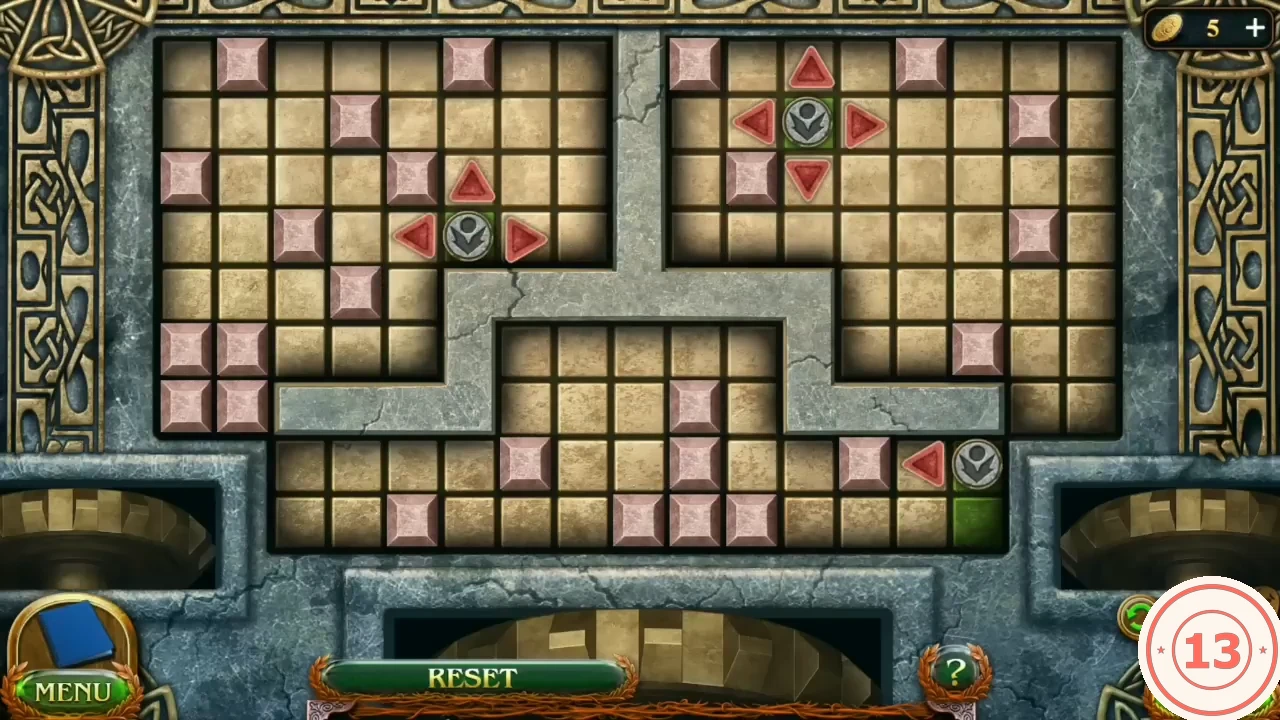
- Rule: move the chips to fill the entire field. Each of the three chambers has one chip. Tap a chip, then an arrow: it slides until a pink block, a wall or a green trail stops it, painting its path green. Fill the bottom chamber first, then the left, then the right.
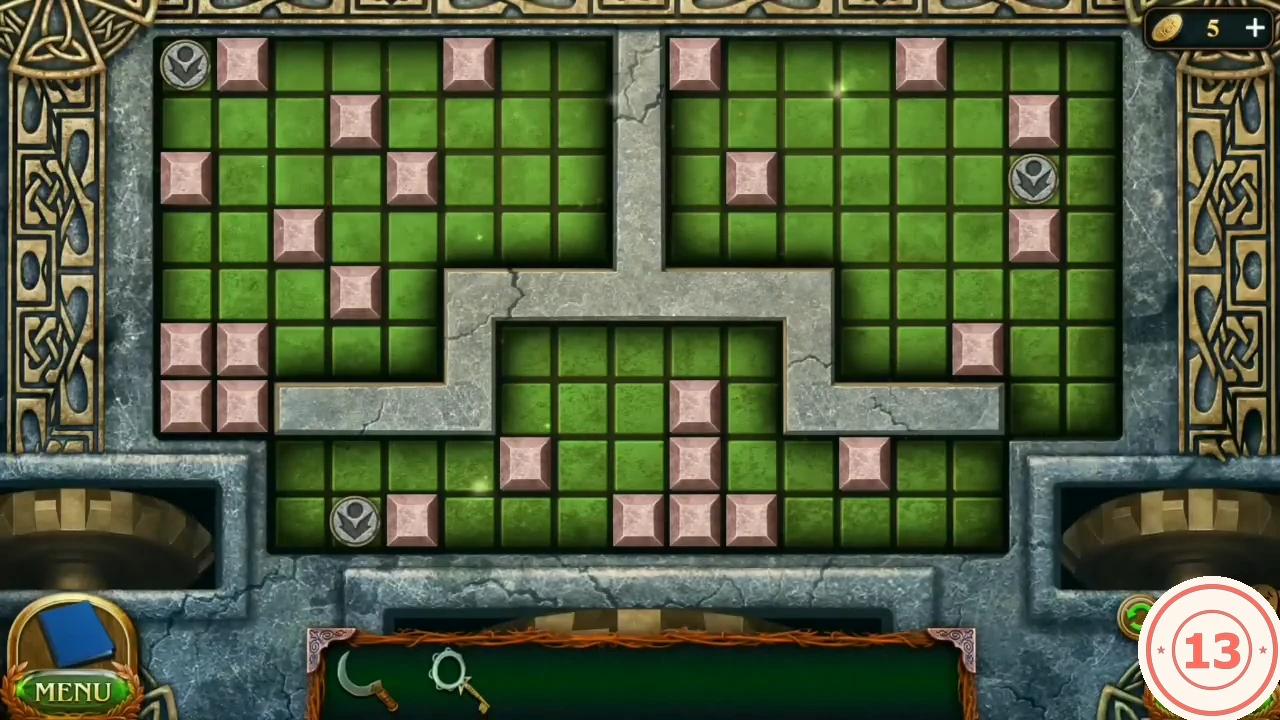
Solved: every free cell is painted green. - Enter the portal to the Keene river in Trilly valley.
Keene river: stable, boat and the Set of tools
A fallen windmill blocks the ferry. Prepare the tools in the stable first.
- Collect the rune-stone item in the stream (set 6/8) and the Morphing object on the cottage roof across the river (26/45). In the stable collect the Morphing object on the floor (27/45) and the dreamcatcher item on the beam (set 6/7).
- Take the Hammer leaning on the tool chest (its top lock needs a key).
- On the riverbank cut the rope over the boat's tarp with the Sickle and pull the tarp off. Smash the barrel in the boat with the Hammer and take the keg of Water.
- Cut the tall grass on the riverbank path with the Sickle to get Oats.
- Fill the stable trough: Oats on the left side, Water on the right. The horse moves to eat; take the Key from the hay where it stood.
- Open the tool chest's top lock with the Key and take the Set of tools.
Puzzle: windmill boards and the ferry
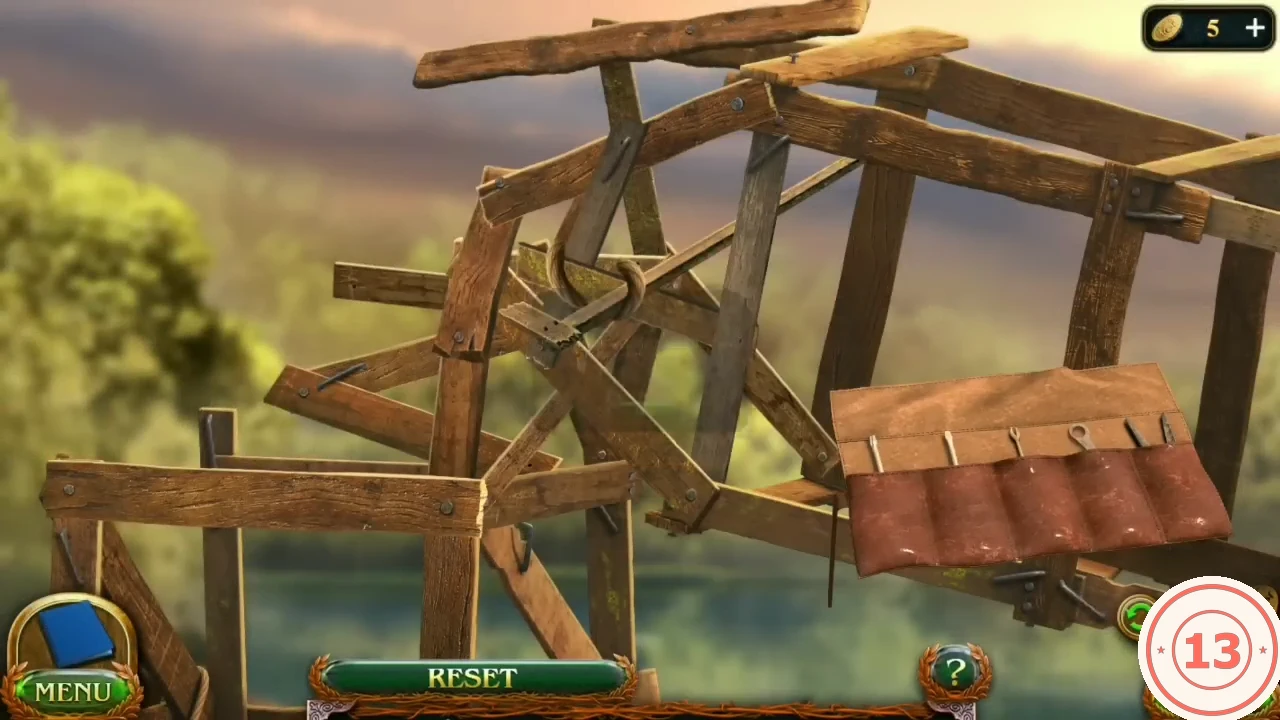
Rule: remove the boards one by one to remove the broken windmill.
- Use the Set of tools on the fallen windmill by the pier.
- Tap only boards that are free (not pinned under another board); a blocked board wobbles, and some boards are reported as not in the way. Keep removing free boards until the structure collapses into the river.
- Take the Pitchfork leaning right of the stall, push the debris away from the ferry with it and cross the river.
Dwarven school: outside the door
The beast has wrecked the school. Get in and repair the blackboard with the staff-room code puzzle.
- Collect the last dreamcatcher item on the wall left of the door (set 7/7, achievement Shaman) and the Morphing object at the stone basin on the left (28/45).
Search: crates in the side building
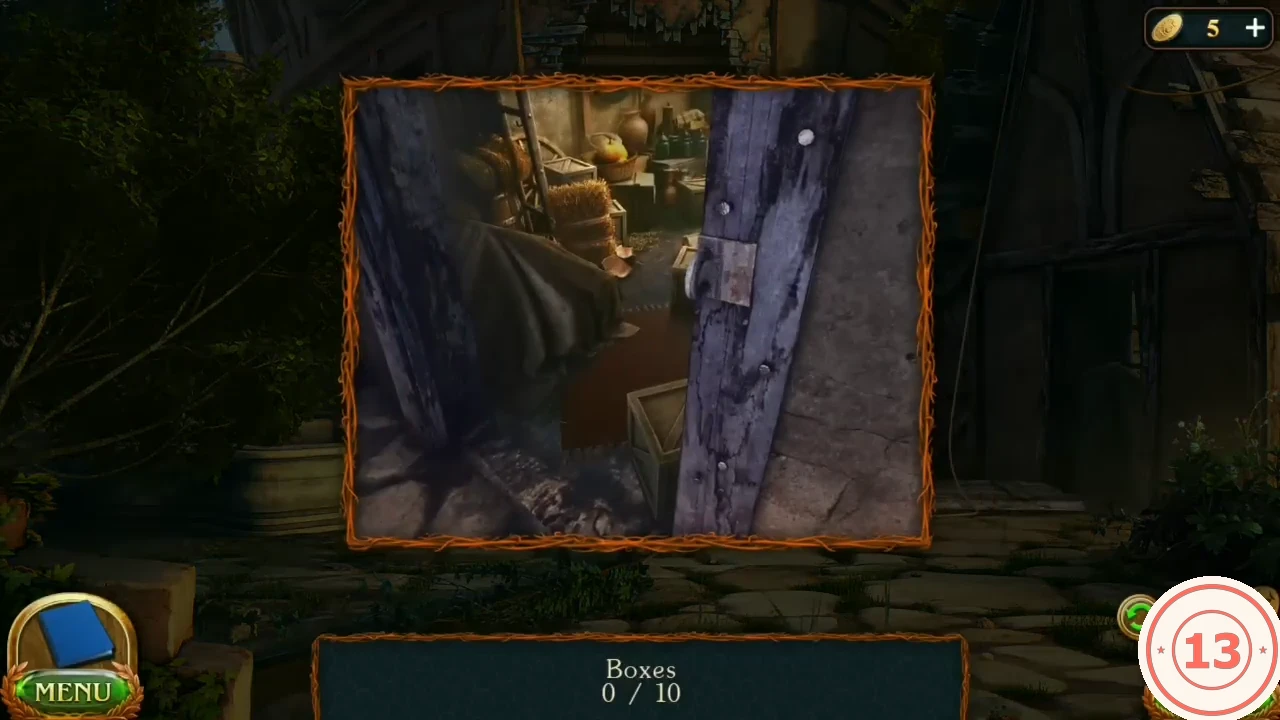
The School key turns in the lock, but the school door is propped shut from the inside. The way in is the broken upper window, and you need a pile of crates to reach it. Collect them in an interactive search (Boxes 0/10) through the gap in the wooden building to the right of the school.
- Use the School key on the school door: "Something is propping the door from the inside".
- Tap the half-open plank door of the wooden building to the right of the school and look through its gap. Tap all 10 crates in the close-up (Boxes 0/10).
- Back in the school yard the crates stack up by themselves against the wall below the broken upper window, to the right of the school door. Zoom into the broken window and go through it into the classroom.
Classroom: the broken blackboard
Inside the school the blackboard is broken; gather its pieces and the Chalk to reach the staff-room code puzzle.
- In the classroom collect the rune-stone item in front of the armchair (set 7/8) and the Morphing object on the dish between chair and books (29/45).
- Collect three Pieces of board: on the left window sill, in the curtain folds, and in the right desk (together with the Chalk). The note on the blackboard says the staff-room code is the answer to the triangle problem.
- Fit the three Pieces of board into the blackboard and use the Chalk.
Puzzle: find all the triangles
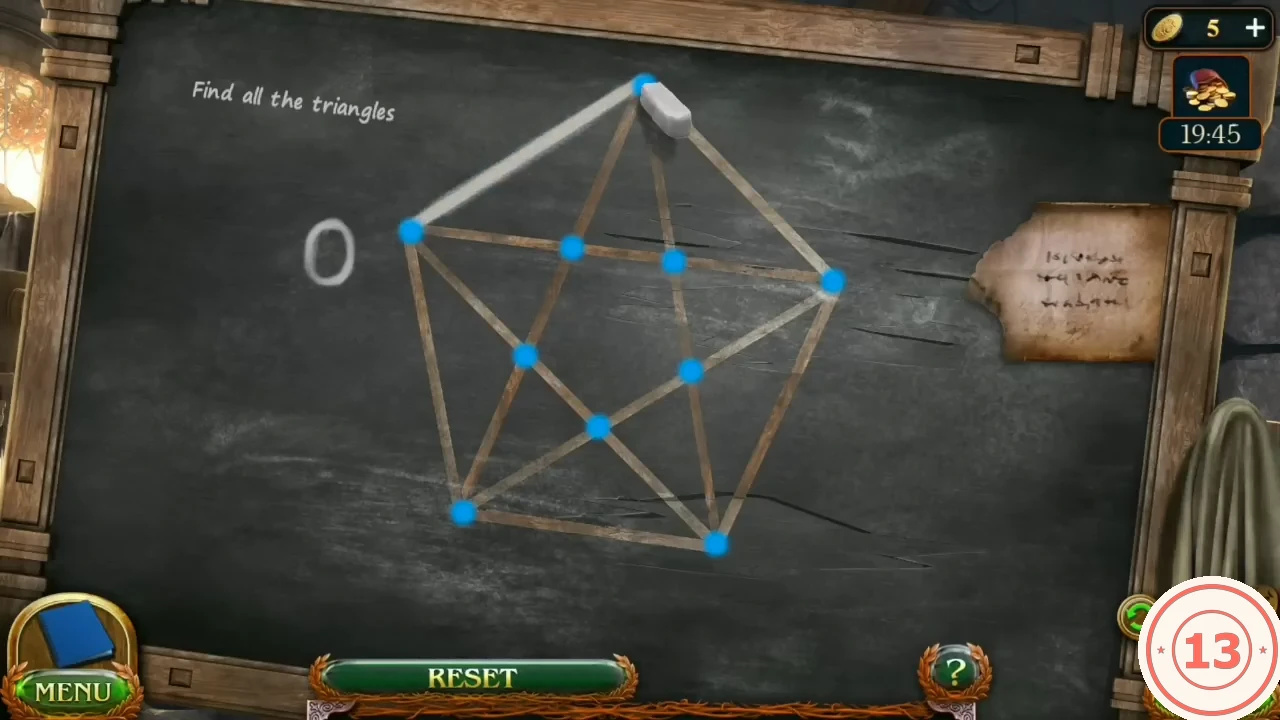
The board shows a pentagon with an inscribed pentagram. Tap the three corners of each distinct triangle; the counter rises with each new one.
- Mark every distinct triangle; the total is 35. Work by type so you do not miss any: the five small points of the star, the five small triangles between the star and the pentagon edges, then the larger triangles that combine several regions. The counter only rises for a triangle you have not marked before.CODE35
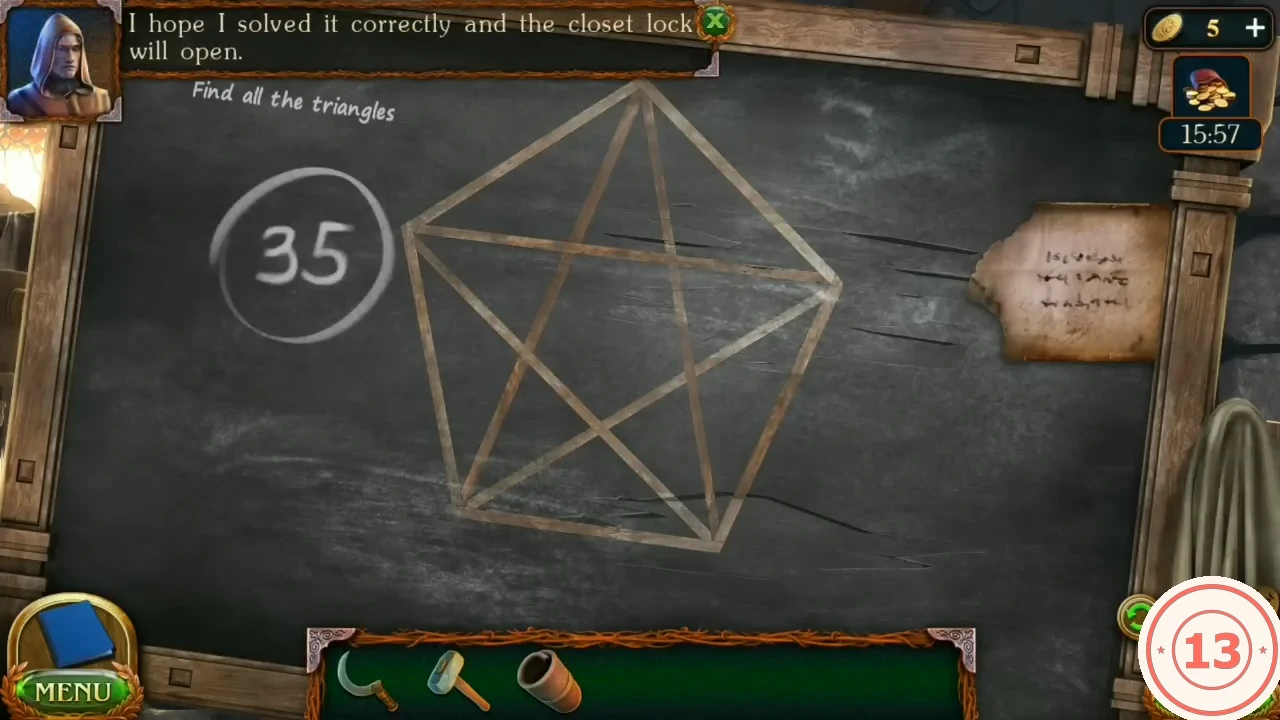
All 35 triangles found. - Set the staff-room door lock to 0-3-5. The beast bursts out of the storage room through the wall. Task Follow the tracks starts.CODE0-3-5
Four horseshoes for the mare
The tracks lead to distant rocks. The mare needs shoes before she can carry Maaron there.
- Take the Casket from the storage room and open it in the inventory: a child's note says one horseshoe is hidden by the fountain.
- Collect the four horseshoes: under the stone at the school-yard fountain base; on the riverbank signpost (pull its three nails with the Set of tools); in the riverbank grass; in the bottom of the rowboat.
- In the stable put the horseshoes by the stump under the mare's hoof. Take the nail tray from the tool chest's middle drawer and place it there too.
- Clean the hoof with the Sickle, put a shoe on, add nails from the tray and hammer them in with the Hammer; the rest is automatic.
- At the mine the task Follow the tracks completes. Tap the last rune-stone item in the tall grass at the right edge of the mine camp, beside the large flat rocks (set 8/8); completing the runestone collection earns the achievement Predictor. Then tap the Morphing object: the round shield on the ivy-covered post at the right corner of the forge shed, which keeps changing its look (30/45). The game confirms that all chapter 2 collection items and Morphing objects are found.
Mine camp: opening the portcullis
A metal cable from the crane holds the mine portcullis. The mare can pull it if the cable gets a loop.
- Unroll the blueprint on the camp table to get the Climber's reminder.
- Take the End of the rope from the cable. Lay it on the anvil and bend a loop with the Hammer.
- Take the Bolt and nut from the table by the blueprint, put it on the clamp and tighten it with the Set of tools.
- Fix the Rope loop to the mare's saddle. She pulls the cable and the portcullis rises. Enter the mine.
Mine: the climber's kit
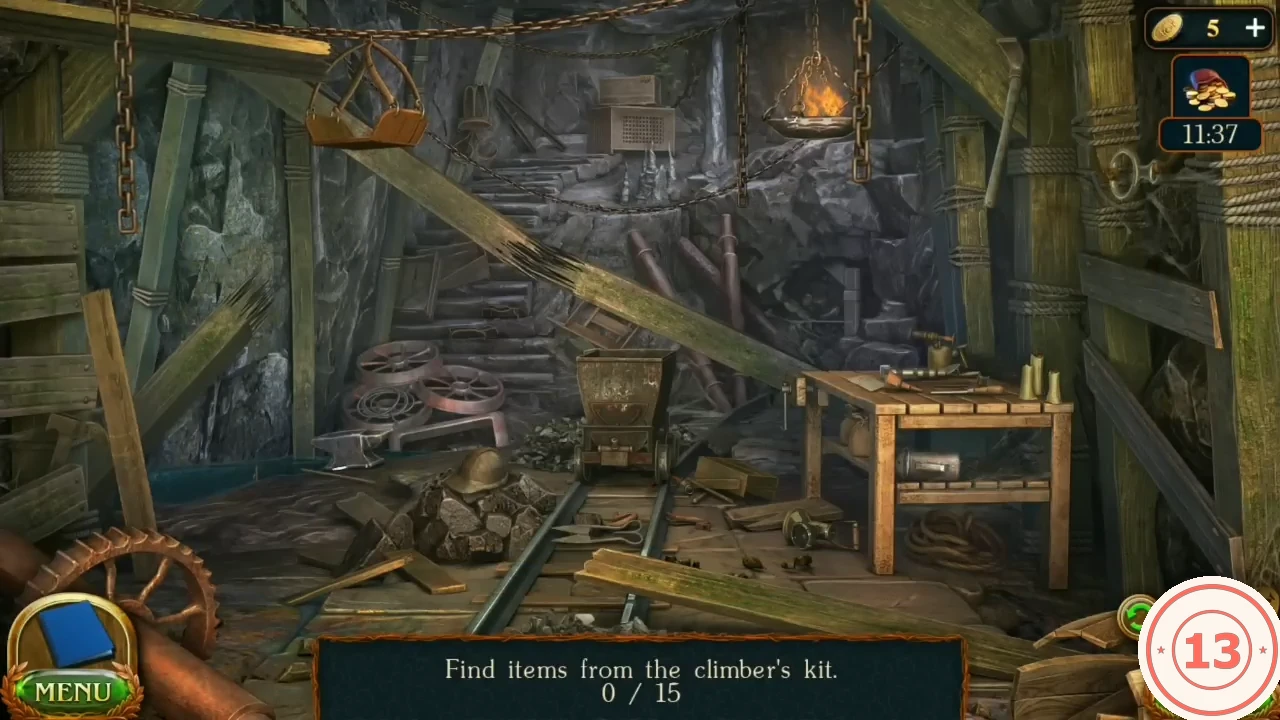
Use the Climber's reminder to start the search: Find items from the climber's kit 0/15.
- Use the Climber's reminder in the mine to start the list.
- The list shows only a counter; the item names and drawings are on the Climber's reminder (Carabiner, Ascender, Rope, Loops, Safety straps, Crampons, Ice ax, Helmet, Fingerless gloves, Seat, Block roller, Figure 8, Rock hook, Climber's hammer, Cable). Open the flooded pit close-up on the left and tap the stick lying in the water: it comes up with a J-shaped rock hook on its end.
- In the main view, take the coiled wire among the cart wheels on the left, the miner's helmet on the rock pile and the leather strap on the stairs above the wheels.
- Pick up the shears lying on the rails and use them on the cords that tie a metal ring to the right-hand post beside the workbench. Take the ring.
- Open the crate close-up: take the carabiner on the lower crate. The upper crate's lid is nailed shut; take the crowbar lying on the rocks at the upper left of the close-up, prise the lid open and take the coiled rope inside.
- Tap the sling seat hanging from the beam at the upper left.
- Open the mine-cart close-up. Move the gold box to the right of the cart and take the T-shaped lever under it. The trolley is on the brake: put the lever into the brake socket, the cart rolls away and you can take the loops it was standing on.
- Take the hammer leaning on the right-hand post. Open the workbench close-up and take the pulley (block roller) on the right beside the knife. Back in the main view, take the coiled cable on the floor under the workbench.
- Take the T-shaped axe head leaning behind the post at the far left, above the big gear wheel, and the two-loop harness hanging on the chain to the left of the hanging lamp.
Puzzle: workbench medallion box
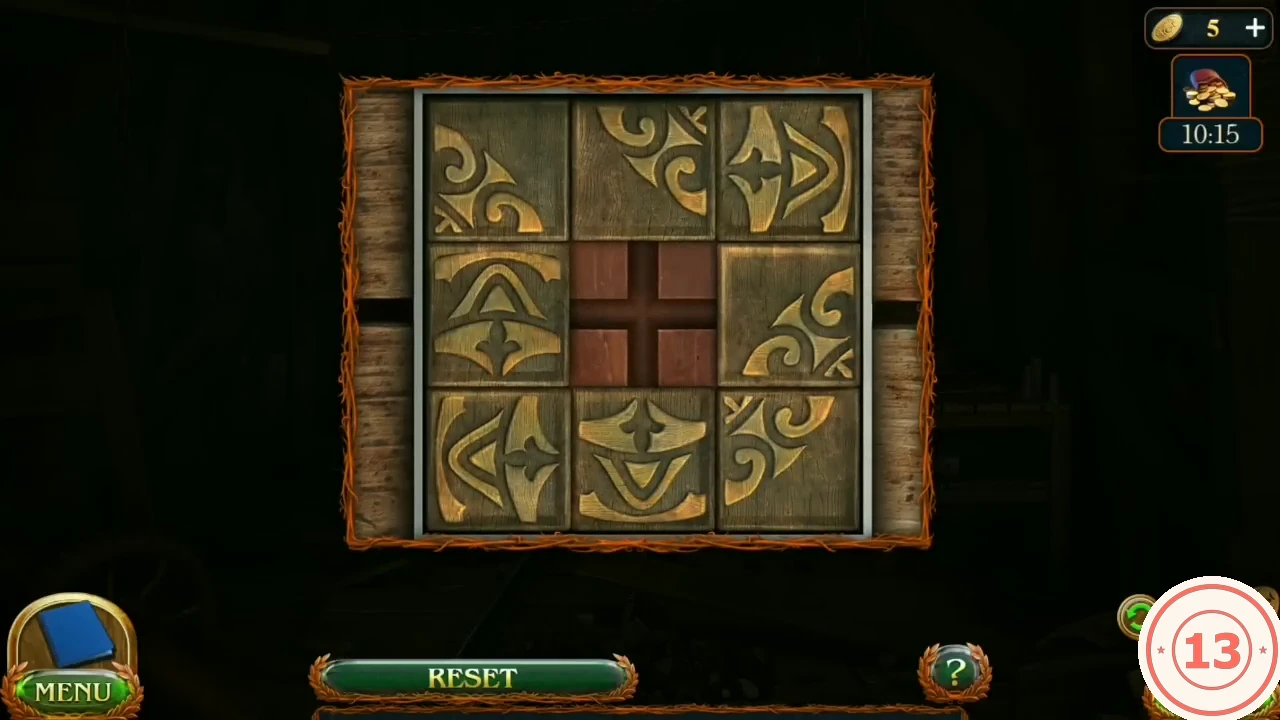
The last climber's kit item is locked in a box on the mine workbench. Its lid has eight gold-patterned tiles around a cross-shaped centre.
- The last item is in the box on the workbench: slide the eight gold-patterned tiles around the cross-shaped centre until they form one round medallion. The lid swings open; tap the metal item lying inside the box to take it. The counter reaches 15/15 and the parts combine into Climber equipment.
Puzzle: climbing the cliff
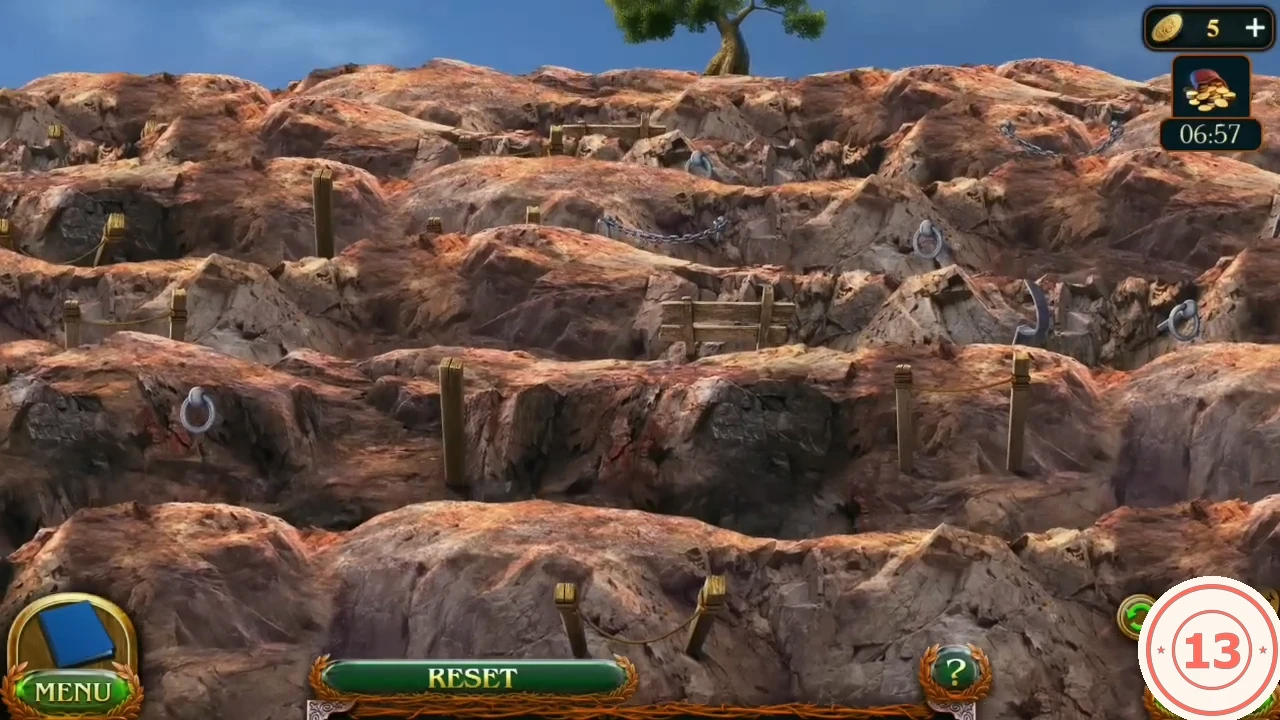
The tracks lead up the cliff to the right of the mine. The rock face is built from eight rows of anchors (posts, wooden fences, rings, hooks and chains), counted here from the roped pair of posts at the bottom up to the ring under the summit tree. Climb one row at a time: tap one anchor on the next row up. The route below reaches the top; on some rows another anchor also works (noted in brackets).
- Use the Climber equipment on the rock face to the right of the mine.
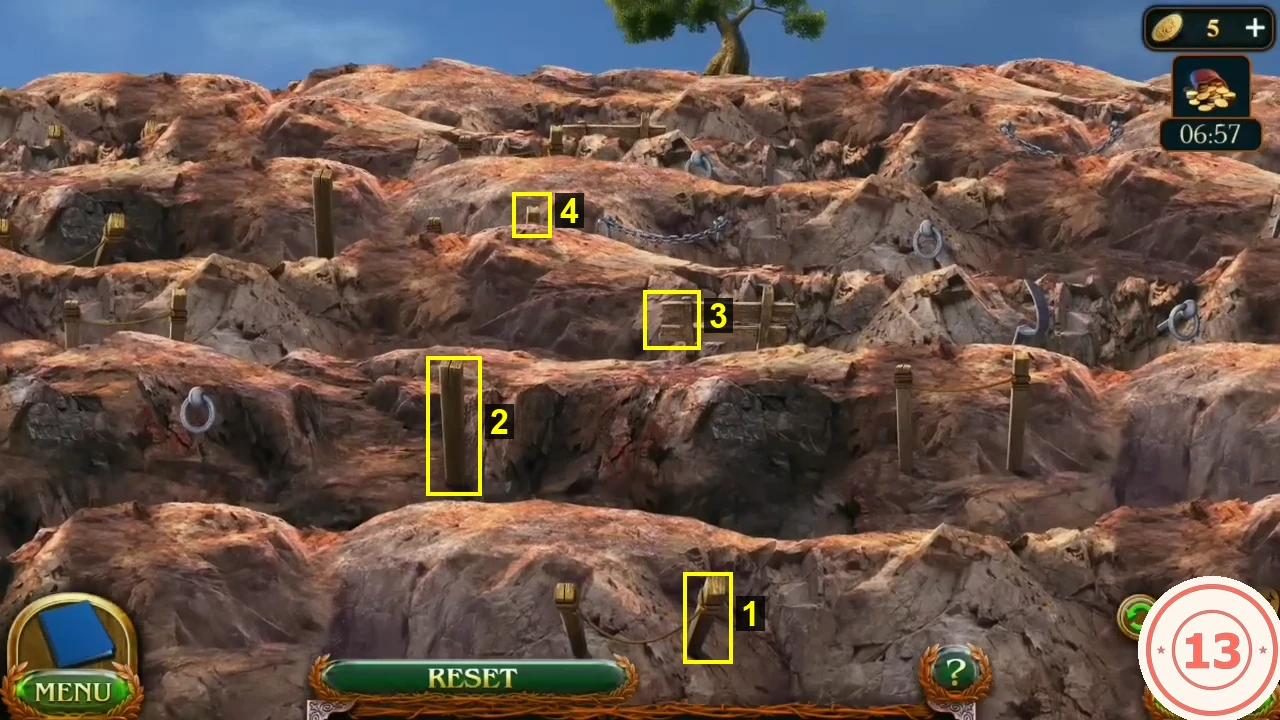
Rows 1-4 of the route (boxes and numbers added by us): 1 right post of the roped pair, 2 tall single post, 3 left end of the fence, 4 right post of the short roped pair left of the chain. - Row 1: tap the pair of short posts joined by a rope at the bottom of the rock face (the rope or its right-hand post). The view climbs up.
- Row 2: tap the top of the tall single wooden post left of centre (the iron ring at the far left of this row also works). A tap on a post two rows higher did nothing - stay one row at a time.
- Row 3: tap the left end of the wooden fence in the middle of the row (the left-hand pair of posts also works).
- Row 4: tap the right-hand post of the pair of short posts joined by a rope, between the tall post and the chain.
- Row 5: tap the left end of the chain at the far right edge of the row.
- Row 6: tap the right end of the wooden fence on this row.
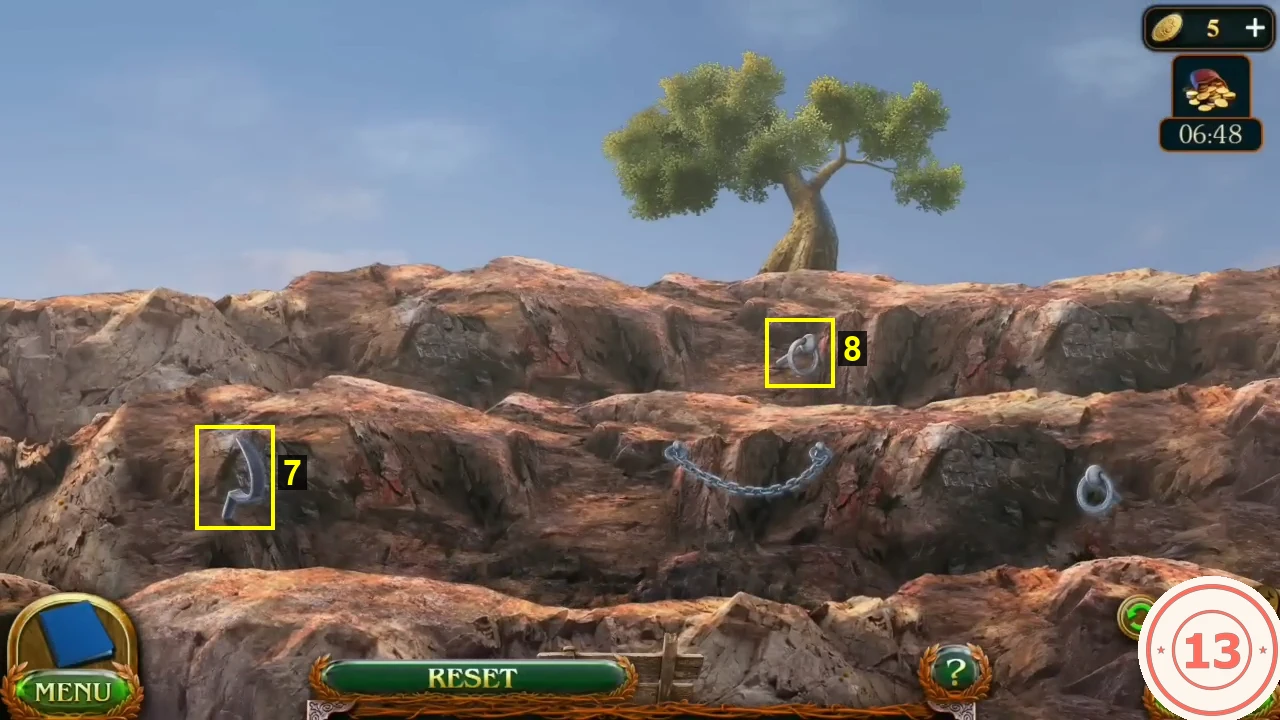
Near the top (boxes added by us): 7 the curved hook left of the short chain, 8 the iron ring just below the summit tree. - Row 7: tap the curved hook left of the short chain in the centre (not the bracket at the far left; the ring at the right end of this row also works).
- Row 8: tap the iron ring just below the tree on the summit.
- Watch the closing storybook (Maaron rescues Folnur). Chapter 2 ends.