Following Mini's Tracks
The glowing lantern shows blue tracks: Mini was dragged from the arena onto the carpet in Zair's room.
- Zair's room: zoom into the glowing floor slab and take the KEY from its recess. Open the wooden cabinet on the right wall: collect Manuscript 7/12 Hunter's lantern and take the BACKPACK WITH PRIZE KYOLLS. The gear box on the upper shelf needs a lever.
- Travel to Grilur's study and take the MECHANISM LEVER from the desk drawer. Fit it on the gear box spindle in Zair's cabinet and turn it; a trapdoor opens in the floor.
- Take the LADDER leaning on the left building at the harbour square and lower it into the shaft; it is deeper than expected. Take the PILLOWS from the hookah tray and drop them in the shaft. Rikahiro jumps down.
Tunnel Arch Lamps
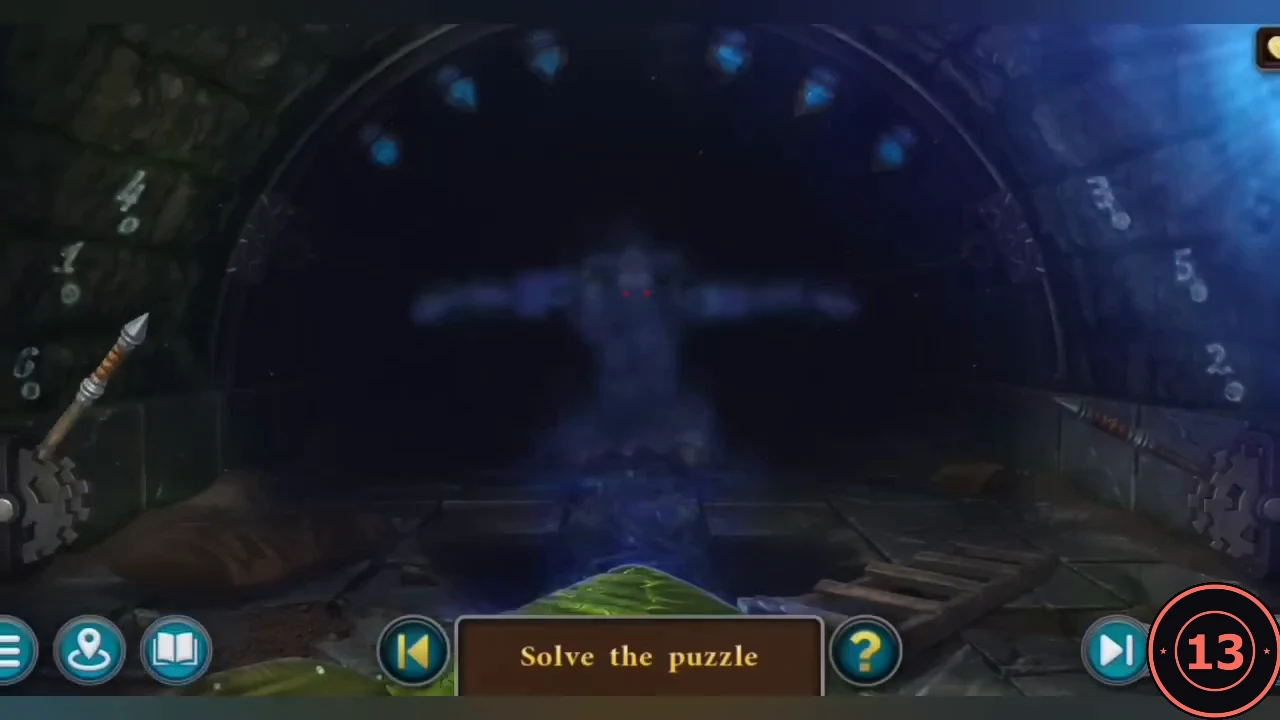
Mini is chained in the dark. Task complete: Minotaur's footprints. Two hook launchers on gears (lower left and right walls) can light six lamps around the arch, three per side.
- The painted numbers on the side walls give the order: left wall top to bottom 4, 1, 6; right wall top to bottom 3, 5, 2. On each side the top number belongs to the highest (inner) lamp. Light the lamps 1–6: left middle, right low, right top, left top, right middle, left low. Tap a launcher to pivot it toward a lamp and fire its hook.CODEL-middle – R-low – R-top – L-top – R-middle – L-low
- Use the ANTIDOTE on Mini. He wakes up. New task: Escape.
Freeing Mini and the Sewer Collector
The pillows cushioned the fall and are stuffed with feathers.
- Flute 7/9 is at the lower left beside the pillows. Tap Mini to collect Manuscript 8/12 Minotaur (all manuscripts in this chapter). Zoom into Mini's head and take MINI'S LOCKPICK from his horn tip. Morph 26/47 is on the right near the floor.
- Use MINI'S LOCKPICK on both wrist shackles to free Mini. Use the MACE on the bricked-up arch; the wall is too thick, but Mini smashes it, opening a passage into an abandoned sewer collector.
- Lute 6/8 is at the upper right edge. Take a VALVE from the right side of the metal door frame. The plaque explains the door opens when the channel valves are turned in the direction the water flows.
- At the upper tunnel mouth with glowing mushrooms take the second VALVE and fit one VALVE on the empty wall socket; turn it for a trickle of water. Morph 27/47 is on the upper left rim. The red valve at the right outlet is rusted.
- The pit's ladder is broken. Take the LADDER from the left floor of Mini's cell and place it at the broken ladder. At the lower tunnel mouth fit the other VALVE on the wall socket and turn it, then use the DAGGERS on the tunnel; water now flows through all channels.
- Take a PILLOW from Mini's cell, place it on the lower right rim of the collector and cut it with the DAGGER. Watch the feathers float through the channels and memorise their path.
Sewer Valve Order
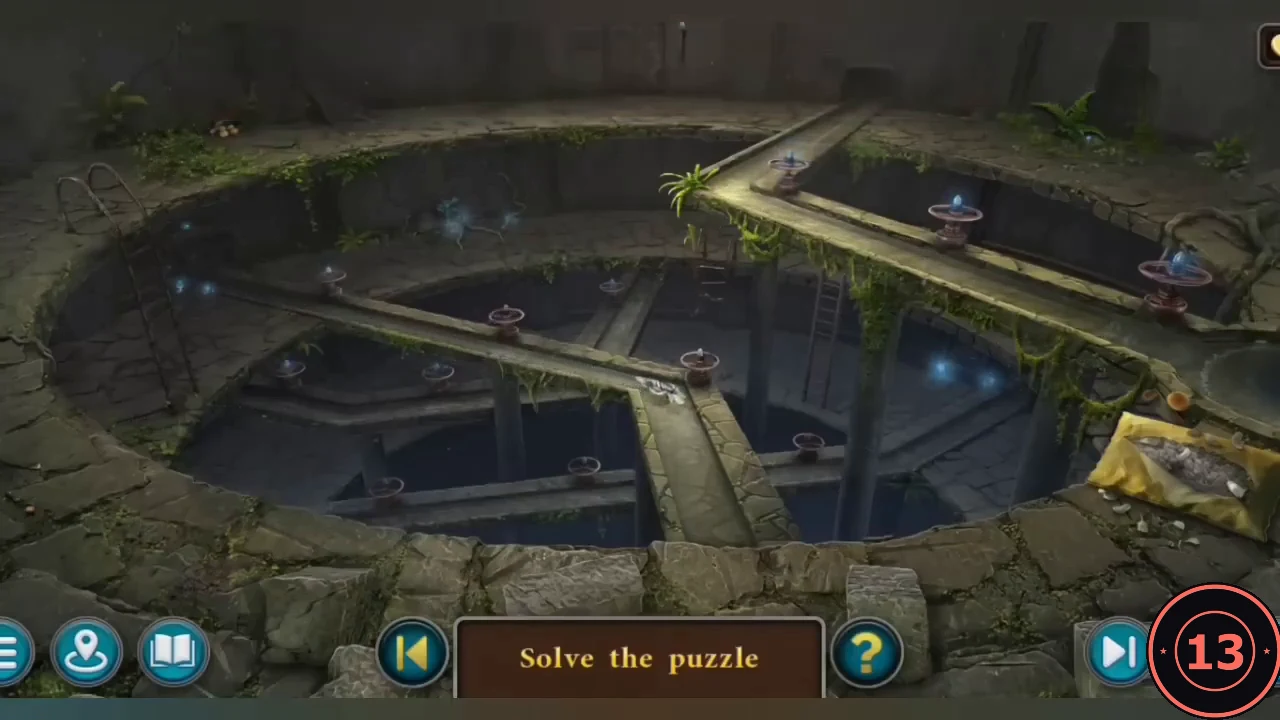
The feathers drift through the channels past every valve; turn the valves in the order they passed. There are twelve valves: three on the upper walkway and ring at the right, three on the middle walkway (left end, middle, centre corner), one on the far ledge behind the middle walkway, two on the lower inner ledge at the left, and three in the bottom row. A turned valve shows a blue water spout about a second after you tap it. Screen positions below refer to the full scene with the pillow at the right.
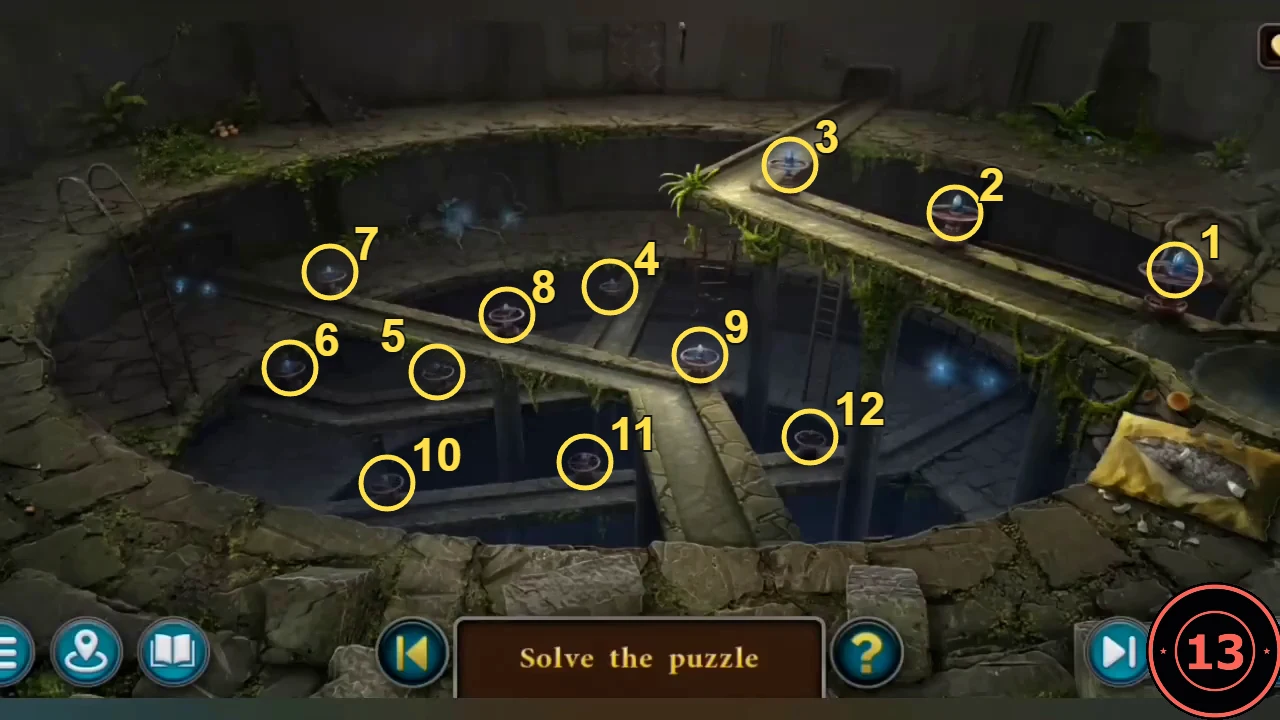
- Tap the valves in this order (numbered 1-12 in the image above; the order the feathers travelled in the reference playthrough): 1 the right valve on the upper ring, beside the pillow; 2 the middle valve of that upper walkway; 3 the top valve at the walkway corner by the palm; 4 the valve on the far ledge just left of centre, behind the middle walkway; 5 the left-centre valve on the lower inner ledge, below the middle walkway; 6 the far-left valve on that same ledge; 7 the valve at the left end of the middle walkway; 8 the middle valve of the middle walkway; 9 the corner valve in the centre where the middle walkway bends down; 10 the left valve of the bottom row; 11 the middle valve of the bottom row; 12 the right valve of the bottom row, right of the central walkway. All twelve spouts turn blue and the sewer door opens.
- The door opens onto pitch darkness. Take the lit TORCH from the wall to the right of the door, then flee into the tunnels before the guards arrive.
Tunnel Maze
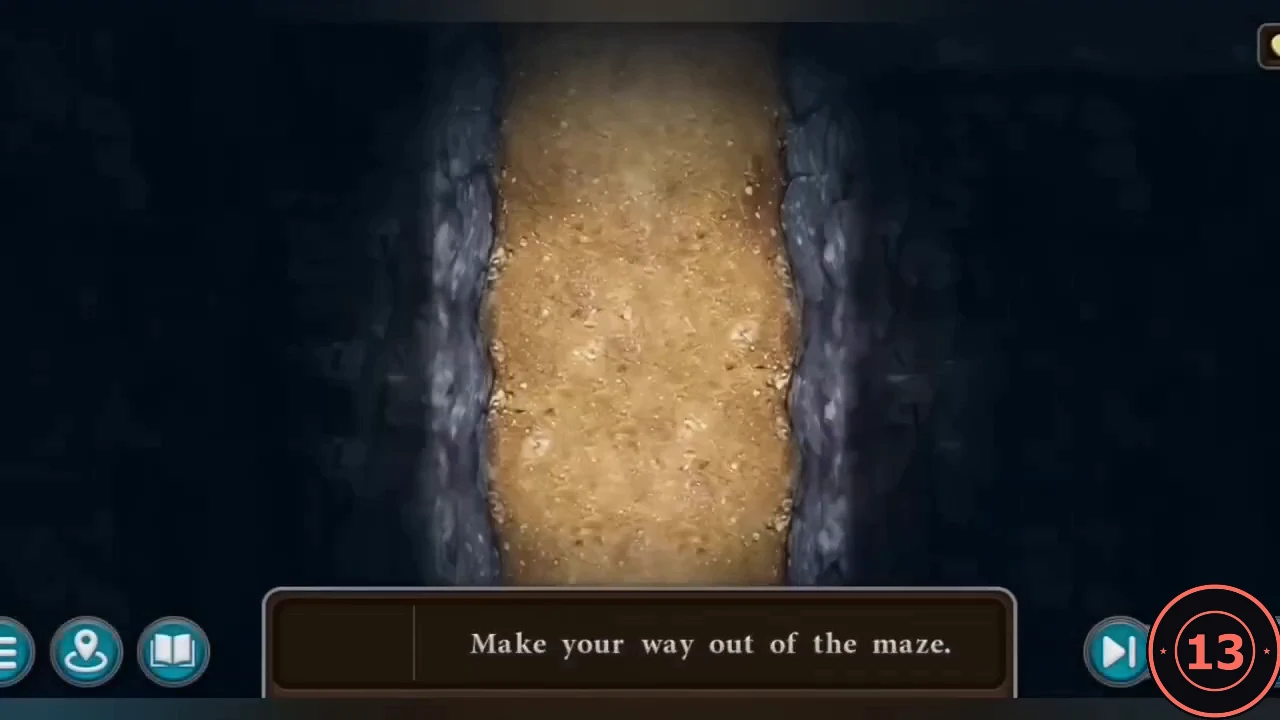
Make your way out of the maze. Only the lantern-lit cell is visible; tap toward an open passage to move one cell. The directions below are screen directions (up = towards the top of the screen), counted in cells, for the layout in the reference playthrough. Passages filled with fallen rocks ("The passage is blocked.") only bounce you back. Every route below was traced cell by cell from the reference playthrough and uses only passages it actually walked through, so it avoids the blocked ones. The barrier with the red, green and yellow sockets closes the top of a short dead end reached from the start by going up 4, left 2, up 1. Three coloured rune tiles stick out of the walls of other dead ends: tap each one so it sinks flush and lights its socket. Once all three sockets are lit, tap the barrier to lower it.
- Red tile: from the start go up 2, right 4, up 2, right 2, down 4, left 2. In this dead end, tap the red rune tile on the left wall; it sinks flush and the red socket on the barrier lights.
- Green tile: right 2, up 4, left 2, down 2, left 4, up 2, left 4, down 4, left 3, up 2, right 2. Tap the green rune tile on the right wall of this dead end so it sinks flush.
- Yellow tile: left 2, down 2, right 3, up 4, right 4, down 2, right 4, up 2, right 3, up 1. Tap the yellow triangle tile on the top wall of this dead end so it sinks flush.
- Barrier: down 1, left 3, down 2, left 4, up 2, left 2, up 1. You are now below the barrier and all three sockets are lit. Tap the barrier; it drops into the floor. Go up 1 across it.
- Chest: right 2, up 1, left 1, up 1, right 1, up 1, right 1. Open the wooden chest in the dead end and take the KEY.
- First gate: left 1, down 1, left 1, down 1, right 1, down 1, left 2, up 2, left 2, up 1. Use the KEY on the gate above you ("Another door!"), then go up 1 through it.
- Shovel: up 2, right 2, up 2, left 4, down 1, left 1, down 2. Take the SHOVEL from the rubble in the dead end.
- Earth pile: up 2, right 1, up 1, right 4, down 2, left 1, down 2, right 6, down 2, right 1, up 4, right 3, down 5. Dig the earth pile in the dead end with the SHOVEL and take the KEY.
- Last gate: up 5, left 3, down 2, left 4, up 3. Use the KEY on the gate above you, then go up 2 along the glowing footprints to leave the maze.
The Frog Statue
The maze ends in a mossy chamber with a frog statue below a dry well shaft.
- Lute 7/8 is on the left wall; Morph 28/47 is on the rocks at the lower right. Zoom into the frog statue and cut the vines with the DAGGERS. The plaque reads "Underground guide: pay the guide, and he will lead you out of the dungeon." Press the stone button on the frog's forehead; the chest in front of it opens.
- Put the BACKPACK WITH PRIZE KYOLLS into the chest three times; each payment raises more stone steps until a spiral staircase reaches the surface. Task complete: Escape.
Bear Gum
Mini asks for one more favour: the hunters' guild cabinet must be opened again.
- Guild hall: use MINI'S LOCKPICK on the arched bookshelf cabinet. It shows the BEAR GUM recipe (corn flour and honey, heated until caramel-like); take the RANGER'S DIARY.
- Crossroads: take the DRIED CORN COB from the cornfield on the right. Farmyard: on the table in the yard, put the cob in the corn sheller, pour the kernels from the pan into the grinder and take the CORN FLOUR.
- Camp cave alchemy table: take the WILD HONEY bowl. Zair's room: take the BURNER from the hookah tray.
- Open the RANGER'S DIARY: put the CORN FLOUR into the honey bowl, stir with the stick and heat the dough with the BURNER. Take the BEAR GUM.
- Stabilizer room: wipe the blackened book pages with the BEAR GUM. Task complete: Bear gum. The Magic Stabilizer page is readable; Mini needs to adjust the stabilizer so the portal can send him home.
Magic Stabilizer
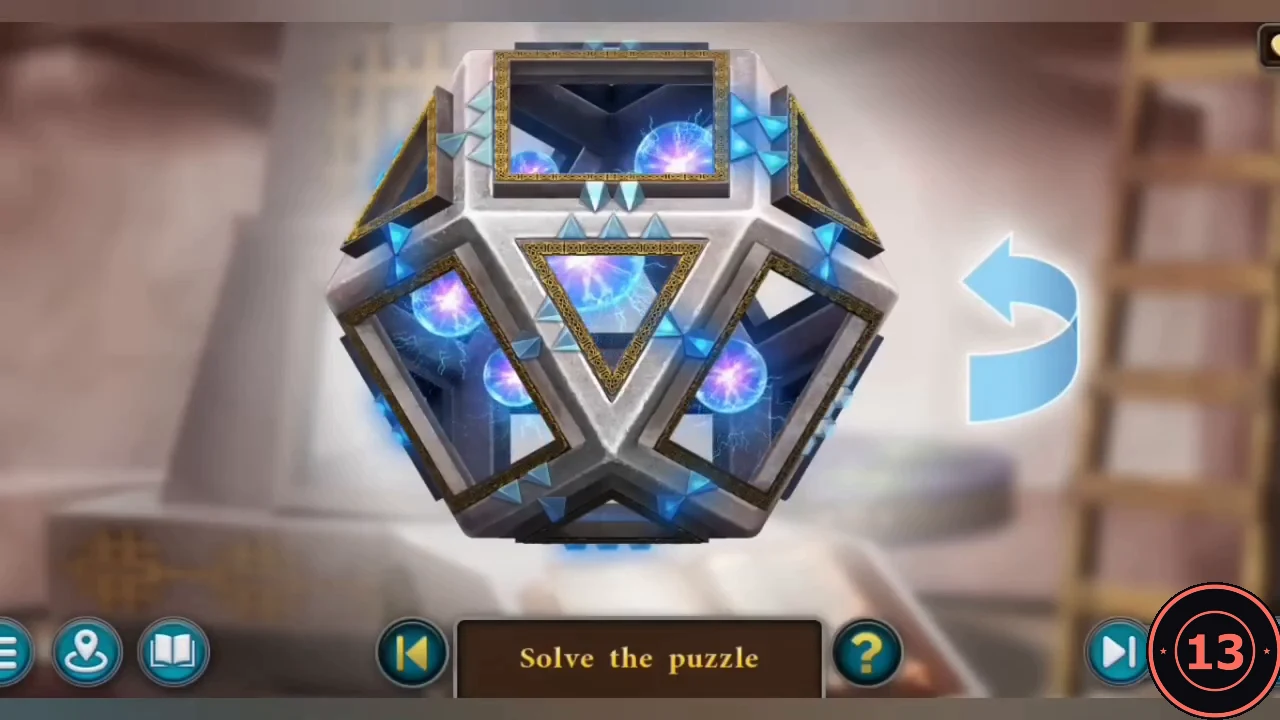
The stabilizer is a polyhedron of triangular and square frames around glowing orbs. The blue curved arrow on the right turns the whole shape to its other side.
- Every frame has groups of small blue spikes along its edges. Tap a frame to rotate it. When the spike groups on both sides of a shared edge line up, that edge locks and glows blue. Solve the visible side, use the arrow to turn the shape, then solve the other side. The puzzle is complete when every edge glows; the image below shows the finished stabilizer.
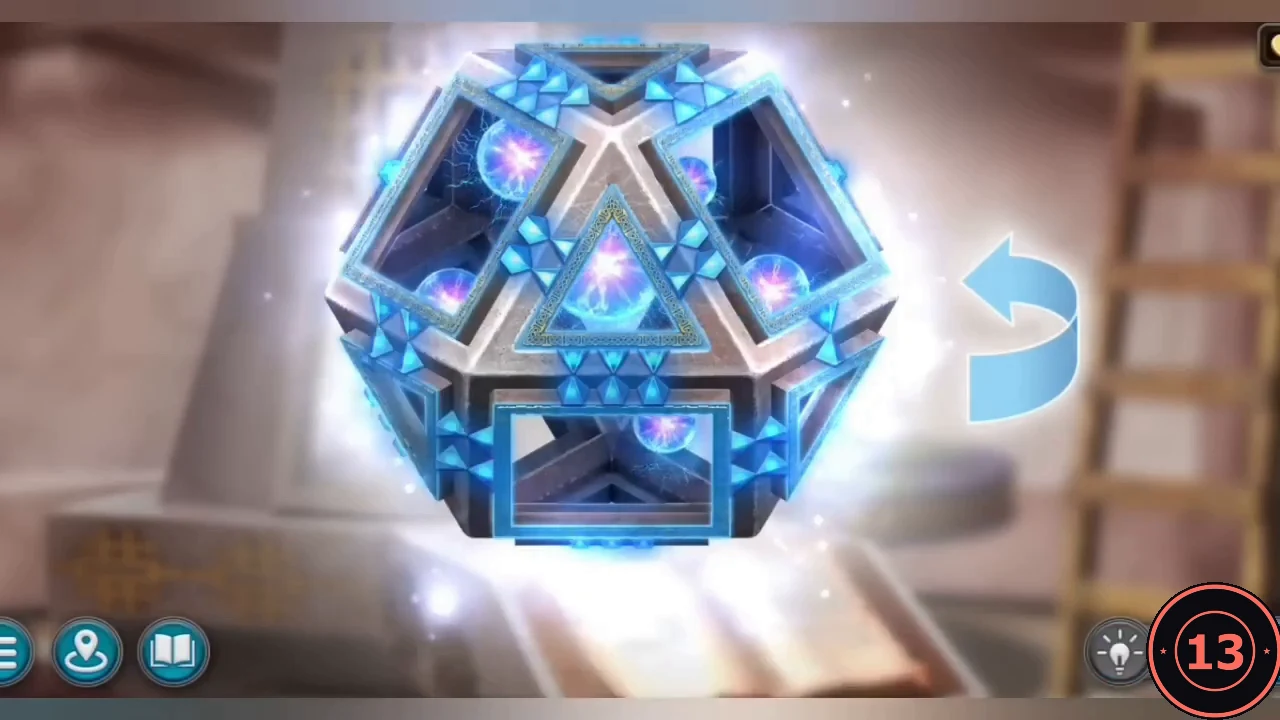
Solved: every edge glows blue and the stabilizer lights up. - Grilur confronts Rikahiro at the tower but lets them go when Rika threatens to expose his stupefier lab. Mini and Rikahiro say farewell and Rikahiro returns through the portal to Japan. In the frame story, a portal appears in Mrs. Shepard's house and pulls her in. The chapter's plot is complete.
Chapter 2 Remaining Collectibles
If you missed any Chapter 2 collectibles, choose Continue after the story to explore again. In the reference playthrough these were collected after the story ended.
- Stabilizer room: Morph 29/47 on the upper-left wall. Crossroads: Lute 8/8 at the lower right edge (achievement Bard).
- Farmyard: Morph 30/47 on the ivy-covered house wall by the window and Flute 8/9 at the upper left above the outdoor oven. Forest riverbank (hut by the river): Flute 9/9 at the right edge among the plants (achievement Esthete; all collectibles in the chapter).
- Rangers' camp cave: Morph 31/47 on the right by the hanging skull. Zair's room: Morph 32/47 on the right wall. A message confirms that all morphing objects in the chapter are found.