Tightrope to the Watchtower
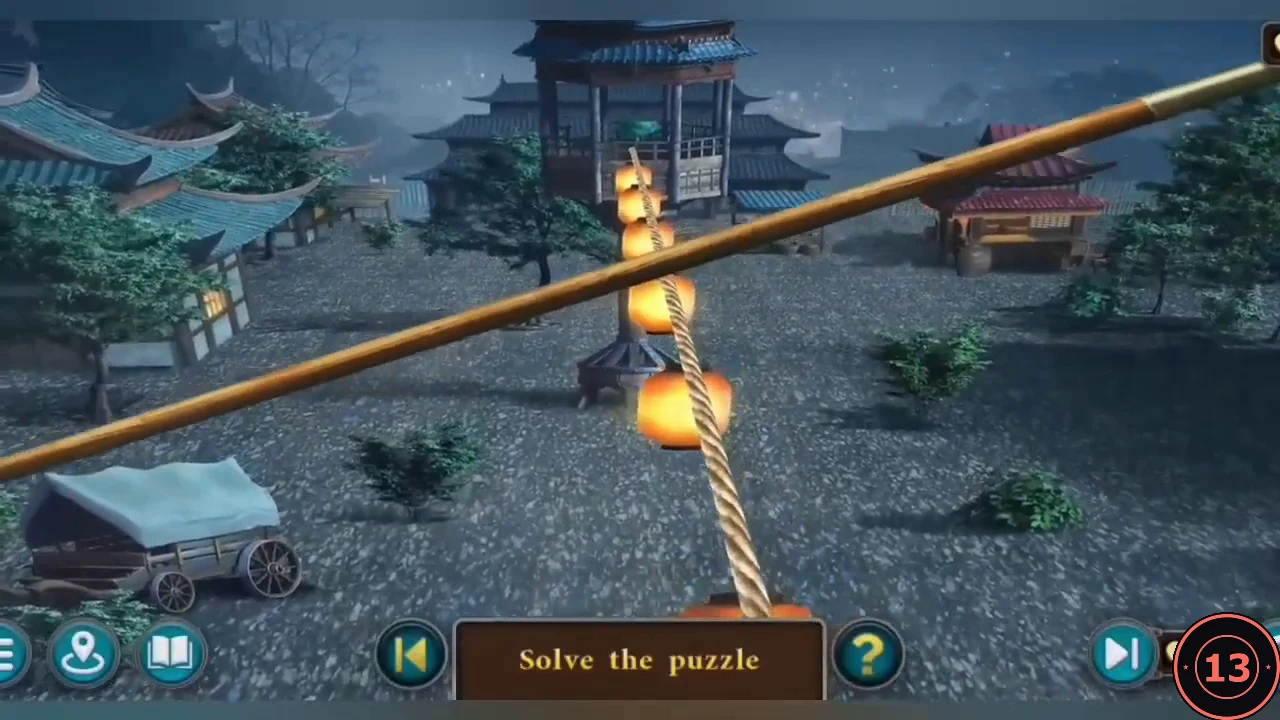
A rope leads from the balcony to the watchtower above the square. Use the SPEAR as a balancing pole.
- Use the SPEAR on the rope. Walk forward and tilt the pole against the direction Cassandra leans to keep it level. If she leans too far, slow down and correct before moving on.
- In the watchtower, zoom into the floor and unroll the rope ladder to climb down to the square. Cassandra realises that the injured dwarf cannot cross the rope; both of you must leave through the gate, so the guards need a distraction.
Assembling the Key
Return to the garden shrine and the commander's room.
- At the garden shrine, the offering box says: take a gift only as needed and leave another in return. Put your remaining COIN in the offering bowl, then open the offering box and take the KEY DETAILS.
- Use the map to travel to the commander's room in the prison. Open the KEY DETAILS box on the low table and fit each part onto its matching outline on the KEYRING to make the ASSEMBLED KEY.
- Insert the RED, BLUE, GREEN and YELLOW gems into the dial of the chest at the back wall. The lock's hole resembles a crest pattern; you need a hint before you can solve it.
- In the hall, open the ornate cell with the ASSEMBLED KEY and cut the pillory rope with the WAKIZASHI to free the prisoner.
Smoke and Mirrors
The freed dwarf suggests a firework to distract the guards. New task: Smoke and Mirrors.
- Take the FIREWORK BLUEPRINT from the freed prisoner and collect Handprint 4/8 on the left pillar of the cell.
- Take CHARCOAL from the hearth.
- Take the TUBE from the papers on the commander's table.
Commander's Gem Chest
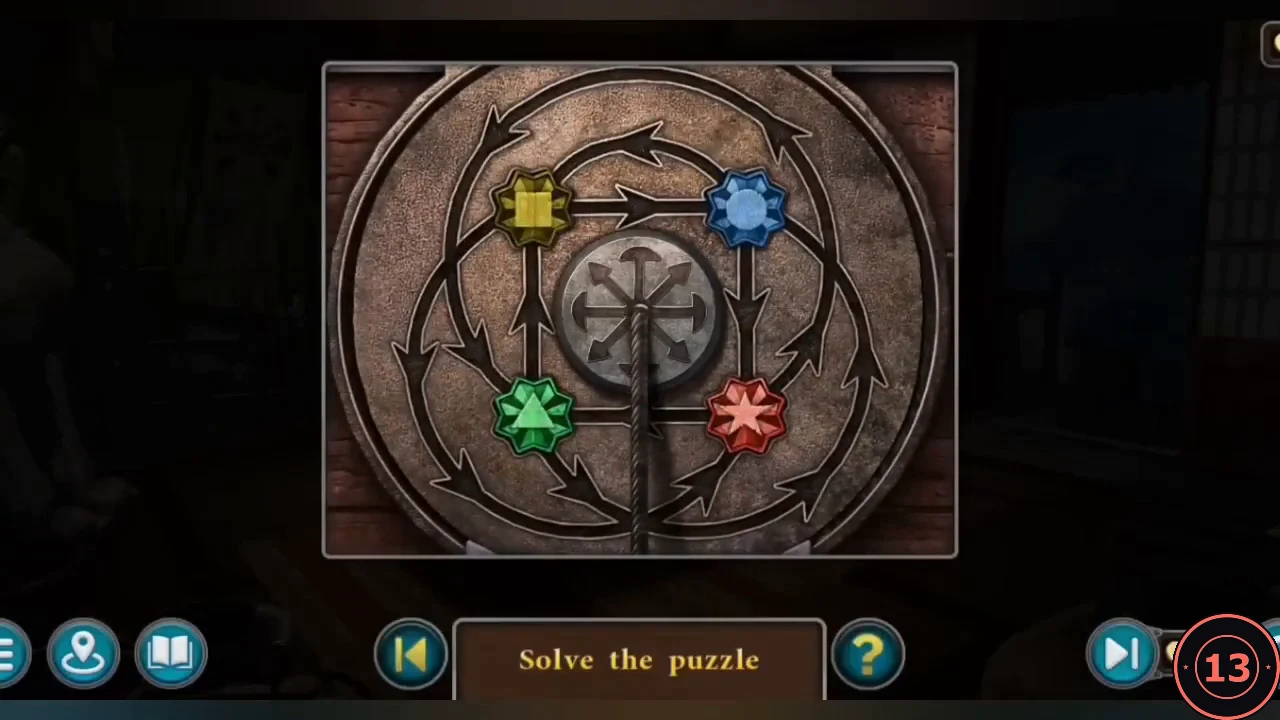
Return to the chest with the gem dial. Place the gems in the correct positions using the blueprint as the hint.
- The Blue Festival Flame diagram on the FIREWORK BLUEPRINT shows a star top left, a triangle top right, a square bottom left and a circle bottom right. Place the red star top left, the green triangle top right, the yellow square bottom left and the blue circle bottom right.
- Take the SULFUR and SALTPETER from the chest.
Measuring the Gunpowder
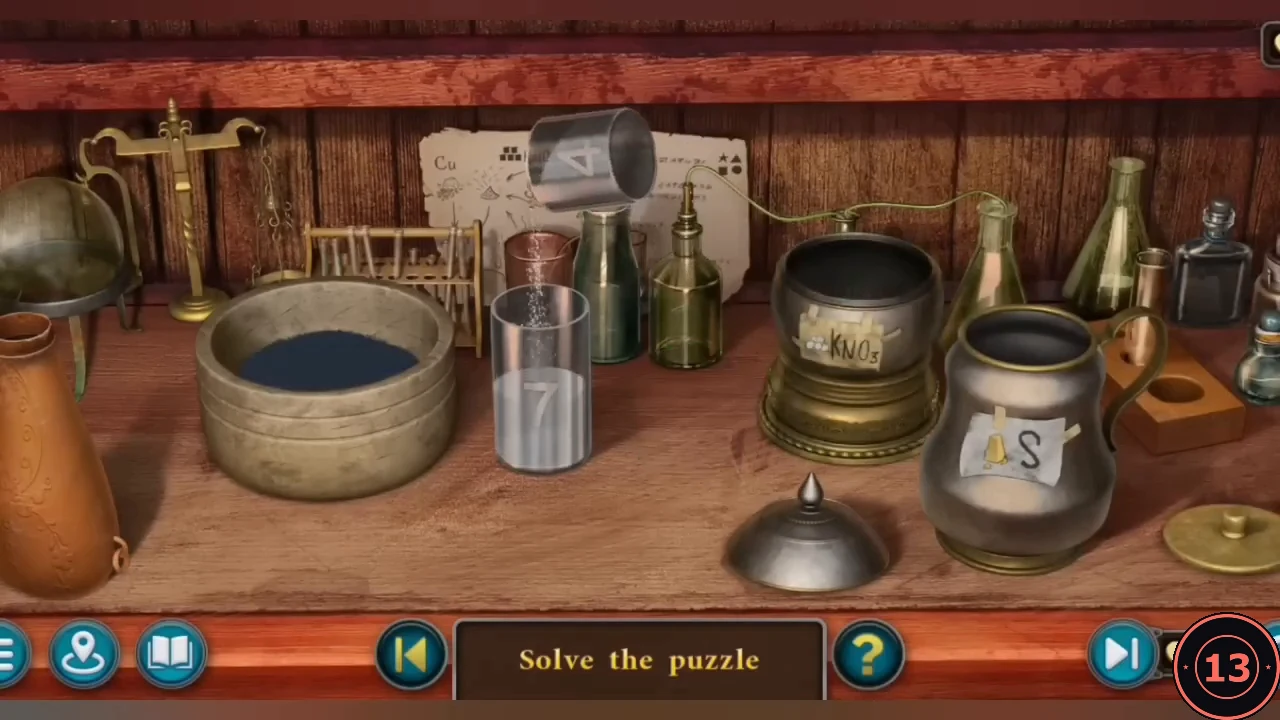
At the lab bench at the back of the cell, the blueprint asks for 5 parts saltpeter, 3 parts charcoal and 2 parts sulfur. You have a 7 and a 4 measuring cylinder.
- Place the CHARCOAL, SALTPETER and SULFUR on the bench; the pestle grinds the charcoal. Tap a source pot to fill a cylinder, tap a cylinder to pour it into the other cylinder, back into its pot, or into the target vessel on the far left.
- Saltpeter 5: fill the 4 and pour it into the 7; fill the 4 again and pour until the 7 is full (1 stays in the 4). Empty the 7 back into the pot, pour the 1 into the 7, fill the 4 and pour it in to make 5, then pour the 7 into the target.
- Charcoal 3: fill the 7, pour it into the 4 and pour the remaining 3 into the target. The 4 is still full of charcoal, so tap it to pour it back into the charcoal pot. Before each new substance both cylinders must be empty; pour any leftover back into its own pot.
- Sulfur 2: with both cylinders empty, make 5 in the 7 as for the saltpeter, then fill the 4 and pour it into the 7 until full, leaving 2 in the 4. Pour the 4 into the target to finish the GUNPOWDER.
Building and Launching the Firework
The blueprint lists the remaining parts: rocket body, gunpowder, copper shavings and fuse.
- You need a copper coin, but you have nothing left to offer at the shrine. Go to the red gate and take back the GONG from its bracket. At the garden shrine, return the GONG to the shrine table, then take the COPPER COIN from the offering bowl.
- Travel to the prison cell. Put the COPPER COIN in the stone mill, turn the wheel and brush the result onto paper to get COPPER SHAVINGS.
- Assemble the rocket: use the TUBE as the body and pour in the GUNPOWDER and COPPER SHAVINGS. To make the fuse burn, pour the LIQUOR BOTTLE (sake) over the ball of THREAD. Fit the cone and the cap, then add the soaked thread as the fuse to get the FIREWORK.
- Launch it near the temple, far from the garrison: in the garden, set the FIREWORK on the launch frame by the lantern left of the bridge and take the BURNER from the lantern. In the market square, use the BURNER on the end of the fuse at the bottom right.
- The firework bursts over the city, the red gates open and the guards rush out. Task complete: Smoke and Mirrors.
The Stranger and the Tower Outskirts
Back in the Stronghold, the rescued dwarf reports that a stranger took the artifact, climbed onto the terrace and left the tower by the lift. New task: The Stranger.
- In the portal room, collect Morph 8/47 on the wooden beam on the left floor.
- On the terrace workbench, read the SOFTENING SPRAY recipe (wine, duckweed juice from Vital Lake, snake venom and night chrysanthemum pollen) and take the ORNATE KEY.
- In the lift room with the green energy column, open the chest with the ORNATE KEY and take the WINE, HAMMER and NAILS.
- On the balcony, fix the lift winch: put the NAILS in the gear shaft and drive them in with the HAMMER. Ride the lift down.
- At the crossroads the stranger's footprints lead into a thorny thicket that needs Softening Spray. Take the empty heart-shaped VIAL and collect Footprint 4/7 on the dirt path at the left.
- Note the hamster burrow at the bottom. Take the SEAL INSERT from the fallen gargoyle on the right.
- At Vital Lake, collect Handprint 5/8 on the left rock, take DUCKWEED from the shore and fill a BUCKET OF WATER at the pier.
- Zoom into the pier and use the HAMMER to pry the loose BOARD off it. Take the BOARD and use it to bridge the water onto the porch of the circus wagon.
Circus Wagon Ice Blocks
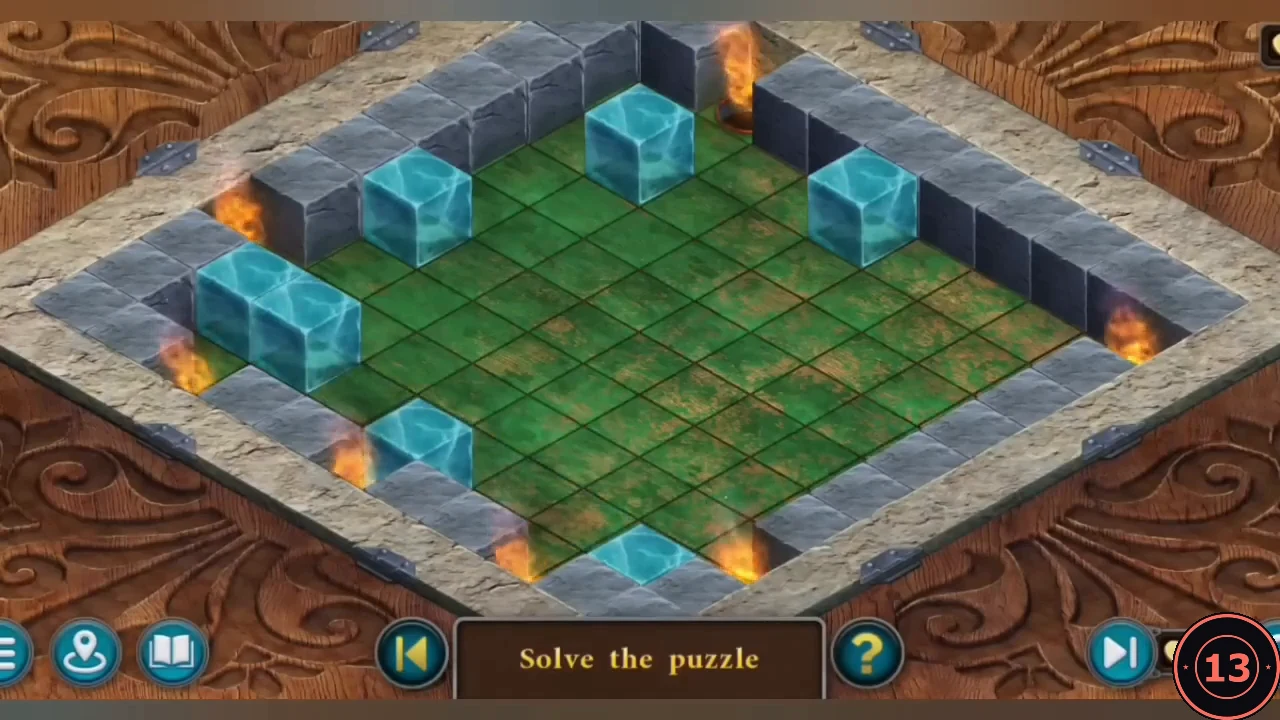
The chest on the wagon porch holds a sliding puzzle: ice blocks on an isometric grid, with burning braziers around the walls.
- Slide each ice block until it stops against a brazier and puts it out. Blocks slide until they hit something, so use other blocks as stops to line up the remaining braziers. Put out every brazier. The puzzle board slides open to reveal the inside of the chest: take the OLD KEY from it.
- Use the OLD KEY from the ice-block chest on the padlock of the wagon door. Inside, take the CAGE and the SNAKE CATCHER.
- At the crossroads burrows, set the CAGE at the lower exit and pour the BUCKET OF WATER into the other hole to catch the HAMSTER.
- At the marked stones by the lake, place the HAMSTER as bait, catch the snake with the SNAKE CATCHER and collect its venom in the VIAL to get SNAKE VENOM. The hamster goes free.
Through the Thicket to the Cave
Mix the Softening Spray and follow the stranger into the forest.
- At the terrace workbench, add the WINE and press the DUCKWEED for its juice, add the SNAKE VENOM and collect night chrysanthemum pollen from the blue flowers to get the SOFTENING SPRAY.
- Spray the thorny thicket at the crossroads to open the forest path.
- In the forest clearing, collect Footprint 5/7 in the left foreground. Cut the vine on the tree with the WAKIZASHI to drop a rope into the pit. The stranger's locked bag lies by the pit.
- At the bottom of the pit, collect Morph 9/47 in the upper-left branches and Handprint 6/8 on the upper-left wall. Break off a CRYSTAL from the blue crystals with the HAMMER.
- Enter the dark cave. Tap the cobweb on the right to take a silver PENDANT, and collect Footprint 6/7 on the floor at the lower left and Morph 10/47 at the right edge of the cave, halfway down. Examine the PENDANT in your inventory to reveal the PENDANT KEY.
- Open the stranger's bag in the forest with the PENDANT KEY and take the VIAL OF REMEDY.
- A chest sits on a ledge in the cave, out of reach. Take the WHIP from the circus wagon interior and use it in the cave to pull the chest down. Take the METAL SPIDER. The chest needs a spider-shaped key, but it is missing some parts.
Gargoyle on the Terrace
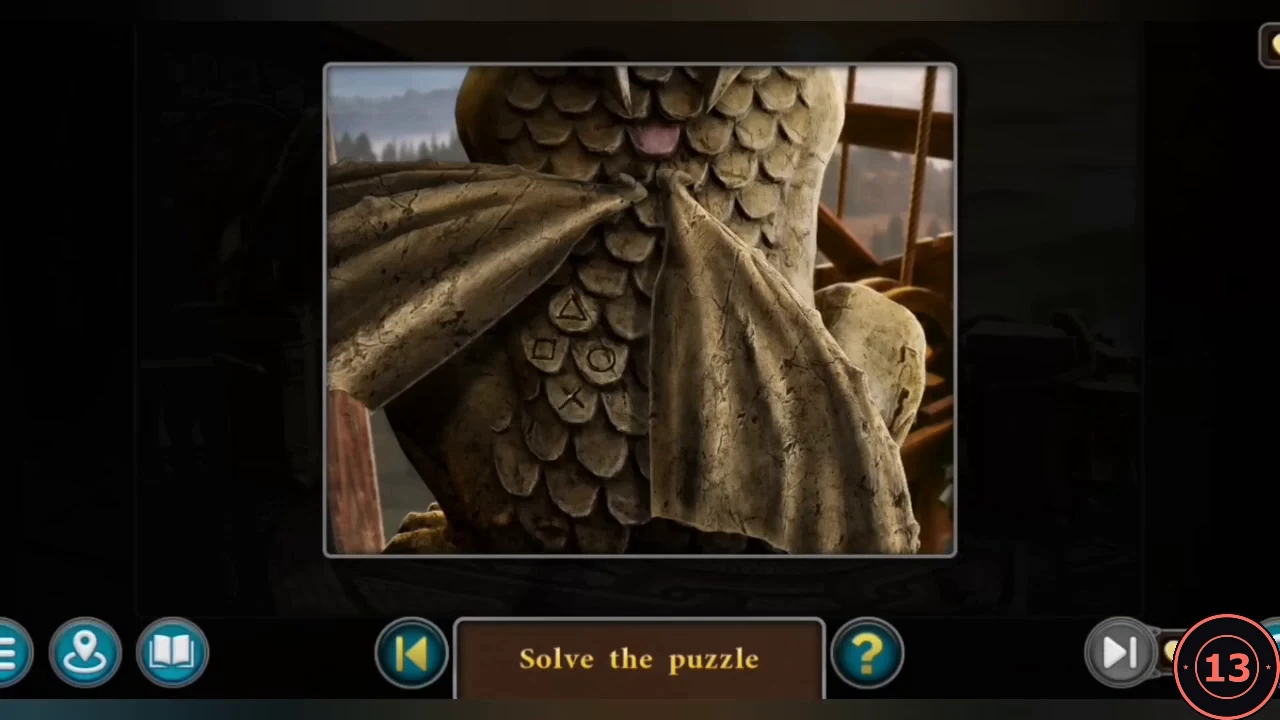
Travel to the domed terrace in the Stronghold. The gargoyle on the pillar has scaled wings with symbols.
- Open the gargoyle's wings and press the scales in the order carved on the stone block by the crane wheels: X, triangle, X, circle. A compartment opens in the scales; take the METAL SKULL from it.CODEX, triangle, X, circle
- In the inventory, combine the METAL SPIDER, METAL SKULL and SEAL INSERT to make the SPIDER KEY.
Spider Key Chest
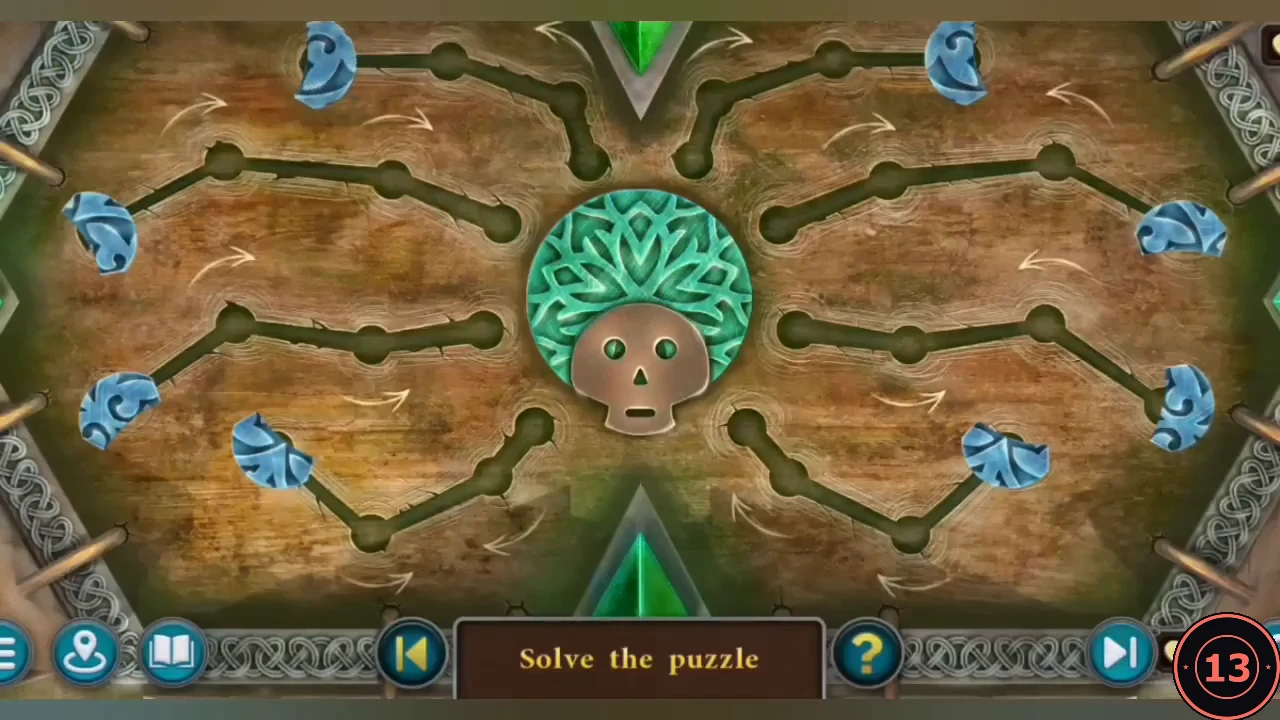
Return to the cave and insert the SPIDER KEY in the chest lock.
- Eight blue shell pieces scatter to the tips of the spider's legs. Tap each piece to rotate it until all eight are turned correctly; then they fly into the skull's collar. Use the solved-state image as your reference.
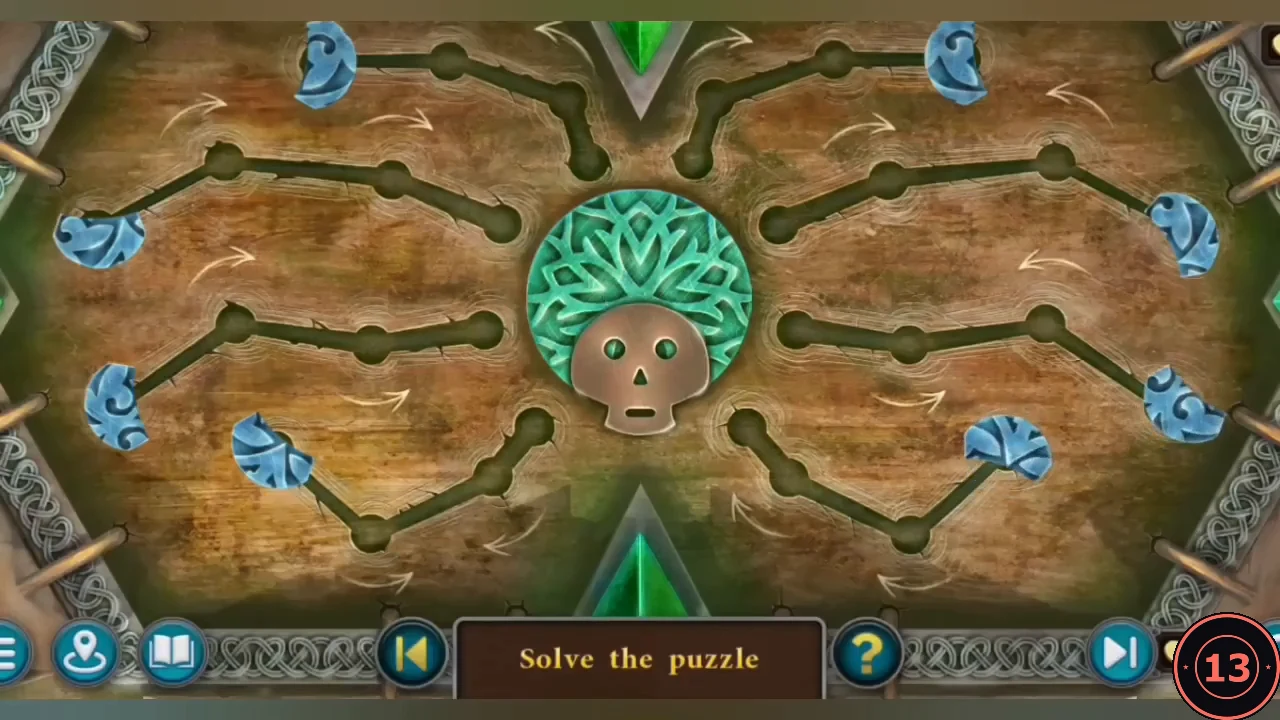
Reference: all eight pieces turned correctly. - Take the second CRYSTAL from the chest, then take the SILK HANDKERCHIEF from the stranger's bag in the forest.
The Spider's Lair
Light the dark cave and rescue the boy trapped in the webs.
- In the dark cave there are four crystal holders on tall staffs. Put one CRYSTAL in the left holder and wipe it with the SILK HANDKERCHIEF until it glows. Put the other CRYSTAL in the right holder and wipe it too. The light reveals a loose crystal on the floor: tap it to set it in the next holder and wipe it with the handkerchief, then repeat with the last loose crystal and holder. When all four crystals glow, the webbed hall is lit.
- Cut the left cocoon with the WAKIZASHI for a SPIDER LEG, and take another SPIDER LEG from the mummified cocoon on the right.
- Something moves inside the upright cocoon in the centre. Cut it open with the WAKIZASHI: a boy inside is struggling to breathe and having a seizure. Give him the VIAL OF REMEDY. He wakes; new task: The Young Prince.
- Mountgor the spider lets you into the dark back chamber. Take the third SPIDER LEG from the floor. The treasury entrance lies beyond the far wall, but it is too dark to see.